Zebra Cupcakes

When I asked my nephew Sam what he wanted for his third birthday cake, he immediately responded, “Zebra cupcake!” I have no idea where he got this idea, or what exactly he thinks a zebra cupcake looks like. To my knowledge, he has never seen anything that could reasonably be called a zebra cupcake. I tried to encourage him to elaborate on the idea of a zebra cupcake, but he wasn’t very forthcoming. So I was left to interpret his request as best I could.
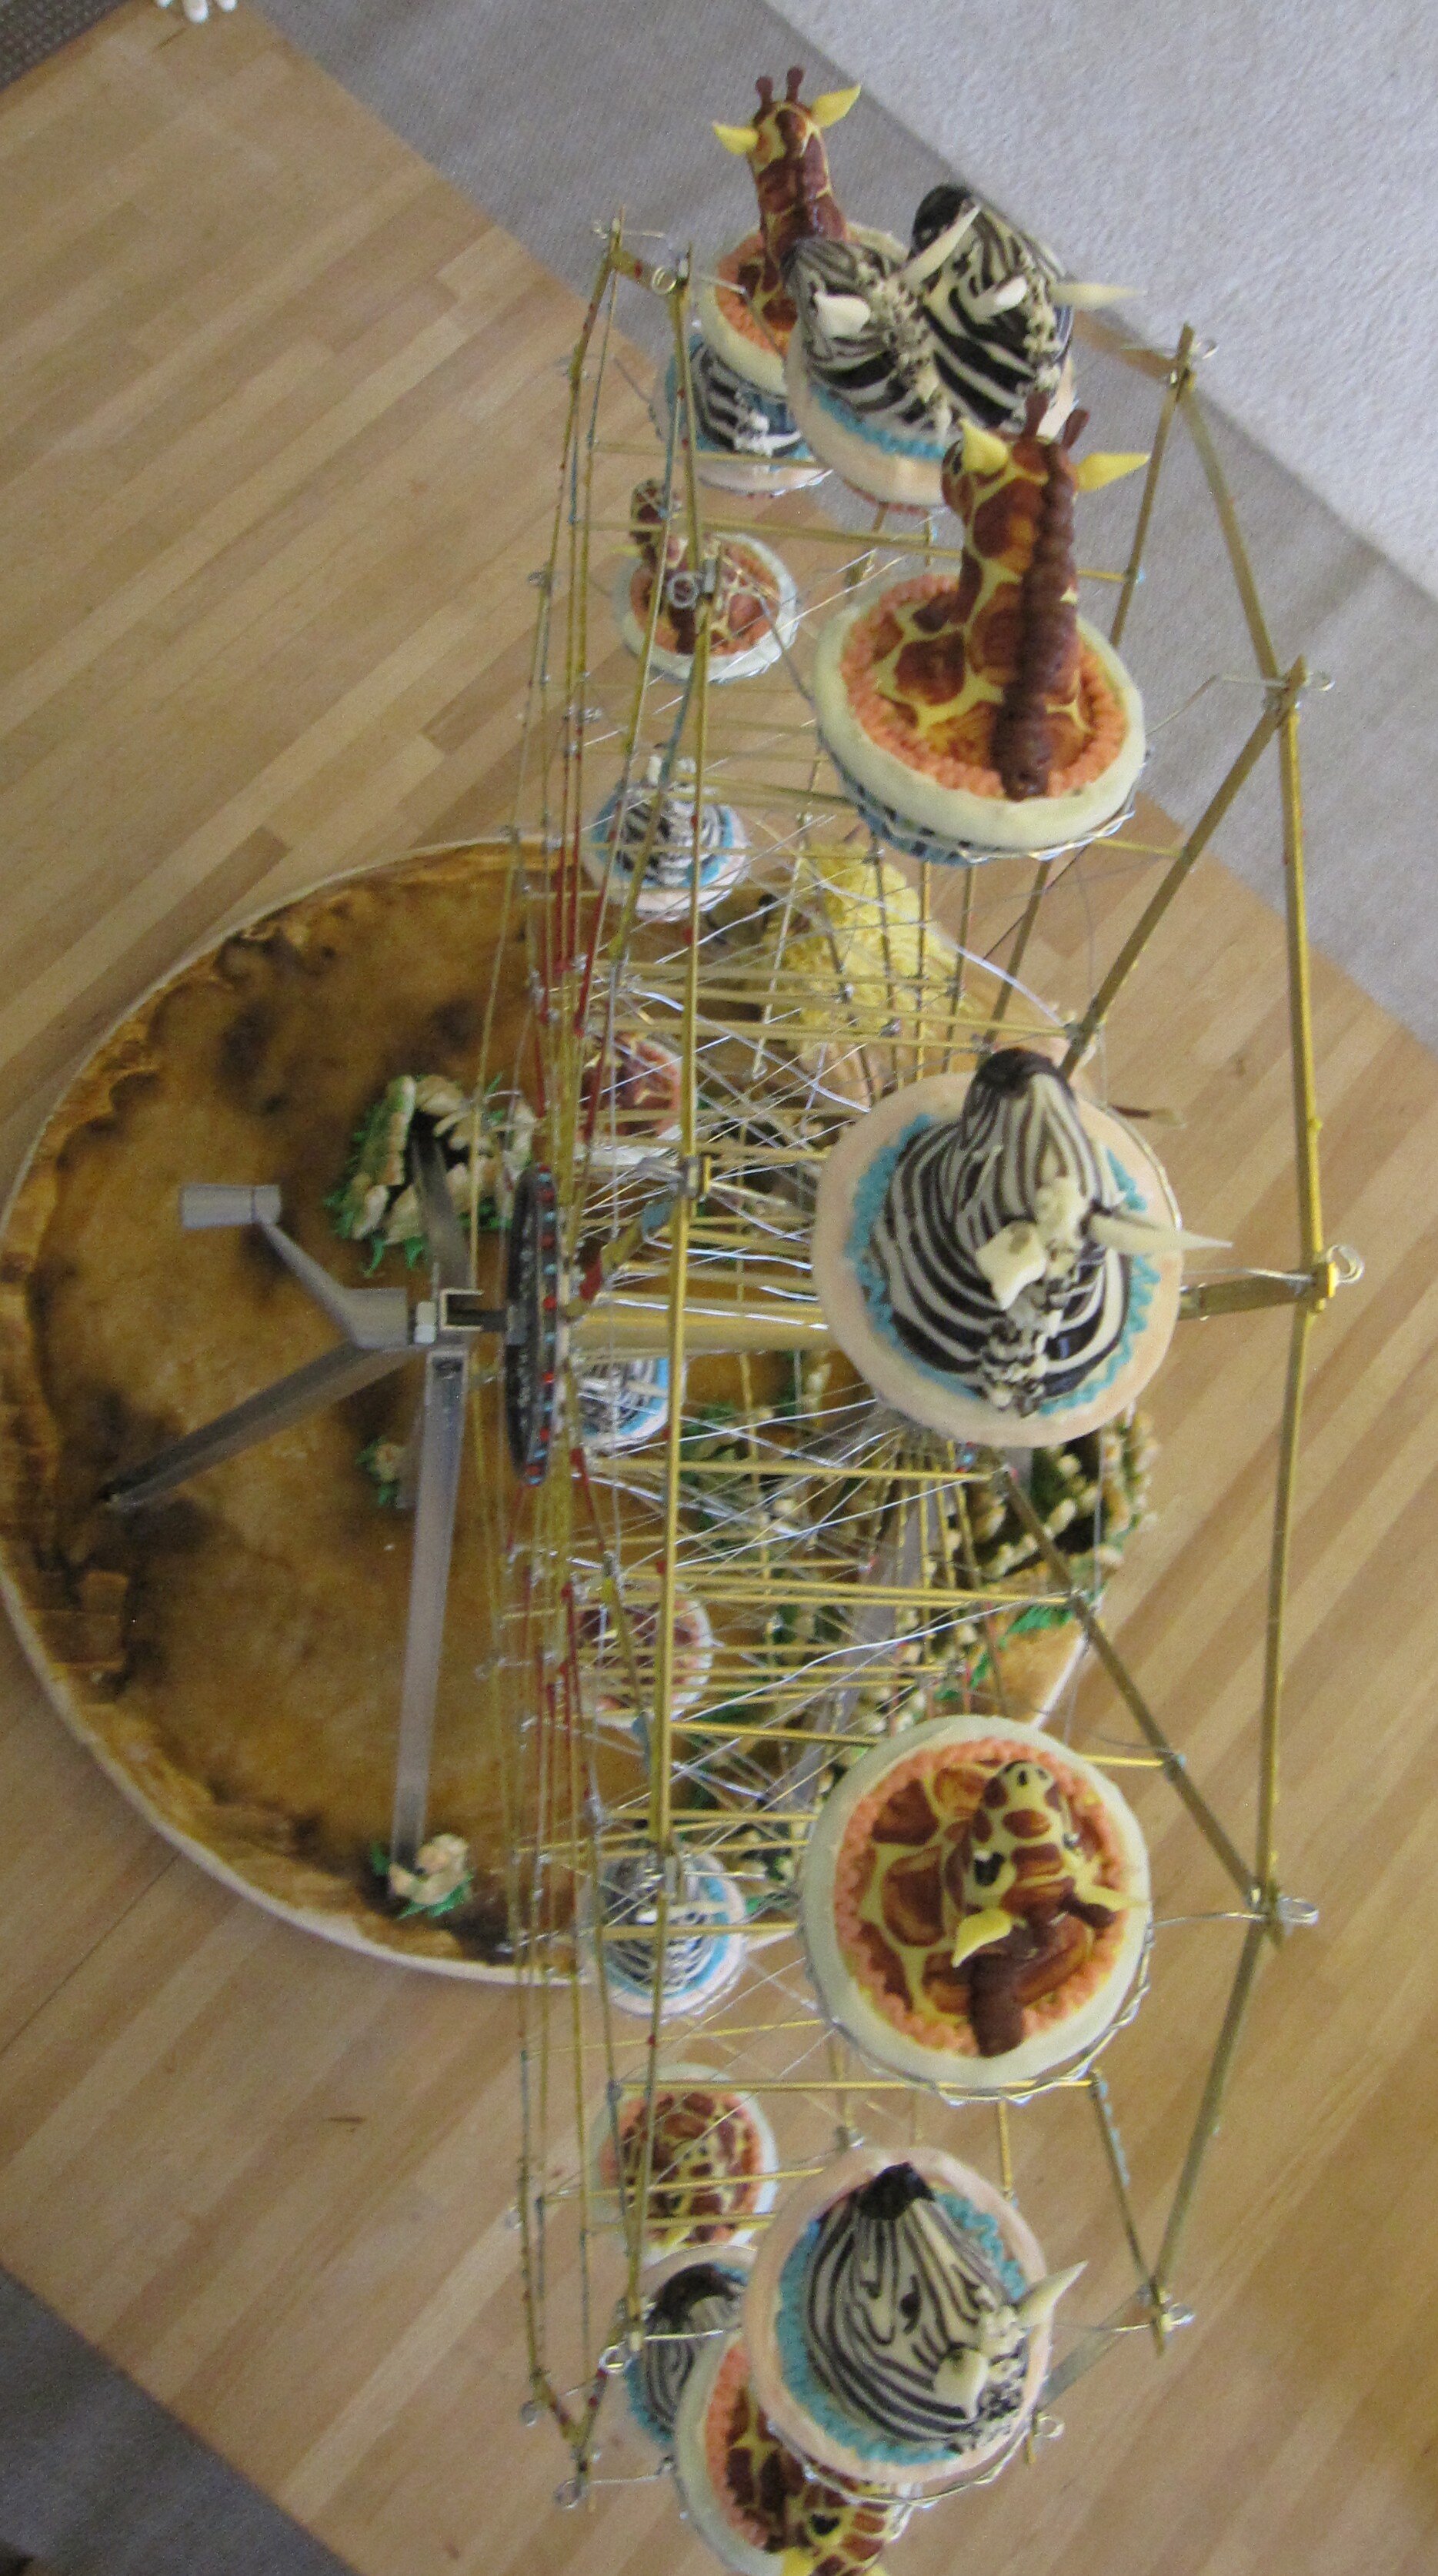
I don’t quite recall my thought process, but I ultimately decided to make zebras riding a big ferris wheel with a lion jumping up to try to get them. Mostly, I probably just wanted to see if I could make a ferris wheel. Initially, I had considered making the ferris wheel motorized, but after consulting Sam’s mom and his big sister, Alex, I decided that Sam would like it more if he could operate the ferris wheel himself with a hand crank. Based on the usual size of cupcakes, I calculated that, in order to accommodate the sixteen cupcake cars that I planned to make, the ferris wheel would need to be about two feet in diameter.

I was at a little bit of a disadvantage in building the ferris wheel because I was visiting my sister and didn’t have my jigsaw with me, so I had to come up with a way to build a ferris wheel with a minimal number of cuts. I began by making each of the sixteen spokes out of brass strips joined by brass tube and steel wire, scratching the heck out of my fingertips in the process. I joined all of these together, using lots of tiny bolts and quart paint can lids as the hubs. On the perimeter of the wheel, I connected the spokes with more brass strips and more teeny tiny bolts. Unfortunately, I didn’t get the two halves of the hub aligned exactly perfectly, so the spokes wound up a tiny bit torqued. It didn’t ultimately impact the functionality of the wheel, but I’ll know to pay more attention to that next time. You know, the next time I make a zebra cupcake ferris wheel. Though the lesson would probably be applicable to other African animal cupcake ferris wheels as well.

For the frame to hold up the ferris wheel, I used half-inch aluminum channel, bolted together and embedded in the wooden base. To my surprise, the wheel turned perfectly as soon as I mounted it in the frame and attached the crank handle. The next challenge, though, was to make the cars work.
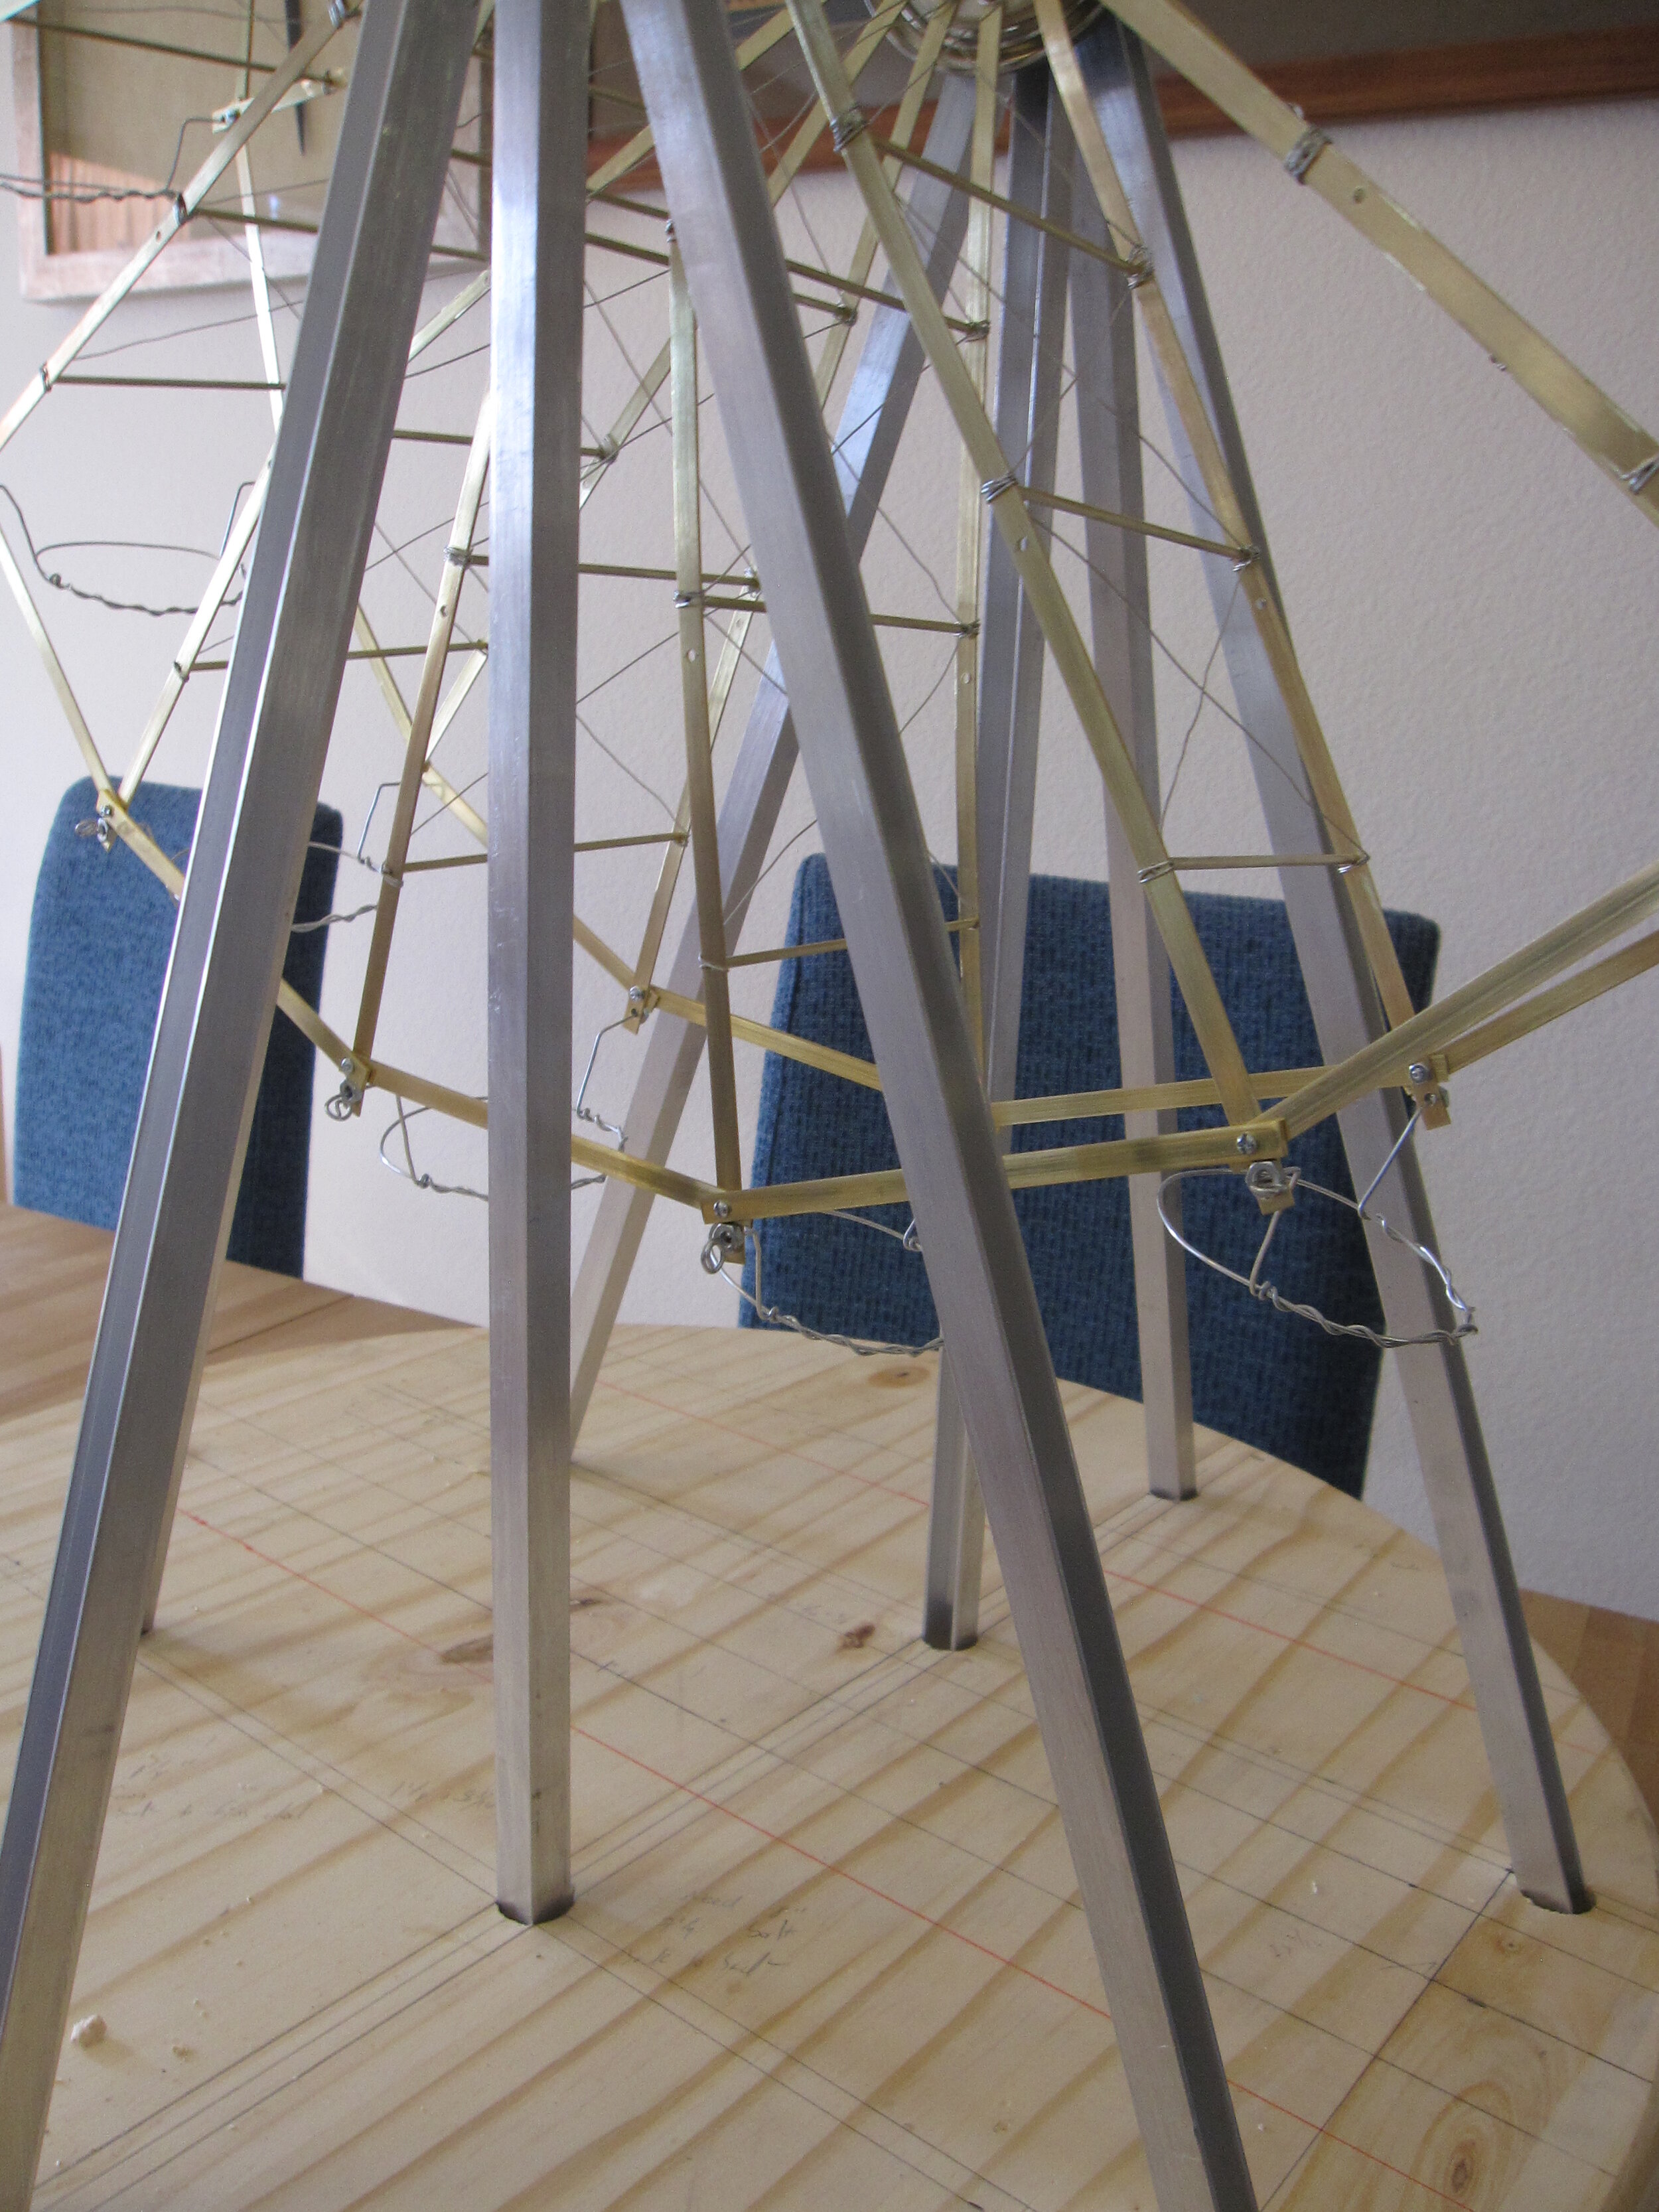
I really wanted people to be able to pick up the entire cupcake car and eat the entire thing. So I made basically little wire rings to set the cupcakes in. Obviously, these had to spin freely so that the cupcakes stayed upright all the way around the wheel (this being the essence of a ferris wheel). This would have been very easy if I had kept the strips connecting the spokes back from the end of the spokes about an additional half an inch. As it was, I had a bit of a struggle to keep the rings from catching on the brass strips, but in the end I managed it. One more thing I’ll know to do differently the next time I make a cupcake ferris wheel.
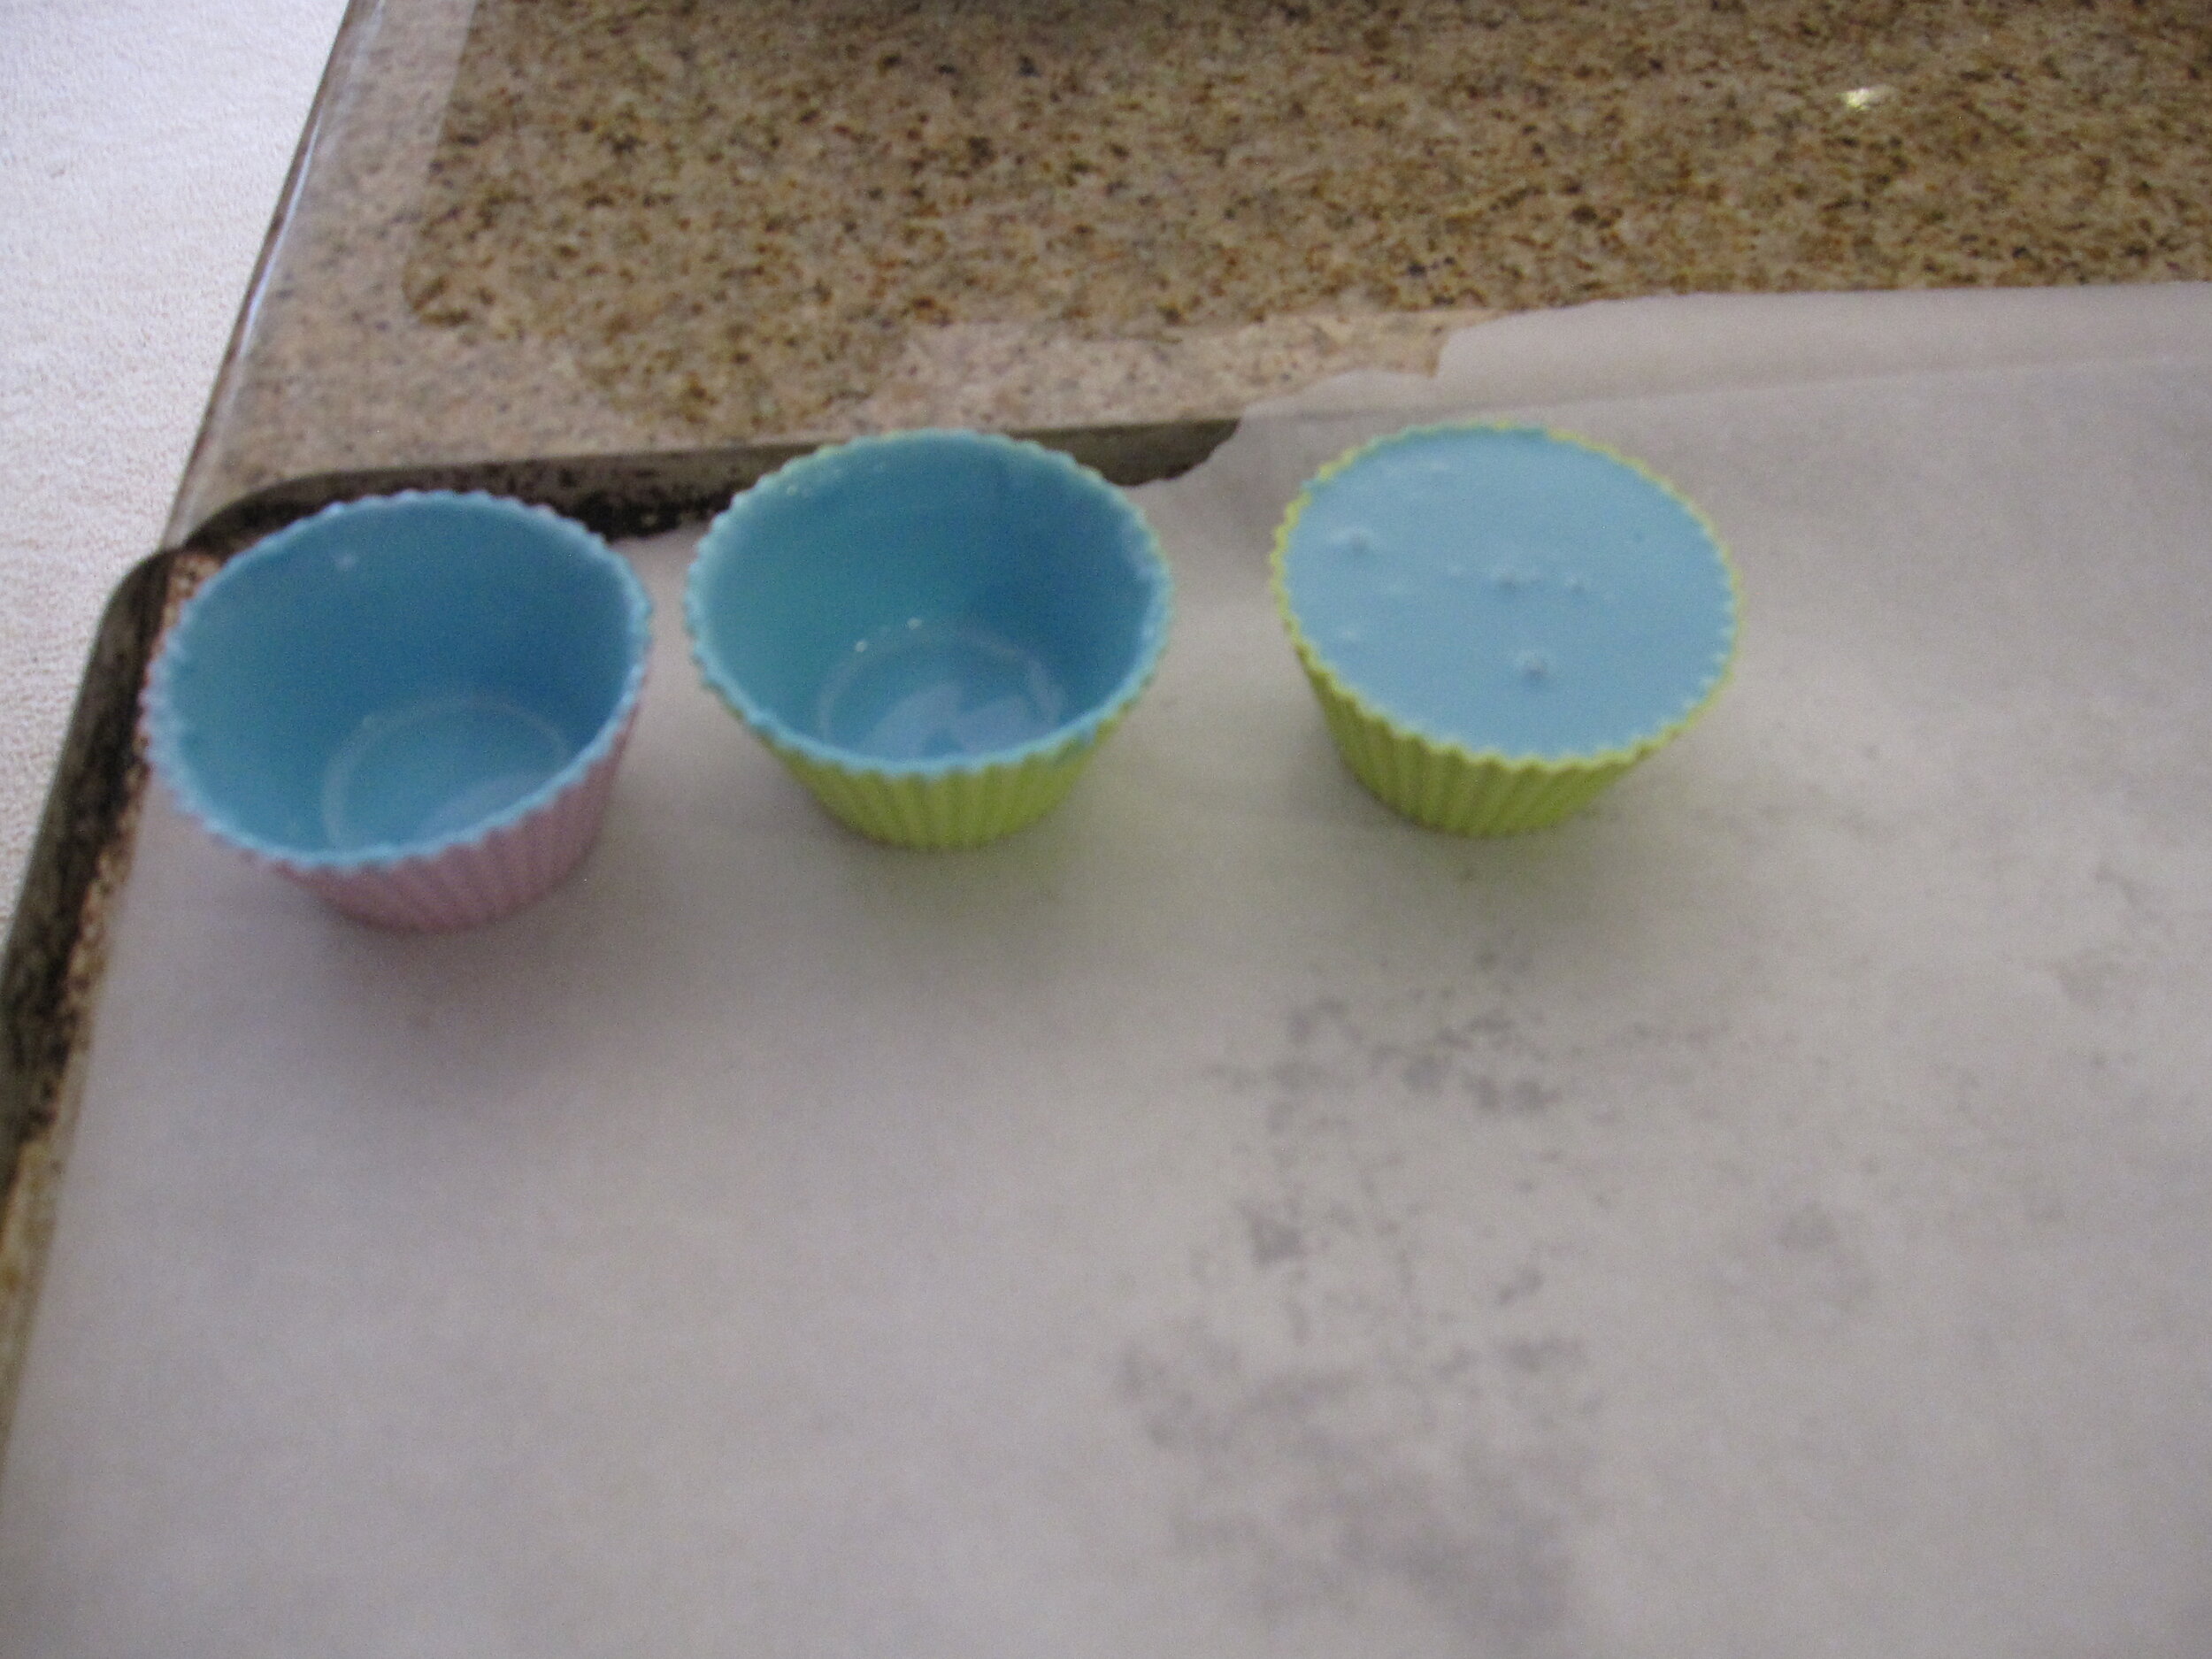
In order to make the cups themselves edible, I poured candy melts into silicone cupcake cups. For many years, I have been vehemently opposed to candy melts because I think they taste disgusting and the colors they come in are generally not in tune with my aesthetic, but my sister gave me that trendy little cake pop kit for Christmas, and I wanted to try out some of the techniques. I have been confirmed in my belief that they taste disgusting, but I suppose that they do have their uses. After all, I use fondant, too, and that doesn’t taste very good either.
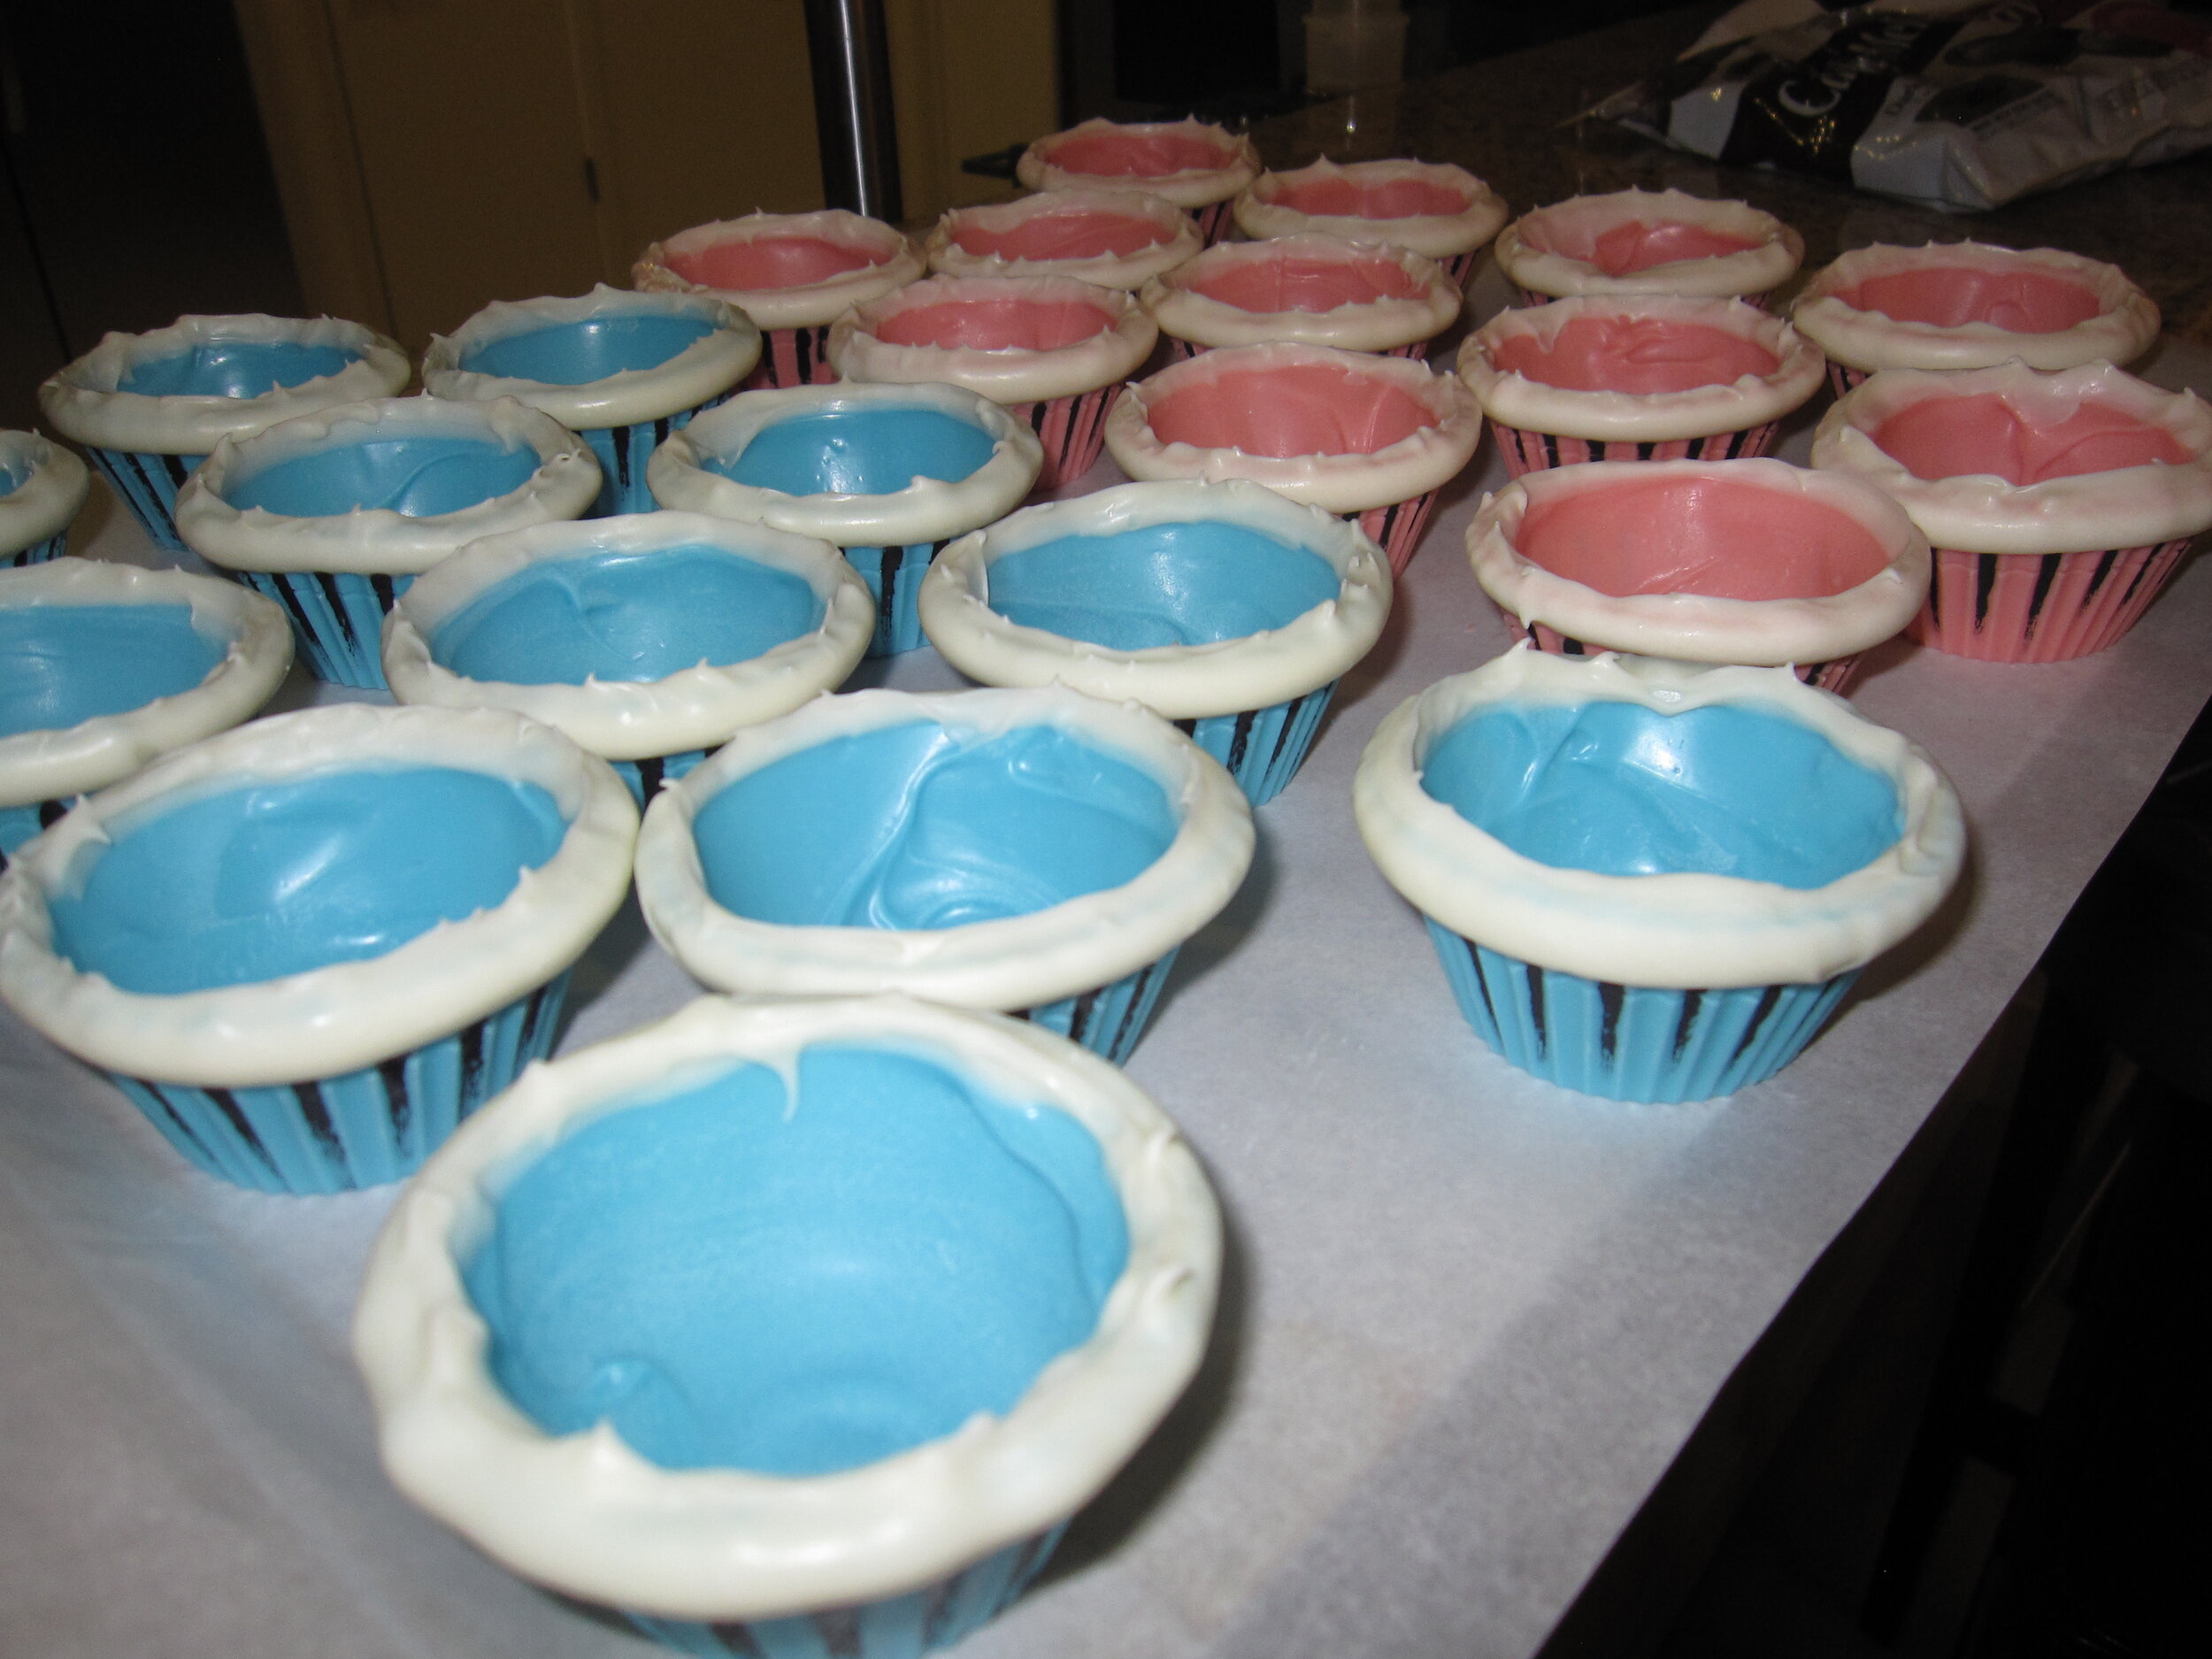
I let Sam pick out the colors of candy melts that he wanted for the cups and he chose pink and baby blue. Much like candy melts in general, this is basically the exact opposite of my aesthetic (and, as my sister pointed out, made it look a bit like a baby shower cake) but, hey, it’s his birthday. Who am I to argue? I gave the cups a second coat of candy melt on the inside to give them added structural stability and to make sure that the weight of the cupcake was concentrated in the bottom so they wouldn’t flip upside down. I dipped the top edge in white candy melt to give them a decorative rim that would also serve to hold them in the wire rings more effectively. I then attempted to ameliorate the pastel-ness of the cups by giving them distressed black streaks in some of the flutes of the cupcake cups. I told myself I was striving for a vaguely Victorian steam-punk aesthetic. I’m not sure that I entirely got there.
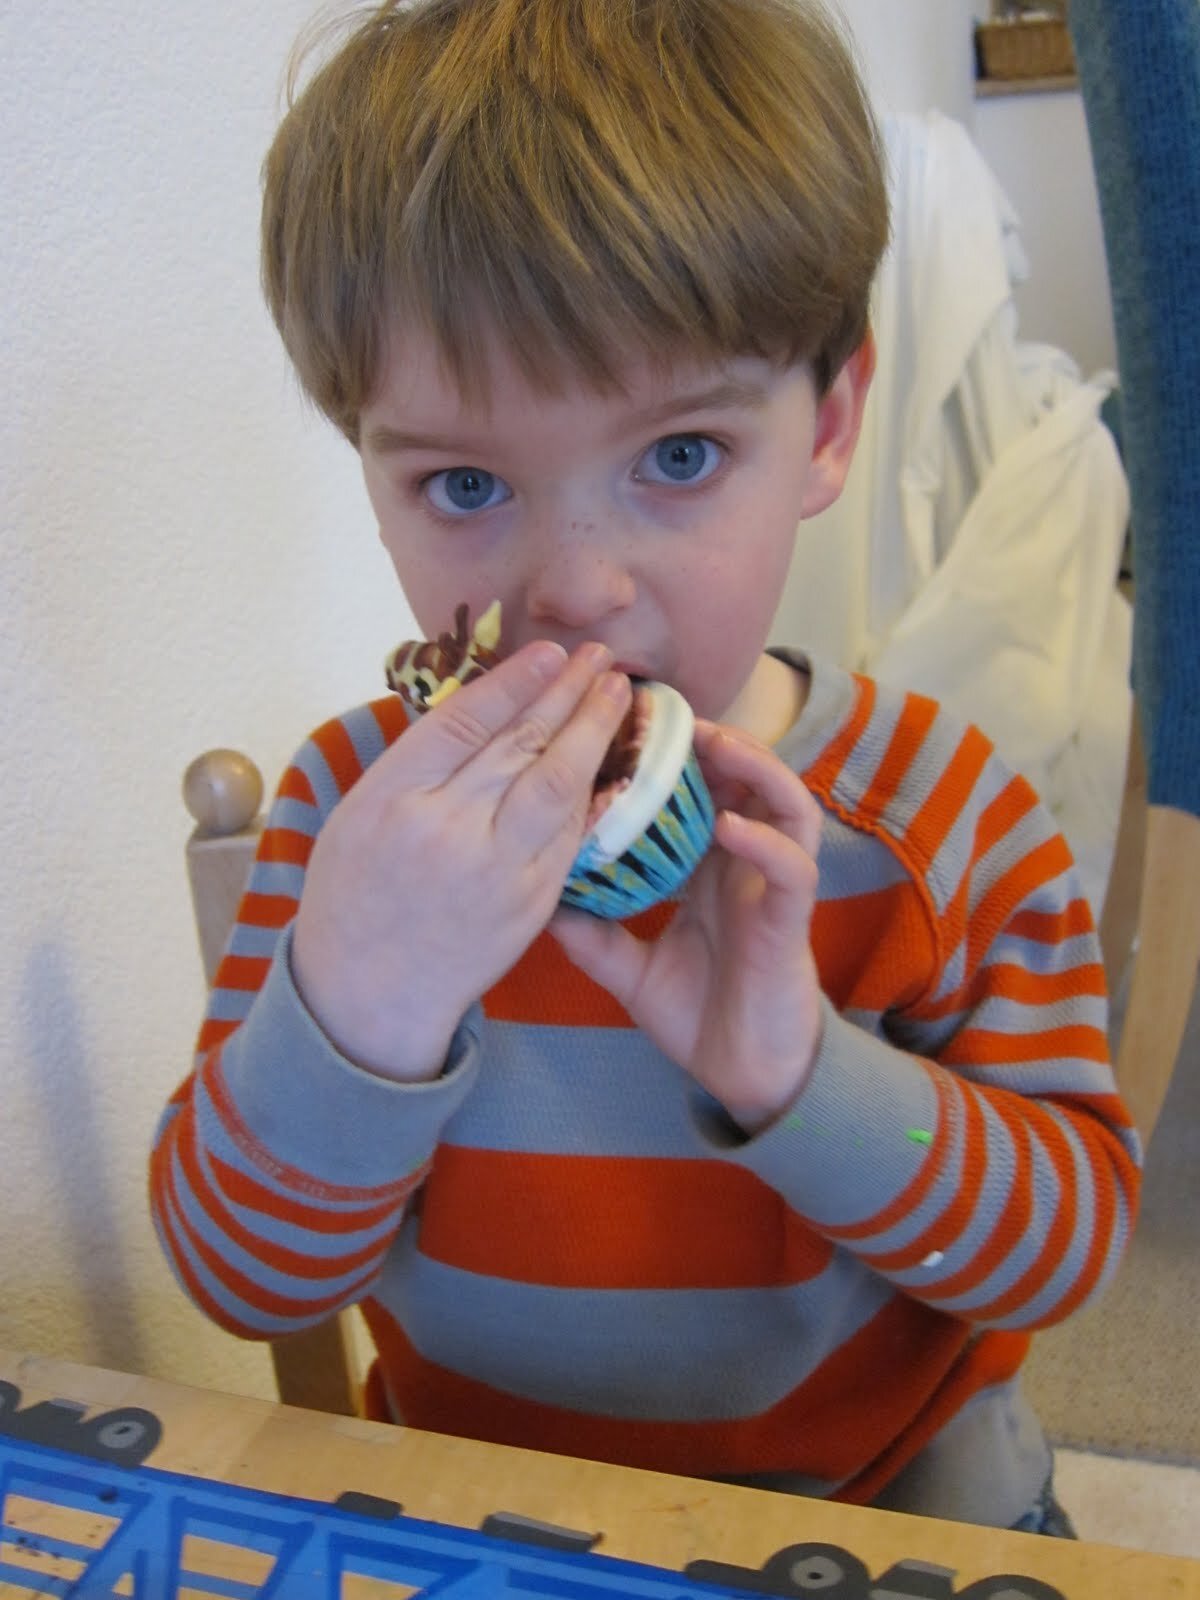
A few days before the party, I made a very important discovery. Sam’s grandparents gave him an awesome set of Little People animals for his birthday, which he absolutely loved. He even refused to eat dinner because he was too busy playing with them, which, coming from Sam, is a huge complement. He pulled the giraffe out of the bag and proudly exclaimed, “Zebra!” Uh oh. I remembered that Sam does not always differentiate between zebras and giraffes. So I pulled out the zebra and the giraffe and asked him which one was a zebra cupcake. First he pointed to the giraffe. Then he pointed to the zebra. So I decided to hedge my bets and make both zebra and giraffe cupcakes.
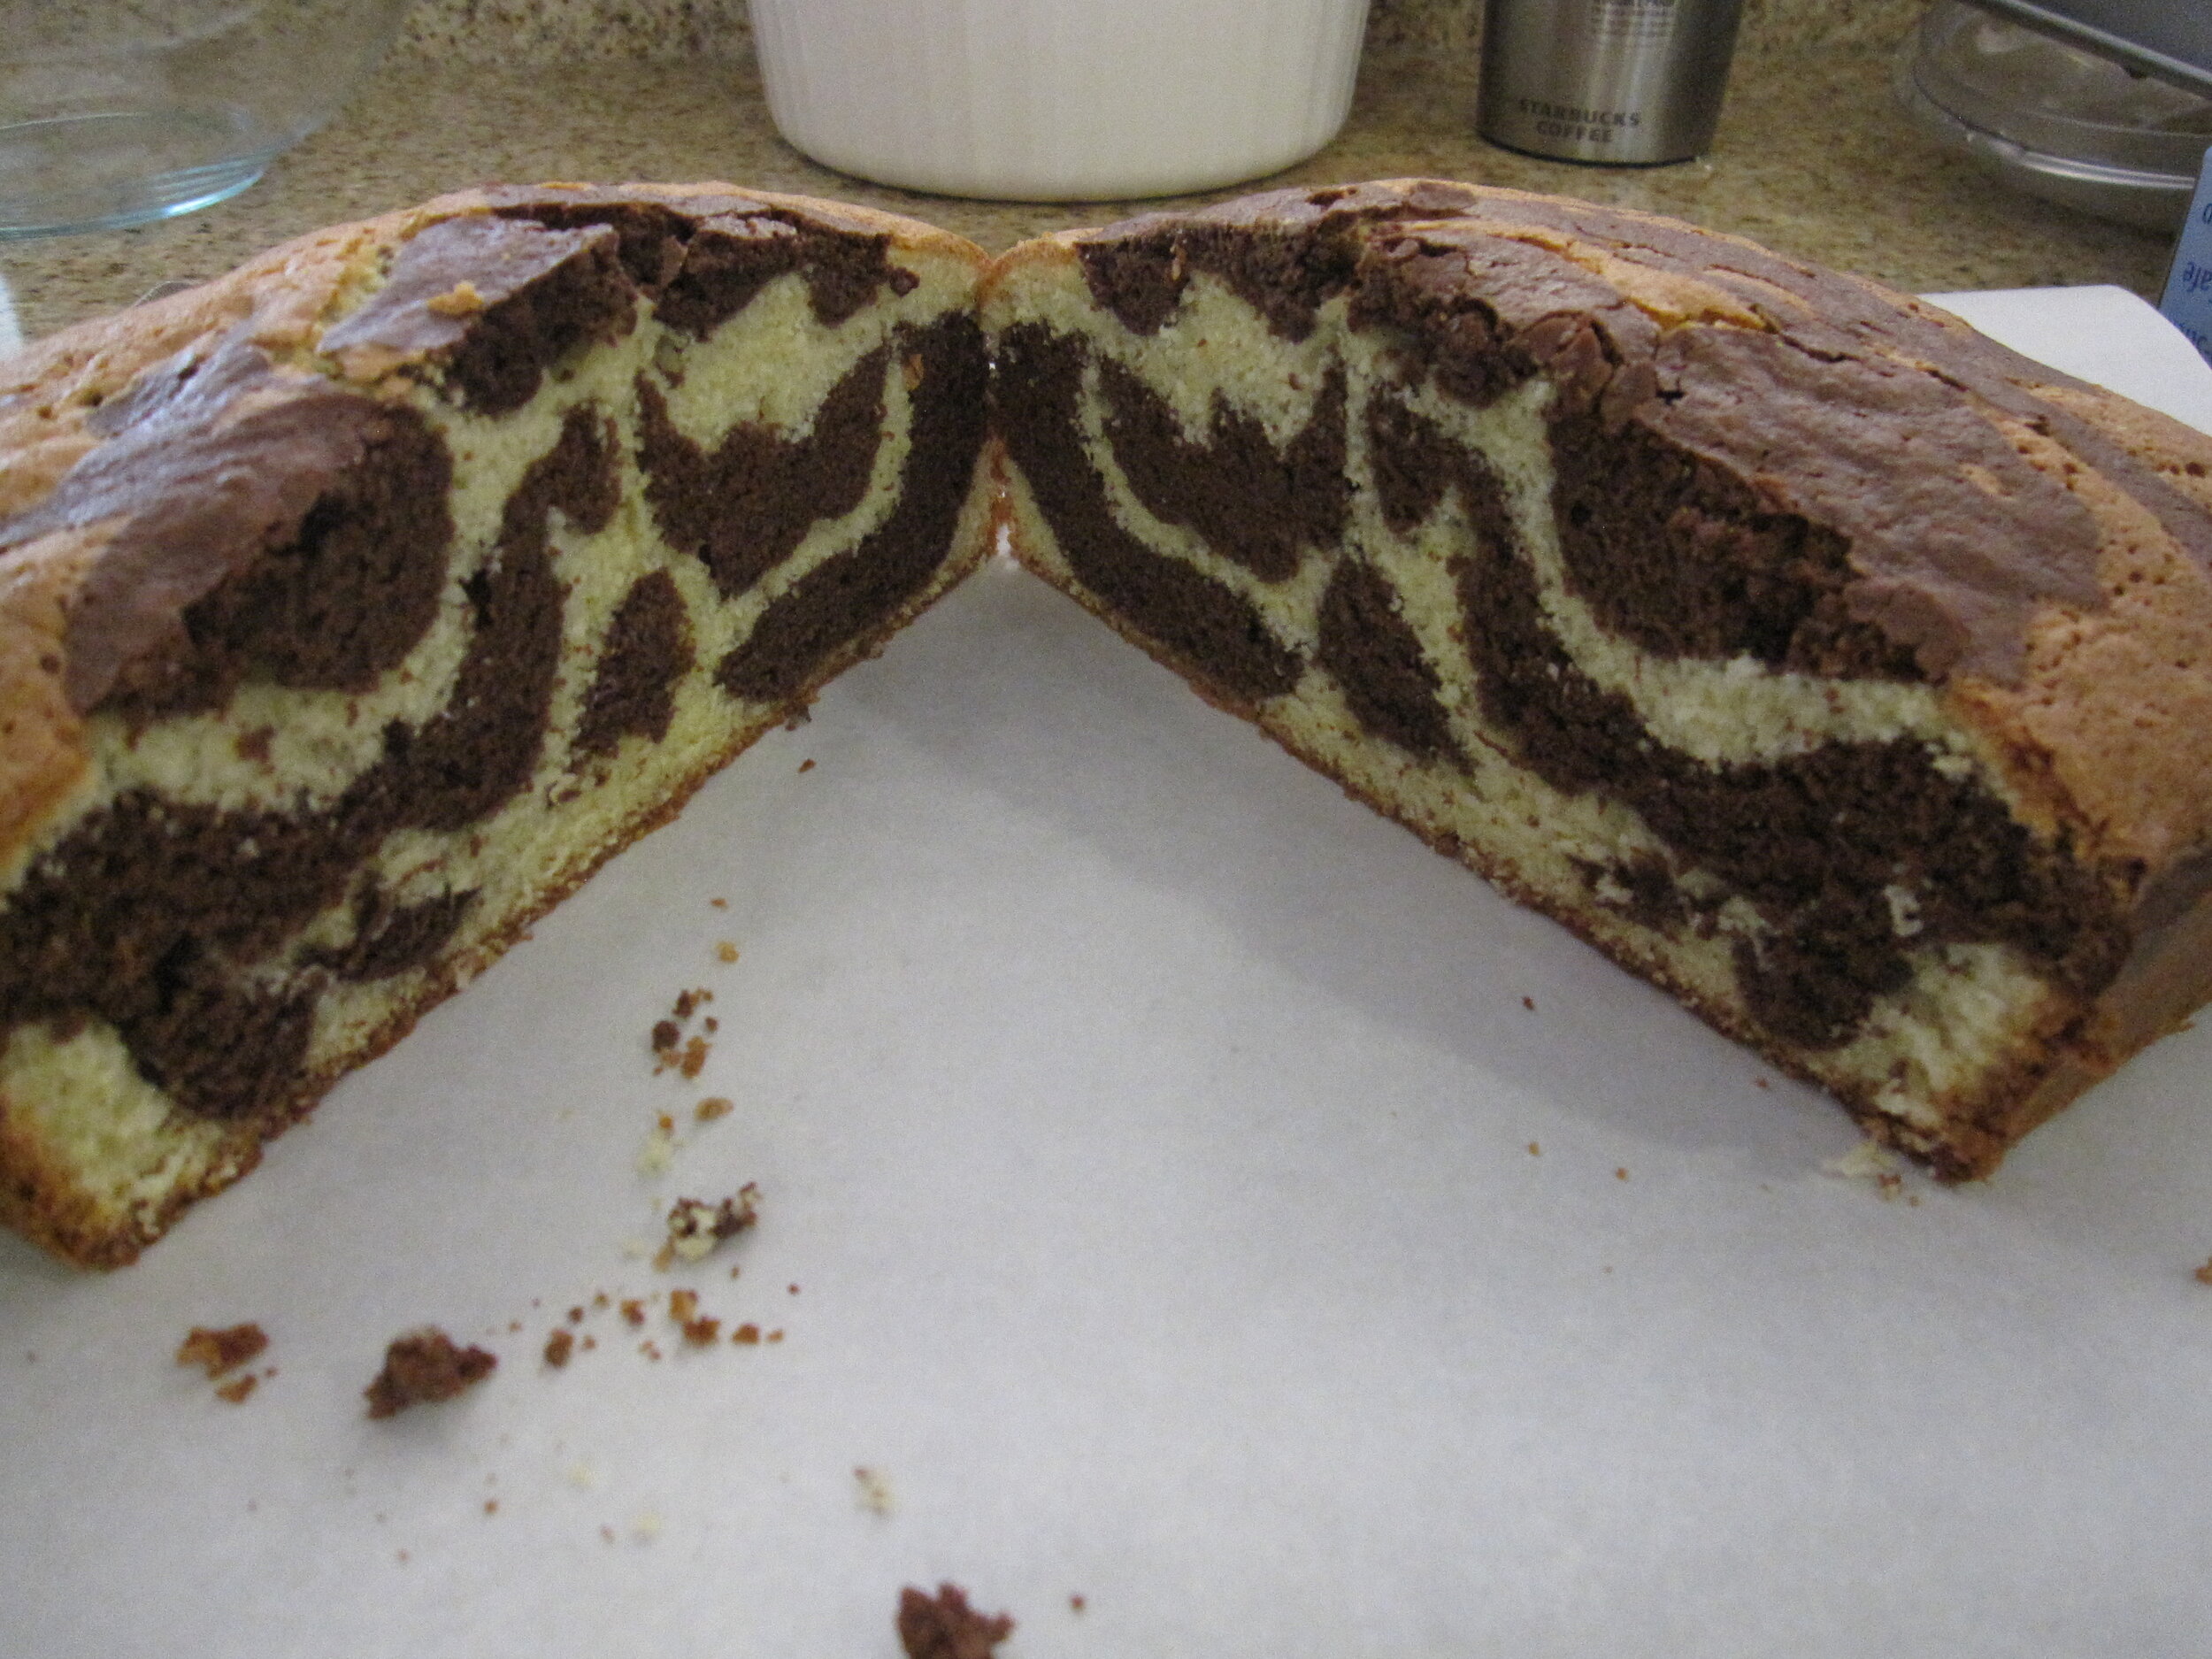
For the cake recipe, I used a new marbled olive oil cake recipe. I had initially chosen this recipe because the marbling resembled zebra stripes. It actually turned out to be perfect because the marbling, both in color and in pattern, is about halfway between a zebra and a giraffe. It also turned out to be quite delicious. Generally, when I’m making a cake, the last thing I want to do is eat cake, but I snacked on this cake the entire time.
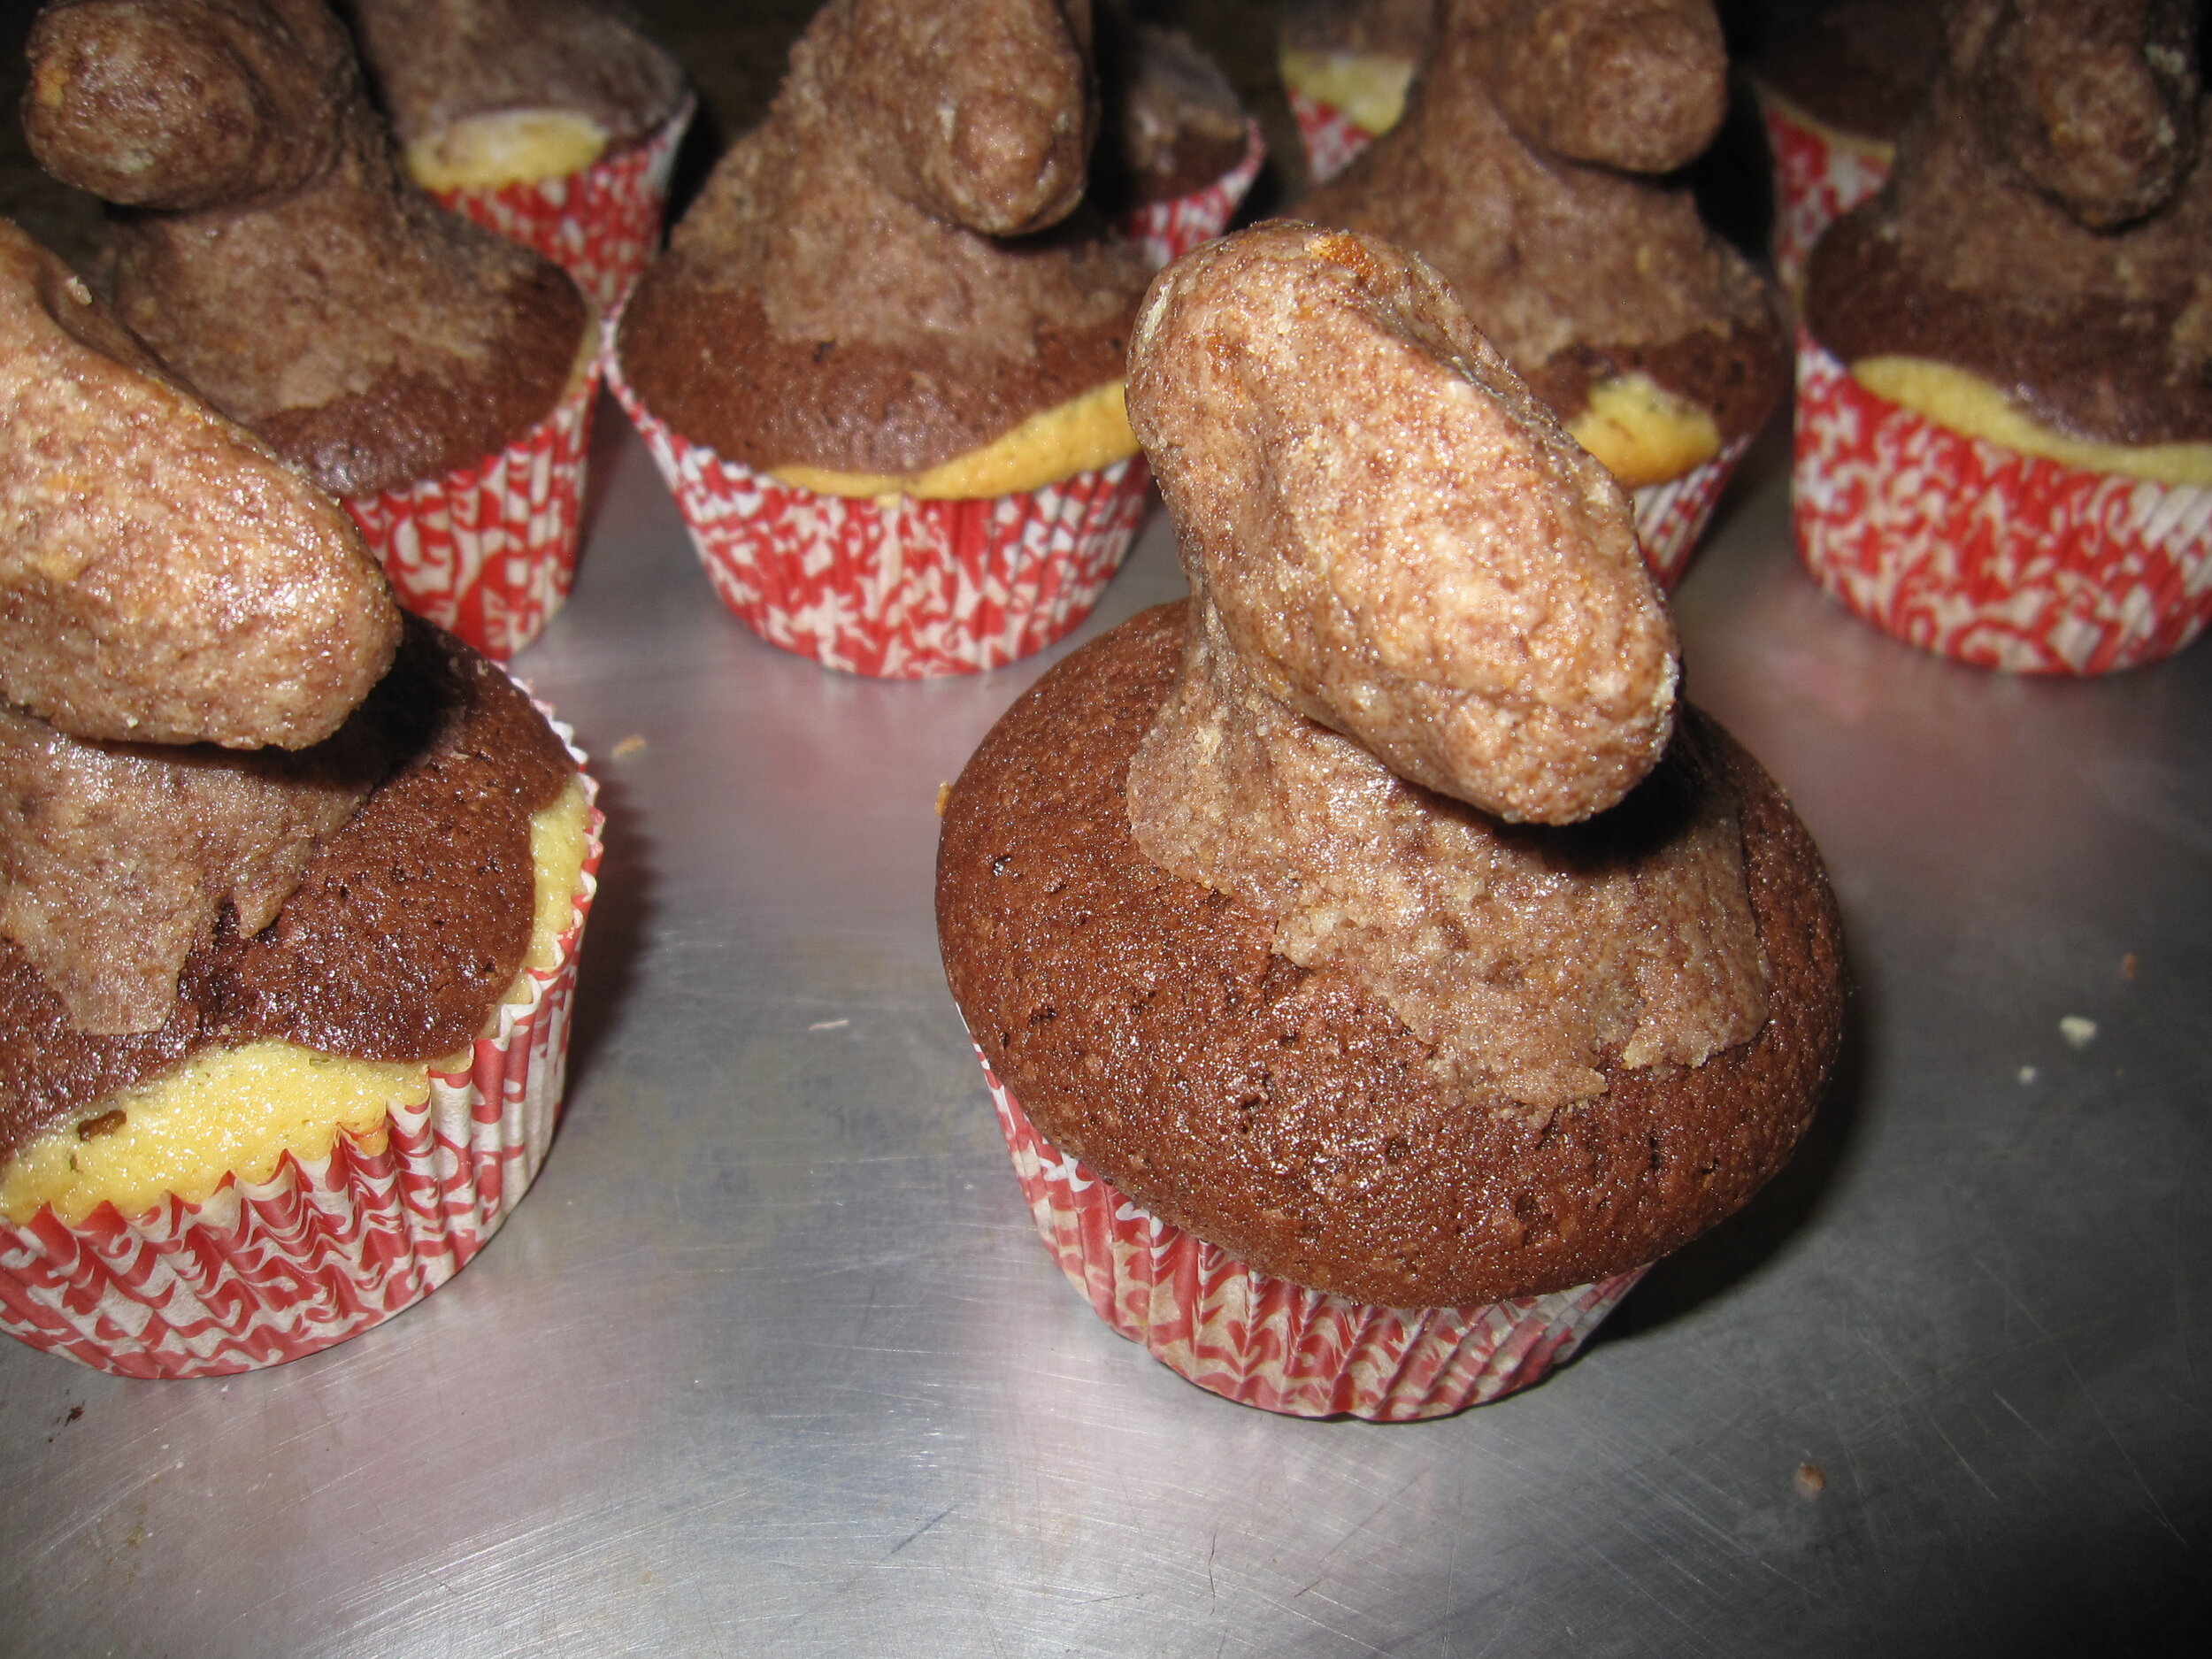
Once the cupcakes were baked, I used essentially the cake pop technique to add zebra and giraffe heads to them. This involves crumbling up cake and mixing it with frosting to make a thick paste and then shaping it as desired. To make the zebra heads, I did this directly on top of the cupcakes. Because the giraffes needed long, thin necks, I made them separately then popped them in the refrigerator to harden up enough that I could then embed them in the cupcakes.
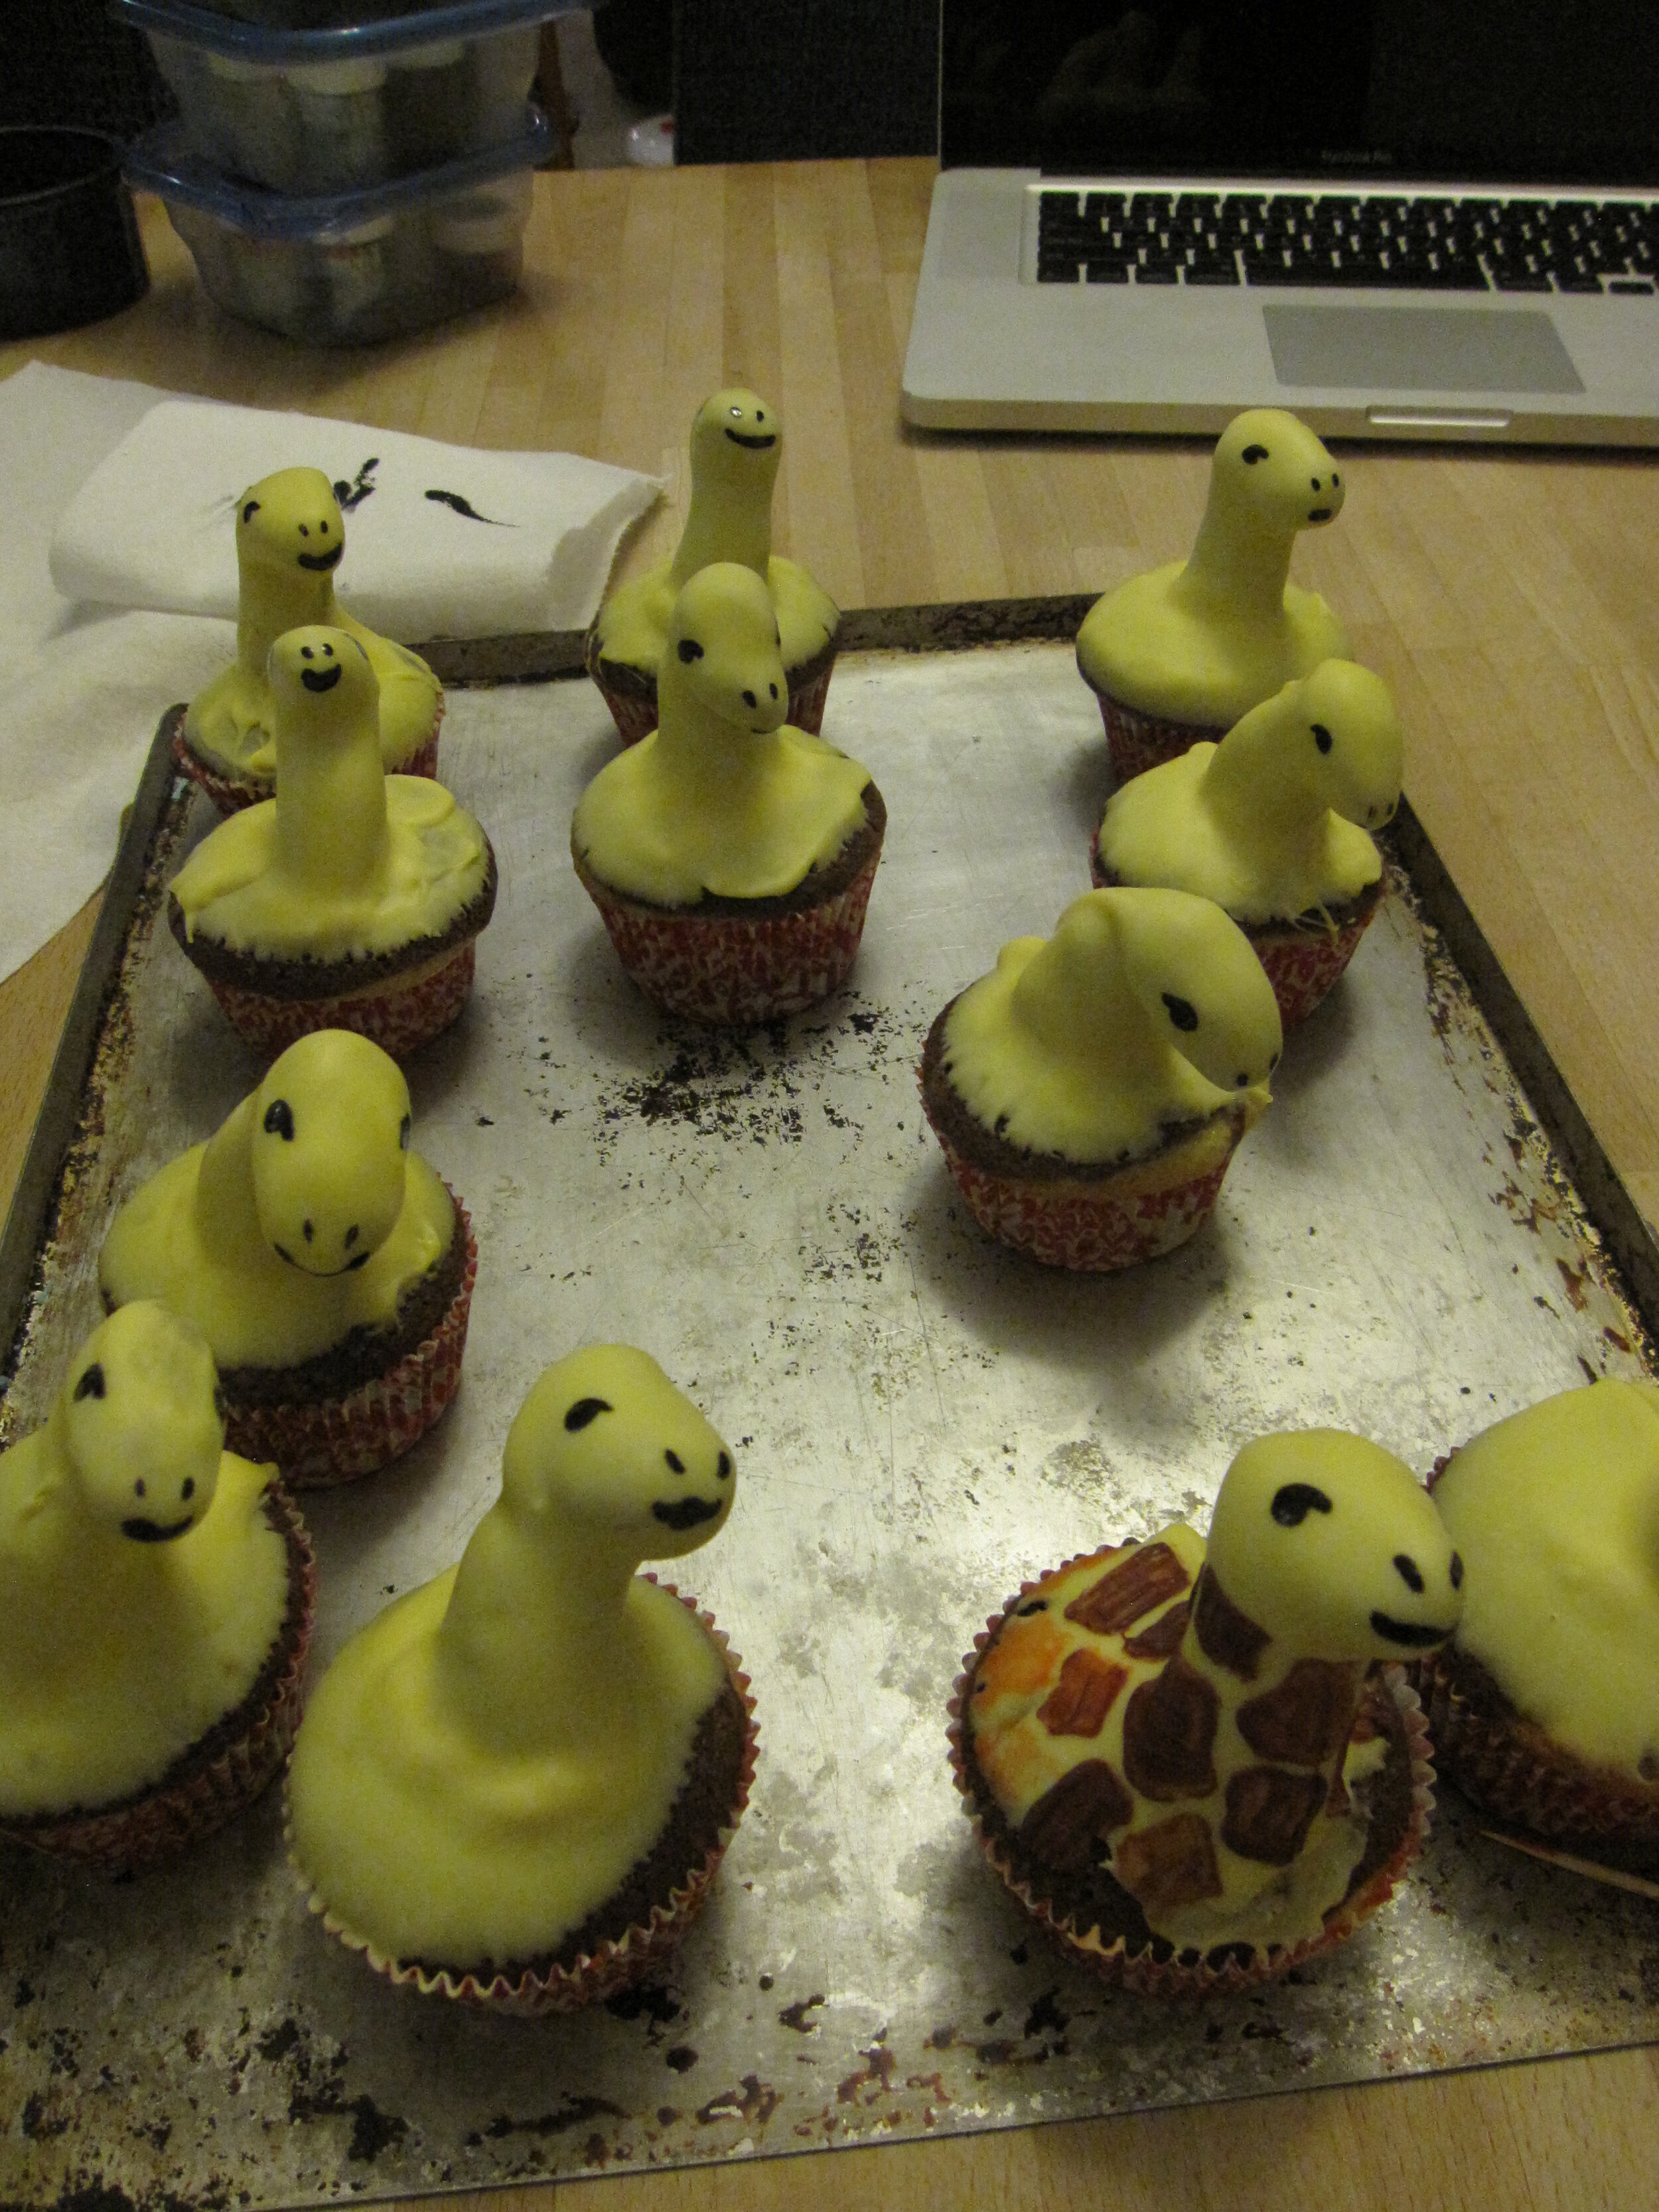
I dipped the zebras in white candy melts and the giraffes in yellowish candy melts. Once this hardened, I peeled the paper off the cupcakes and set the cupcakes in the candy melt cups. Then I used food coloring and candy melts to paint on the patterns, mouths, and eyes. I tried to make them look smug about the fact that the lion couldn’t reach them. I think that next time I should make the eyes more prominent by using something three-dimensional like a candy sprinkle. I also added candy melt ears, manes, and (in the case of the giraffes) horns.
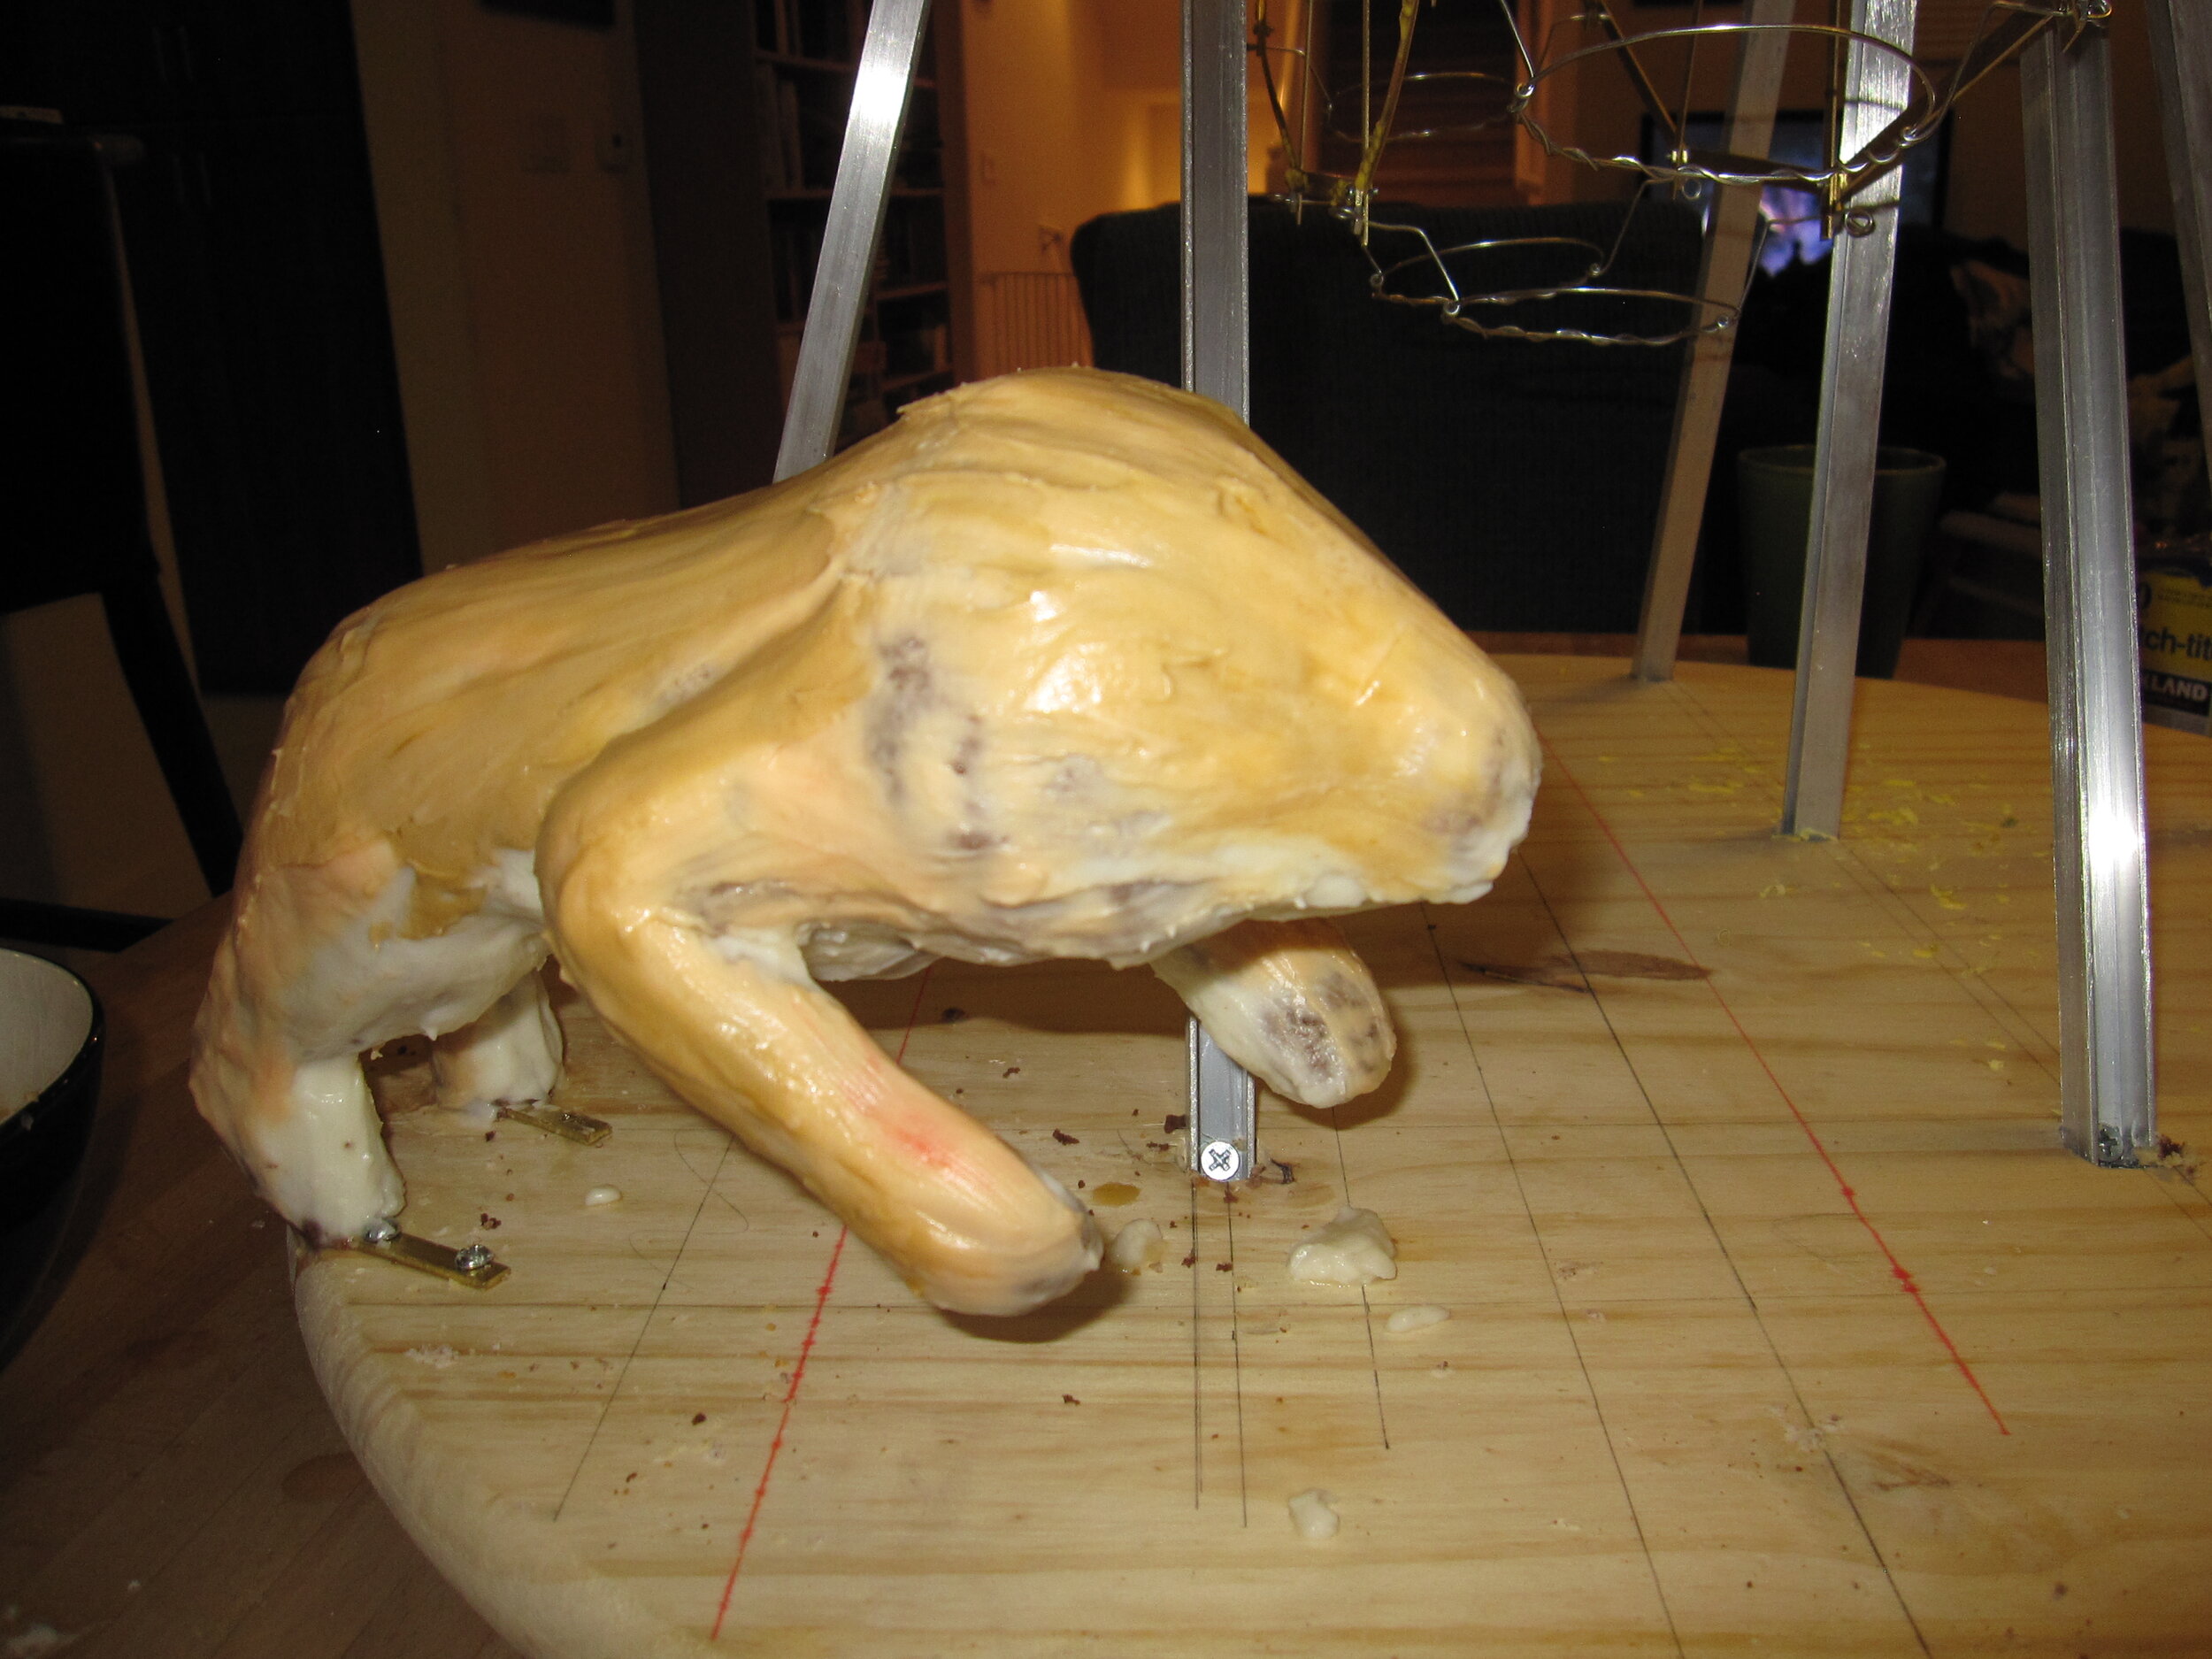
To make the lion look like it was in mid-lunge, I made a base for it using brass strips and foam core so that only the back two feet would be touching the ground. I bolted this to the cake base and built the lion on top of it. I wish that the base had been a little bigger, because I couldn’t really place the lion in the way I would have liked. He wound leaping more alongside the ferris wheel than at the ferris wheel. I also wish I had waited until the cake cooled completely before I put it on the base, because then I would have had less trouble with the cake melting the icing and sliding on the base. After I carved the cake and added a little mass with some of the cake pop goo, I used buttercream icing for the fur and candy melt for the ears and tail. In the end, I wasn’t particularly happy with the way the lion turned out. It was more awkward than scary, but not cartoony enough to be fun. Just as I was feeling most disappointed in how the lion turned out, Sam woke up and saw it. He gave a squeal of unmitigated delight and yelled “A lion!” So apparently, my lion wasn’t such a failure after all. For days after the party, Sam wandered around saying, “I ate the tail!”
At an early point in the process, I had planned to dip the entire ferris wheel in candy melt. Fortunately, I gave this idea up before I tried it, as the results would doubtless have been disastrous. However, I also couldn’t leave it entirely unadorned. For one thing, it clashed with the baby shower pink and blue cupcake cups. For another, Alex pointed out to me that ferris wheels are colorful. So I decorated it with red, blue, and yellow candy melt squiggles and dots. I was reasonably pleased with this effect and Alex also gave it her stamp of approval.

The final touches were to decorate the base. By this time it was the morning of the party and I had been up all night working on the cake. So the base sort of got short changed. I threw down a layer of pressed sugar dirt and then brushed on some different shades of brown food coloring. I didn’t have my airbrush with me, so the results weren’t as subtle as I would have liked. I also tried something new to make the savannah grasses. I used puff pastry, brushed with green food coloring, and cut into grass shapes. In the end, it looked more like french fries than grass, but it was still a fun experiment.
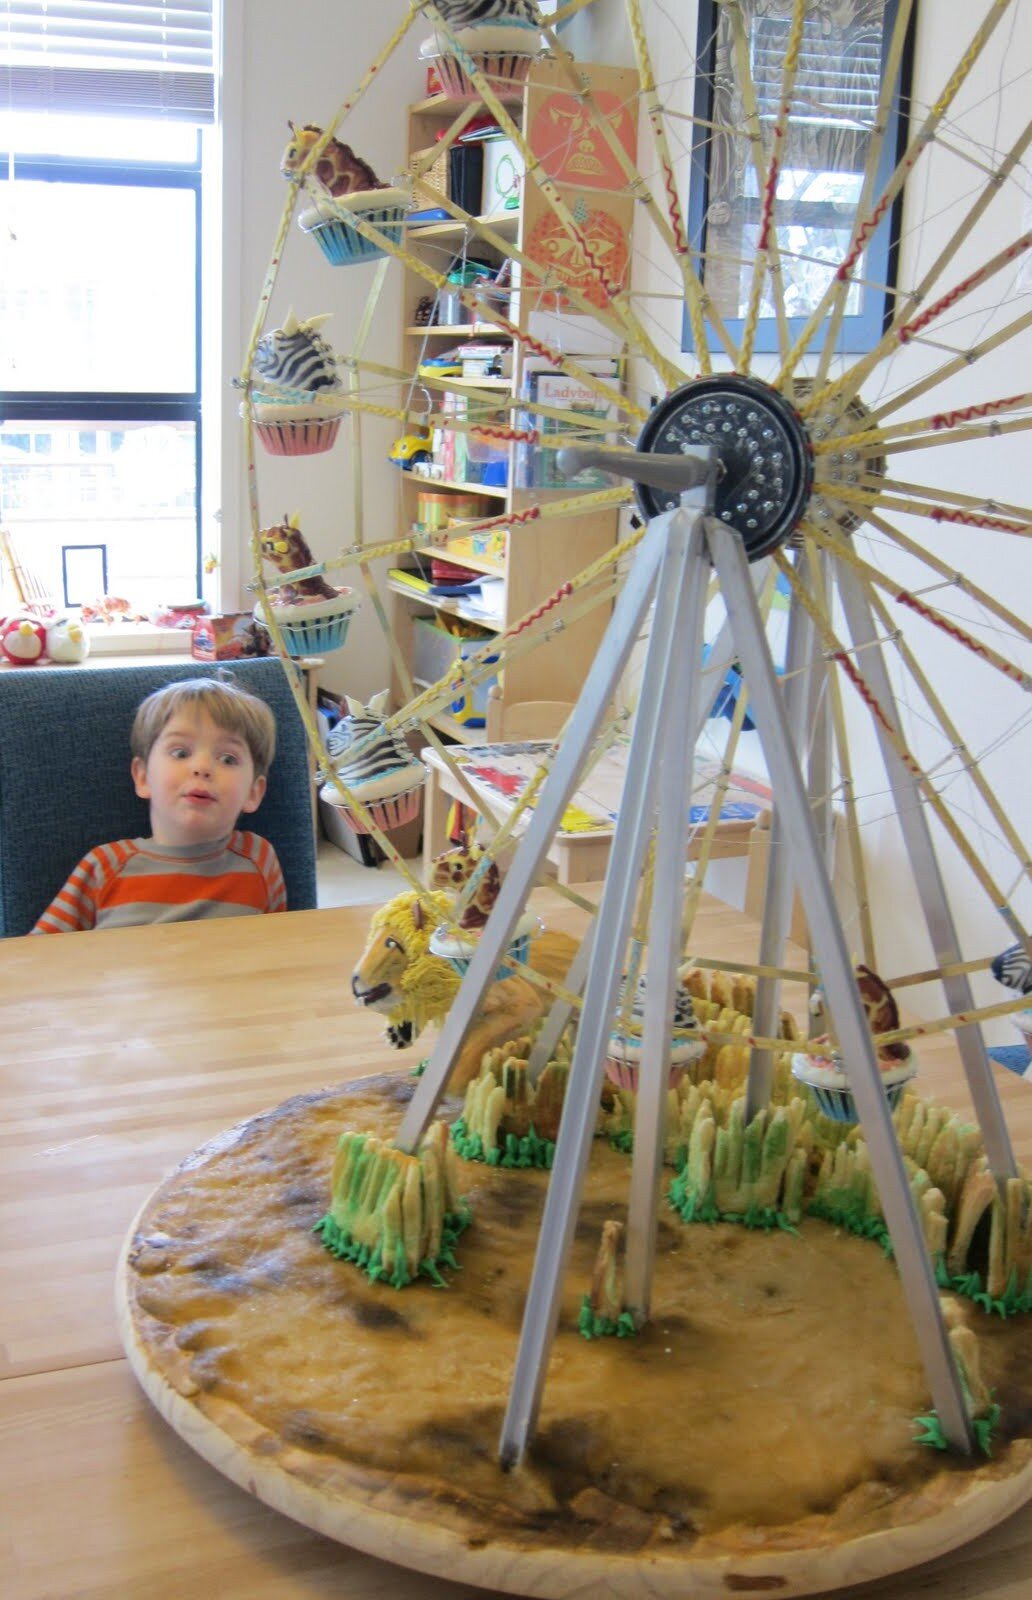
Right before the party, I set all the animals in the ferris wheel. I had to make a few tweaks to get them all to rotate freely, but all in all it really worked remarkably well. Only one zebra fell out in the process, but I had extras, so it wasn’t a problem.The party was great. All the kids took a turn spinning the ferris wheel and they were all very serious about not spinning it too fast. I served the lion to the adults, because it didn’t have candy melt all over it. The kids, of course, loved the candy melts. In fact, Alex ate only the candy melt portion and ignored the actual cake. Of course, I still have no idea what Sam actually imagined that zebra cupcakes are, but he seemed pleased with what I came up with, which is really all that matters. And now he has a two-foot diameter metal ferris wheel to treasure forever.