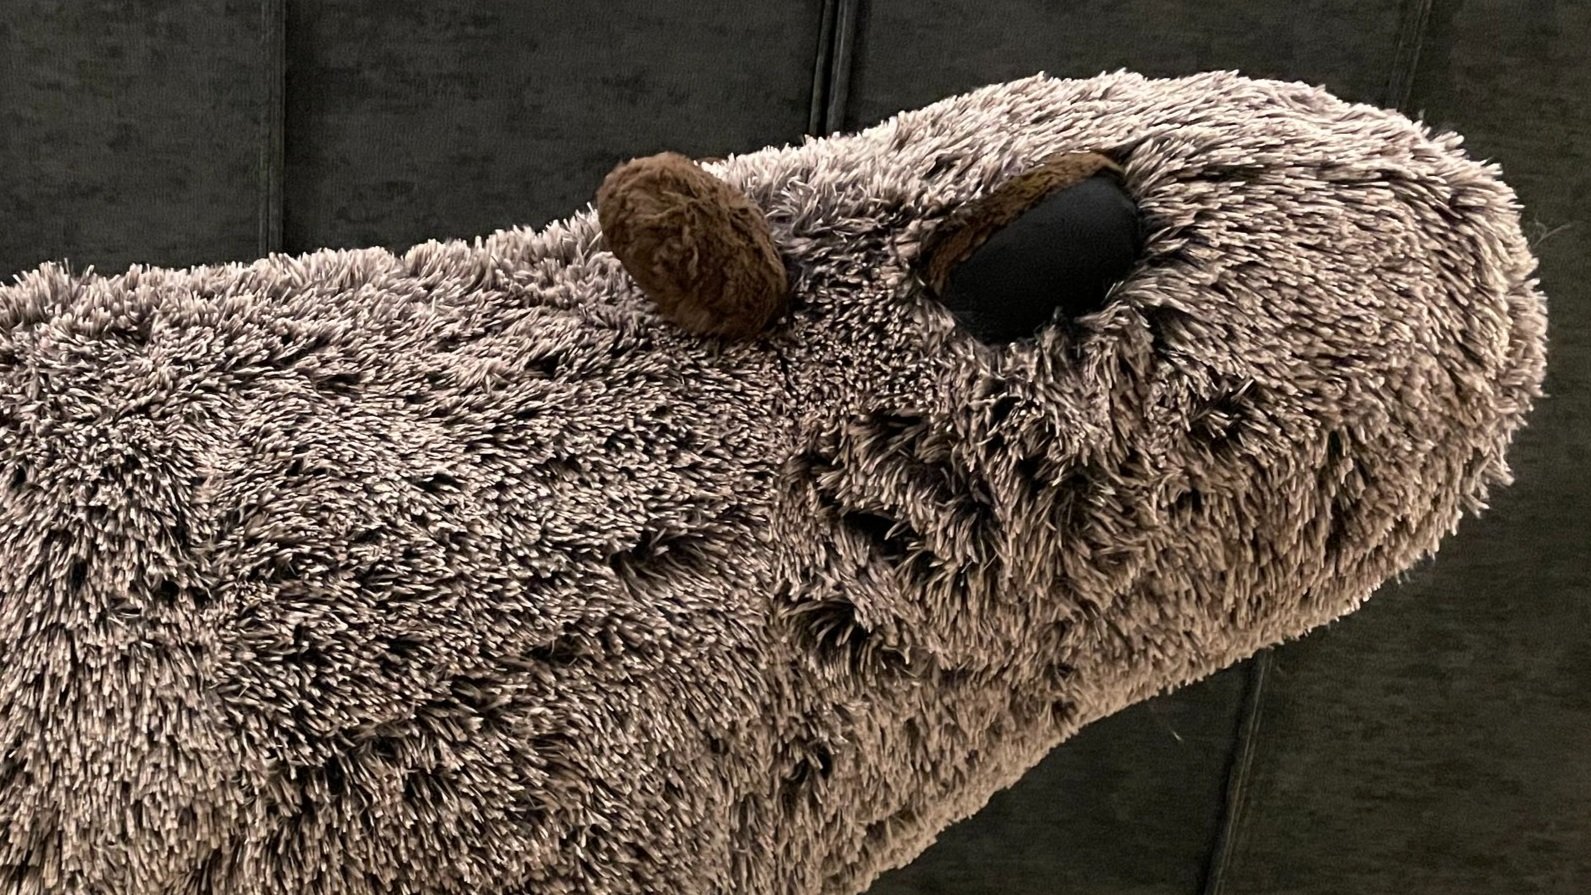
Stuffed Capybara
It’s not quite life size, but it is pretty close.
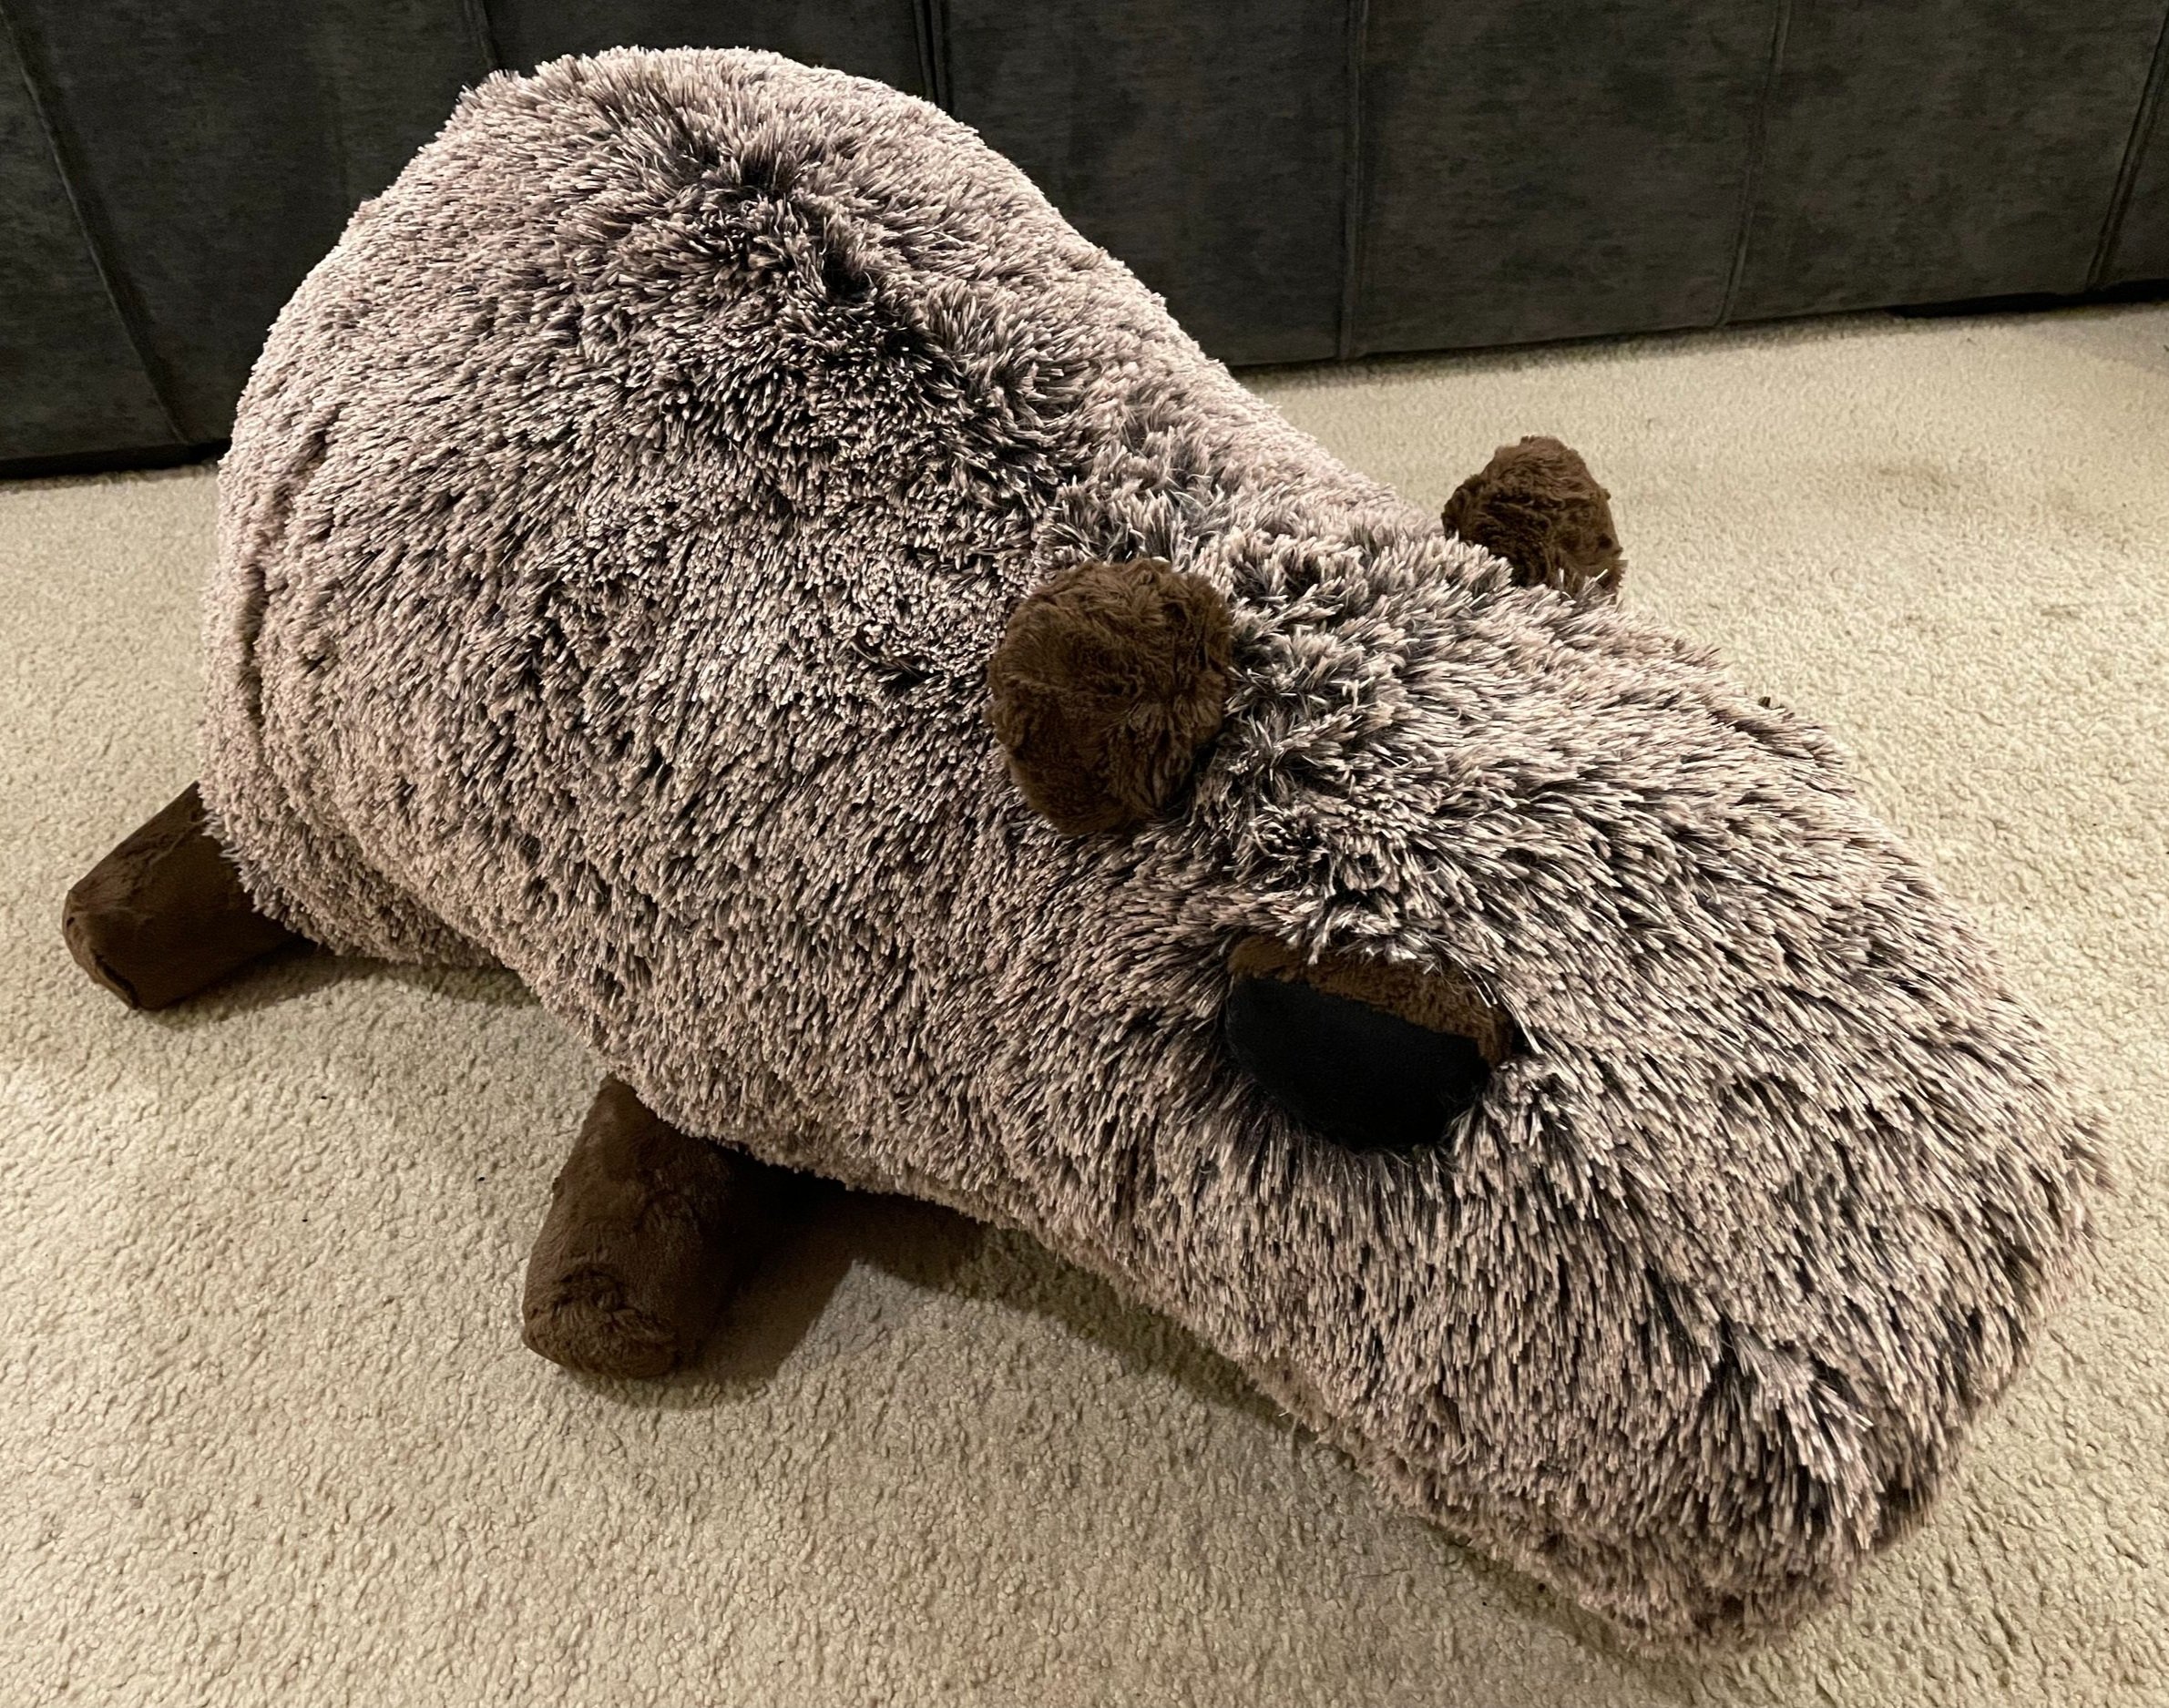
It’s not quite life size, but it is pretty close.

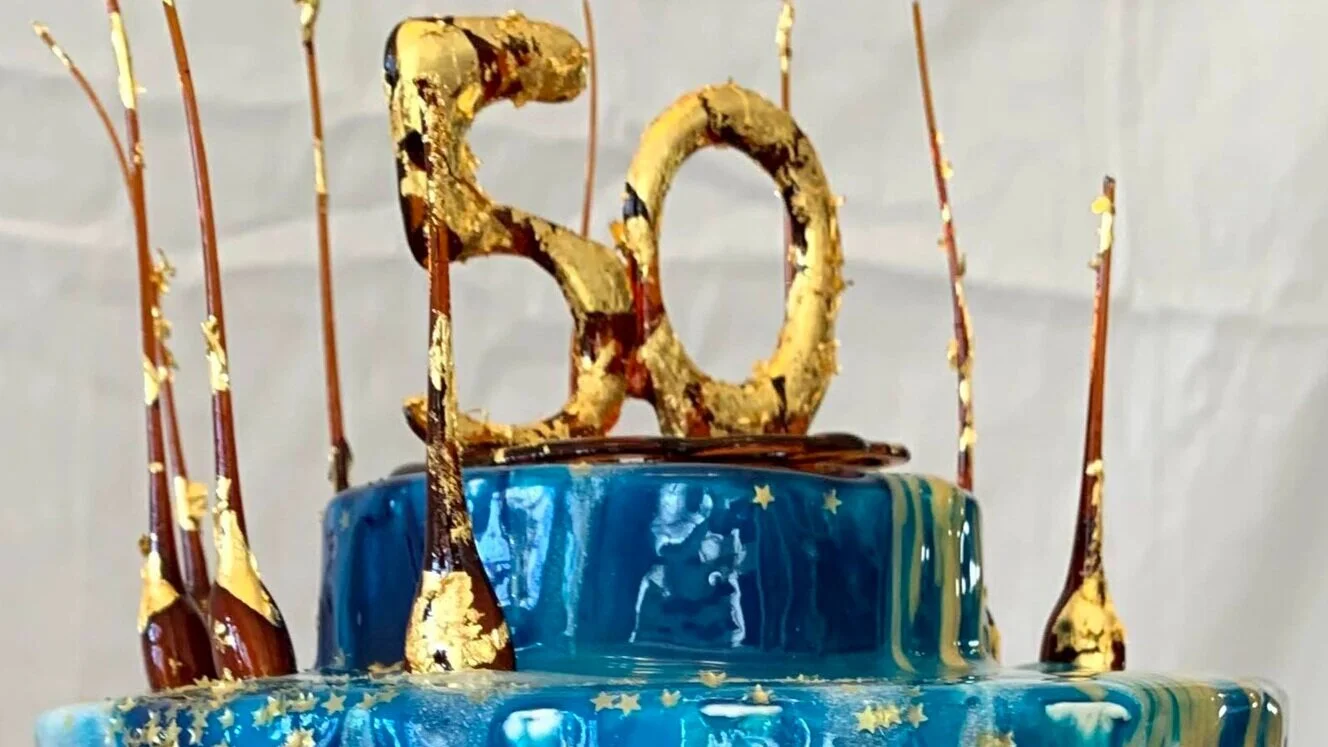
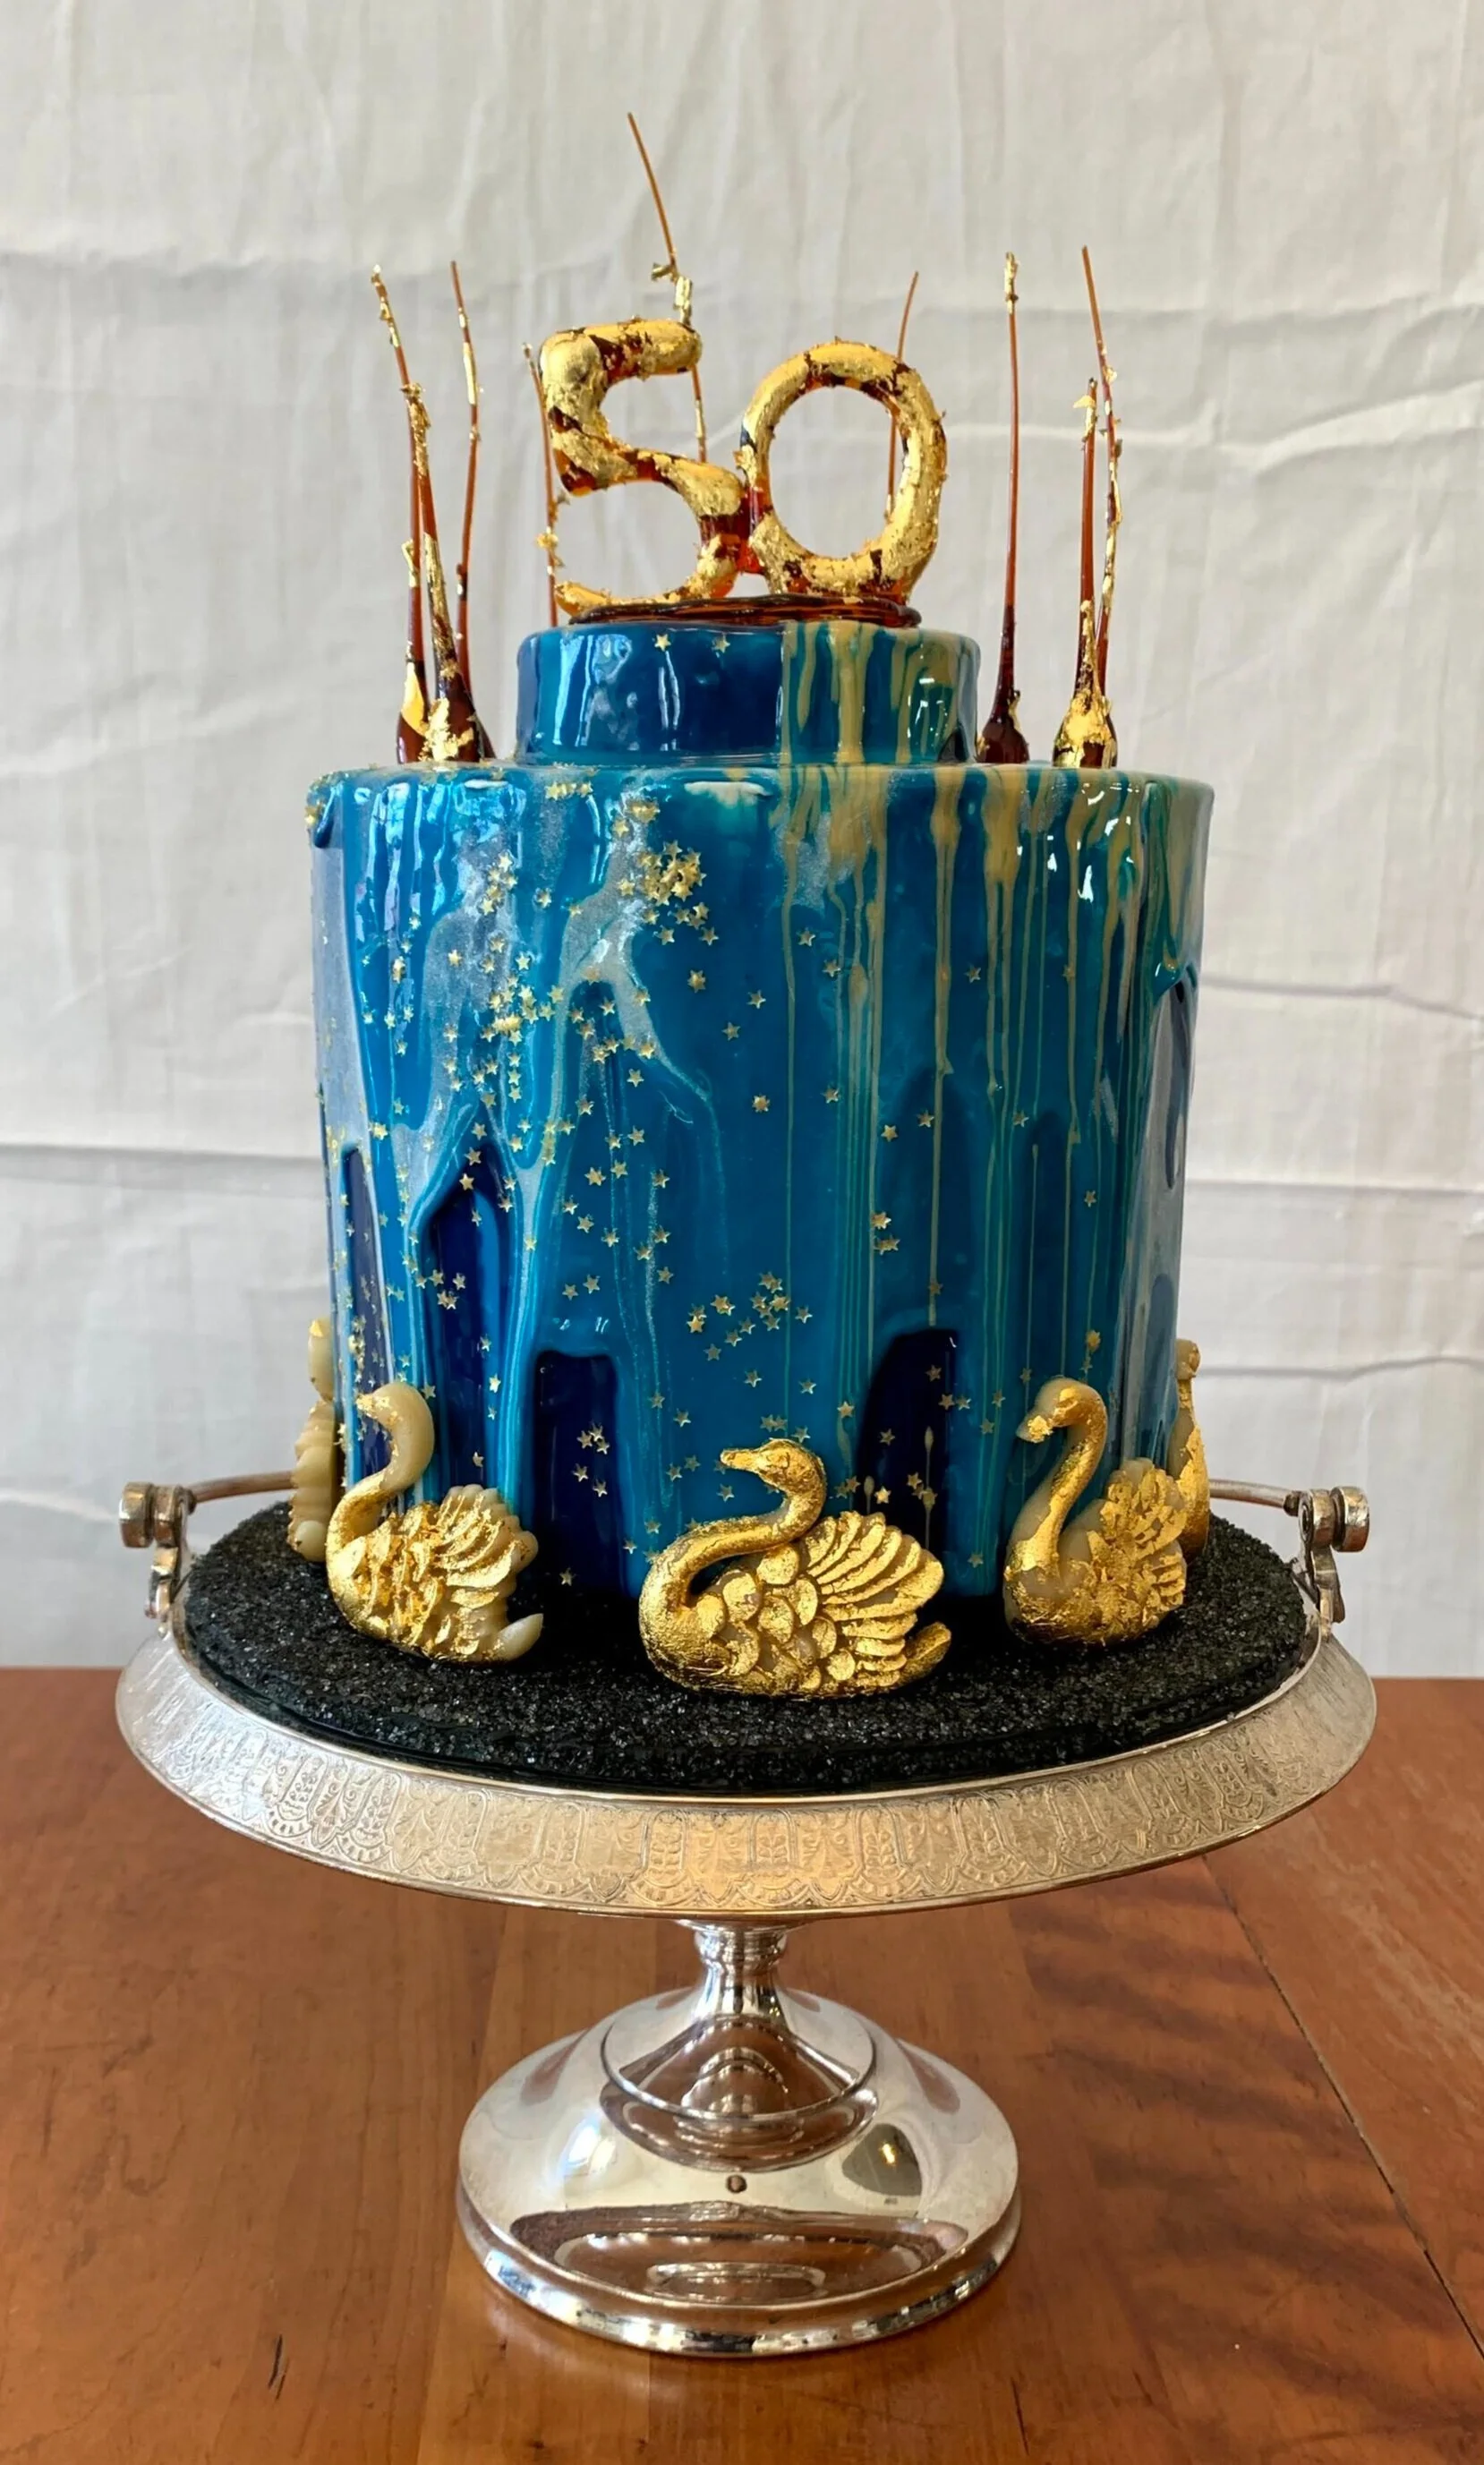
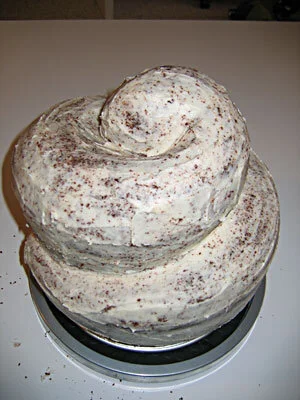
50th Anniversary Cake
We couldn’t celebrate my parents’ 50th anniversary in person, but that didn’t stop me from making them a cake!
We couldn’t celebrate my parents’ 50th anniversary in person, but that didn’t stop me from making them a cake! I tried to make a nice small cake that would be a reasonable size for two people. As usual, despite my best efforts, I made four times as much cake as the occasion required.
The outside of the cake is a blue, white, and gold mirror glaze with golden star sprinkles.

The swans at the bottom are marzipan with gold leaf on them because there were little plastic swans on Mom and Dad’s wedding cake 50 years ago.
The 50 on top is made of caramel and around the perimeter are almonds dipped in caramel.

The platter that the cake is on was (we believe) used in the wedding of some of Dad’s ancestors back three or four generations. We think it dates to the late nineteenth century. My sister and I had it repaired and replated specially for this occasion.
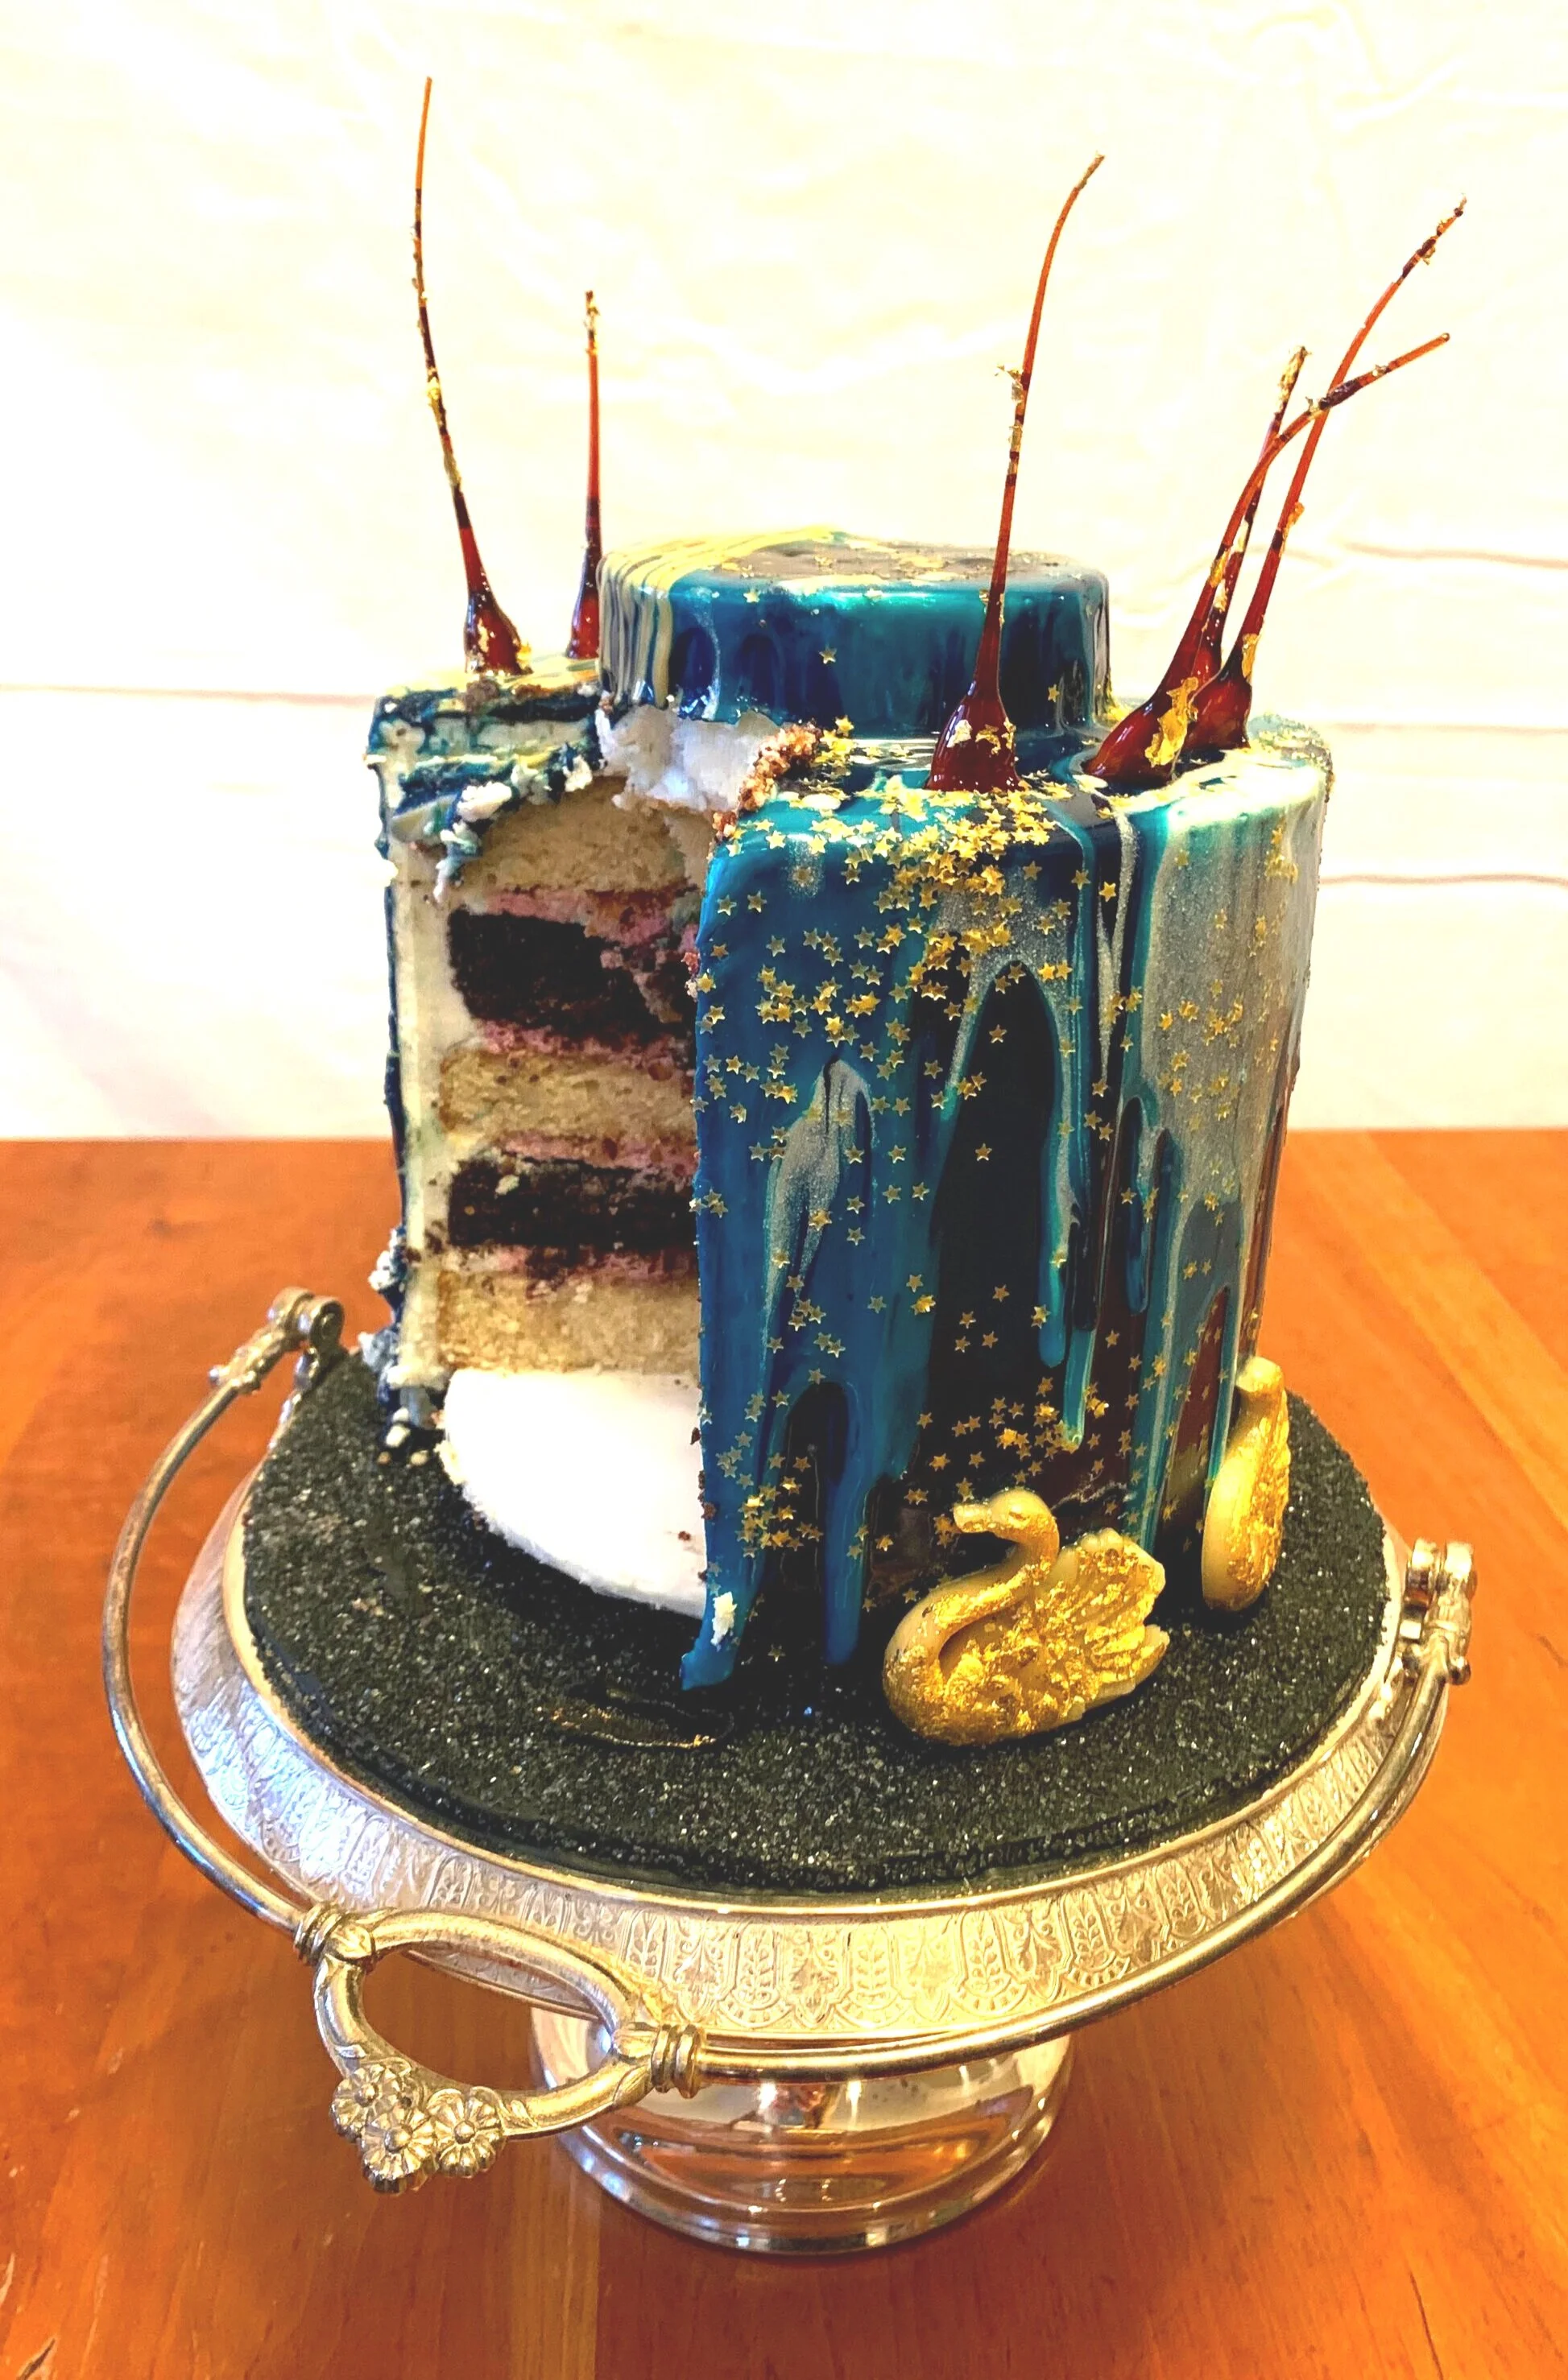
On the inside, the cake is alternating layers of almond cake and chocolate cake with cherry swiss buttercream between the layers. It’s meant to be reminiscent of a gelato bar that was served at Mom and Dad’s wedding, which is half chocolate, half almond with cherries in the middle.

Valkyr Pusheen Cake
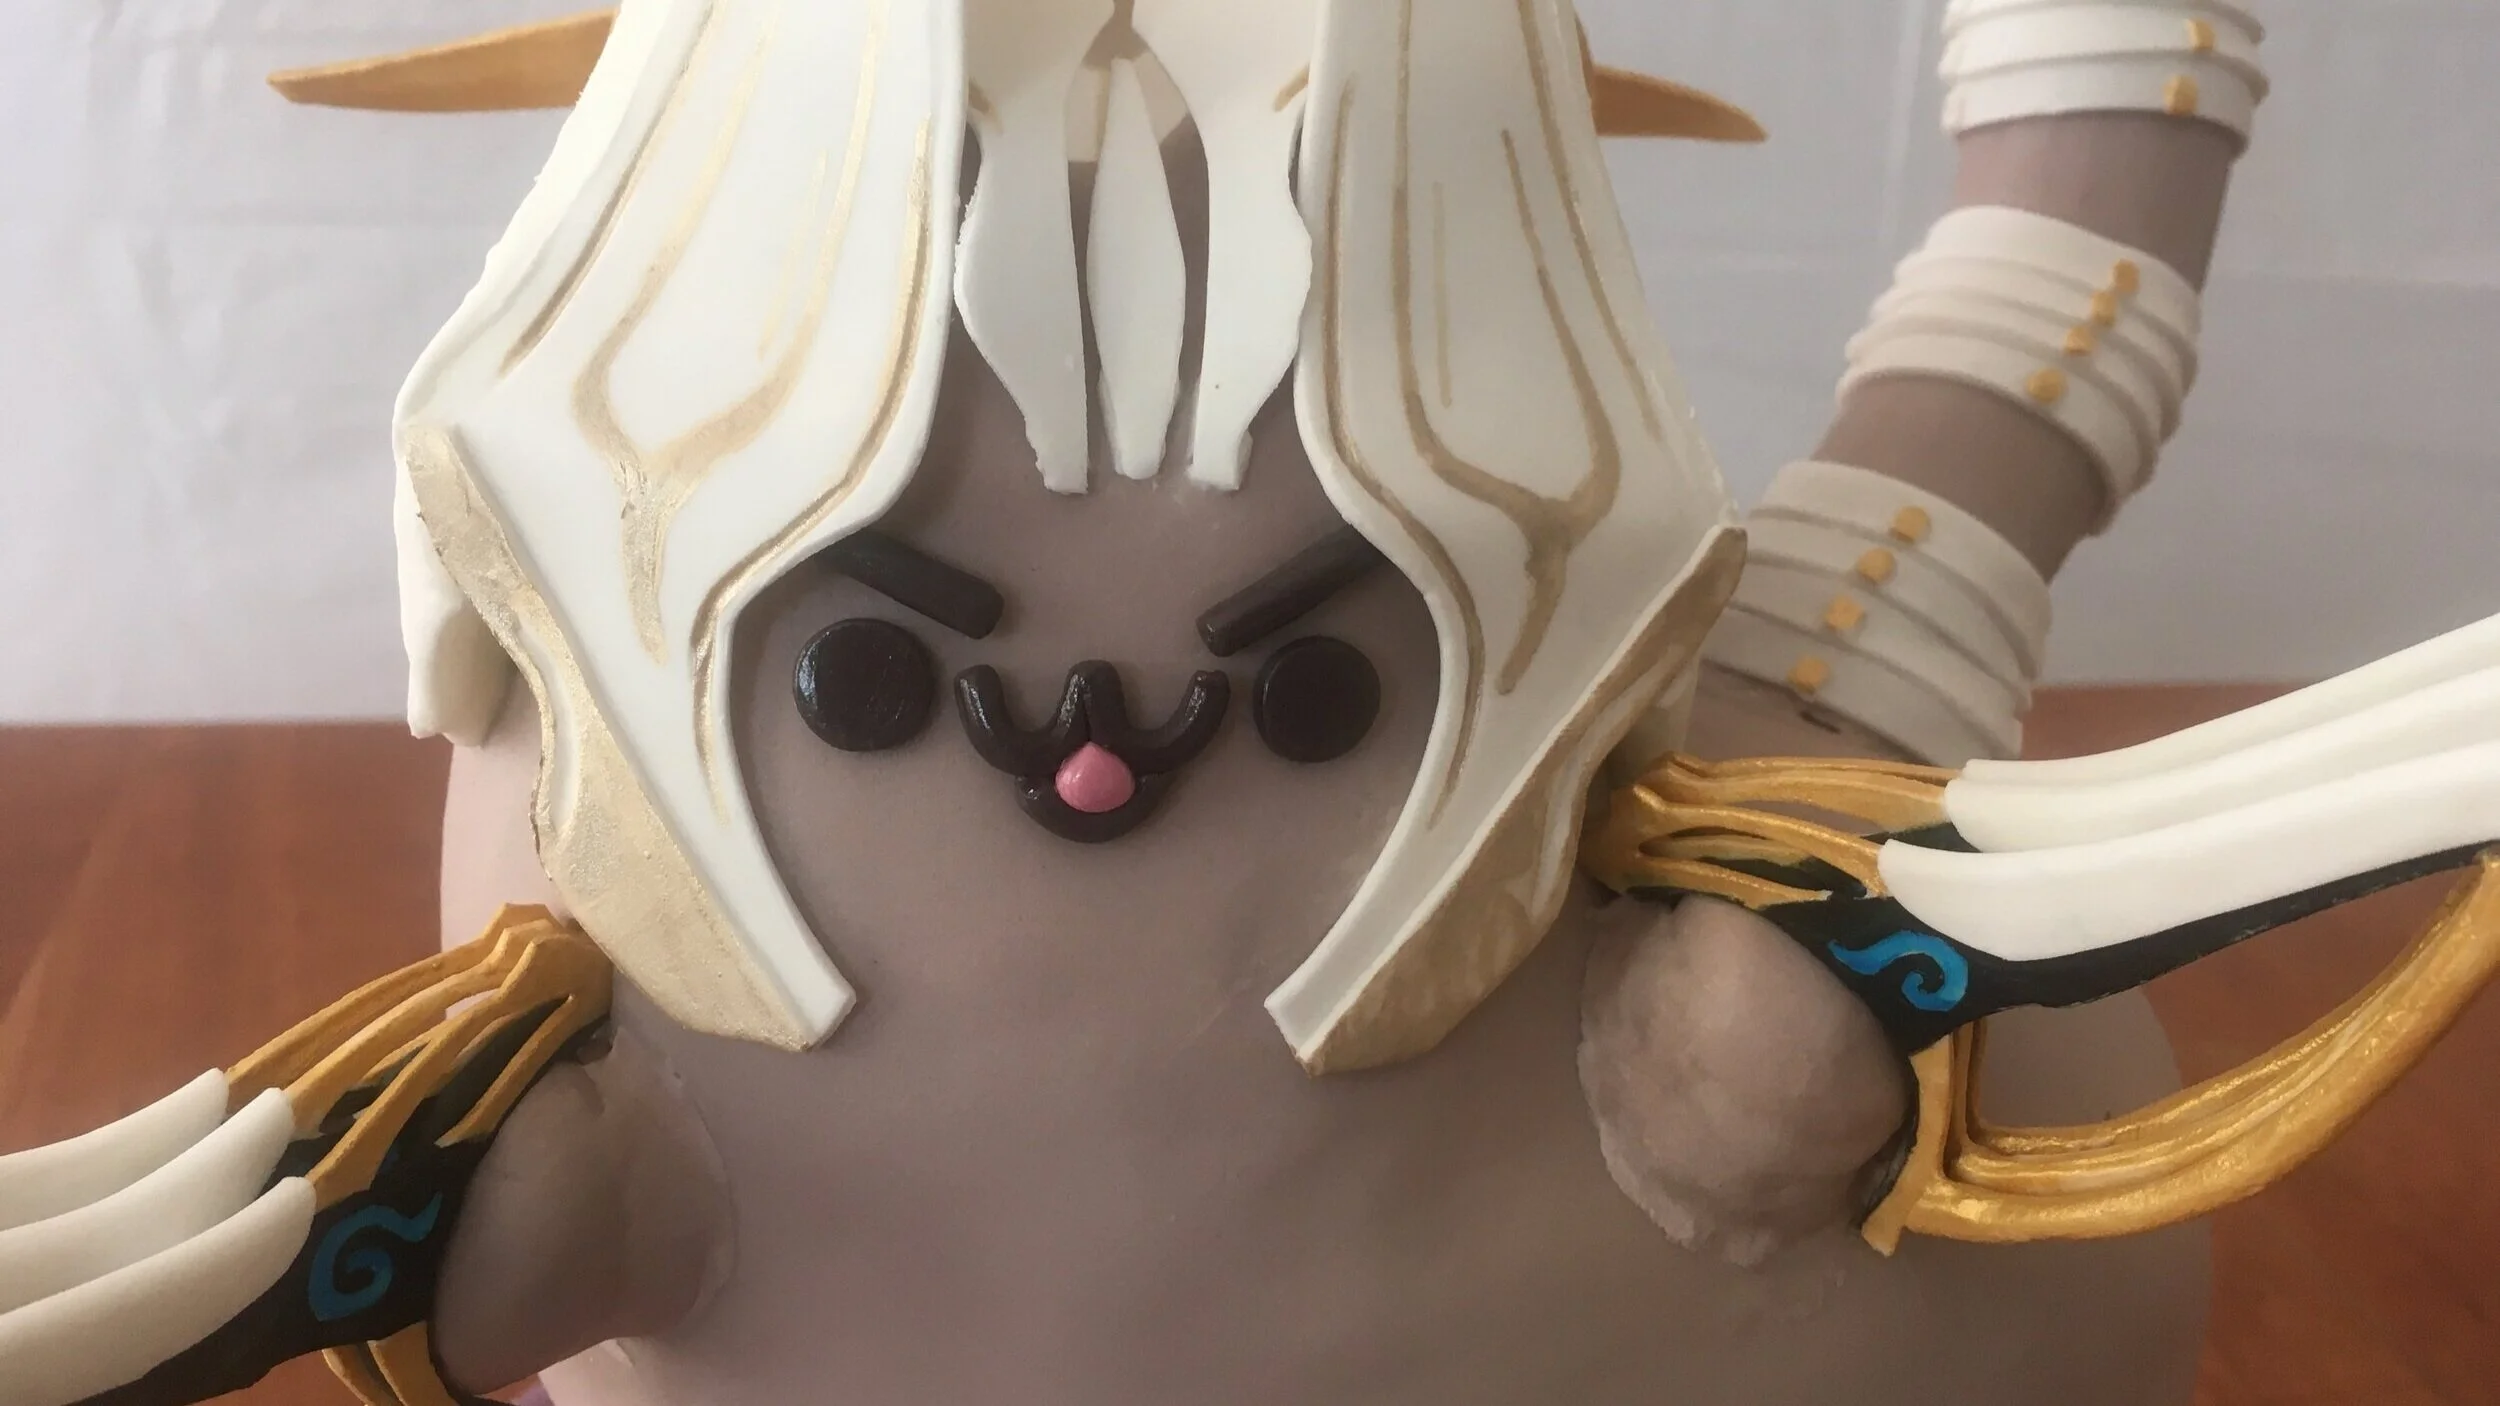
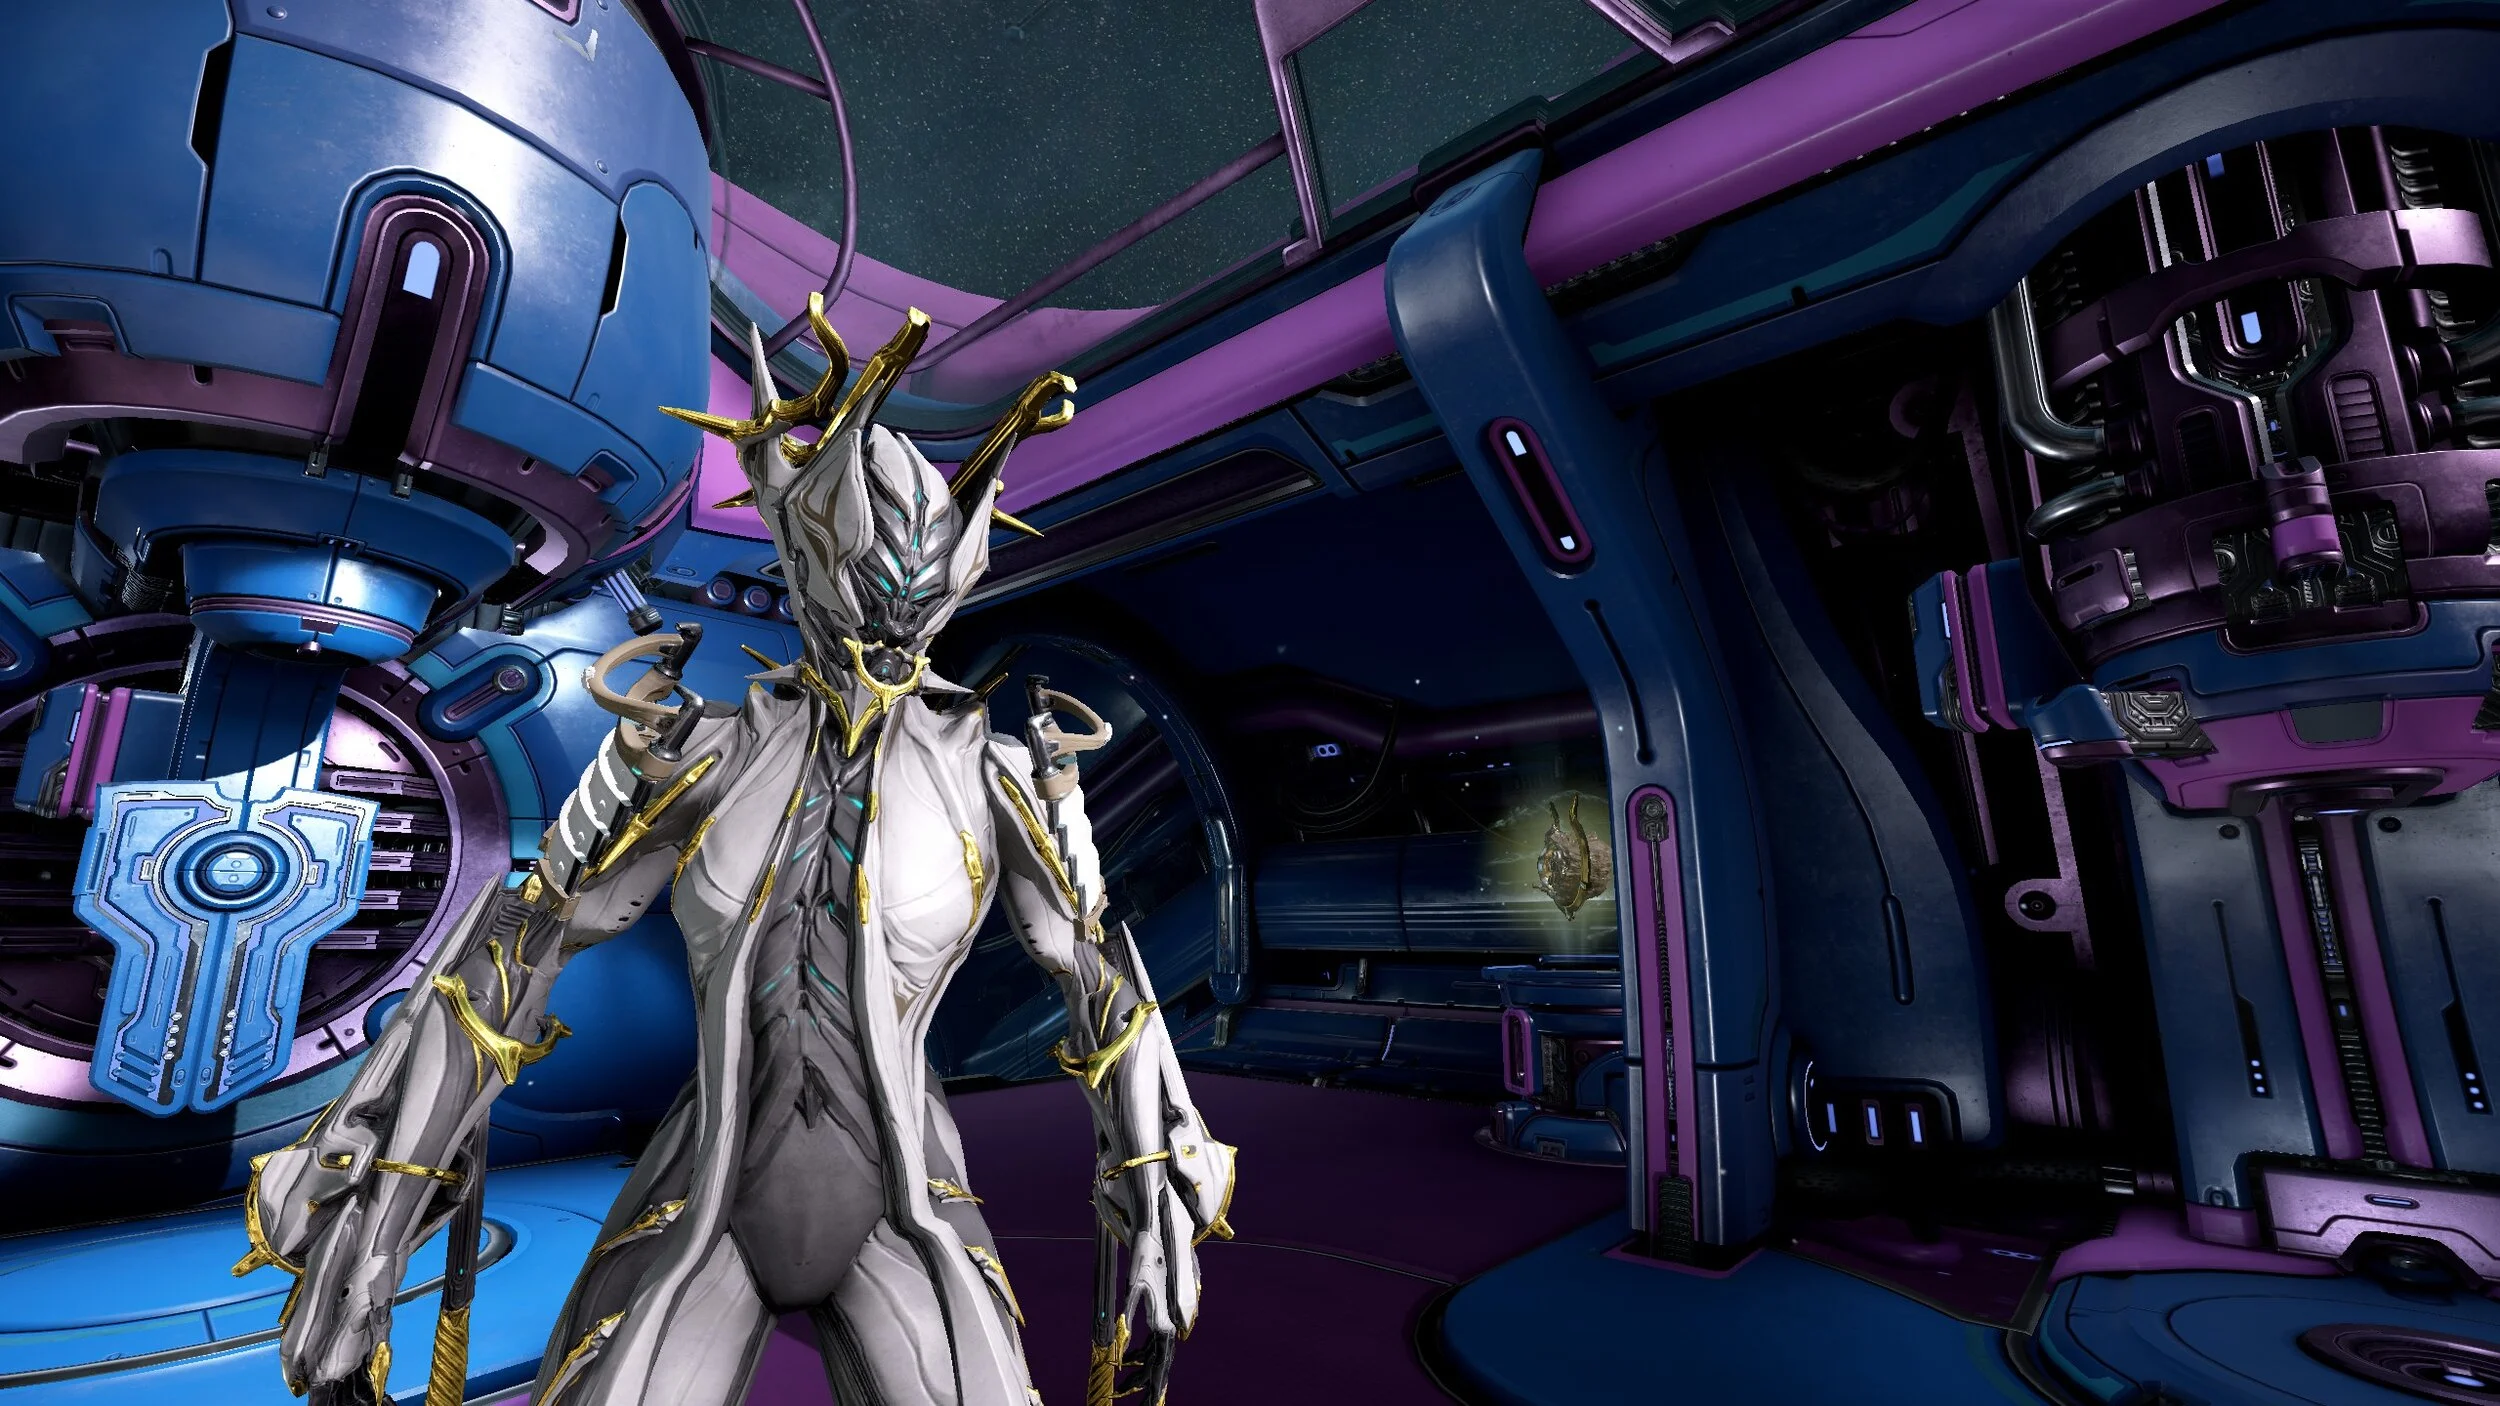
Another cake celebrating my wonderful niece! It’s Pusheen dressed as Valkryr, one of Alex’s favorite frames from Warframe.

Another cake celebrating my wonderful niece! It’s Pusheen dressed as Valkyr, one of Alex’s favorite frames from Warframe. For reference, this is what Alex’s Valkyr looks like.
Pusheen is a very simple shape, but Valkyr’s outfit is quite complicated. To figure out what gum paste pieces I needed to make, I began by making a full-scale model of the cake out of newspaper and masking tape.

Using that as a guide, I made paper patterns for all the pieces of her outfit and from those paper pieces I made templates and forms to cut and shape the gum paste. The amazing thing is that I actually managed to carve the cake enough like my model that all thirteen pieces of the crown fit together on the cake more or less the way that they were supposed to.

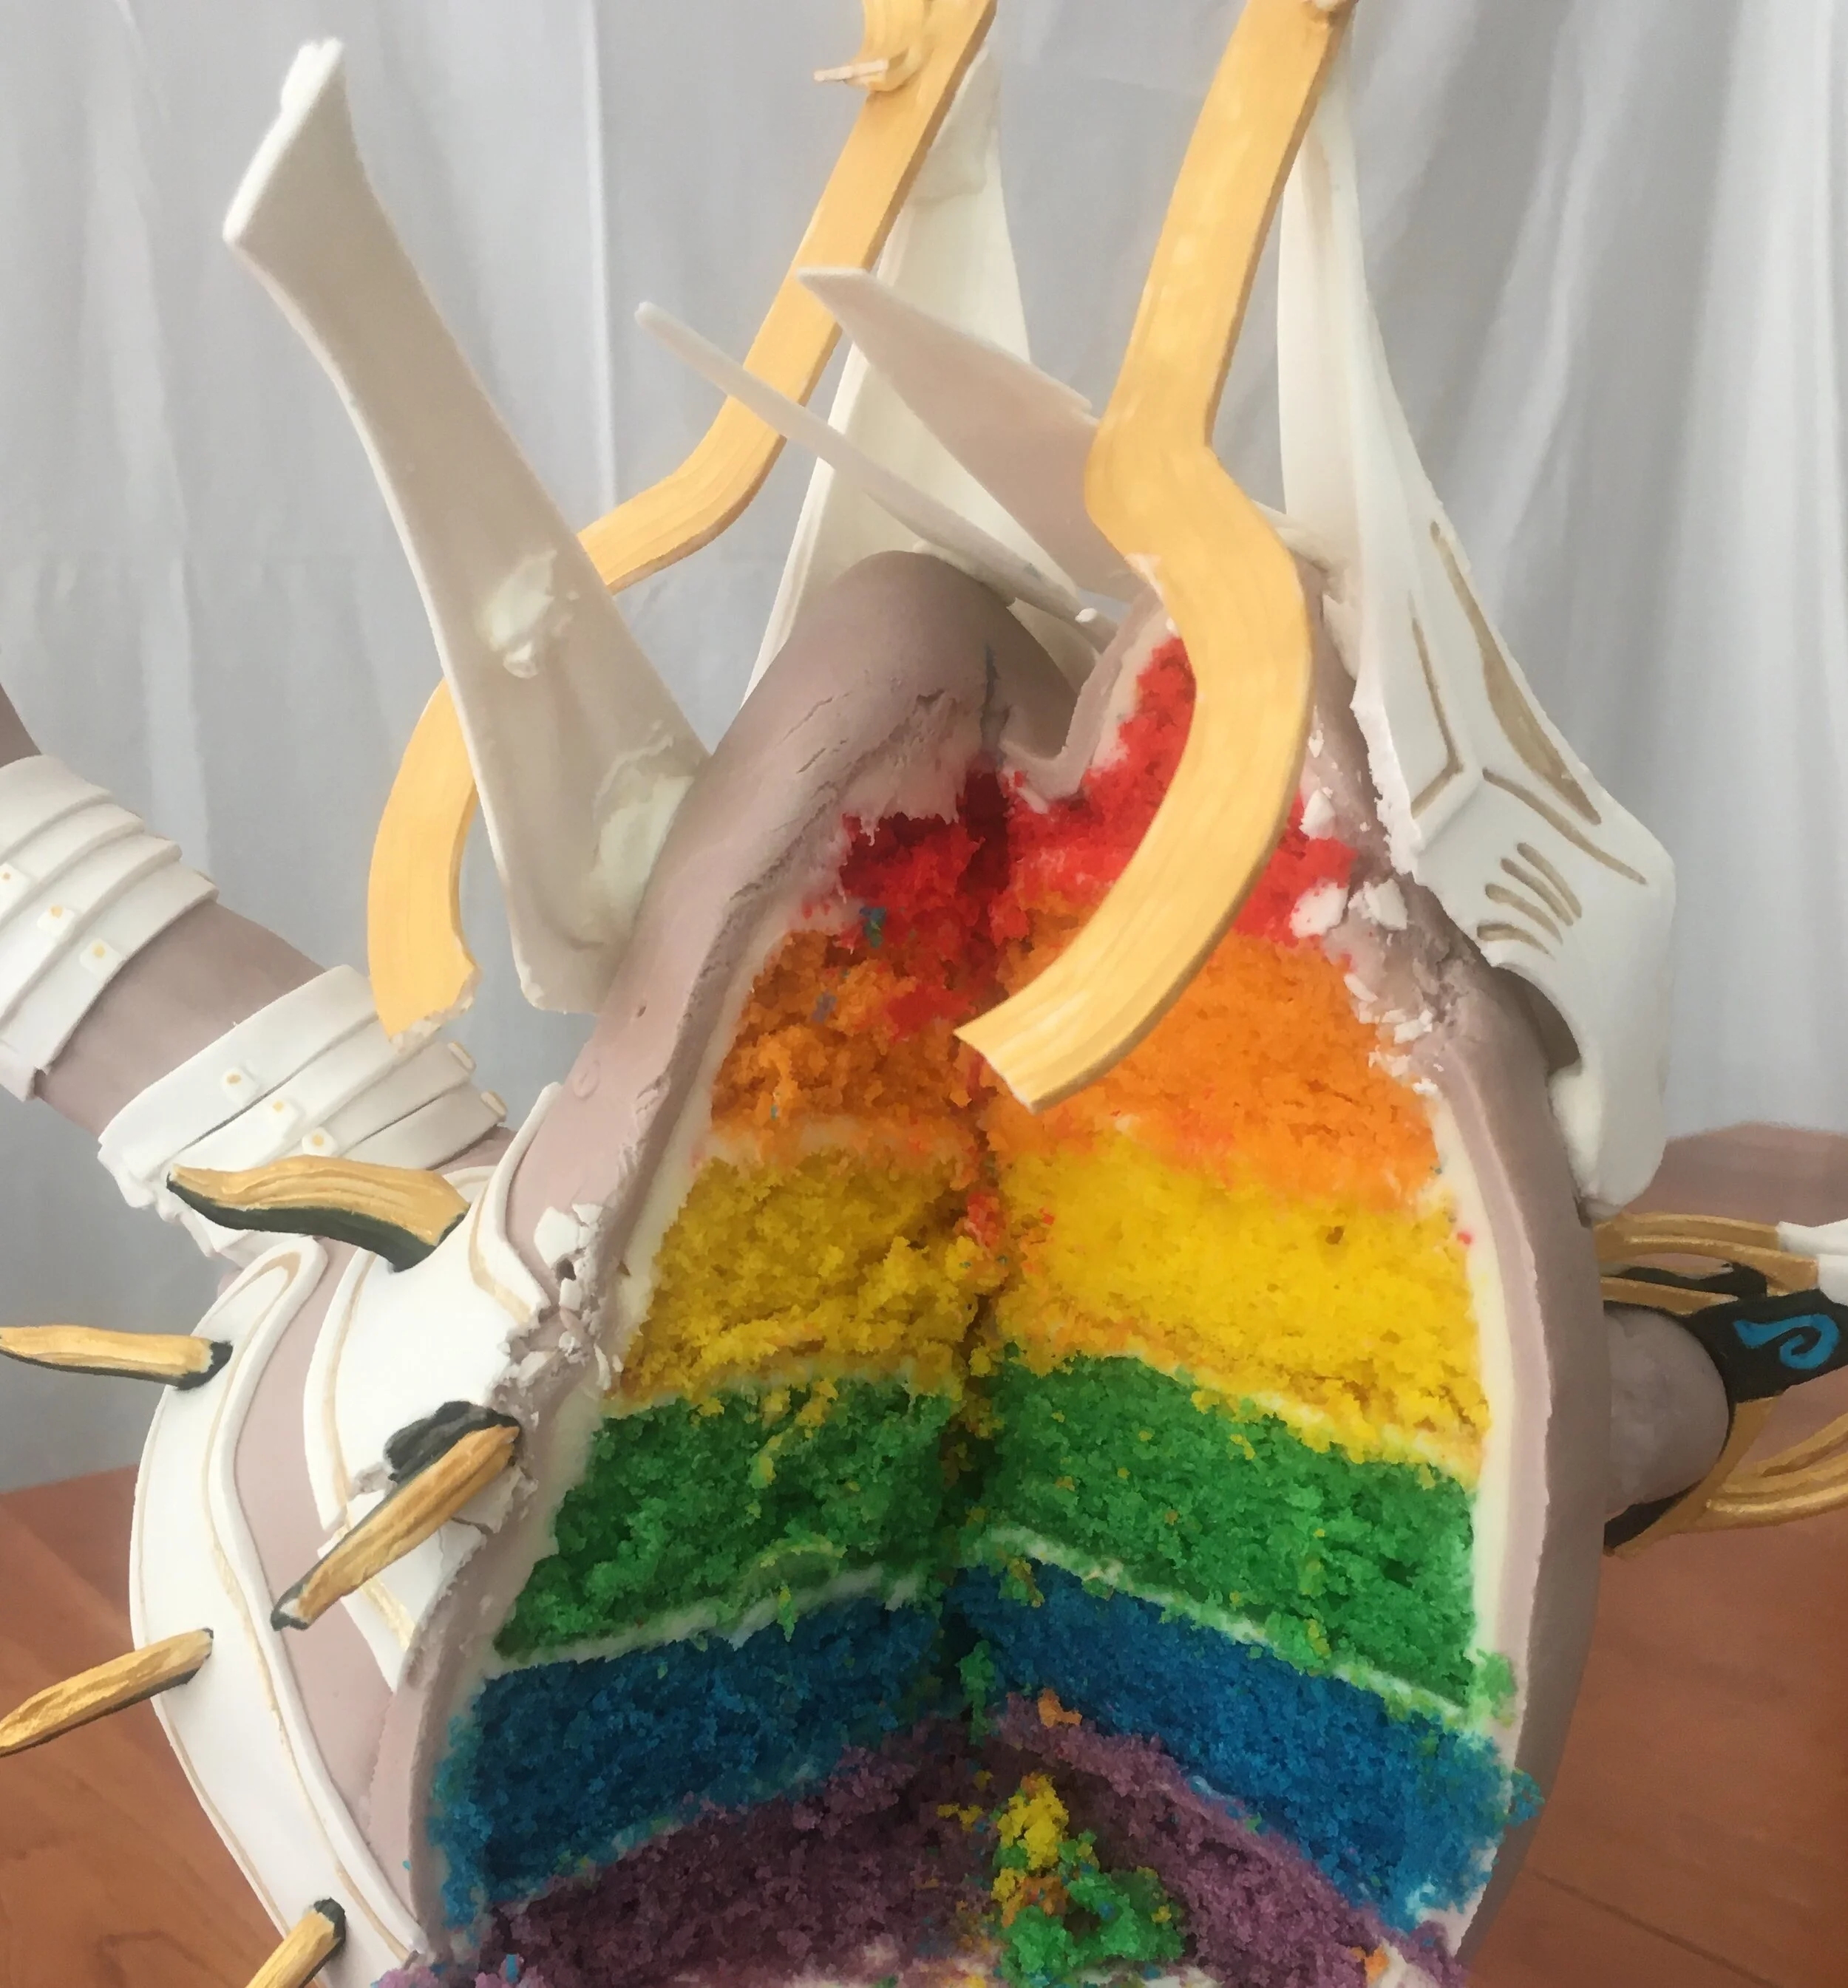
Inisde, Val-kitty-sheen is a beautiful lemon-flavored rainbow.

Pusheen Cupcakes
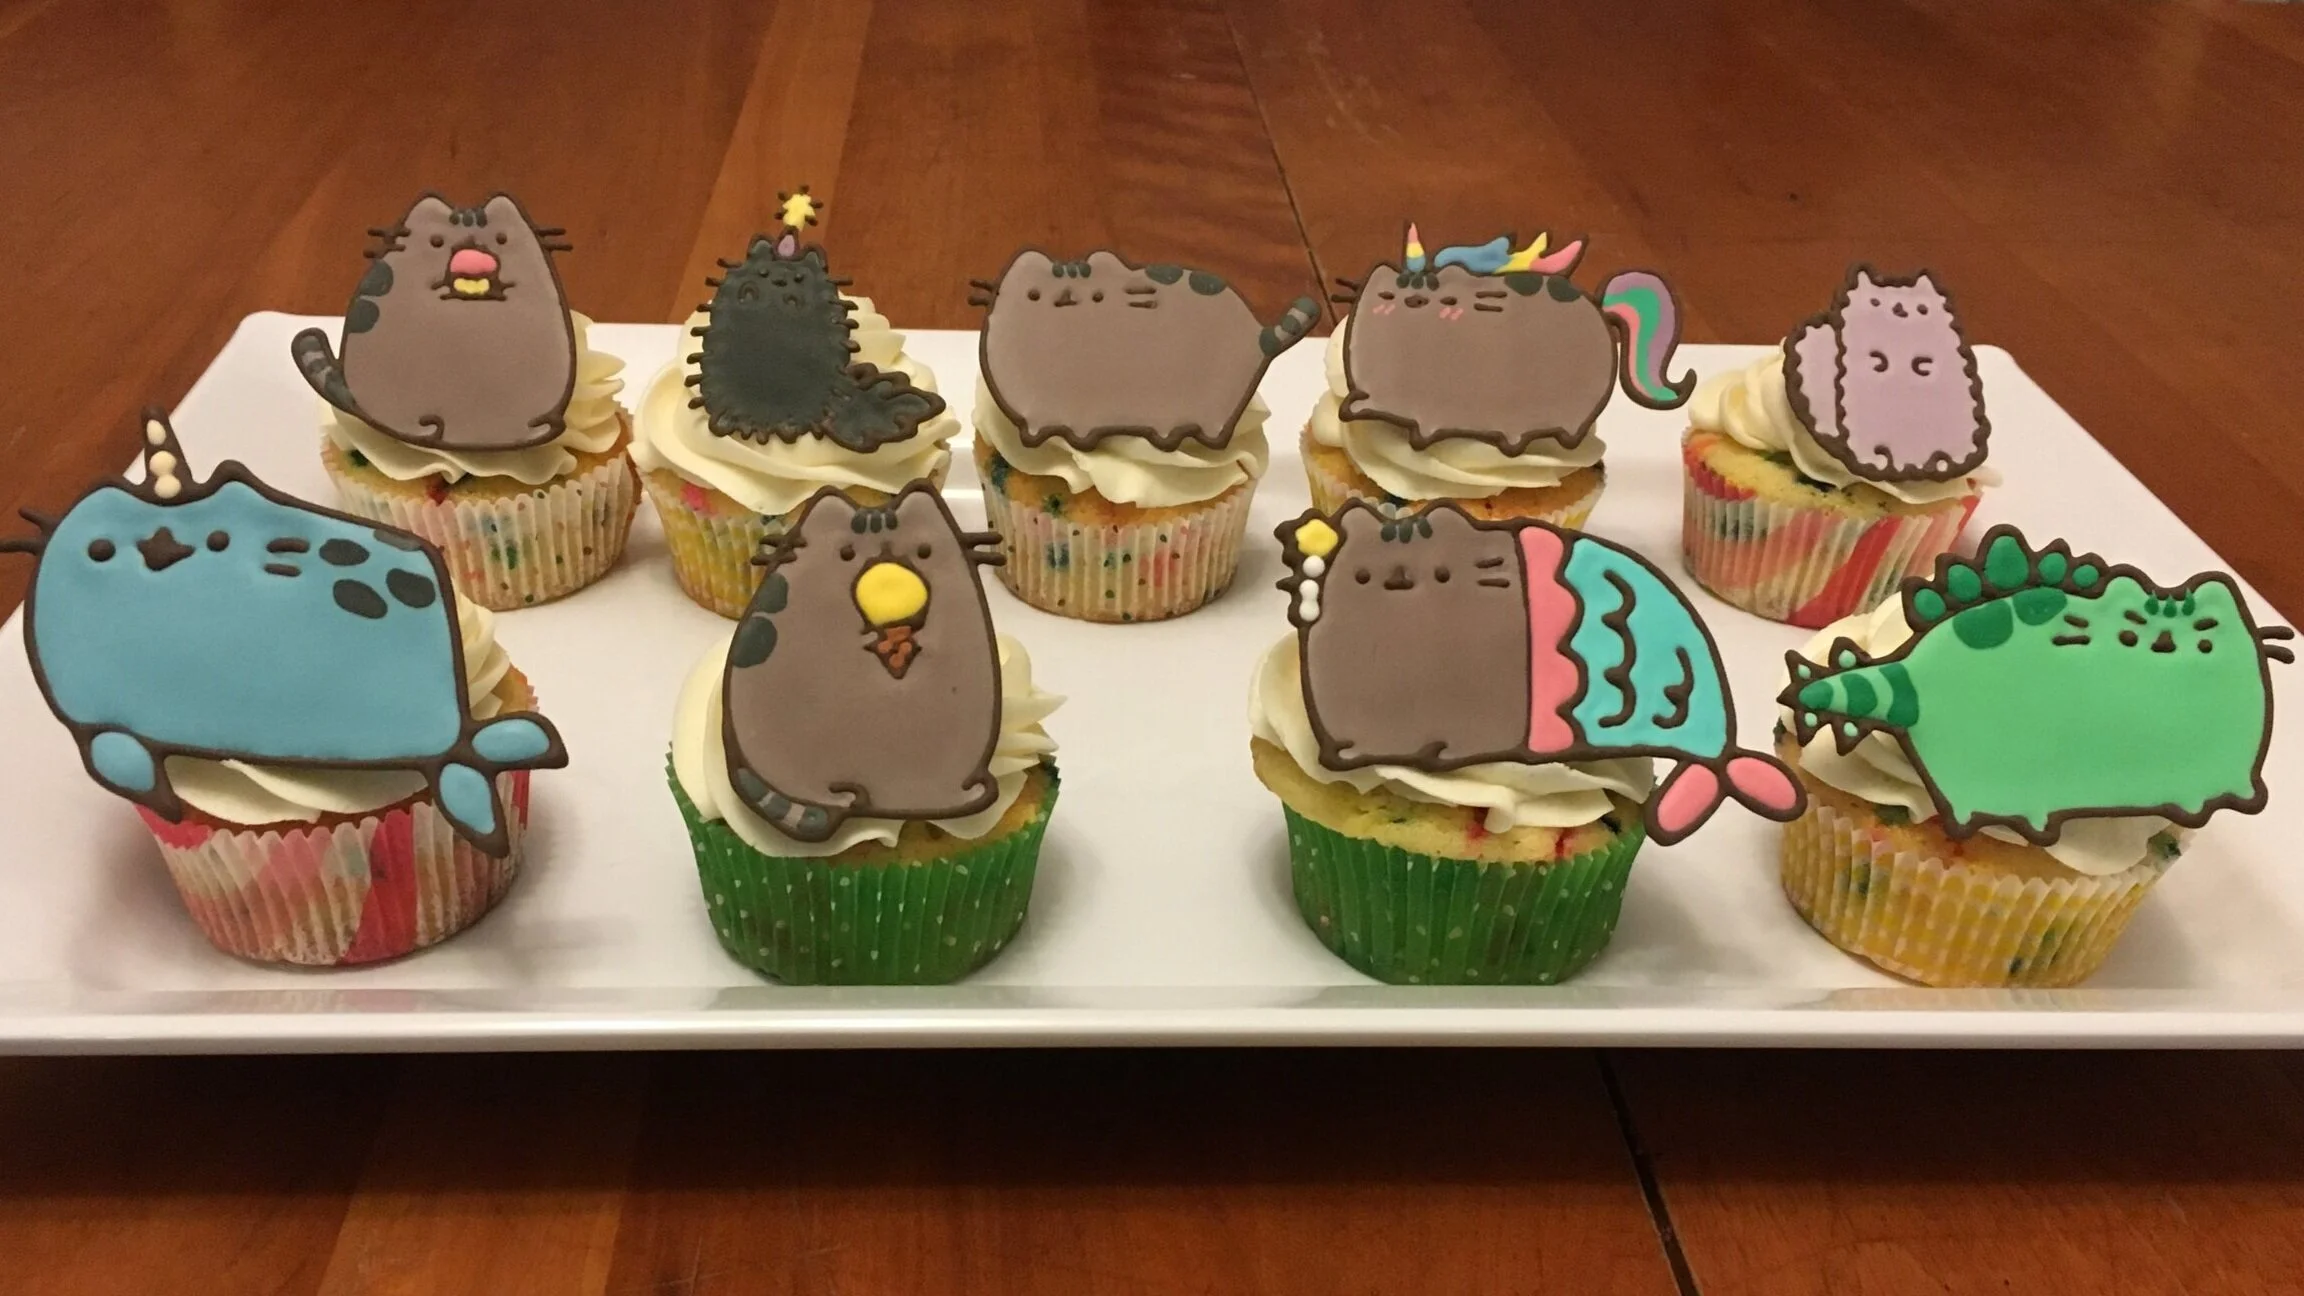
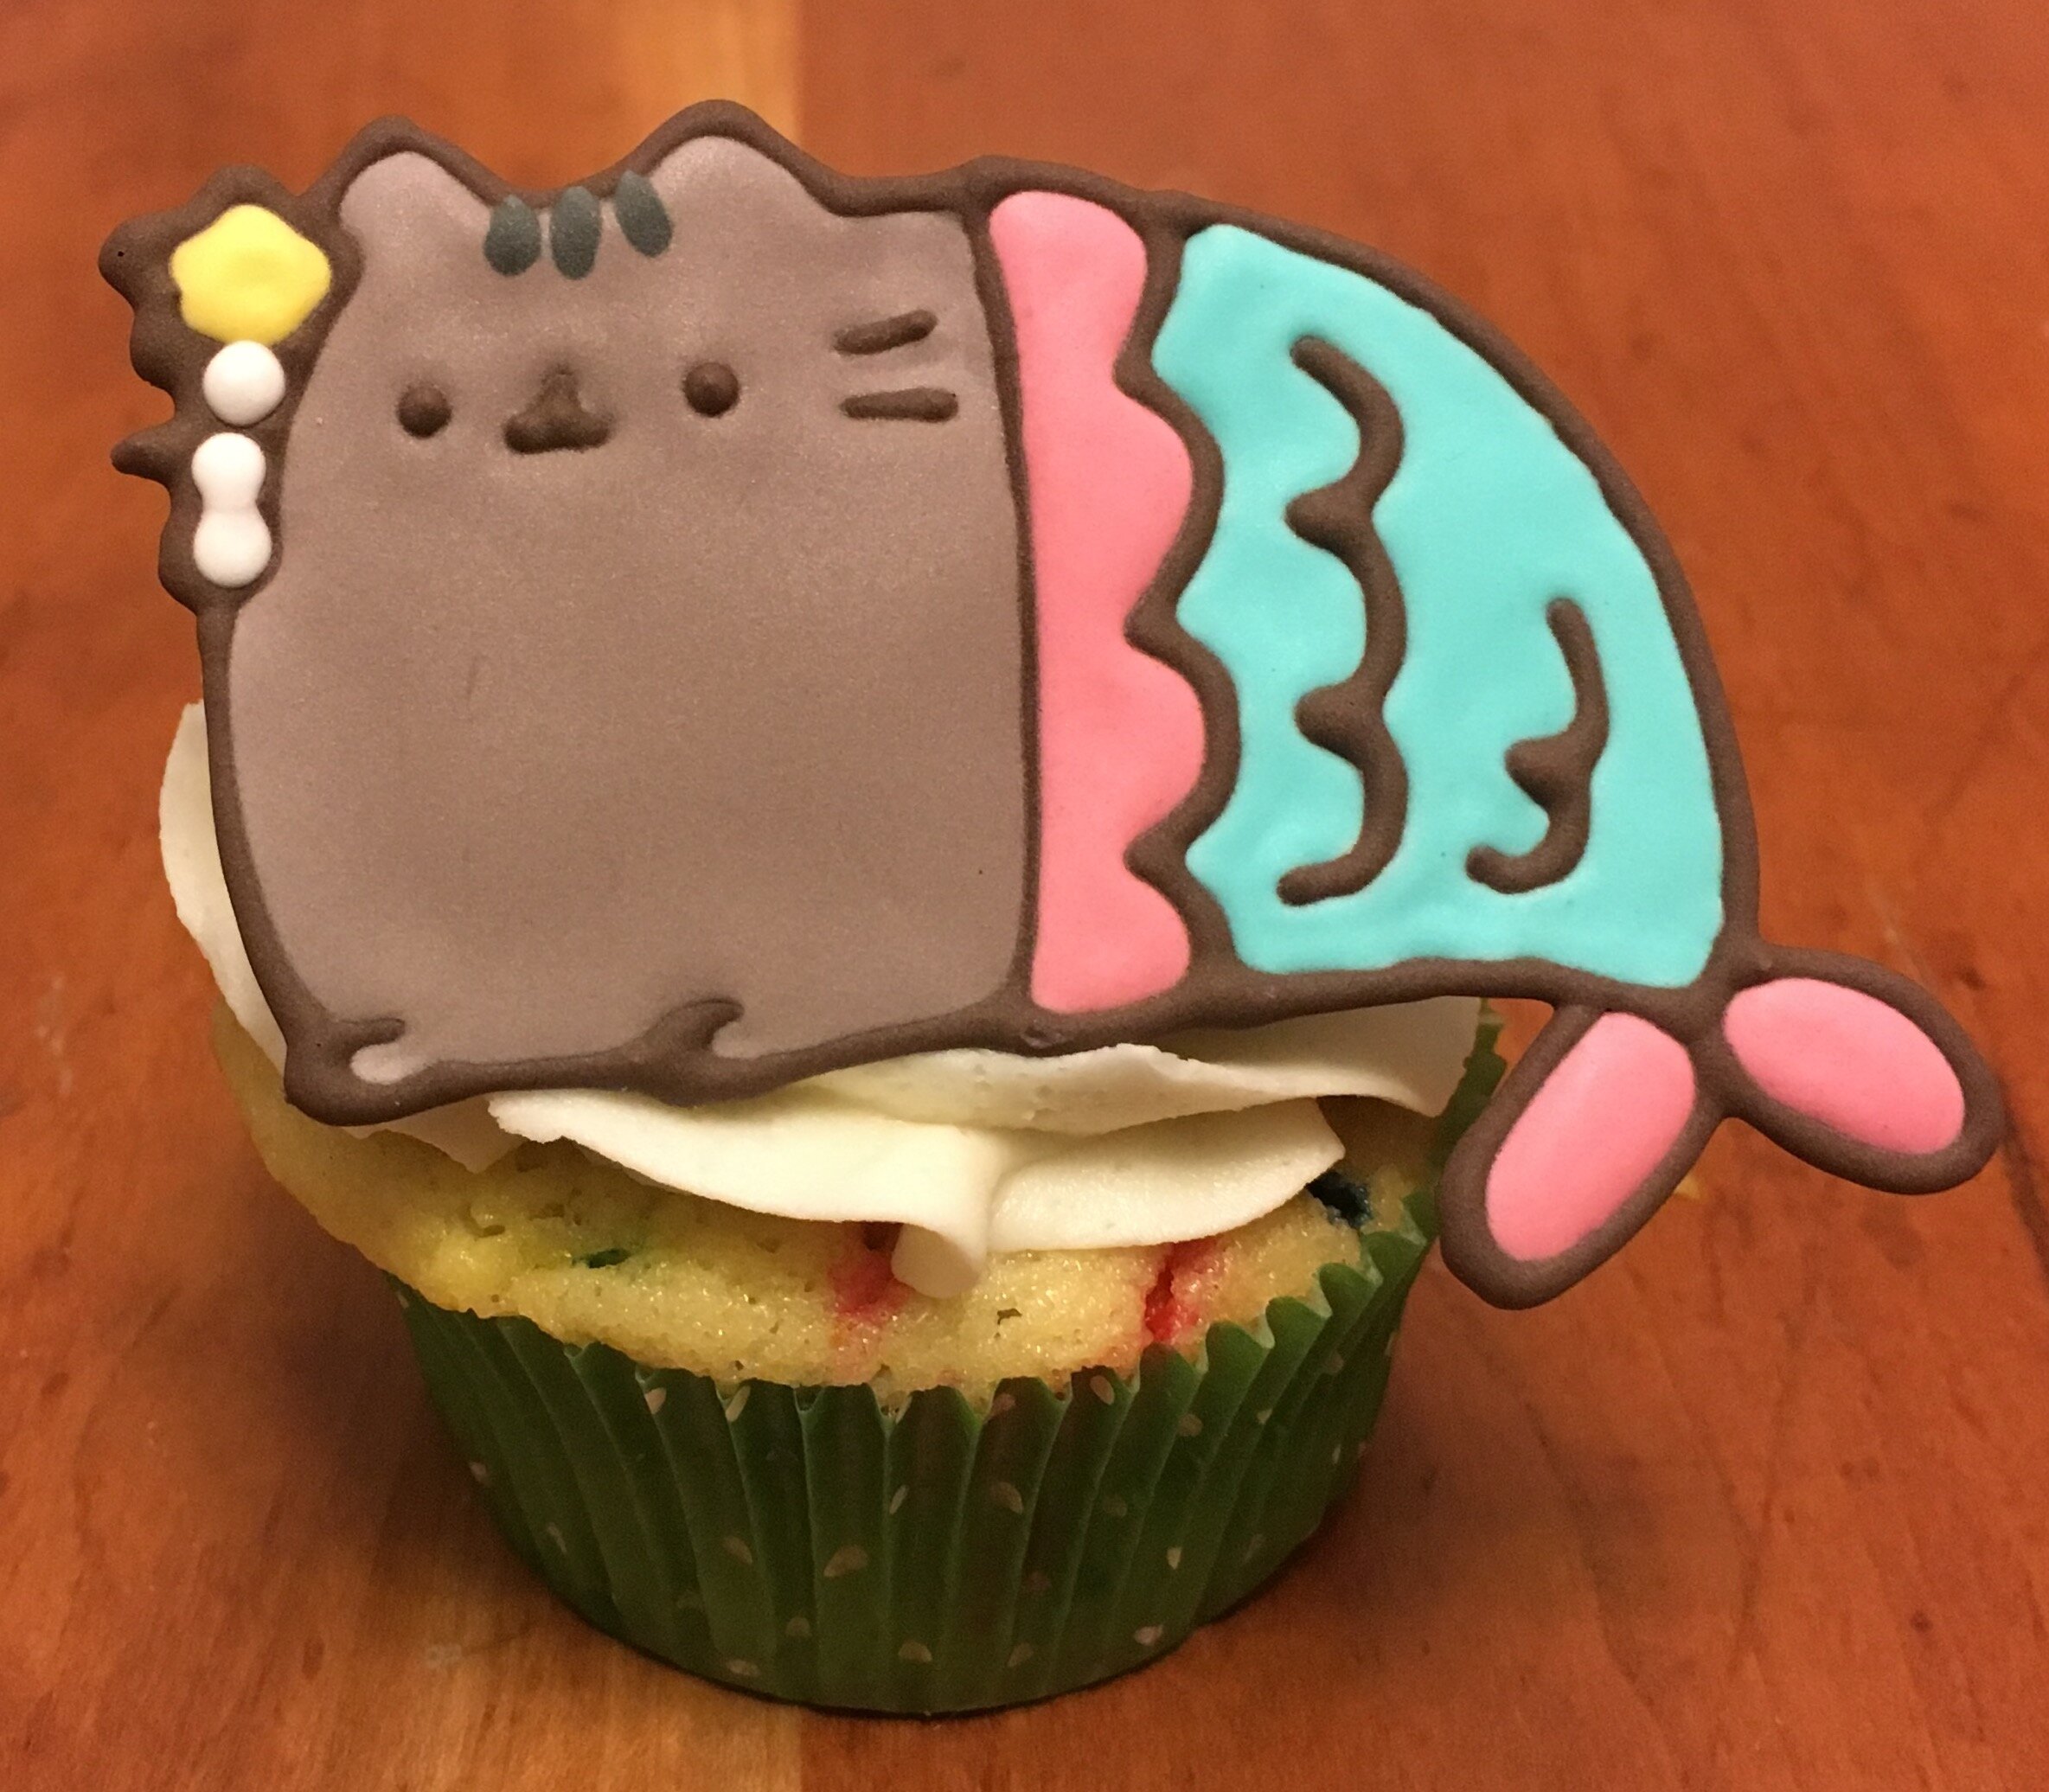
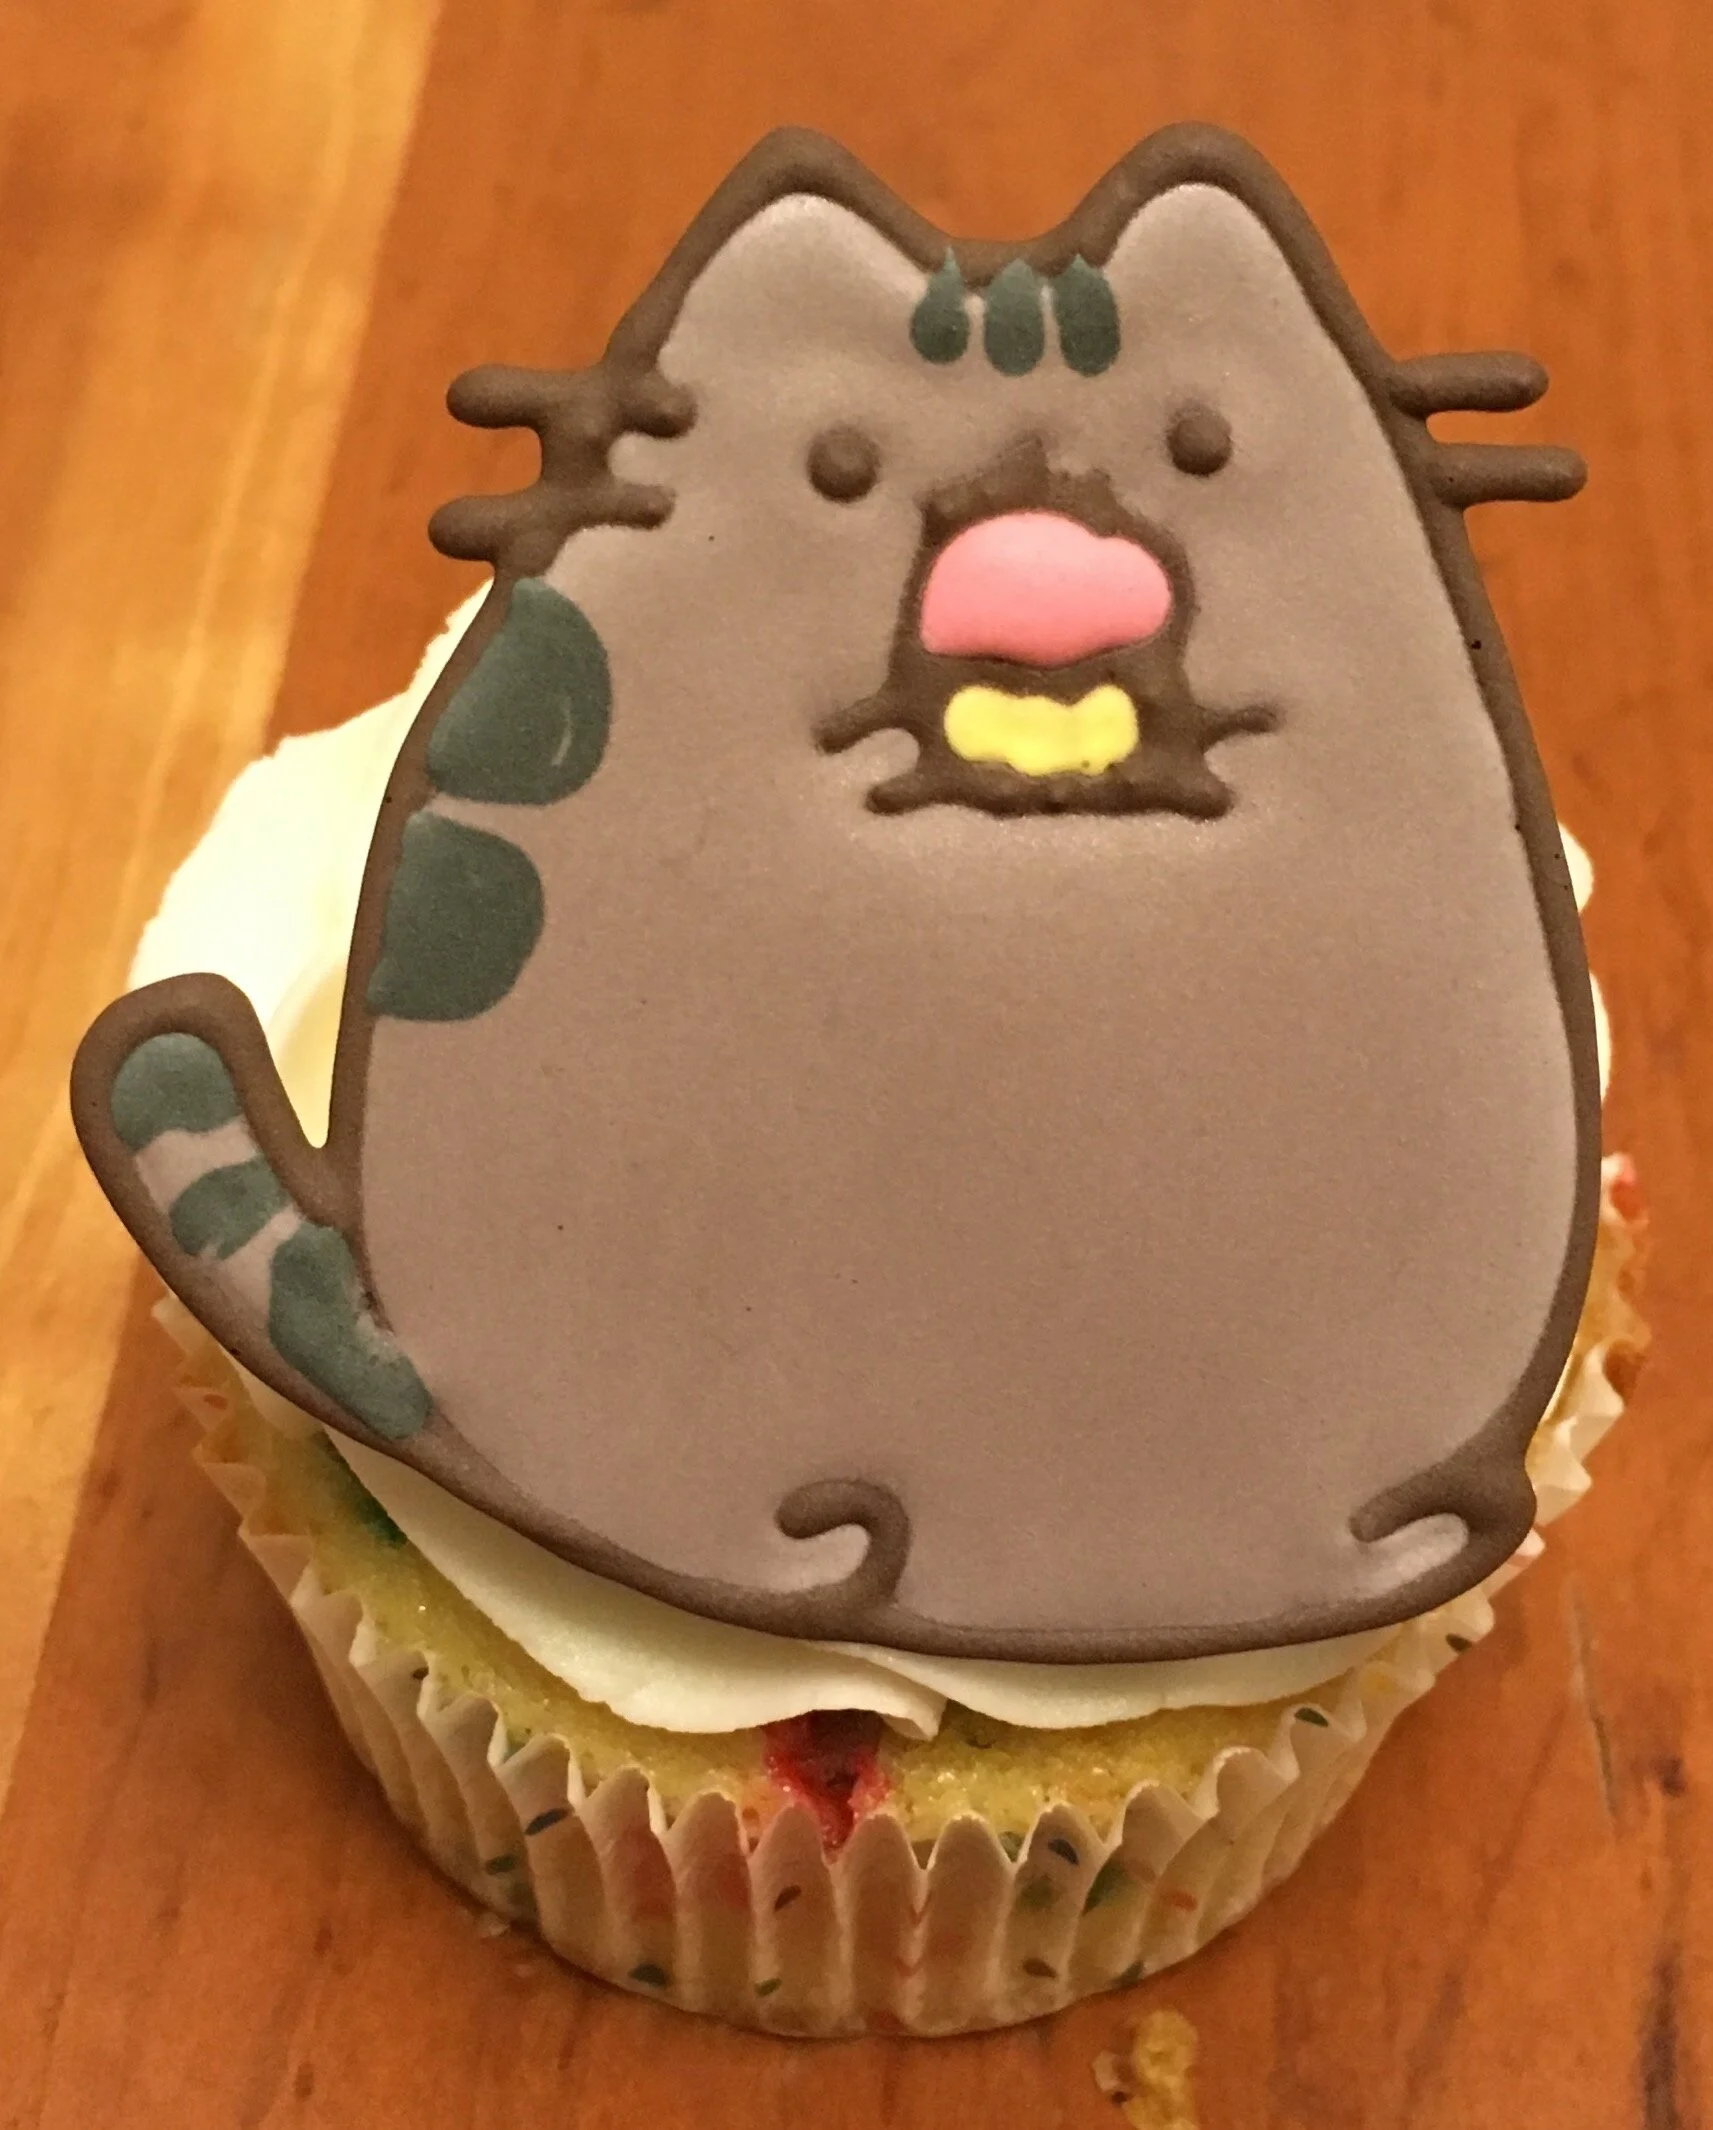
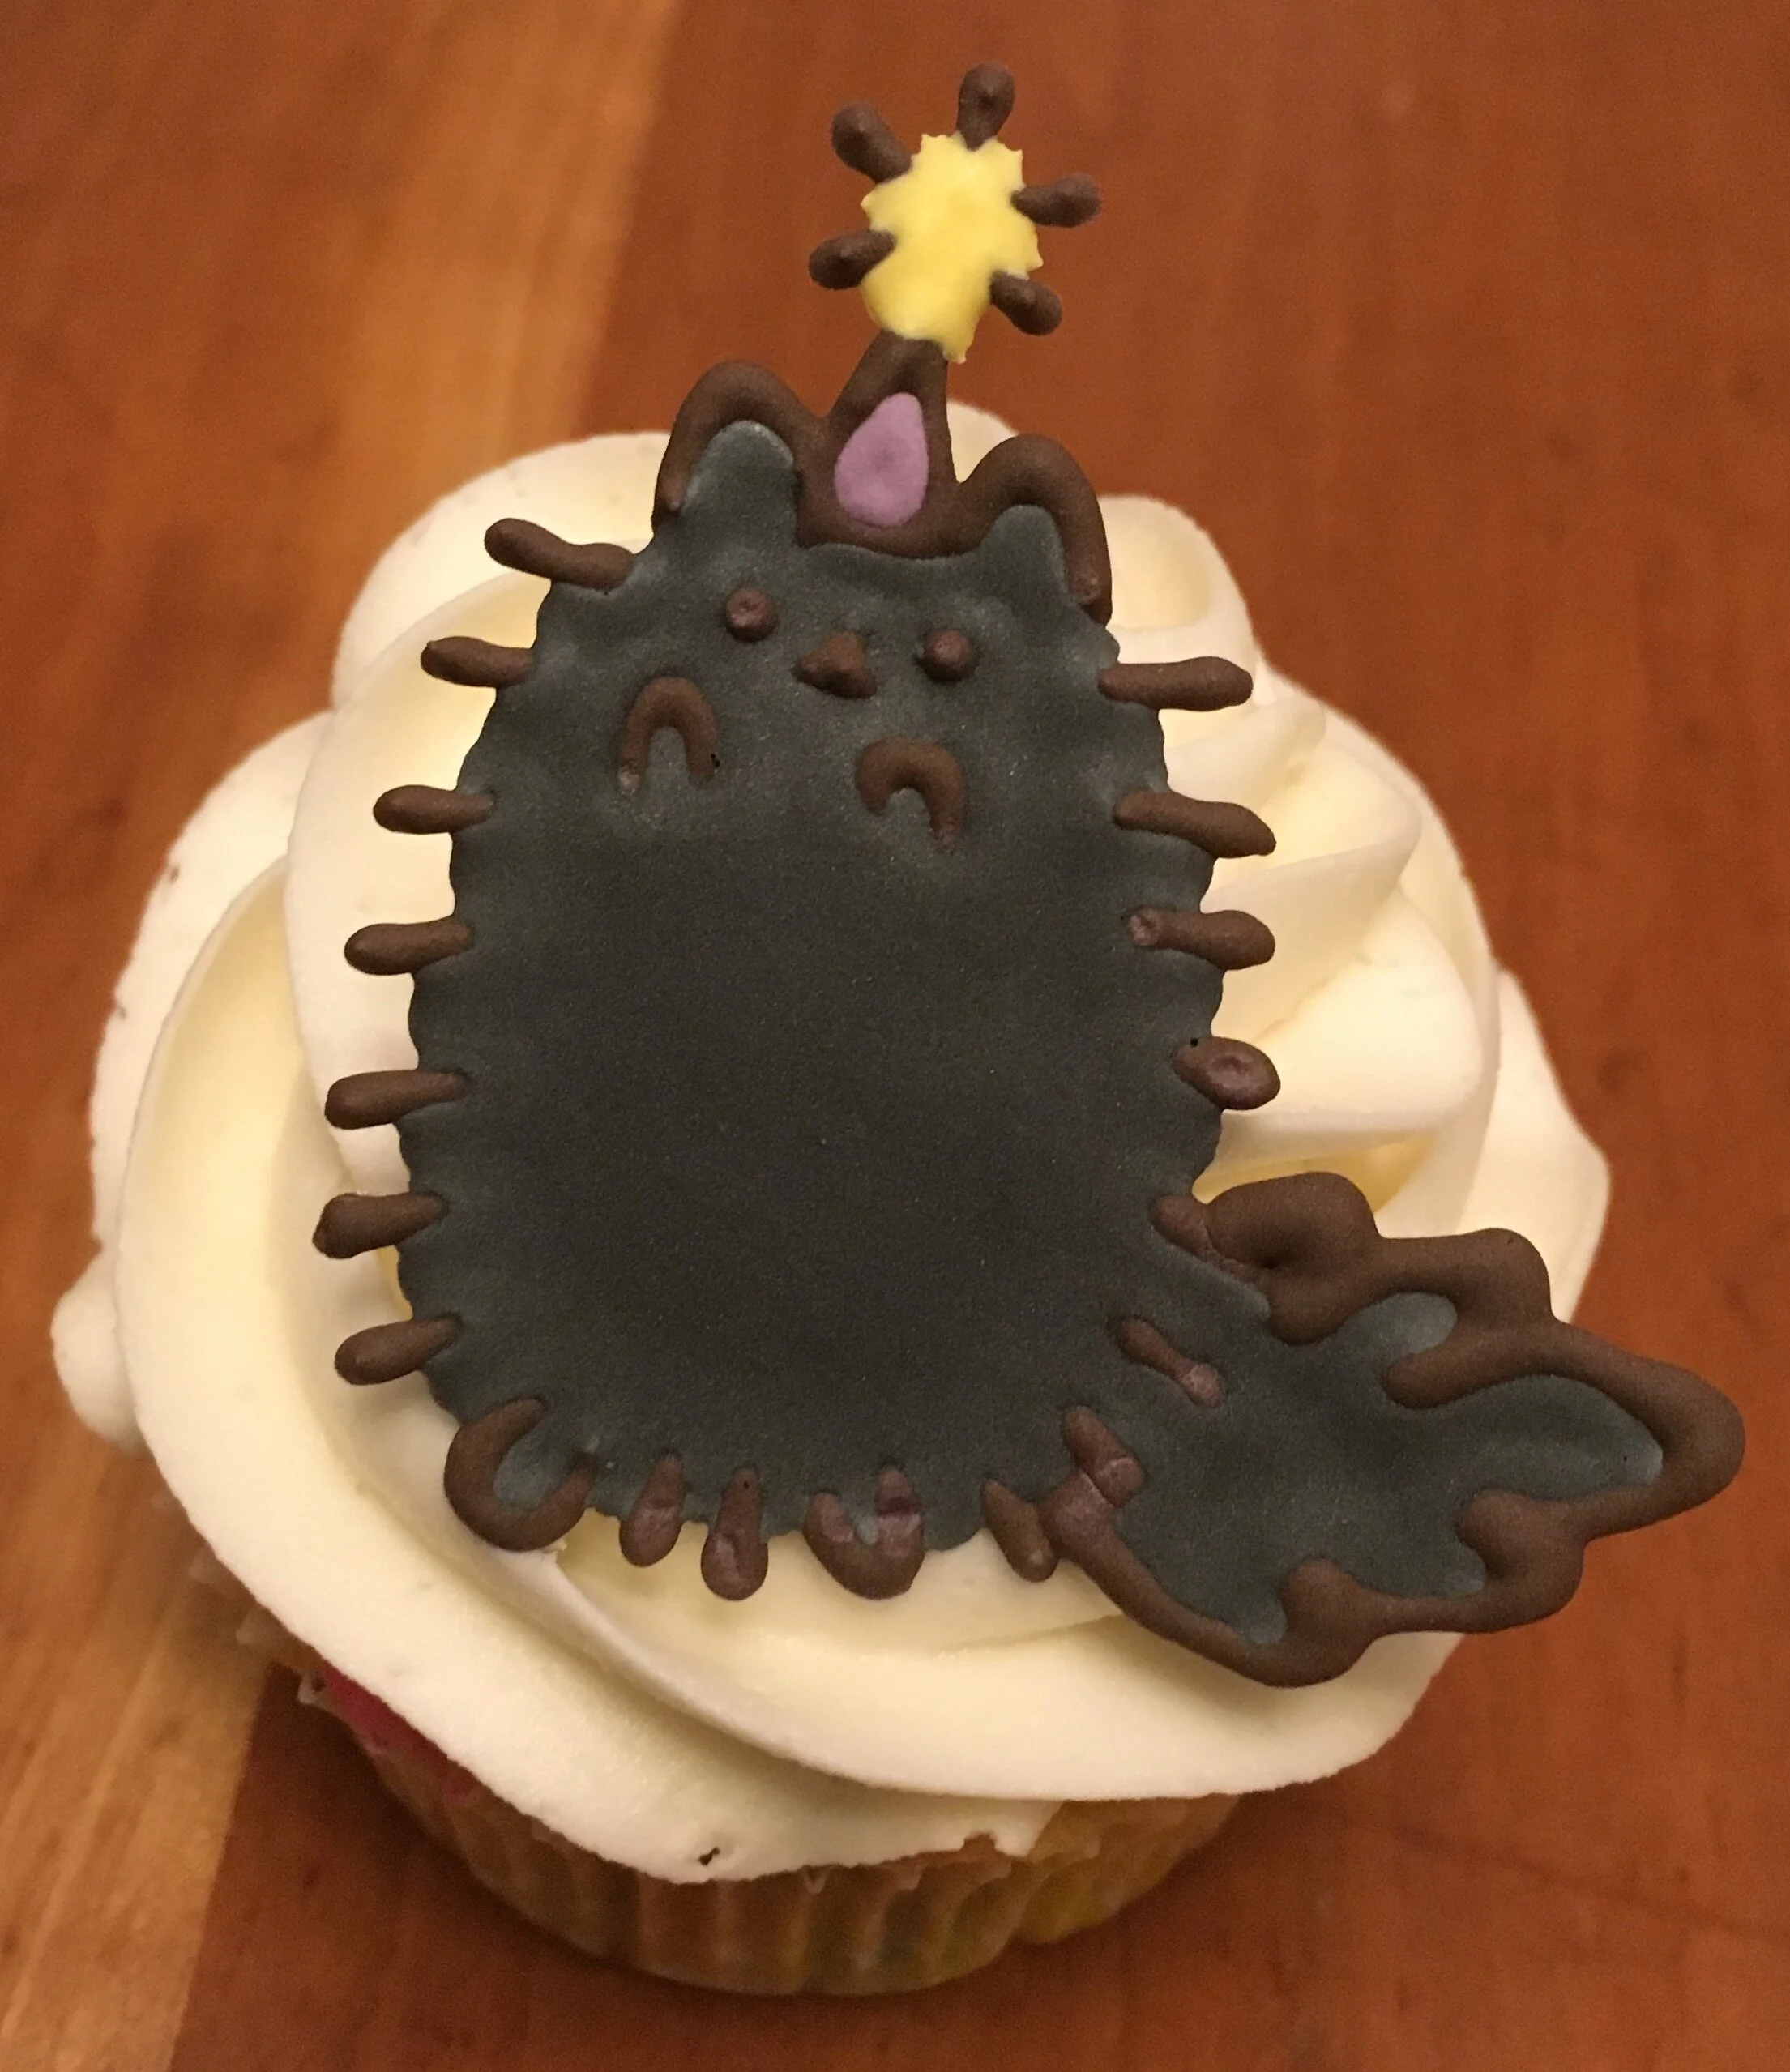
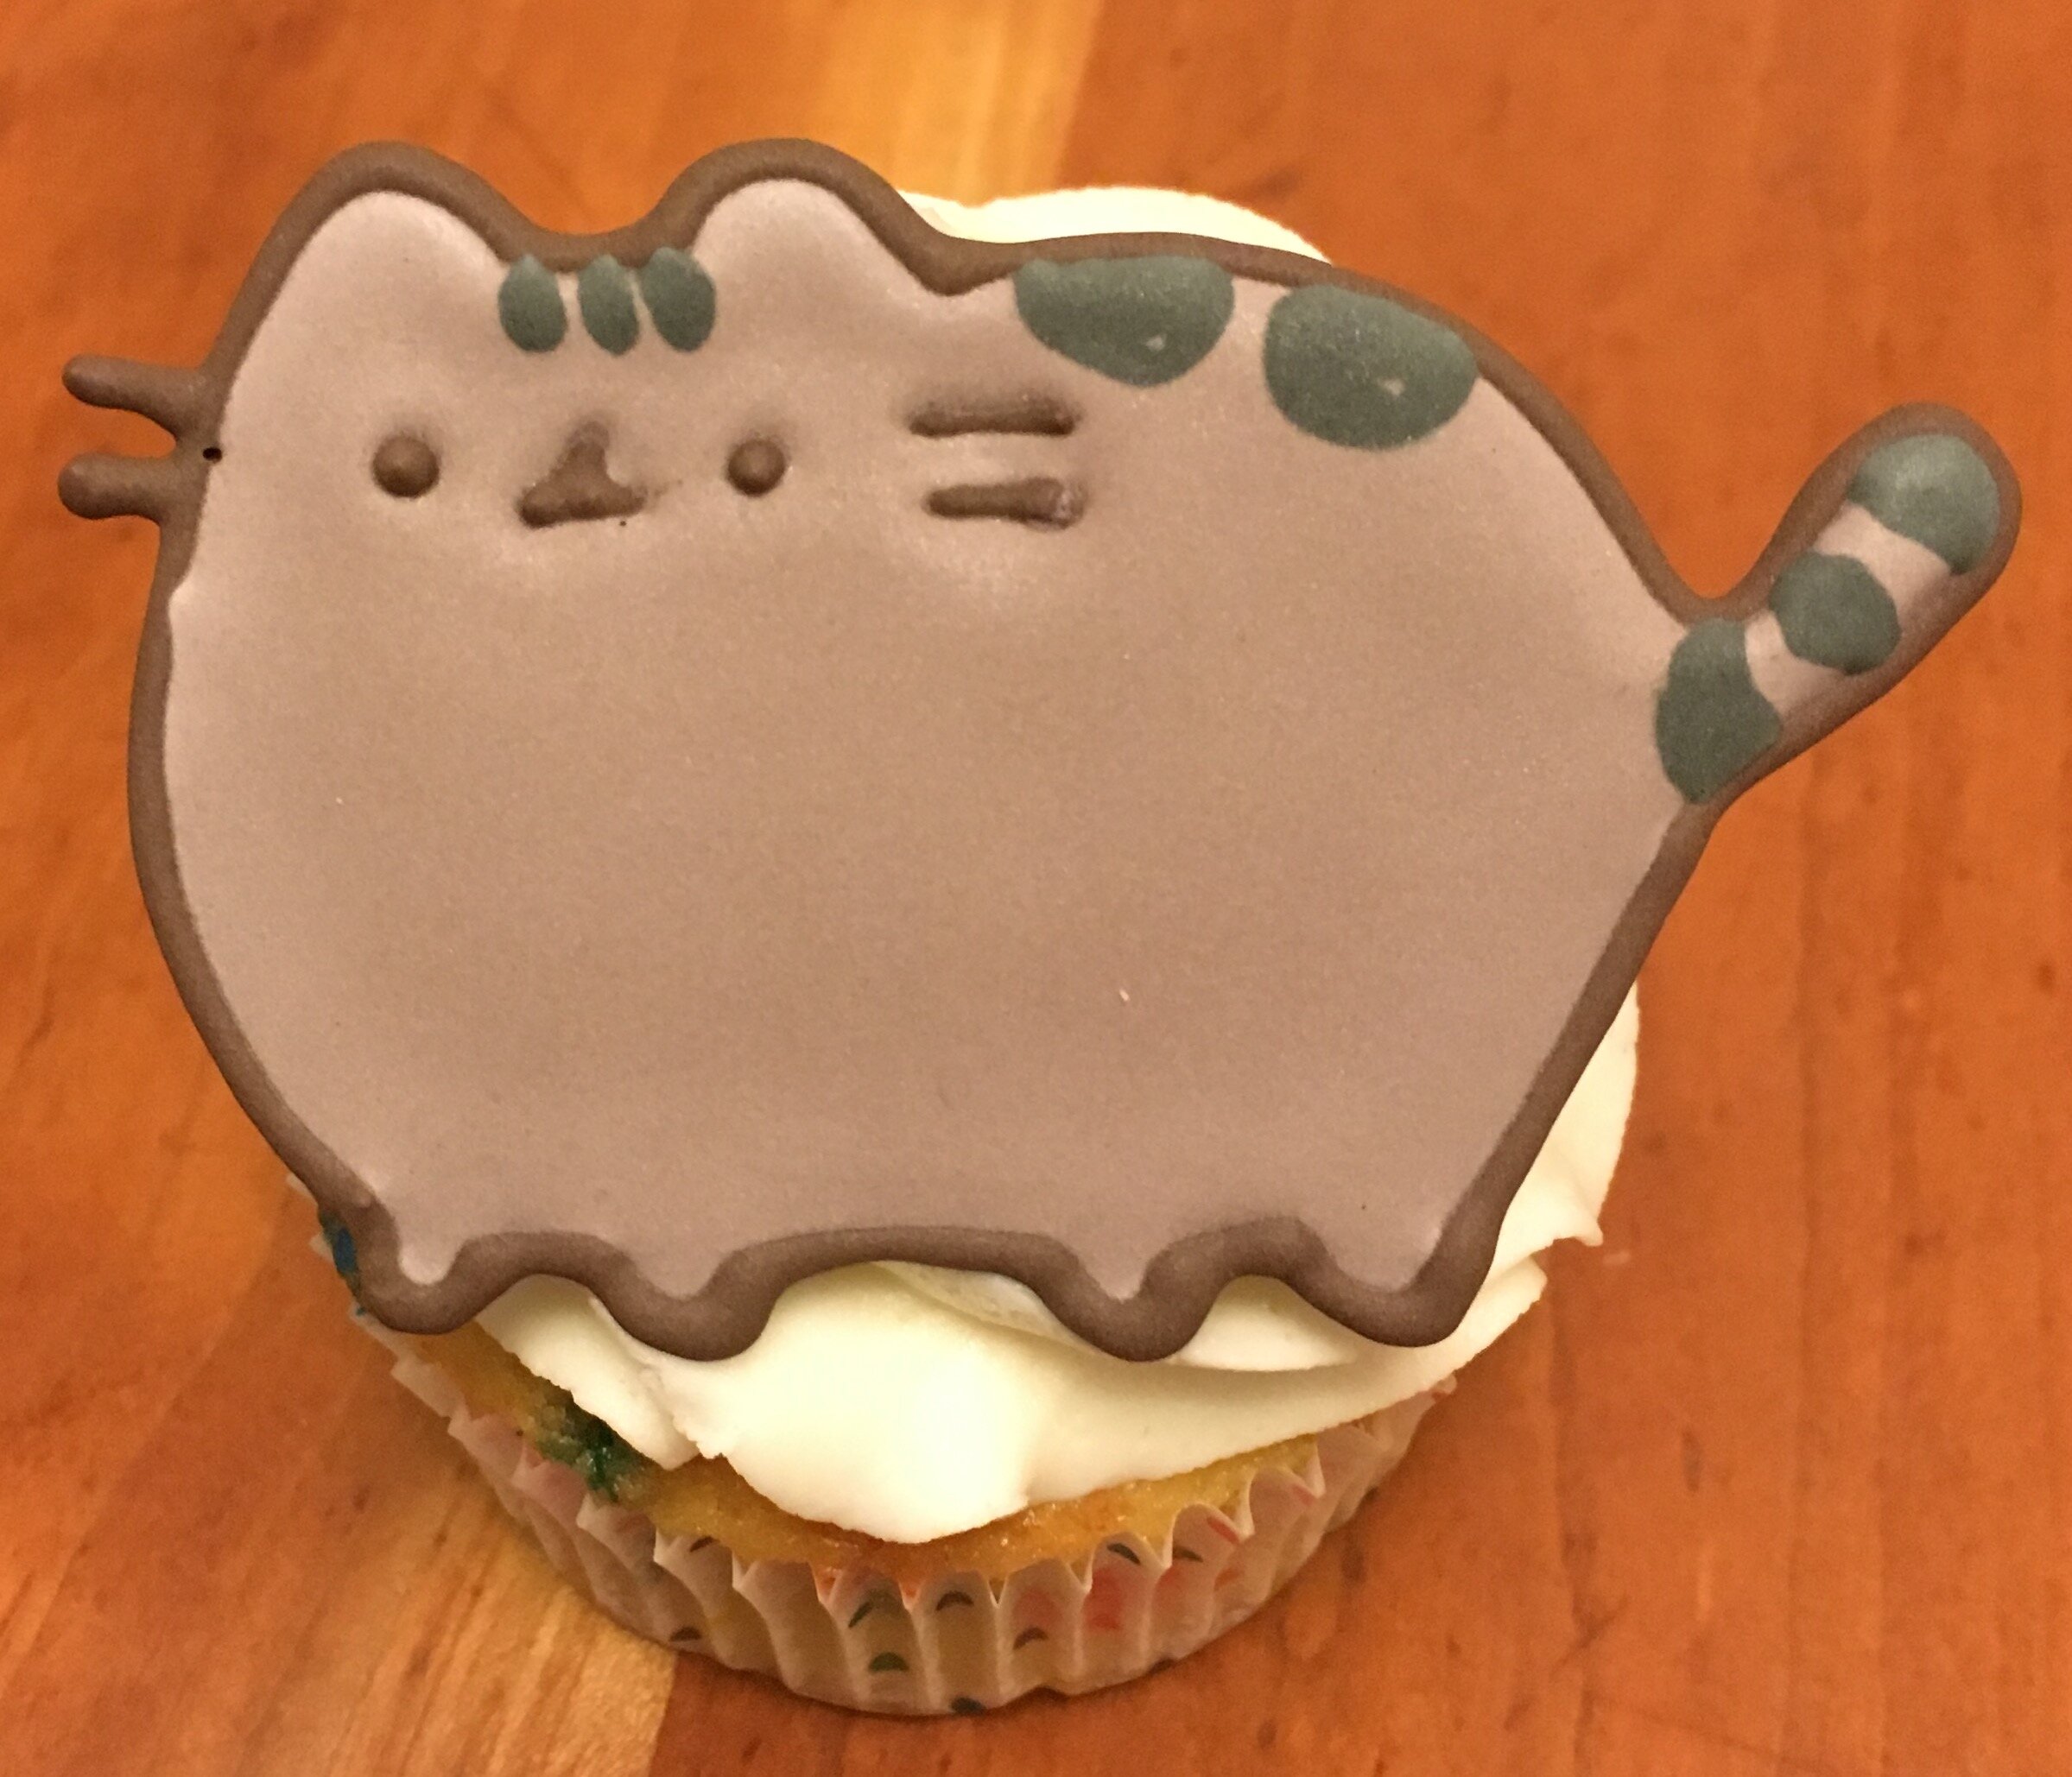
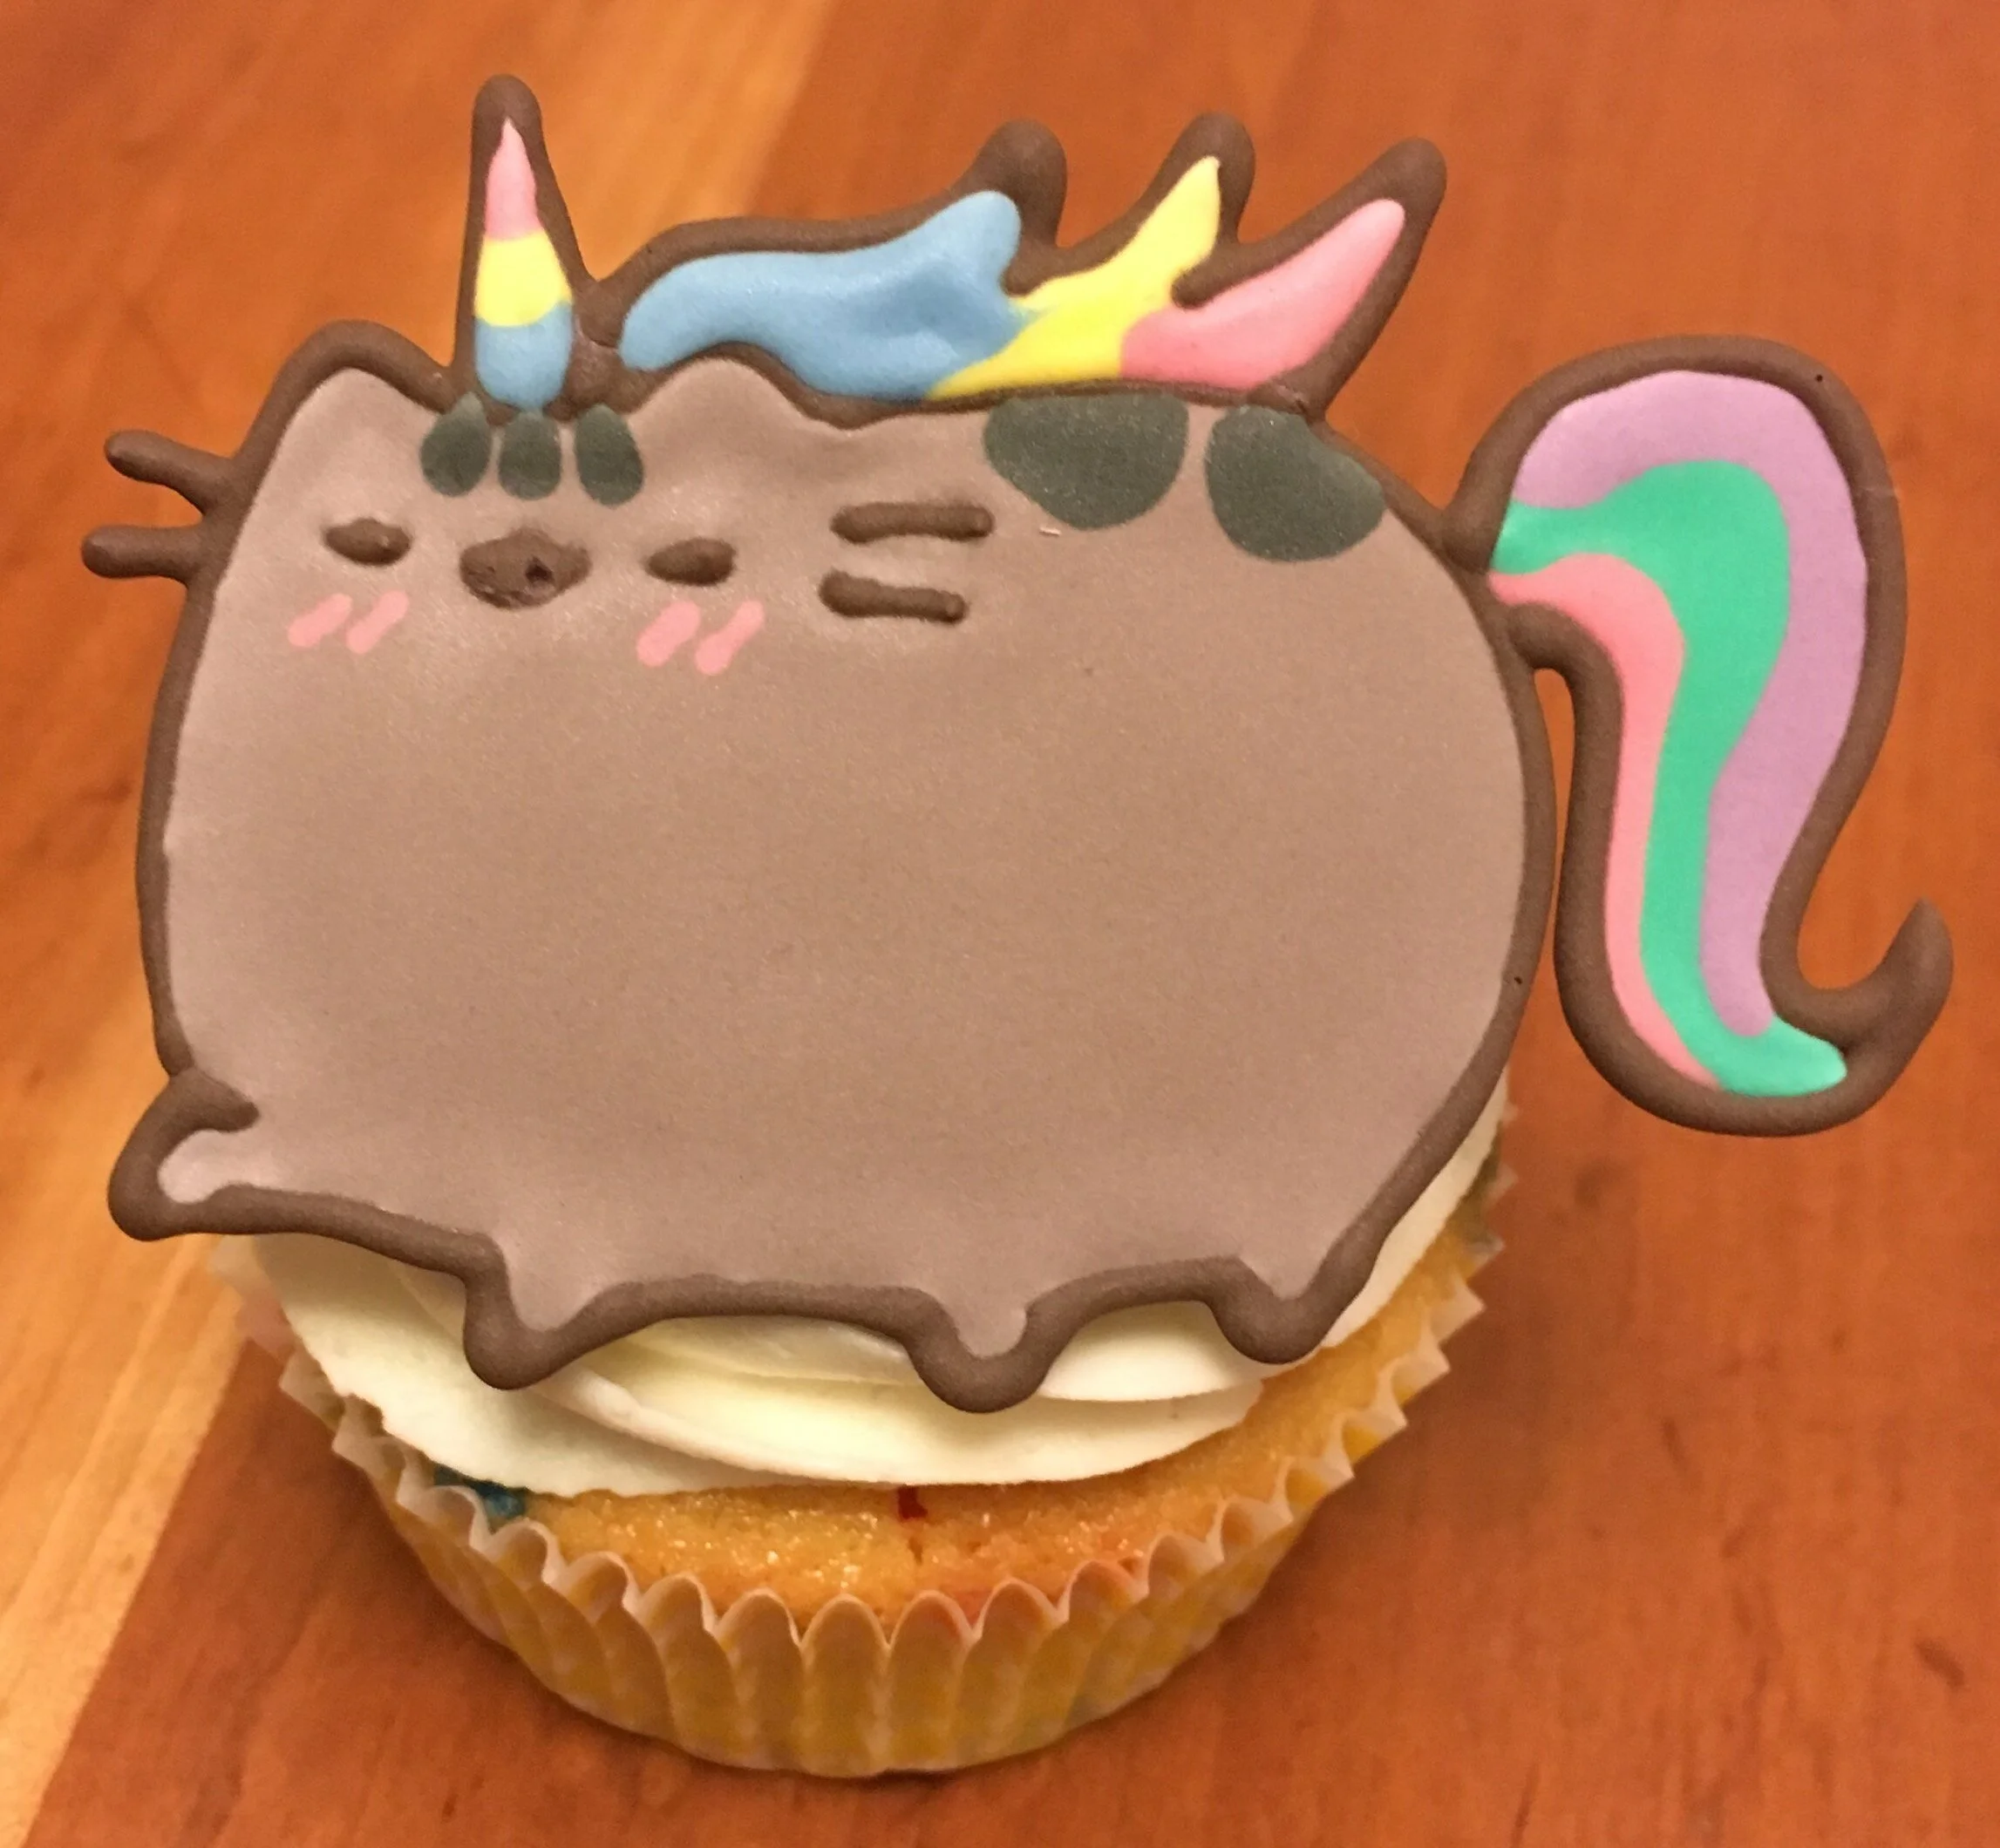
If you haven’t figured it out already from the Rainbow Pusheen Cake, my nephew loves Pusheen. For Christmas, he got a Pusheen calendar that indicates that February 18 is Pusheen’s birthday. So naturally we had to have a party.
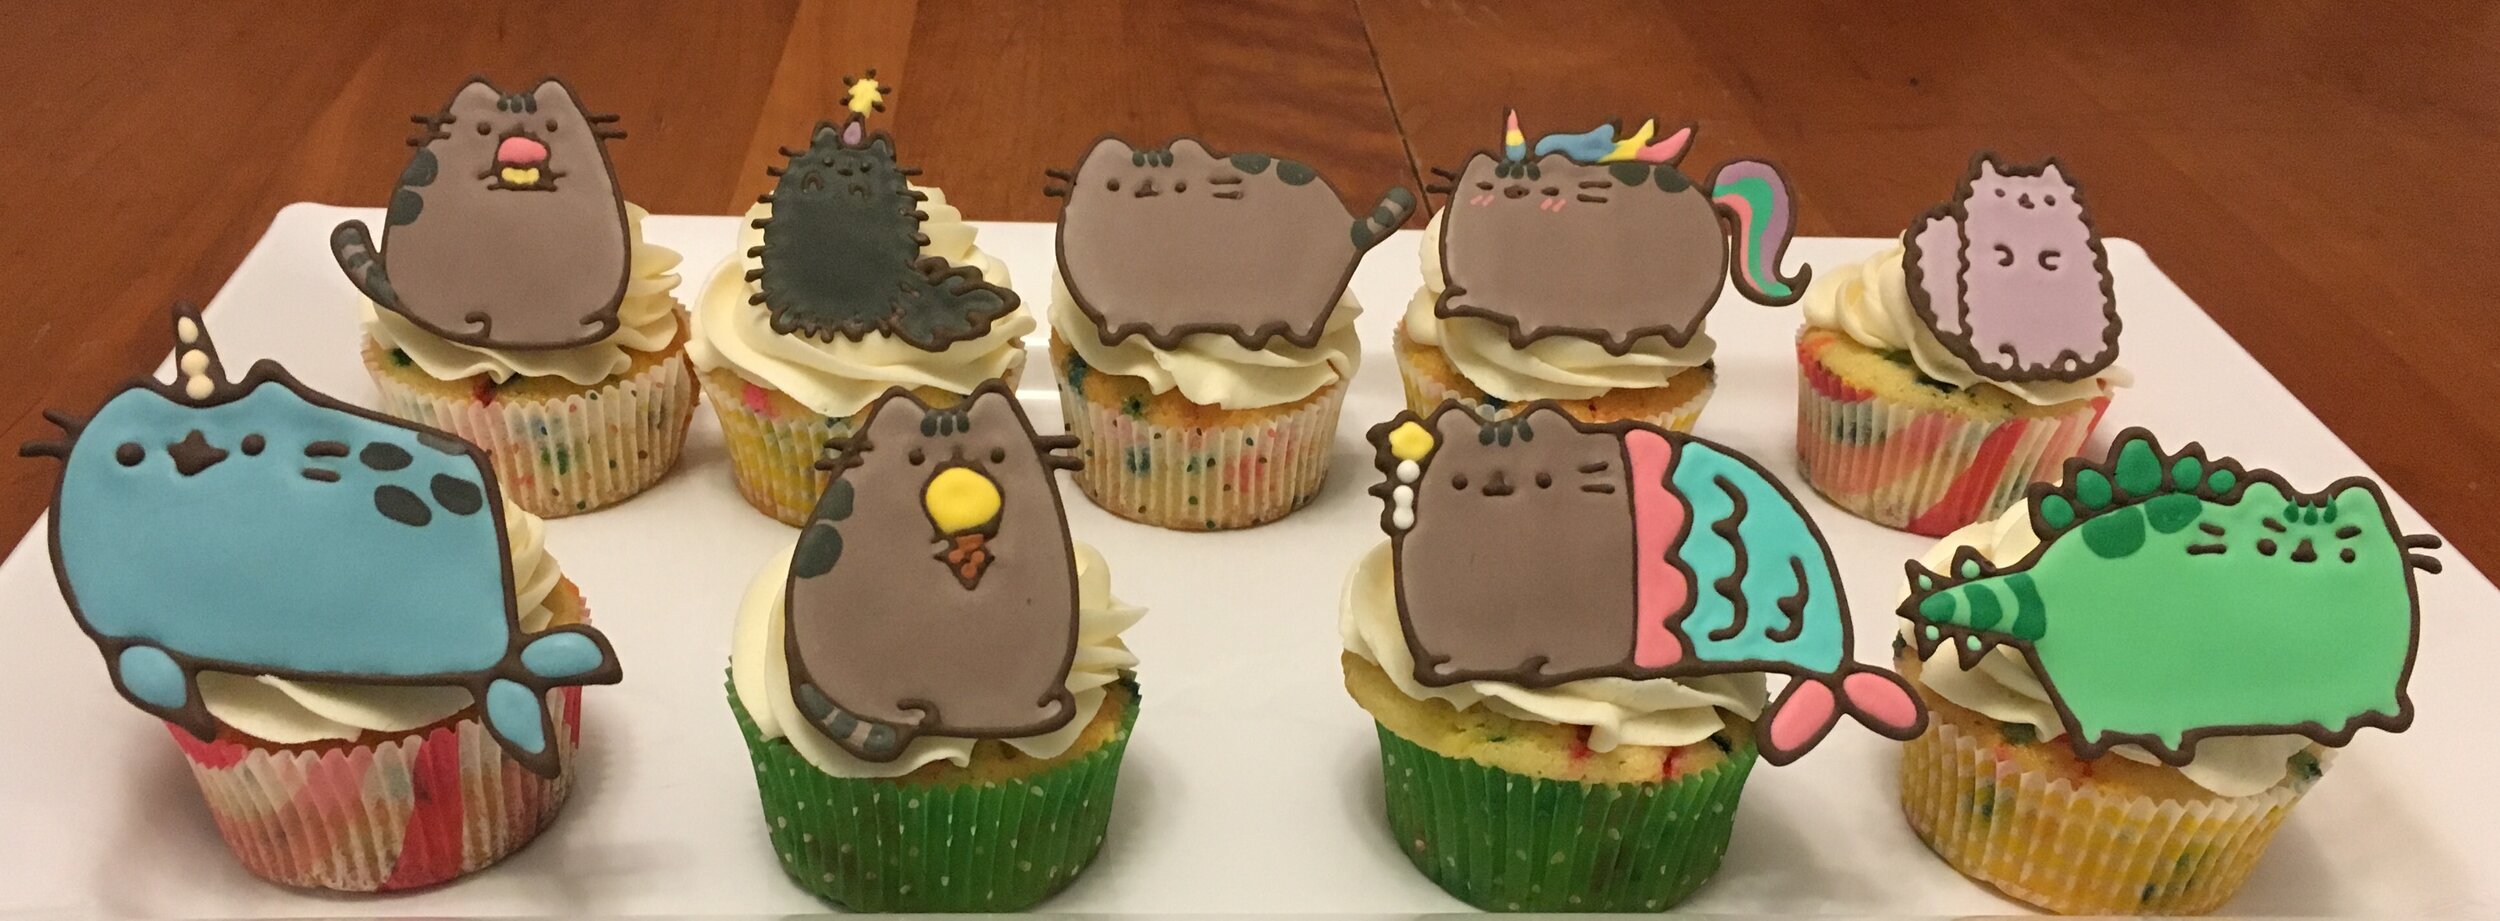
If you haven’t figured it out already from the Rainbow Pusheen Cake, my nephew loves Pusheen. For Christmas, he got a Pusheen calendar that indicates that February 18 is Pusheen’s birthday. So naturally we had to have a party. The cupcake toppers are run-in sugar portraits of all the stuffed Pusheens that he owns, plus Pusheen’s siblings, Pip and Stormy. Happy birthday, Pusheen!


Rainbow Unicorn Pusheen Cake
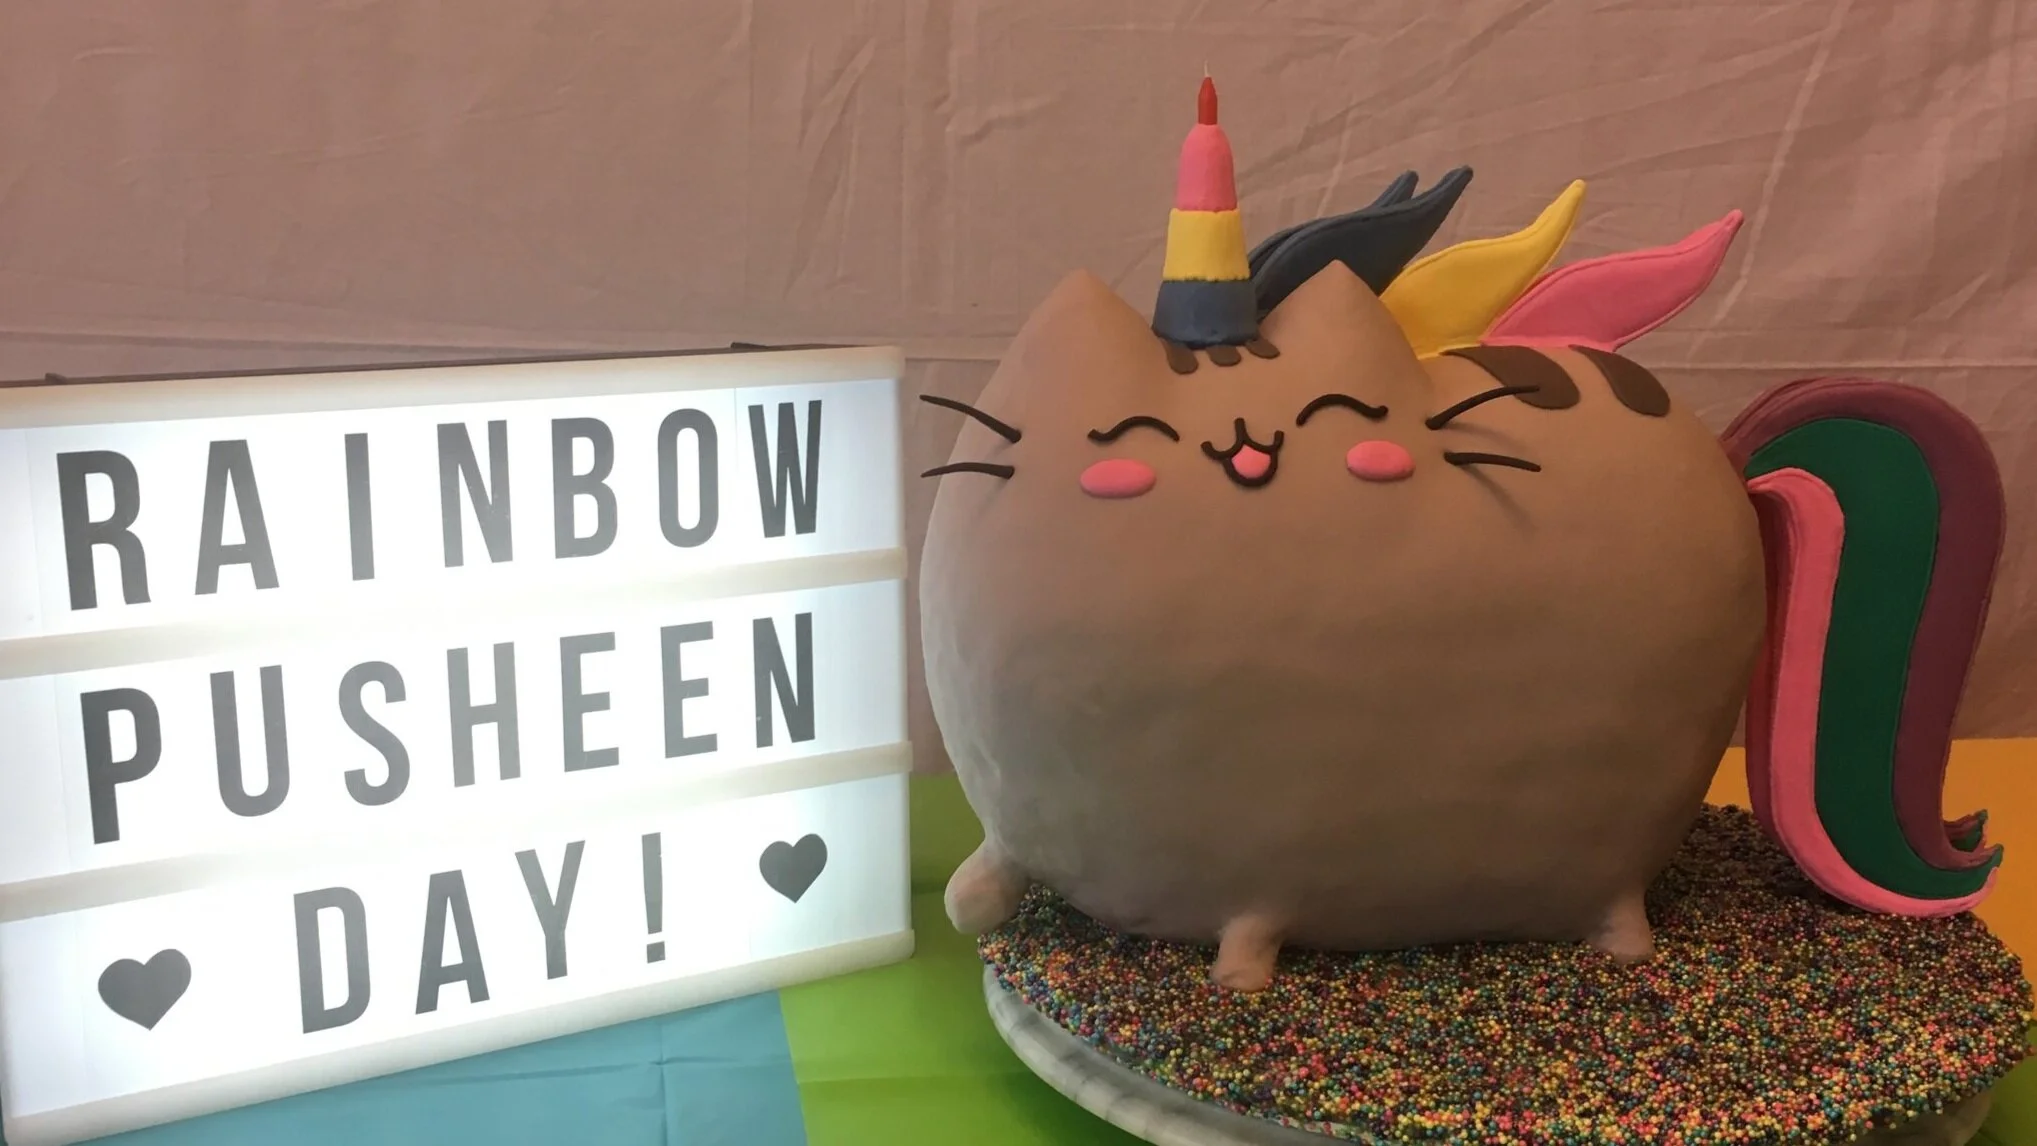
What’s cuter than Pusheen? That’s right – Rainbow Unicorn Pusheen! Cute cakes aren’t generally my forte, so I’m pretty pleased with how this turned out.

What’s cuter than Pusheen? That’s right – Rainbow Unicorn Pusheen! Cute cakes aren’t generally my forte, so I’m pretty pleased with how this turned out. The cake is lemon butter cake with white chocolate ganache filling, in rainbow color. The horn, tail, and mane are all royal icing.

Bluebird Cake
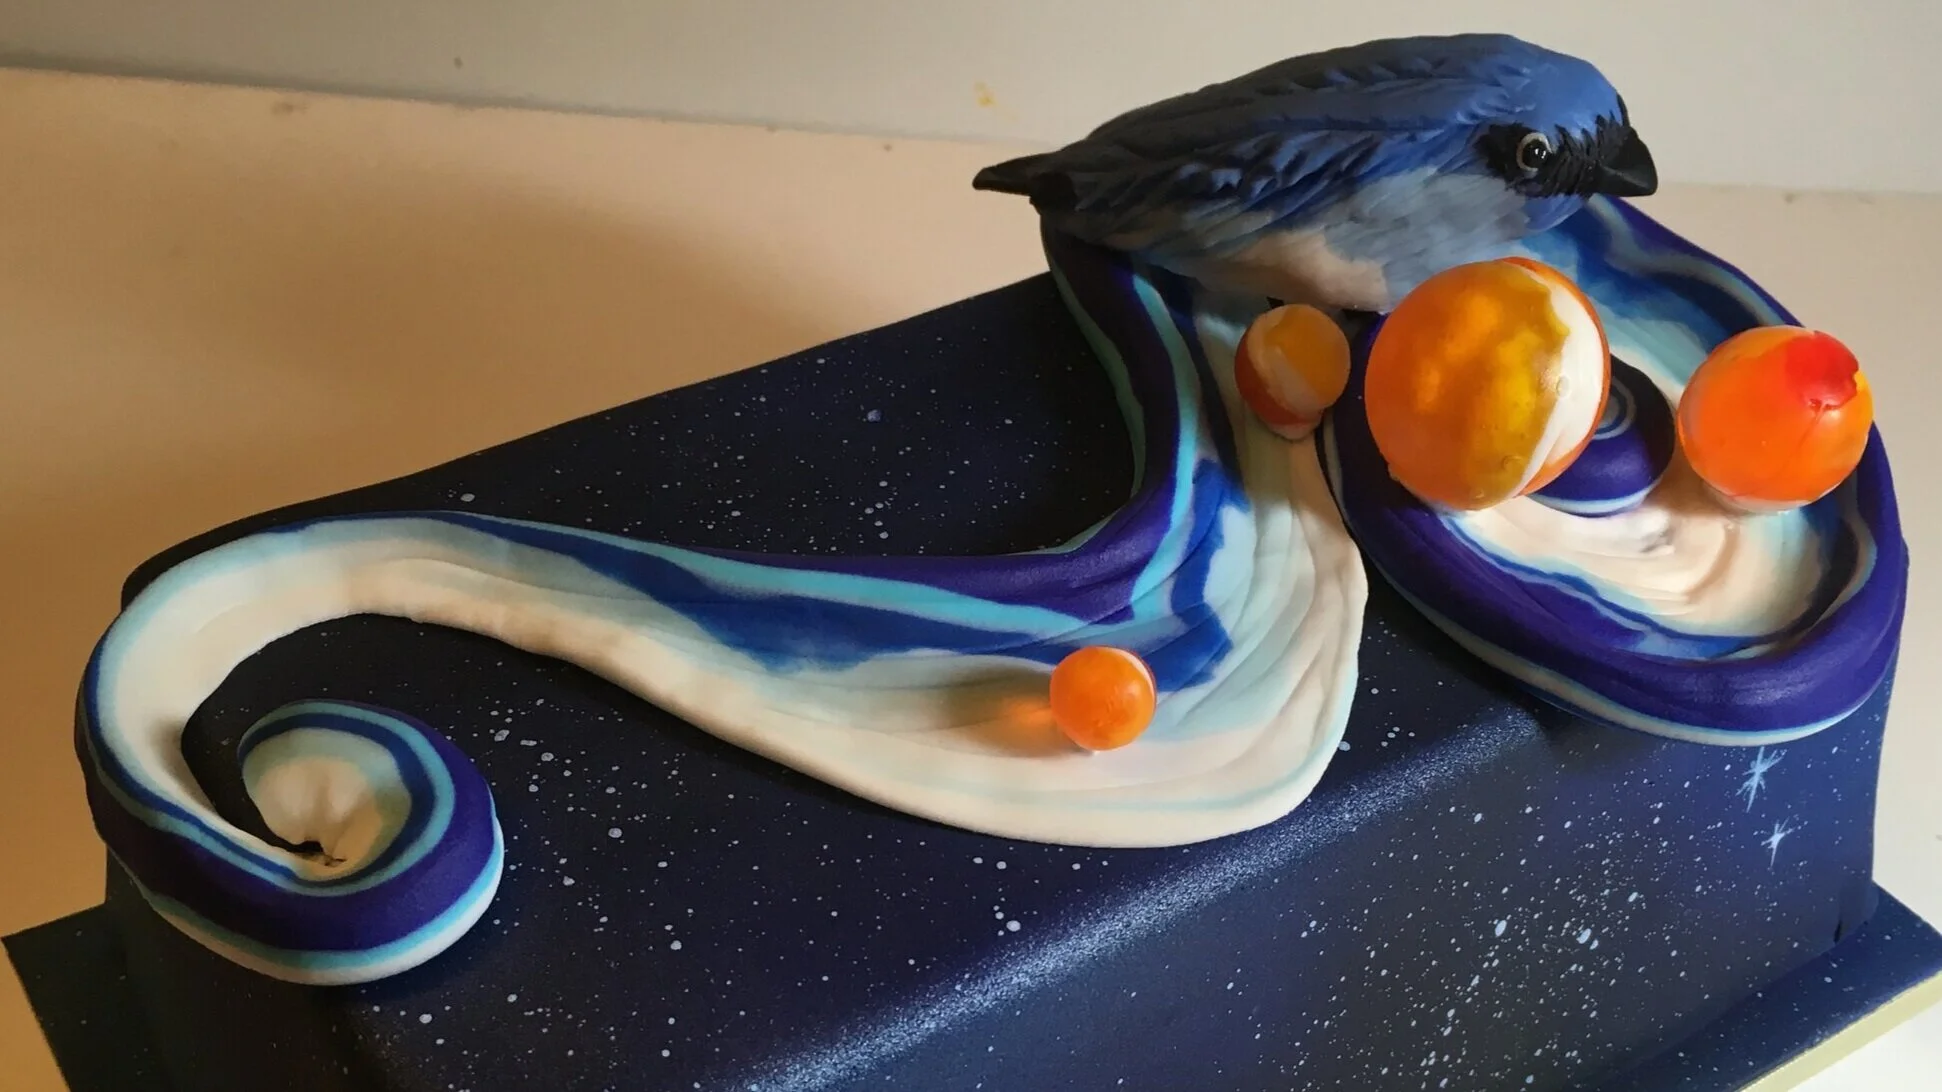
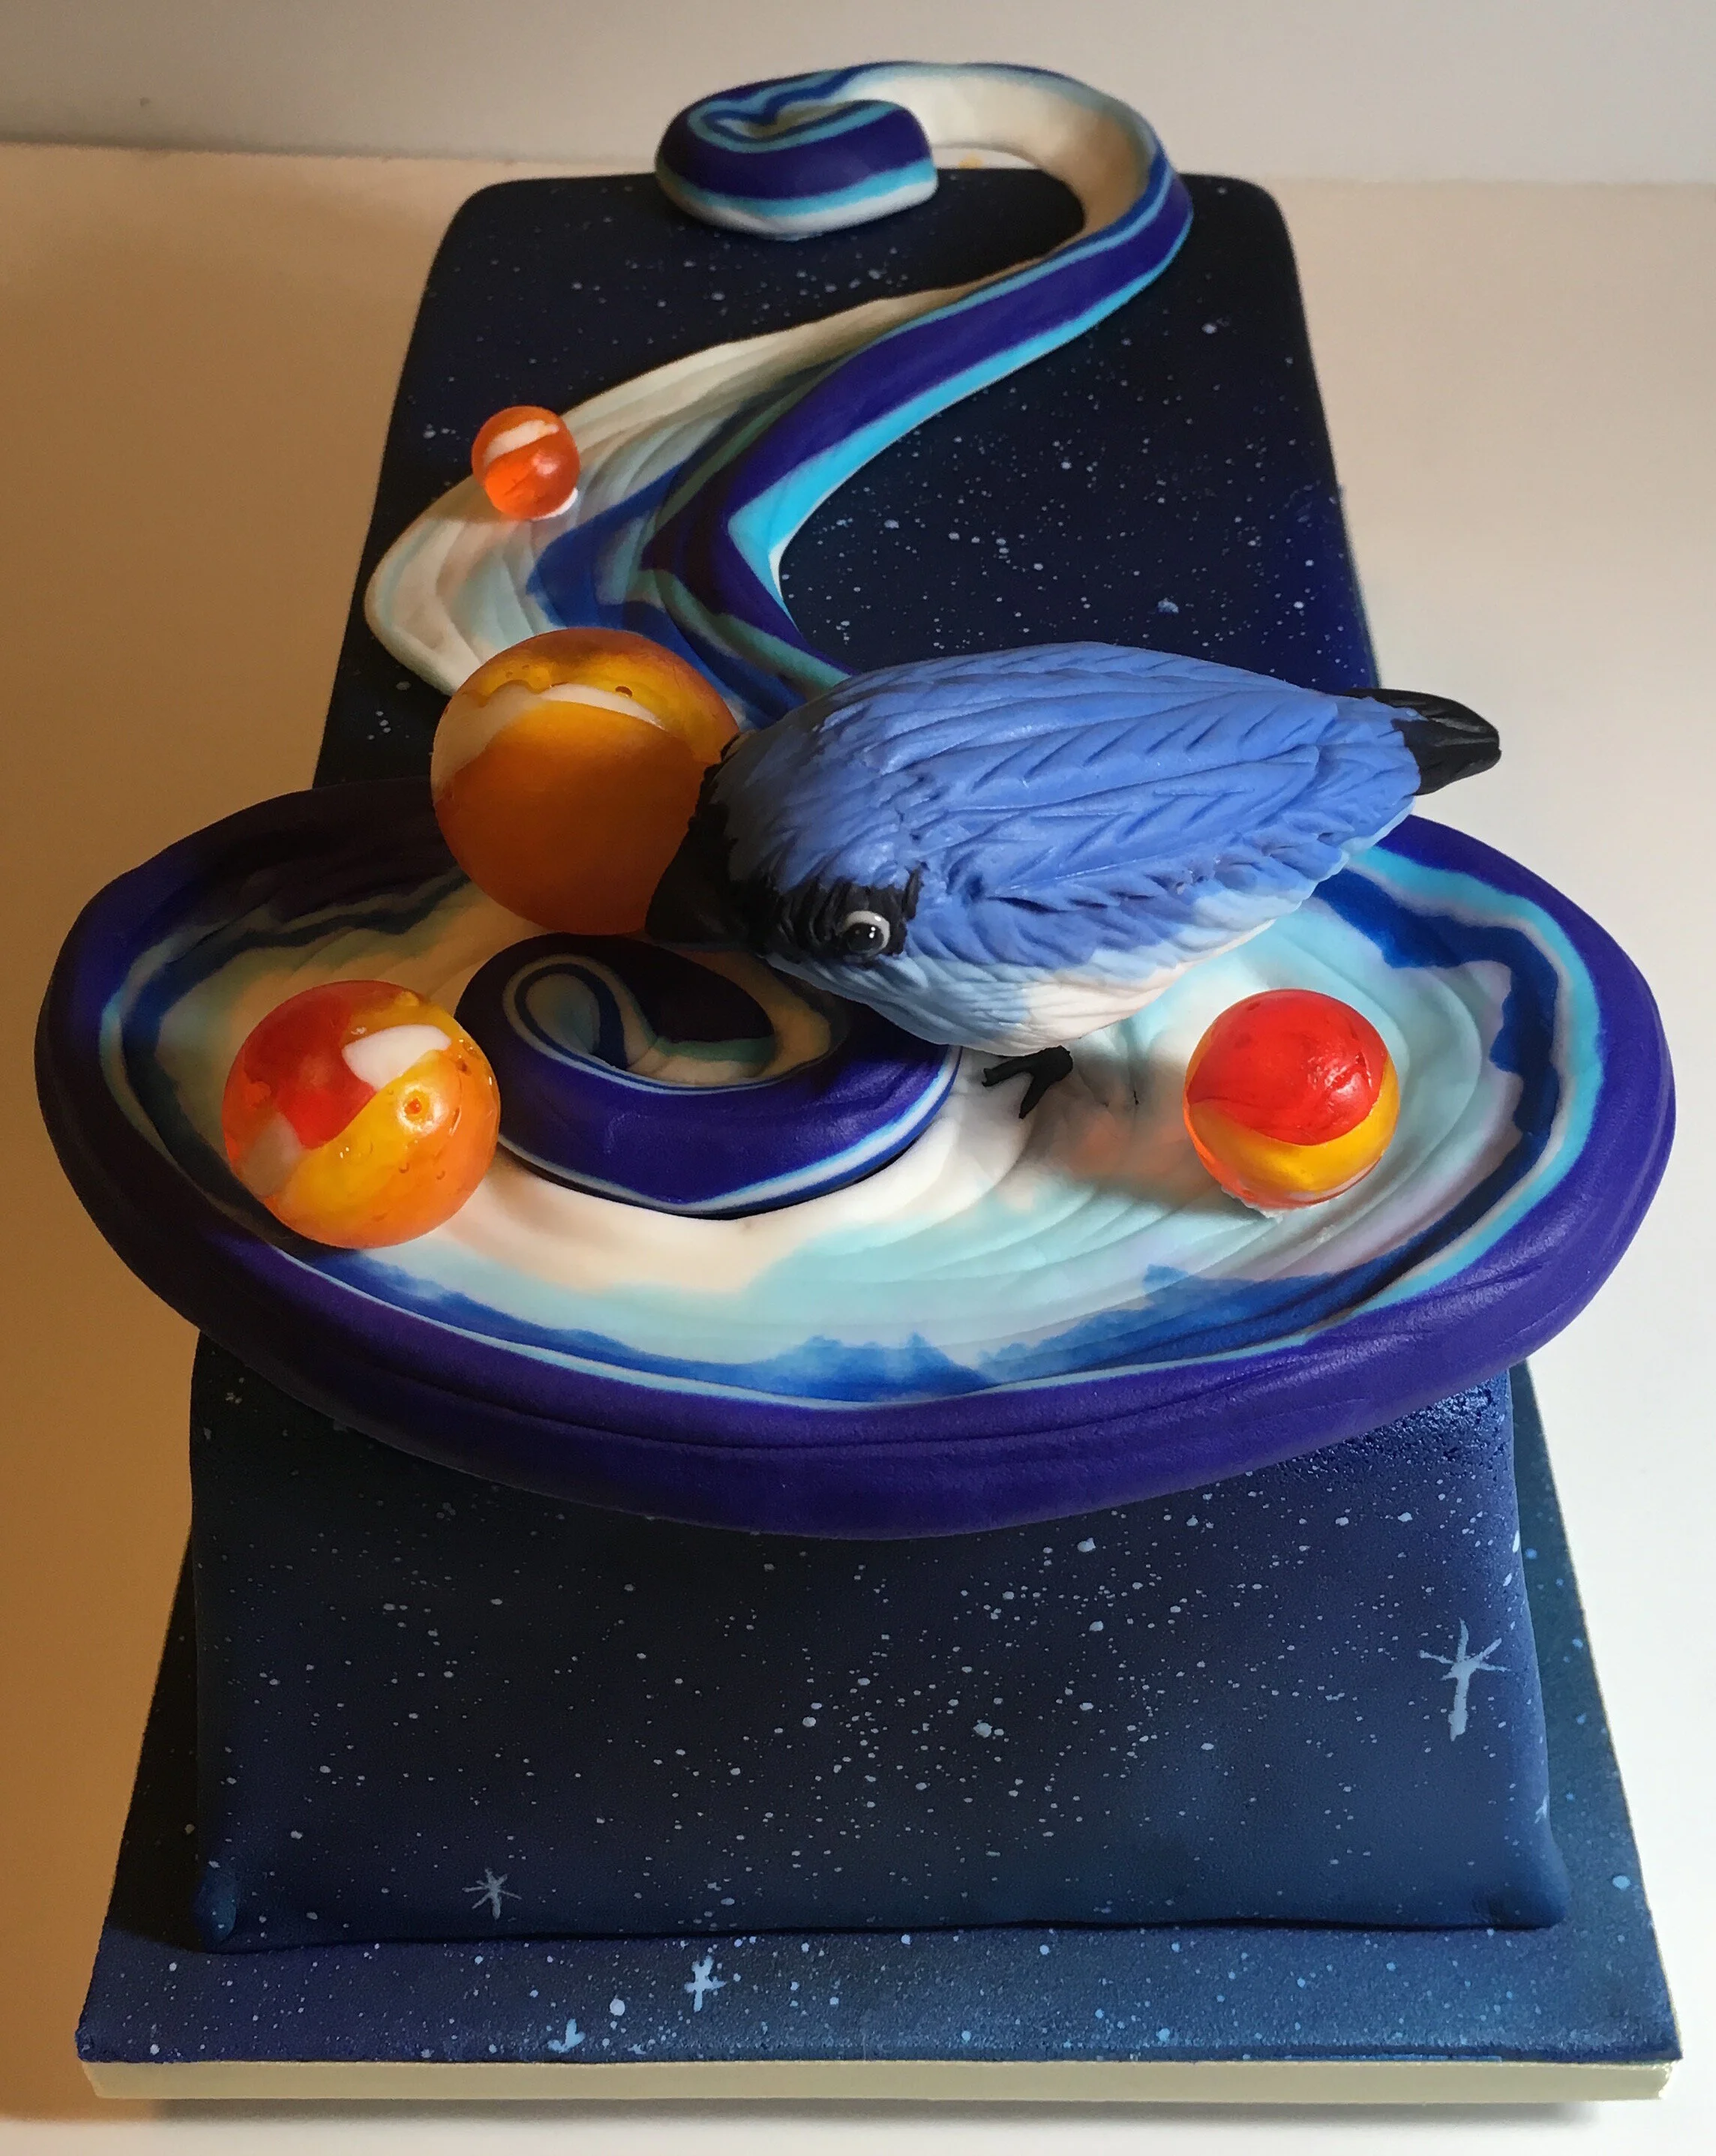
For her granddaughter’s birthday, my friend asked for a cake that somehow combined the themes of bluebirds and the universe. I came up with this cake that’s sort of a cosmic bluebird in a space nest with planetary eggs in it.
For her granddaughter’s birthday, my friend asked for a cake that somehow combined the themes of bluebirds and the universe.
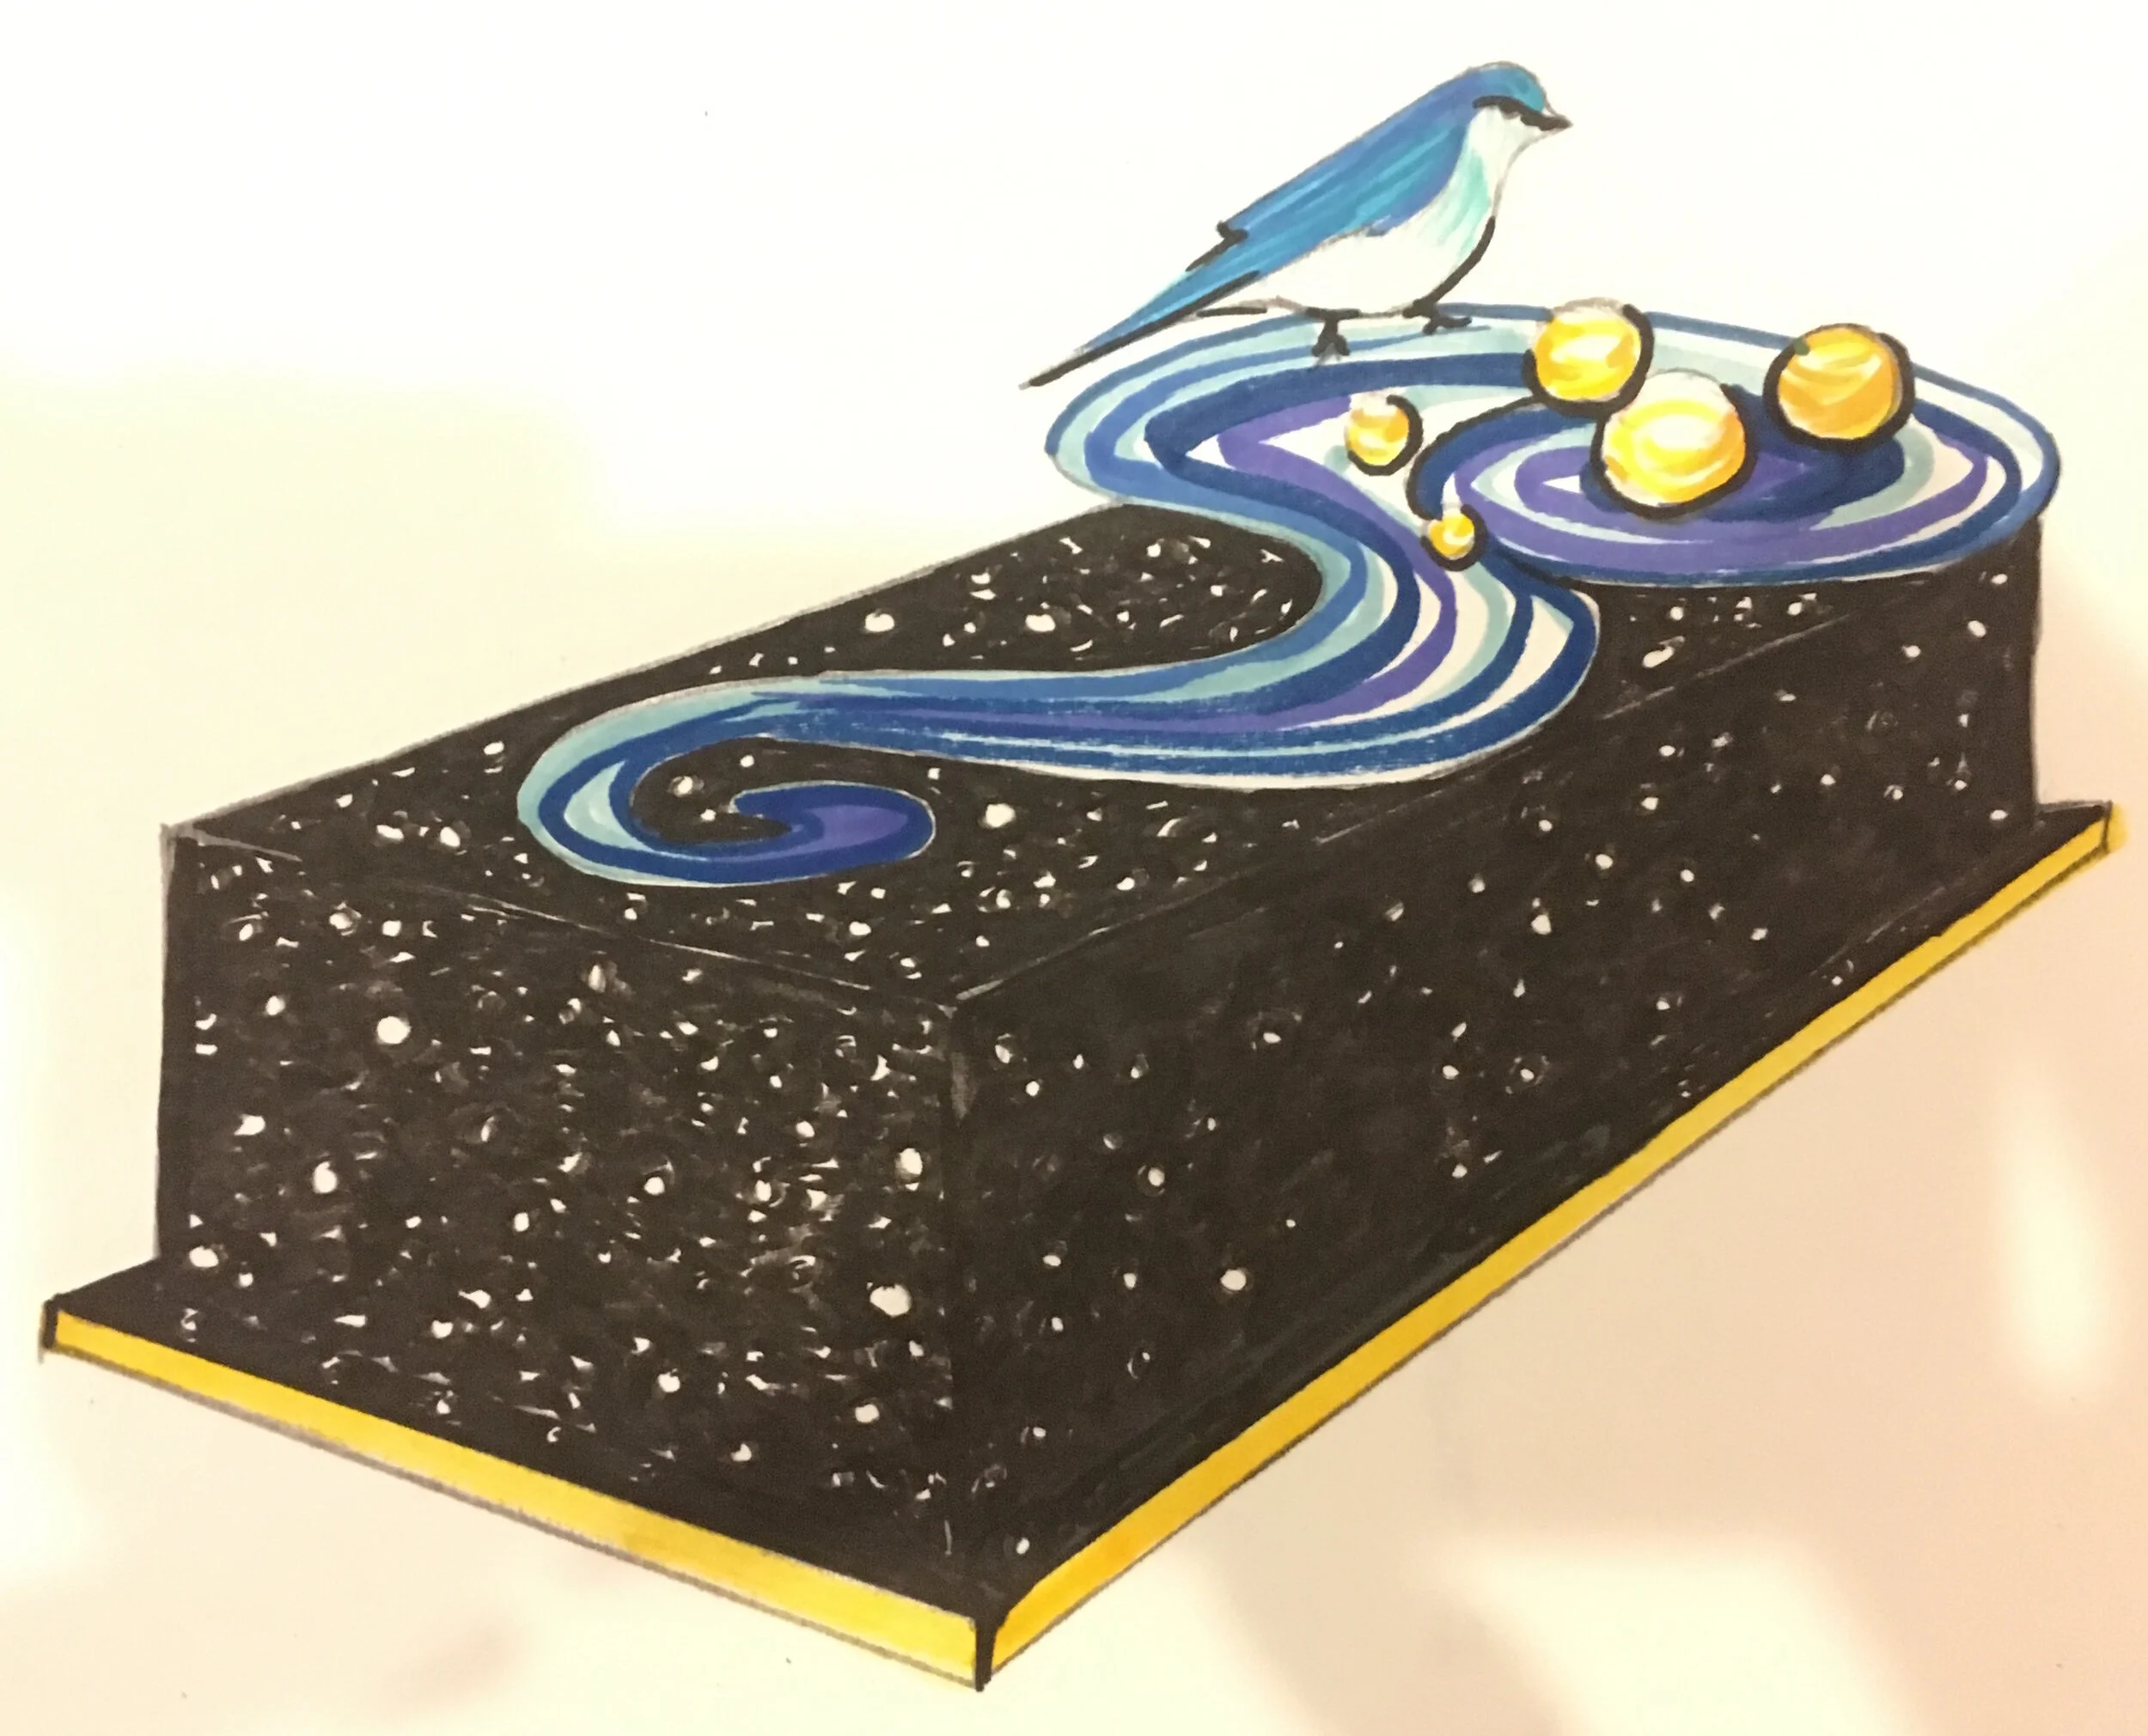
I came up with this cake that’s sort of a cosmic bluebird in a space nest with planetary eggs in it.
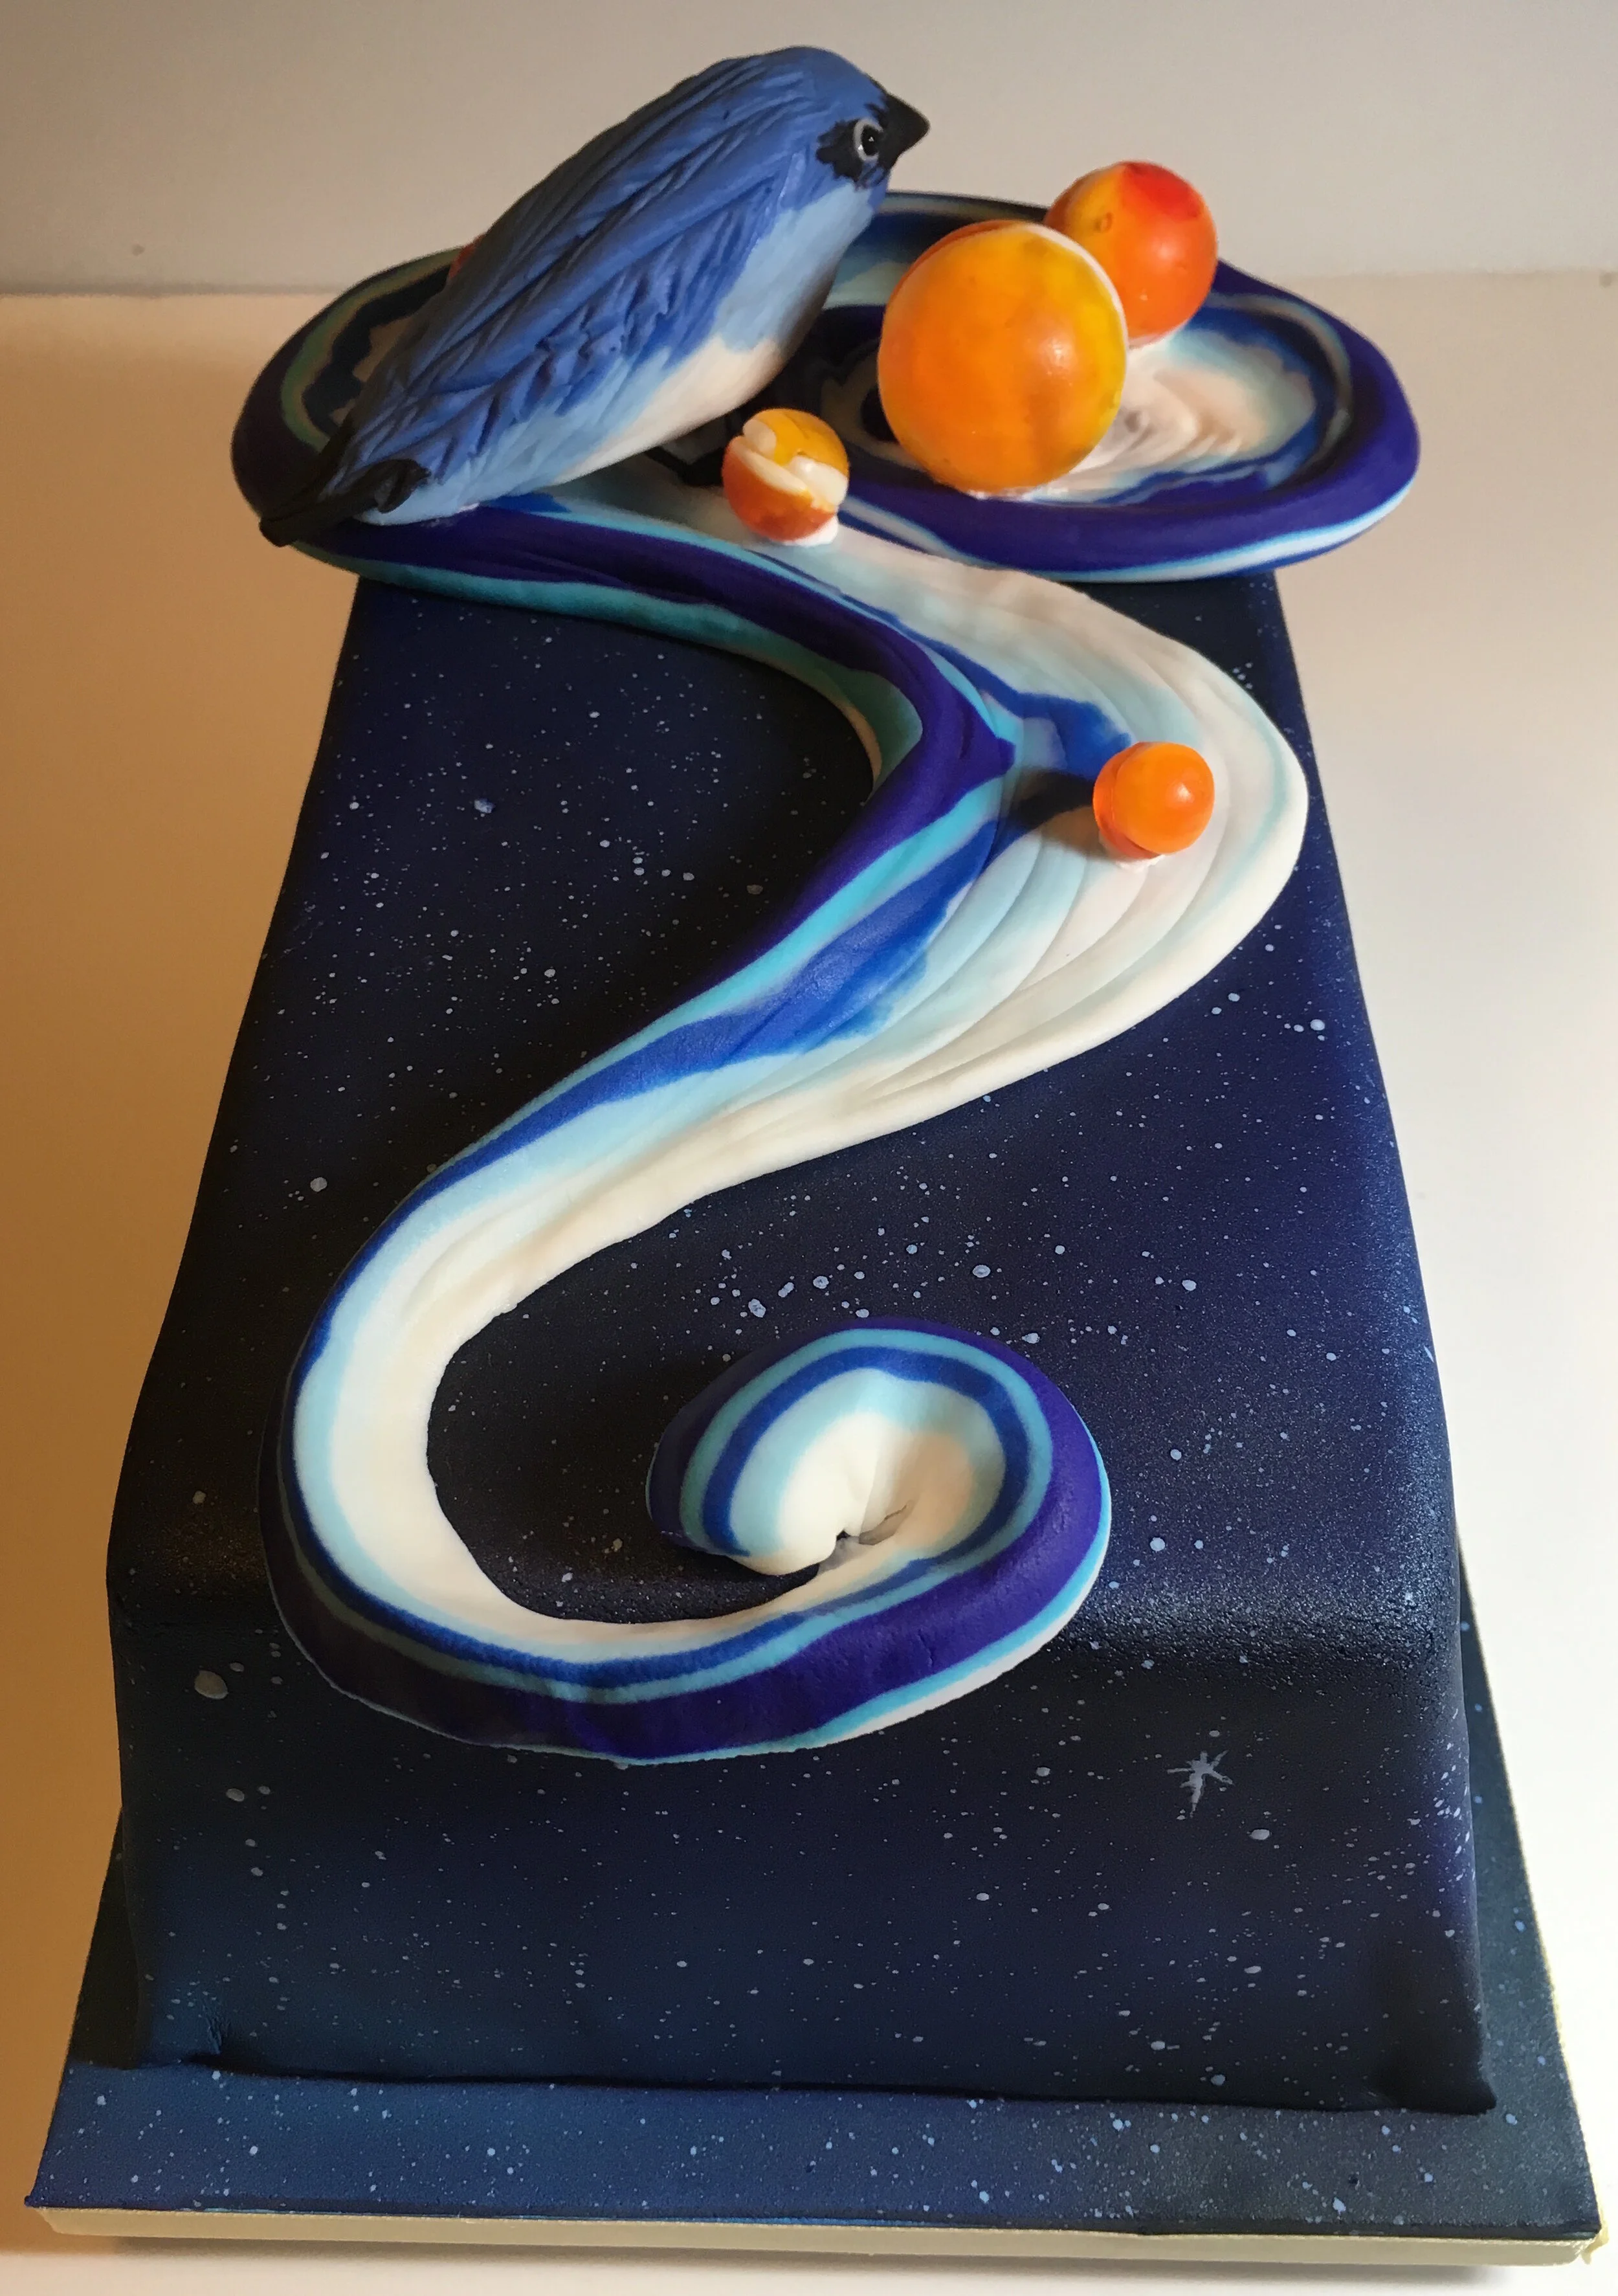
It turned out to be surprisingly elegant, especially when compared to my usual cakes.

The swirl is a gum paste / fondant mix. The planets are isomalt. The bird is gum paste over rice krispie treats. I also put a little blue silhouette of a bird inside the cake.

History of Life Wedding Cake
This is the third wedding cake that I have ever made. Which means that, amazingly, there are three couples in the world with that level of trust in me. The bride is in law school and the groom is a paleontologist. The wedding was on September 3, which is the anniversary of the signing of the Treaty of Paris.
This is the third wedding cake that I have ever made. Which means that, amazingly, there are three couples in the world with that level of trust in me
The bride is in law school and the groom is a paleontologist. The wedding was on September 3, which is the anniversary of the signing of the Treaty of Paris, which, as everyone knows, is the treaty that ended the American Revolutionary War and in which Britain recognized the United States as an independent nation. Just kidding, I had no idea what the Treaty of Paris was; I had to google it.
This is the design we came up with.

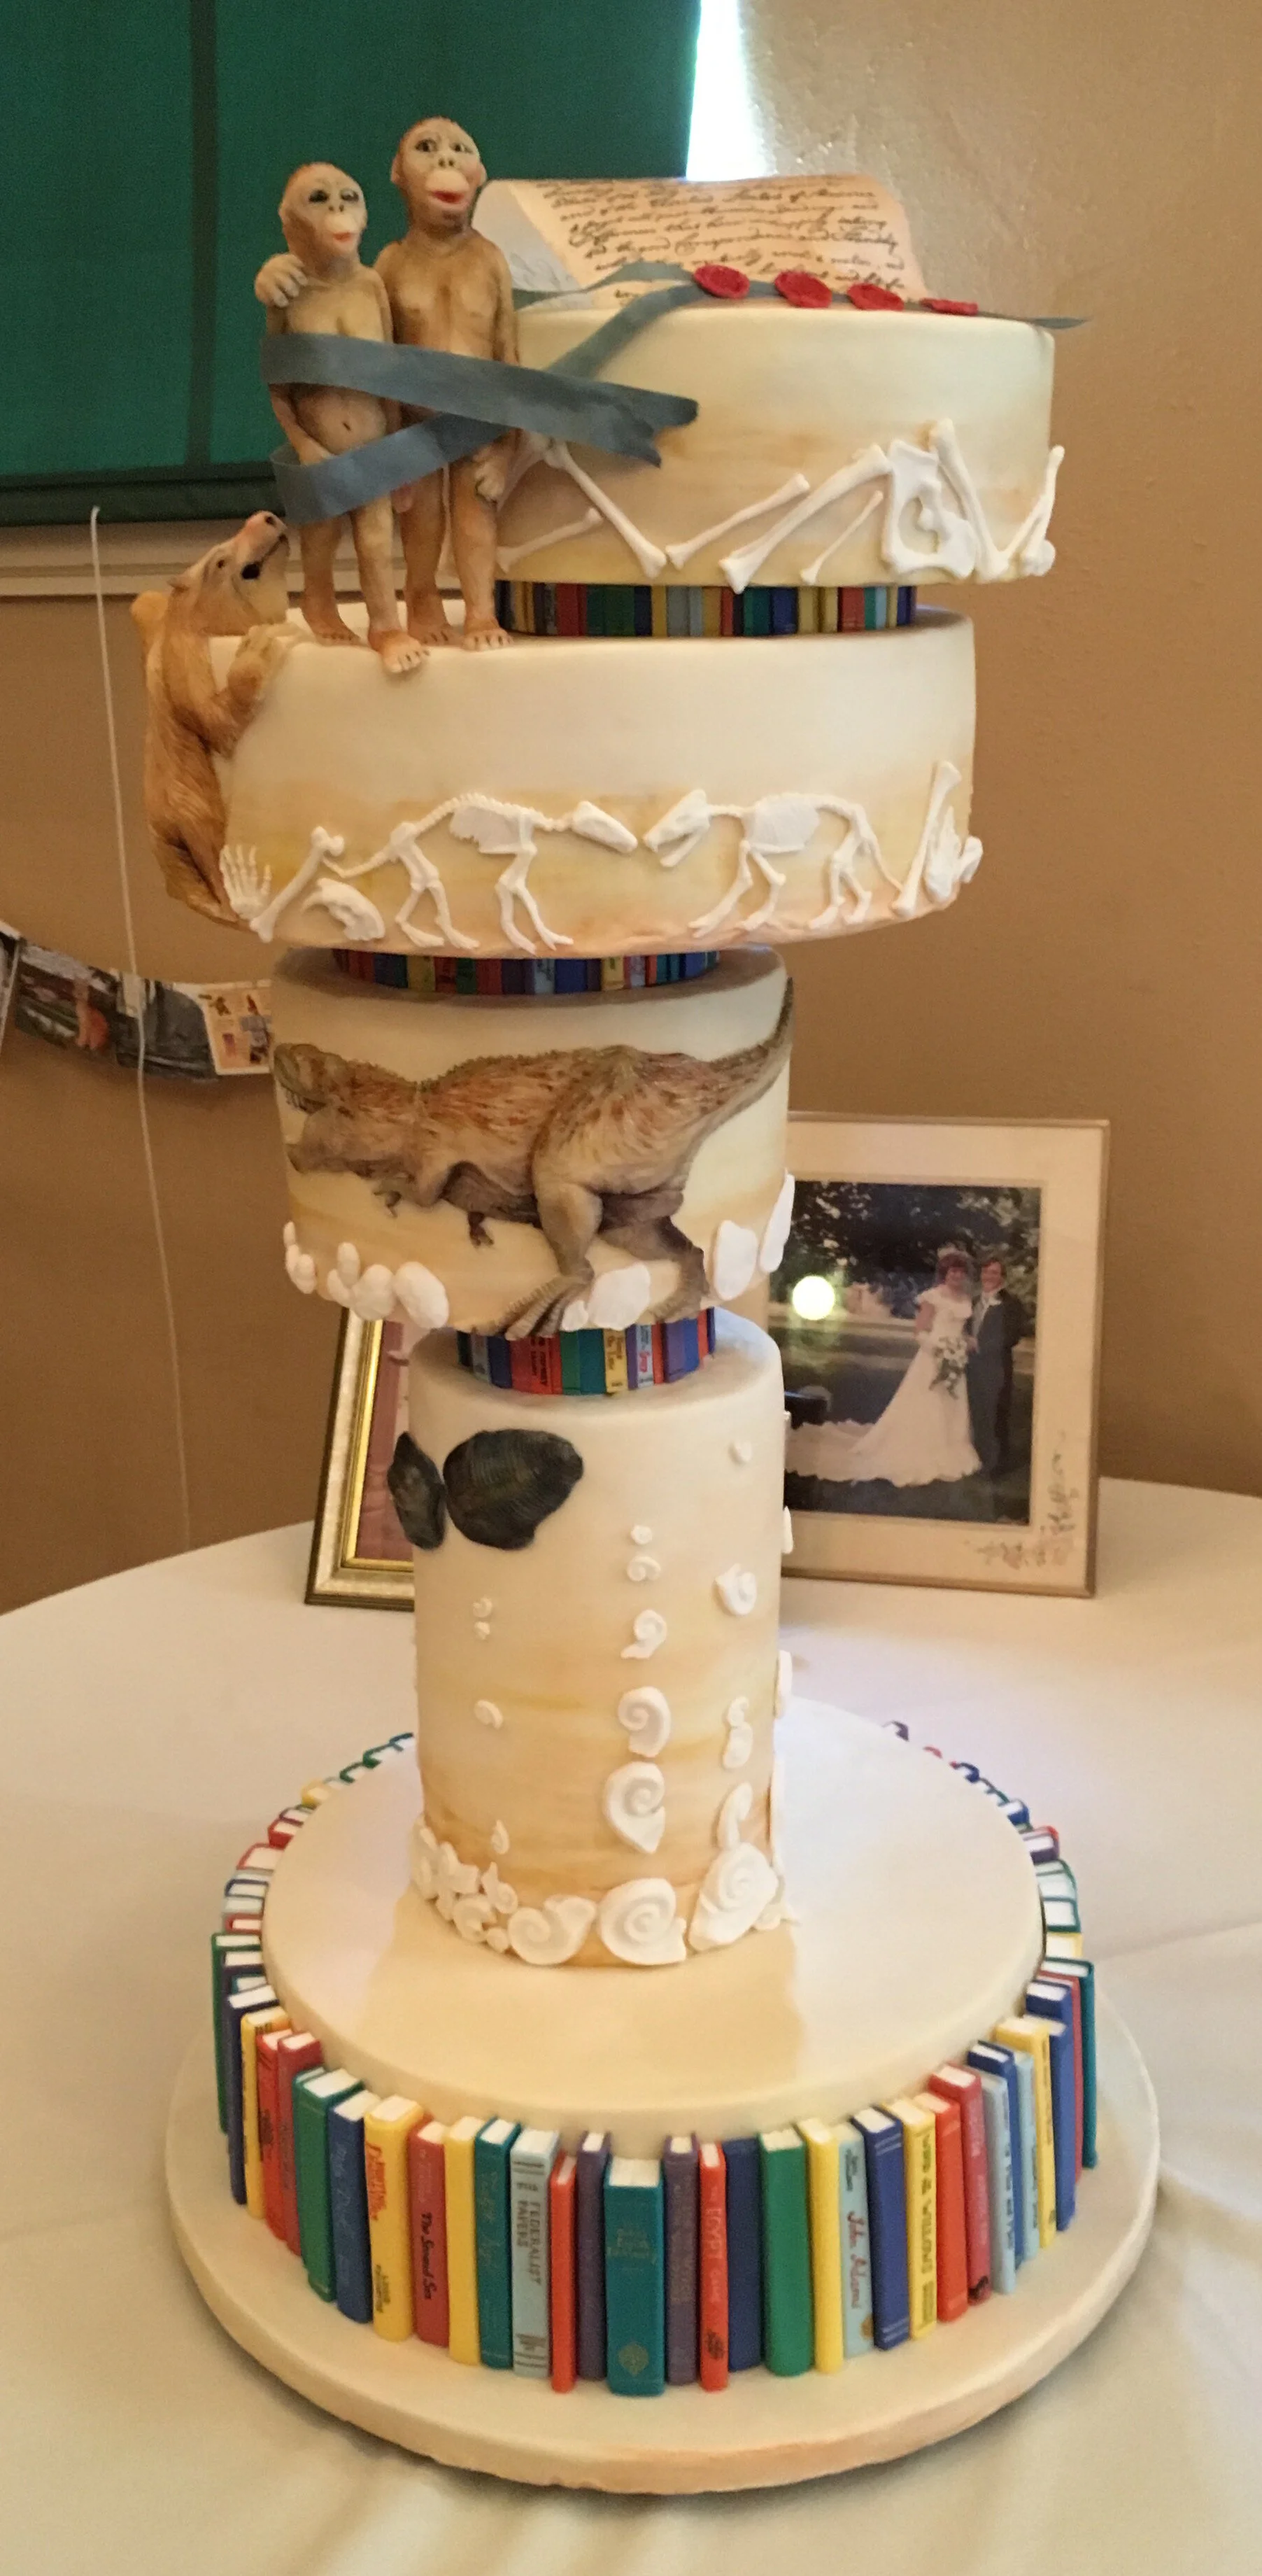
Each tier represents an era of the evolution of life on Earth – Paleozoic, Mesozoic, and Cenozoic. The tiers get progressively shorter as you move up the cake, to suggest the shorter duration of each era. The overall shape is meant to evoke this kind of spiral shape that is often used in images describing the history of life.
Each tier has a “couple” on it, as well as other iconic forms of life from that era. The Paleozoic tier has a couple of trilobites.

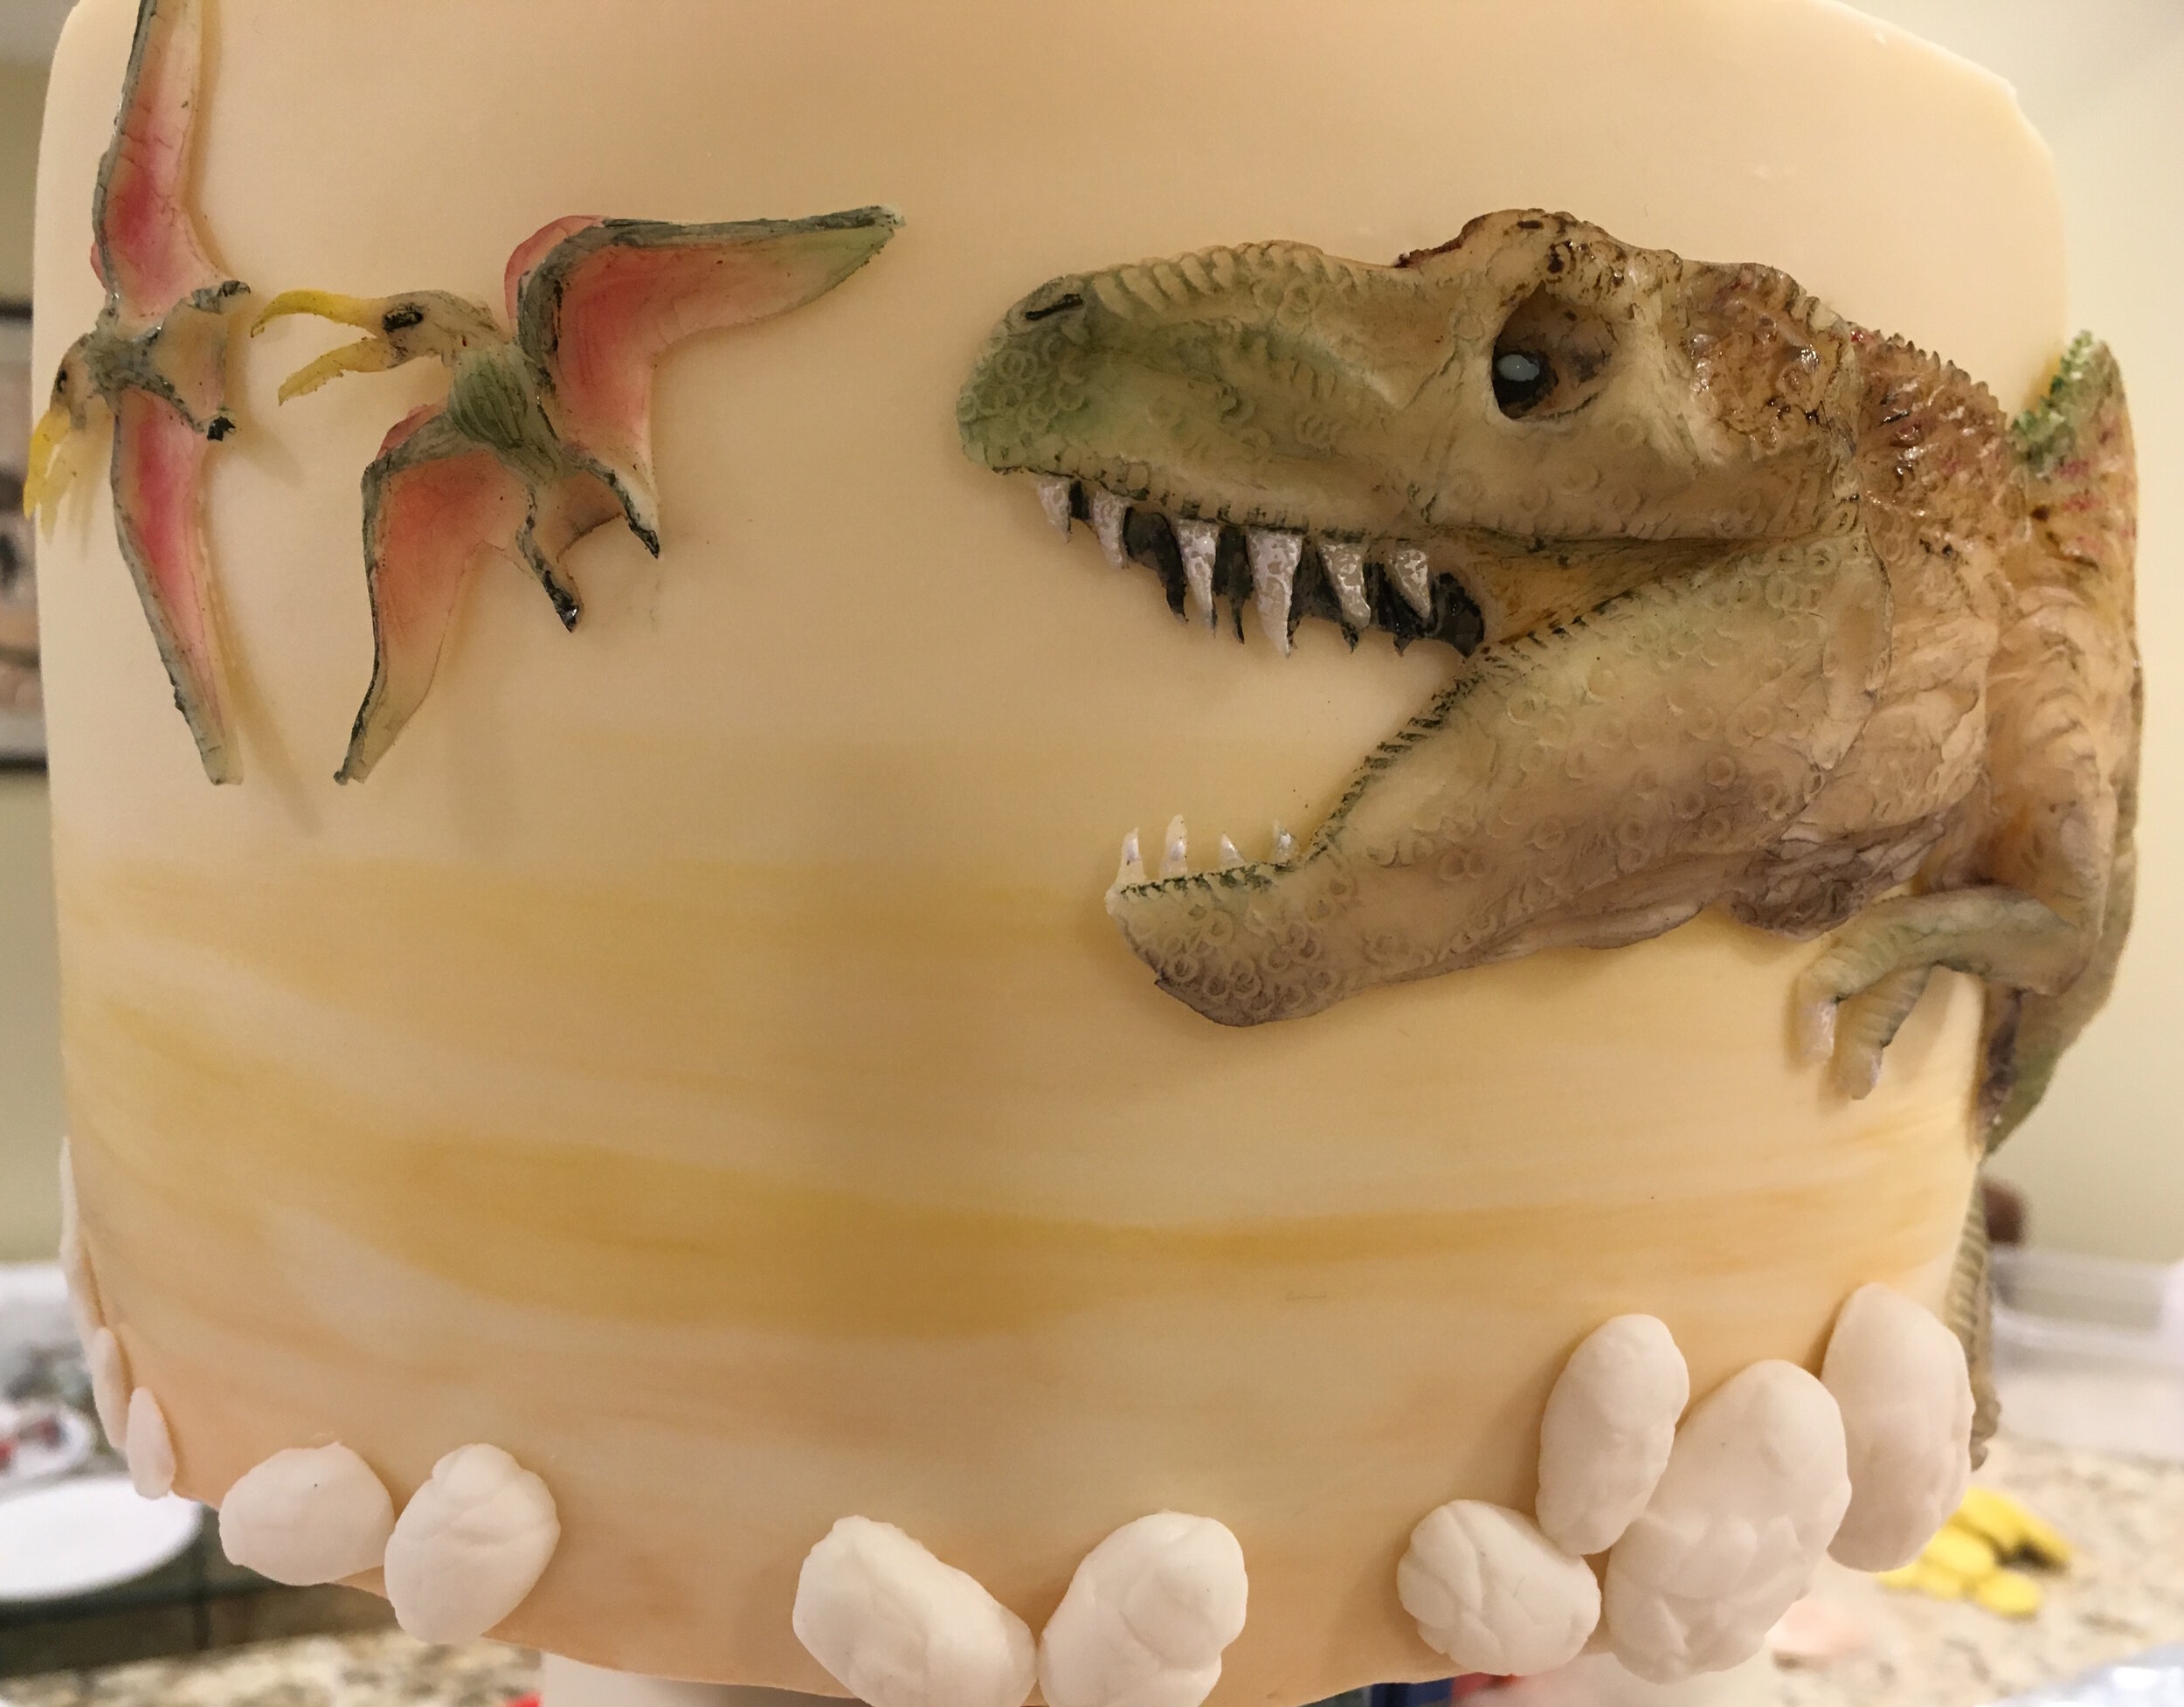
The Mesozoic era features a Tyrannosaurus Rex chasing a fleeing pair of pterosaurs. Note the T-Rex's feathers.
And the Cenozoic era tier has a megatherium (which is kind of giant prehistoric ground sloth) and a couple of hyaenodont skeletons (the groom’s PhD dissertation centered on hyaenodonts).
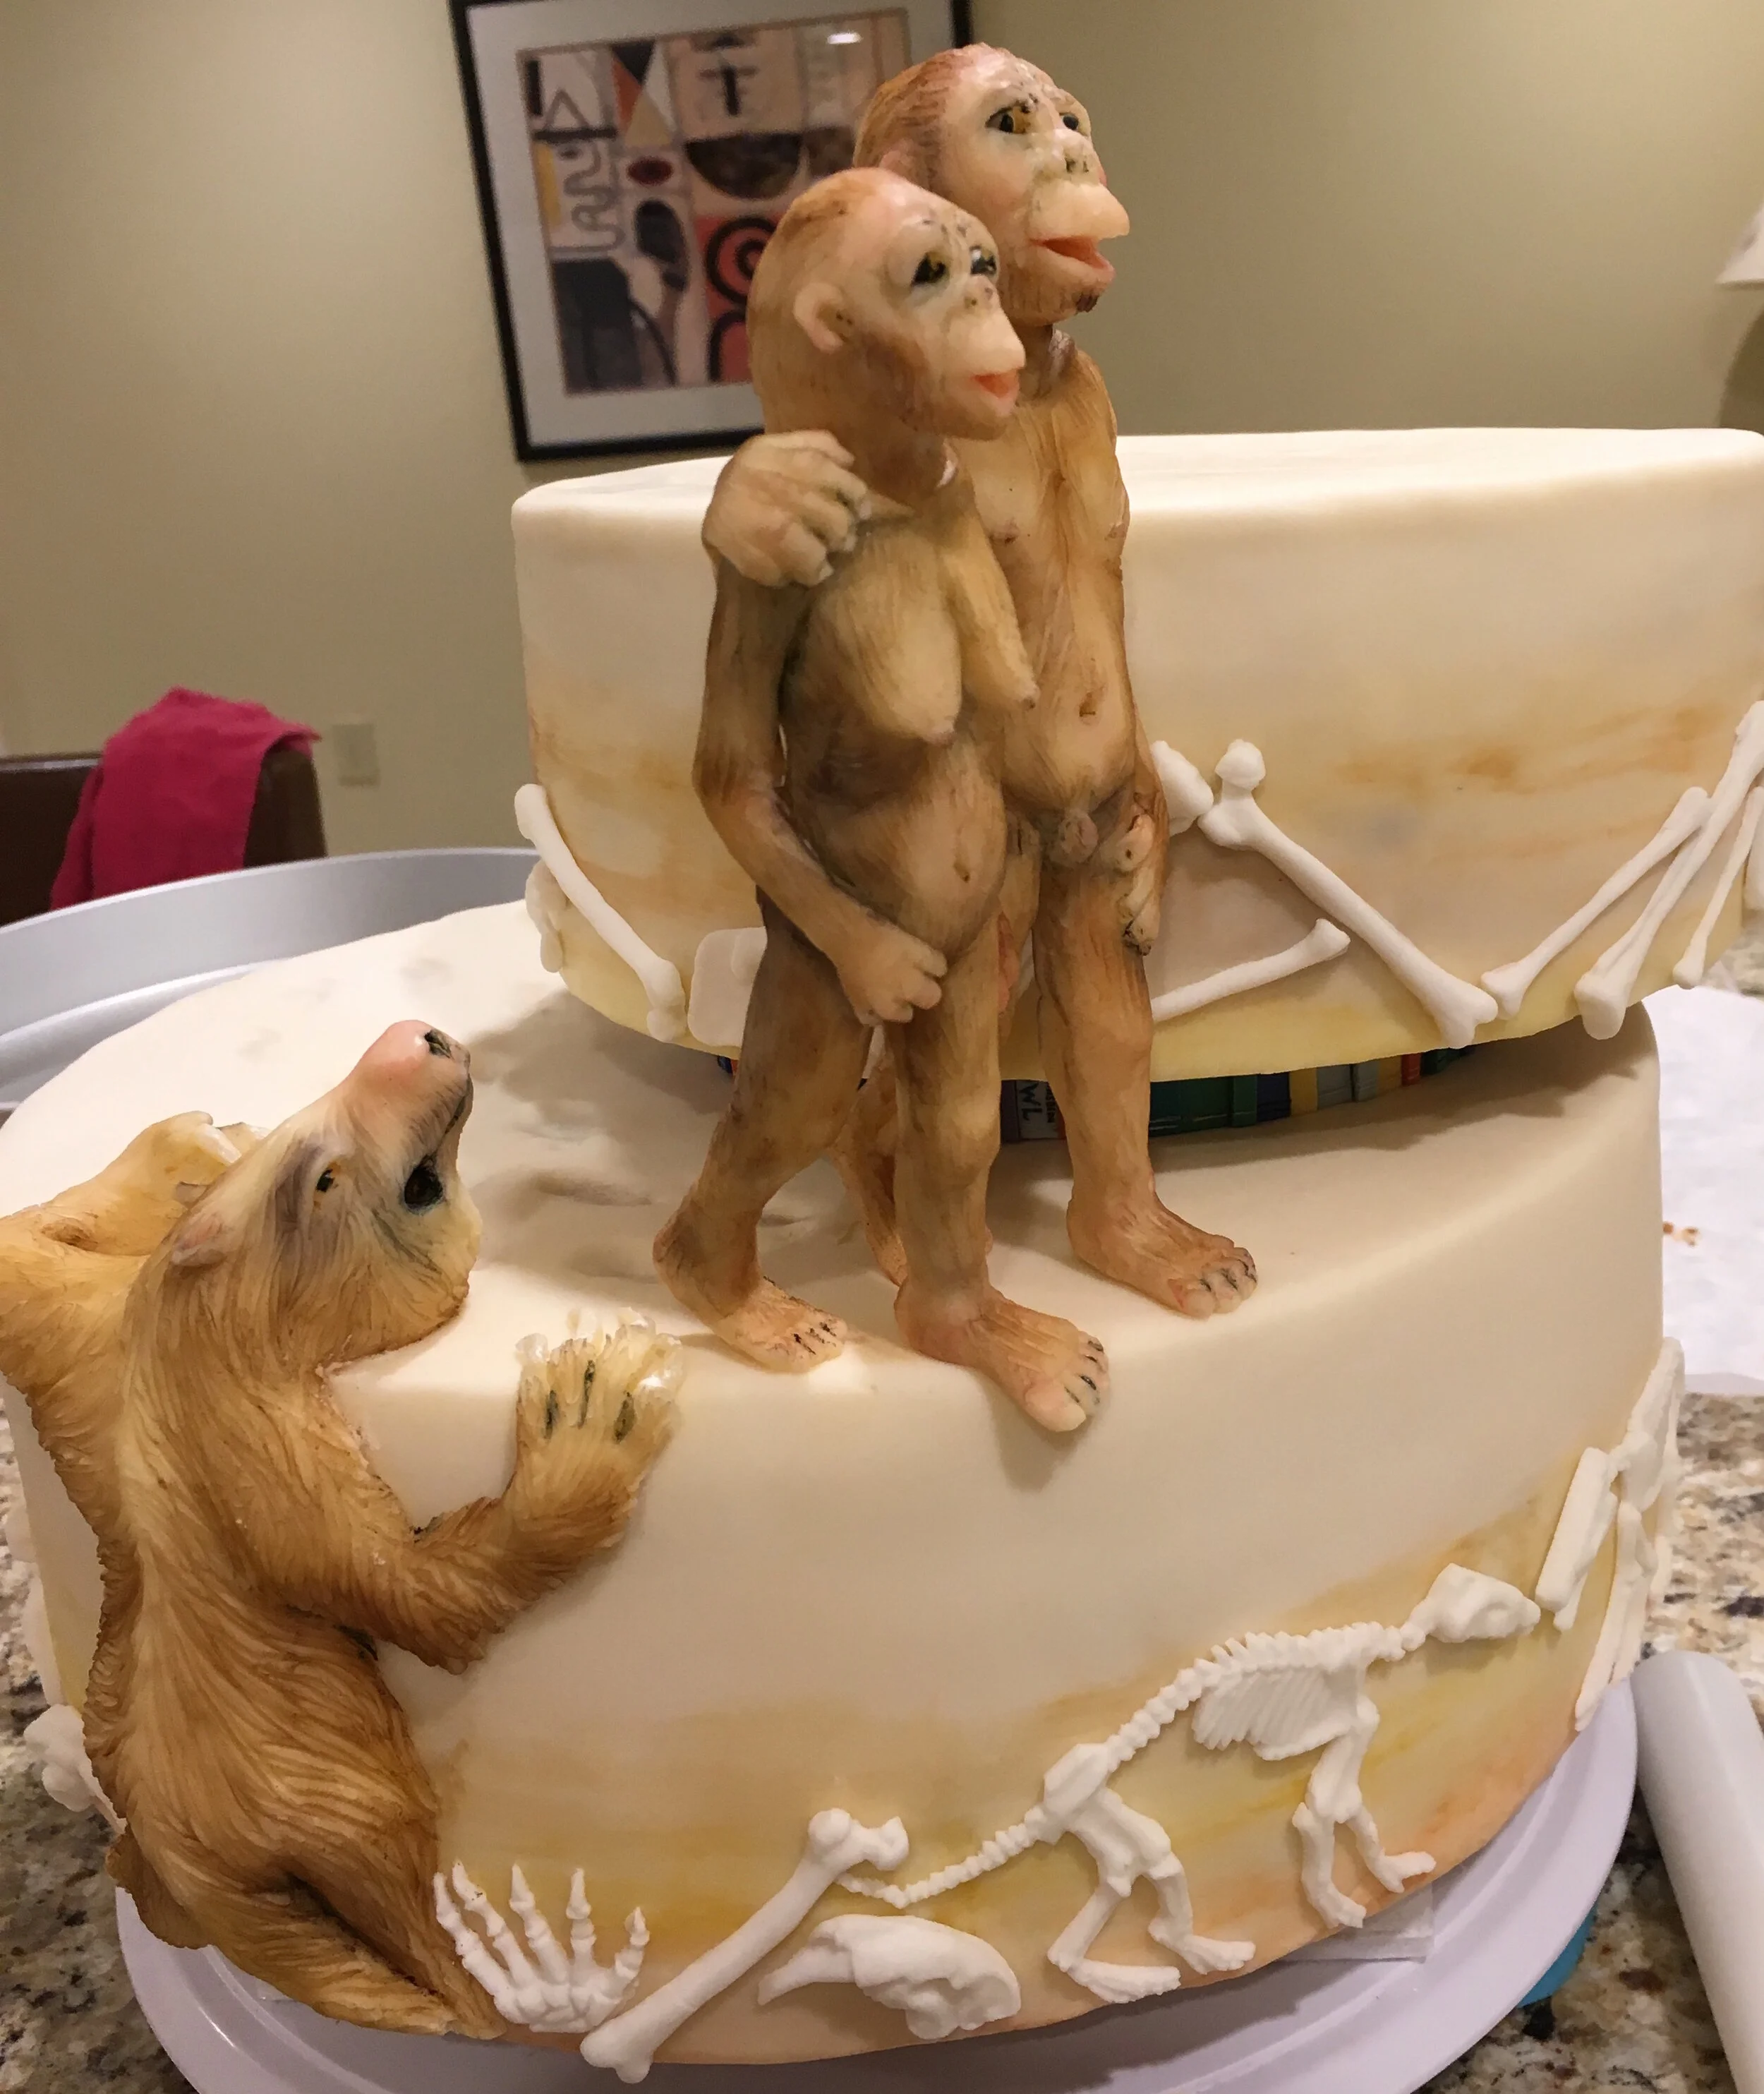
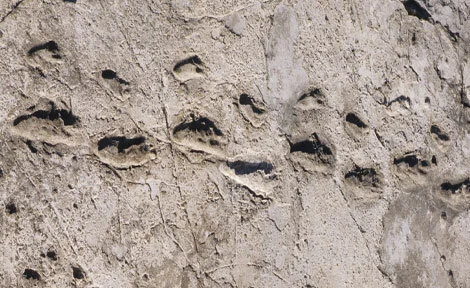
On top of that tier walks a couple of Australopithecus, which I’m told is something that the groom has been imagining on his wedding cake since he was a little boy. It’s inspired by these fossilized footprints that suggest that an Australopithecus couple might have walked next to each other, hand in hand.
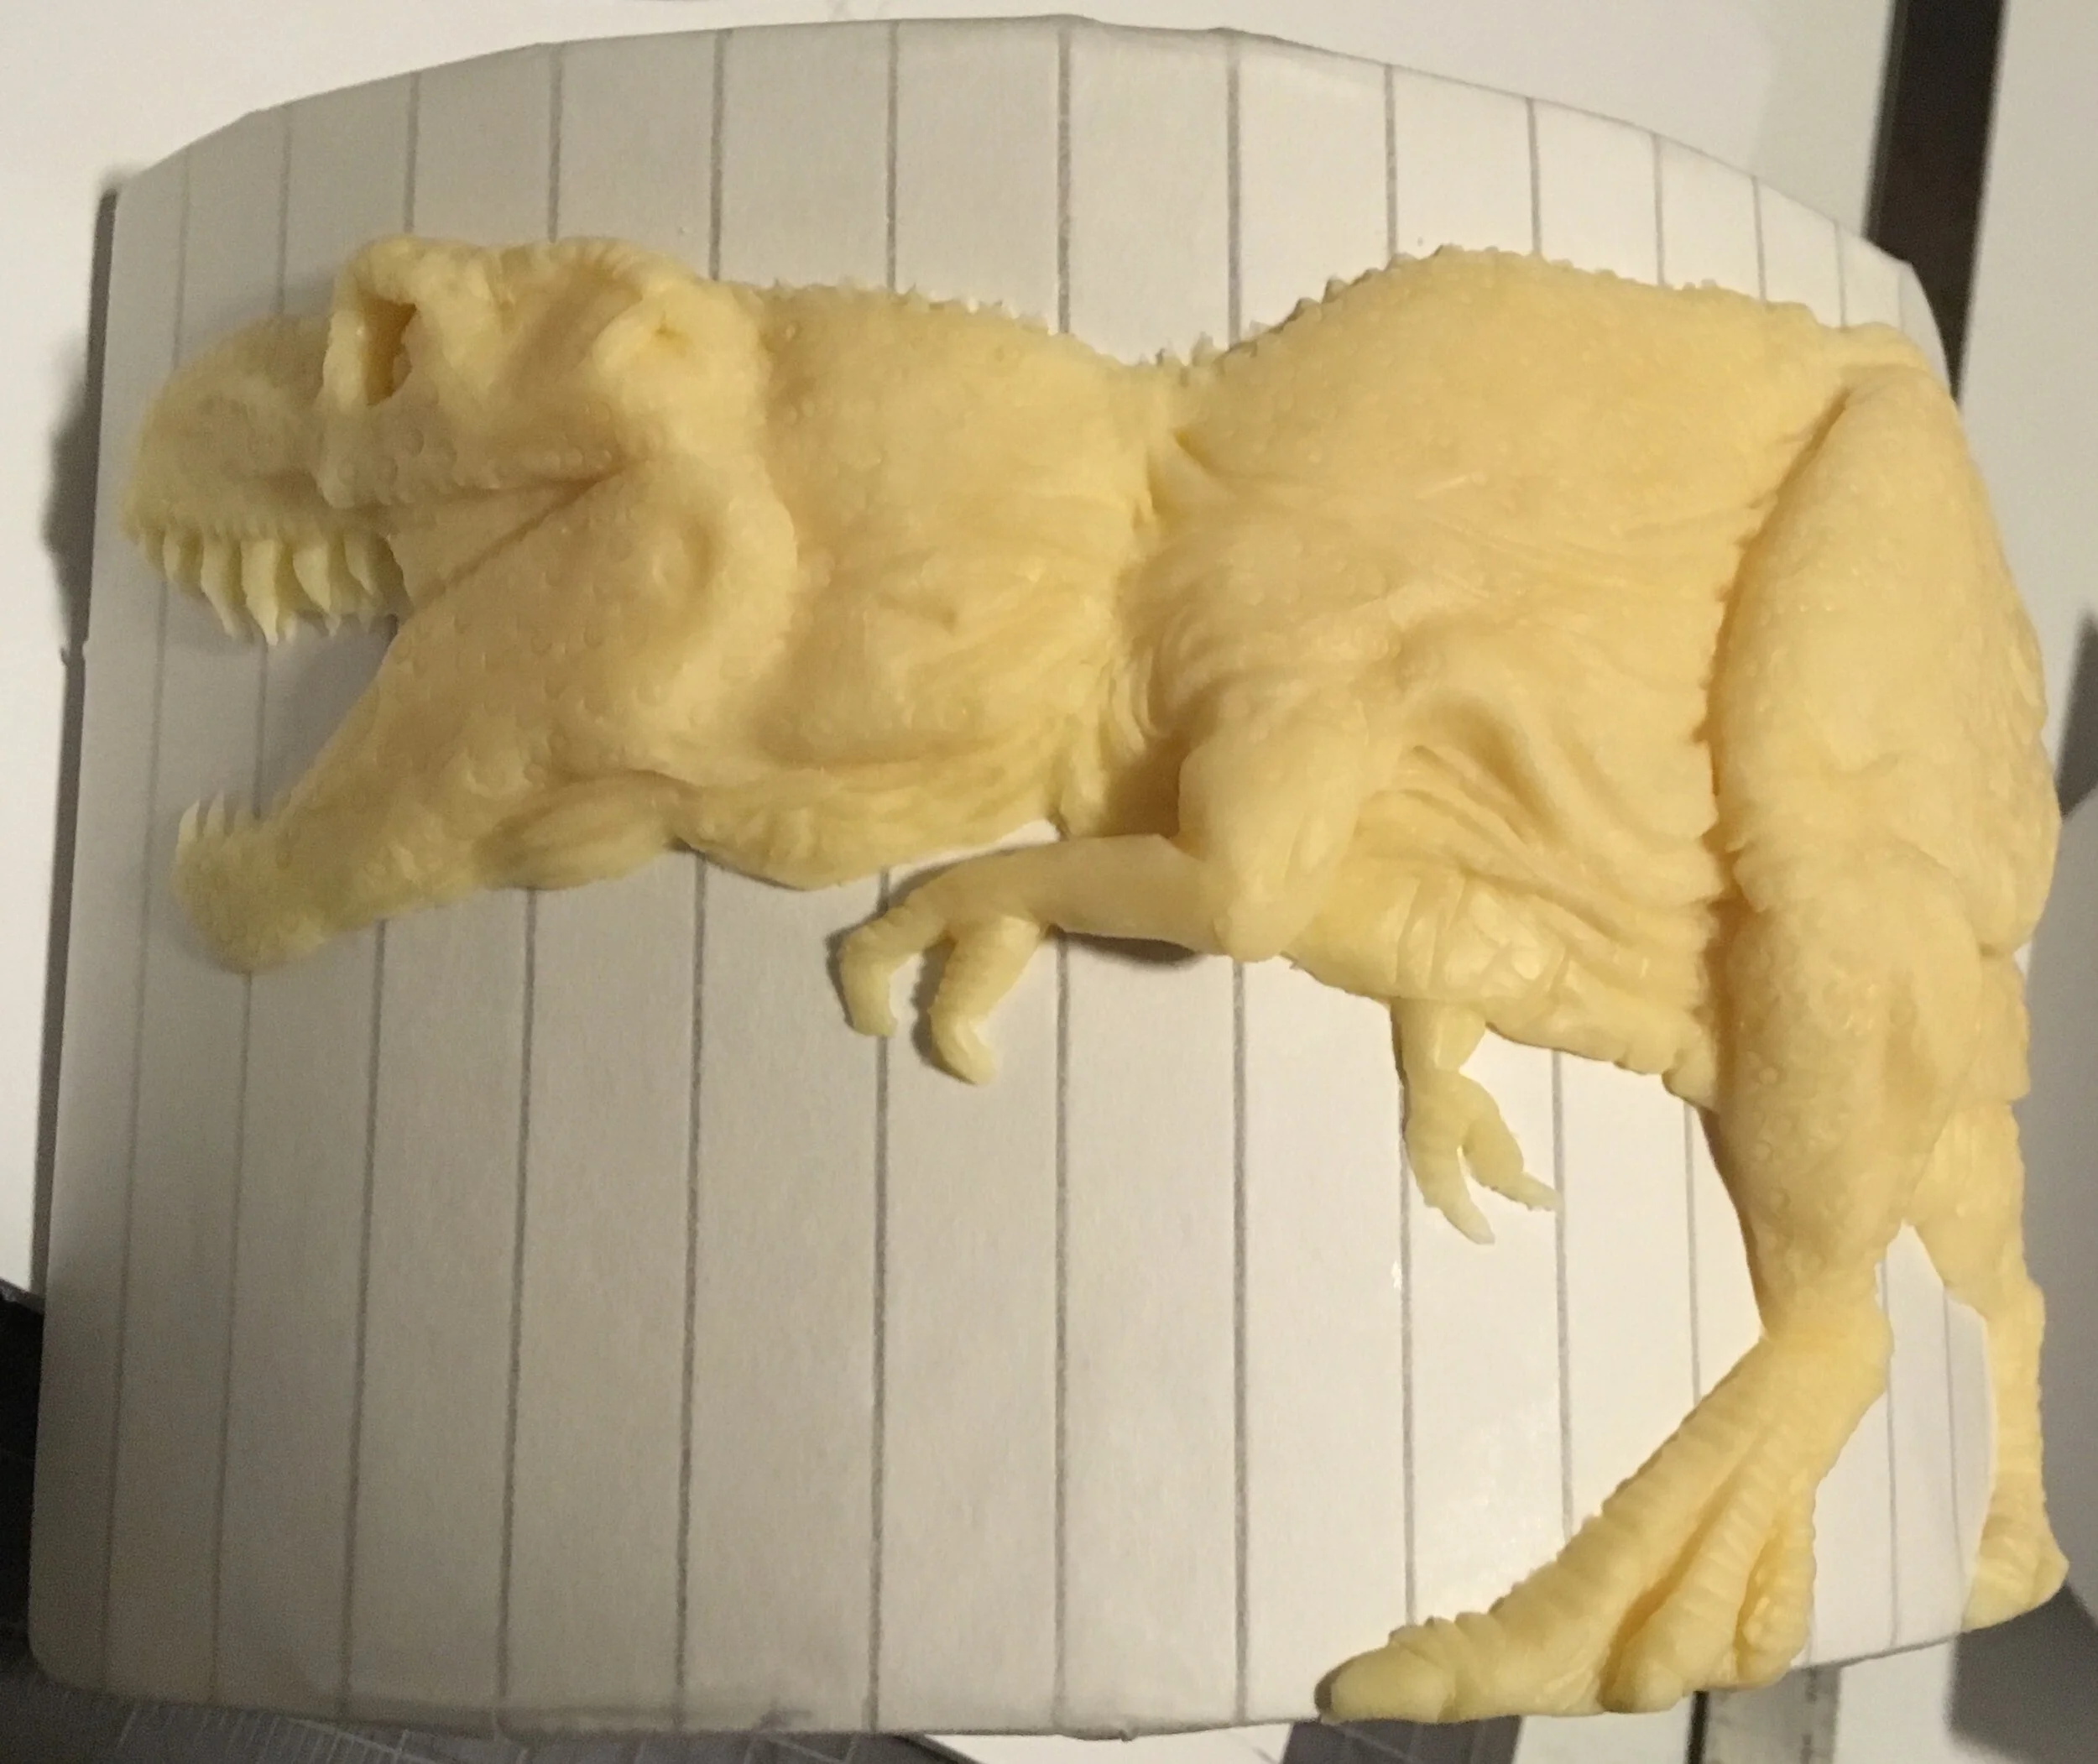
The cake is covered with a mix of fondant and modeling chocolate and all of the figures are sculpted out of modeling chocolate colored with powdered food coloring. I made all the large figures in advance, over forms made to mimic the curvature of the cake tiers. That way I could make them well in advance and bring them in my carryon, since I had to fly cross-country for the wedding. (I didn’t fly with the whole cake. I arrived three days early and rented an Air BNB with a full kitchen to do the actual baking and assembly.
For the smaller fossils and bones at the base of each tier, I made molds out of food-safe silicon, so that when I assembled the cake I could just push some fondant into the mold and stick it on the cake.
Of course, Australopithecus would have been nude and the couple understandably didn’t want exposed genitalia on their wedding cake. They also wanted to incorporate the Treaty of Paris, so I was delighted to discover that the Treaty of Paris has a nice blue ribbon at the bottom, running underneath the signatories’ seals. So I made a replica of the Treaty of Paris for the top of the cake with a long ribbon on the bottom to wrap around the couple’s inappropriate bits. Although if you look closely at the above photo before I put the ribbon in place, you’ll see that I couldn’t resist making the Australopithecus couple anatomically correct.
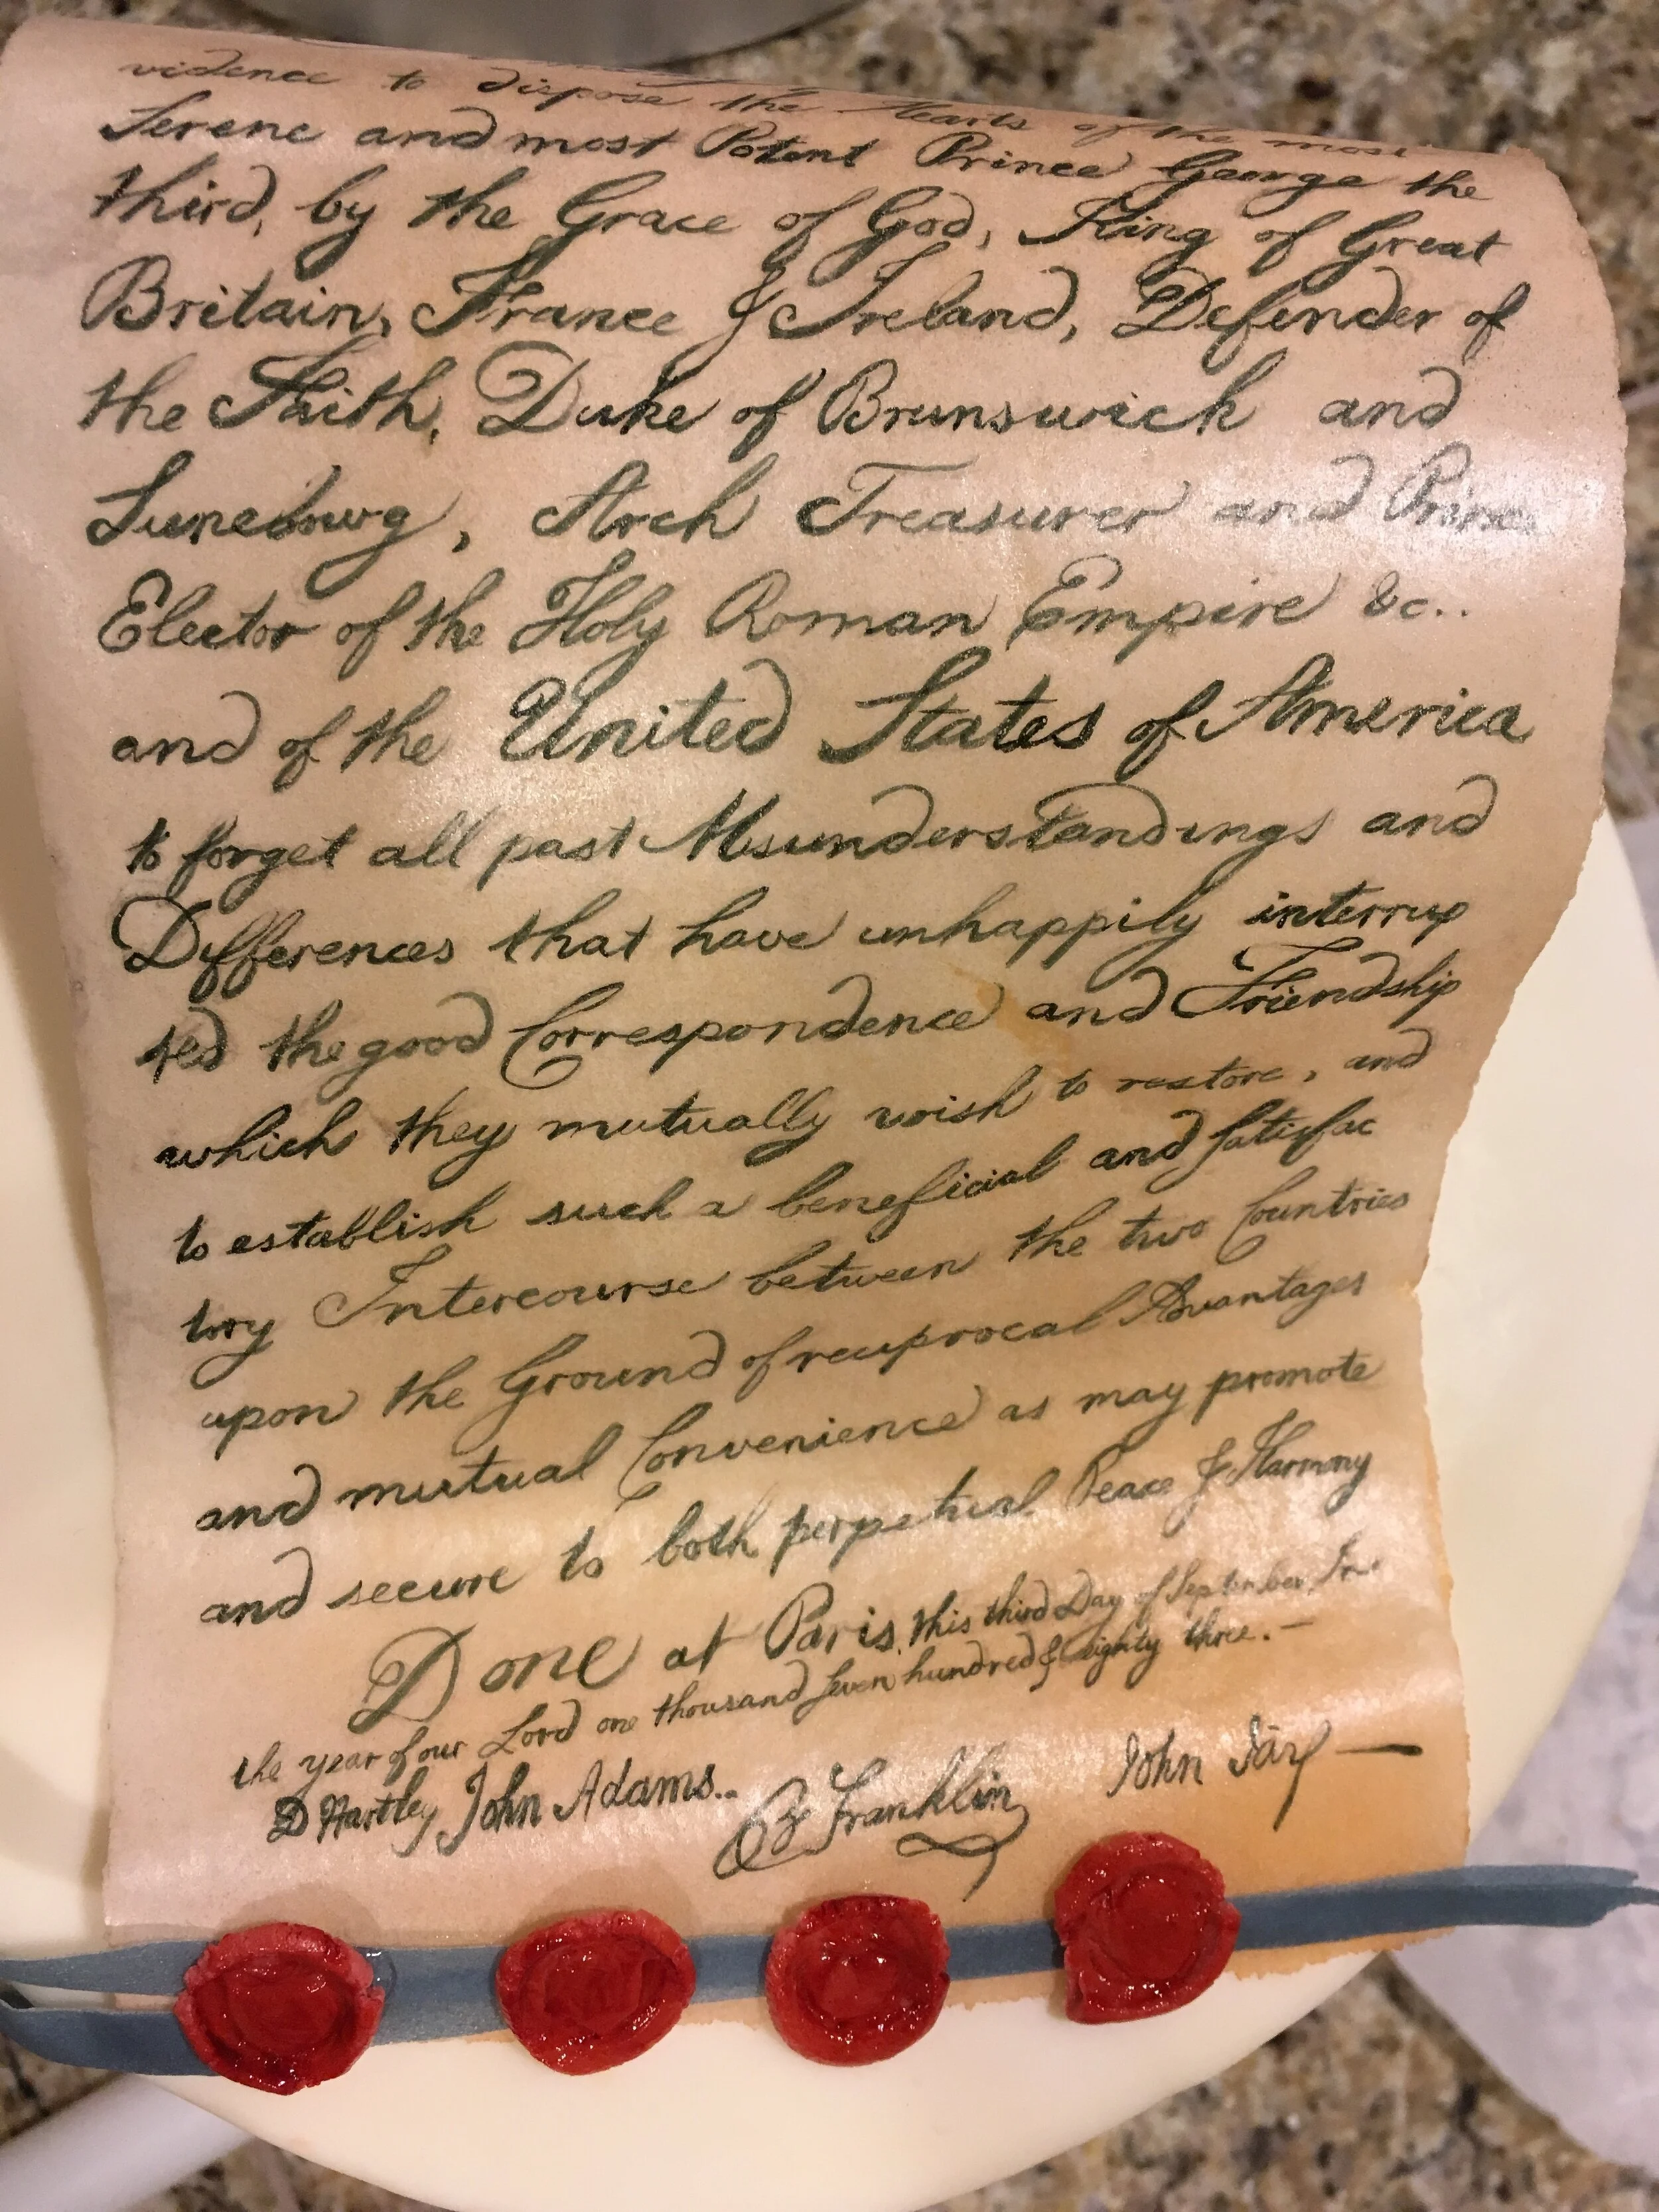
It's made of edible wafer paper with the actual text of the Treaty of Paris hand painted with food coloring. Of course it’s not the entire text, as the treaty is far too long for that. Using images I downloaded of the actual document, I photoshopped the signatures onto the bottom of the first paragraph. Then I printed it out at the actual size I needed for the cake. I turned this into basically edible transfer paper by coating the back of the paper with powdered food coloring. I put this on top of the wafer paper and transferred the text onto the wafer paper by tracing the printed image with a toothpick. Then I went back over the traced text with paste color and a detail brush. To get the graceful curve, I lightly sprayed the back of the wafer paper with water and then set it over and under a couple of rolling pins to dry.

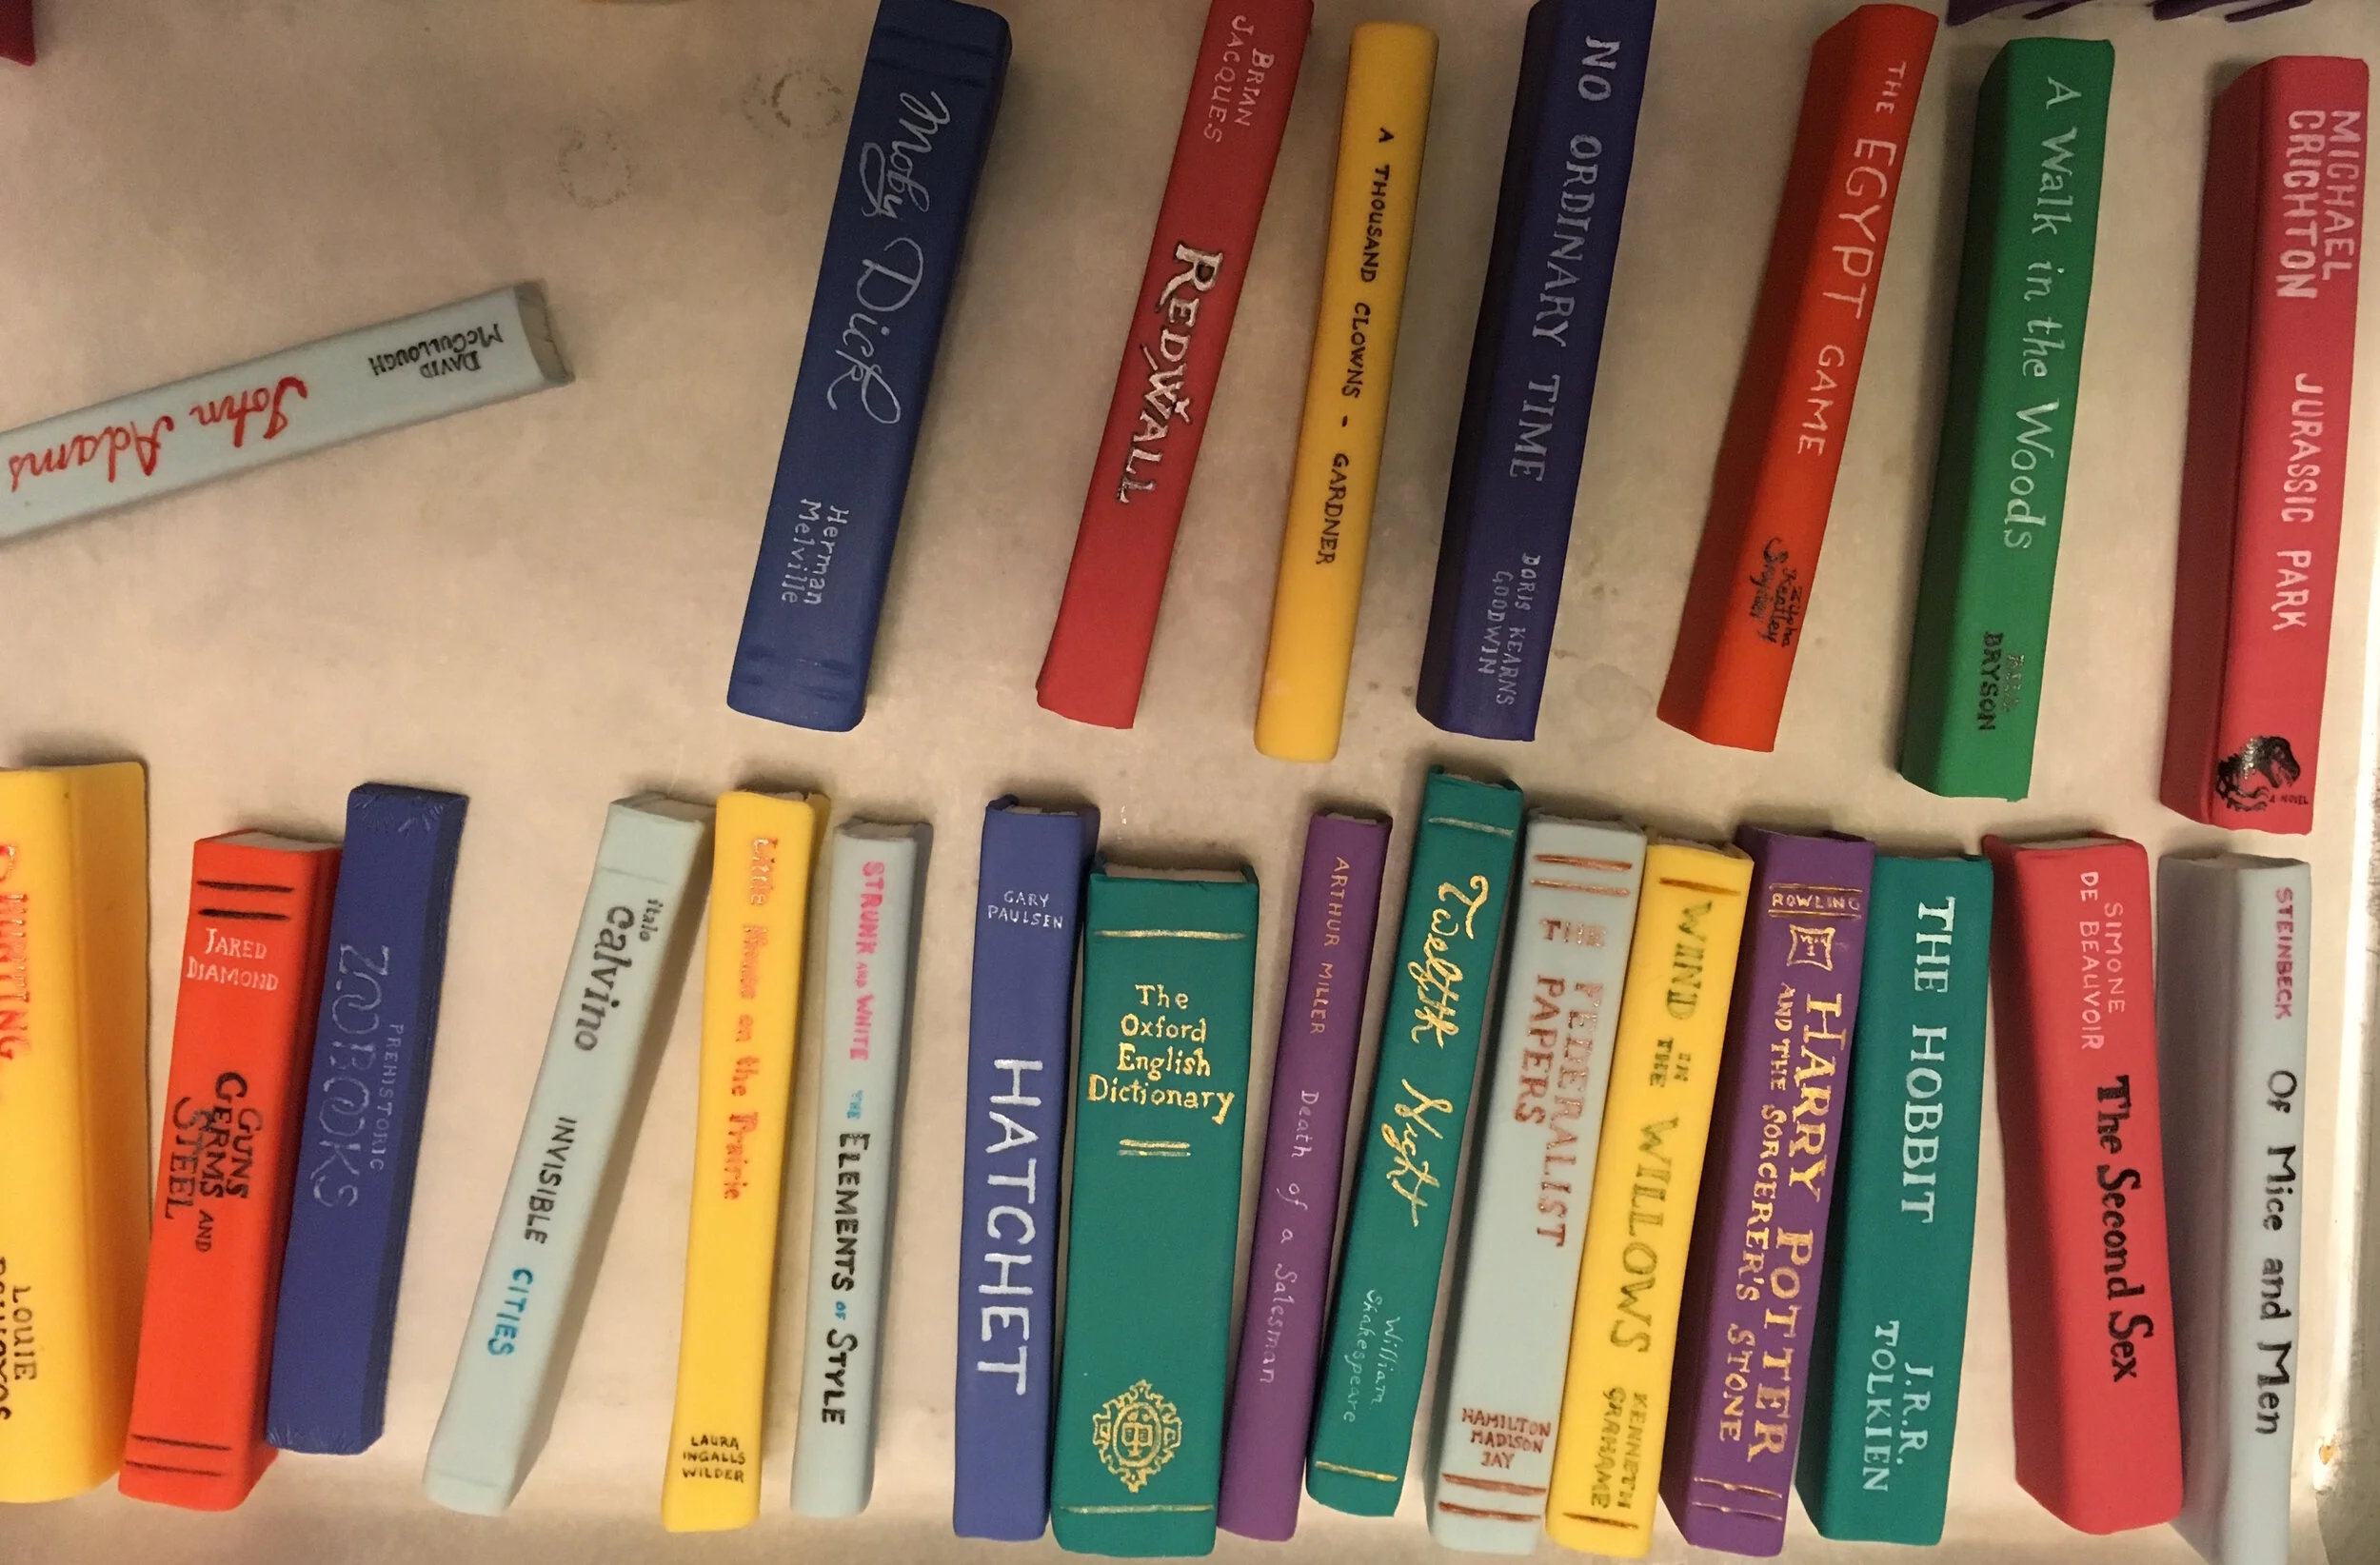
The lowest tier and the dividers between the evolutionary era tiers are encircled with books, which are meant to bring in the bride’s studiousness. They also offered a great opportunity for personalization as the bride and groom sent me a list of all their most influential books. The dividers between the tiers are quite small and made so that they can be popped into place to conceal the cake’s internal support. Those books are just gum paste with the titles painted on.

The books on the bottom tier are much larger and can be seen from the top as well as the sides, so they required more detail to be convincing. So I made pages out of wafer paper and stuck them together with piping gel. Once that was dry, I wrapped each book in a gum paste cover and then painted the title onto the spine. In most cases, I was able to find real cover art from the book to base it on.
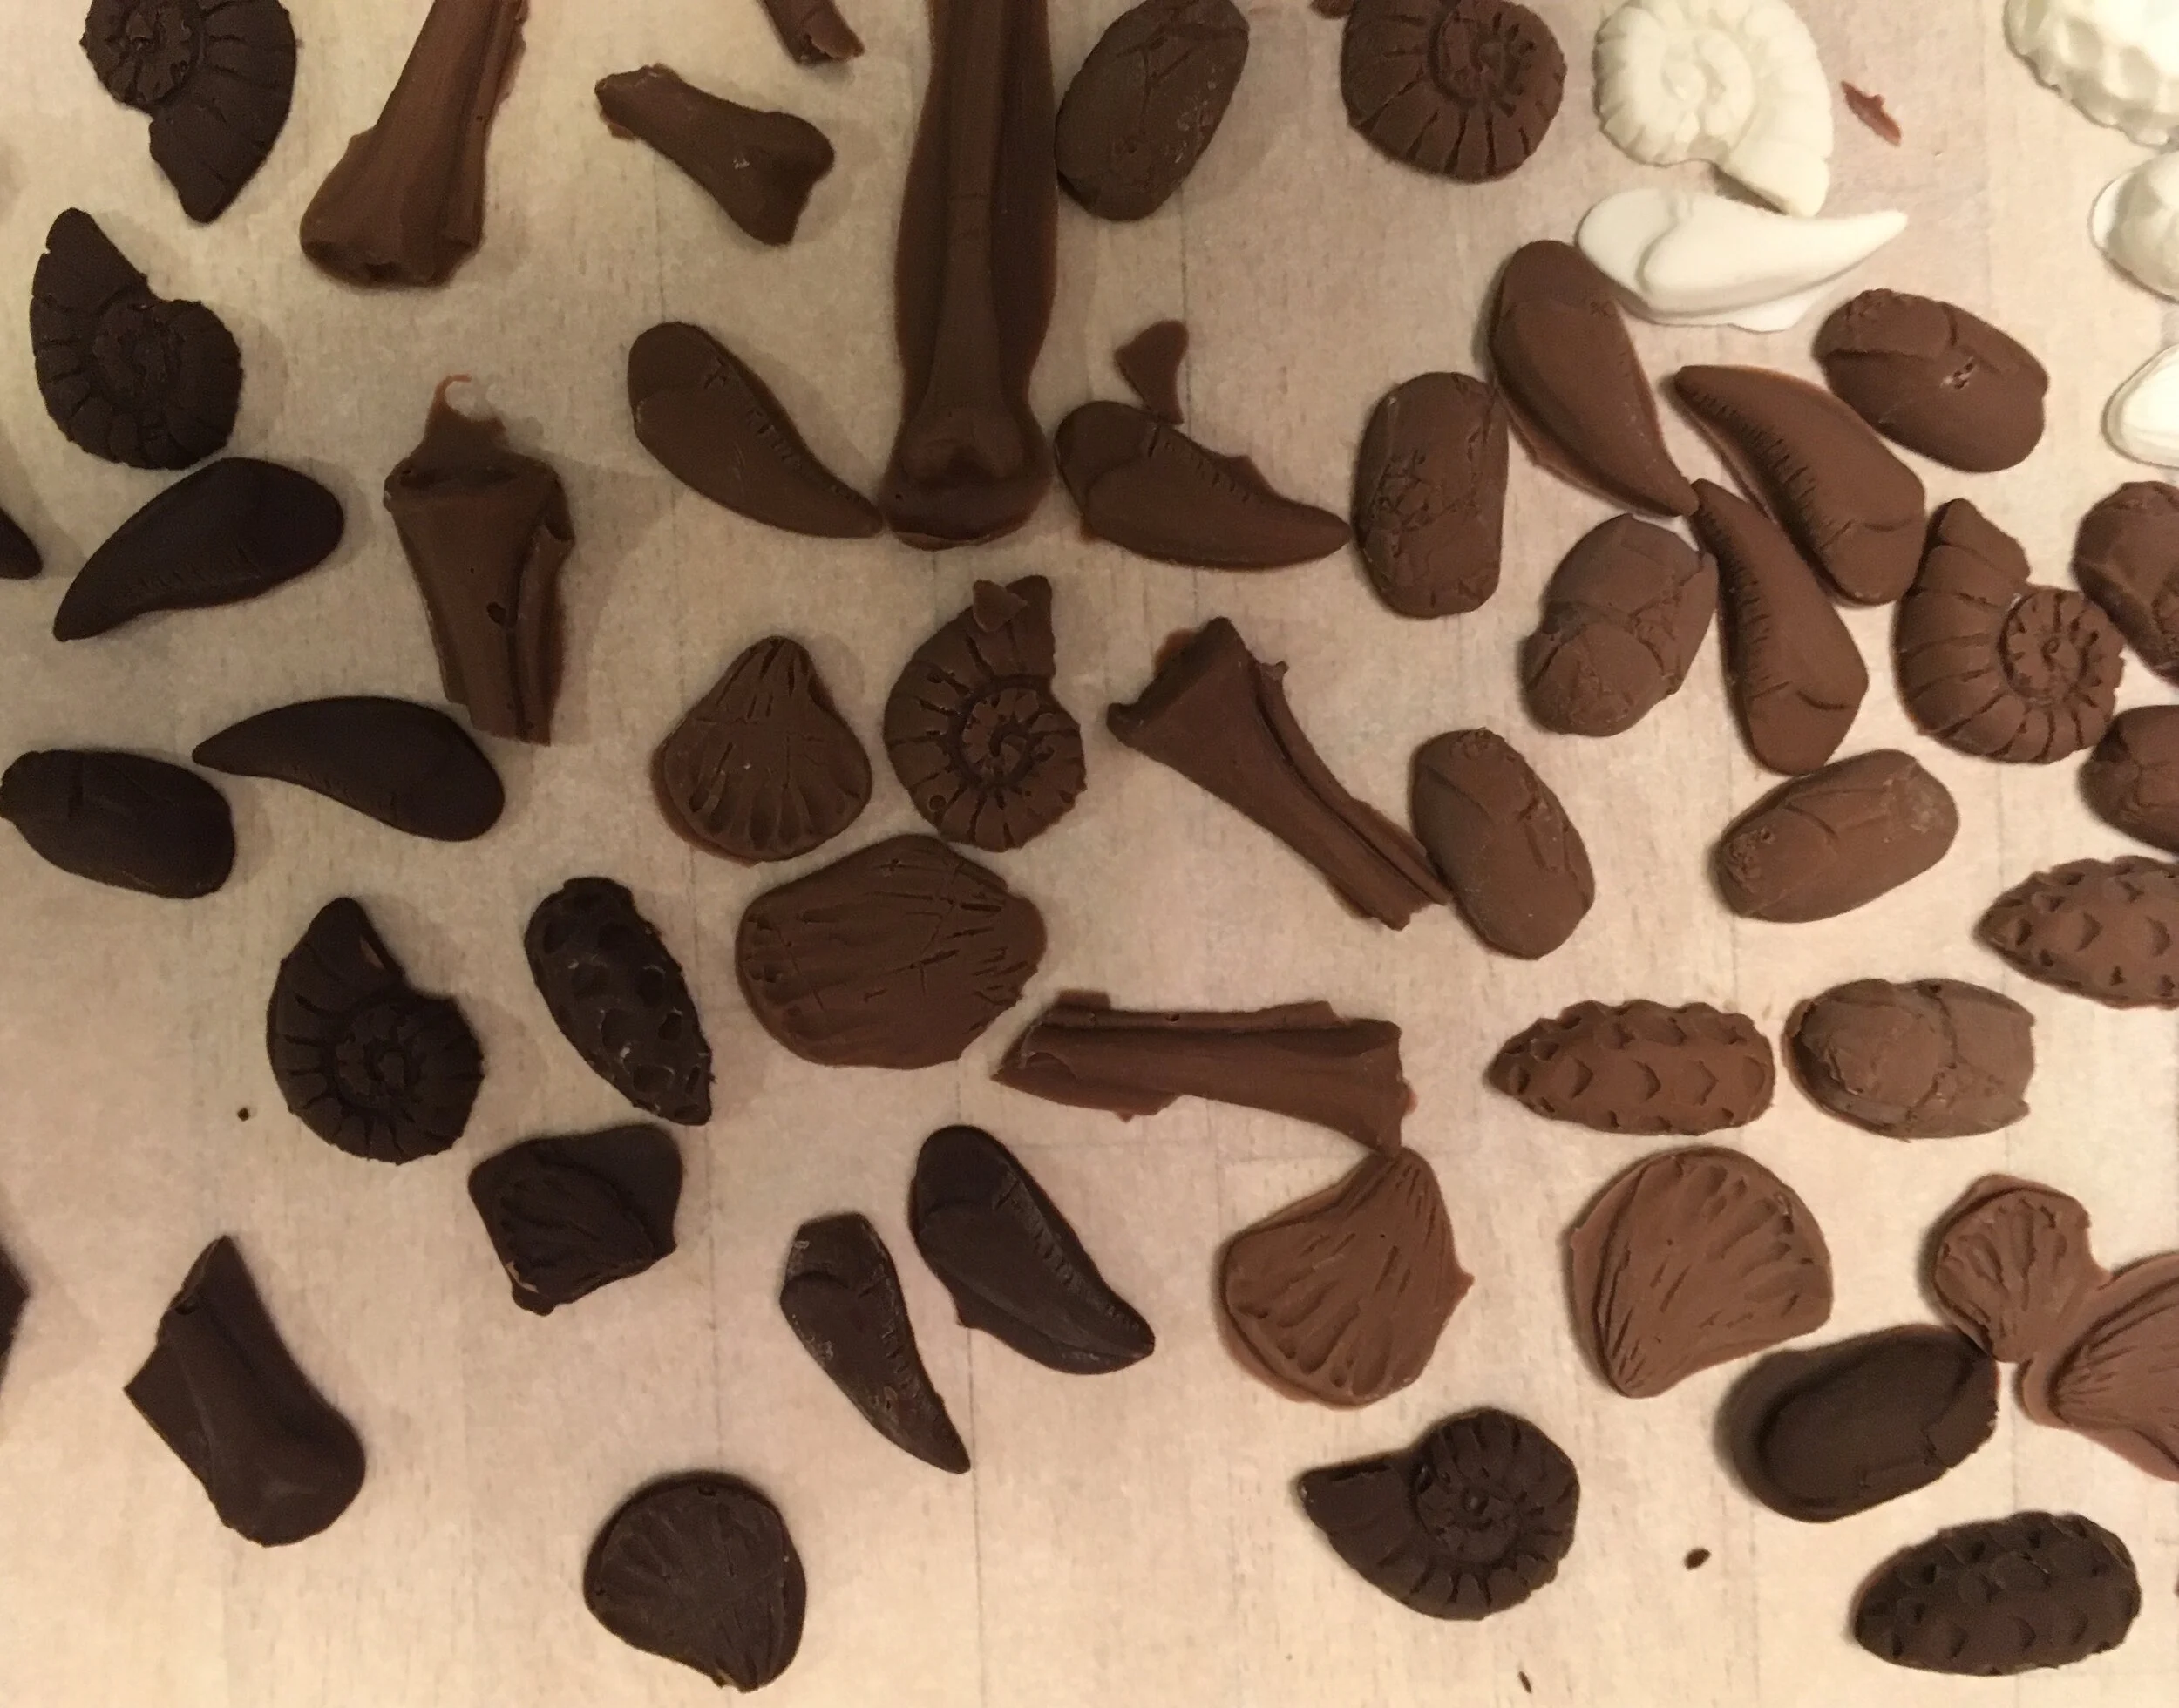
Inside, the cake flavors are vanilla, orange, ginger, and chocolate in alternating layers to suggest different strata of dirt. We wanted people to be able to have an archeological experience while eating the cake, so I buried chocolate fossils inside each layer. I made custom molds for the fossils, based on sculptures that I did representing various fossils that would have been common in each of the cake’s eras. With these molds, I cast the fossils in white, milk, and dark chocolate and then embedded them in the cake layers as I was stacking this cake. Then as the guests ate the cake, they got to excavate their chocolate fossils.
The drive from the Air BNB was about half an hour and not over the greatest roads. I enlisted the bride’s brother to help me deliver the cake, since he has an SUV with enough space. He is a former Army Ranger, yet apparently still found the pressure of the drive terrifying. I don’t blame him. I hate driving with cakes. We arrived at the venue without incident, though.
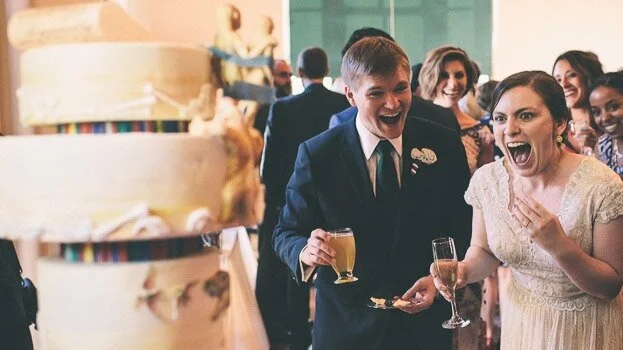
One of the groom’s paleontology friends created a museum card to accompany the cake, explaining all the different fossils, inside and out. He even gave a little introductory speech before they cut the cake. And apparently some of the groom’s paleontology colleagues even said my T-Rex was one of the best reconstructions they have ever seen in any medium. But, really, this photo is the best part.


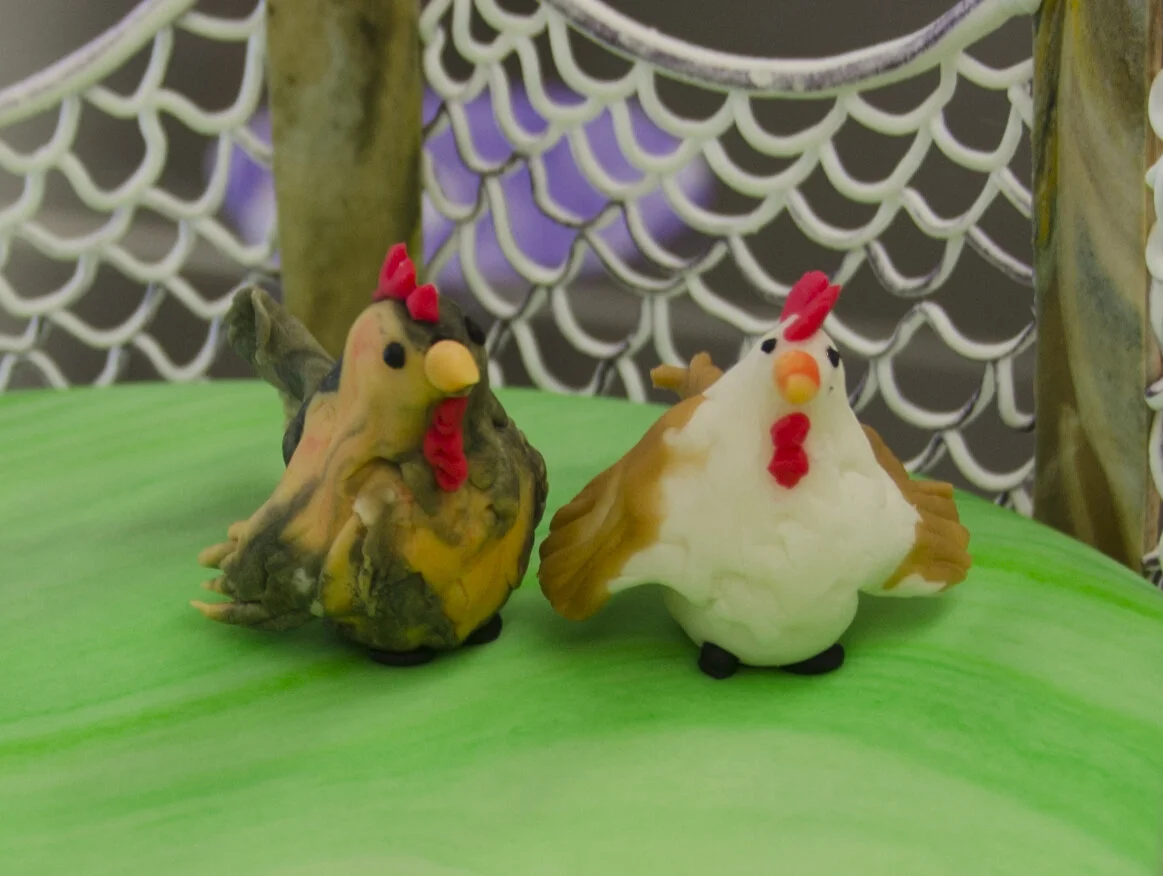
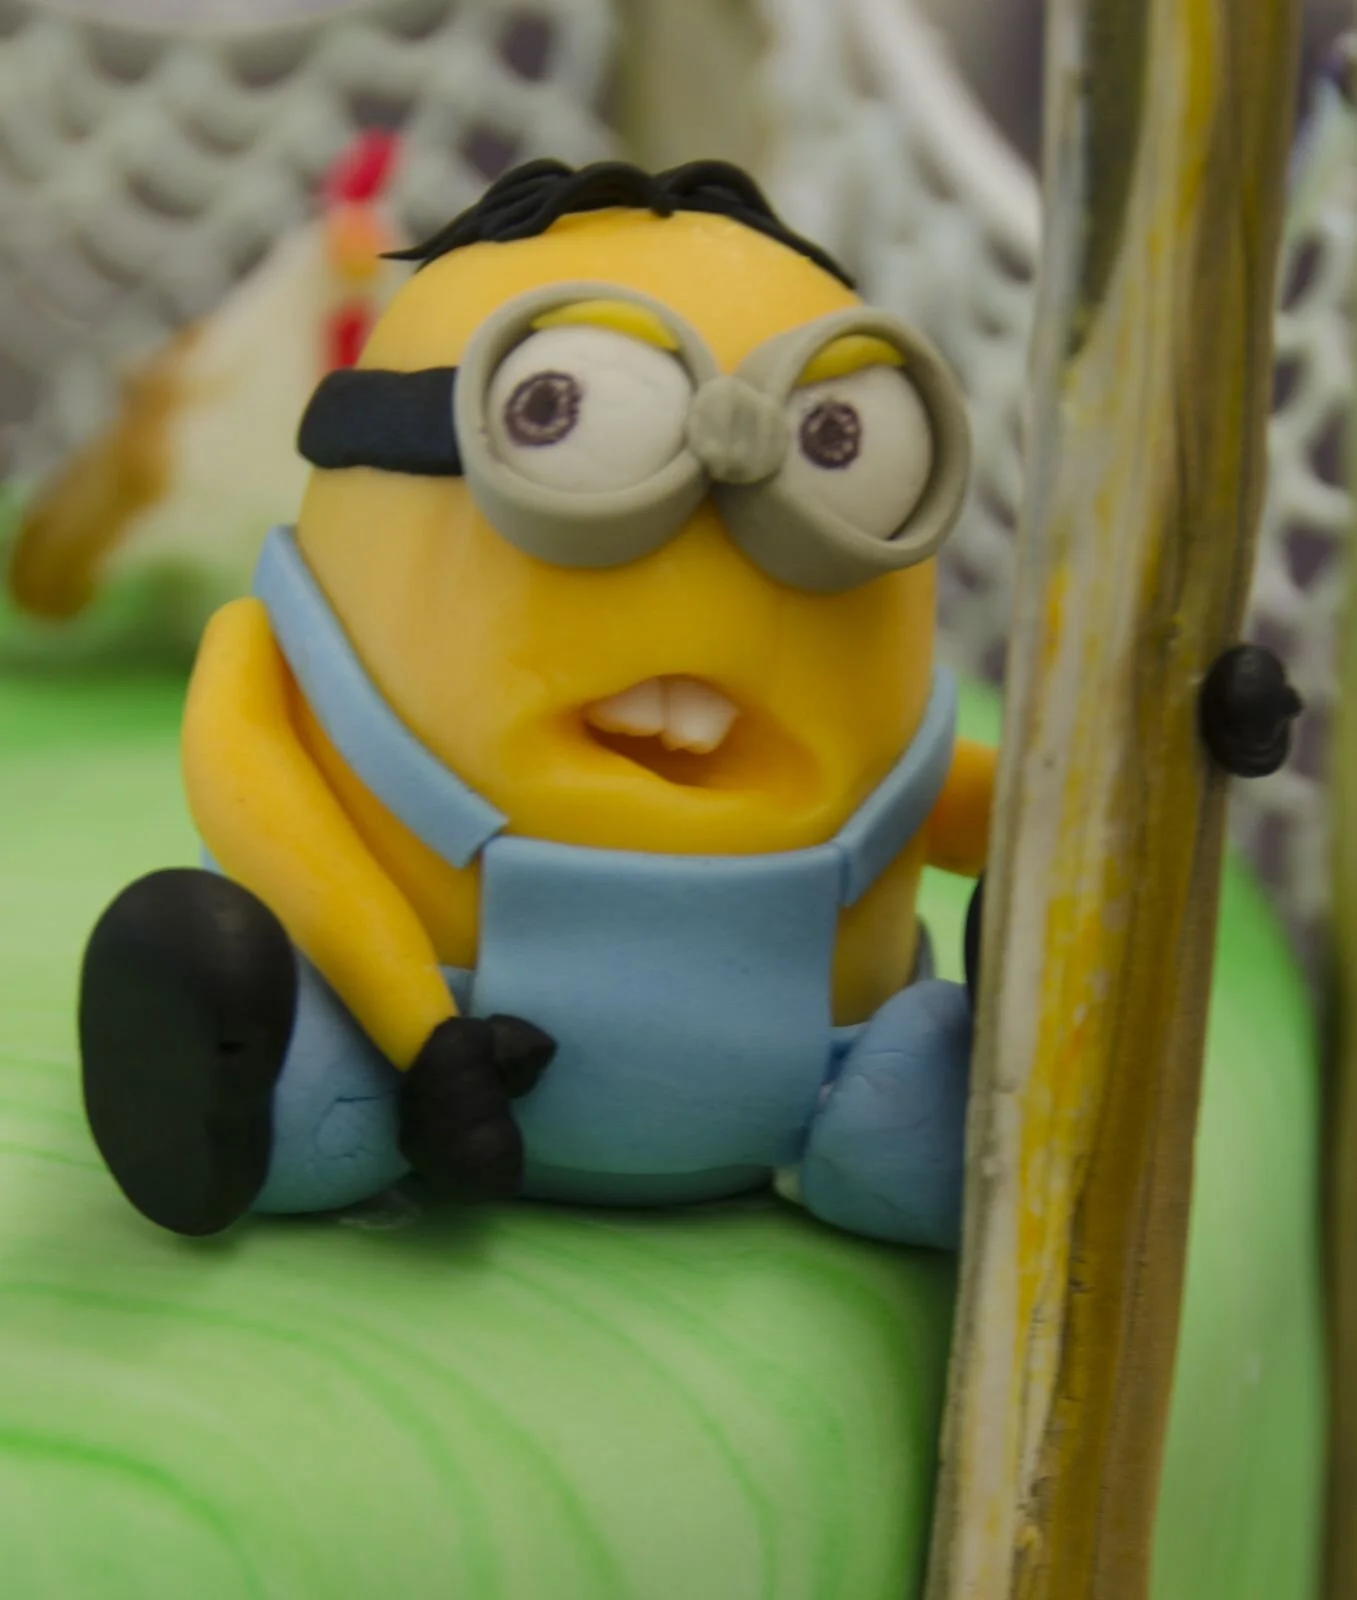
Minion Chicken Coop Cake
While my mom and I were taking a cake class at the Wilton School, we had a very nice Skype call with my niece and nephew. They told us that they were planning to be minions from Despicable Me for Halloween. We also had a very entertaining conversation about whether or not they were building me a chicken coop. So I made the cake I was making for class a minion / chicken coop cake.
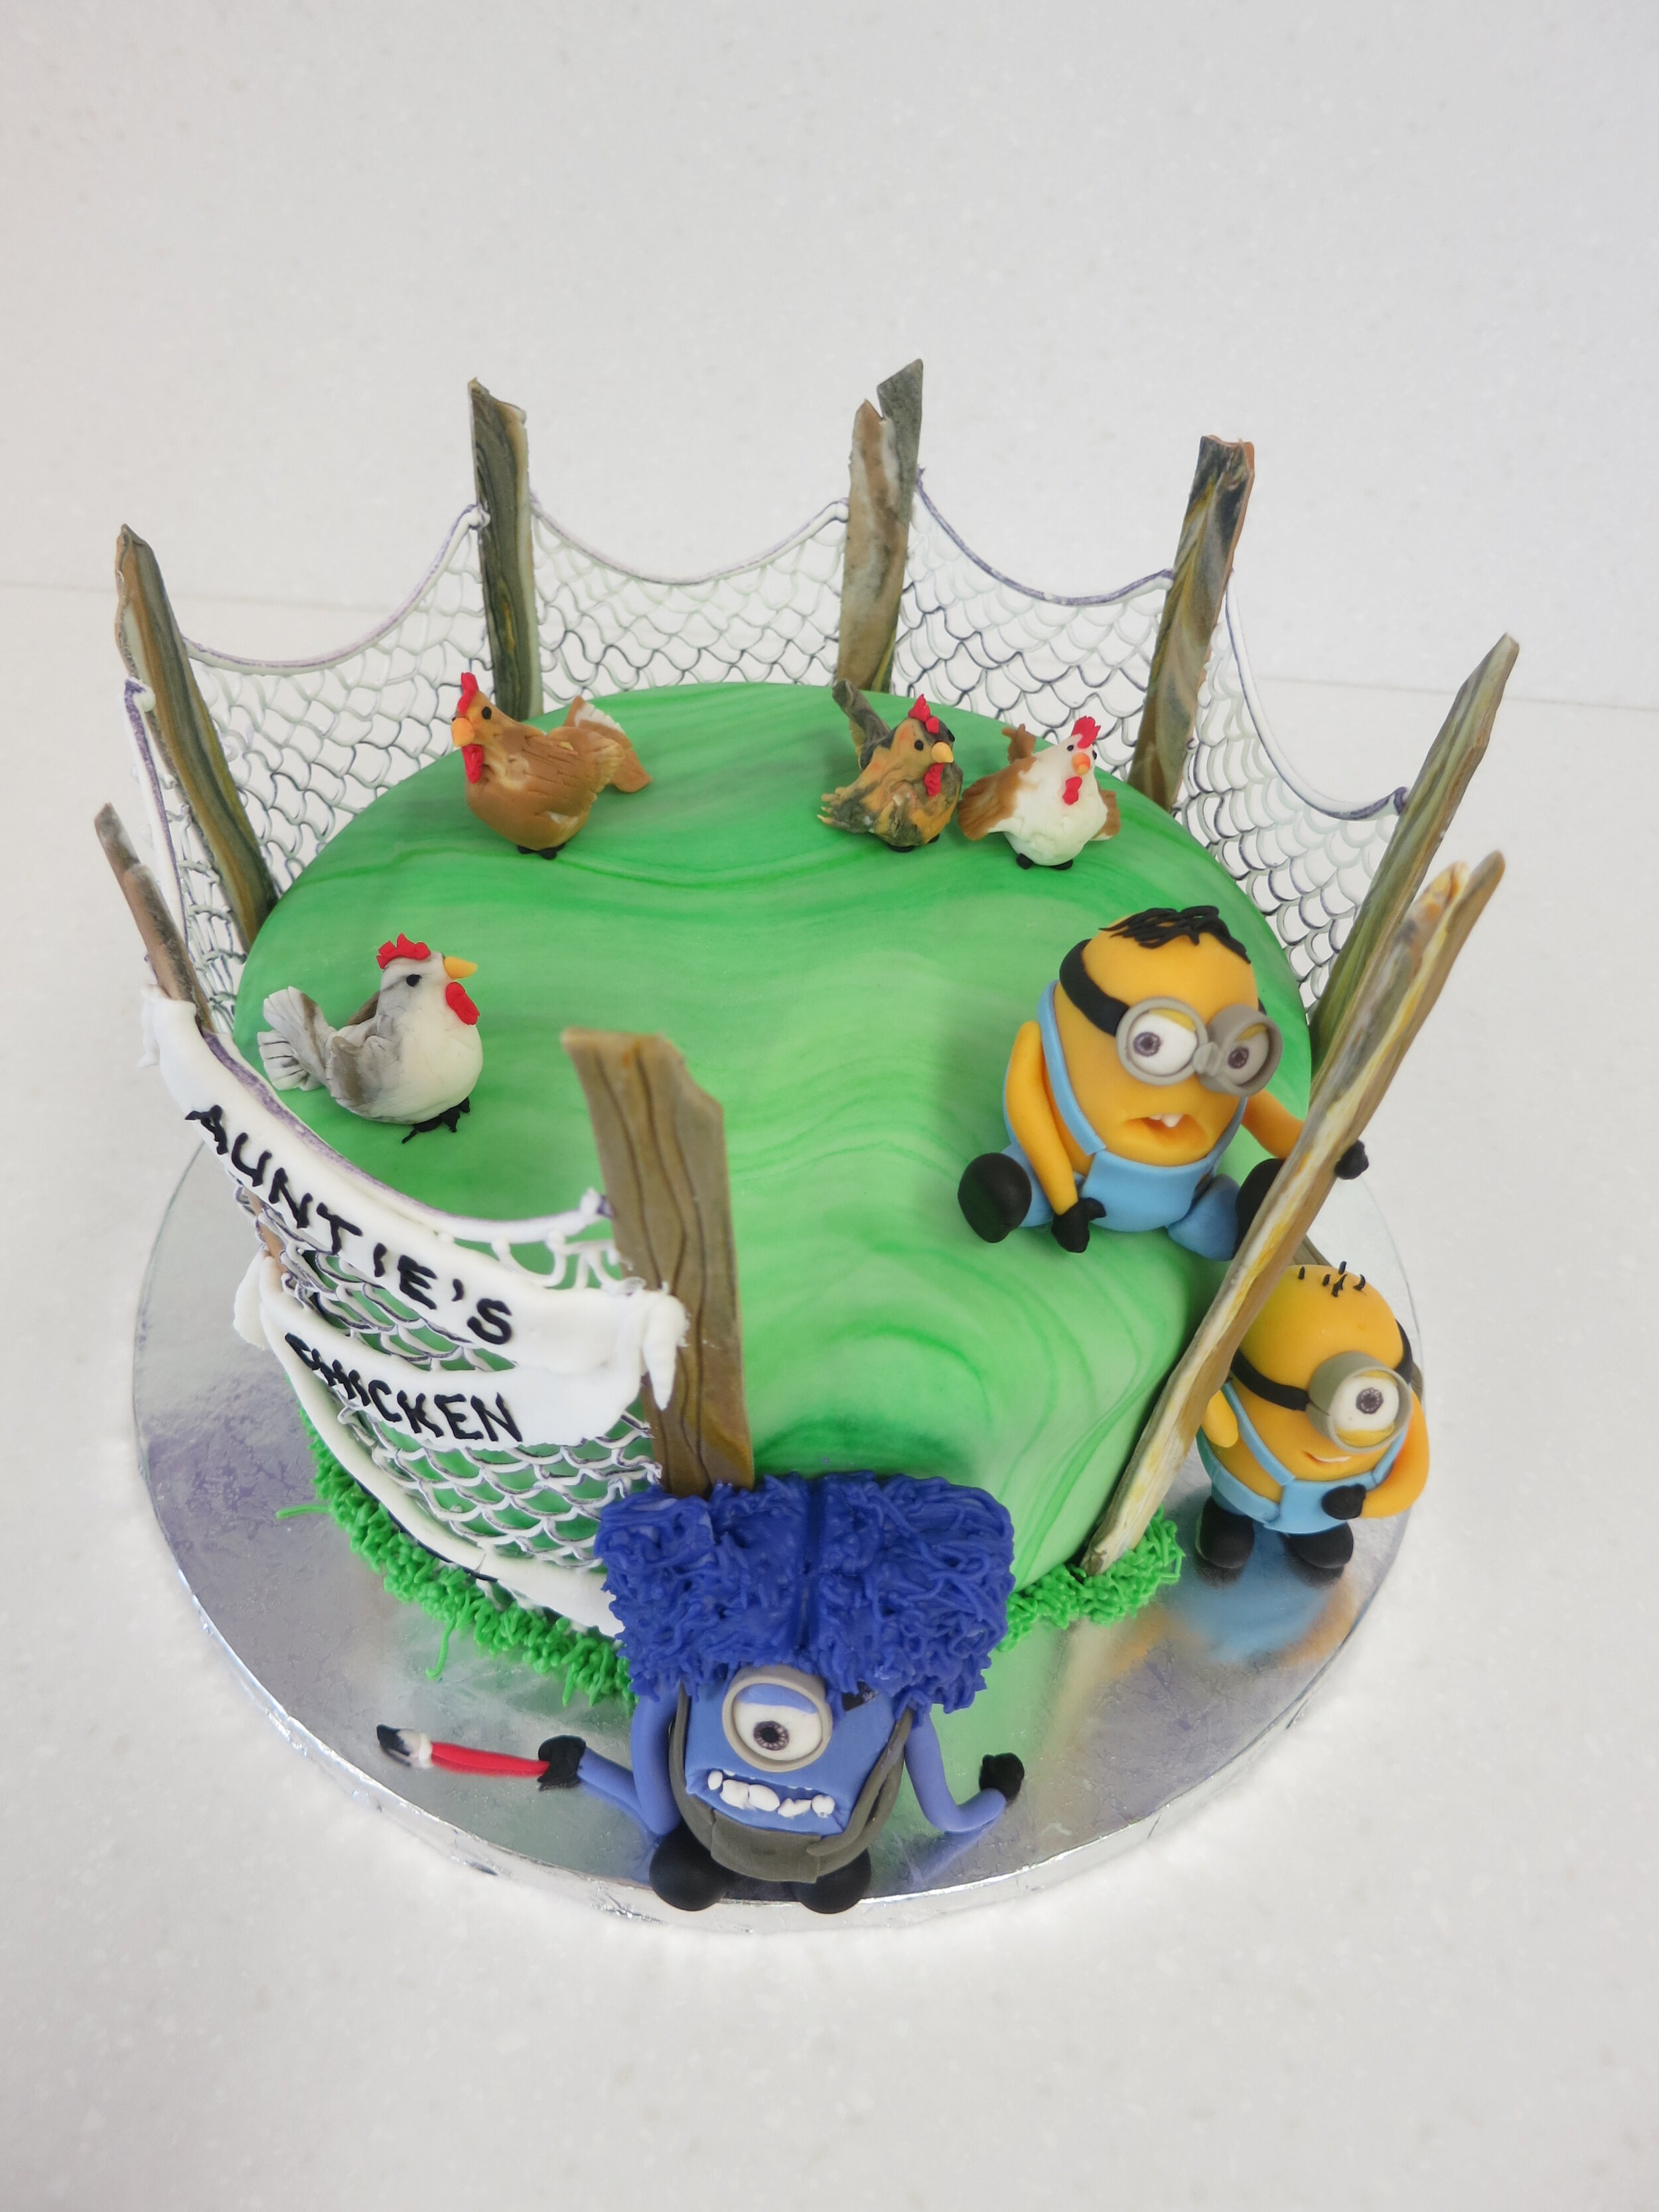
While my mom and I were taking a cake class at the Wilton School, we had a very nice Skype call with my niece and nephew. They told us that they were planning to be minions from Despicable Me for Halloween. We also had a very entertaining conversation about whether or not they were building me a chicken coop. The details of the chicken coop joke are kind of hard to explain, but basically I decided to take the joke to the next level.
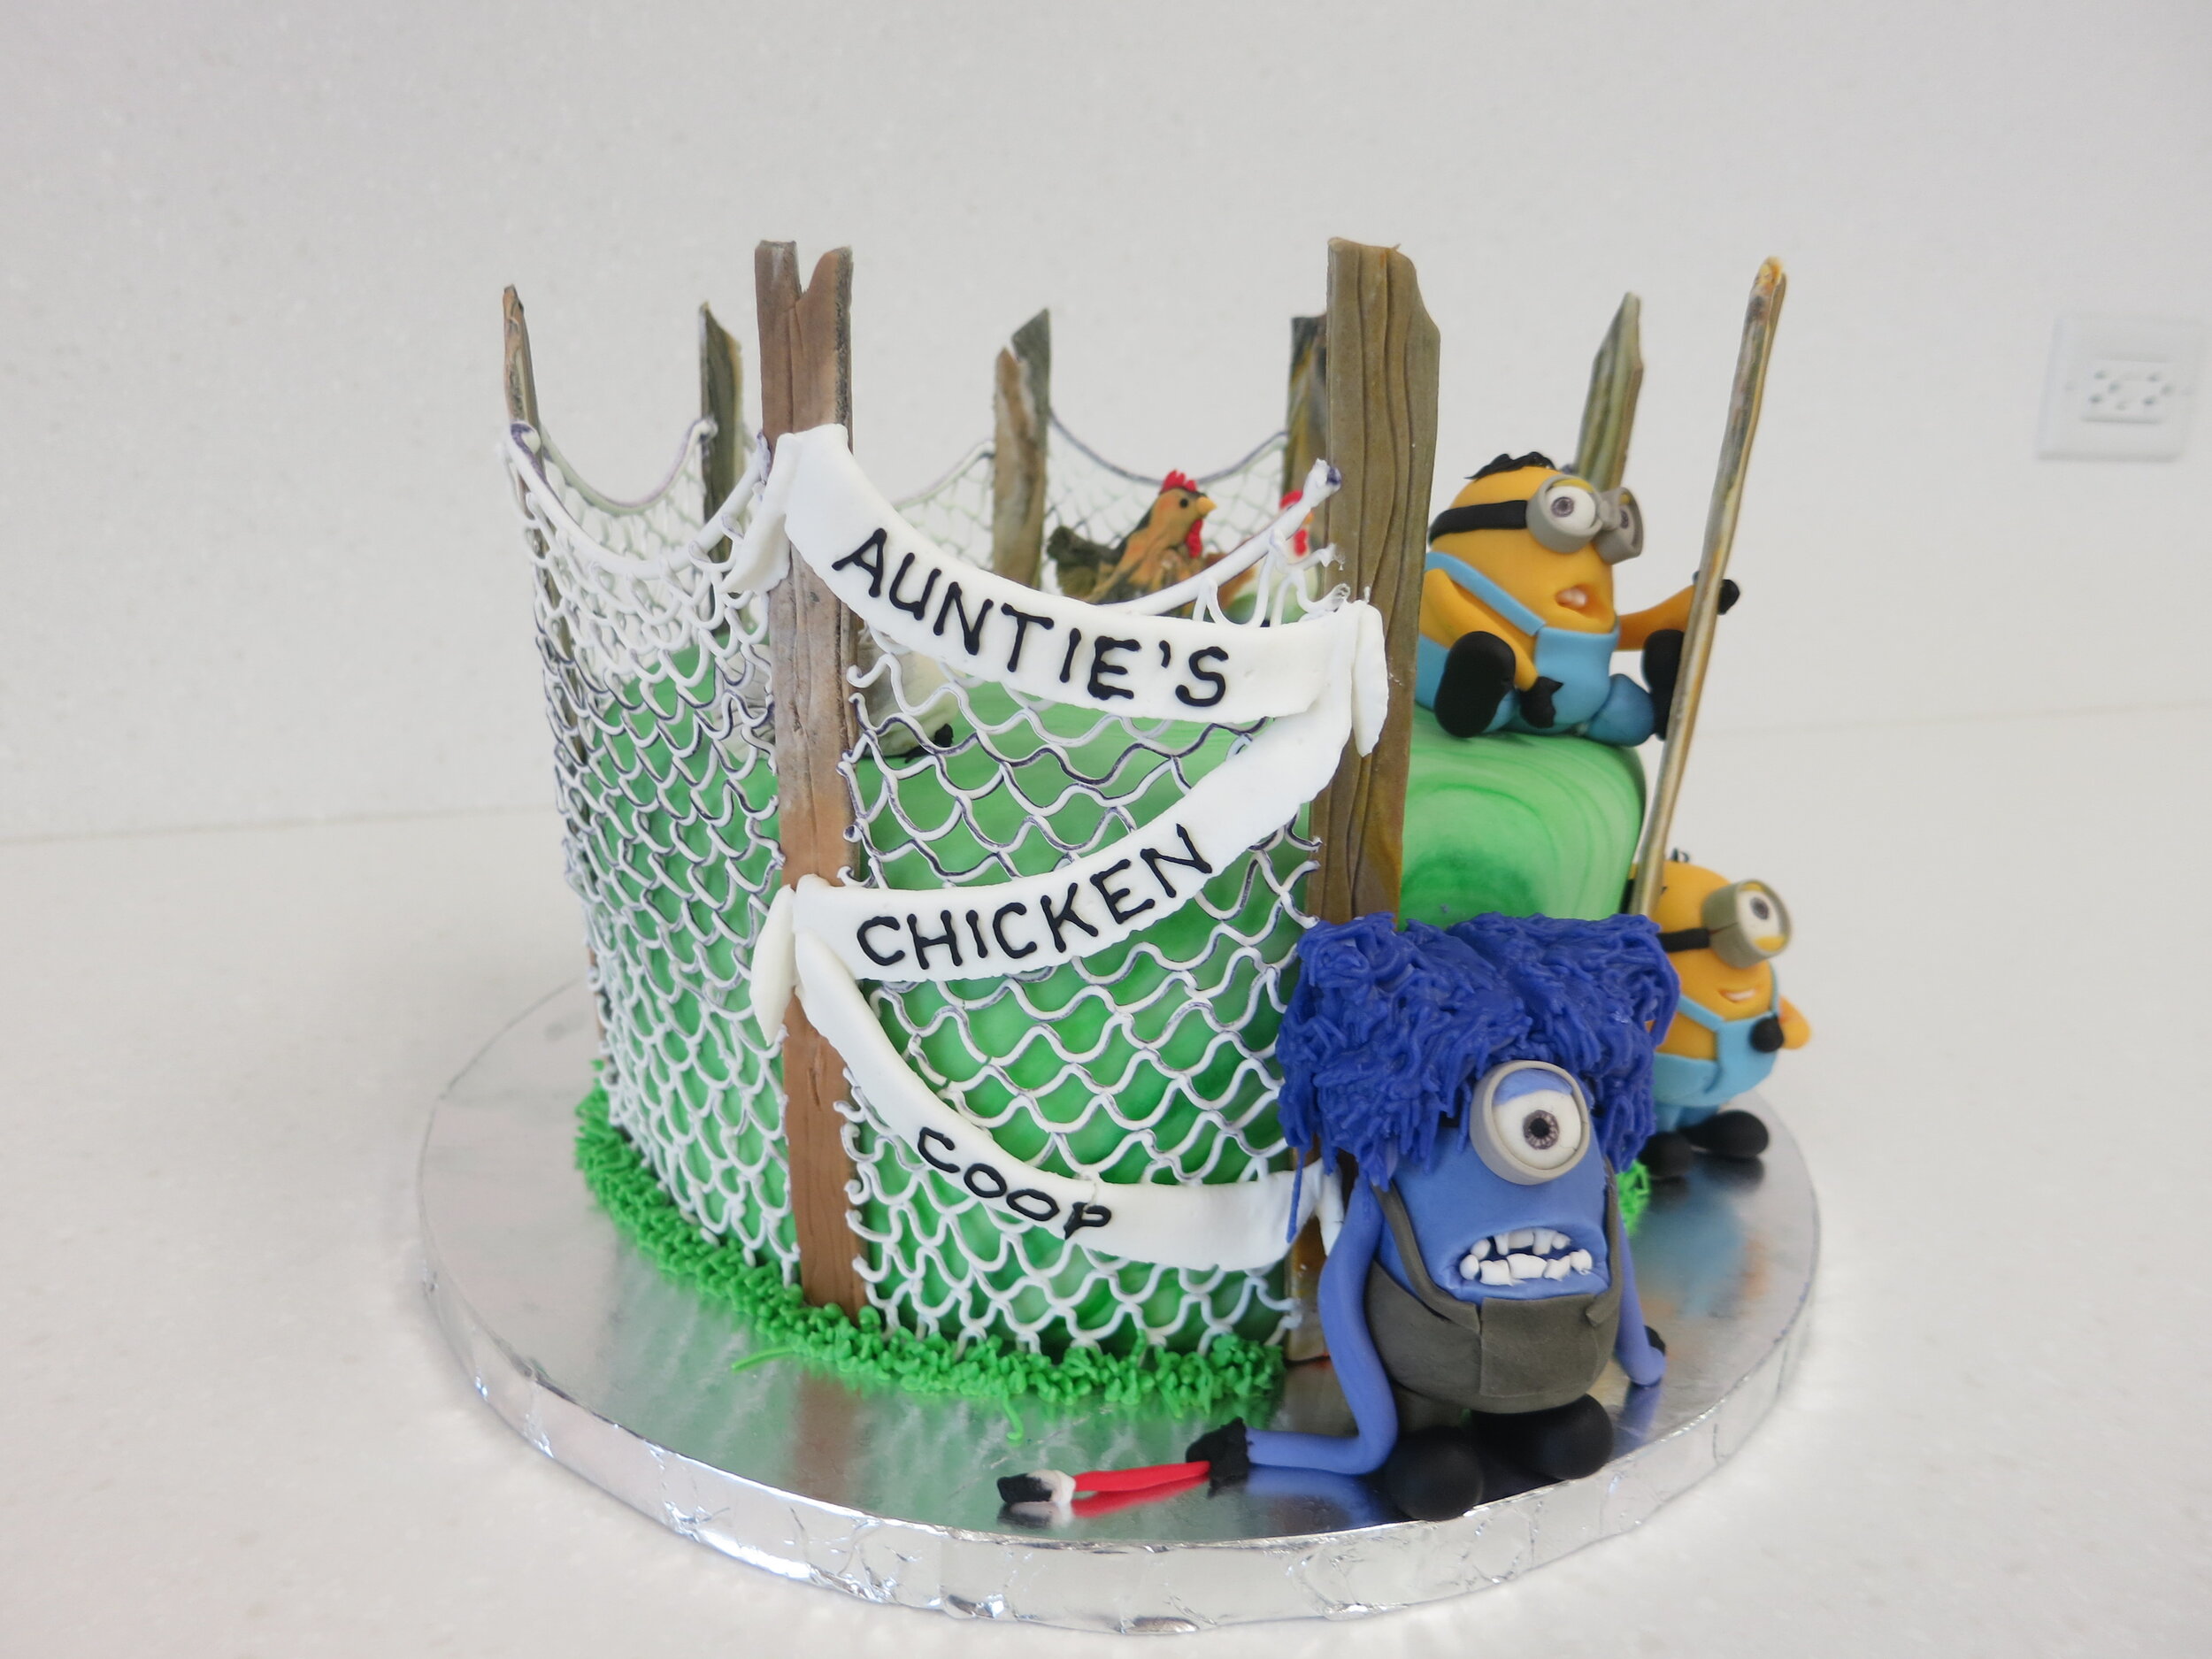
So I made the cake I was making for class a minion / chicken coop cake. Then I carried it back home on the plane. It was greeted with shrieks of joy.

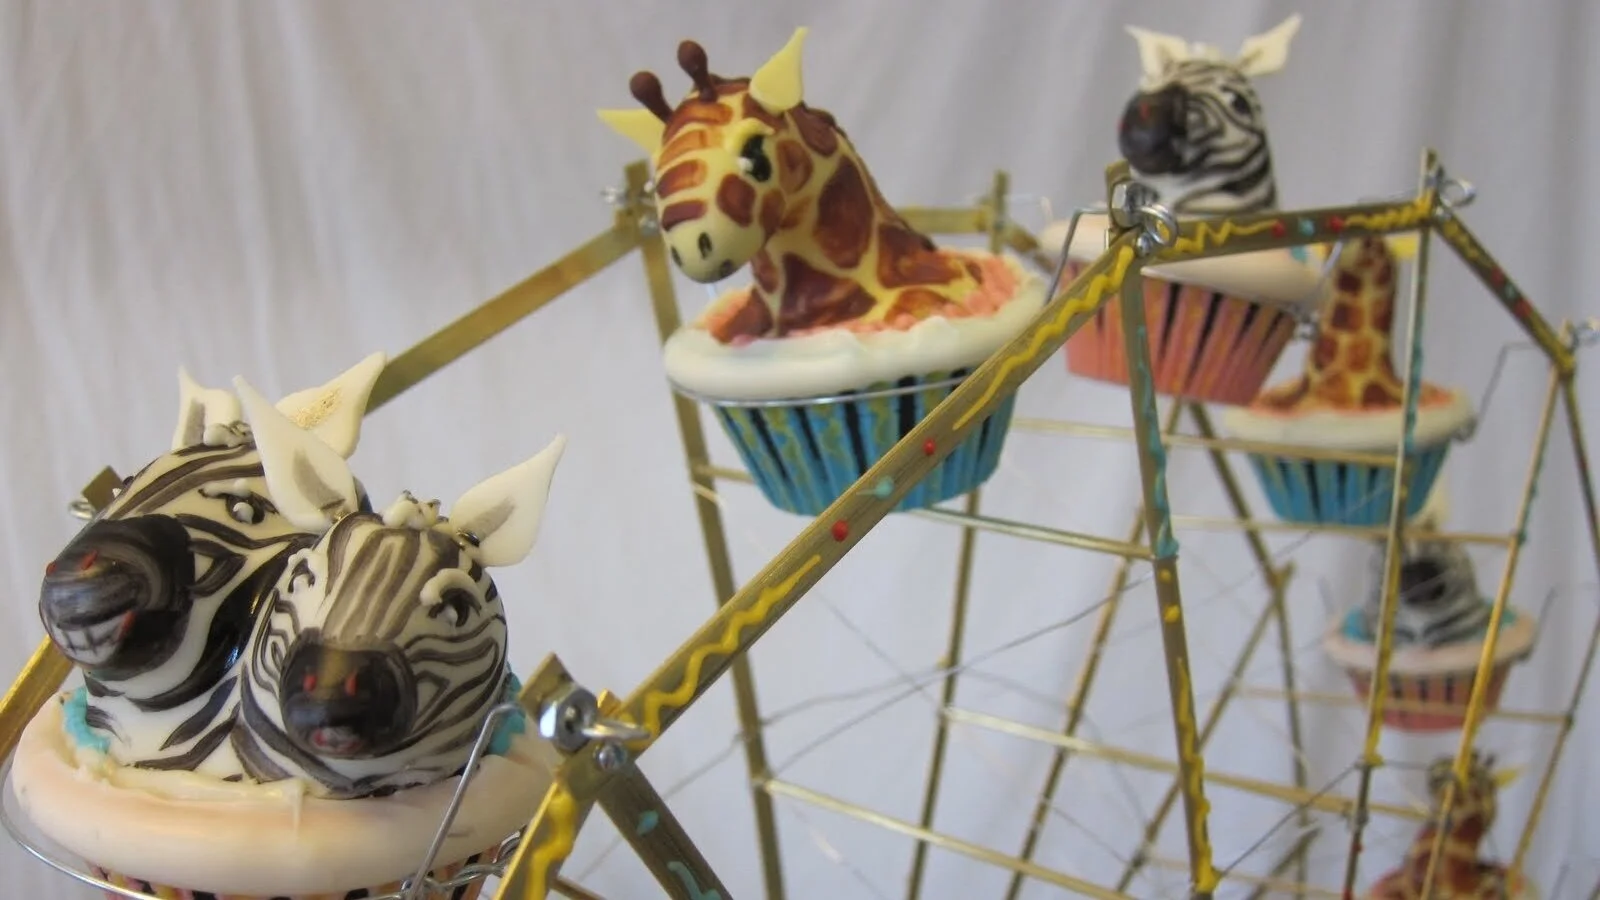
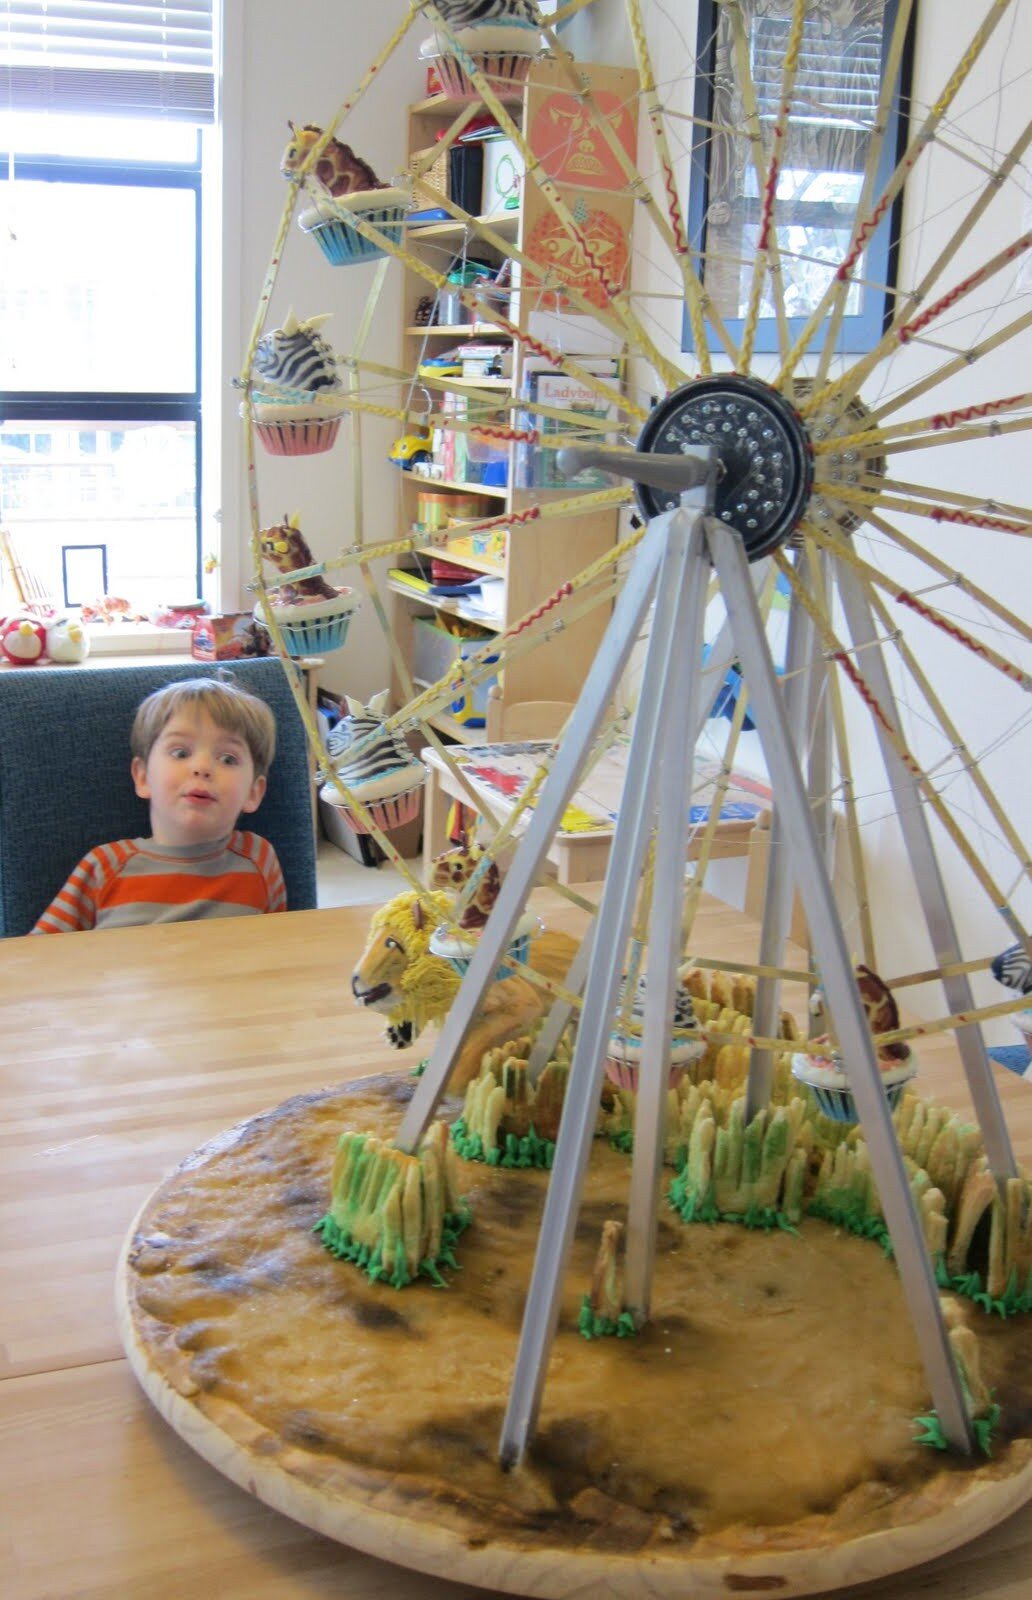
Zebra Cupcakes
When I asked my nephew Sam what he wanted for his third birthday cake, he immediately responded, “Zebra cupcake!" I have no idea where he got this idea, or what exactly he thinks a zebra cupcake looks like.

When I asked my nephew Sam what he wanted for his third birthday cake, he immediately responded, “Zebra cupcake!” I have no idea where he got this idea, or what exactly he thinks a zebra cupcake looks like. To my knowledge, he has never seen anything that could reasonably be called a zebra cupcake. I tried to encourage him to elaborate on the idea of a zebra cupcake, but he wasn’t very forthcoming. So I was left to interpret his request as best I could.
I don’t quite recall my thought process, but I ultimately decided to make zebras riding a big ferris wheel with a lion jumping up to try to get them. Mostly, I probably just wanted to see if I could make a ferris wheel. Initially, I had considered making the ferris wheel motorized, but after consulting Sam’s mom and his big sister, Alex, I decided that Sam would like it more if he could operate the ferris wheel himself with a hand crank. Based on the usual size of cupcakes, I calculated that, in order to accommodate the sixteen cupcake cars that I planned to make, the ferris wheel would need to be about two feet in diameter.

I was at a little bit of a disadvantage in building the ferris wheel because I was visiting my sister and didn’t have my jigsaw with me, so I had to come up with a way to build a ferris wheel with a minimal number of cuts. I began by making each of the sixteen spokes out of brass strips joined by brass tube and steel wire, scratching the heck out of my fingertips in the process. I joined all of these together, using lots of tiny bolts and quart paint can lids as the hubs. On the perimeter of the wheel, I connected the spokes with more brass strips and more teeny tiny bolts. Unfortunately, I didn’t get the two halves of the hub aligned exactly perfectly, so the spokes wound up a tiny bit torqued. It didn’t ultimately impact the functionality of the wheel, but I’ll know to pay more attention to that next time. You know, the next time I make a zebra cupcake ferris wheel. Though the lesson would probably be applicable to other African animal cupcake ferris wheels as well.

For the frame to hold up the ferris wheel, I used half-inch aluminum channel, bolted together and embedded in the wooden base. To my surprise, the wheel turned perfectly as soon as I mounted it in the frame and attached the crank handle. The next challenge, though, was to make the cars work.
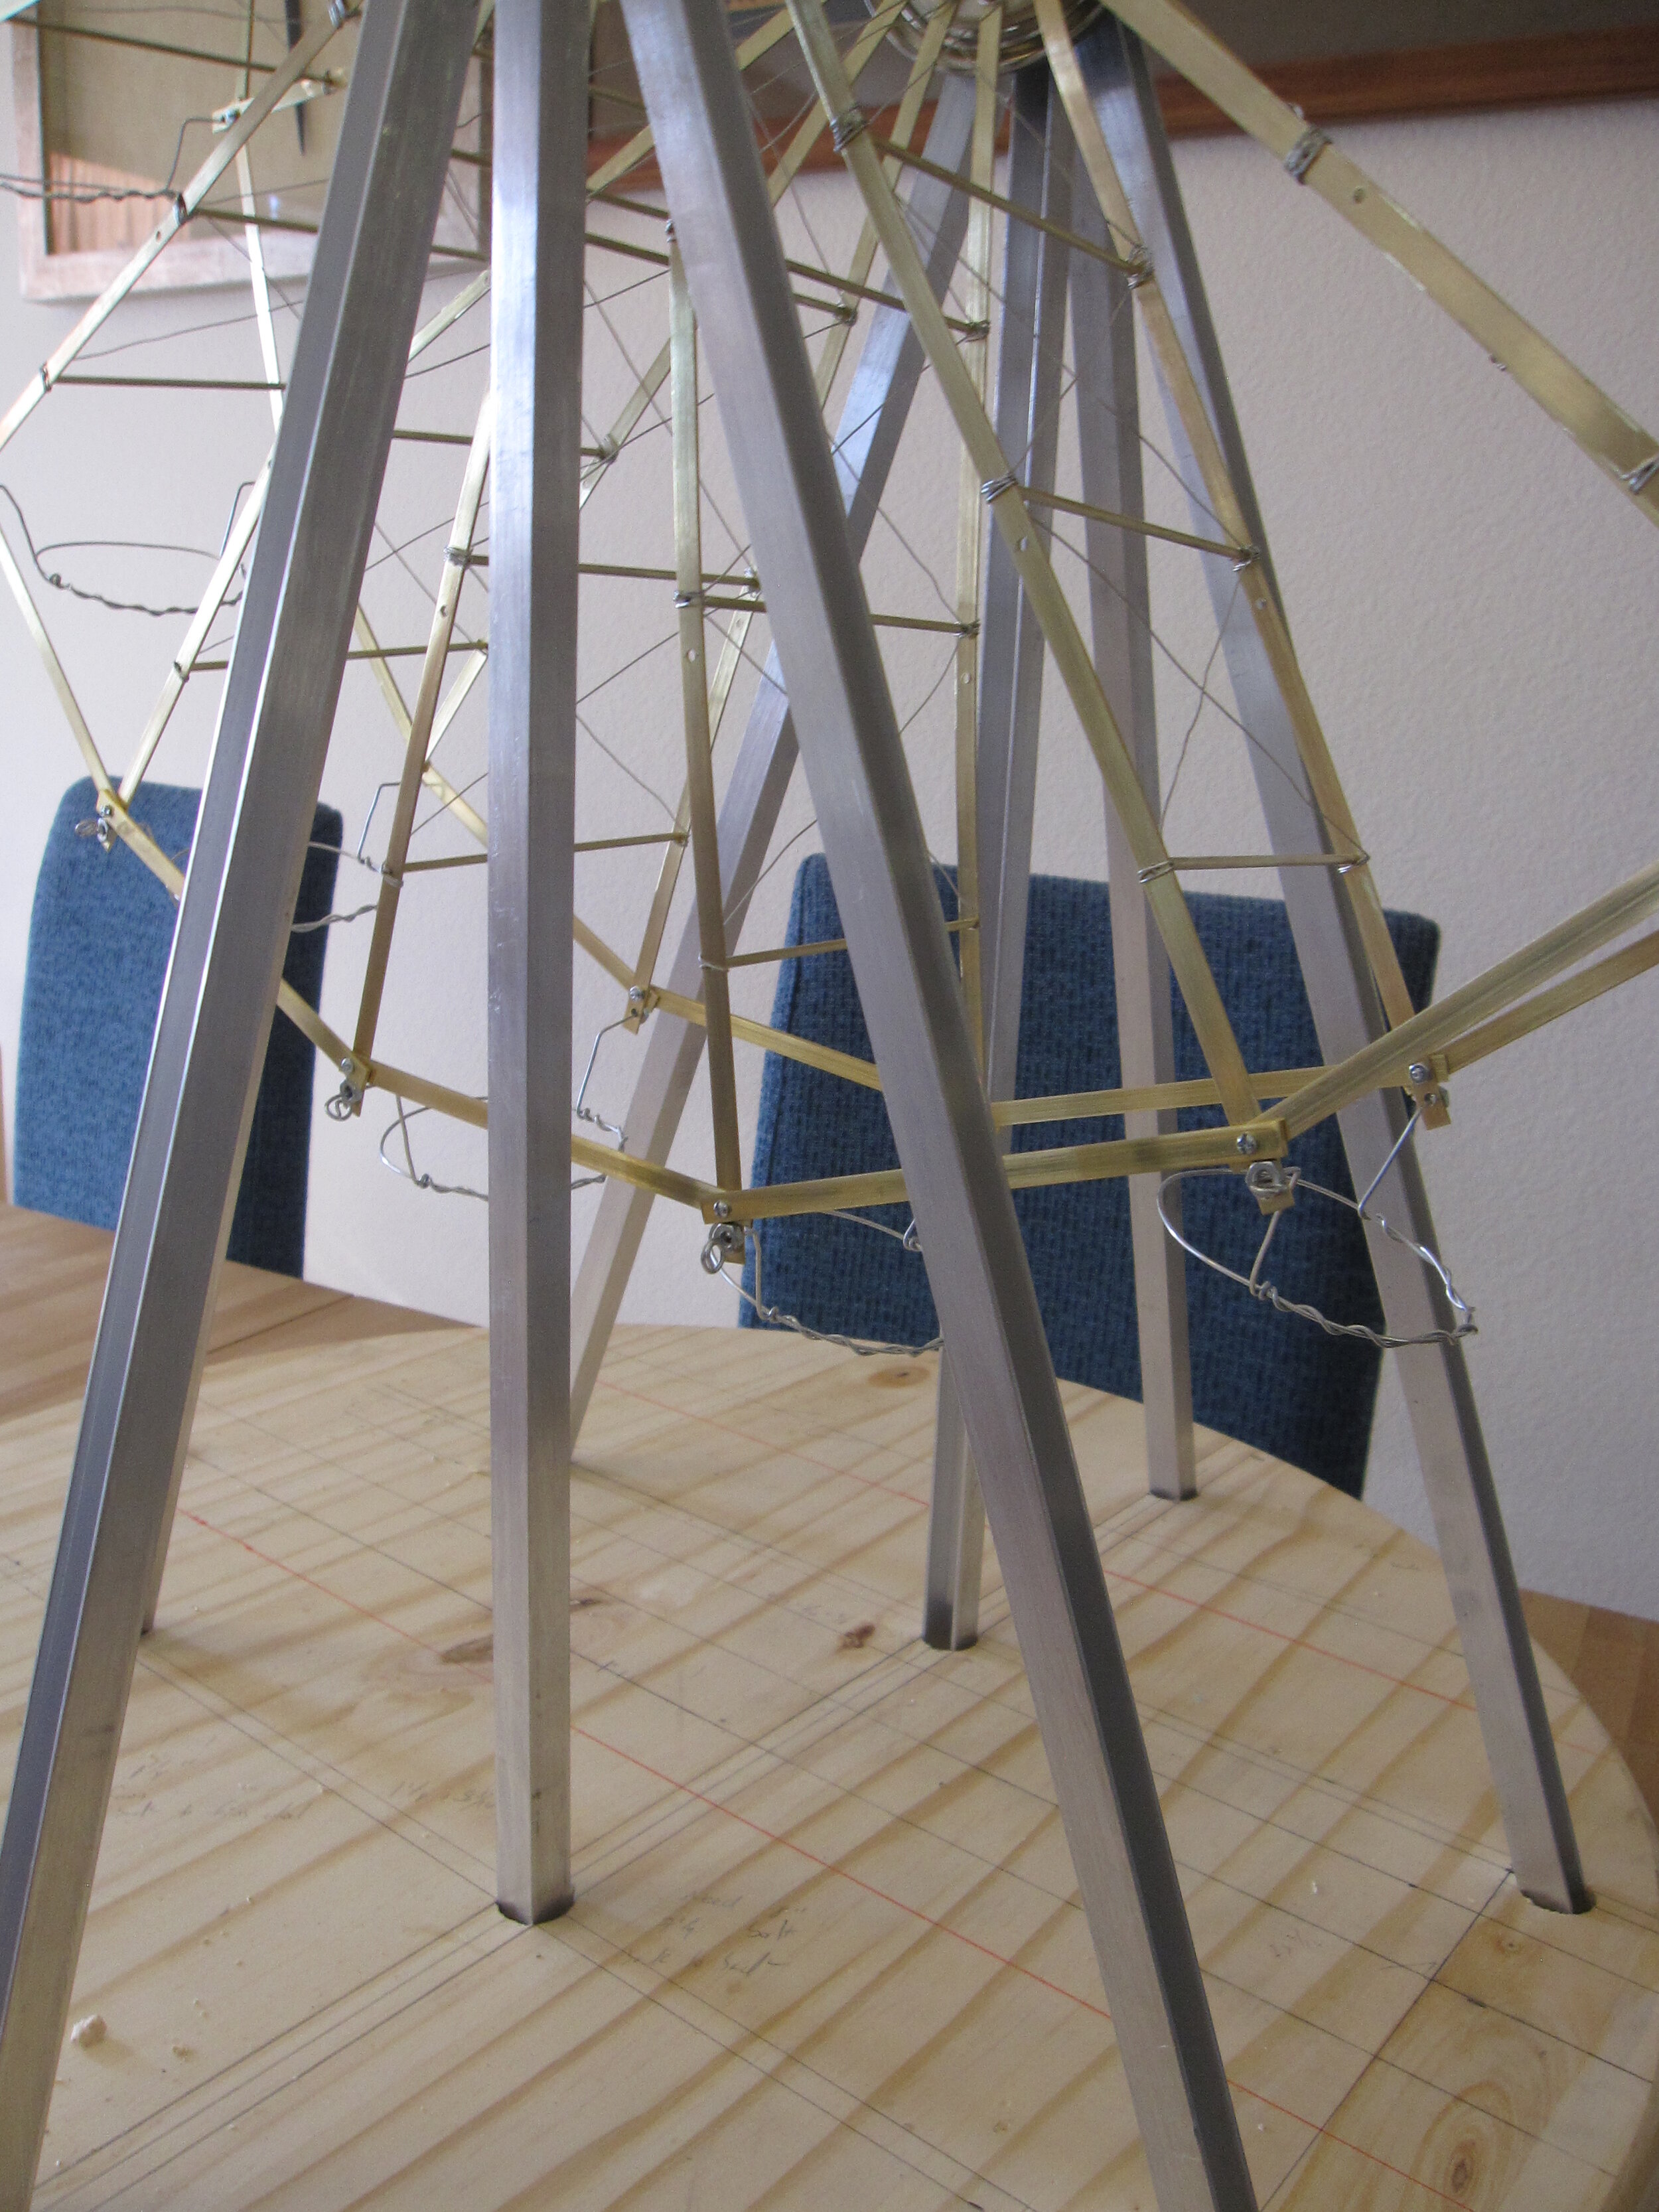
I really wanted people to be able to pick up the entire cupcake car and eat the entire thing. So I made basically little wire rings to set the cupcakes in. Obviously, these had to spin freely so that the cupcakes stayed upright all the way around the wheel (this being the essence of a ferris wheel). This would have been very easy if I had kept the strips connecting the spokes back from the end of the spokes about an additional half an inch. As it was, I had a bit of a struggle to keep the rings from catching on the brass strips, but in the end I managed it. One more thing I’ll know to do differently the next time I make a cupcake ferris wheel.
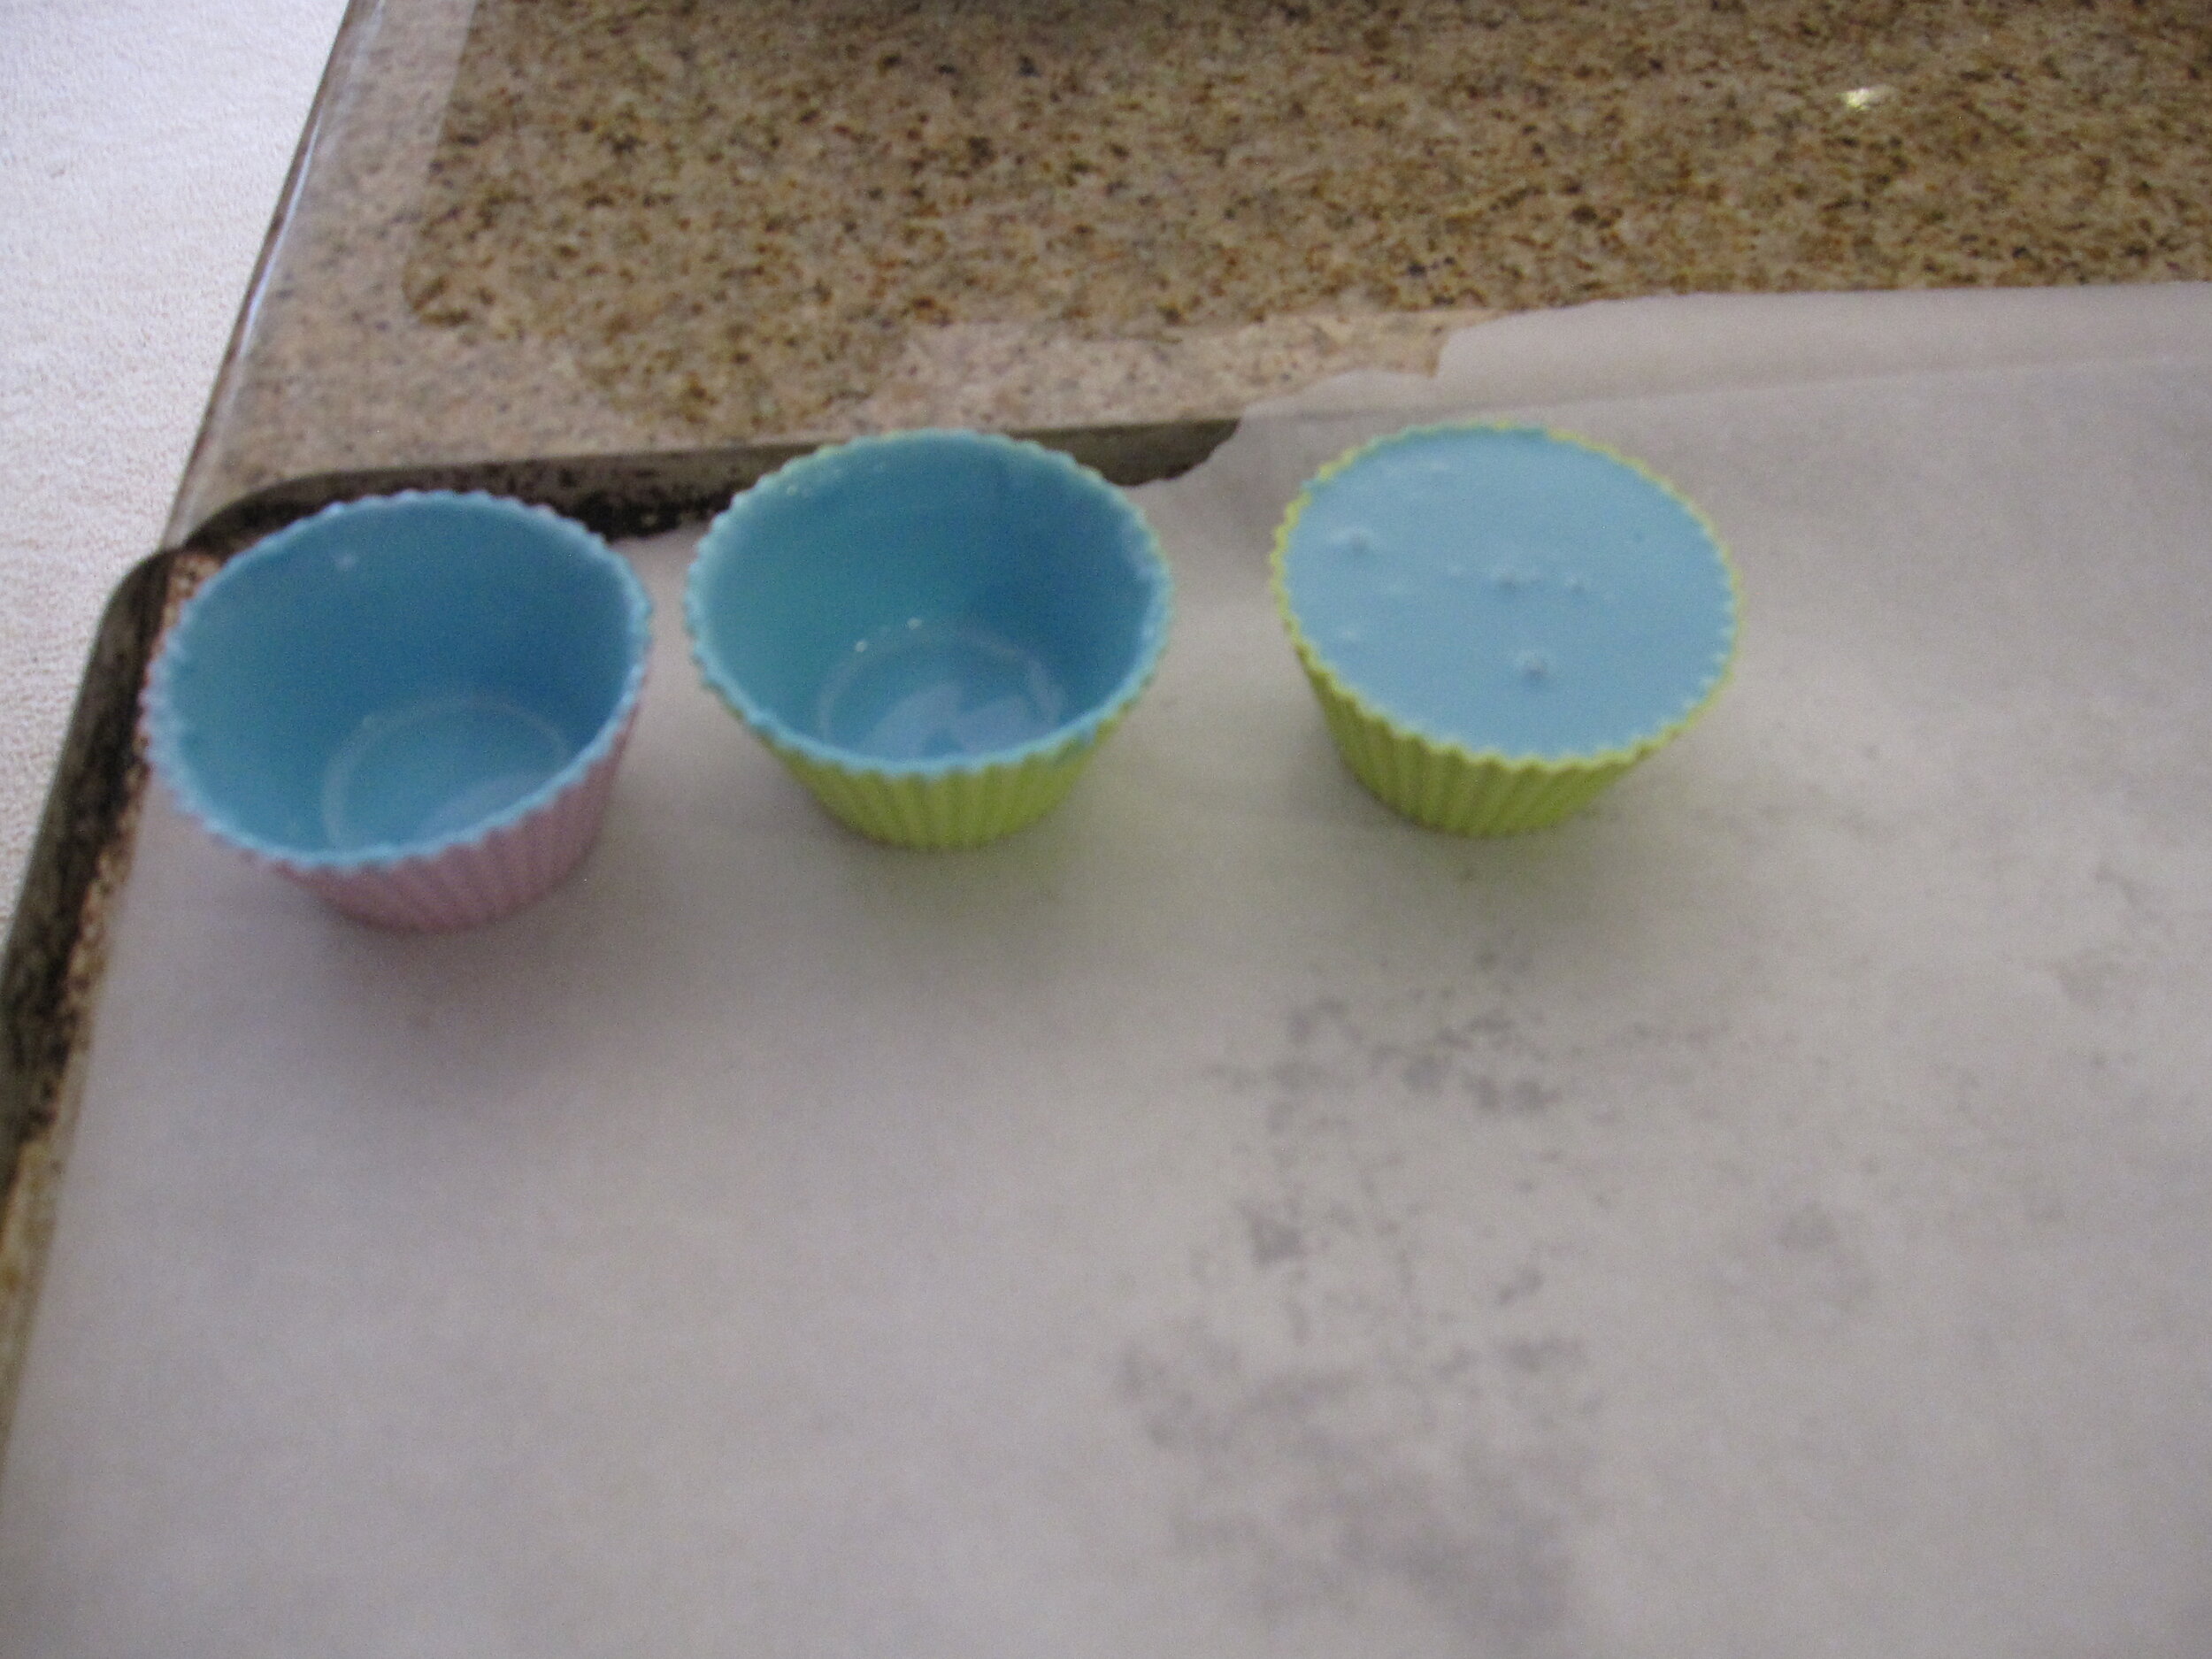
In order to make the cups themselves edible, I poured candy melts into silicone cupcake cups. For many years, I have been vehemently opposed to candy melts because I think they taste disgusting and the colors they come in are generally not in tune with my aesthetic, but my sister gave me that trendy little cake pop kit for Christmas, and I wanted to try out some of the techniques. I have been confirmed in my belief that they taste disgusting, but I suppose that they do have their uses. After all, I use fondant, too, and that doesn’t taste very good either.
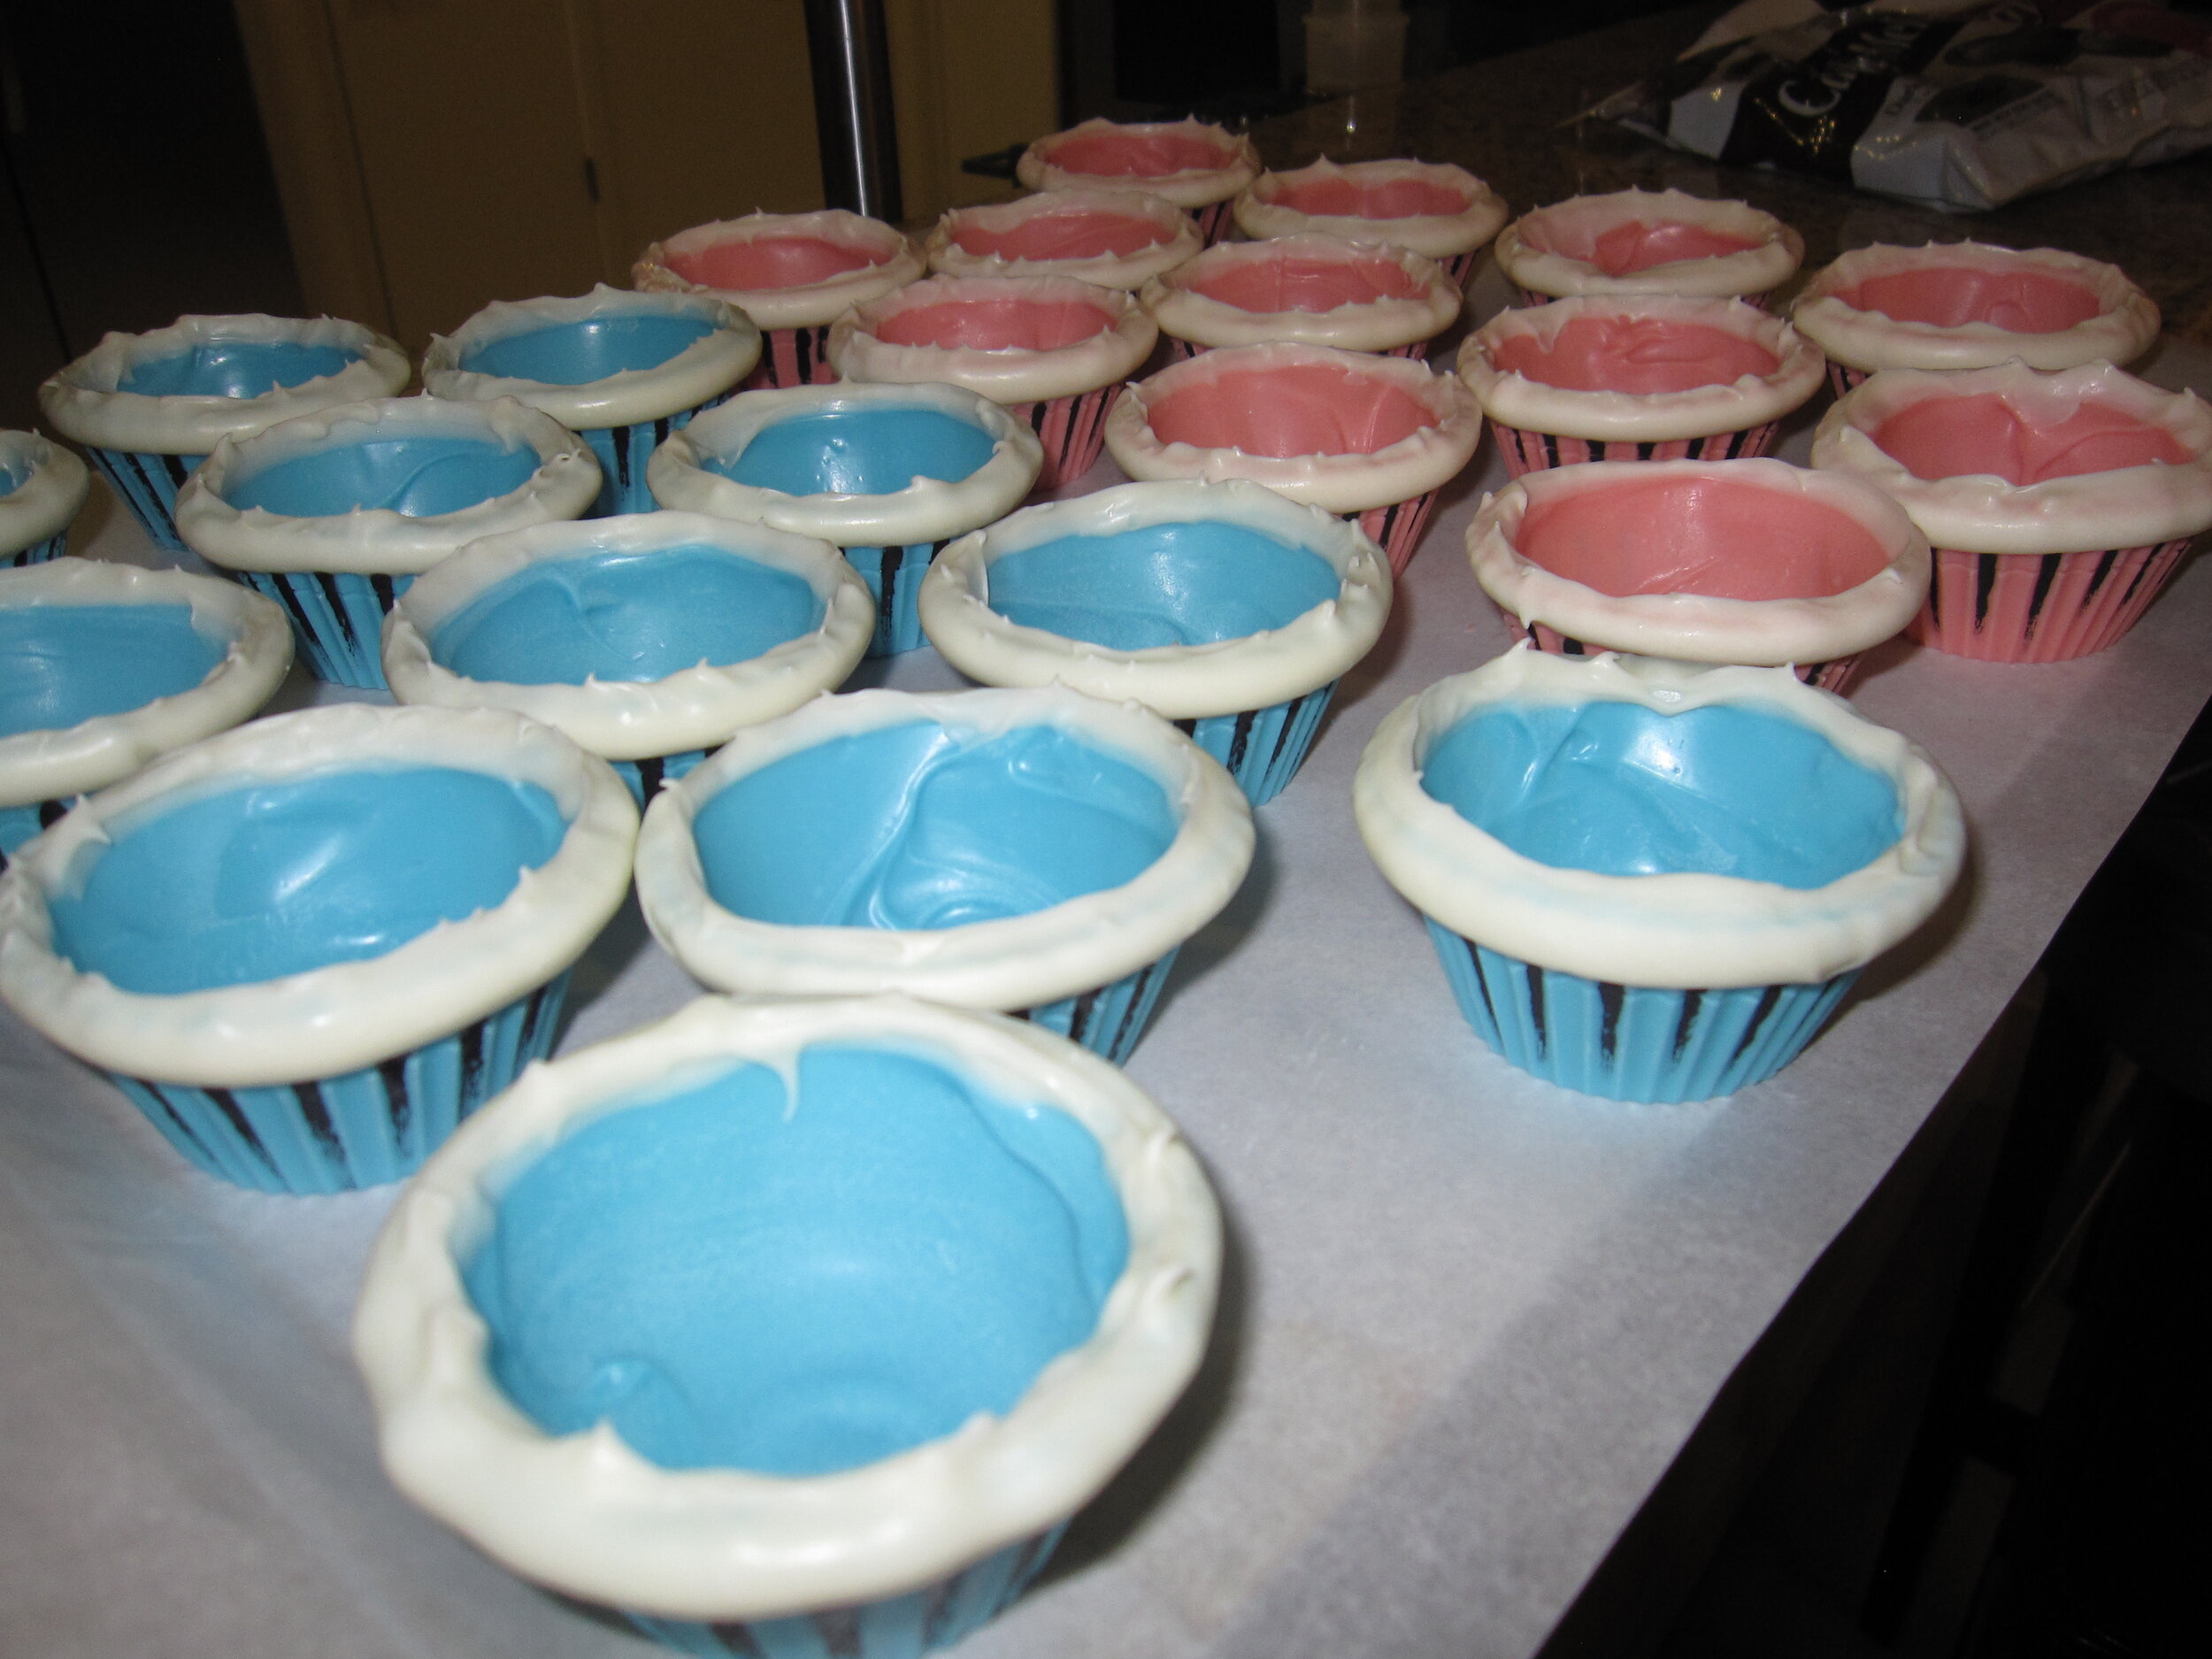
I let Sam pick out the colors of candy melts that he wanted for the cups and he chose pink and baby blue. Much like candy melts in general, this is basically the exact opposite of my aesthetic (and, as my sister pointed out, made it look a bit like a baby shower cake) but, hey, it’s his birthday. Who am I to argue? I gave the cups a second coat of candy melt on the inside to give them added structural stability and to make sure that the weight of the cupcake was concentrated in the bottom so they wouldn’t flip upside down. I dipped the top edge in white candy melt to give them a decorative rim that would also serve to hold them in the wire rings more effectively. I then attempted to ameliorate the pastel-ness of the cups by giving them distressed black streaks in some of the flutes of the cupcake cups. I told myself I was striving for a vaguely Victorian steam-punk aesthetic. I’m not sure that I entirely got there.
A few days before the party, I made a very important discovery. Sam’s grandparents gave him an awesome set of Little People animals for his birthday, which he absolutely loved. He even refused to eat dinner because he was too busy playing with them, which, coming from Sam, is a huge complement. He pulled the giraffe out of the bag and proudly exclaimed, “Zebra!” Uh oh. I remembered that Sam does not always differentiate between zebras and giraffes. So I pulled out the zebra and the giraffe and asked him which one was a zebra cupcake. First he pointed to the giraffe. Then he pointed to the zebra. So I decided to hedge my bets and make both zebra and giraffe cupcakes.
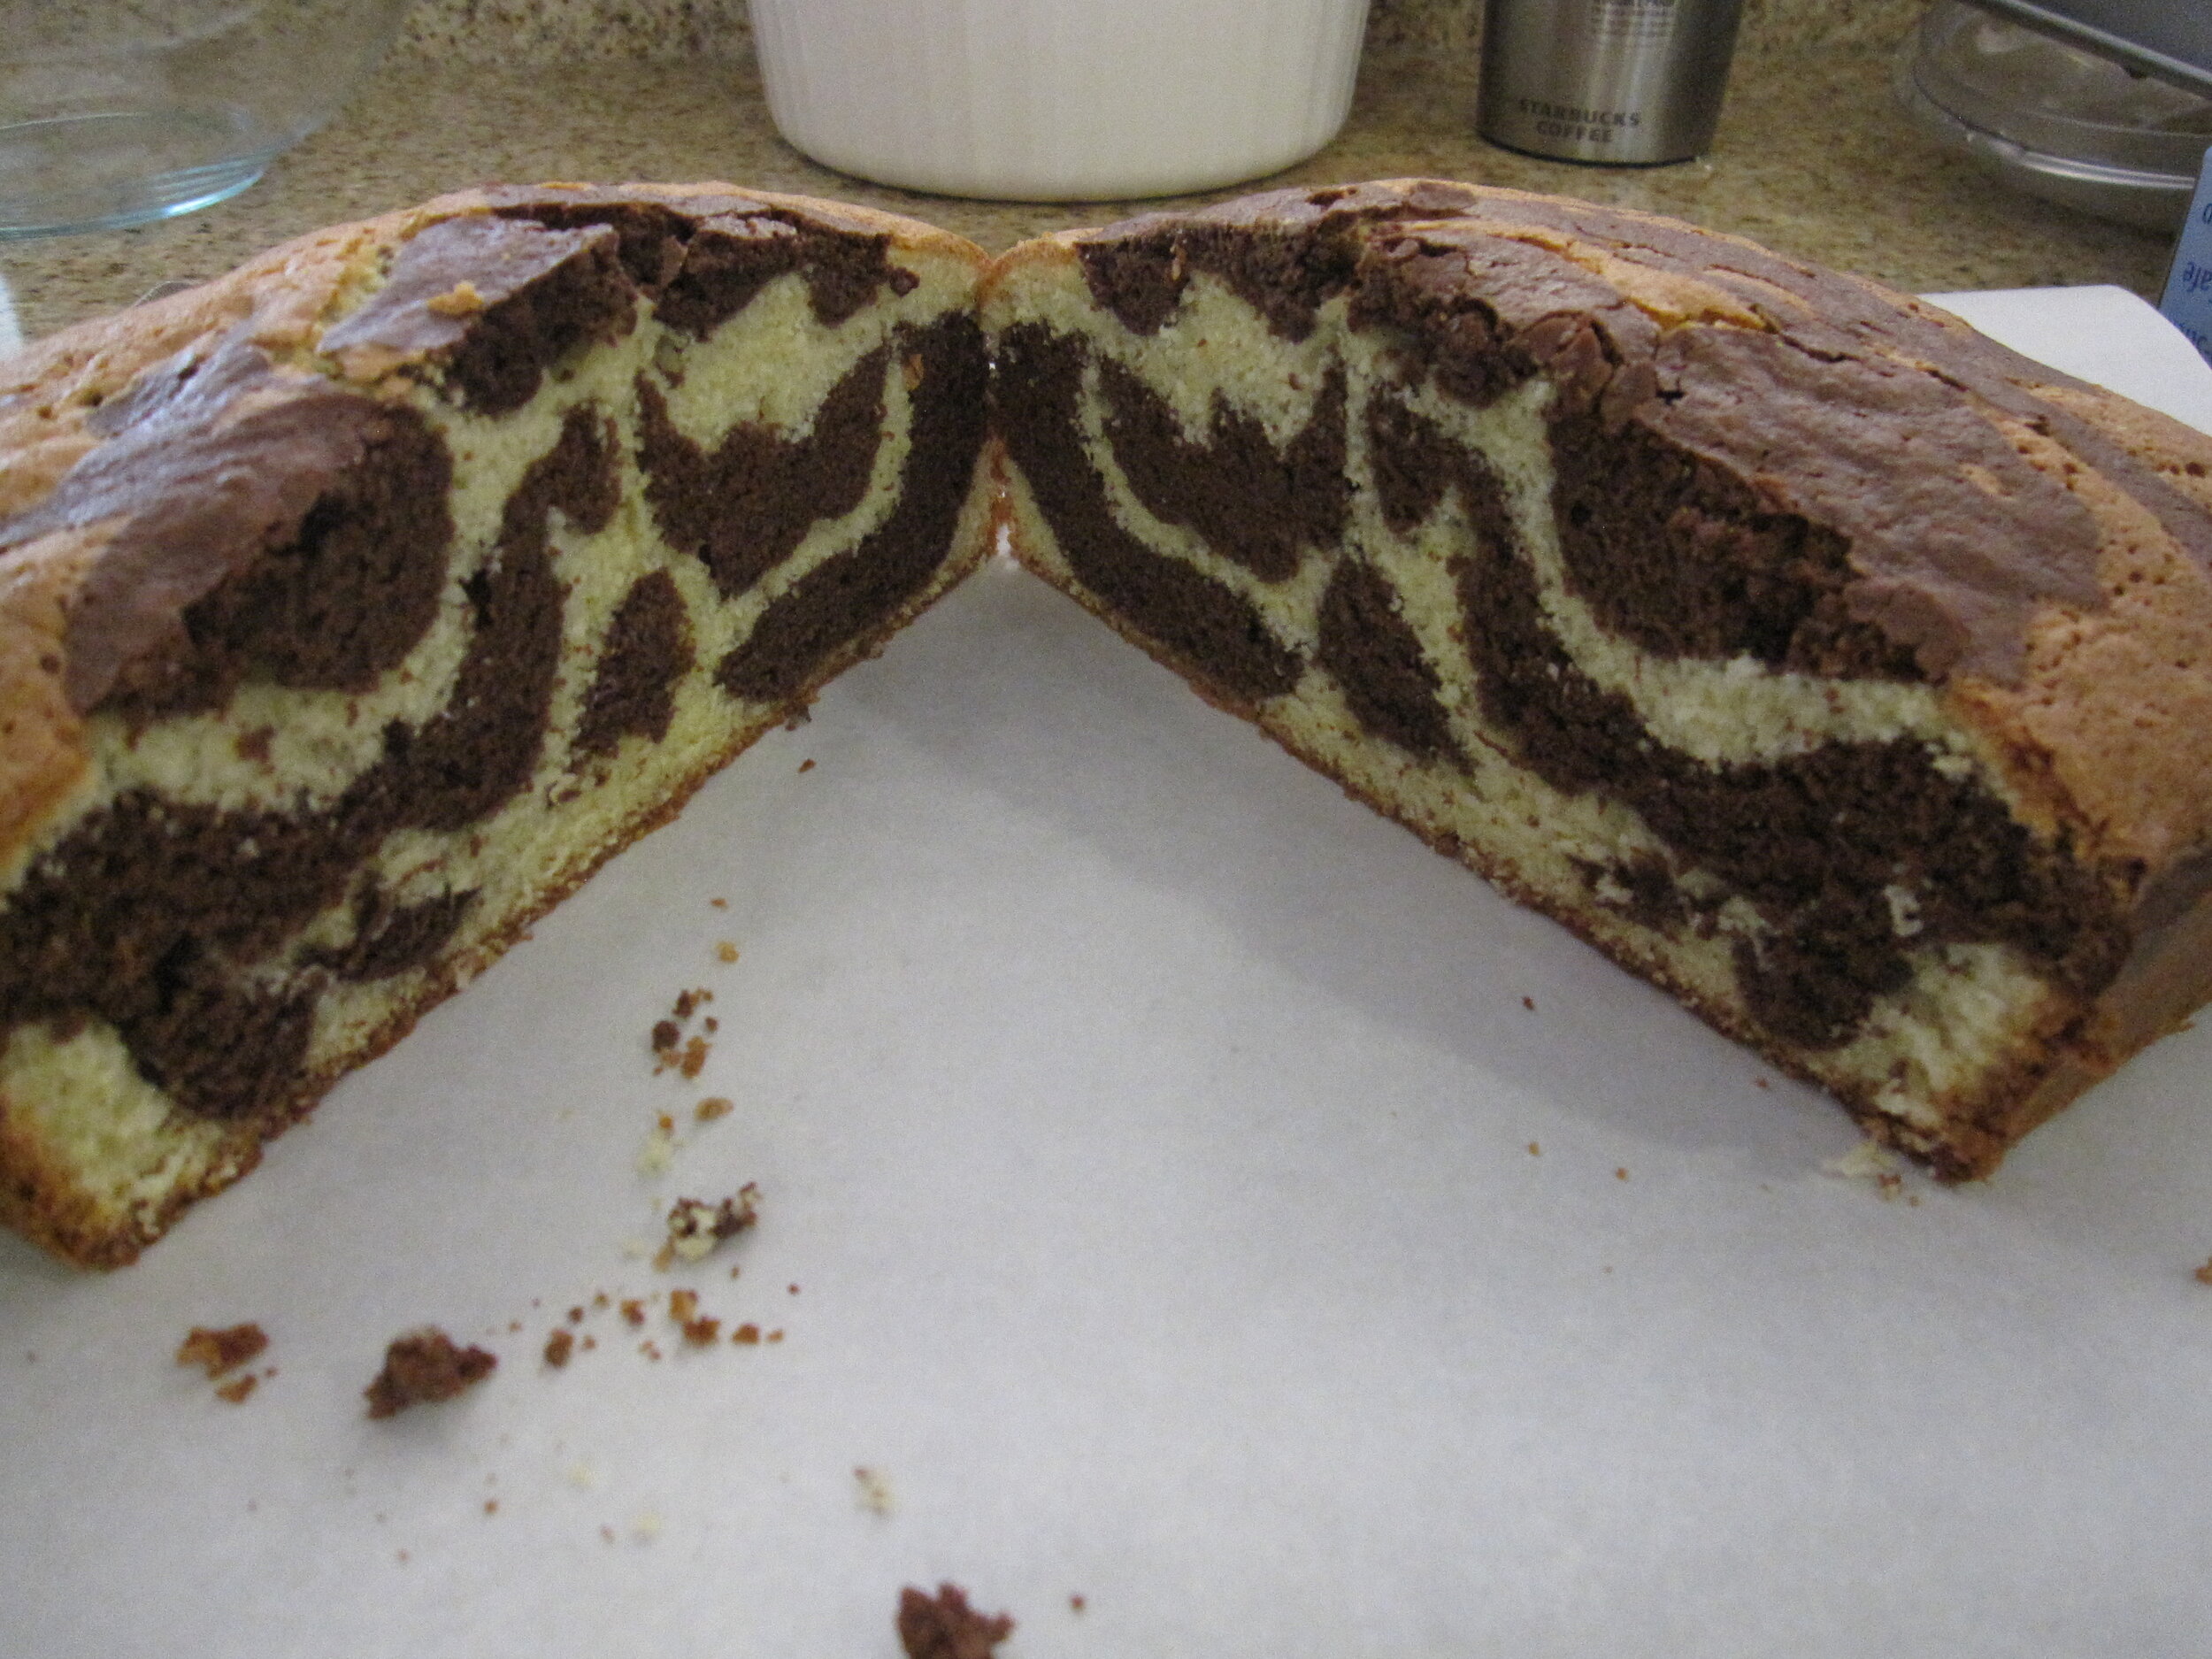
For the cake recipe, I used a new marbled olive oil cake recipe. I had initially chosen this recipe because the marbling resembled zebra stripes. It actually turned out to be perfect because the marbling, both in color and in pattern, is about halfway between a zebra and a giraffe. It also turned out to be quite delicious. Generally, when I’m making a cake, the last thing I want to do is eat cake, but I snacked on this cake the entire time.
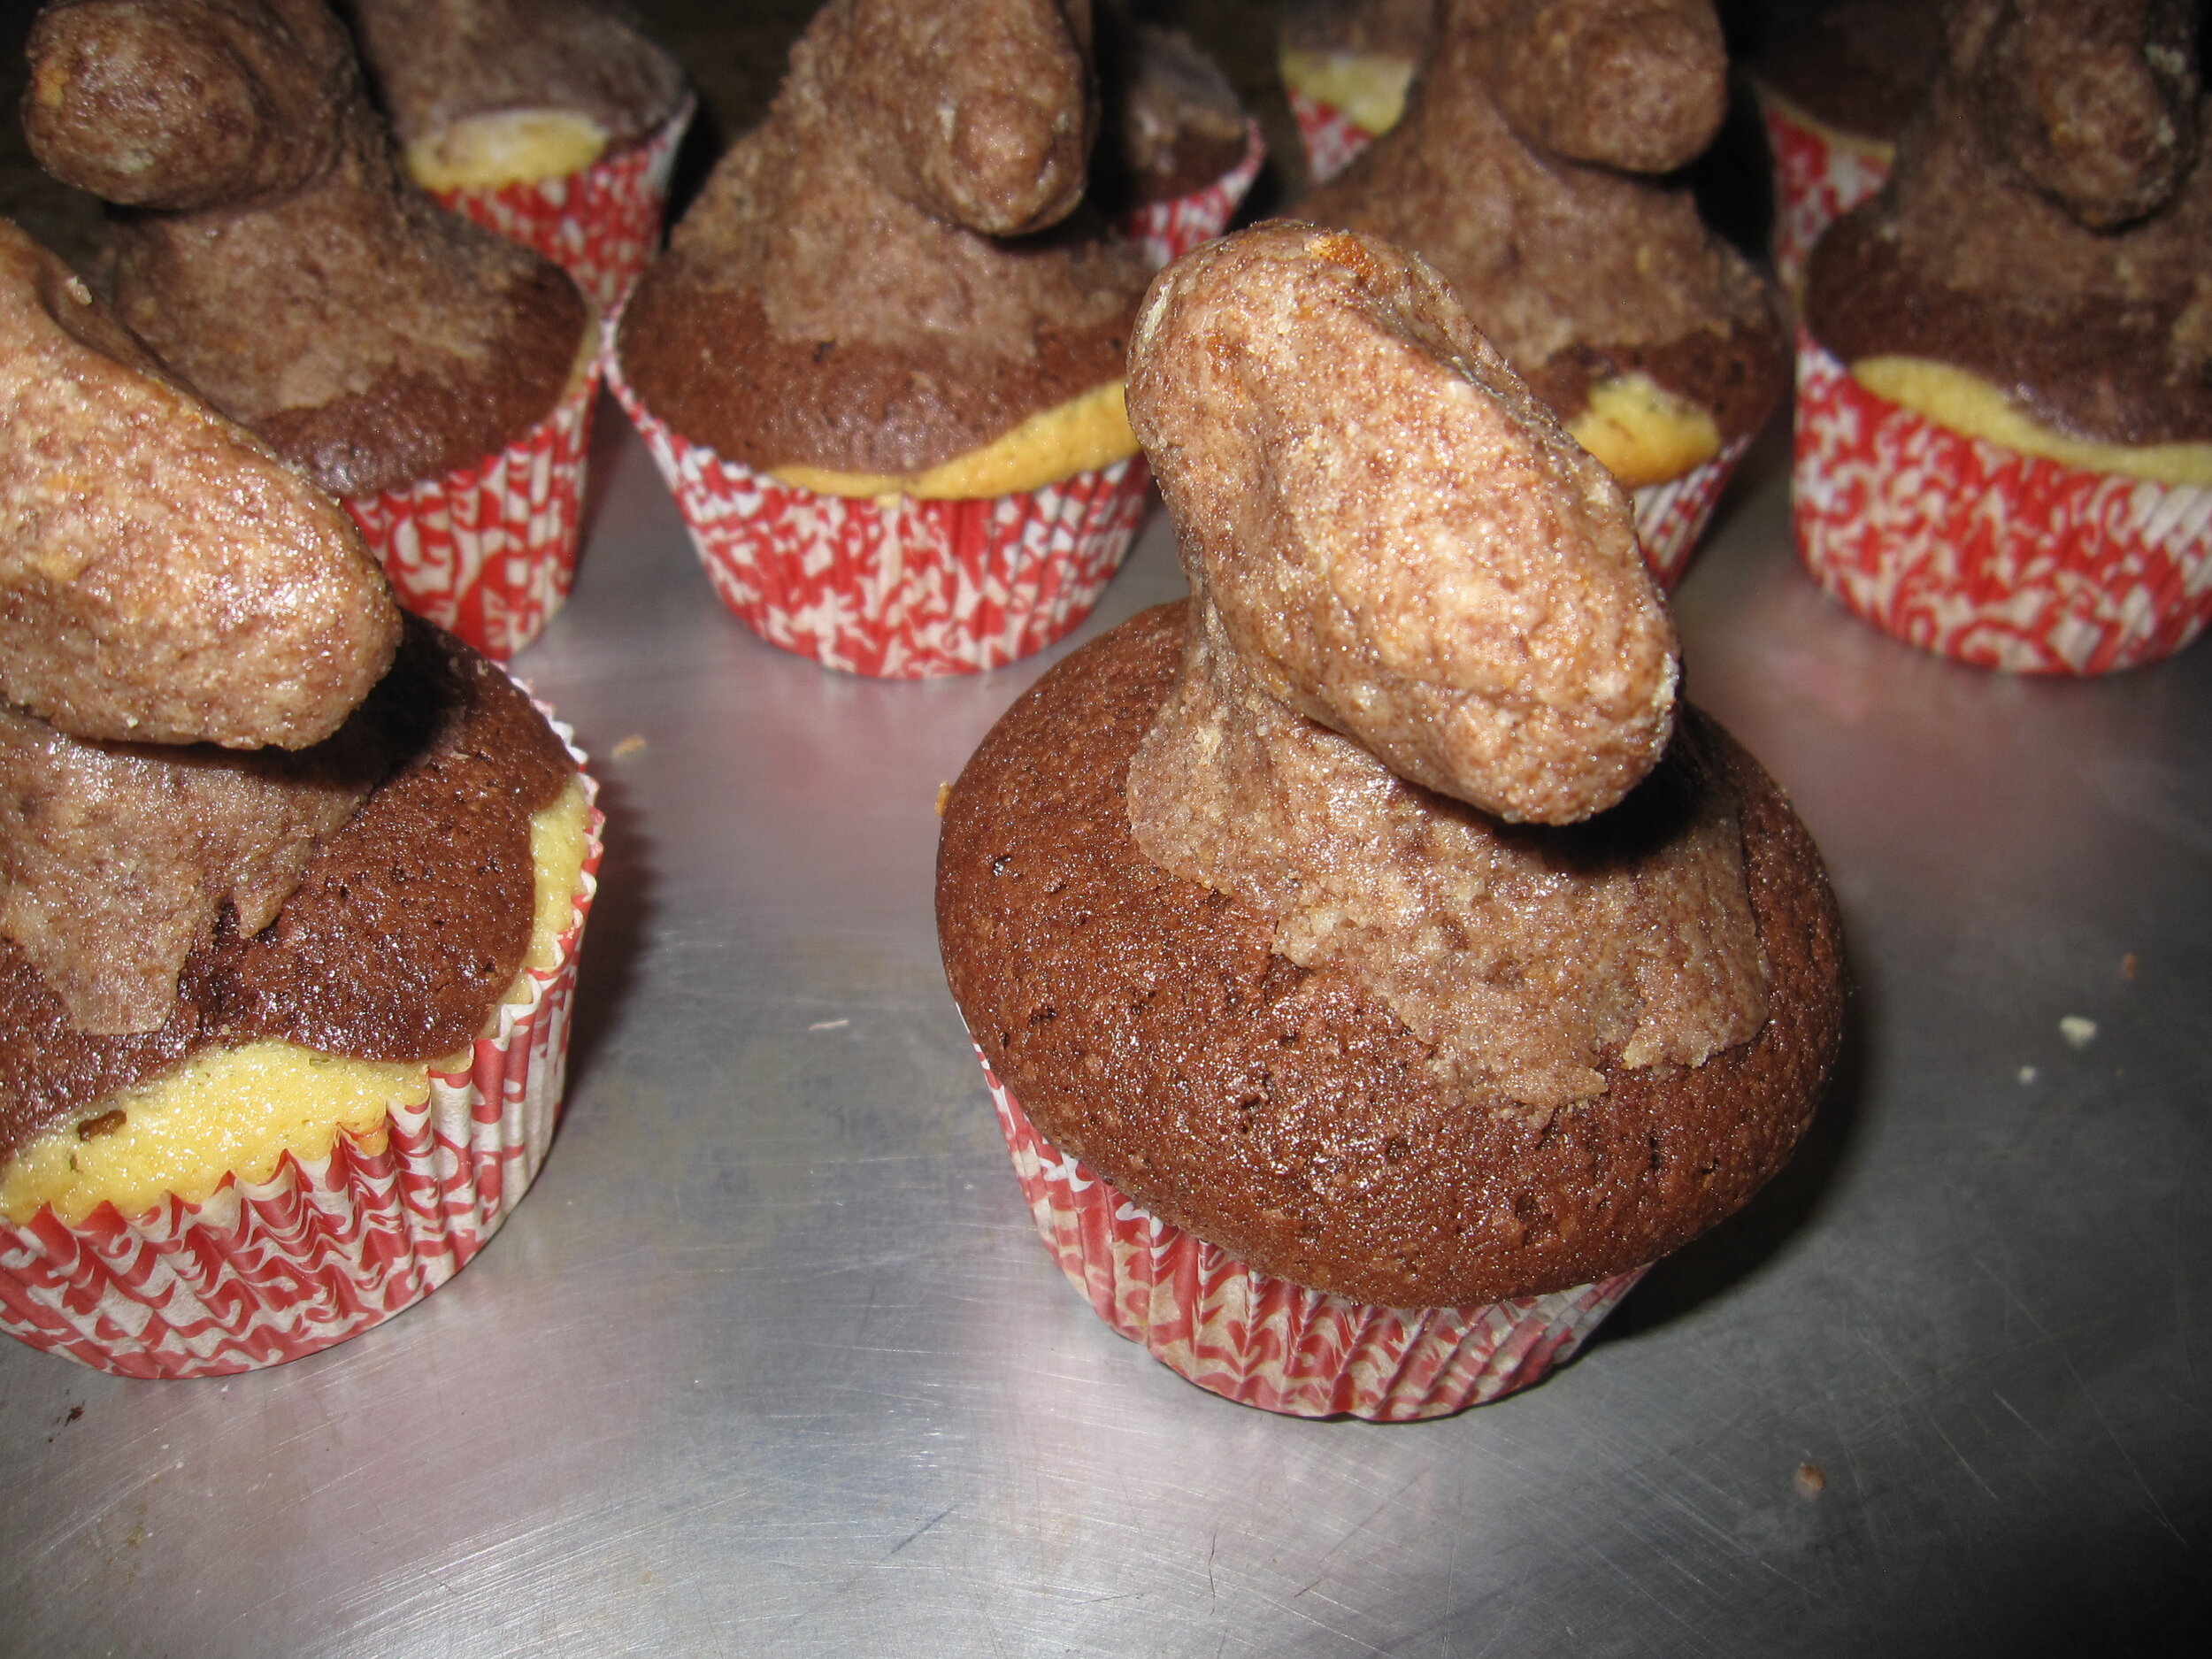
Once the cupcakes were baked, I used essentially the cake pop technique to add zebra and giraffe heads to them. This involves crumbling up cake and mixing it with frosting to make a thick paste and then shaping it as desired. To make the zebra heads, I did this directly on top of the cupcakes. Because the giraffes needed long, thin necks, I made them separately then popped them in the refrigerator to harden up enough that I could then embed them in the cupcakes.
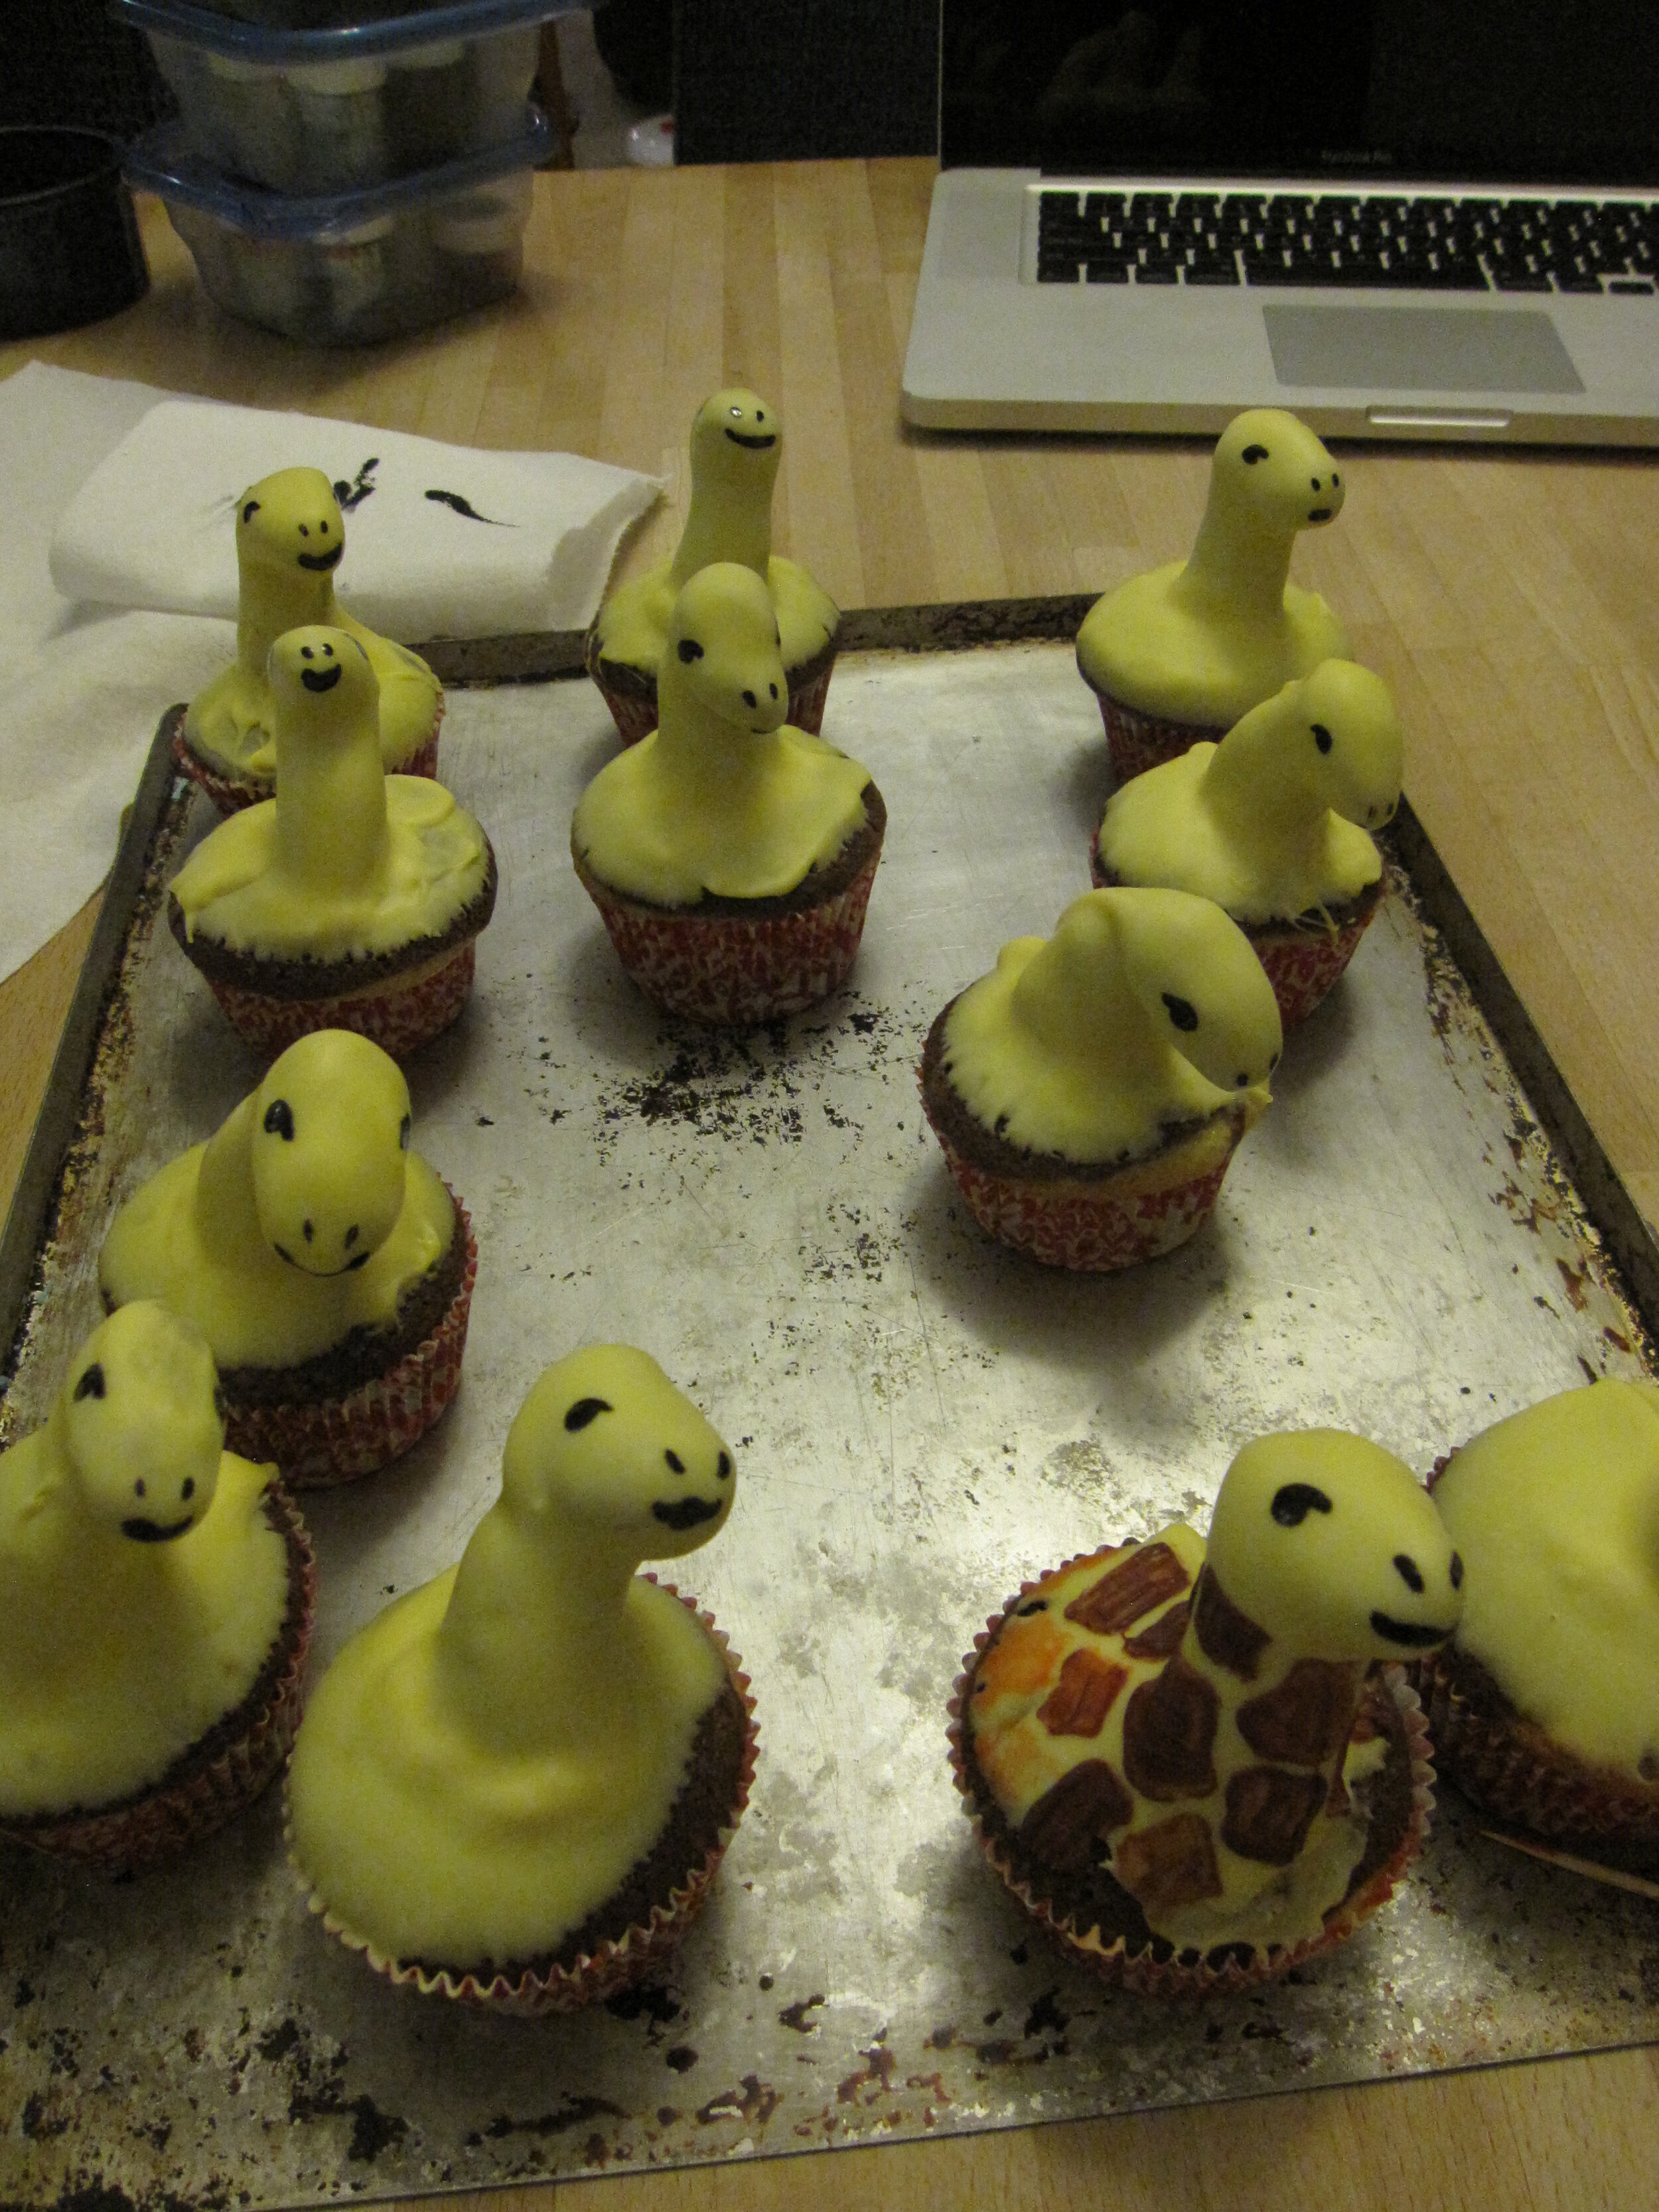
I dipped the zebras in white candy melts and the giraffes in yellowish candy melts. Once this hardened, I peeled the paper off the cupcakes and set the cupcakes in the candy melt cups. Then I used food coloring and candy melts to paint on the patterns, mouths, and eyes. I tried to make them look smug about the fact that the lion couldn’t reach them. I think that next time I should make the eyes more prominent by using something three-dimensional like a candy sprinkle. I also added candy melt ears, manes, and (in the case of the giraffes) horns.
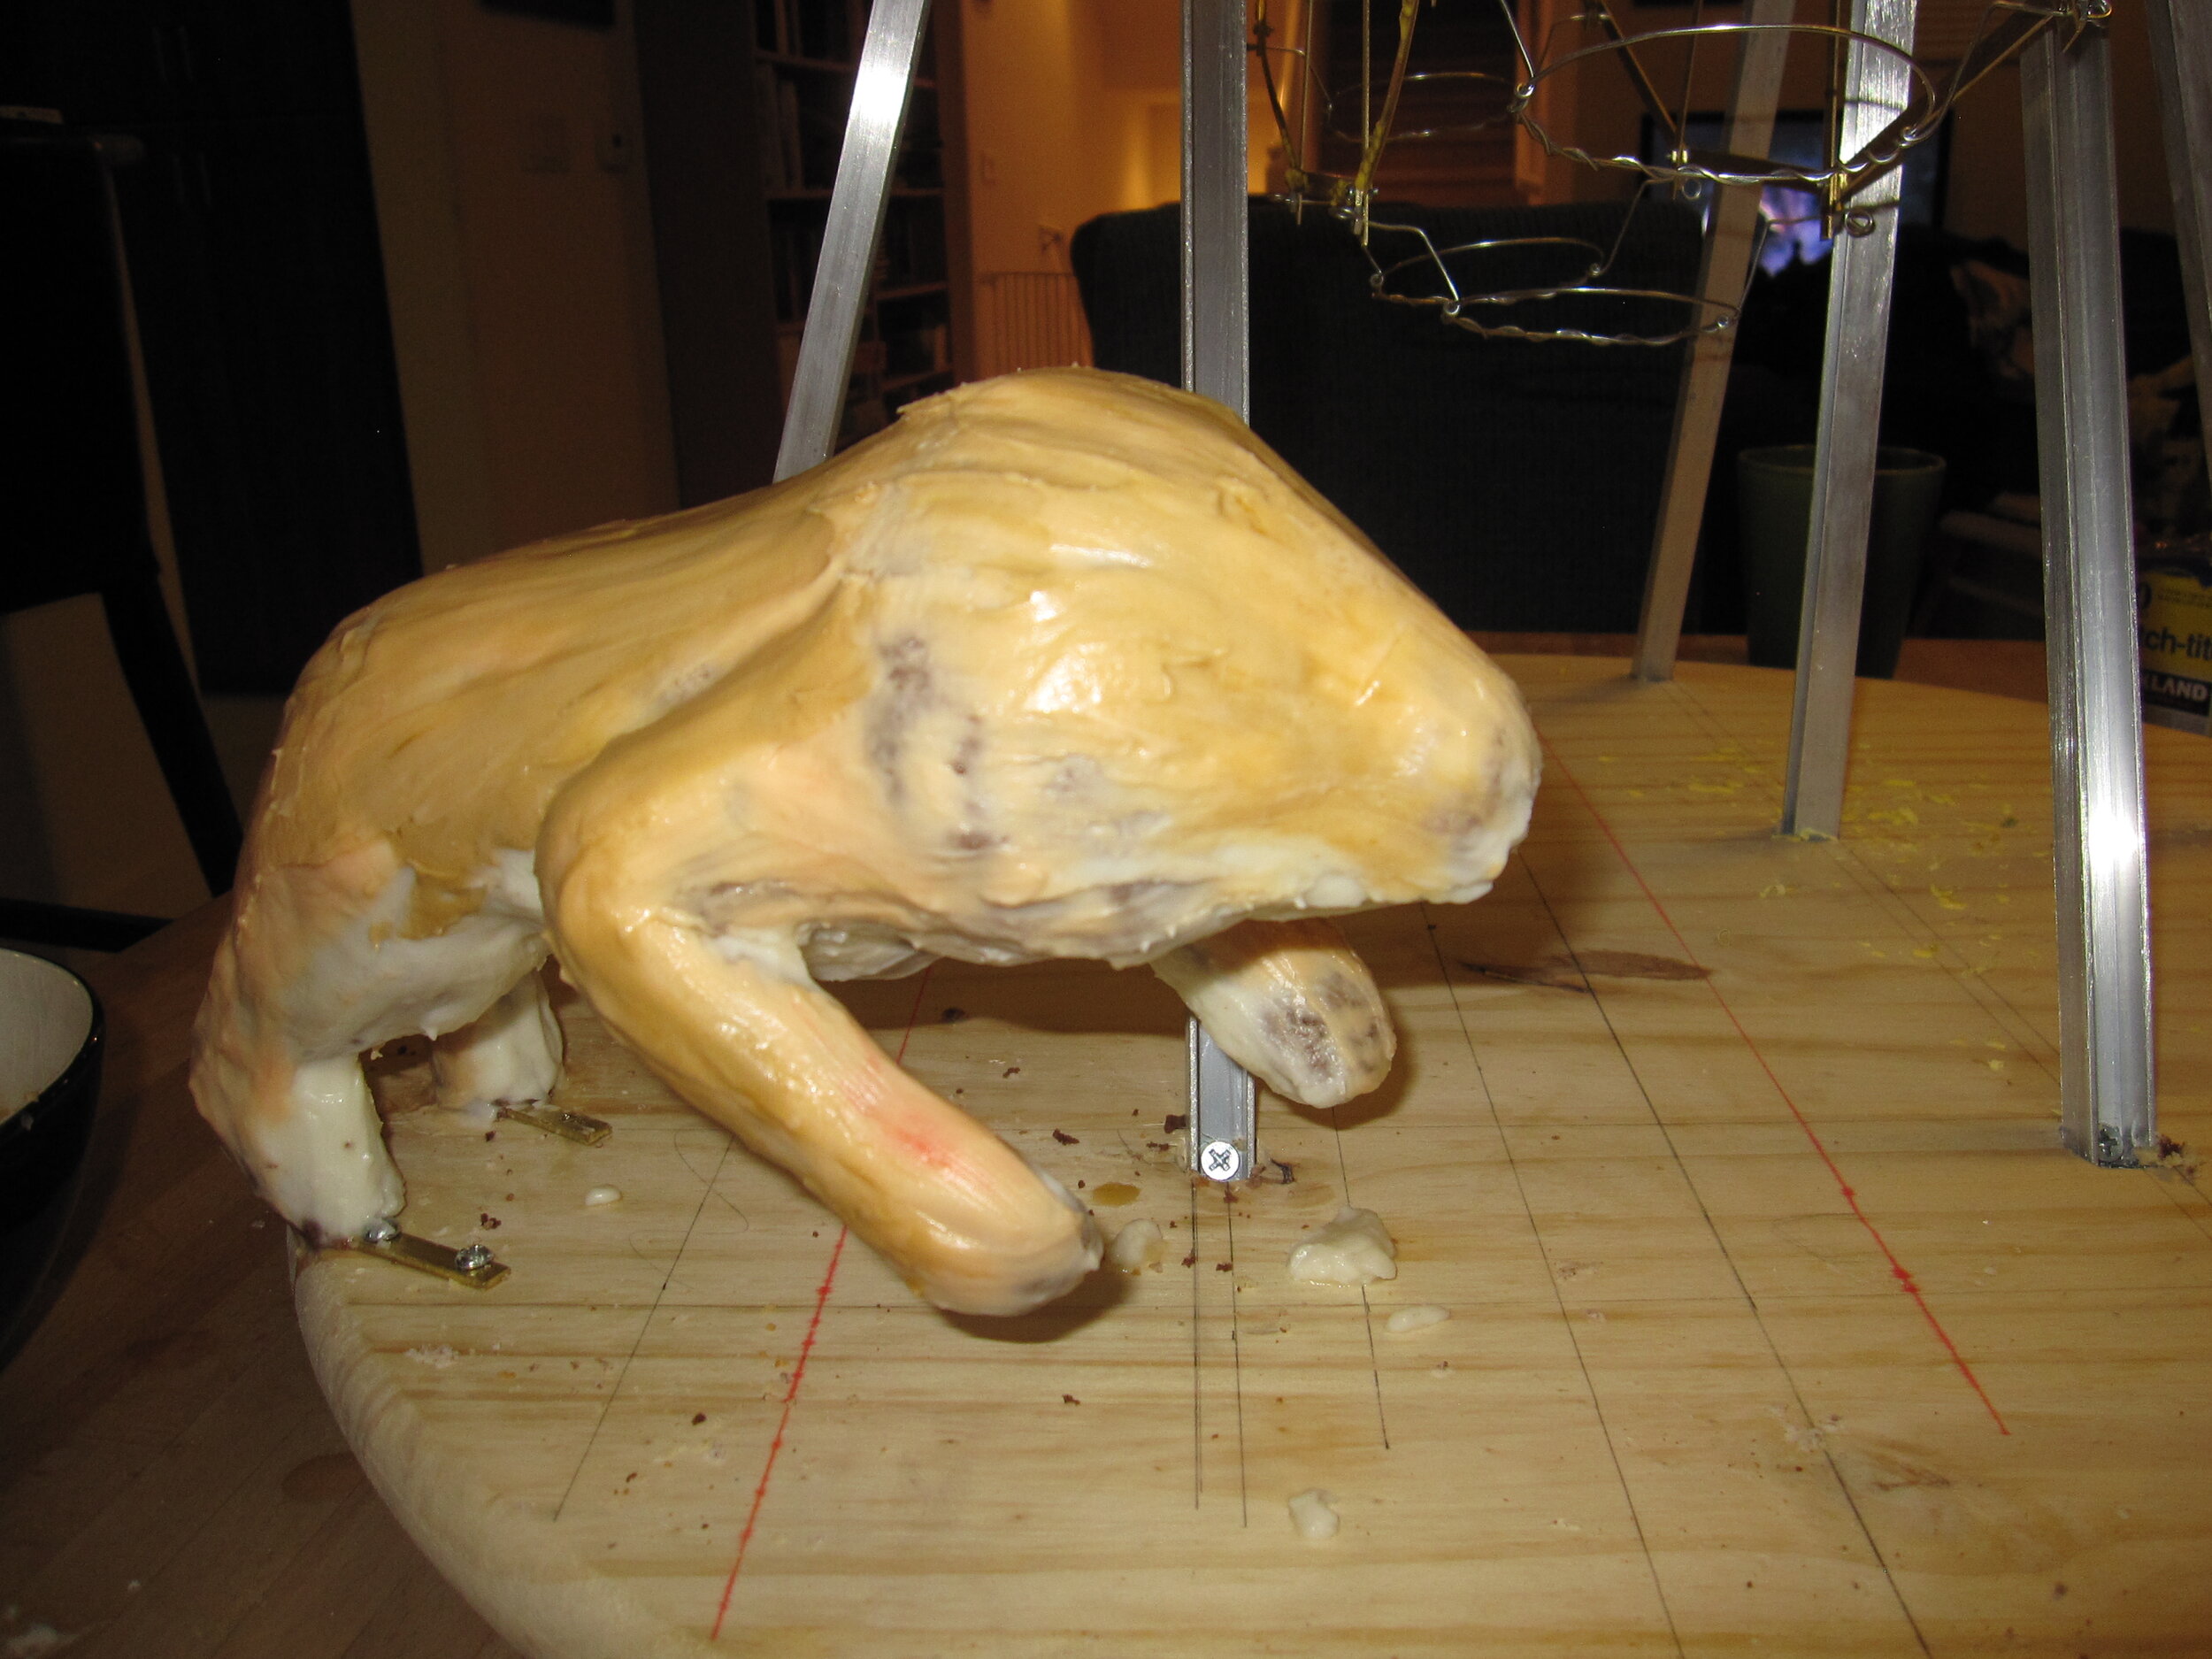
To make the lion look like it was in mid-lunge, I made a base for it using brass strips and foam core so that only the back two feet would be touching the ground. I bolted this to the cake base and built the lion on top of it. I wish that the base had been a little bigger, because I couldn’t really place the lion in the way I would have liked. He wound leaping more alongside the ferris wheel than at the ferris wheel. I also wish I had waited until the cake cooled completely before I put it on the base, because then I would have had less trouble with the cake melting the icing and sliding on the base. After I carved the cake and added a little mass with some of the cake pop goo, I used buttercream icing for the fur and candy melt for the ears and tail. In the end, I wasn’t particularly happy with the way the lion turned out. It was more awkward than scary, but not cartoony enough to be fun. Just as I was feeling most disappointed in how the lion turned out, Sam woke up and saw it. He gave a squeal of unmitigated delight and yelled “A lion!” So apparently, my lion wasn’t such a failure after all. For days after the party, Sam wandered around saying, “I ate the tail!”
At an early point in the process, I had planned to dip the entire ferris wheel in candy melt. Fortunately, I gave this idea up before I tried it, as the results would doubtless have been disastrous. However, I also couldn’t leave it entirely unadorned. For one thing, it clashed with the baby shower pink and blue cupcake cups. For another, Alex pointed out to me that ferris wheels are colorful. So I decorated it with red, blue, and yellow candy melt squiggles and dots. I was reasonably pleased with this effect and Alex also gave it her stamp of approval.

The final touches were to decorate the base. By this time it was the morning of the party and I had been up all night working on the cake. So the base sort of got short changed. I threw down a layer of pressed sugar dirt and then brushed on some different shades of brown food coloring. I didn’t have my airbrush with me, so the results weren’t as subtle as I would have liked. I also tried something new to make the savannah grasses. I used puff pastry, brushed with green food coloring, and cut into grass shapes. In the end, it looked more like french fries than grass, but it was still a fun experiment.
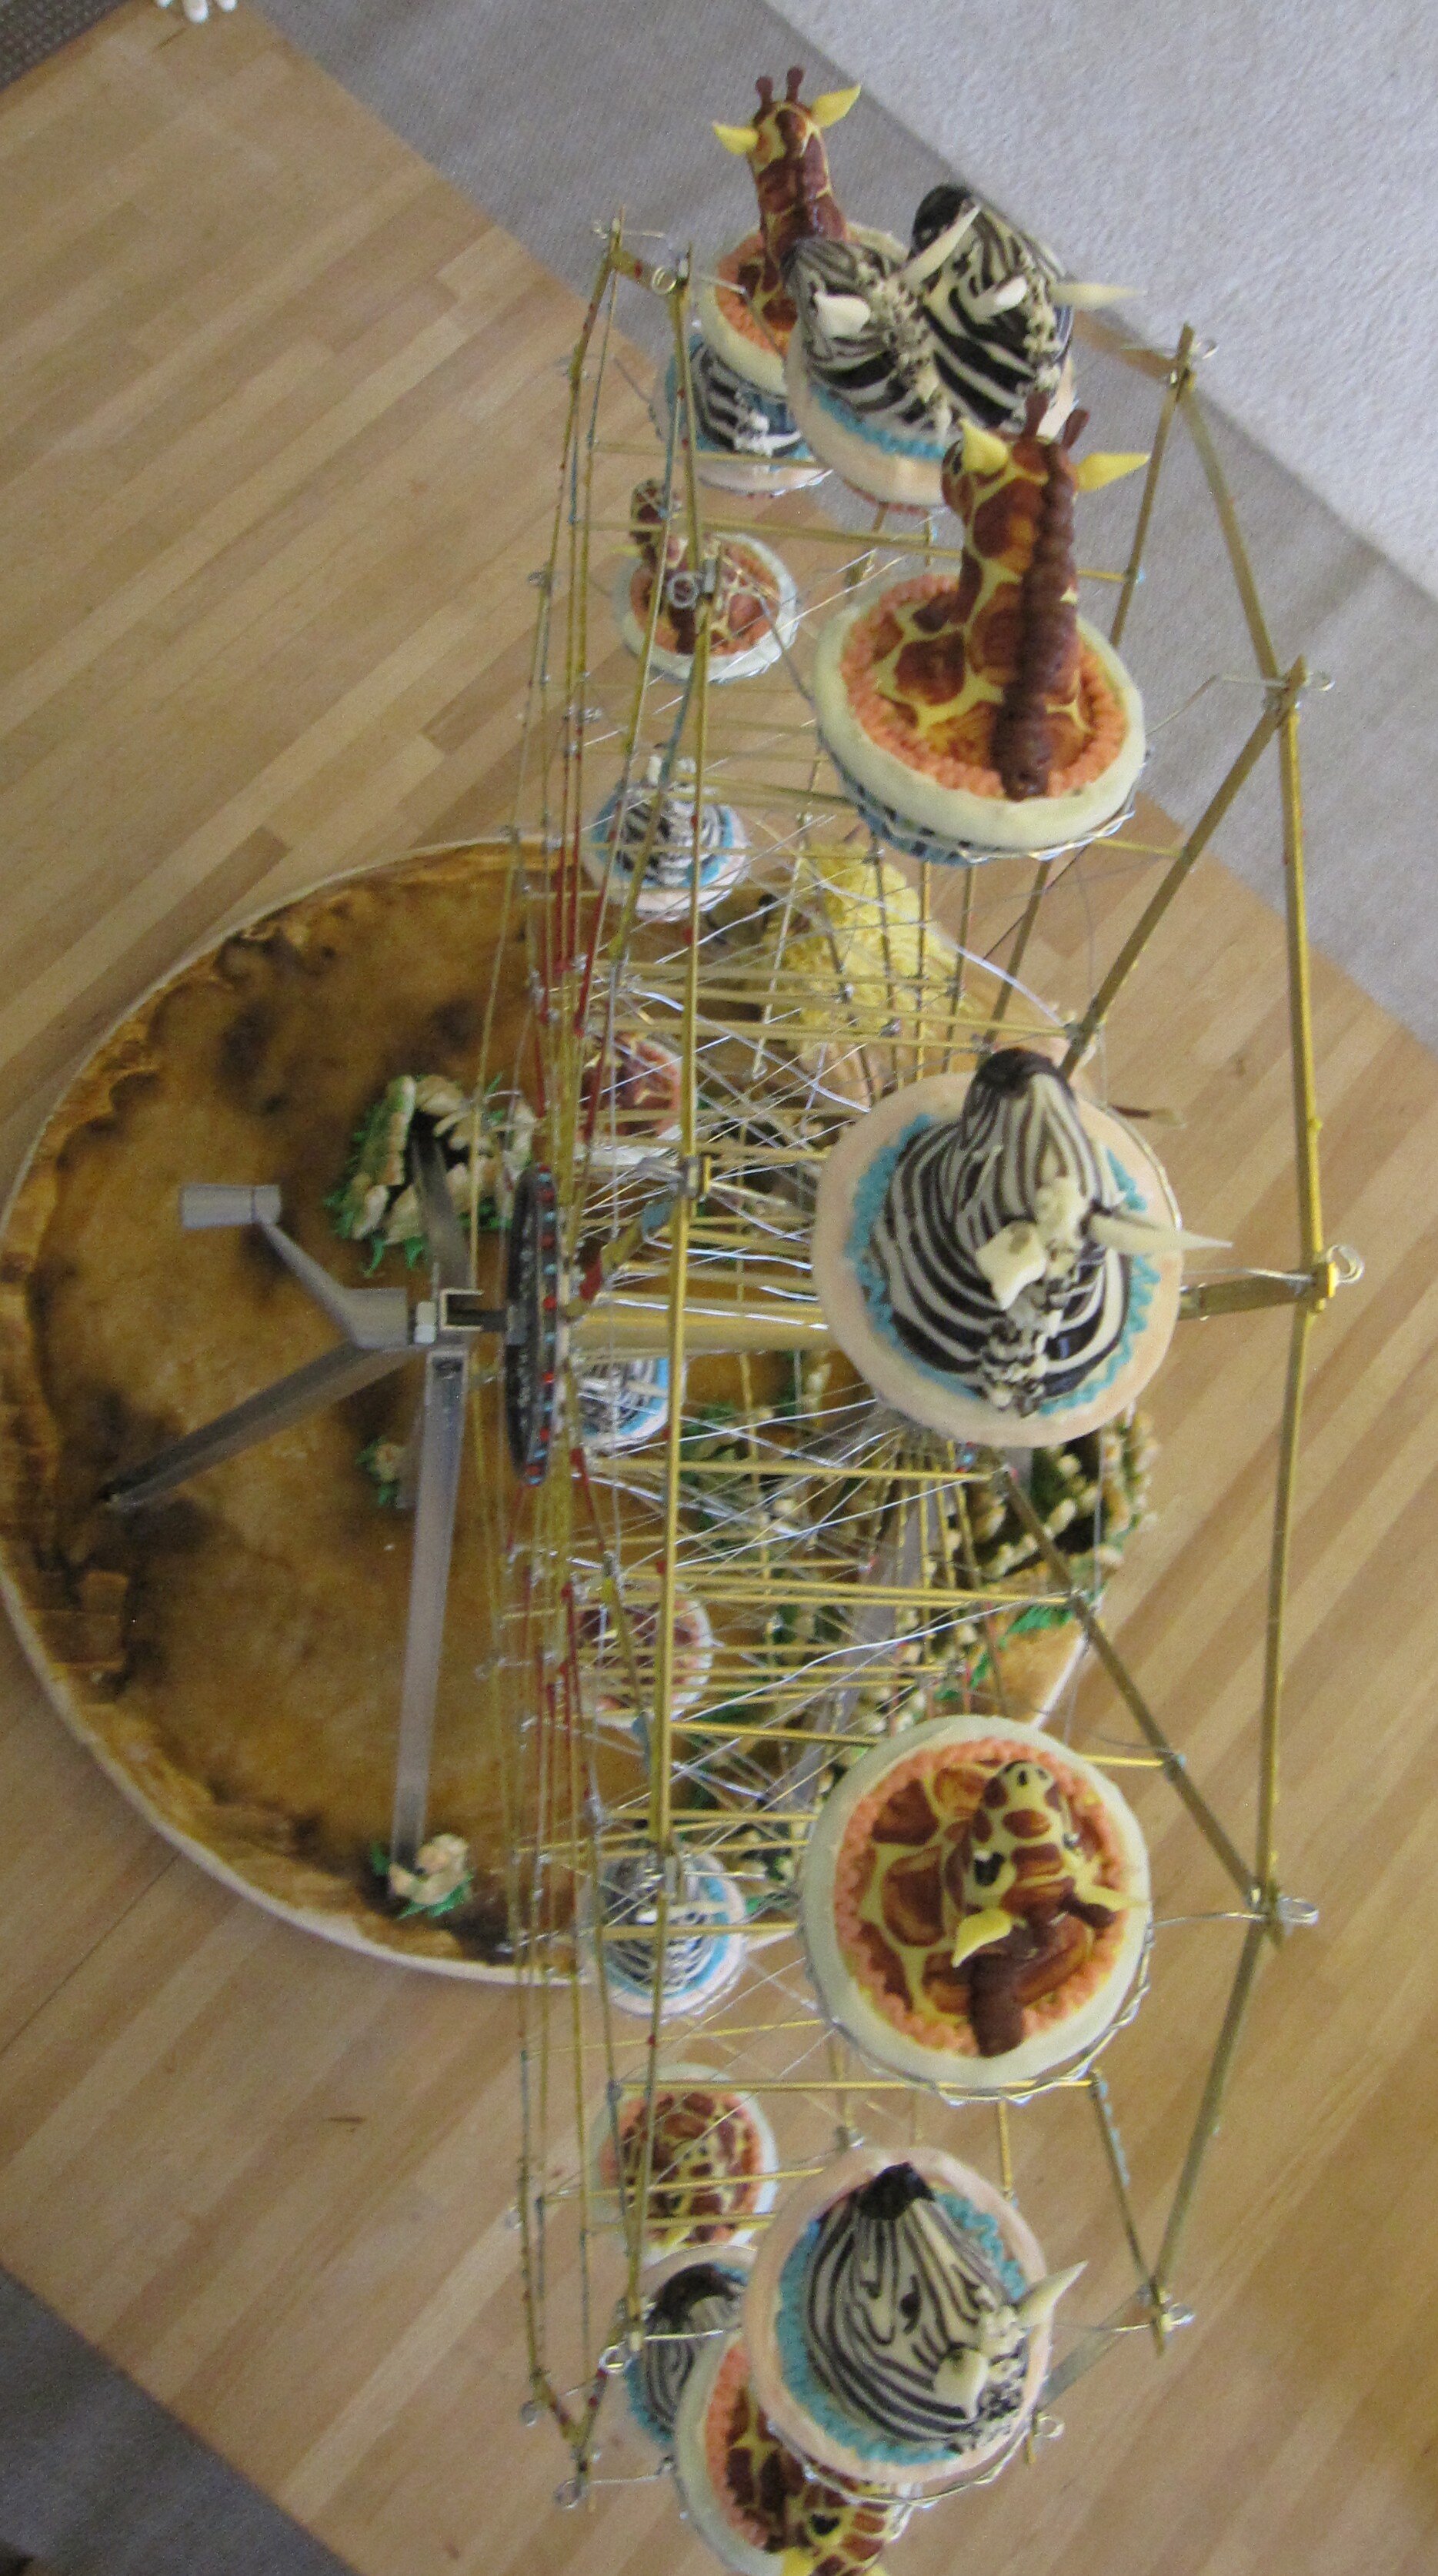
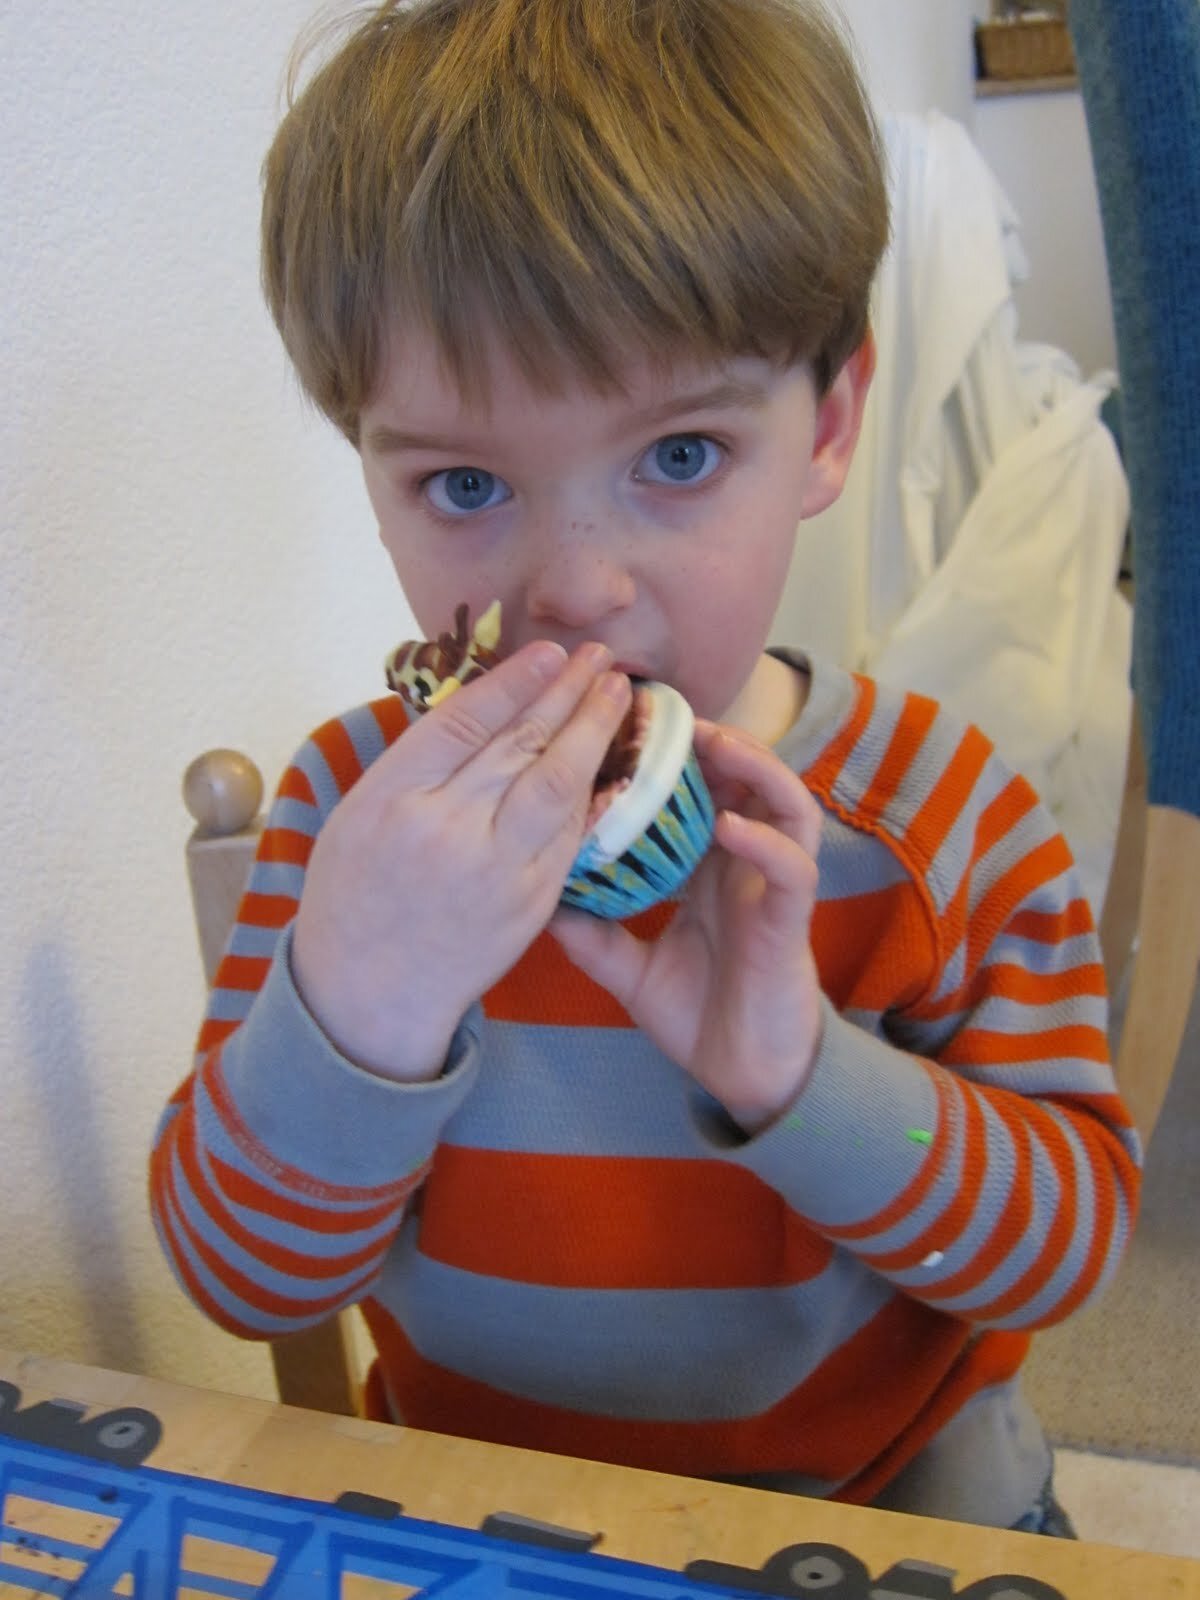
Right before the party, I set all the animals in the ferris wheel. I had to make a few tweaks to get them all to rotate freely, but all in all it really worked remarkably well. Only one zebra fell out in the process, but I had extras, so it wasn’t a problem.The party was great. All the kids took a turn spinning the ferris wheel and they were all very serious about not spinning it too fast. I served the lion to the adults, because it didn’t have candy melt all over it. The kids, of course, loved the candy melts. In fact, Alex ate only the candy melt portion and ignored the actual cake. Of course, I still have no idea what Sam actually imagined that zebra cupcakes are, but he seemed pleased with what I came up with, which is really all that matters. And now he has a two-foot diameter metal ferris wheel to treasure forever.

Peep and the Big Wide World Cake
When it came time to design my nephew Sam’s second birthday cake, I turned to Sam’s older sister, Alex, to help me conceptualize the cake. Alex came up with the idea that Sam might like a duck cake, which I thought was a very good idea. Sam loves animals of all kinds. After further discussion, I suggested that we should make a cake based on the TV show Peep and the Big Wide World, which could include not only Quack (a duck), but also Peep (a chick) and Chirp (a baby bird).
When it came time to design my nephew Sam’s second birthday cake, I turned to Sam’s older sister, Alex, to help me conceptualize the cake. Sam, while remarkably verbal for a two-year-old, still cannot be relied up to respond to specific questions in a direct manner.
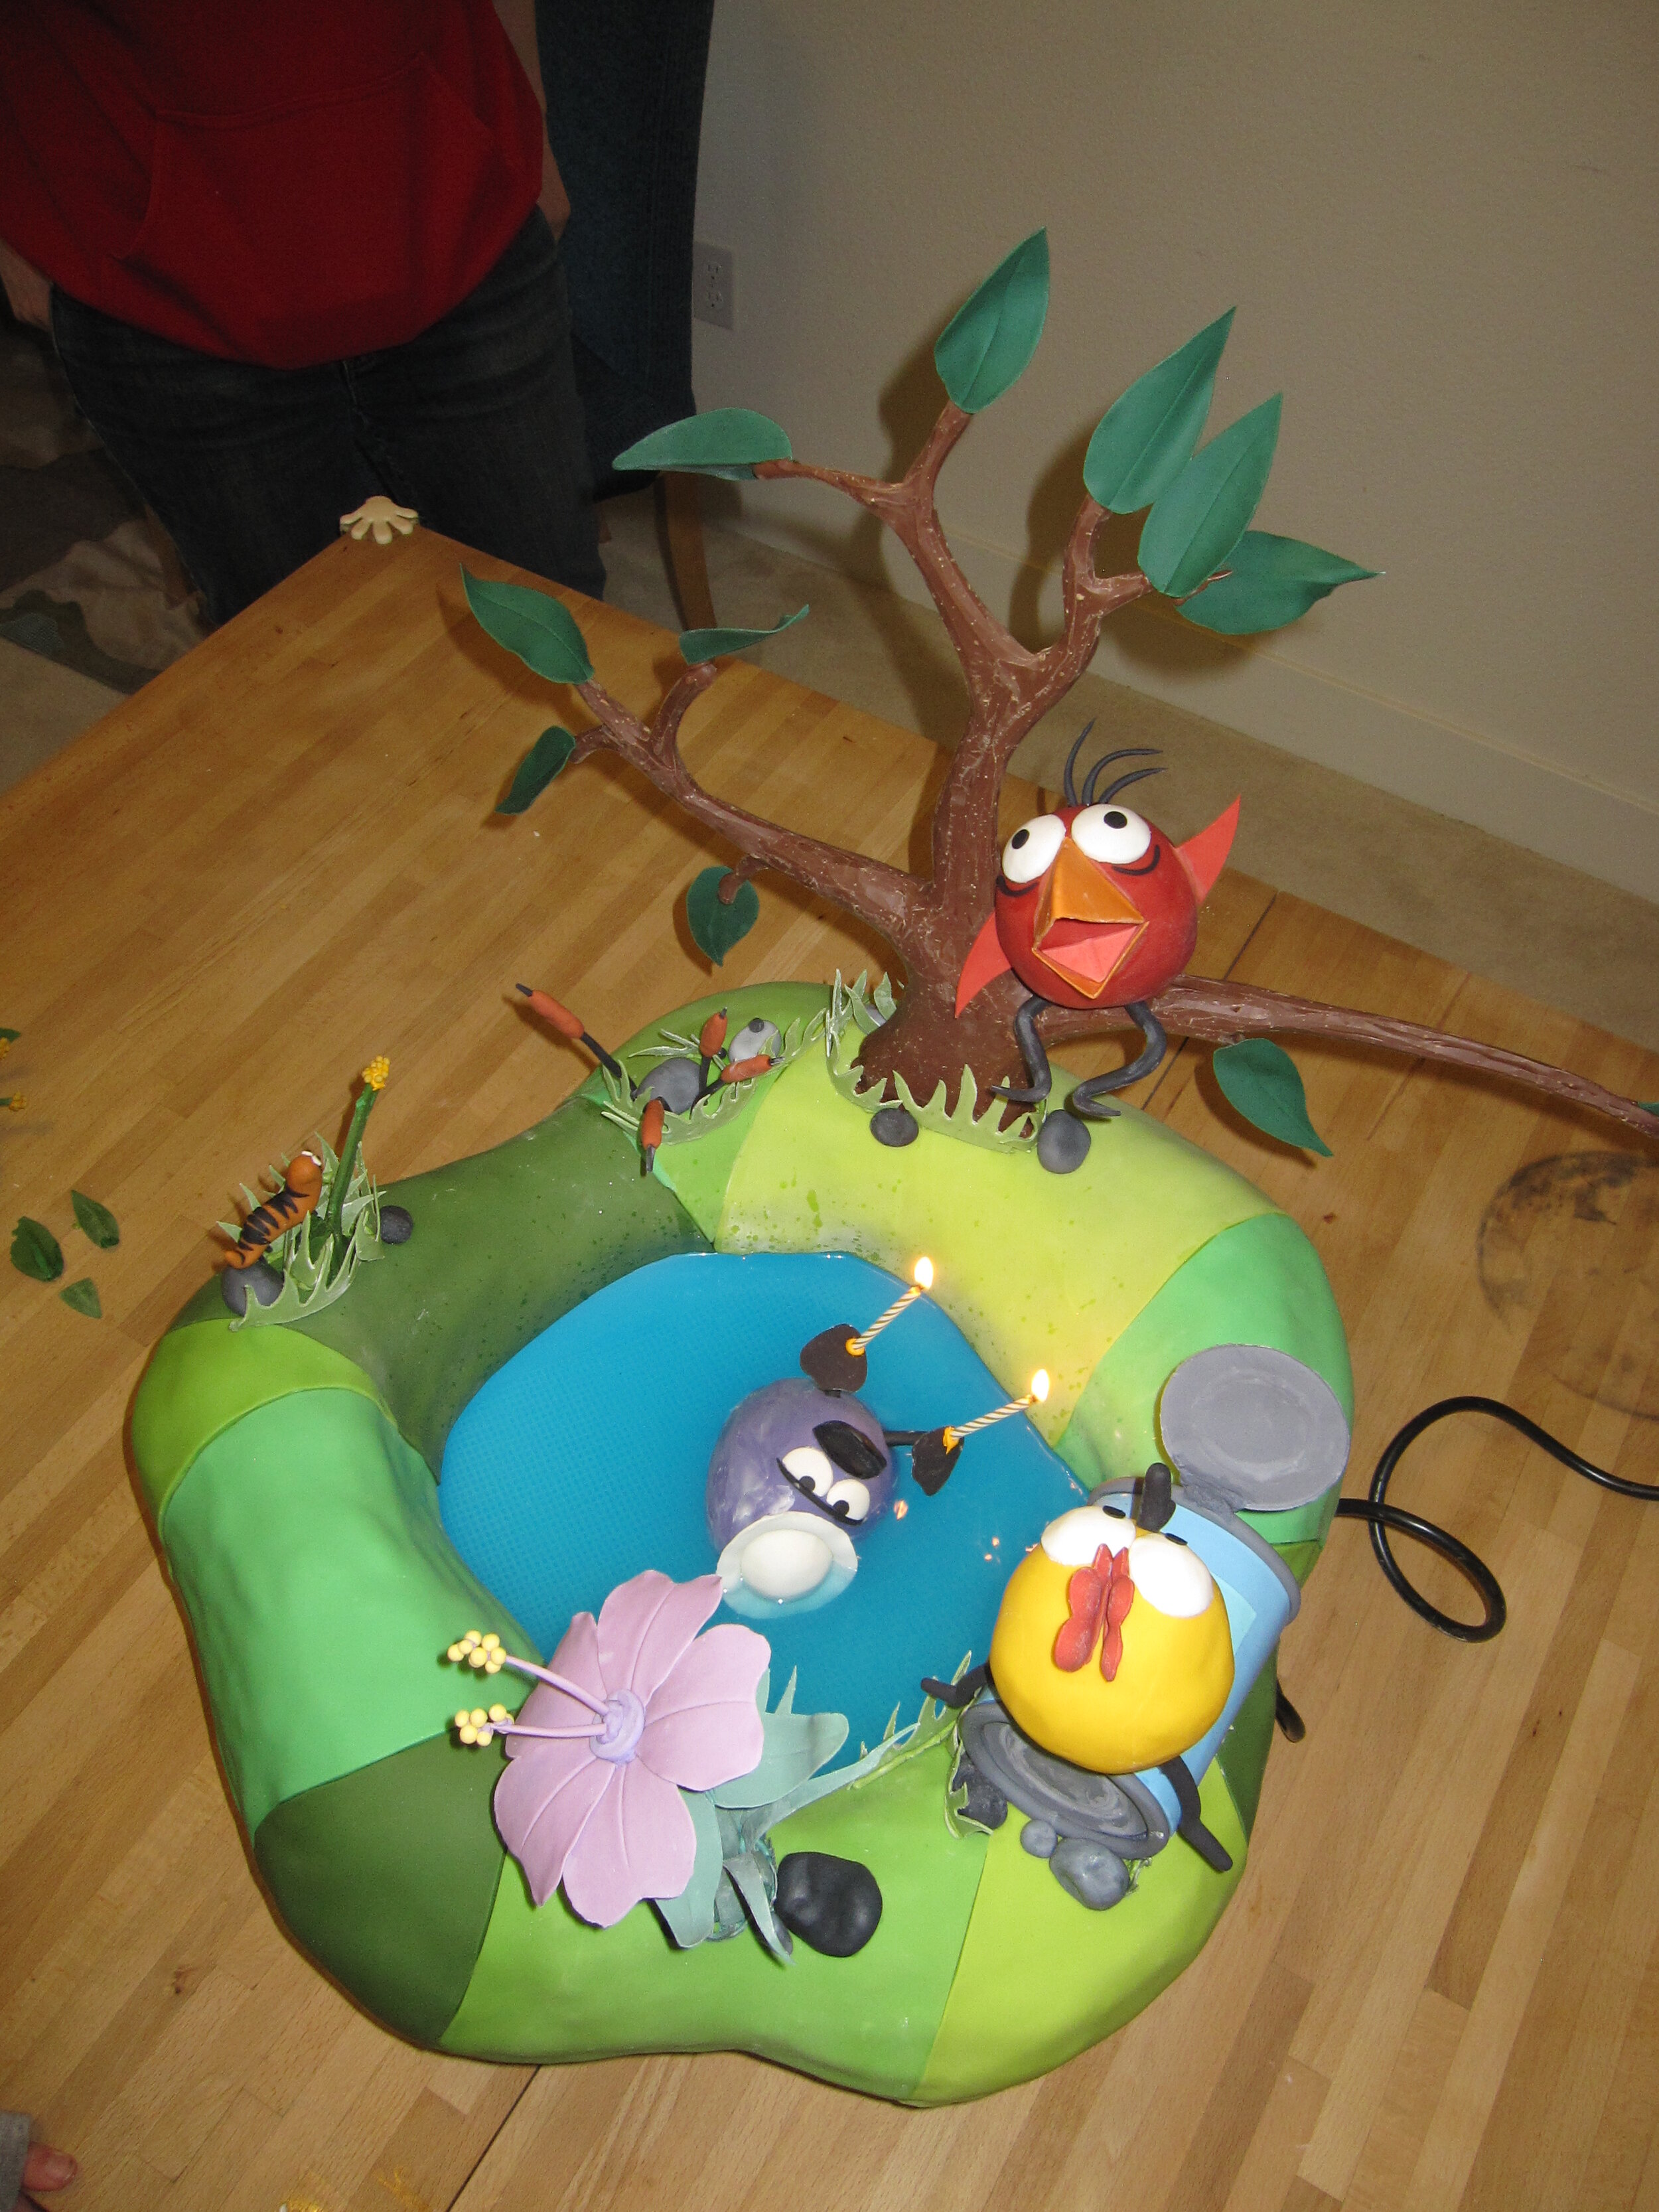
At first, Alex suggested various vehicle-based concepts because Alex loves vehicles. Eventually, I was able to convince Alex that we should base the cake design primarily on things that Sam likes, which may not correlate directly to things that Alex likes. At this point, Alex came up with the idea that Sam might like a duck cake, which I thought was a very good idea. Sam loves animals of all kinds. After further discussion, I suggested that we should make a cake based on the TV show Peep and the Big Wide World, which could include not only Quack (a duck), but also Peep (a chick) and Chirp (a baby bird). Since Quack is very much attached to his pond, I decided that it would be fun to make Quack float in a lake of blue Kool-Aid. As it turns out, blue Kool-Aid is difficult to find, but Gatorade makes an absolutely disgusting flavor that was the perfect color for Quack’s pond, so I used that instead.
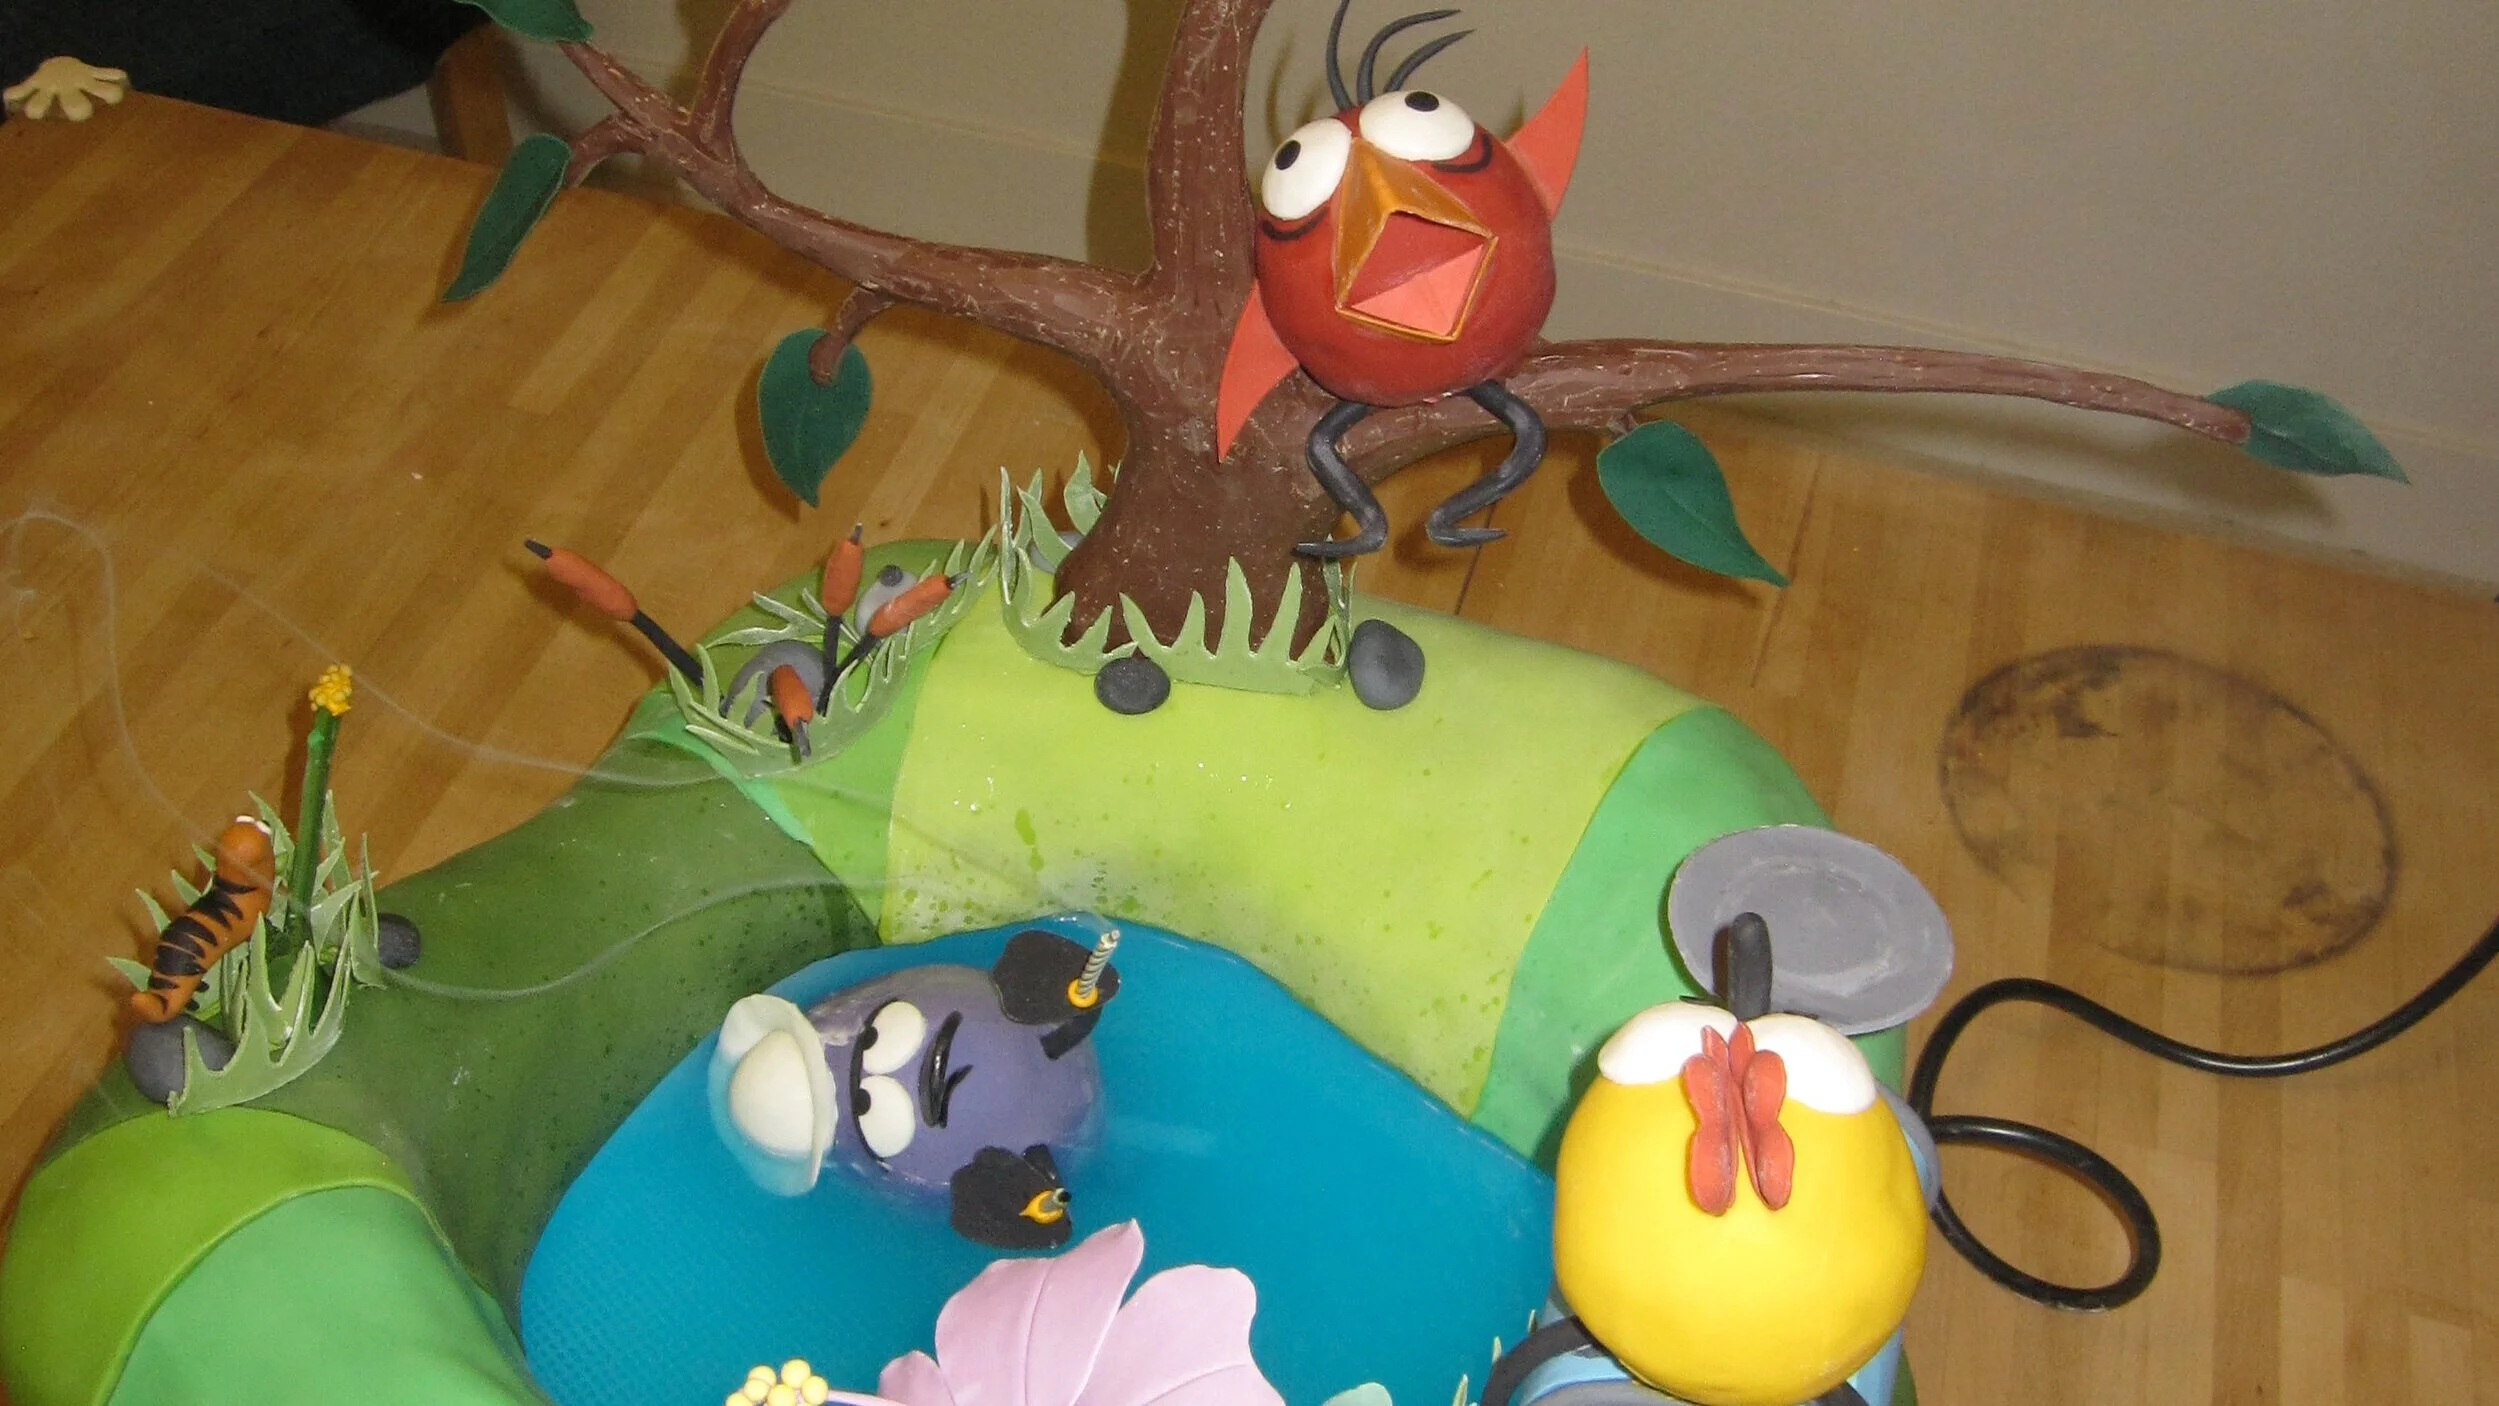
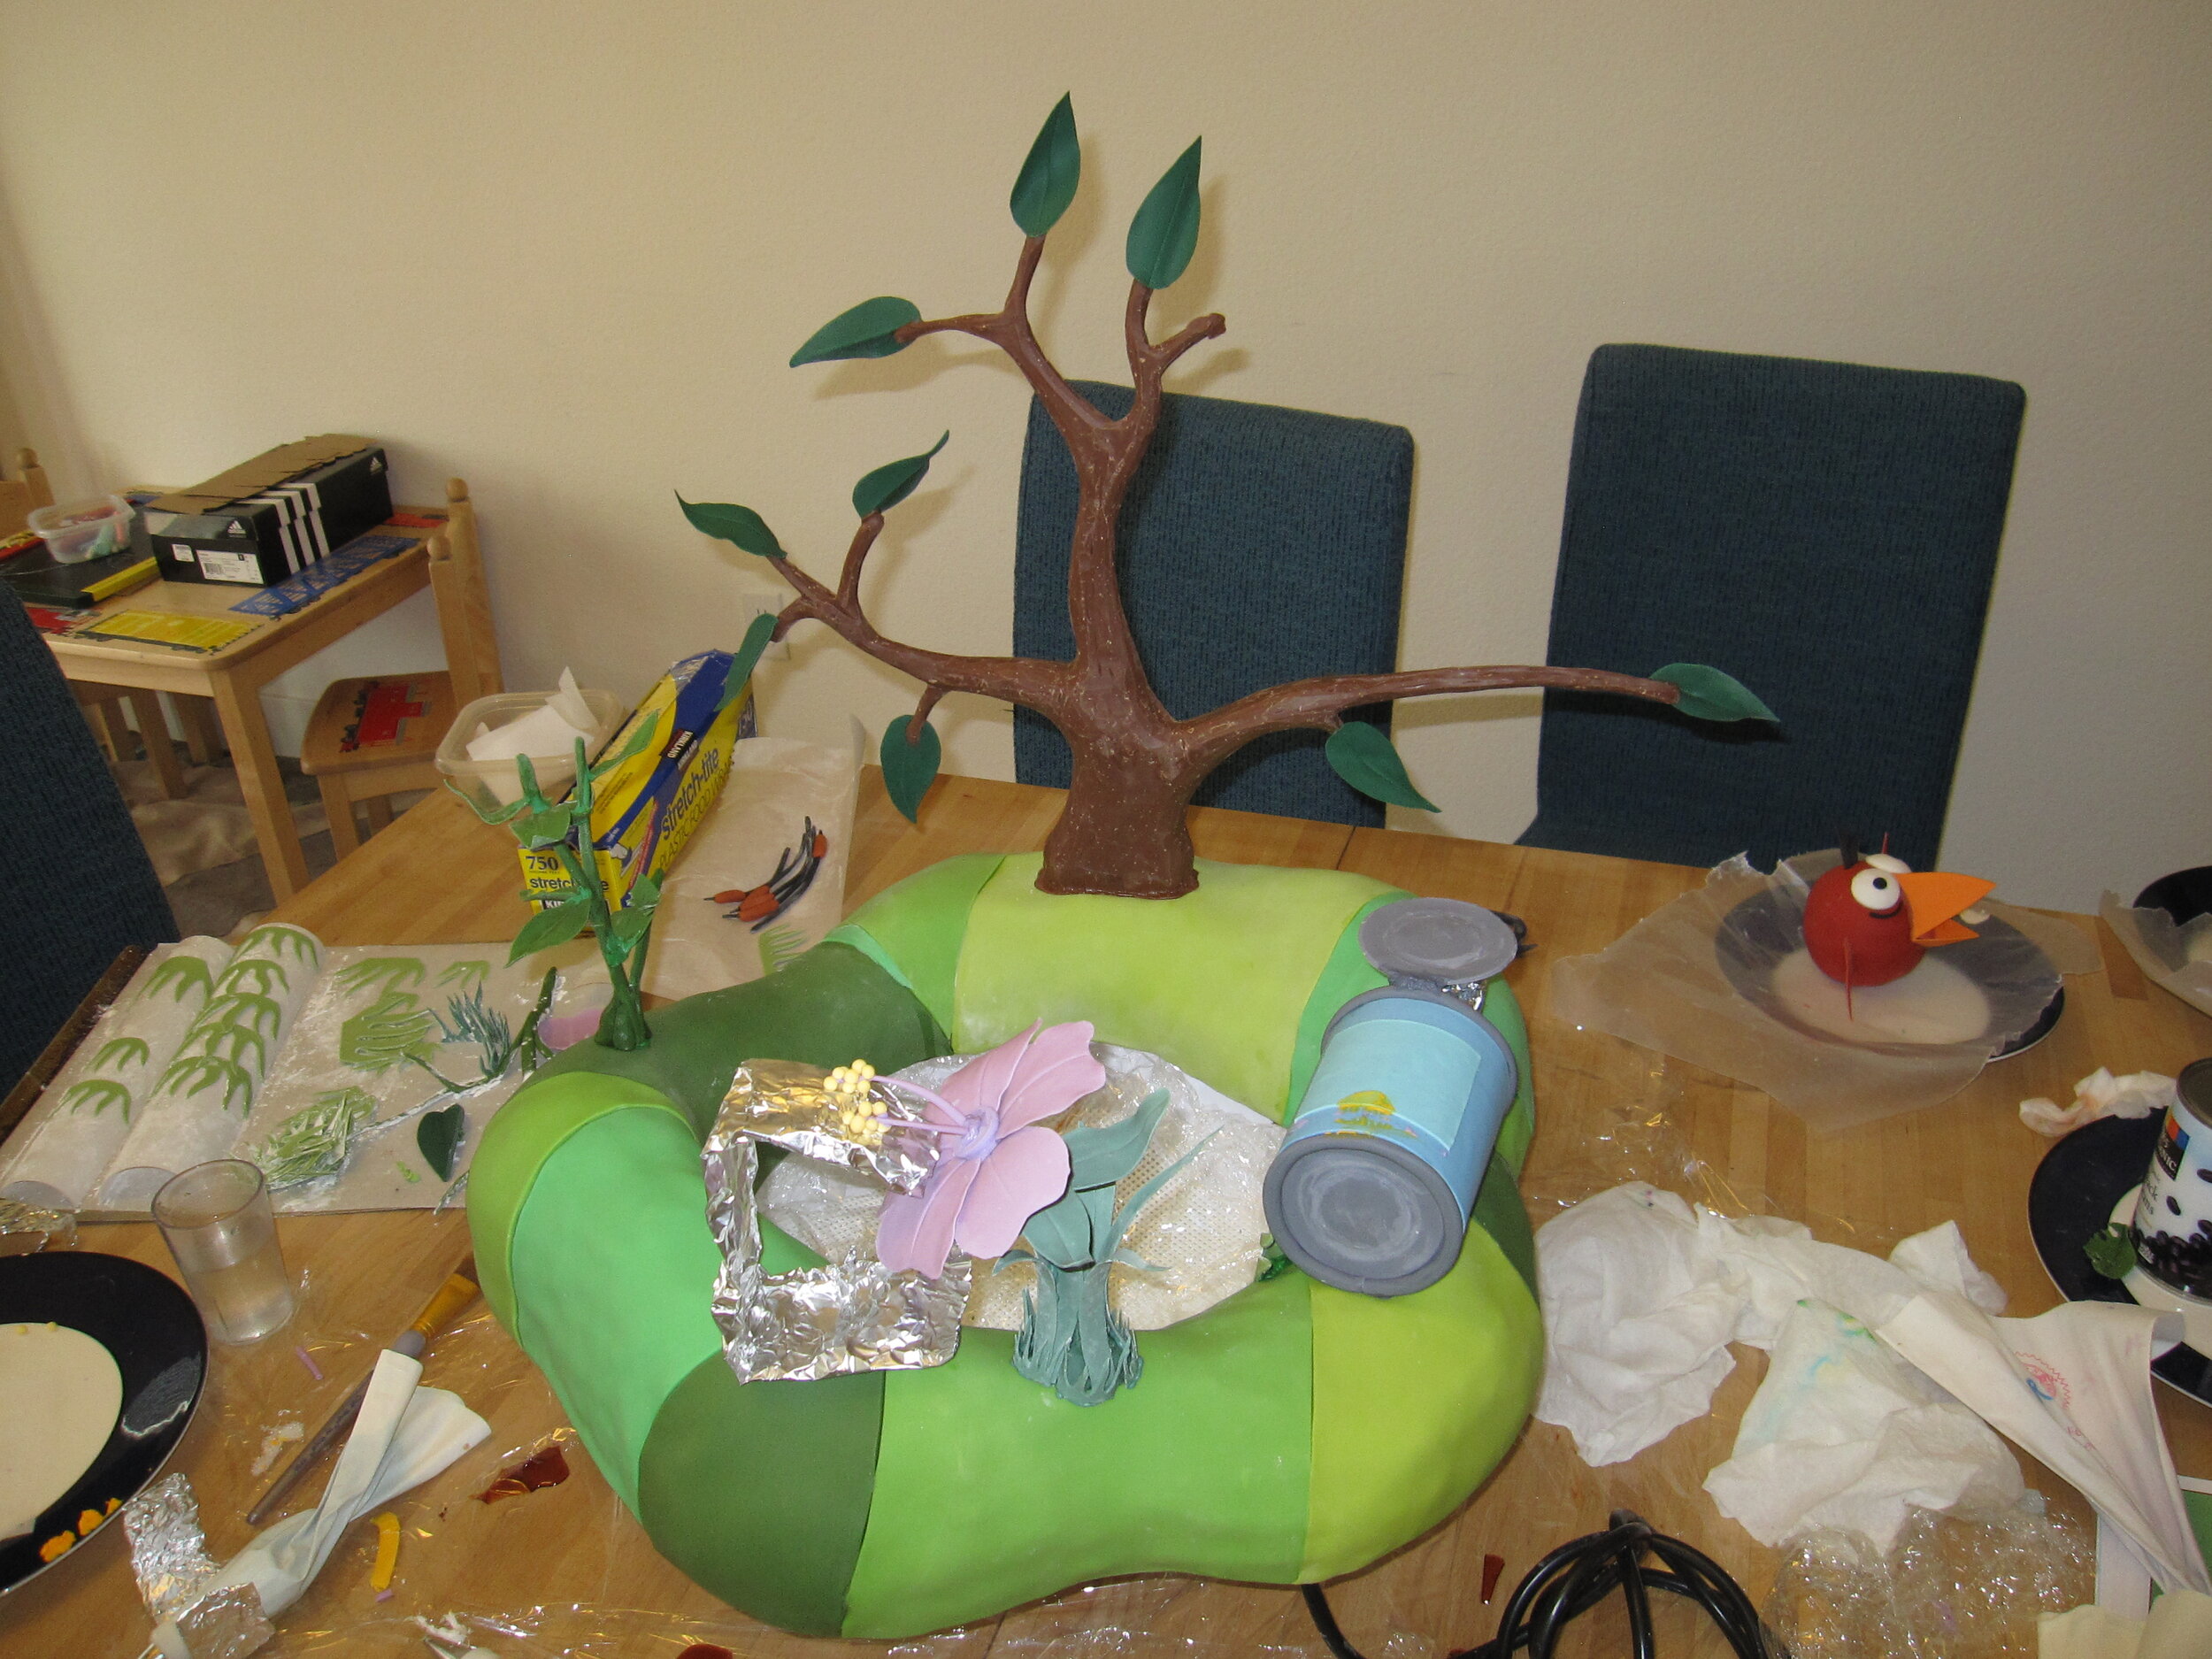
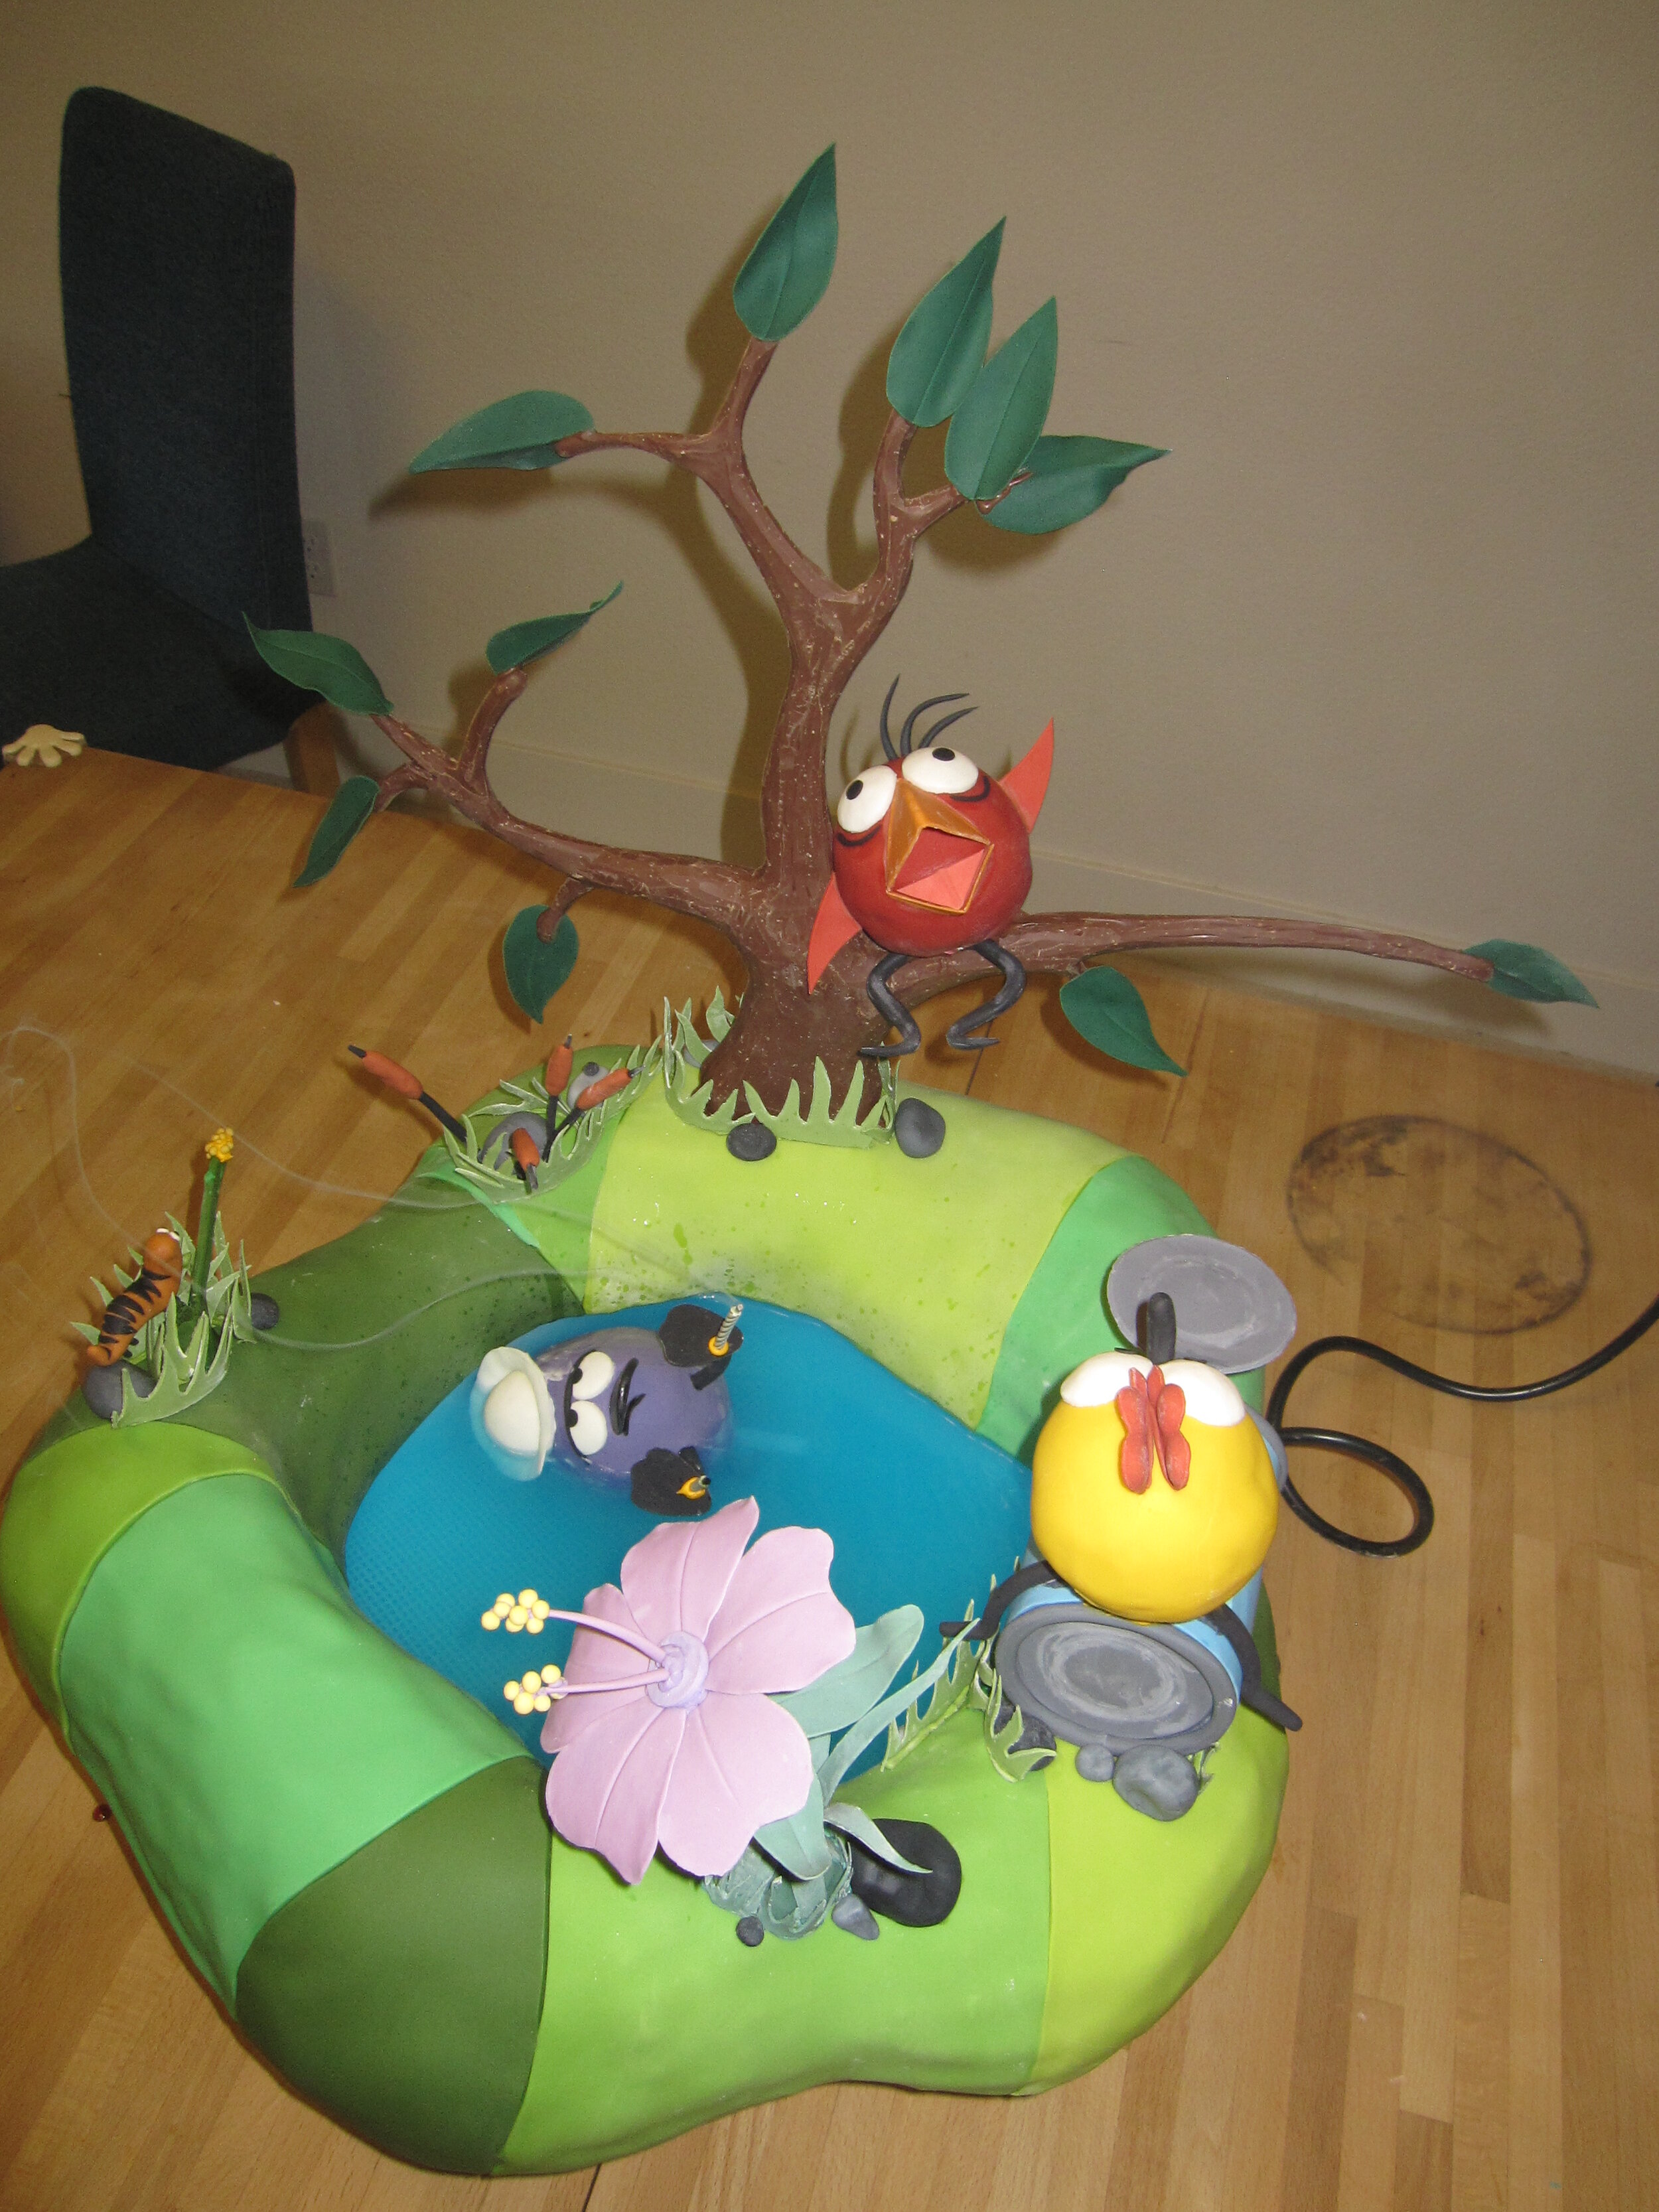
This is almost the first cake I’ve made that was primarily landscape-based, rather than primarily object- or character-based. Each major character in Peep and the Big Wide World has a special landscape feature with which he or she is associated. Quack has his pond; Chirp perches in her big tree; Peep lives in an old tin can. I also decided to include “the most beautiful flower,” because I really like that episode, and a caterpillar. The caterpillar is a minor character in the show, but Sam had recently said “caterpillar,” which he pronounced something like “patta-putter,” when I was reading to him. I thought this was absolutely adorable and I hoped that, if I put a caterpillar on his cake, he might say it again.
All of this required a great deal of advance work in gum paste and in chocolate. Most of the gum paste work was fairly conventional – cutting leaves and flower petals out of gum paste and draping them over various things to get graceful curves. The can was easily accomplished by wrapping gum paste around an actual tin can.

I was quite proud of Chirp’s tree. Rather than making the tree out of gum paste or fondant, I decided to make it out of chocolate. While I have taken classes in chocolate-work and I frequently make truffles and such, this was my first attempt at making anything this big out of chocolate, at least since the white chocolate rib cage of the Thorax Cake. The first step in casting the tree was to cut the basic shape out of foam core. Then I made a soft bed of cocoa powder by sifting it into a baking tray. I pushed the foam core positive into the cocoa powder to make the negative mold, then piped tempered milk chocolate into the depression in the cocoa powder. Then I flipped the piece of foam core over and did the same thing again to make the other side of the tree. Once those pieces had set, I glued them together with more milk chocolate. After carving off the excess cocoa powder and smoothing out the rough edges with a knife, I was really pleased with the result. And, as it turns out, properly tempered chocolate is much more rigid than my usual building materials of gum paste and fondant. I’m going to have to start incorporating chocolate into my cakes more often.
To create the pond, I bought a big bowl. Then I cut a piece of ½” foam core with a hole in the middle to sit on top of the bowl to support the cake for the land. I also bought a little pump and put it into the pond. The idea was that, if the water was moving, Quack would float around the pond, rather than remaining stationary.
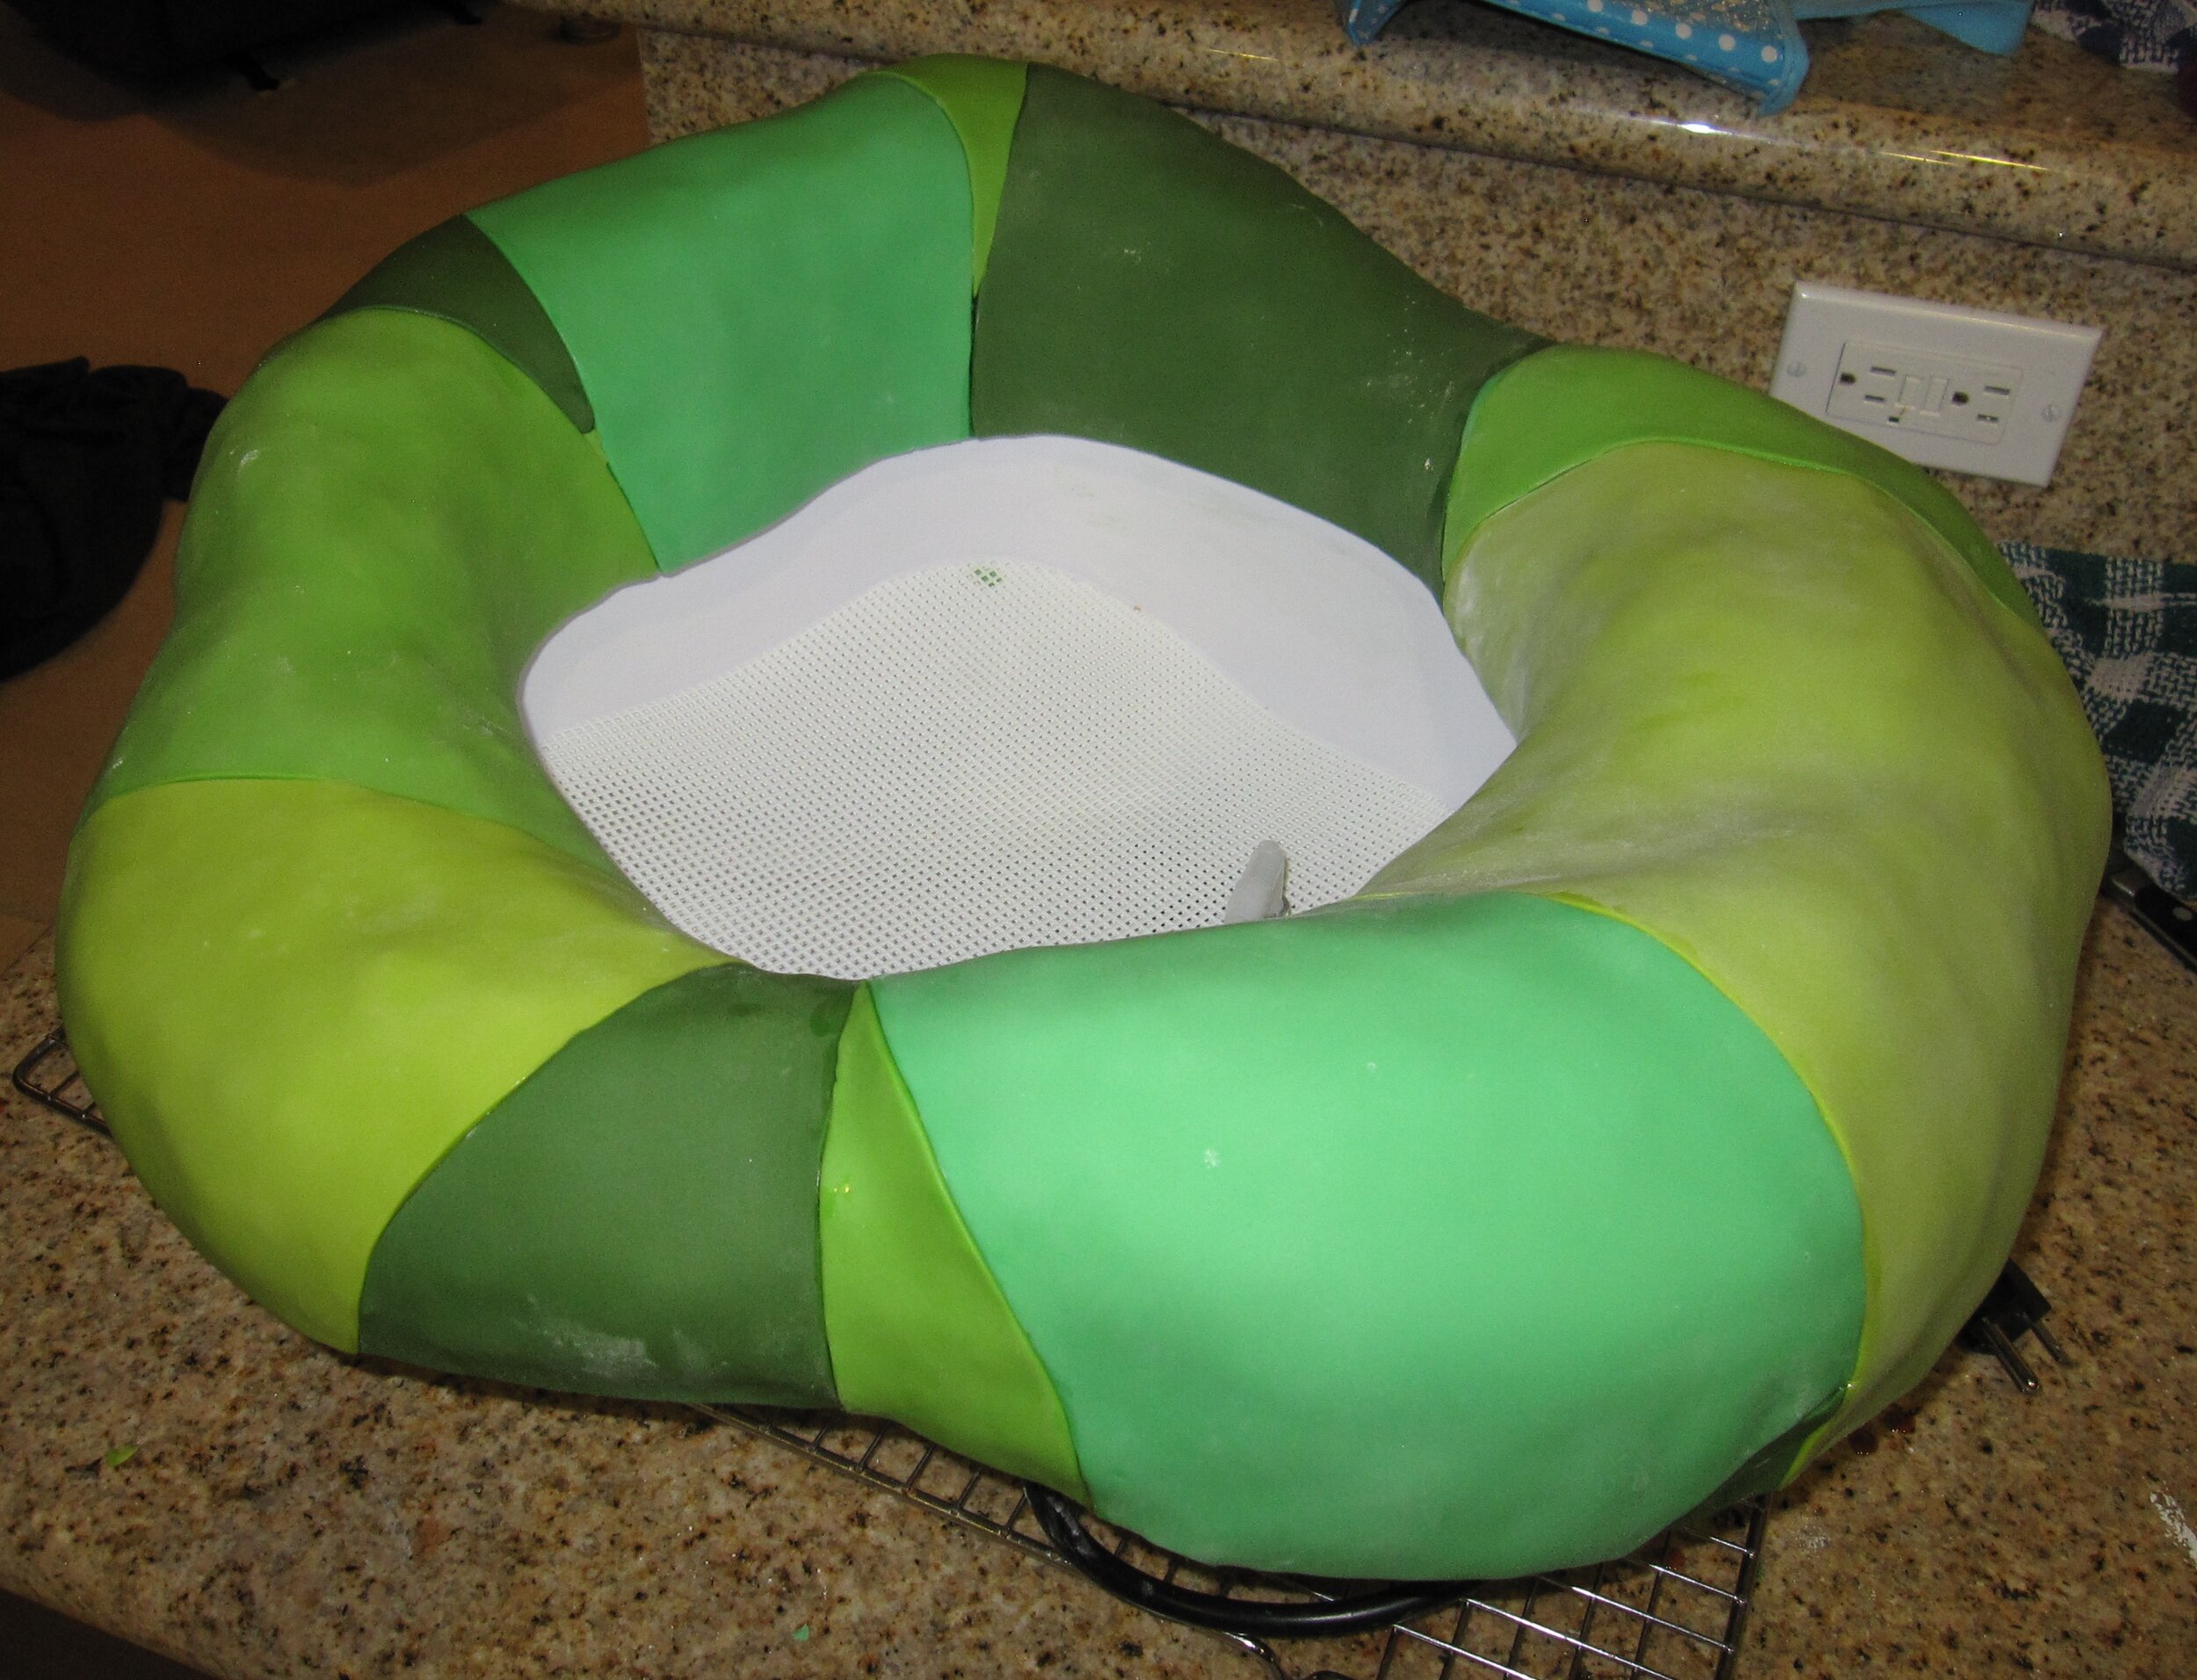
Sculpting the cake into a scenic hilly landscape was easy. Rather than attempting to cover the entire thing in a single piece of fondant, I decided to cover it in a patchwork of various shades of green. This didn’t perfectly mimic the landscape of the show, but I felt that it still captured the cartoony effect.

Installing the tree went remarkably well. I cut a big hole in the cake, poured tempered chocolate into it, and then stuck in the tree. A little more chocolate easily adhered the leaves. It worked perfectly. Have I mentioned that I need to use chocolate more often?
At this point in the project, two days before the birthday party was scheduled, Sam came down with a truly unfortunate case of croup. Sam and his parents spent the day before what was supposed to be his party at the hospital and I spent the day that I had planned to spend finishing Sam’s cake watching Alex and reassuring him that Mommy and Sam would be home soon. Obviously, we cancelled the party. But it was too late not to finish the cake, and the point of the cake was largely to amuse Sam and Alex, rather than our guests, so I decided to finish the cake anyway, even though there was no longer a party at which to serve it.
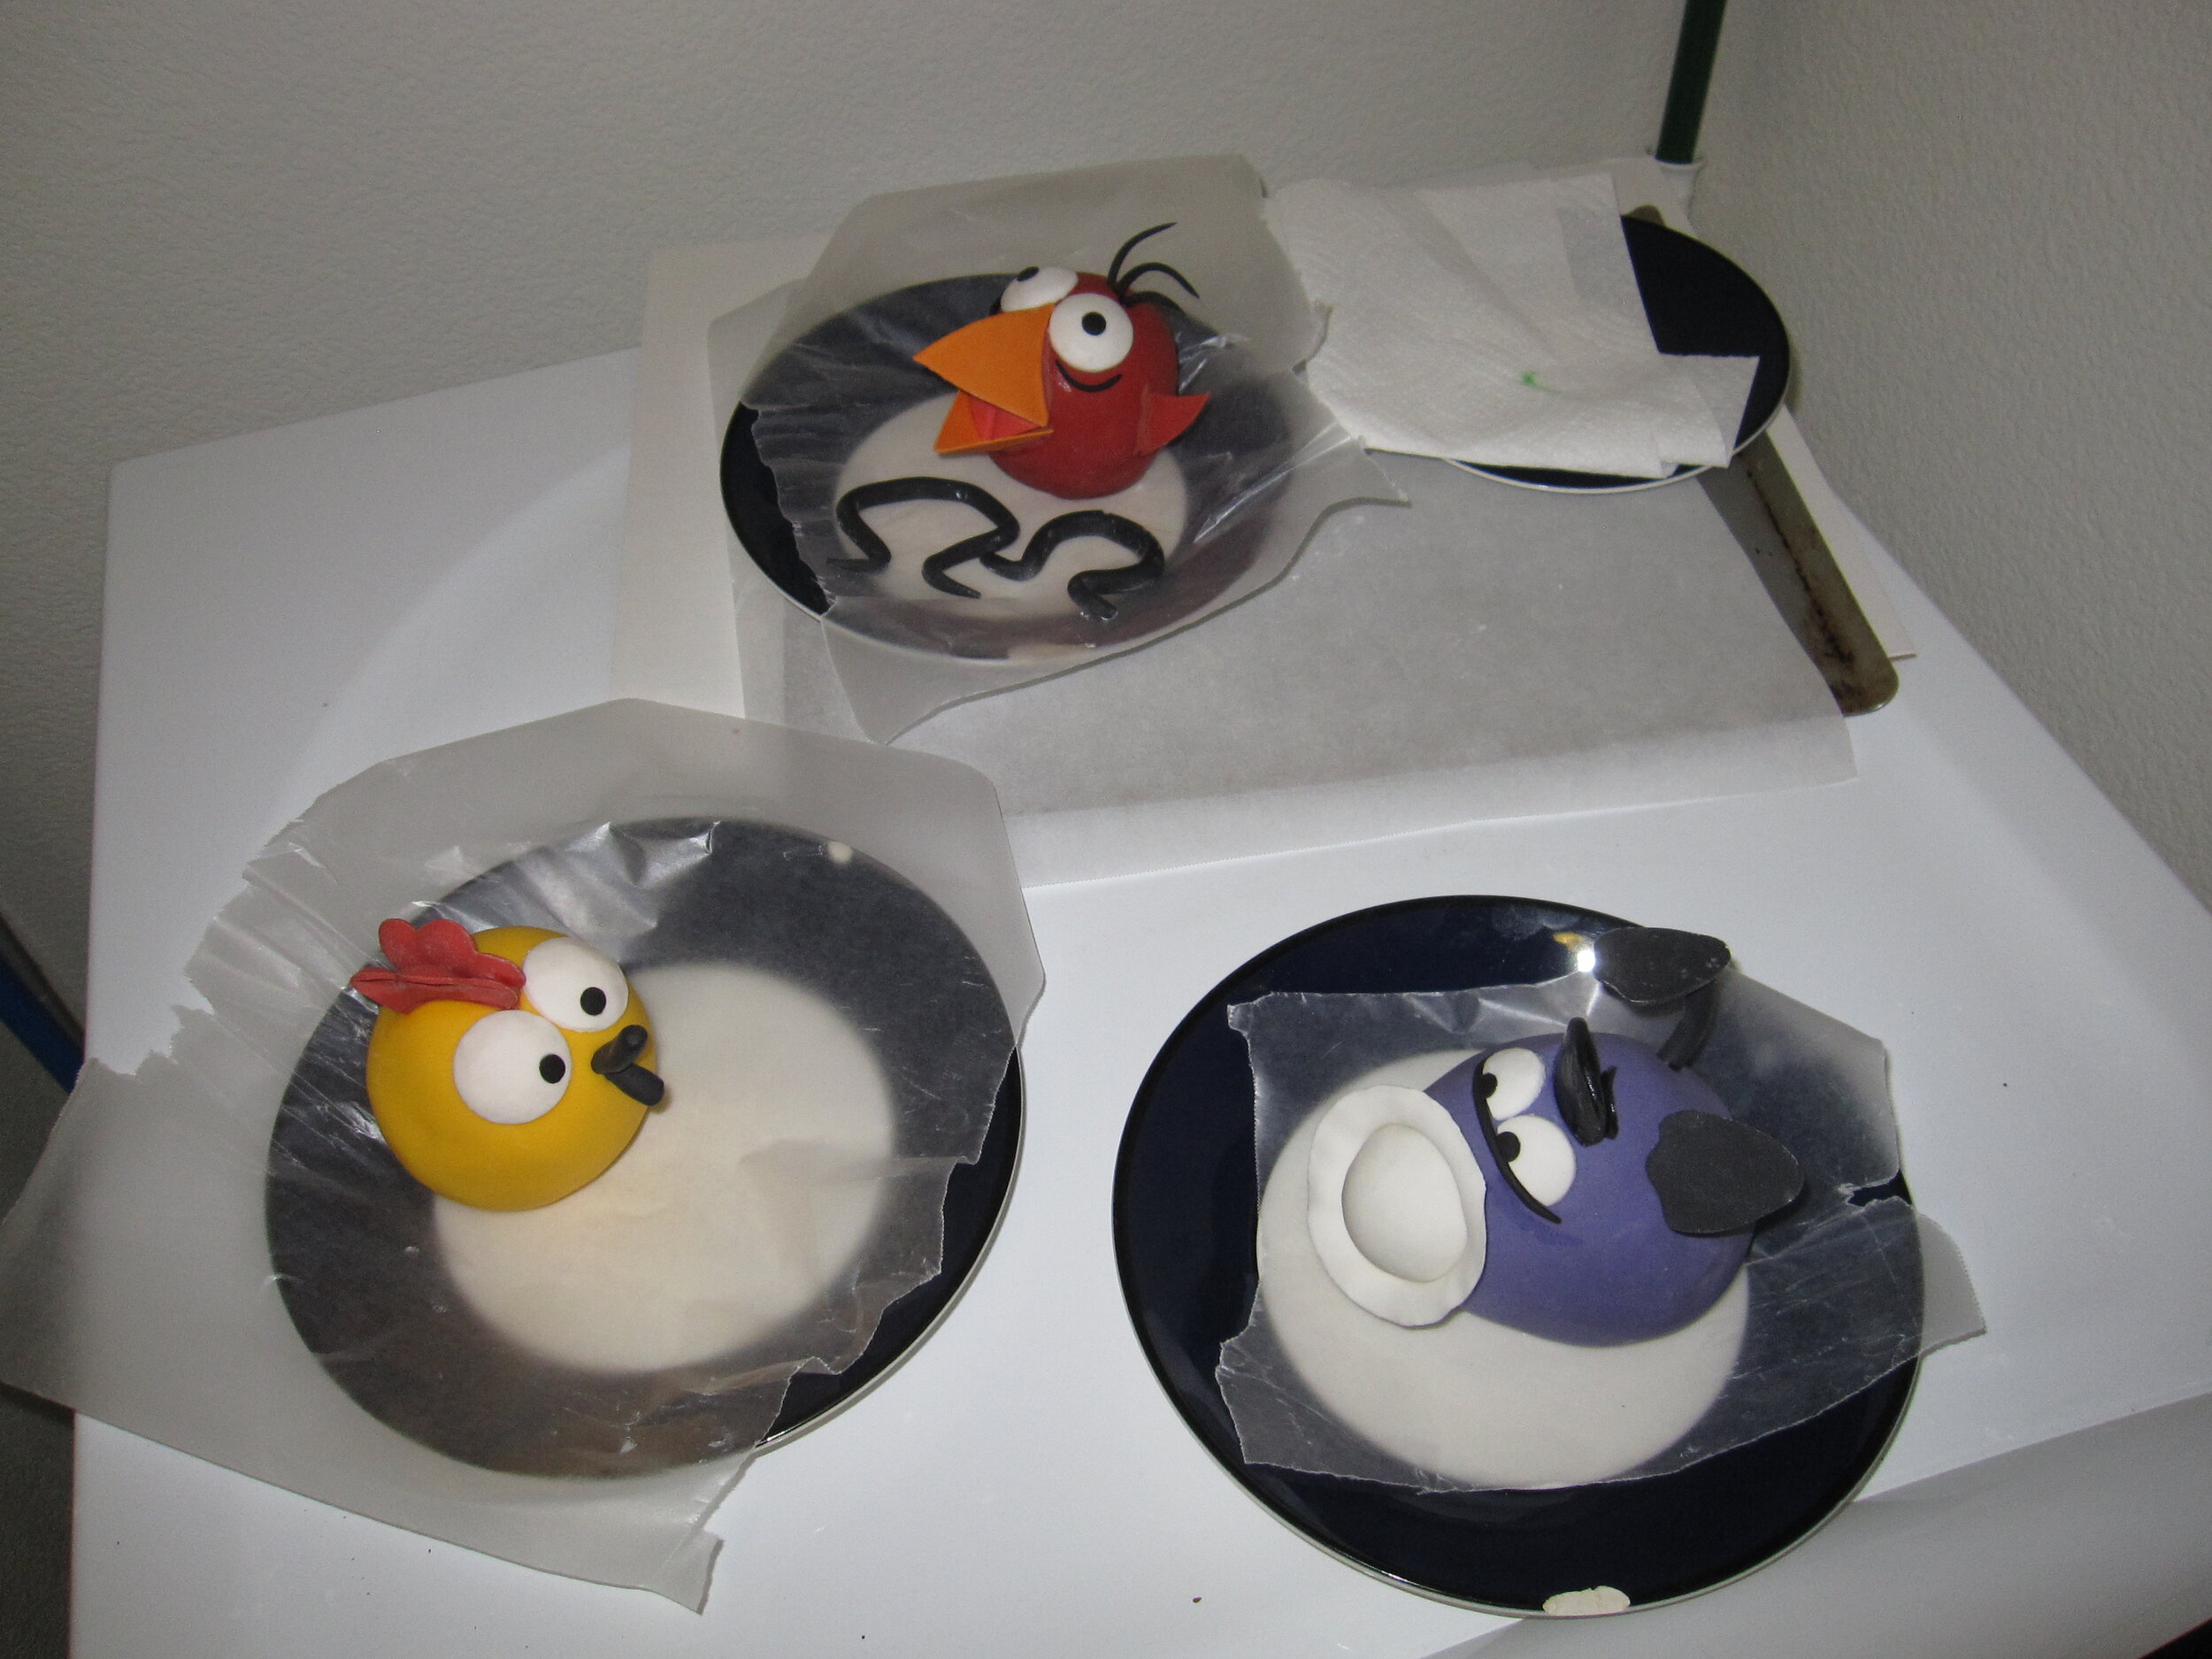
I had hoped to make Chirp and Peep entirely out of cake, but I discovered that it is basically impossible to make a sphere out of nothing but cake. So I cut some Styrofoam balls in half, covered them in tin foil, and used those for the bottom half of Peep and Chirp, with only the top half made of cake. I was quite pleased with how well I did in covering 3” diameter spheres in a smooth layer of fondant. I also think I did a pretty good job of capturing Chirp’s characteristic expression of frustration and exhaustion after she has failed in an attempt to fly.
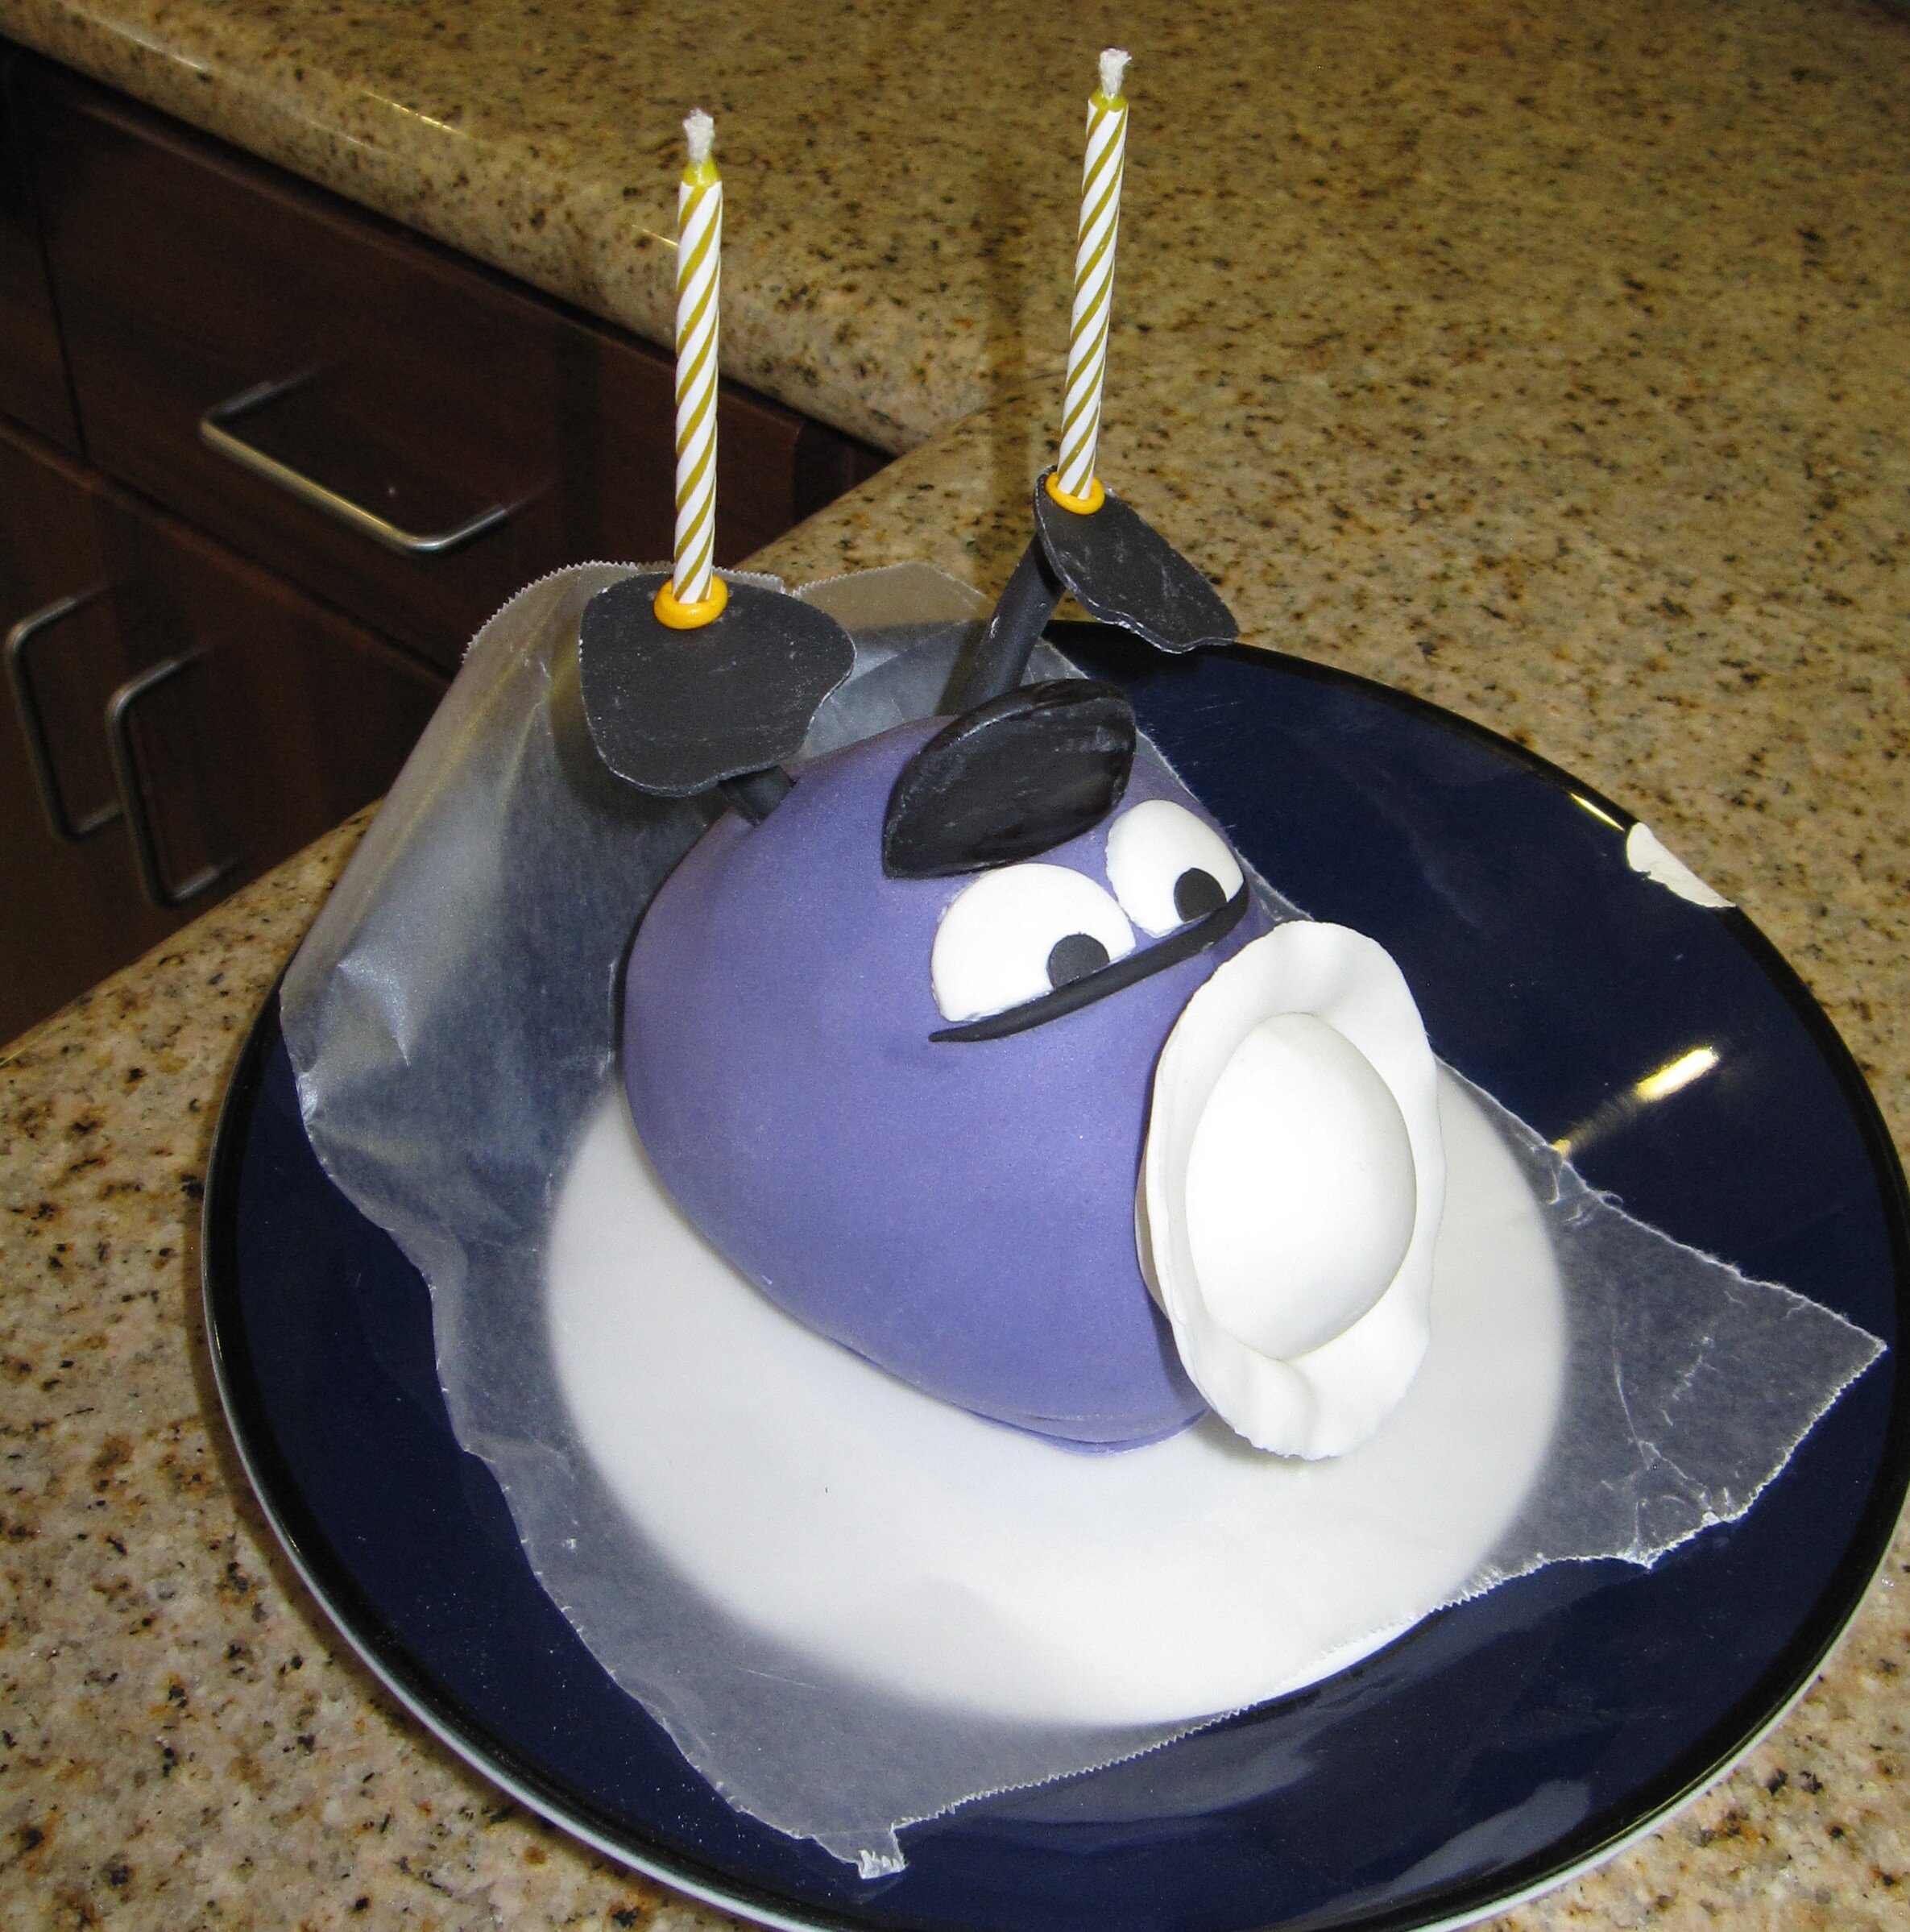
For Quack, the major problem was, of course, how to make him float. My plan was to make the bottom half of Quack out of buoyant foam and the top half out of cake. The first thing I discovered was that, if you make something egg-shaped (ie. Quack) half out of lightweight foam and half out of heavyweight cake and then place it in water, it will immediately flip over so that the heavy cake part is underwater. No good. I addressed this problem by gluing a lot of heavy steel nuts to the bottom of the foam, so that the bottom of Quack outweighed the top. This worked, up to a point, but it also necessitated a higher proportion of foam to cake to make up for the increased weight. Quack ended up only about one quarter cake and three quarters foam.
I also conducted some experiments on the solubility of fondant in water and I discovered that if I coated the fondant covering Quack in Crisco I could reasonably expect him not to dissolve for at least a quarter of an hour.
Assembling all the cake elements proved more problematic than I had anticipated for two reasons. First, my plan to stick the gum paste flower and the gum paste milkweed plant for the caterpillar directly into the cake utterly failed to account for the fact that moist cake rapidly erodes the structural integrity of gum paste. In the end I did manage to get the flower standing, but the caterpillar’s plant was ultimately a lost cause and he wound up just perched on a clump of grass.

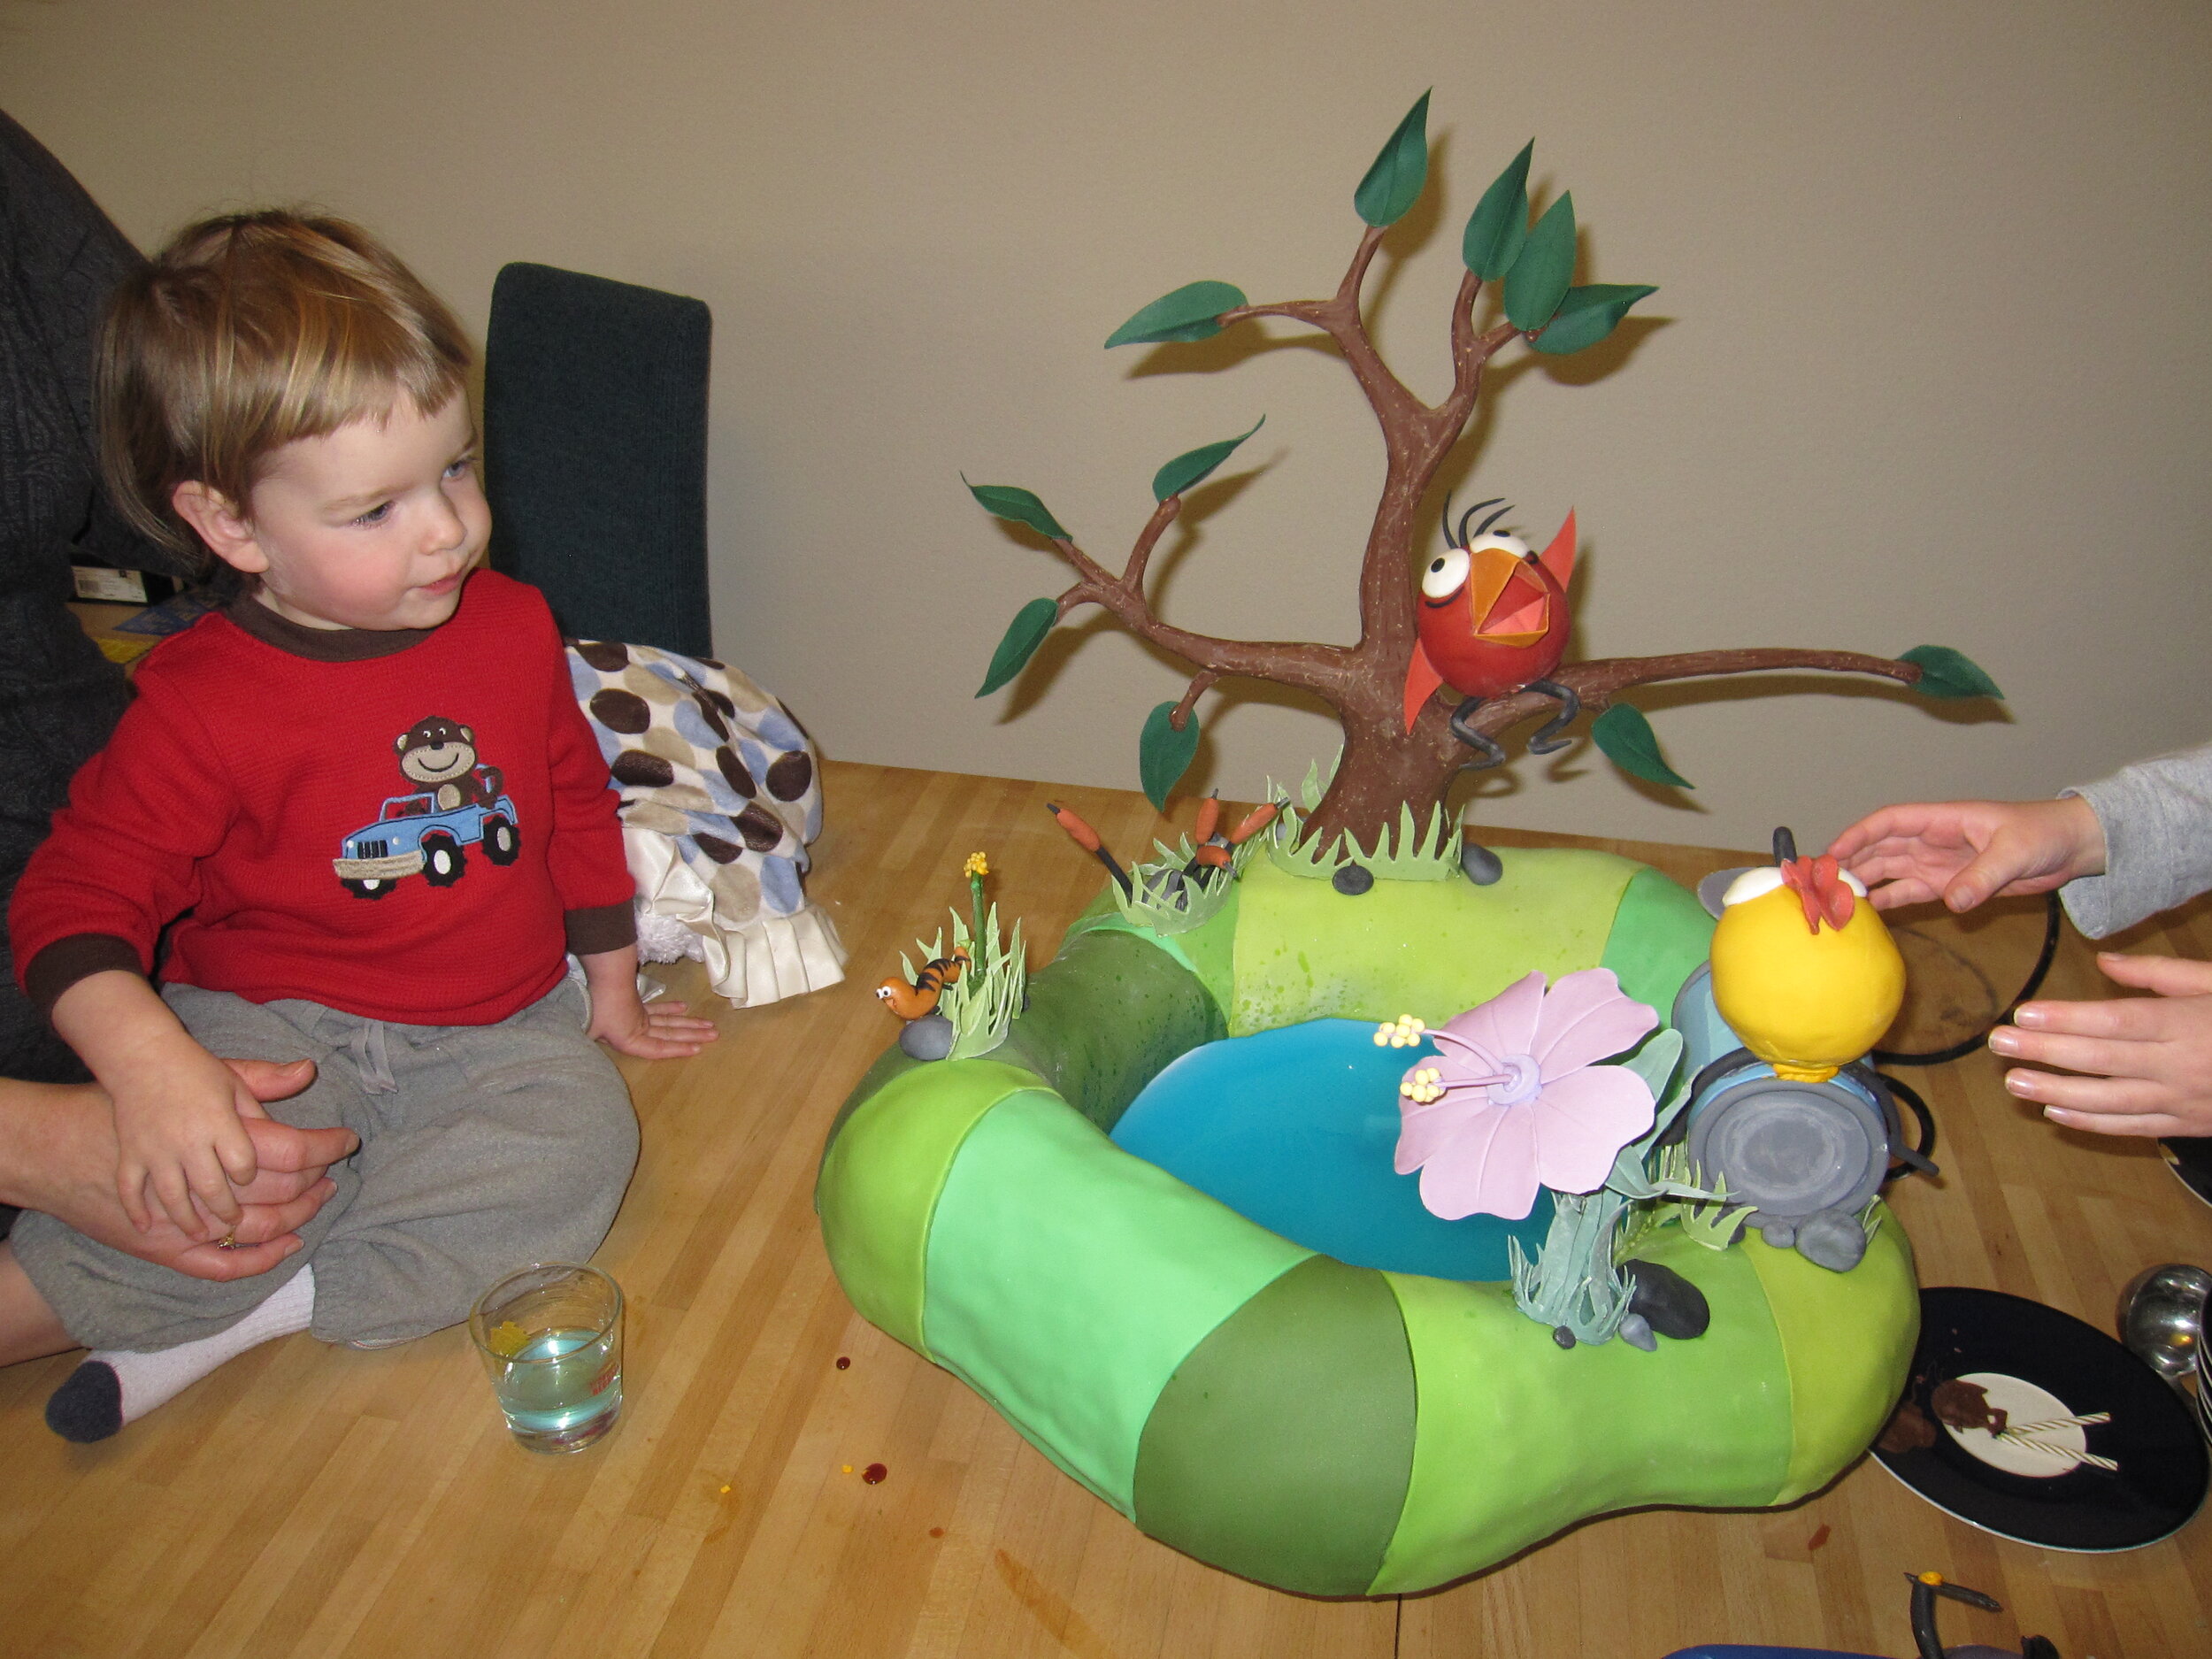
Second, I had planned to assemble the cake while Sam napped and my sister took Alex out to the museum. As Alex proved to be utterly uninterested in the museum that day, though, they came home early. At first, this was delightful, as she immediately ran up to the not-yet-completed cake and yelled, “I love it!!!”
Unfortunately, this was also the moment at which several pieces of the cake started to fall apart. Peep fell off her can. The flower and the milkweed plant began to collapse. I began to freak out. So we spent the next hour or so forbidding Alex from approaching the cake. “It’s very, very fragile!” “Please be careful!” “Oh, stay behind the train table, please!” The poor little kid just wanted to look at it. Alex, I’m sorry. I should have been more concerned with you than I was with the cake.
Sam woke up at about the moment that I finally managed to get the cake assembled and properly accessorized with gum paste rocks and gum paste tufts of grass. Because I was convinced that several components were about to collapse, we rushed to serve the cake, making this an extremely short-lived object, even by cake standards.
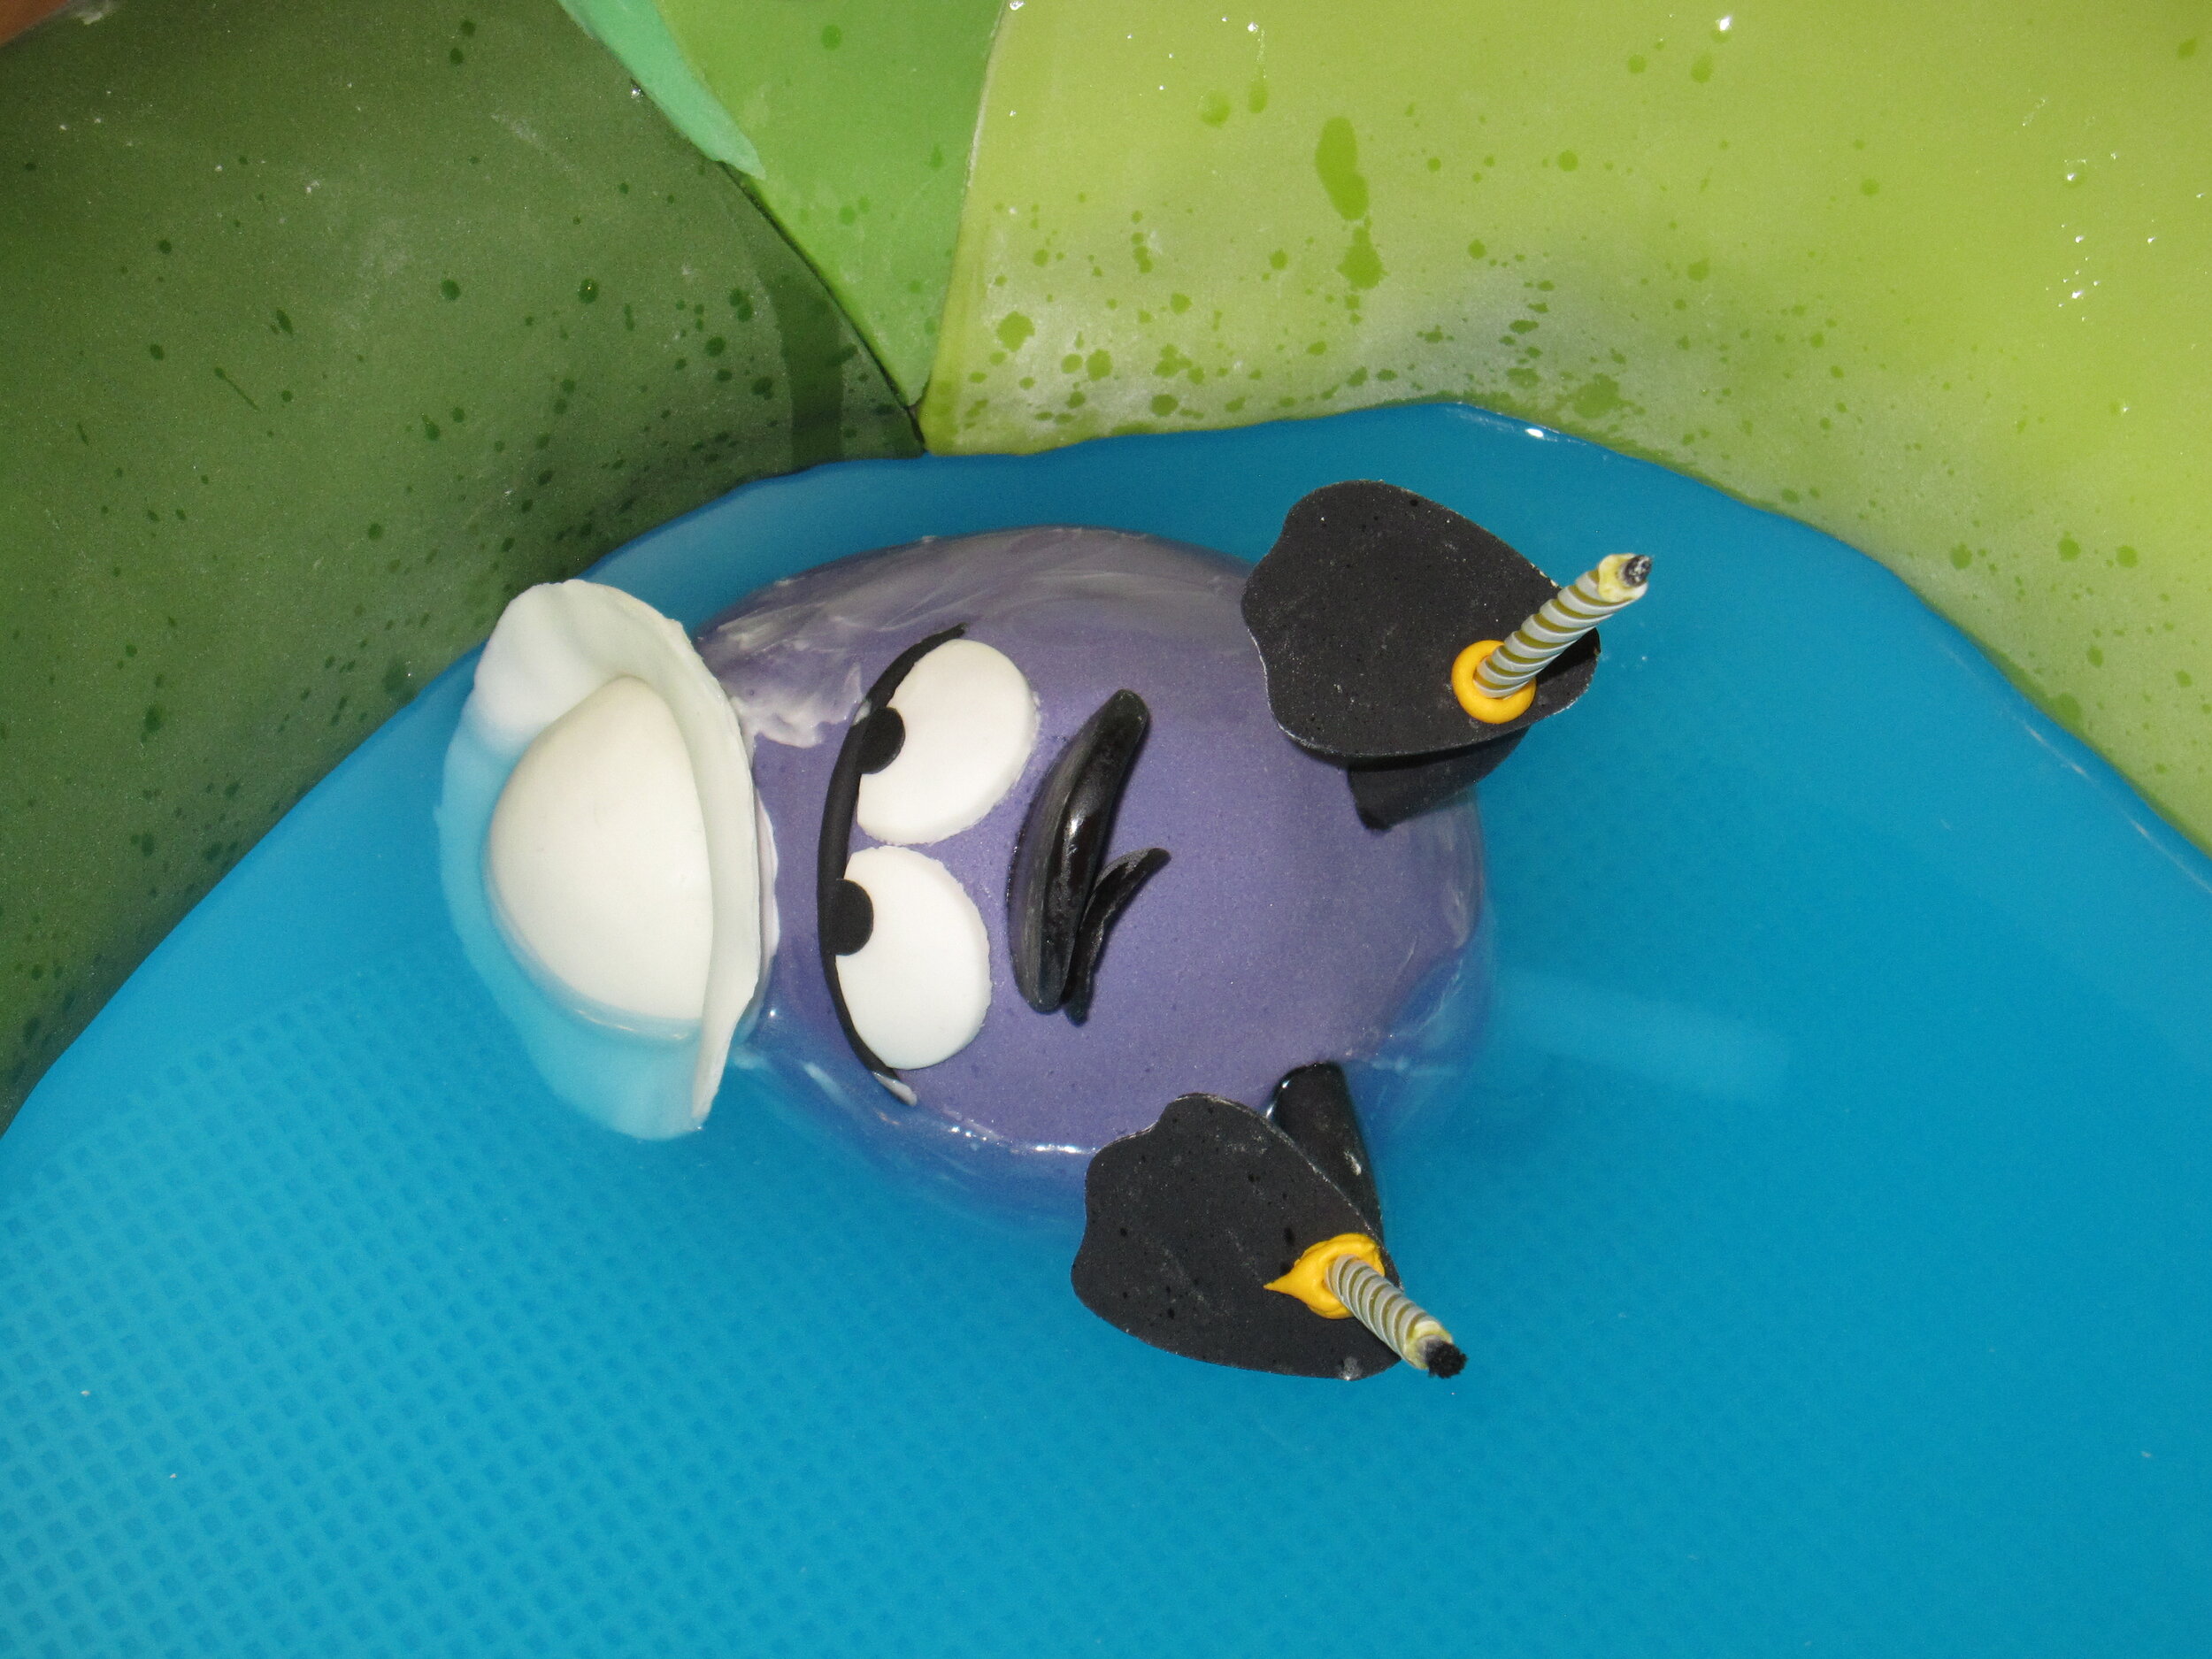
I slightly overfilled Quack’s pond with Gatorade, so that when I actually put Quack in the pond and turned on the pump to agitate the water, it overflowed a bit onto the floor. Other than that, Quack’s floating worked remarkably well. He was a little askew, but he definitely floated, and we were even able to light the two candles that I had adhered to his feet. Remarkably, the bit of cake inside of Quack even remained undamaged and edible.
Poor Sam was probably still recovering from his croup and had just woken up, so he didn’t seem terribly impressed. I’m not sure he understood that it was cake until I dissected Chirp and actually put the cake in front of him. Then he was happy. Sam loves cake. After he finished eating Chirp, he even asked, very sweetly, for “more cake, please?” Happy birthday, Sam!
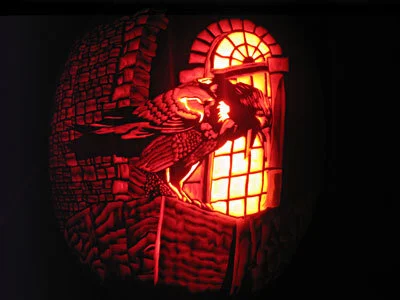
Raven Pumpkin
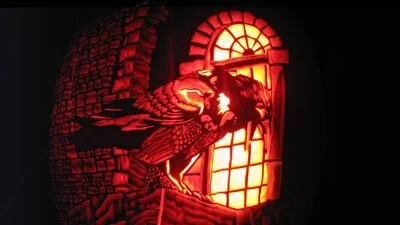
In my 11th consecutive year of entering the Pumpkinmasters carving contest, this is the pumpkin that finally won me the Grand Prize! Inspired by the ravens at the Tower of London, I think it represented my most effective use of textures to date.
In my 11th consecutive year of entering the Pumpkinmasters carving contest, this is the pumpkin that finally won me the Grand Prize! Inspired by the ravens at the Tower of London, I think it represented my most effective use of textures to date.
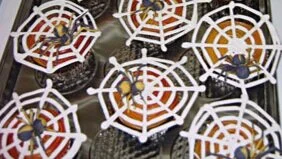
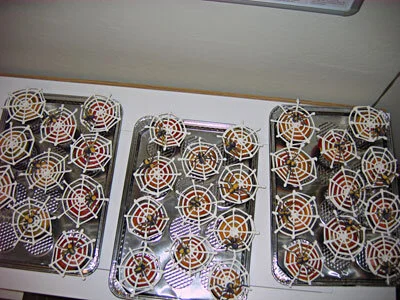
Spider Cupcakes
The spider cupcakes were my first commissioned baking project for my niece's preschool, to be part of the bake sale at their fall carnival. My goal was to show off and entertain myself while not traumatizing the children or horrifying the parents.

The spider cupcakes were my first commissioned baking project for my niece's preschool, to be part of the bake sale at their fall carnival. My goal was to show off and entertain myself while not traumatizing the children or horrifying the parents.
It wasn't actually a Halloween carnival, but it was in October, so I figured that gave me license to make something a bit spooky, though the fact that the audience was two-to-five-year-olds placed some obvious restraints on what I could get away with. Because my time was also fairly limited I decided to go with the restrained elegance of a basic spider and web design.
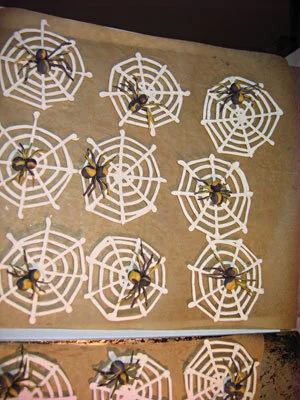
I made the webs freehand with white royal icing from a medium-sized round piping tip. As I learned from the snowflakes on the Season of Love Cake, little kids love crunchy royal icing candy. At first I tried a few methods of making curved webs - piping them over bowls and such - but the results weren't particularly inspiring, so I decided just to make them flat, which was much easier.
For the spiders, I was going for something leaning towards refined and arty (as opposed to ugly and scary or goofy and cartoony). I decided on a simple two-color palette. The dominant color was a deep grey-purple, highlighted with yellow. In the interests of maintaining a clean, elegant look I went relatively minimalist with the spiders. Each one was made up simply of two balls - one for the cephalothorax and one for the abdomen - plus, of course, eight legs. I made all these pieces out of gum paste. For the heads and bodies I started with three equal sized pieces - two purple and one yellow. I placed the two purple pieces on either side of the yellow piece and rolled the whole thing into a ball, resulting in purple spiders with irregular yellow stripes down their backs. For the legs, I just put a piece of yellow alongside a piece of purple and rolled them into very thin, striped ropes, which I cut to length and bent at the knee.
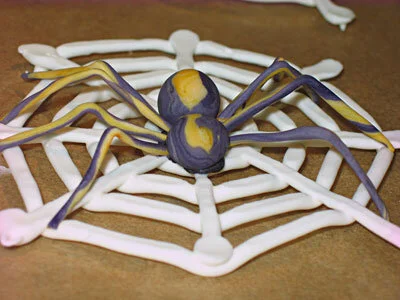
Before I even made the cupcakes, I was able to assemble the spiders on the webs. I'm pleased to say that I went to the trouble of tinting the royal icing that I used to stick the spiders together the same purple as the gum paste. I often find myself to be too lazy to tint my royal icing adhesive appropriately, and I always regret it. The key to assembling convincing spiders is to remember that the legs are attached to the cephalothorax, not the abdomen.

With my spiders settled comfortably on their webs, it was time to make cupcakes. I used some special Halloween cupcake paper cups for most of them, but I ran out and had to use plain silver for the rest. My initial plan had been to frost the cupcakes with buttercream icing the color of fall leaves, and then texture it like a leaf by gently pressing it with a piece of lettuce. That way (I thought) it would look like the spiders had spun their webs in a tree covered with fall leaves. It didn't work at all. The buttercream just stuck to the lettuce and rather than nicely textured, it wound up bumpy and ugly. So I gave up on that idea and just piped the icing in a swirl with a big star tip and then plopped the spider webs on top, which looked fine. Frankly, even if my plan to make the leaf texture had worked, it wouldn't have read very well through the spider web anyway.
The cupcakes were very well received when I dropped them off at the preschool. I'm told that they were even sold for more money than the standard cupcakes at the bake sale. It's nice when I'm able to combine my love of showing off my cakes with something that actually benefits other people.
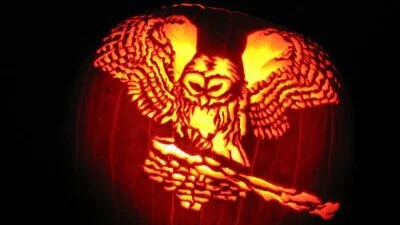
Owl Pumpkin
I only carved one pumpkin this year (but I still won the Pumpkinmasters "Animals" category! Woohoo!) I created the pattern by tracing over a photo of an owl.

I only carved one pumpkin this year (but I still won the Pumpkinmasters "Animals" category! Woohoo!) I created the pattern by tracing over a photo of an owl.
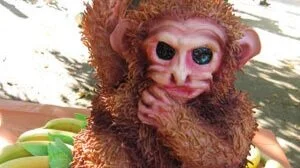
Poo-Flinging Monkey Cake
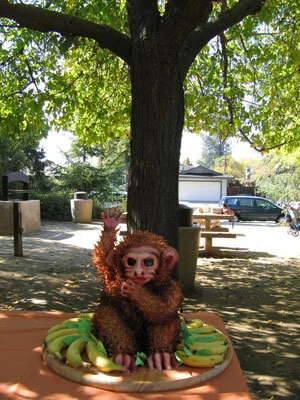
I made this creepy poo-flinging monkey cake for our little friend Isaac's first birthday party. This was a special request by Isaac's mother, who was also the recipient of the dancing yeti wedding cake.

I made this creepy poo-flinging monkey cake for our little friend Isaac's first birthday party. This was a special request by Isaac's mother, who was also the recipient of the dancing yeti wedding cake.
What does every little boy want for his first birthday? That's right - a cake shaped like a creepy-looking monkey! And what's even better than a creepy-looking monkey cake? That's right - a creepy-looking monkey cake that flings poo, just like a real monkey.
OK, maybe that's not exactly what my little friend Isaac would have requested for his first birthday cake, but he can't talk, and that is exactly what his mom requested.

The first step, of course, was to figure out exactly how the poo mechanism should work. My first thought was to make it a sort of catapult, but thenI realized that it would be more fun if it could fling poo repeatedly without a complicated reset of the mechanism. So I decided to go with a spring-loaded hinge. I made an armature for the arm and hand out of wood and brass tubing - I felt that it was necessary to have a metal structure within each individual finger so they wouldn't break off when I pulled the arm back to release the poo. The arm was connected via the spring hinge to a post, which was in turn secured to the heavy wooden base of the cake.

Before I made the cake, I sculpted the arm out of gum paste and fondant around the wooden armature, which meant that I had a sort of ghostly white monkey arm on a stick. I did load it up with some raisinettes (aka cake monkey poo), which it flung quite effectively, so I was ready to move onto the cake.
My sister was kind enough to actually bake the cakes for me. Fortunately she baked more than I asked her to, because the amount that I asked her to make would not have been enough. I had to cut notches in each tier and slide them into place around the arm support post. When I was done, I had what appeared to be a squat, one-armed robot, at least until I carved it into a more monkey-like shape.

This cake marked my first experiment with using rice krispie treats to sculpt additively onto my cakes. It's a technique that I learned, like so many others, from reading Colette Peters' books. My plan was to sculpt the tail, haunches, and second arm out of rice krispie treats. Not having ever made rice krispie treats myself, for some reason I thought they solidified really quickly. "I'll have to work fast," I thought, "but once I get them into shape they'll hold really well." Yeah, it didn't work out that way atall.

I'm not sure whether it was because it was really wet out or just because that's the way rice krispie treats are, but they didn't behave at all the way I expected them to. As I started sculpting them, they were just gooey and collapsing everywhere. I hollered for my sister to bring me skewers! Hurry! Hurry! Yikes! I stuck in skewers, here, there, everywhere! Anything to hold those rice krispie treats together and to hold them in place. Pretty soon I had a proto-monkey which appeared to be undergoing a truly ghastly acupuncture session. But at least it had arms and legs. I added some detail to the hand and feet with fondant.
I made the facial features by piping buttercream and sculpting it with a paintbrush. It was kind of hard to make it look like a monkey rather than like a sort of withered old man, but I think I did OK. I was using one of my baby niece’s animal picture books as a reference. It was very nice of her to share it with me.
The ears I had made a few days in advance out of gum paste with skewers embedded in them so I could just stab them into place in the cake.
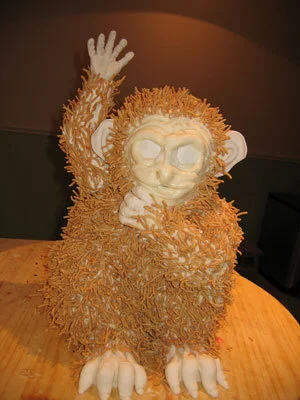
What's the point of a poo-flinging monkey without gross, matted fur? It would have been easy to make the fur out of frosting, but that tends to be too cartoonish for my taste. So I came up with a different plan - those little crunchy chow mein noodles. I know, I know it sounds a little weird. But potato chips and chocolate can be good. Those little shoestring potato snacks and chocolate can be good. I though it was workable. And they looked GREAT! It took me quite a while to cover the entire monkey and I seriously underestimated the amount of noodles it would take. Fortunately, there was some confusion as to who was buying how many packages of noodles, and we wound up buying approximately twice as many as I thought I would need. Which turned out to be just barely enough.

The noodles were already a pretty good base monkey color, so I just airbrushed in some mottling and some shadows. I painted the eyes with black food coloring and then went over that with clear piping gel to get the necessary depth and sheen. With that, the monkey itself was done. Left to my own devices I probably would have left it at that, but fortunately my sister gave me the kick in the ass that I needed to make it a better presentation. She came up with the idea of surrounding the monkey with bananas. So we bought about sixteen bananas and I made some gum paste leaves to fill in the gaps. It looked quite regal really, like he was a monkey king sitting on his banana throne.
The party was in an outdoor park, which was a great setting. We arranged the monkey on a picnic table underneath a big tree, with a convenient bowl of raisinettes to use as poo. The green leaves of the tree complimented the green leaves on the cake perfectly and I got to bask in the compliments of the guests at the party in the next picnic area as well as those of the guests at our party. I actually went to the party thinking that the cake was entirely innocuous and mainstream, at least compared to all my other cakes. But the unanimous verdict was that it was actually quite creepy, primarily due to the huge, hypnotic, glassy eyes.

The weight of all the gum paste and frosting and chow mein noodles on the arm made the poo flinging a little more sluggish than it was in my initial tests, so the monkey only threw his poo about two feet in front of him. Oh well, next time maybe I can get a better angle of release.
Cutting the cake was very funny because I had to cut it away around the arm mechanism. We ended up with a monkey arm hovering above a field of cake and banana carnage. The verdict on the chow mein noodles with the cake was mixed. Some people thought it worked quite well - a bit of crunch, a bit of salt - while others just found it weird and incongruous and ate around it. The birthday boy himself didn't weigh in on that particular issue, as he doesn't have enough teeth to get any of the chow mein noodles, but he certainly seemed to enjoy the cake. No one's quite sure how he got some on the back of his head, though.

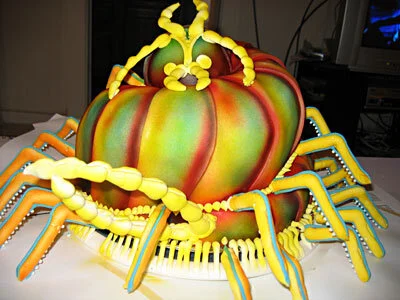
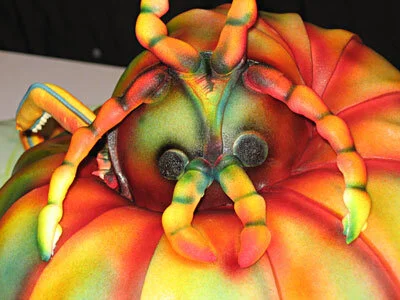
Centipede Cake
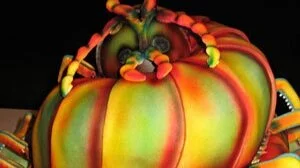
When I was in MBA school I had to take a class called Venture Creation, for which the final project was to write a business plan. Mine was for a cake business. We also had to do a presentation for people pretending to be potential investors, so, as part of that presentation, I naturally needed to make a cake. The Centipede Cake is what I came up with.
When I was in MBA school I had to take a class called Venture Creation, for which the final project was to write a business plan. Mine was for a cake business. We also had to do a presentation for people pretending to be potential investors, so, as part of that presentation, I naturally needed to make a cake. The Centipede Cake is what I came up with.
Since the name of my imaginary cake business was Kinetic Cakes, it was obvious that my cake had to do something. Since I didn't have all that much time blocked out in my schedule to make the cake, it was obvious that it wouldn't do anything too complicated. Since there would only be a few people at the presentation, it was obvious that it shouldn't be very big. Since moderation in cakes is not one of my strong suits, it was obvious that I was going to make way too much cake.
I had some trouble coming up with a concept because I had a bit too much creative freedom - it can be hard to design anything when there are so few parameters. I have no idea why I ultimately settled on the centipede, unless perhaps it was because the apartment I was living in at the time was occasionally invaded by house centipedes, which are completely harmless but quite large and shocking to meet in the bathroom in the middle of the night. And I like arthropods. I once had to walk five blocks in my pajamas to my friend's apartment because she had a house centipede in her sink and couldn't get rid of it herself.
The legs are, of course, the most pivotal part of the centipede, plus it is their disturbingly inhuman rippling motion that makes the centipede seem so alien to us. It was this motion that I was trying to convey through my cake.
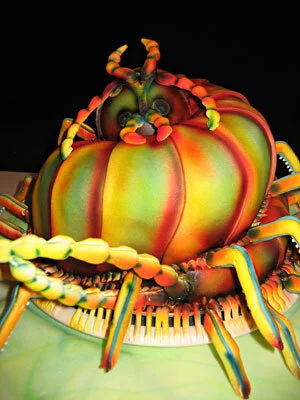
My plan was to mount the cake on a turntable that was, in turn, sitting on a bumpy base so that, when the turntable was spun, the legs, which would hang off the sides of the turntable, would ripple up and down as they passed over the bumps.
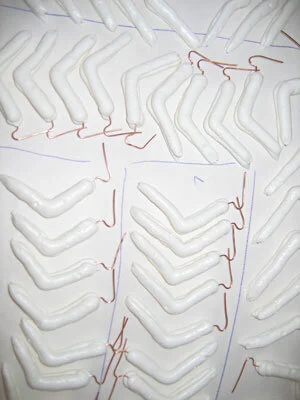
First I needed a turntable. I was fortunate enough to find one with a wire around the perimeter so that I could easily attach my legs to it. In order to do that, I built the legs around lengths of copper wire by piping royal icing onto each side of the wire with a large round tip. I airbrushed one side of each leg yellow and the other side orange because I though that having a variance in color between the two sides would help to emphasize the rotational motion of the turntable. To hide the seams running up each side of the legs, I piped on a thin line of turquoise royal icing. (If this sounds like an unusually colorful centipede, you're right. I don't really recall why I chose this color scheme, but it was quite festive.) Then I positioned the legs all the way around the perimeter of the turntable, wrapping the copper wire in the legs around the wire at the circumference of the turntable.
For the base that the turntable would rest on I used a big piece of foamcore, with smaller segments of foamcore arranged around it to create the bumps. Then I covered the whole thing with a layer of green marbled fondant, to suggest grass and because I like marbled fondant.
To make the cake, I started with two tiers of chocolate cake, one 10" in diameter, the other 8" in diameter, torted and filled with buttercream frosting. Then I carved that into a spiral, as if the centipede was curled into a loop, and coated it with buttercream.

Because centipedes have segmented bodies, it was easy to cover the cake with small fondant sections, each overlapping the one before. With the fondant in place, I built up the airbrush color in layers. First a yellow base, then orange and red shadows around the perimeter of each segment, then blue shading in the center of the segments. Once the color was on, I moved the whole cake onto the base, which already had the legs attached. I stuck some additional legs directly into the cake, following the curve of the centipede's body. In an attempt to conceal the edge of the turntable that wasn't already obscured by the legs, I piped on some sort of mini-legs between the big legs. I also piped some details onto the face. I had made some royal icing antennae and mandibles in advance, as well as some wicked-looking pincers for the back, and I stuck those on at this point as well. Then I airbrushed my new royal icing details with the same yellow, orange, red, and blue and a bit of black for good measure.
The cake went over well at the presentation, though I think if I were talking to real potential investors for a real project it would behoove me to make a cake that did something more impressive, though the rippling of the legs was nice in a restrained kind of way. And of course I had about five times as much cake as I needed, so I gave the rest to my friends in the Entrepreneurship Center. And I got an A in the class (which no one but my parents cares about because it's grad school.)

Hobby Eagle
As soon as my niece Alex learned how to walk I decided that she was ready to fly. So for her first birthday I made her a hobby eagle. (It's like a hobby horse, but much more cumbersome.) Being the giant Tolkien nerd that I am, I called it Gwaihir the Windlord.
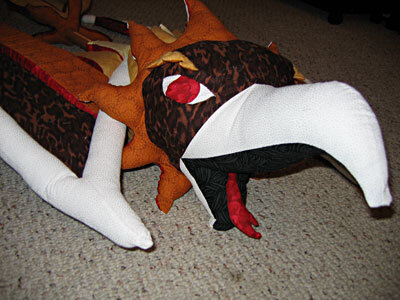
As soon as my niece Alex learned how to walk I decided that she was ready to fly. So for her first birthday I made her a hobby eagle. (It's like a hobby horse, but much more cumbersome.) Being the giant Tolkien nerd that I am, I called it Gwaihir the Windlord.
In making the pattern, I tried to size it appropriately for a taller-than-average one-year-old child. Time has proven that I, in fact, sized it appropriately for a taller-than-average three-year-old child, which is just as well, since time has also proven that Alex had virtually no interest in the eagle until she turned three.
For the structure I used a wooden spindle with a dowel stuck through it at a right angle for the handle. I had already decided to go with a muted palette of natural eagle-toned browns (because everyone knows that one-year-olds love subdued, tasteful colors), so I simply used a basic oak stain. I put a caster on the bottom as well because I figured that would make it easier to use for a child too small to actually pick the whole thing up.

I then made a complete mockup of the entire fabric section out of paper. I of course made it unnecessarily complicated with layers of feathers in gradated colors and lots of alternating curves and a big gaping maw with a twisted tongue. So when it came time to sew the real thing out of fabric, I had to do a lot of hand sewing on the little fiddly bits. Then I used foam rubber to stuff the wing feathers and batting to stuff the rest of it and glued the fabric pieces onto the wooden structure.
Since I was making this in Wisconsin and my niece lives in California, I then had to make a giant, custom-made foam core box to ship the huge thing to Alex. I think that she found the box at least as interesting as she found the eagle.
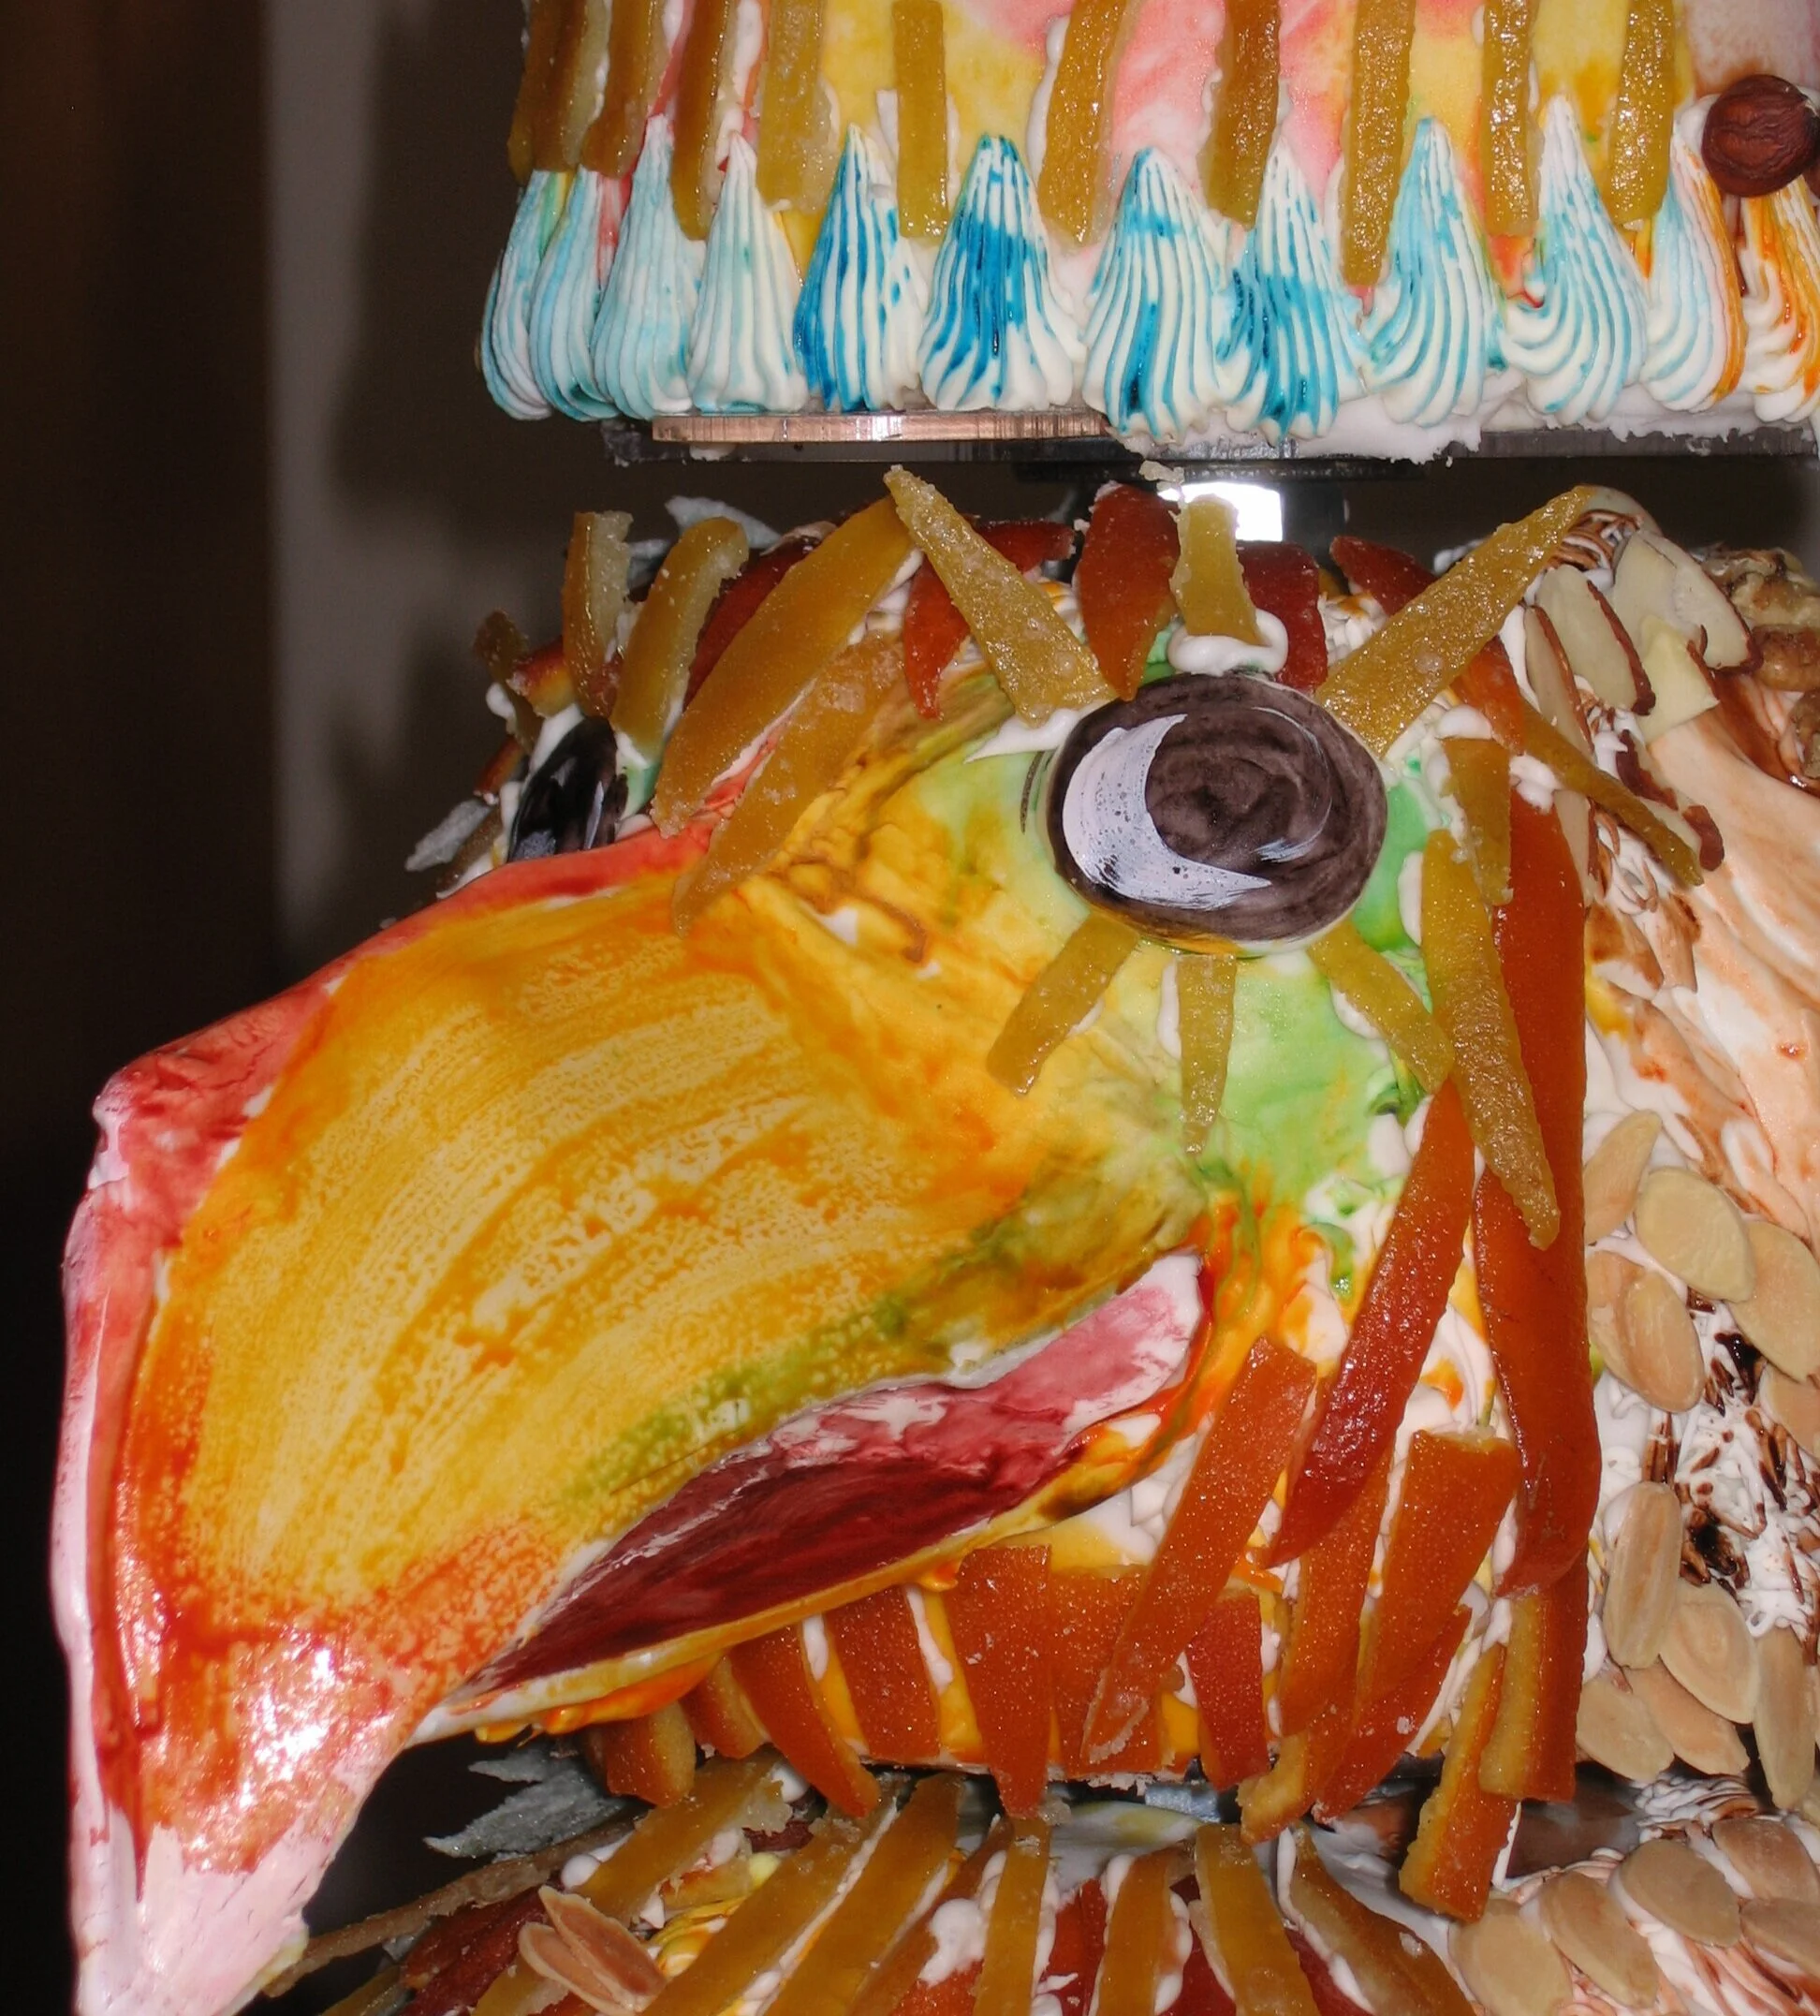
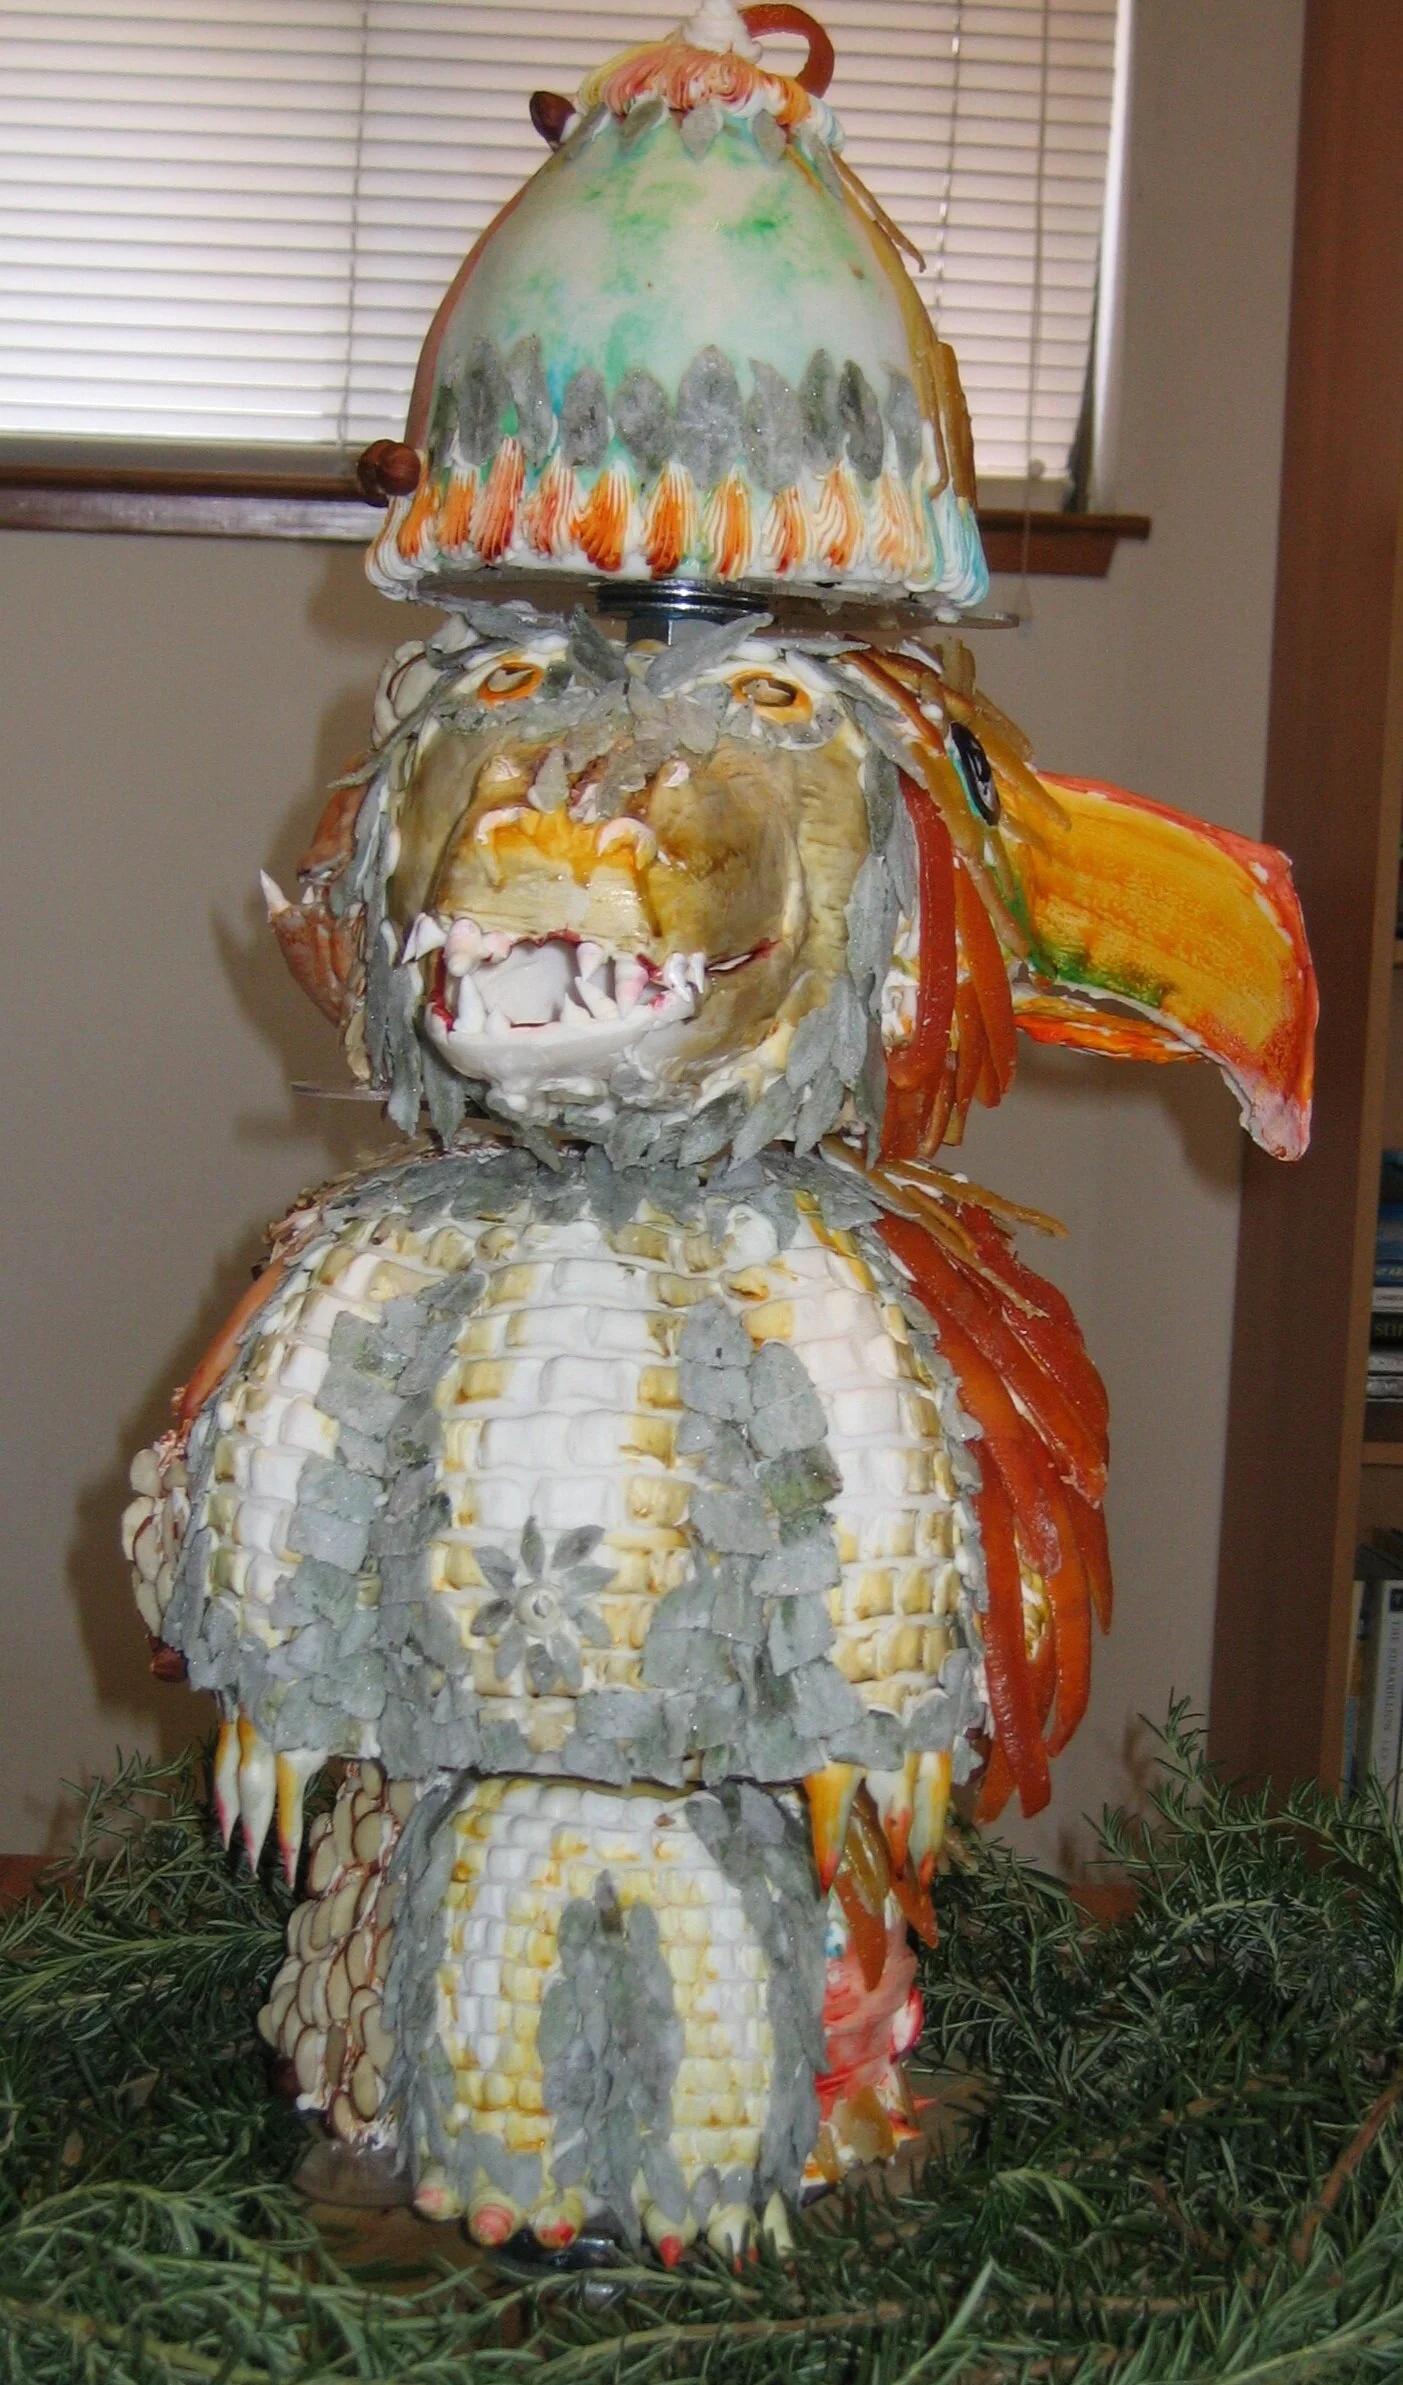
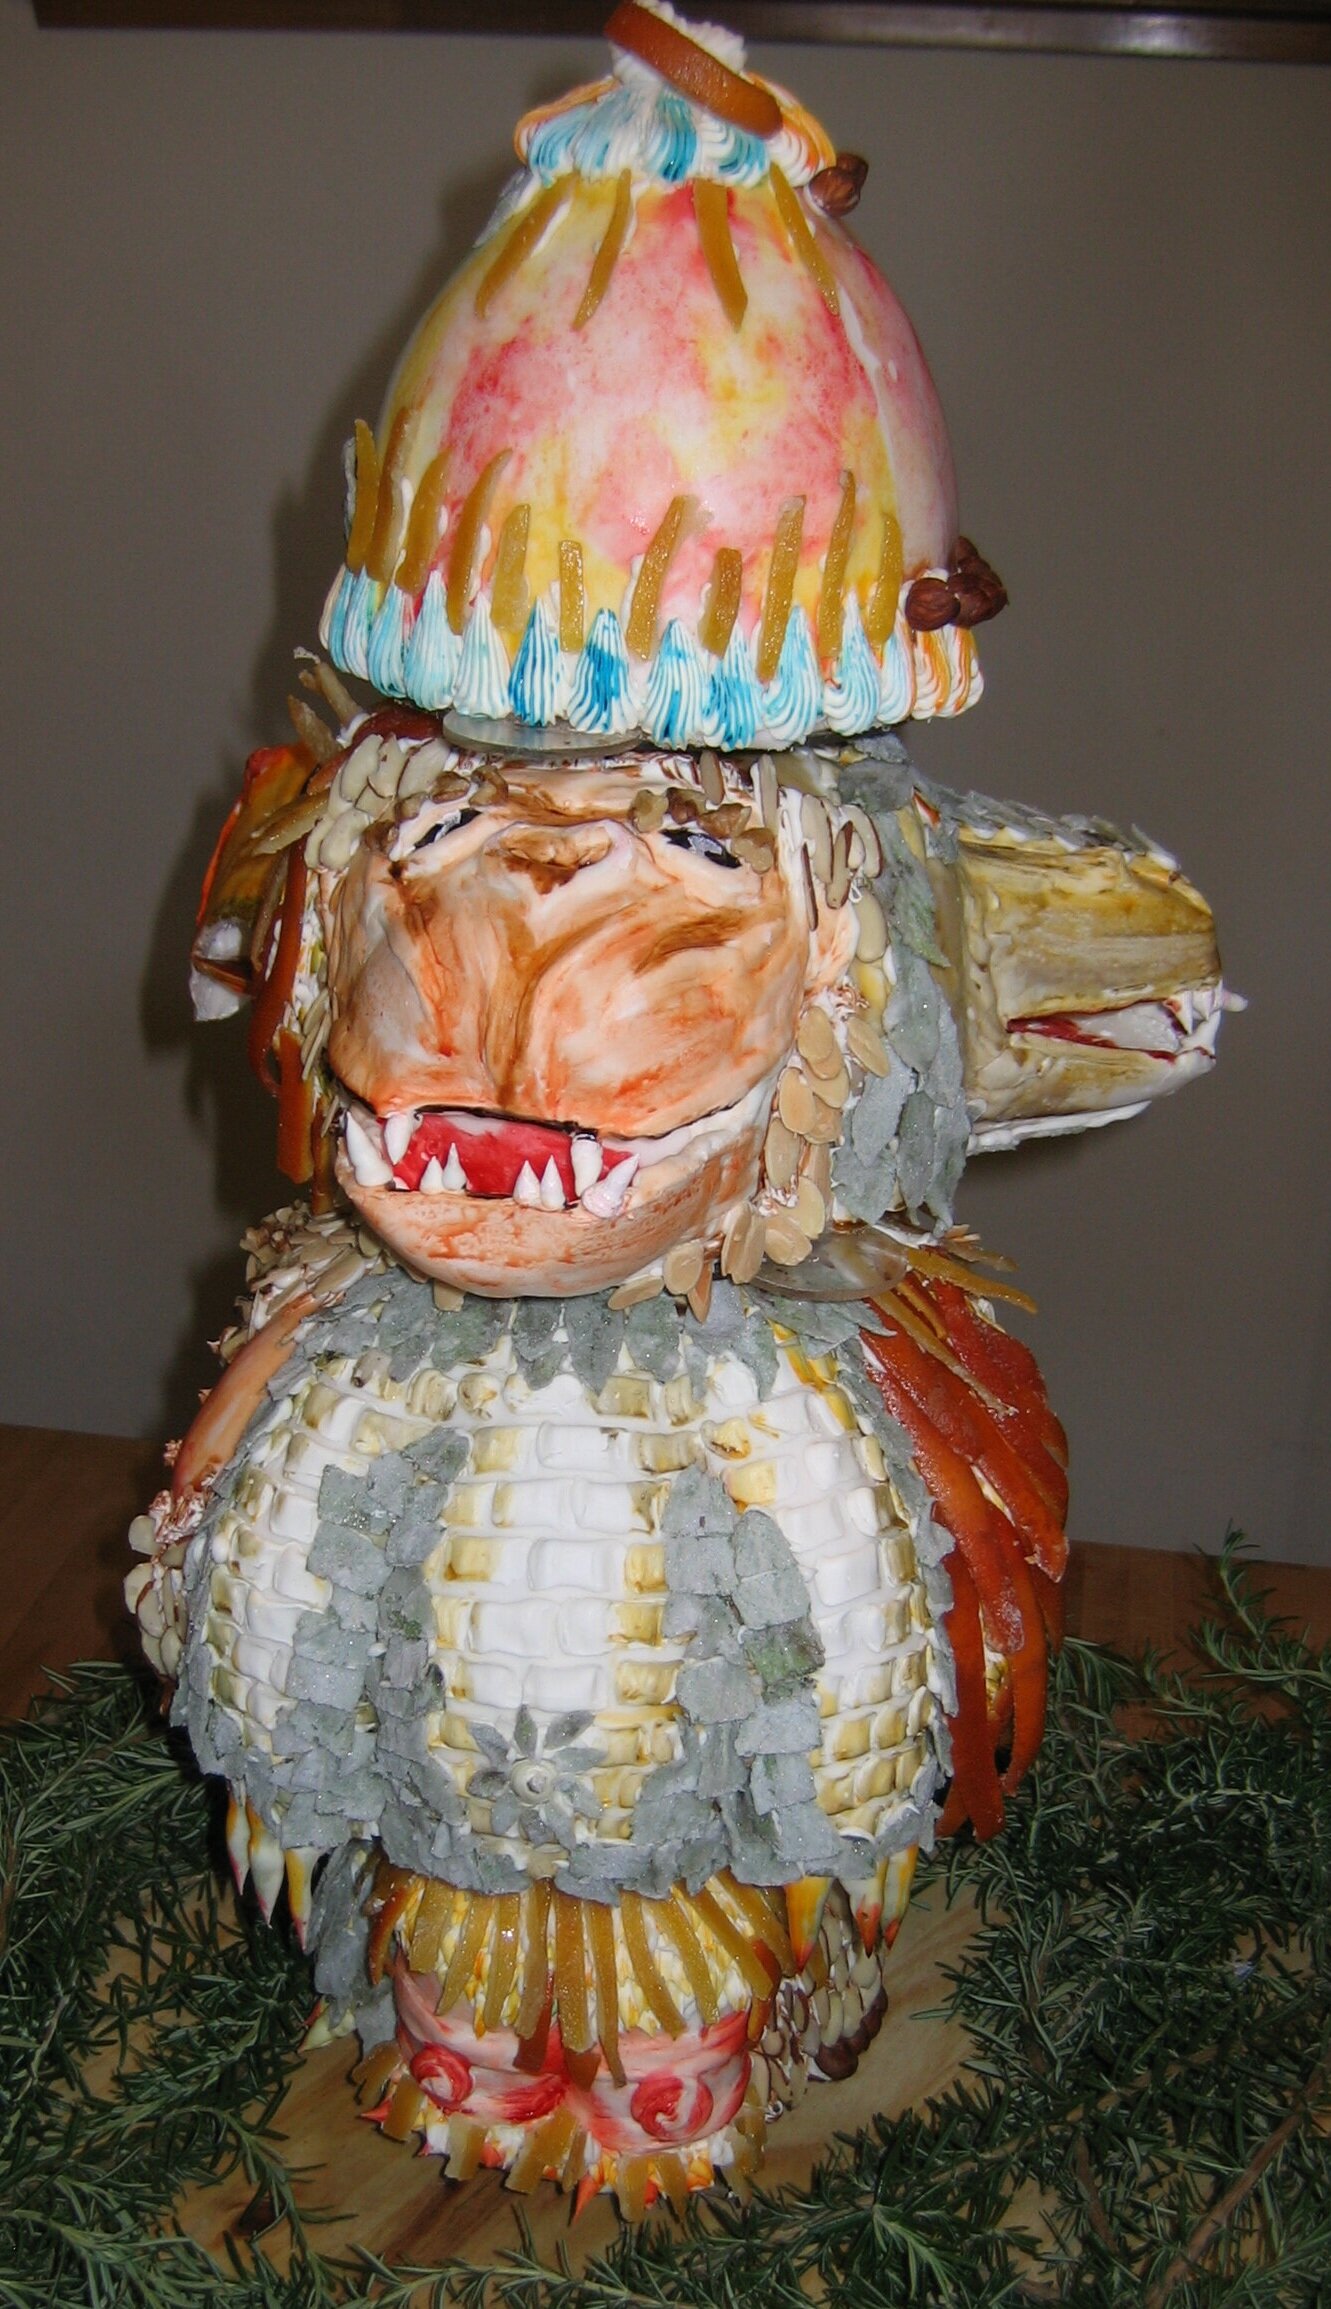
Triple Animal Cake
This cake was made for my niece's first birthday. I was trying to make a 3-dimensional version of those children's picture books where each page is split into three parts so that you can mix and match the heads, bodies, and feet of the animals.
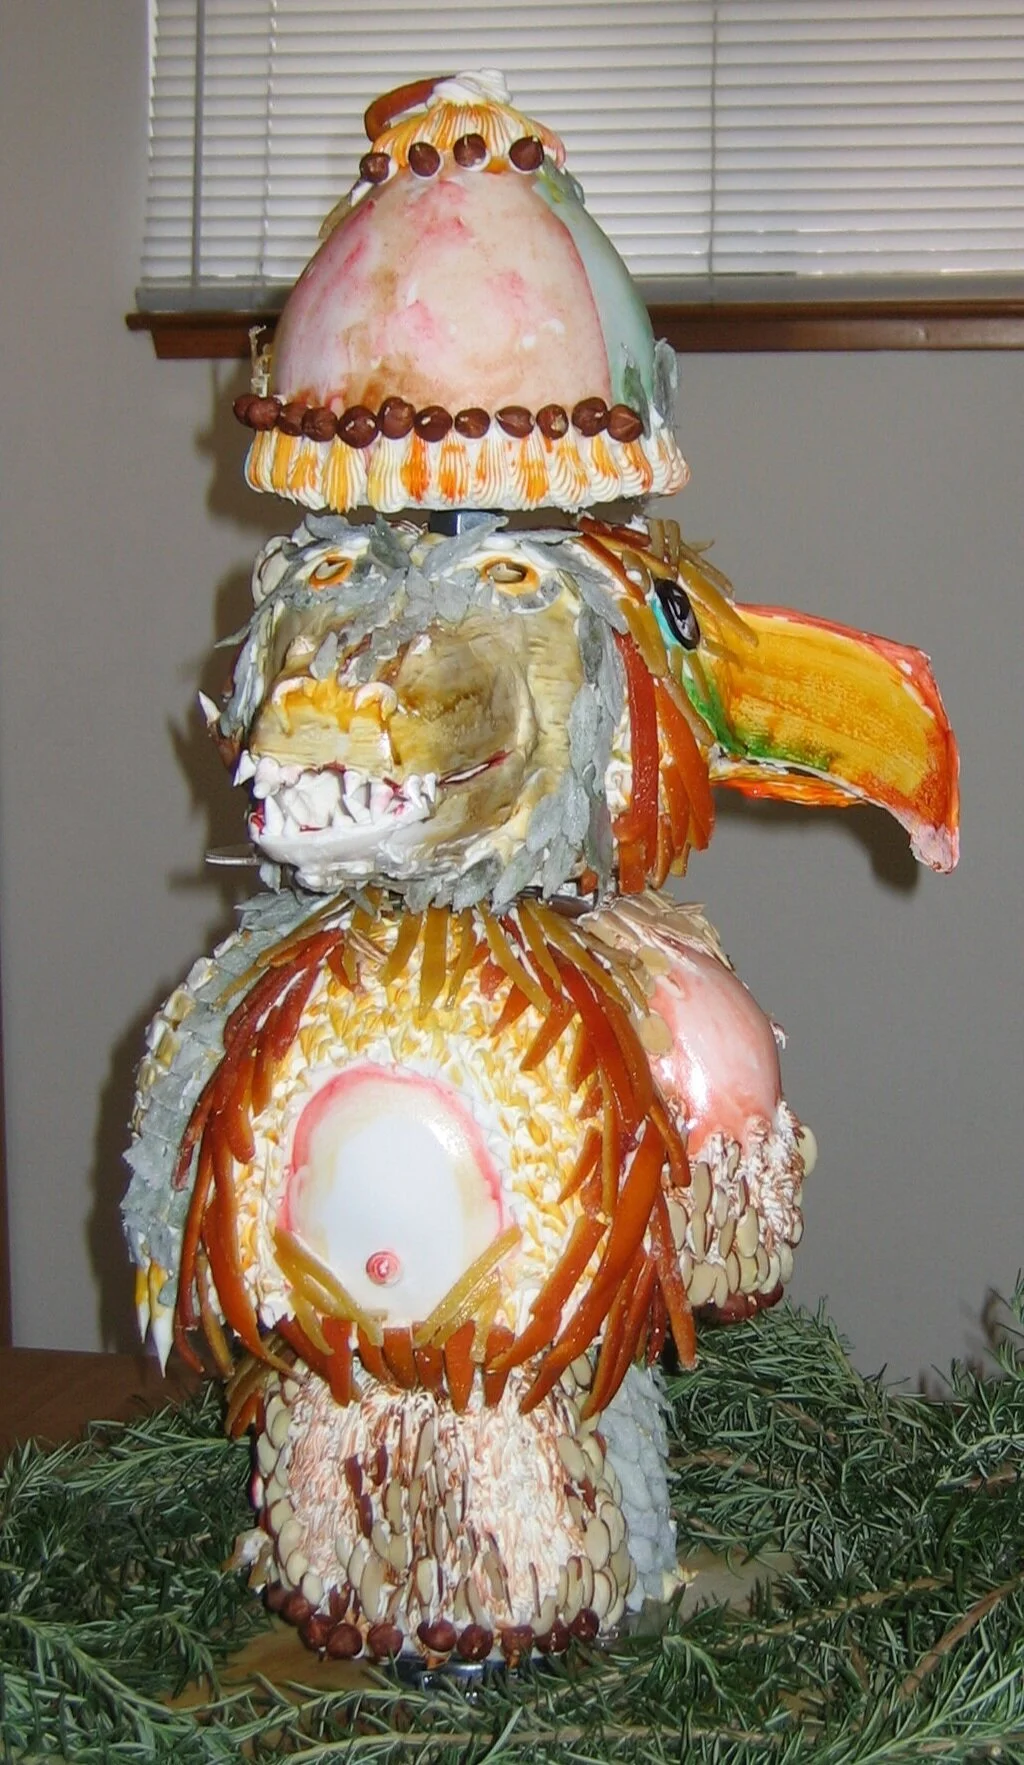
This cake was made for my niece's first birthday. I was trying to make a 3-dimensional version of those children's picture books where each page is split into three parts so that you can mix and match the heads, bodies, and feet of the animals.
My plan to adapt the concept of the mix-and-match animal parts book into a 3-dimensional cake was to build the cake around a central pole, so that each tier would be able to rotate independently of the others. The first tier was the feet, the second tier the body, and the third tier the head. Because I was planning to put all kinds of decorative schmutz onto and into these cakes and because I wanted to have just a basic chocolate cake section for the one-year-old birthday girl to smush, I also made a hat for the fourth tier, which frankly didn't really add a whole lot, visually or conceptually speaking.
Each tier was divided into three sections, each decorated like a different animal. That way, you could line all the sides up so that the three animals appeared in their entirety on the three sides of the cake, or you could rotate the sections relative to one another so that, for, instance, each side of the cake would show the feet of one animal, the body of another, and the head of the third. I also wanted to experiment with different decorating and texturing techniques, so rather than decorating in the usual way with only fondant and frosting and food coloring, I decided to enhance the primary texture of each animal with a different food product and then also coordinate the flavor of the cake within to the decor on the facade of the cake. My animal / decoration / flavor combinations were:
Side #1: Monkey / Nuts / Hazelnut Chocolate Cake
The monkey side of the cake was made of chocolate cake with hazelnut paste added to the batter, with nuts of various types and textures applied to the outside to create the appearance of matted monkey fur.
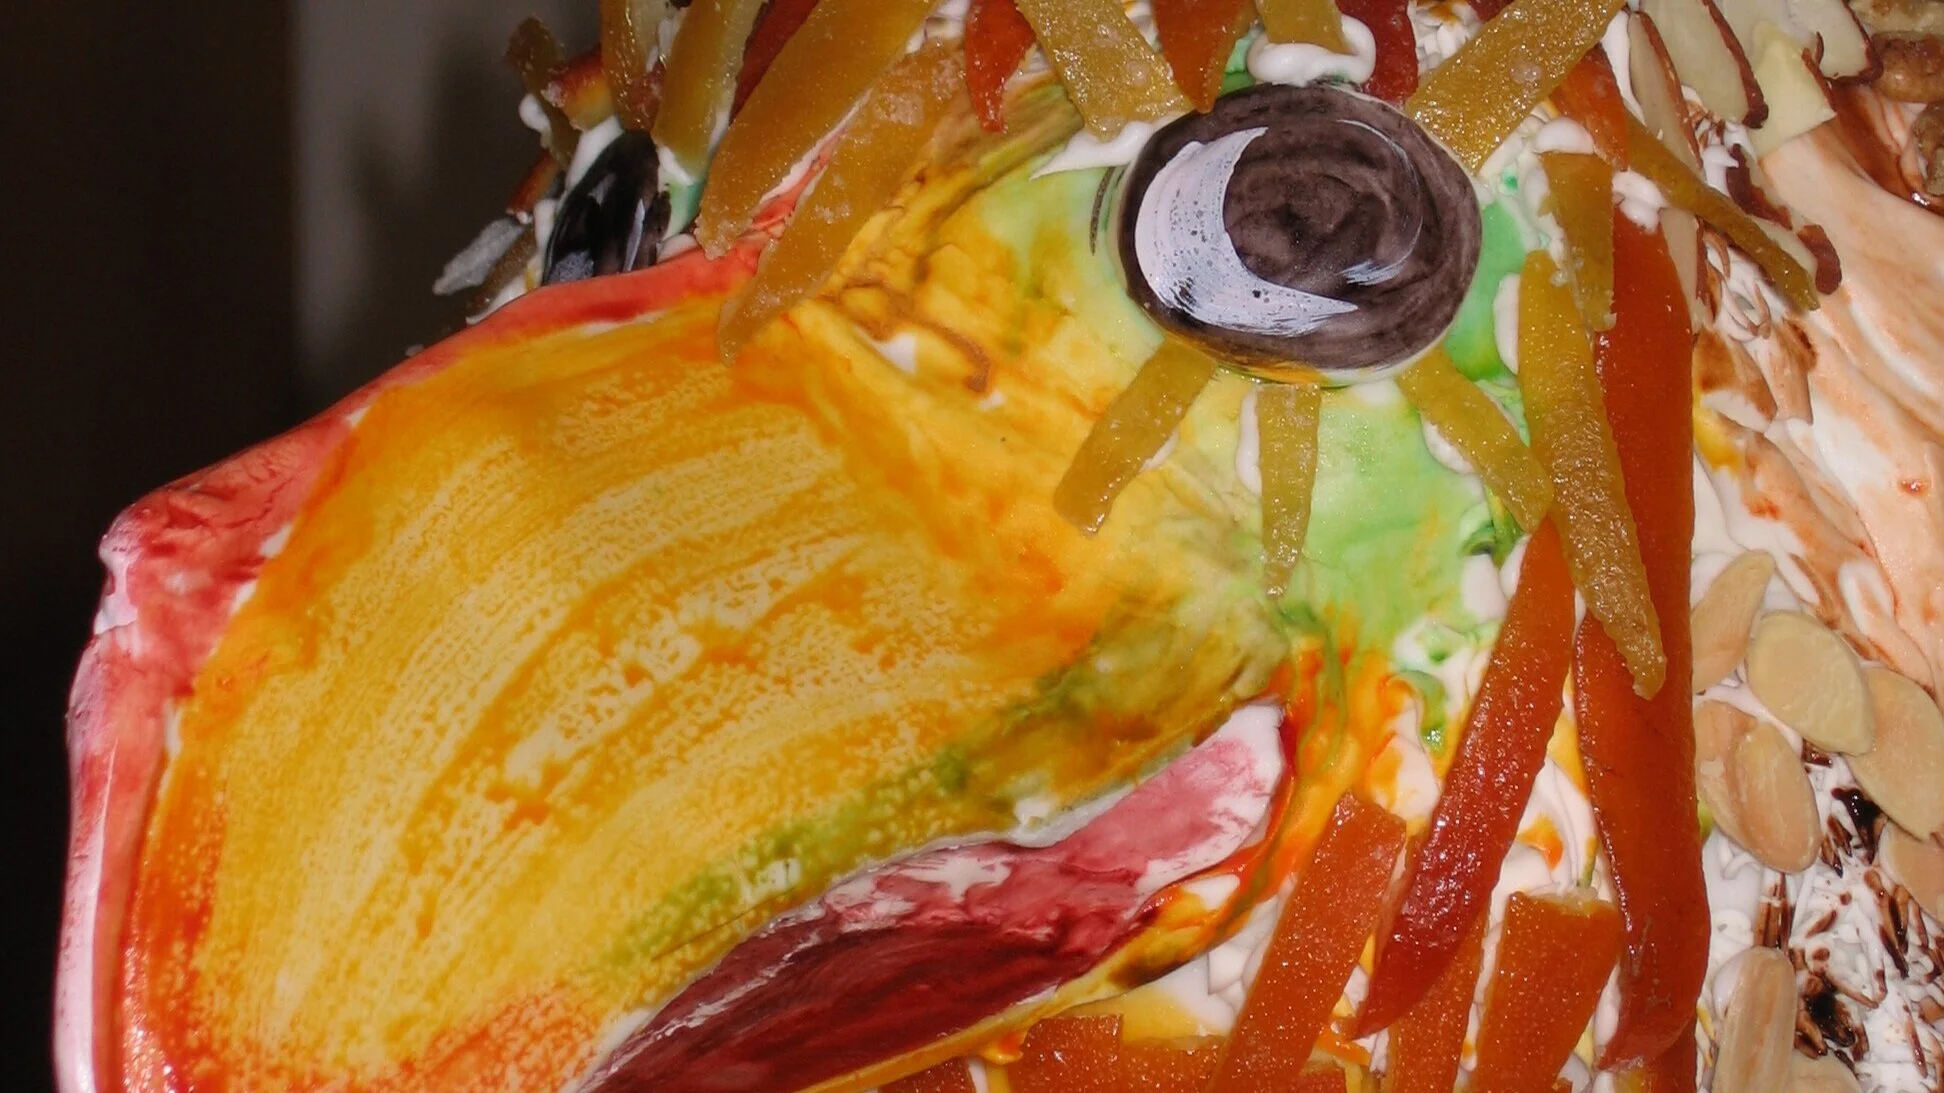
Side #2: Bird / Candied Citrus Peel / Chocolate Orange Zest Cake
The bird was chocolate cake with orange zest added to the batter, with candied lemon, orange, and grapefruit peel feathers.
Side #3: Alligator / Sugared Mint Leaves / Mint Chocolate Chip Cake
The alligator was chocolate cake with mint chocolate chips mixed in, with sugar-coated mint leaves for the textured skin.
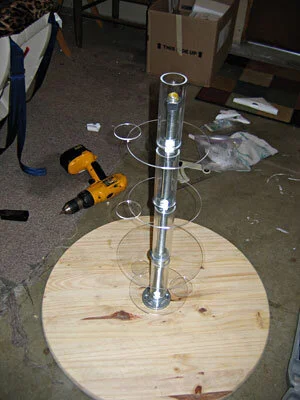
The first thing I needed was a central pole for my cakes to rotate around. I started with a heavy circular wooden base with a 3/4" threaded rod screwed into a phalange in the center. To support the cakes, I got four plexiglass circles with holes drilled in the middle with acrylic tubes the height of the tiers glued around the holes. So that we would be able to turn the tiers without touching the cakes, I glued little plexiglass circles onto the edges of the bigger circles to use as handles. To support these plexi cake bases, I used big nuts and fender washers, screwed onto the central threaded rod. Each tier required three nuts and a fender washer. The nuts were just the right size to fit inside the acrylic tube while the fender washers were big enough for the plexi bases to rest on. To assemble, I started with one nut, then a fender washer, then another nut pinching the fender washer in between. Then one more nut, positioned so that the distance from the top of the fender washer to the top of the nut was the same as the height of the tier. That way, when I slipped the plexi plate and acrylic tube over the nuts, the plate rested on the fender washer and the nuts at the top and bottom kept the whole piece stable. Then repeat the whole operation for each successive tier. I did a dry run putting this whole assembly together without cake to make sure it would work the way it did in my head before I started working on any of the edible cake components. When I reassembled it later with the cakes in place, I also sprayed the washers with cooking spray as lubricant to counteract the weight of the cakes, which I was afraid would hinder the rotation.
Before I started on the cakes themselves, there was lot of advance work to do:
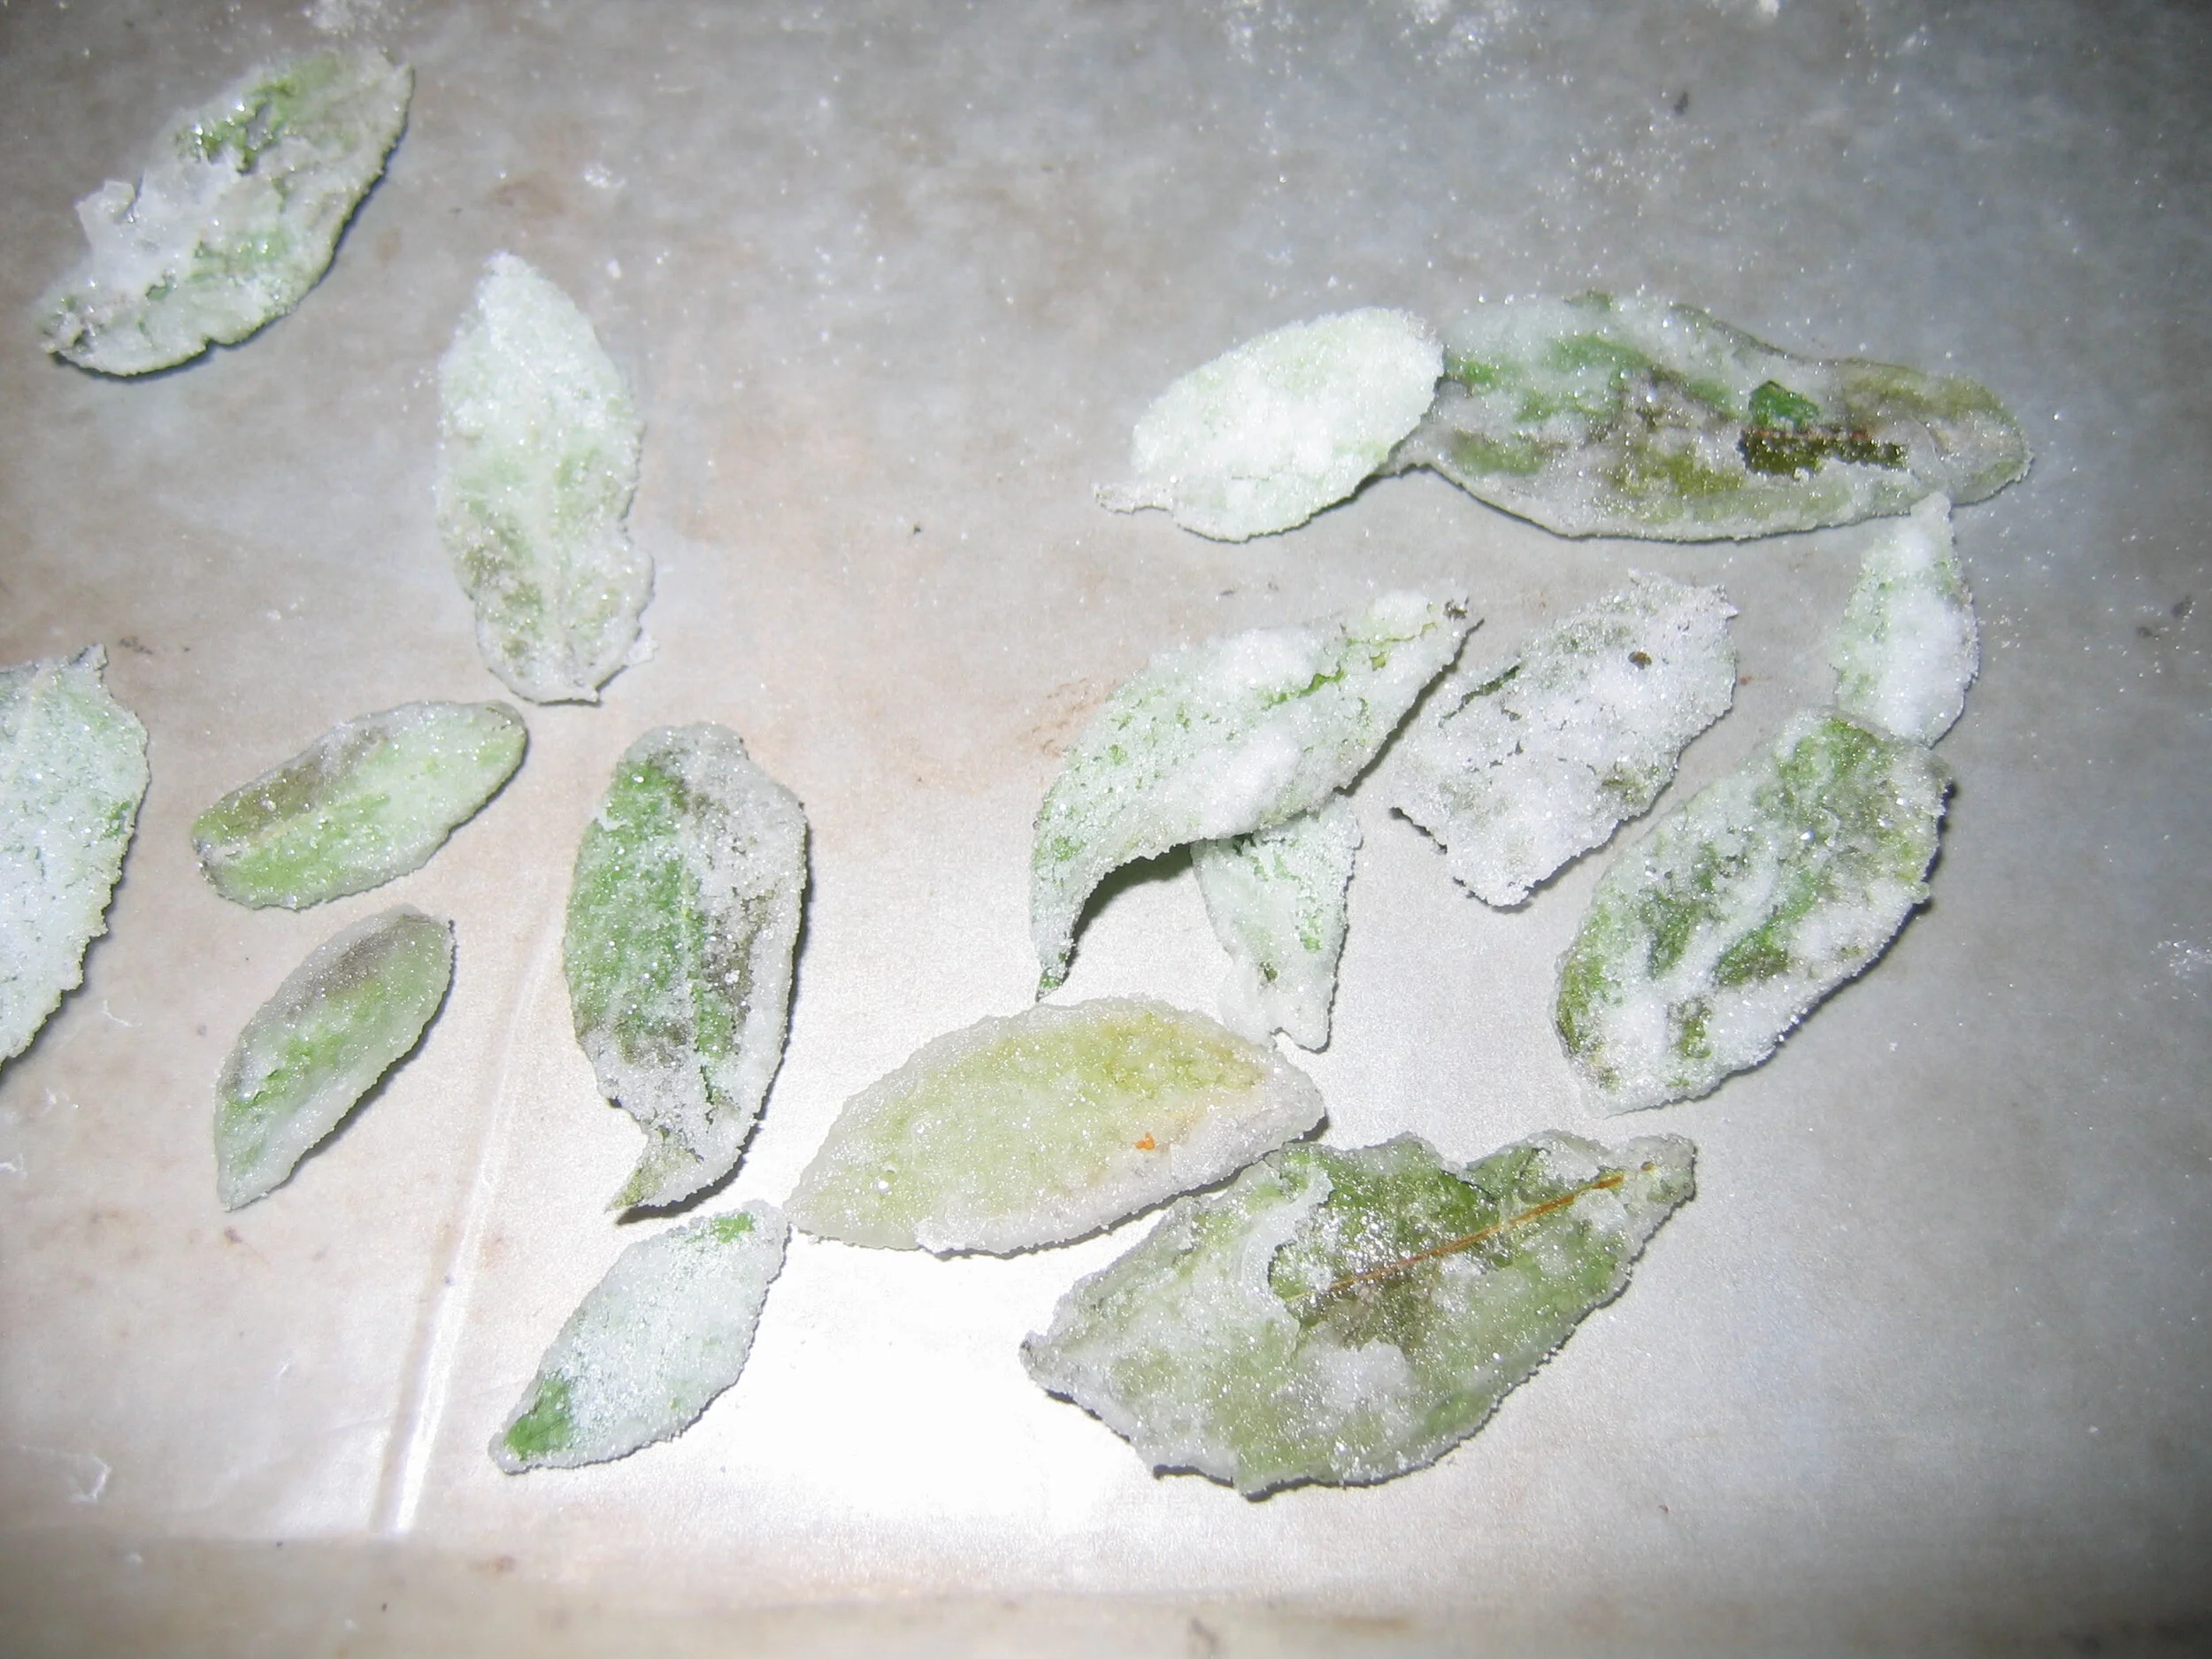
Sugared mint leaves:
These were easy to make, if a bit gooey and tedious. Fortunately, my sister had a big mint plant in her back yard, so I had ready access to a virtually infinite supply of mint leaves. To sugar them, I dipped each leaf one at a time in egg white, then in granulated sugar and put them on wax paper to dry. I have since realized that I could probably have gotten a nicer result had I rubbed on the egg white with my fingers in a thinner layer and then sifted the sugar overtop. As it was, some of my leaves got too much egg white or too much sugar on them and wound up being unusable or just a little lumpy and weird.
Candied citrus peels:
I started with lemon peels, orange peels, and grapefruit peels, so that I would have a variety of sizes and colors to use for my feathers, using a recipe from Jacques Torres. First I cut the fruit into fourths and removed the peels. My mom was in town (she and Dad were both a big help on this cake) so she took the leftover fruit and carefully separated the fruit from the inner membranes to feed to my niece. I tried to eat some of the grapefruit but Mom shooed me away. Apparently I don't rate as highly as she does. The pieces of peel went into a pot of boiling water three times to blanch some of the bitterness out of them. Then they went into a pot of sugary water to simmer for a couple of hours. Then I pulled them out of the syrup and left them on a wire rack to drain and dry. I had been lead to believe, by Jacques Torres' recipe, that they would dry out in a few hours. As usual, Jacques' recipe didn't work out the way I expected. None of Jacques' recipes that I have ever tried have worked out the way I expected. I left the peels out on the rack overnight, and they were still nowhere near dry. At that point, I became pressed for time, so I had to put them into a warm oven to dry before I could put them on the cake.

Gum paste faces:
To make the snouts of the alligator and the monkey and the beak of the bird protrude appropriately from the cake surface, I made them in advance out of gum paste. As it turned out, I didn't make them quite enough in advance, as the beak wasn't quite fully hard when I went to attach it, but I'll get to that in a little bit. In order to get the shapes I needed, I draped rolled-out sheets of gum paste over forms. In the case of the monkey nose and the alligator snout I was able to find cups lying around the kitchen that were basically the right size and shape. To get the more distinctive shape of the bird's beak, I made my own form out of cardboard. All the forms had to be liberally coated with corn starch before applying the gum paste to insure that the finished pieces would release easily.

When it came time to make the cakes and the frostings, Mom and Dad were invaluable, with Mom doing most of the baking work and Dad doing most of the cleanup. For each tier, we made three two-inch tall cakes - one of each of the three flavors described above. I torted each of the cakes and filled them with chocolate buttercream frosting. Then I cut each of the cakes into thirds and stacked the thirds on top of each other, so that I wound up with three pie wedges per tier, one in each flavor, each about six inches tall. I had to cut a little divot out of the corner of each pie wedge so I could fit them around the central tubes, assembling the pie wedges back into circles. As it turns out, cakes are much flimsier when they're built this way and until I finished carving them and covering them with fondant I was very worried that the three sections of the cakes would flop outwards like the petals of a flower. As I said before, I had conceived of the hat as the smash cake for the birthday girl, so for that one I simply made a basic chocolate cake and didn't have to worry about cutting it into thirds.

Carving was pretty easy, actually, since I was going for sort of puffy cartoony animal shapes. Once I had them covered with fondant, I was able to stick my gum paste beaks and snouts on with royal icing, holding them in place with skewers until the icing dried. Unfortunately the beak wasn't quite dry enough and it sort of sunk over the skewer, so I had to leave the skewer embedded in it and pipe royal icing on top to hide the end of the skewer sticking out.
I added a base layer of royal icing details - feathers and fur and scales - because I didn't trust my textural appliques to provide the level of detail that I was looking for. I also added facial features to the heads, and nipples and belly buttons to the torsos. I wasn't quite sure what to do with the hat, so I just gave it a poorly executed inverted shell border.

Because I was visiting my sister when I made this cake, I didn't have my airbrush with me, so I had to paint the colors on the old fashioned way - with a soft brush and some paste food coloring. I didn't do a very good job - so I wound up with a lot of drips and messy brush marks. I also think I either went too muted with the alligator colors or too bright with the bird colors because they sort of didn't belong in the same world.
I was pleased with the effect of my appliques, though. I did get a little carried away with the alligator. I'm not sure why I put a little flower of mint petals around its belly button (which reptile don't even have, by the way!) My bird wound up looking a bit like it was on drugs, because I gave it big blank staring eyes surrounded by dramatic lemon peel lashes. The monkey was apparently a bit diseased, since its shoulders were bald and red and splotchy. You didn't really expect me to successfully make cute little children's book animals, did you?

The board had to be pretty big relative to the cake in order to make sure that it was stable, but I hadn't given any thought whatsoever to decorating it, so it looked very bare. Mom suggested that we get some rosemary sprigs from the garden to gussy it up a little. I think it helped.
Whatever aesthetic faults the cake may have had, my rotation mechanism worked flawlessly. With that aspect, I really couldn't have been happier. Each tier spun easily and smoothly and yet the cake as a whole still felt rock solid.
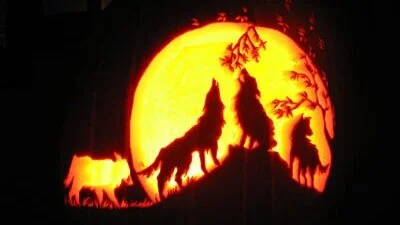
Howling Wolves Pumpkin
Generally, I'm not a big fan of the pumpkins that define an object by silhouetting it against the moon. I think it's overdone and simplistic enough that it usually indicates a poor command of the medium. But I did it anyway.
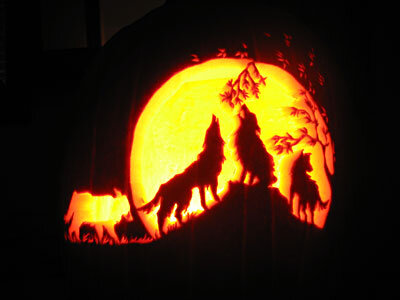
Generally, I'm not a big fan of the pumpkins that define an object by silhouetting it against the moon. I think it's overdone and simplistic enough that it usually indicates a poor command of the medium. But I did it anyway. And apparently it was good enough to win first prize in the Pumpkinmasters "Animals" category.

Stuffed Spider
When I found out that my dear friend had given birth to her son Isaac prematurely, the only thing that I could think to do with my worry for them was to make Isaac an enormous stuffed spider.

When I found out that my dear friend had given birth to her son Isaac prematurely, the only thing that I could think to do with my worry for them was to make Isaac an enormous stuffed spider.
At some point I read or heard something about black and white patterns stimulating babies' developing brains. In retrospect, I imagine that is a drastic oversimplification of someone's preliminary research that got completely distorted in its portrayal in the popular media, much like the Mozart effect. Either that, or I just imagined that I had heard that somewhere, when, in fact, I made it up altogether.
Be that as it may, I used black and white patterns as a jumping off point. I chose to make a spider both because spiders have a lot of legs and eyes and such that I figured would be good for a baby to grab onto and because I really like spiders. I chose to make it two feet long because I always overdo these things. I chose to use various fabric textures, under the theory that someone exploring the world with his hands and his mouth would appreciate some textural options.
I decided on a black velour and two different black and white patterned cottons for the abdomen and cephalothorax. For the legs and eyes I chose eight different colorful patterned cottons plus a white vinyl.
Each of the eight eyeballs is made of pentagons assembled into a sphere, using both the colored patterned fabrics and the black and white fabric. Because the pieces were so little, it proved to be easier to hand sew them then to sew them on a machine. I think I made a blessing out of a necessity by using a thick thread so as to create textured ridges on all the seams, again, under the theory that it might be a nice touch for someone prone to chewing on things. I attached each eyeball to the cephalothorax with a length of elastic wrapped in black and white fabric, giving them some movement and bounce.
I also made big vinyl pedipalps for the front and a crazy big stinger of some kind for the back.
I believe that initially little Isaac greeted the gargantuan spider with equanimity, but I am told that it has recently been banished from his bedroom because it was inducing nightmares.


Sewer Rats Pumpkin
I think I did pretty well with the dramatic perspective on this one, but I wish I had put more effort into creating more realistic rats.
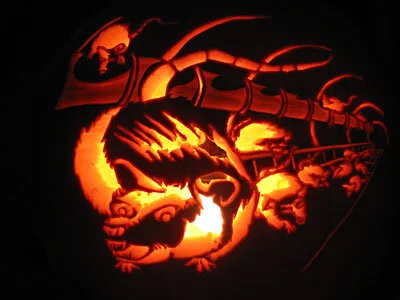
I think I did pretty well with the dramatic perspective on this one, but I wish I had put more effort into creating more realistic rats.