
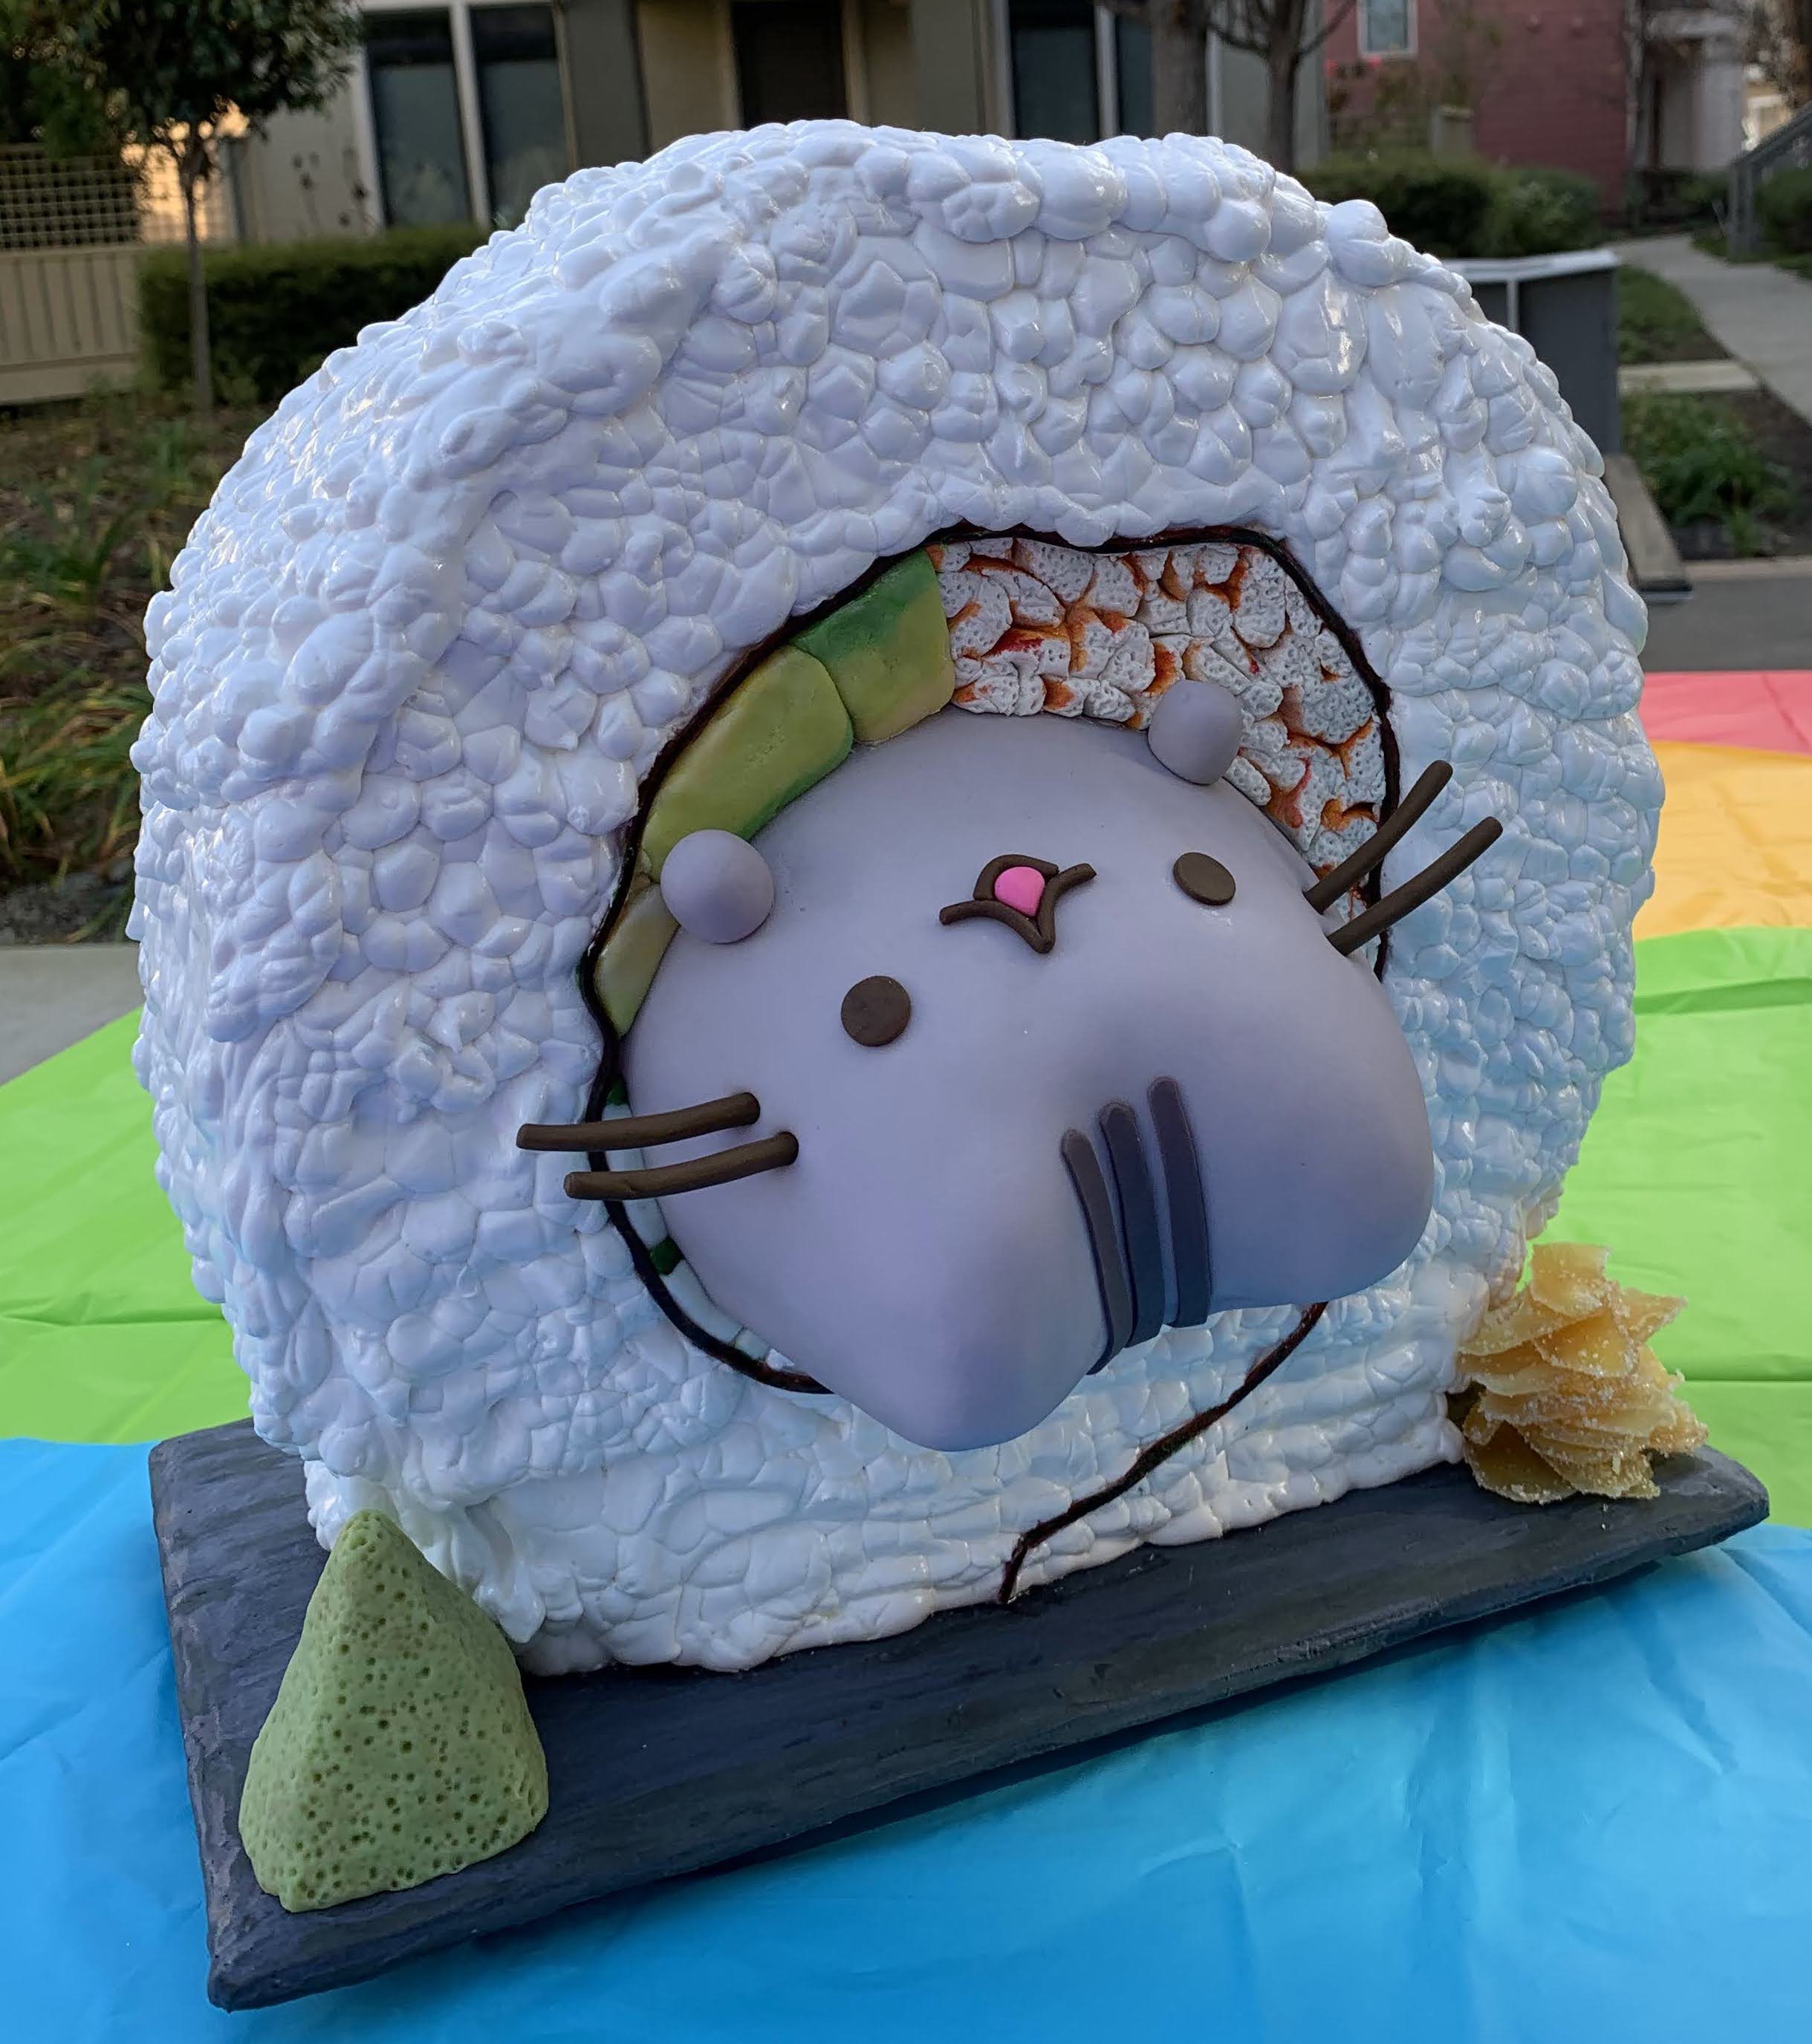
Sushi Pusheen Cake
My nephew loves sushi and he loves Pusheen, so his request for his birthday cake was Pusheen wrapped up in a California roll (otherwise known as Susheen).
My nephew loves sushi and he loves Pusheen, so his request for his birthday cake was Pusheen wrapped up in a California roll (otherwise known as Susheen).
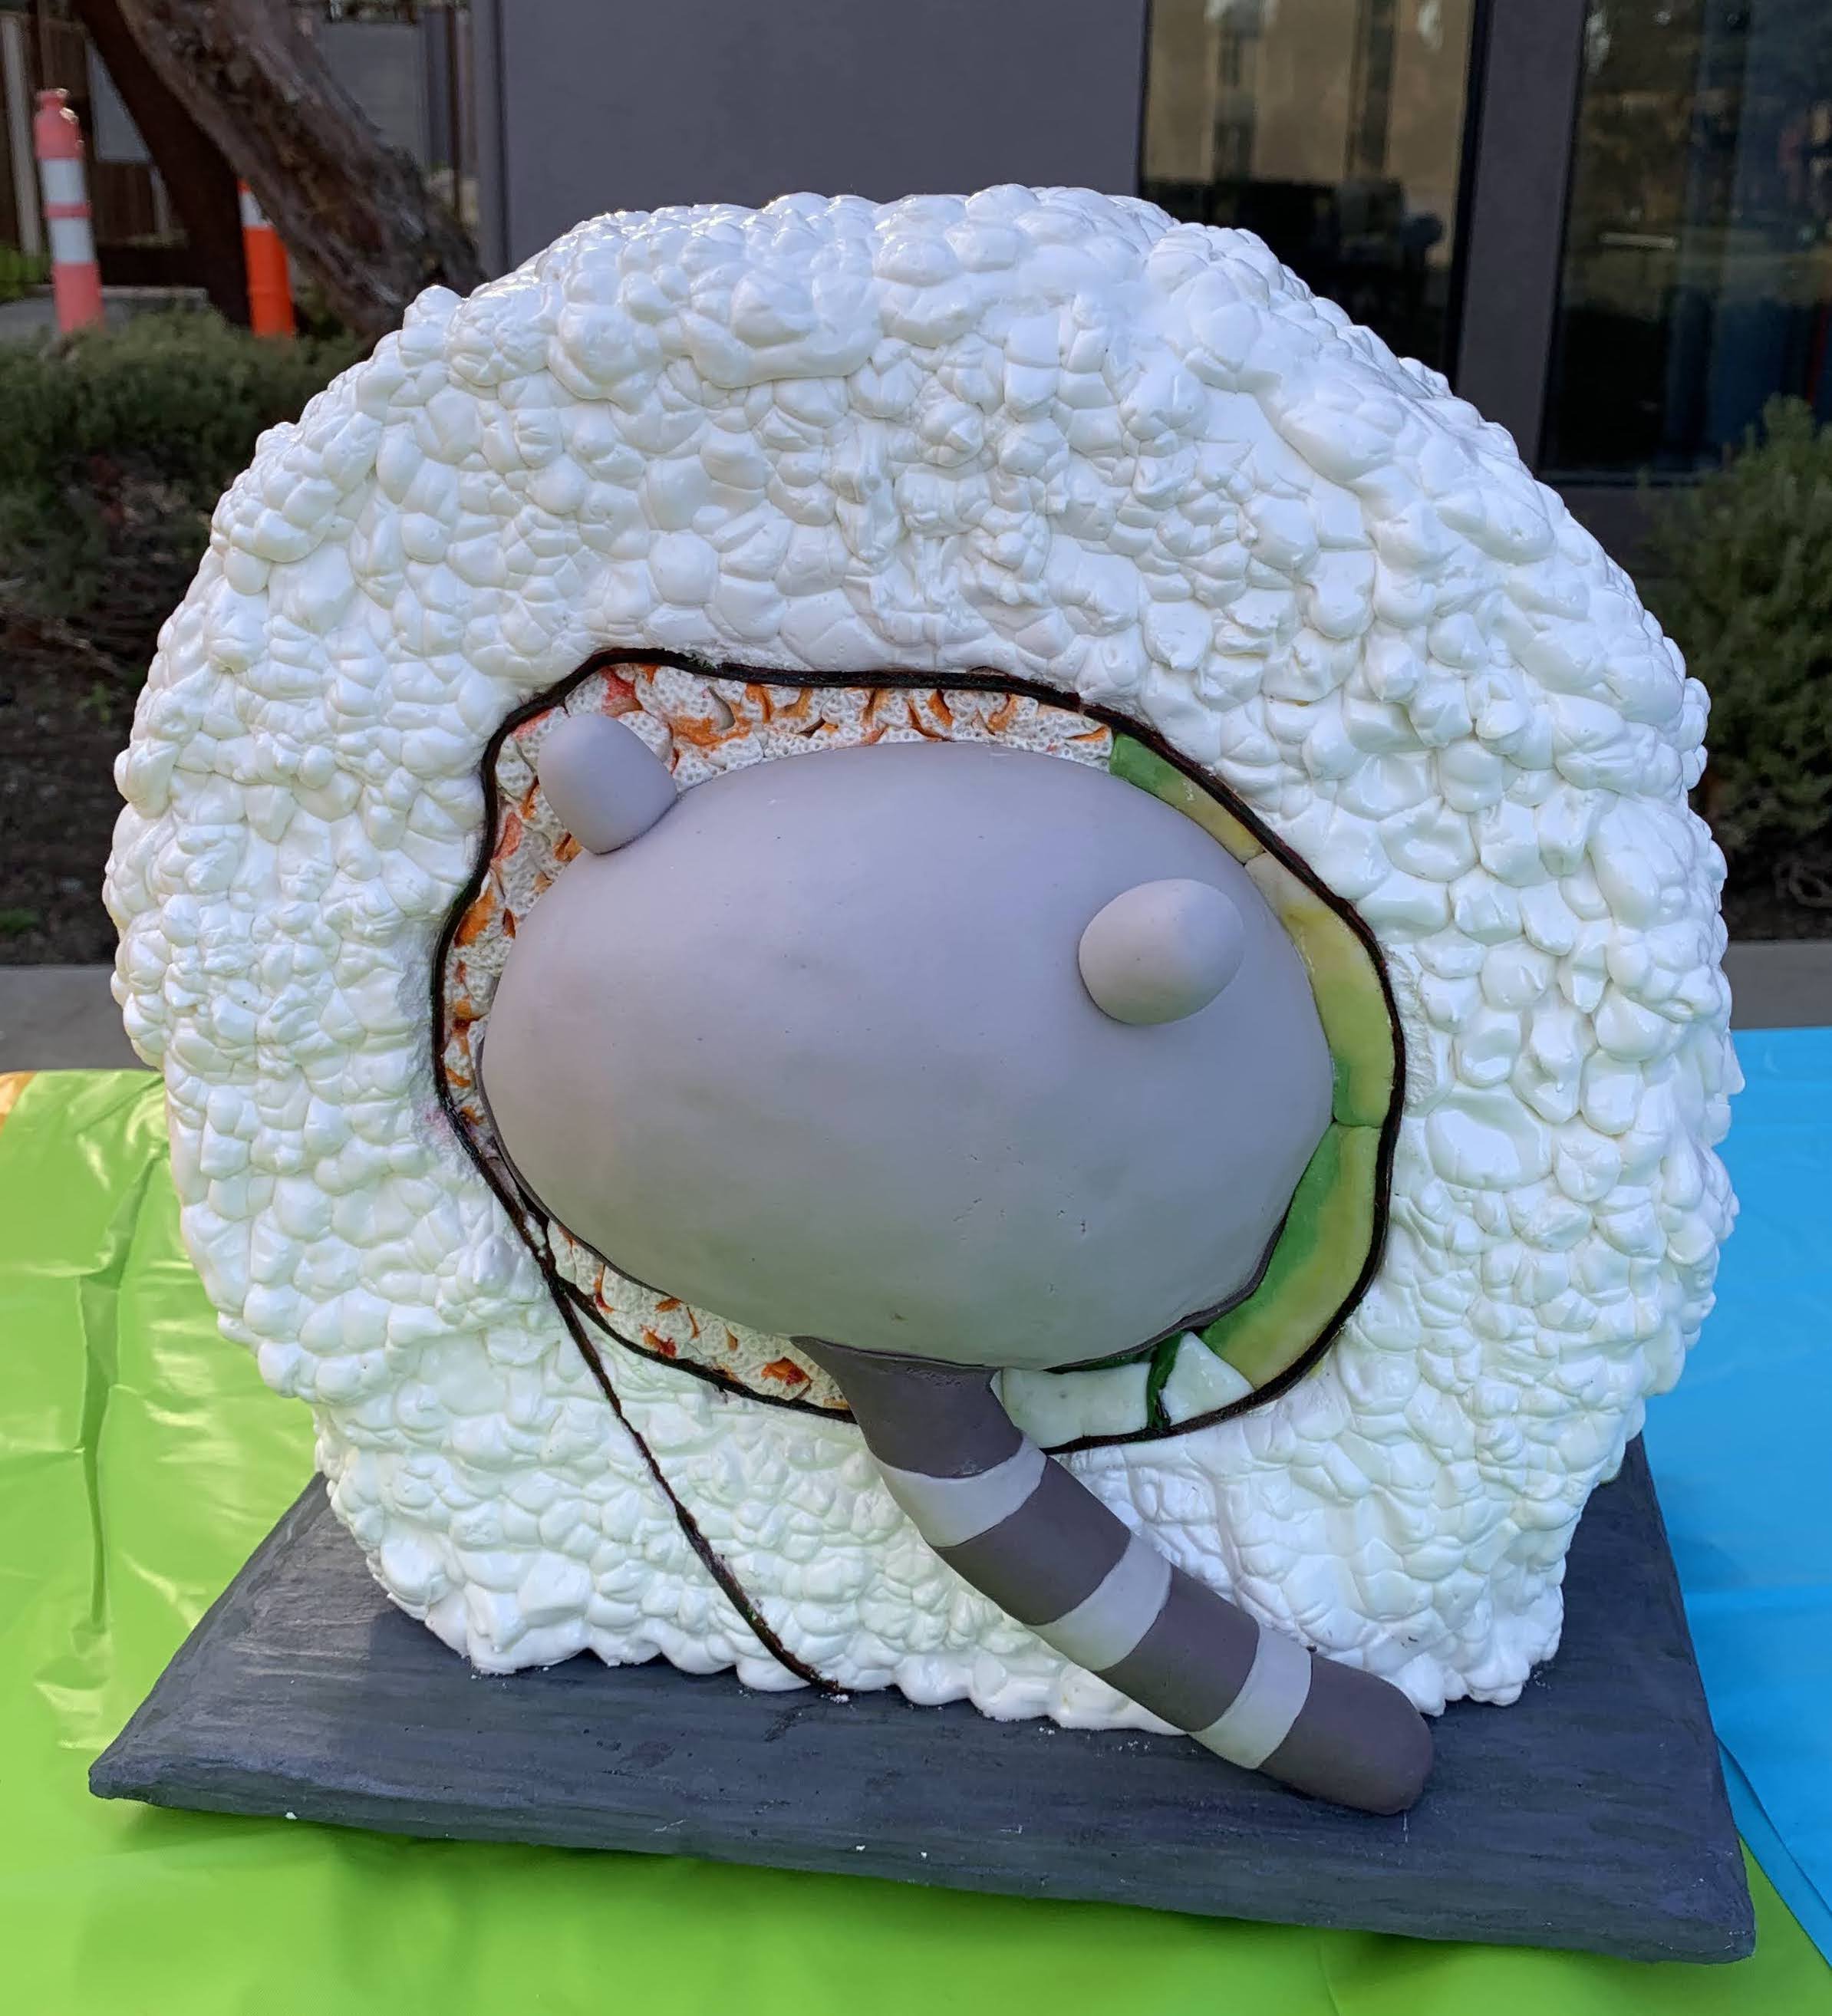
The rice is marshmallow piped over top of a chocolate cookie structure. I made the Pusheen cake separately, inserted it into the middle of the rice tube, then filled in the space between the rice and the Pusheen with marzipan krab and avocado and fondant cucumber. The nori is fruit leather, painted with green food coloring. The wasabi is also marzipan and the ginger is just thinly sliced candied ginger. The base is covered with royal icing and is supposed to look like a slate serving tray.
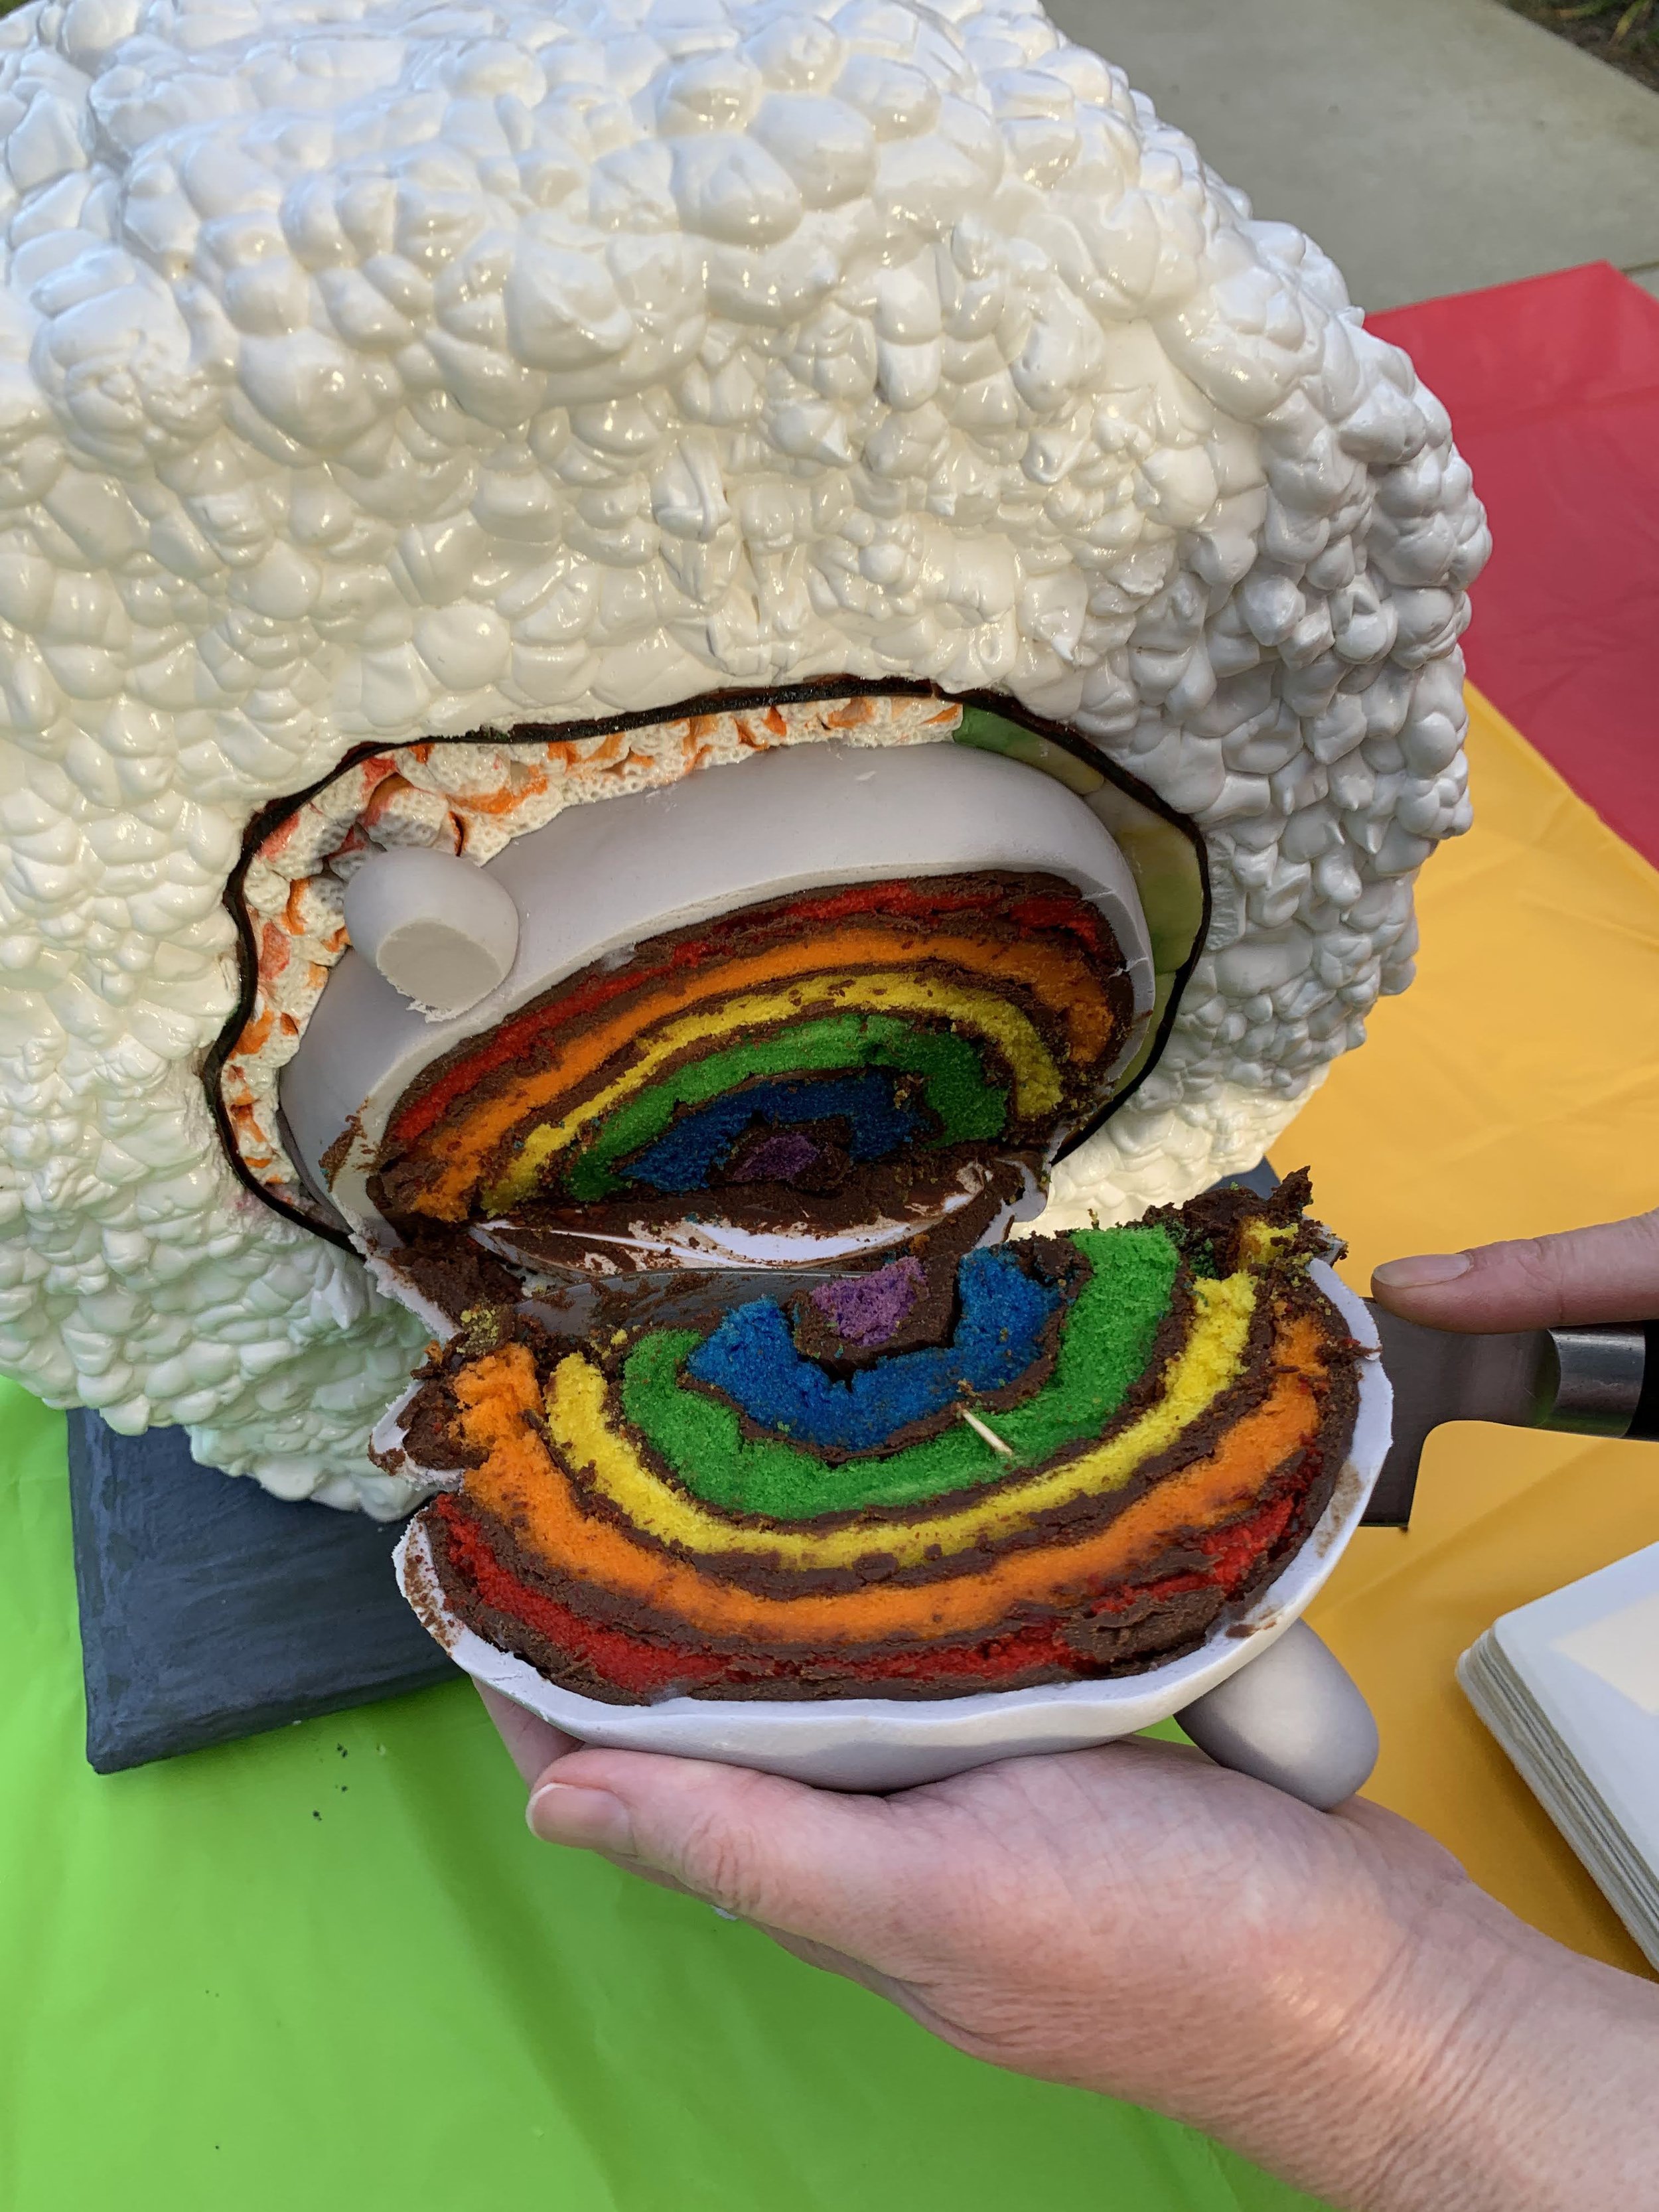
When I made my Rainbow Unicorn Pusheen Cake and my Valkyr Pusheen Cake, they were rainbow colored inside, but the layers of the cake were still flat. This time I decided to make the inside rainbow shaped as well as rainbow colored.

Swan Cookies
Because Mom and Dad’s 50th anniversary party had to be on Zoom, the attendees couldn’t have any of the cake. So I sent everyone cookies.

Because Mom and Dad’s 50th anniversary party had to be on Zoom, the attendees couldn’t have any of the cake. So I sent everyone cookies.
They’re almond cookies with cherry royal icing and gold leaf on the beaks.
They’re shaped like swans to tie in with the cake and because Mom and Dad had plastic swans on their wedding cake 50 years ago.
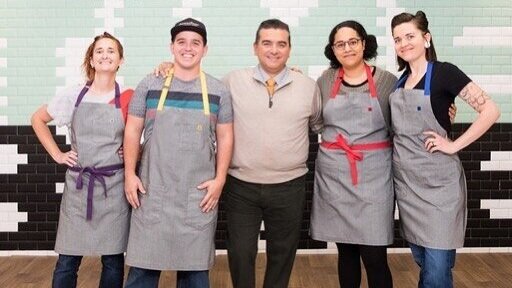
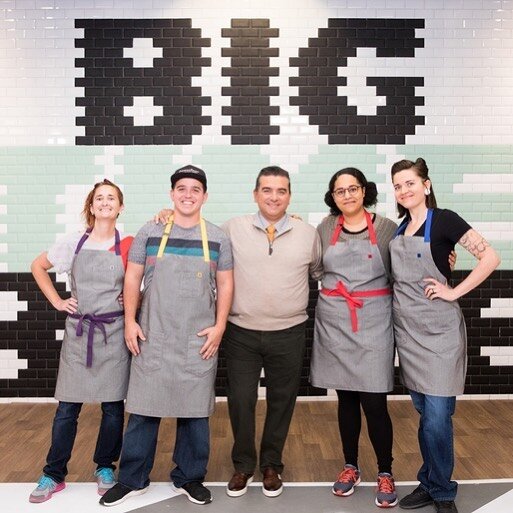
Big Time Bake
I’m back on the Food Network! You can watch me in the “Fantasy” episode of Big Time Bake.

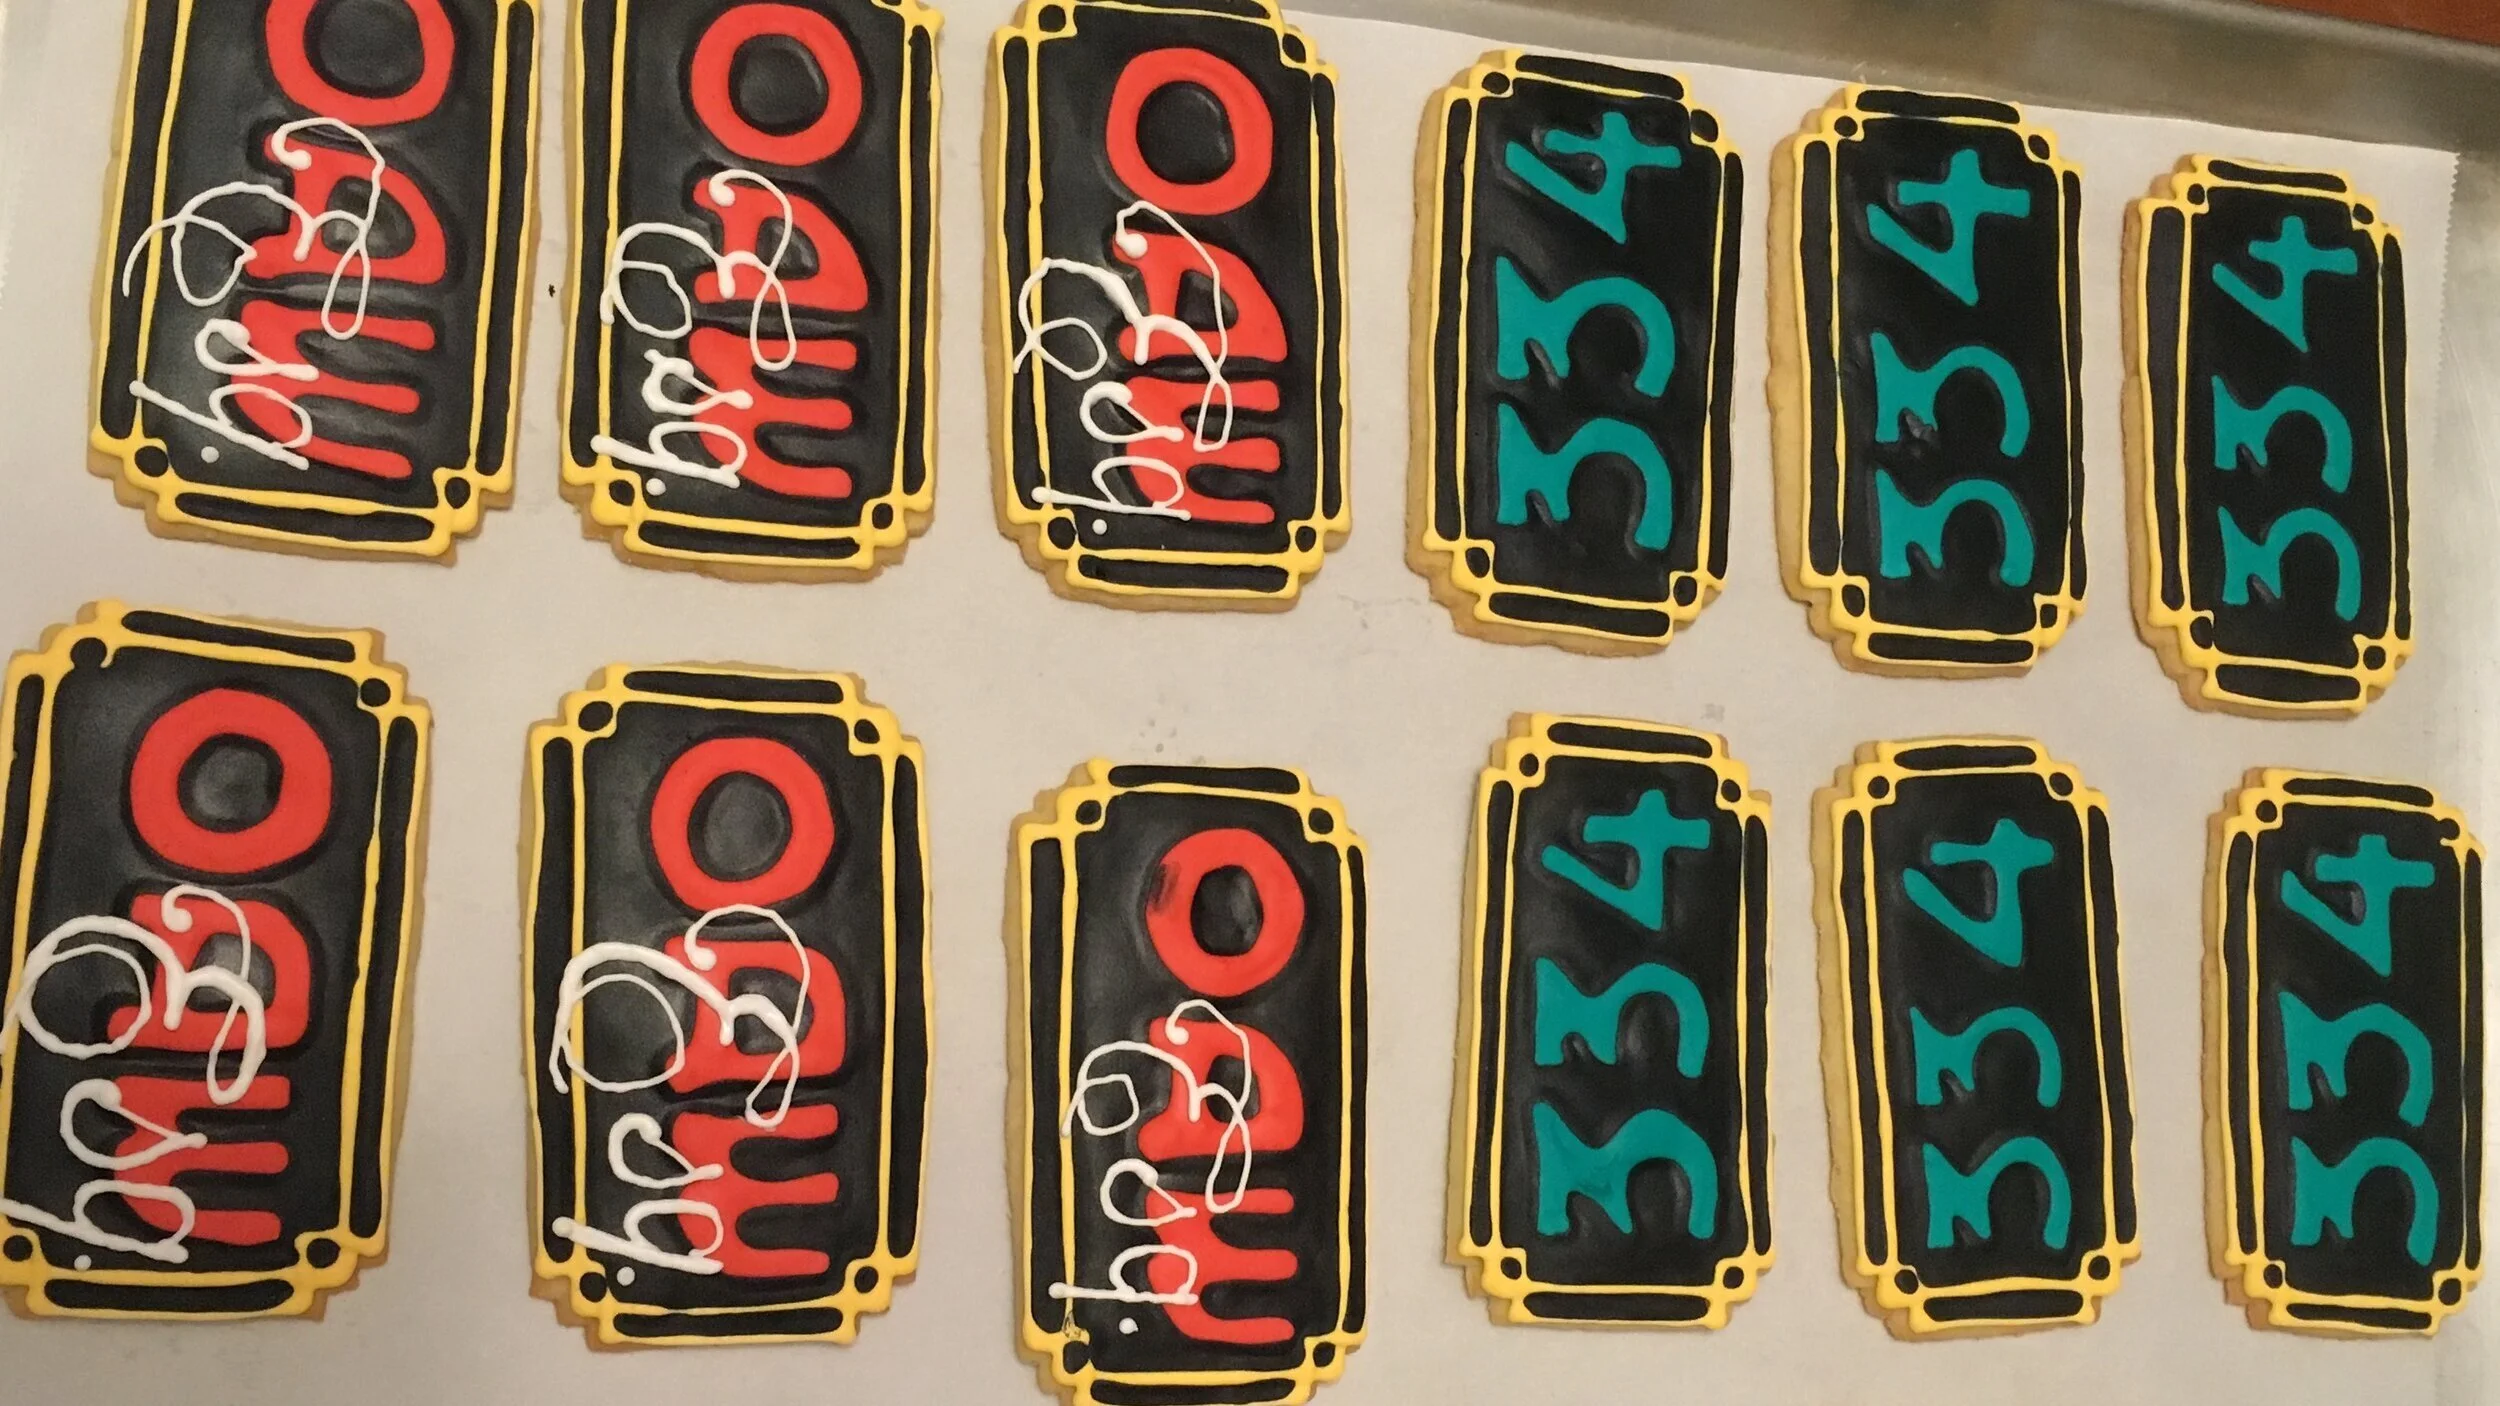
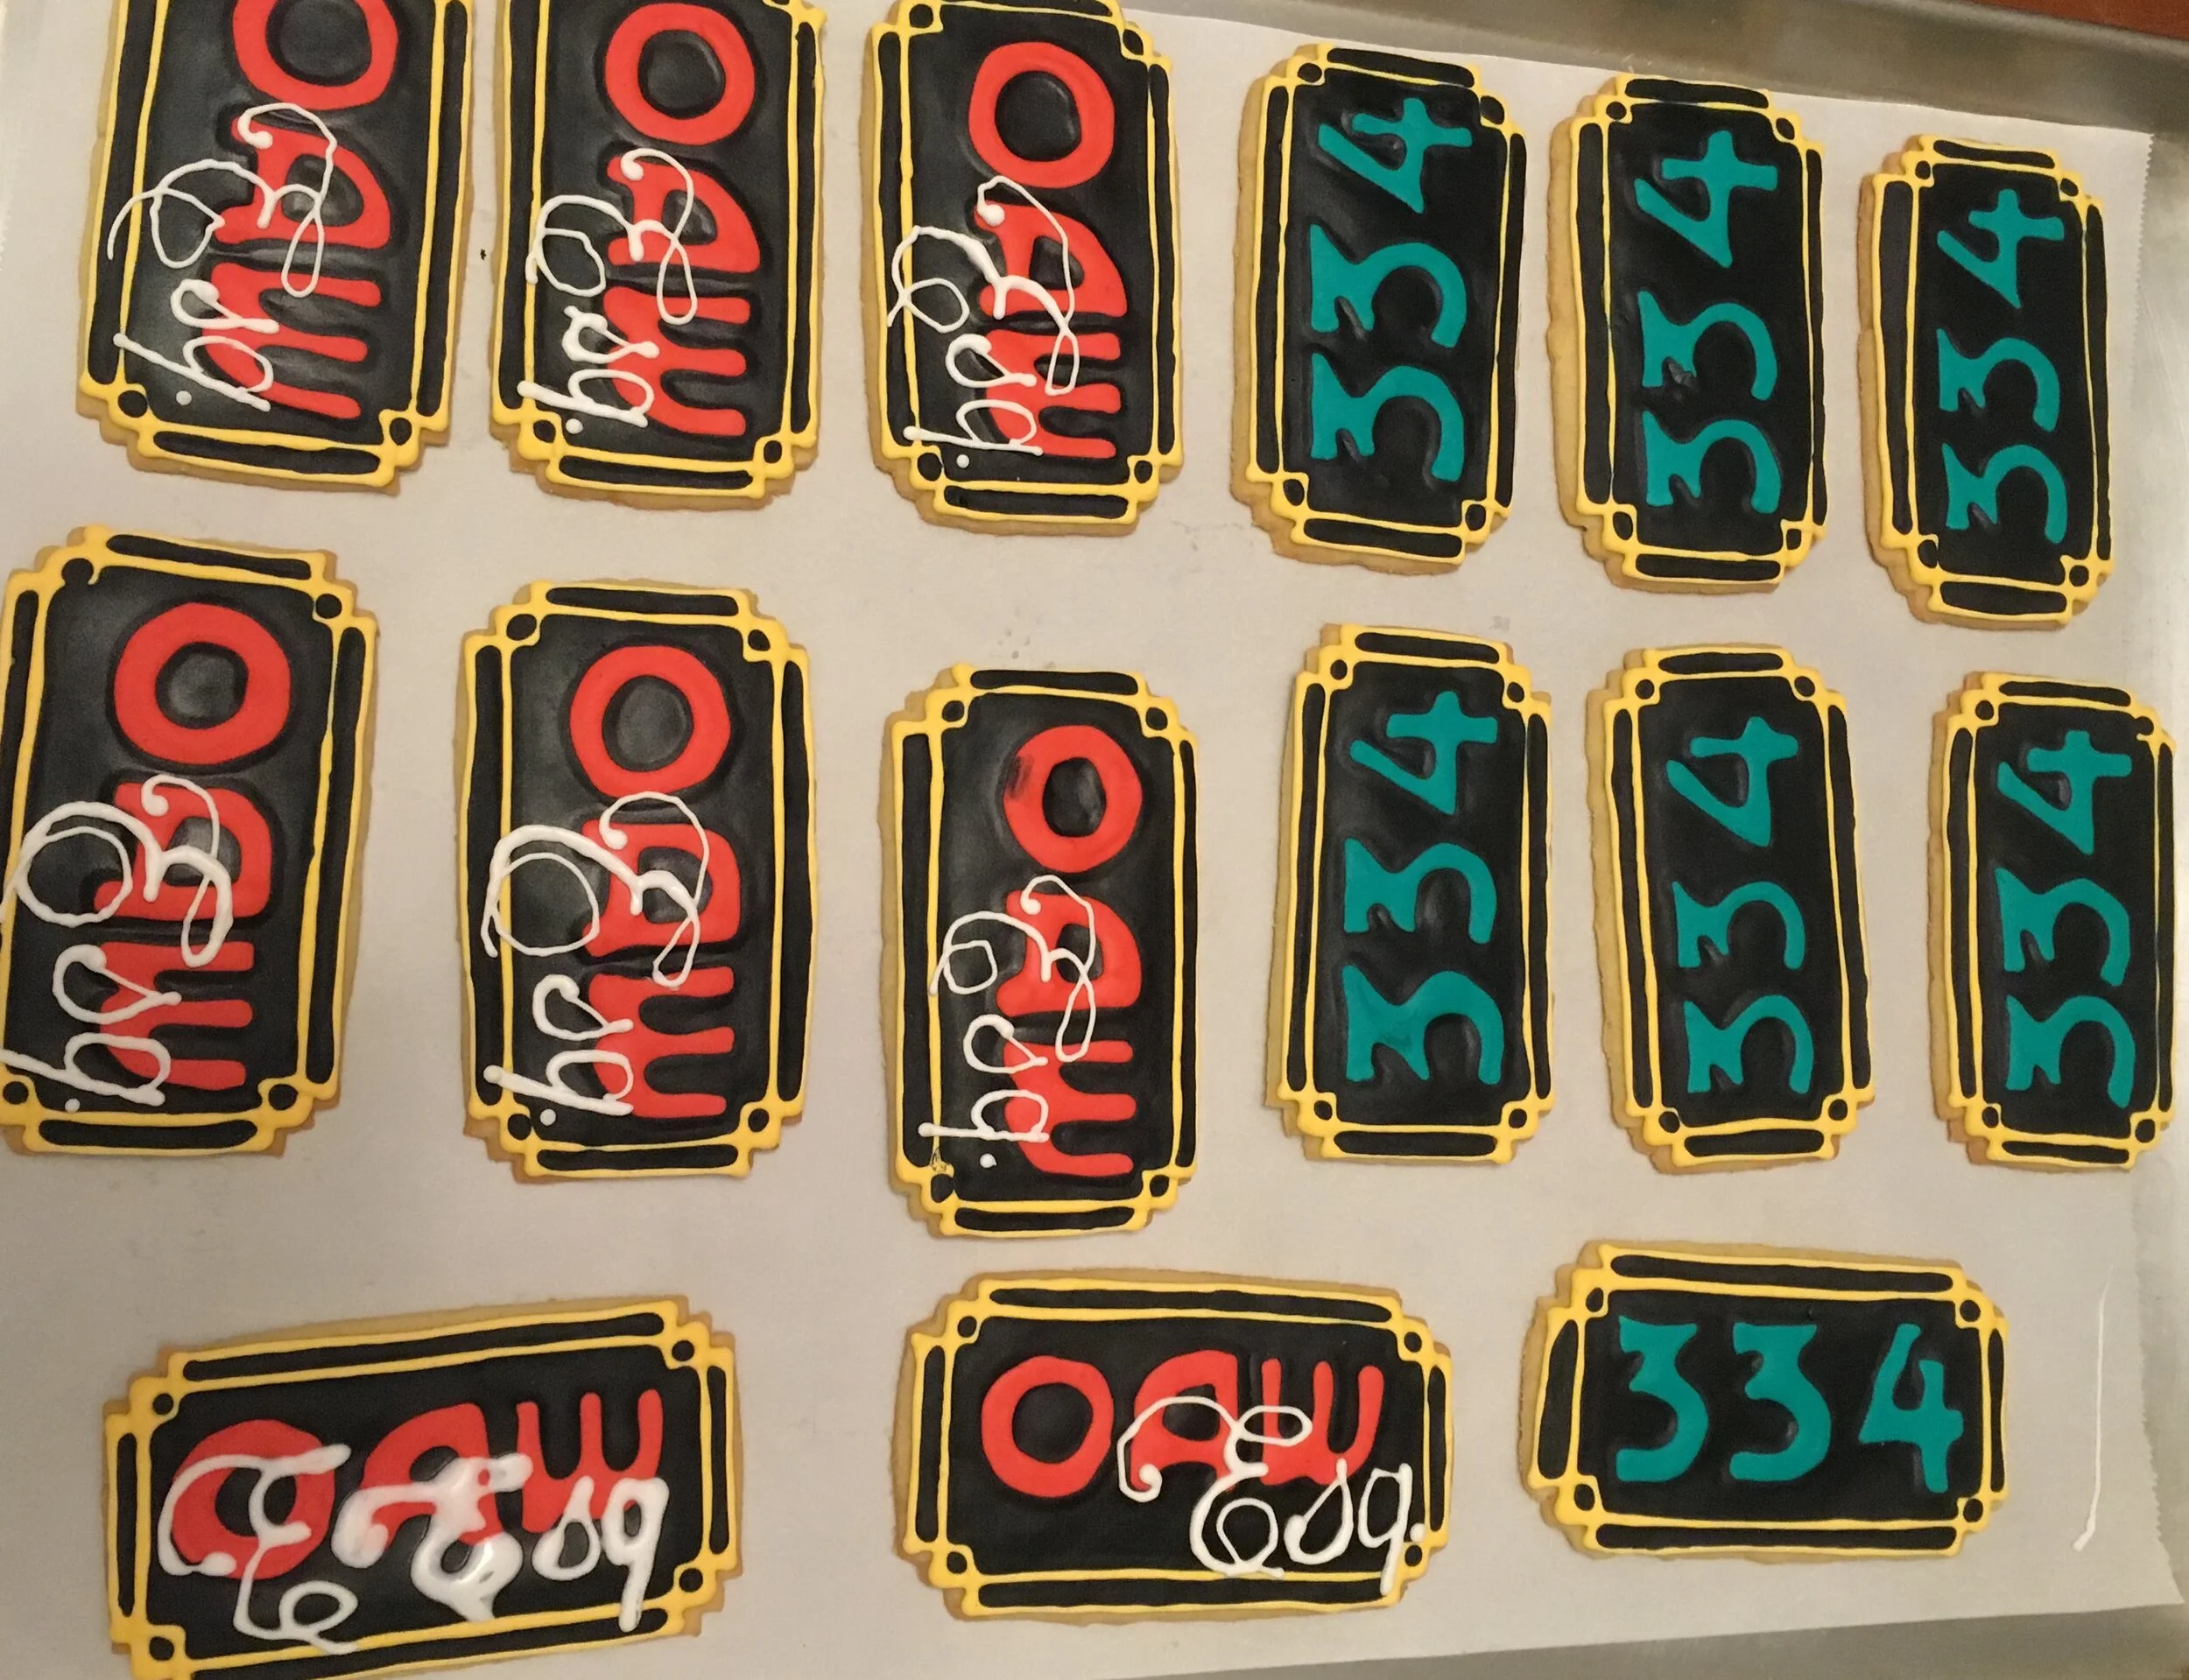
Bar Exam Cookies
My good friend just passed the bar exam with flying colors! To congratulate her, I made her these cookies with "Esq." over her initials and her bar exam score.
My good friend just passed the bar exam with flying colors! To congratulate her, I made her these cookies with "Esq." over her initials and her bar exam score.

Terraria Blood Moon Cake
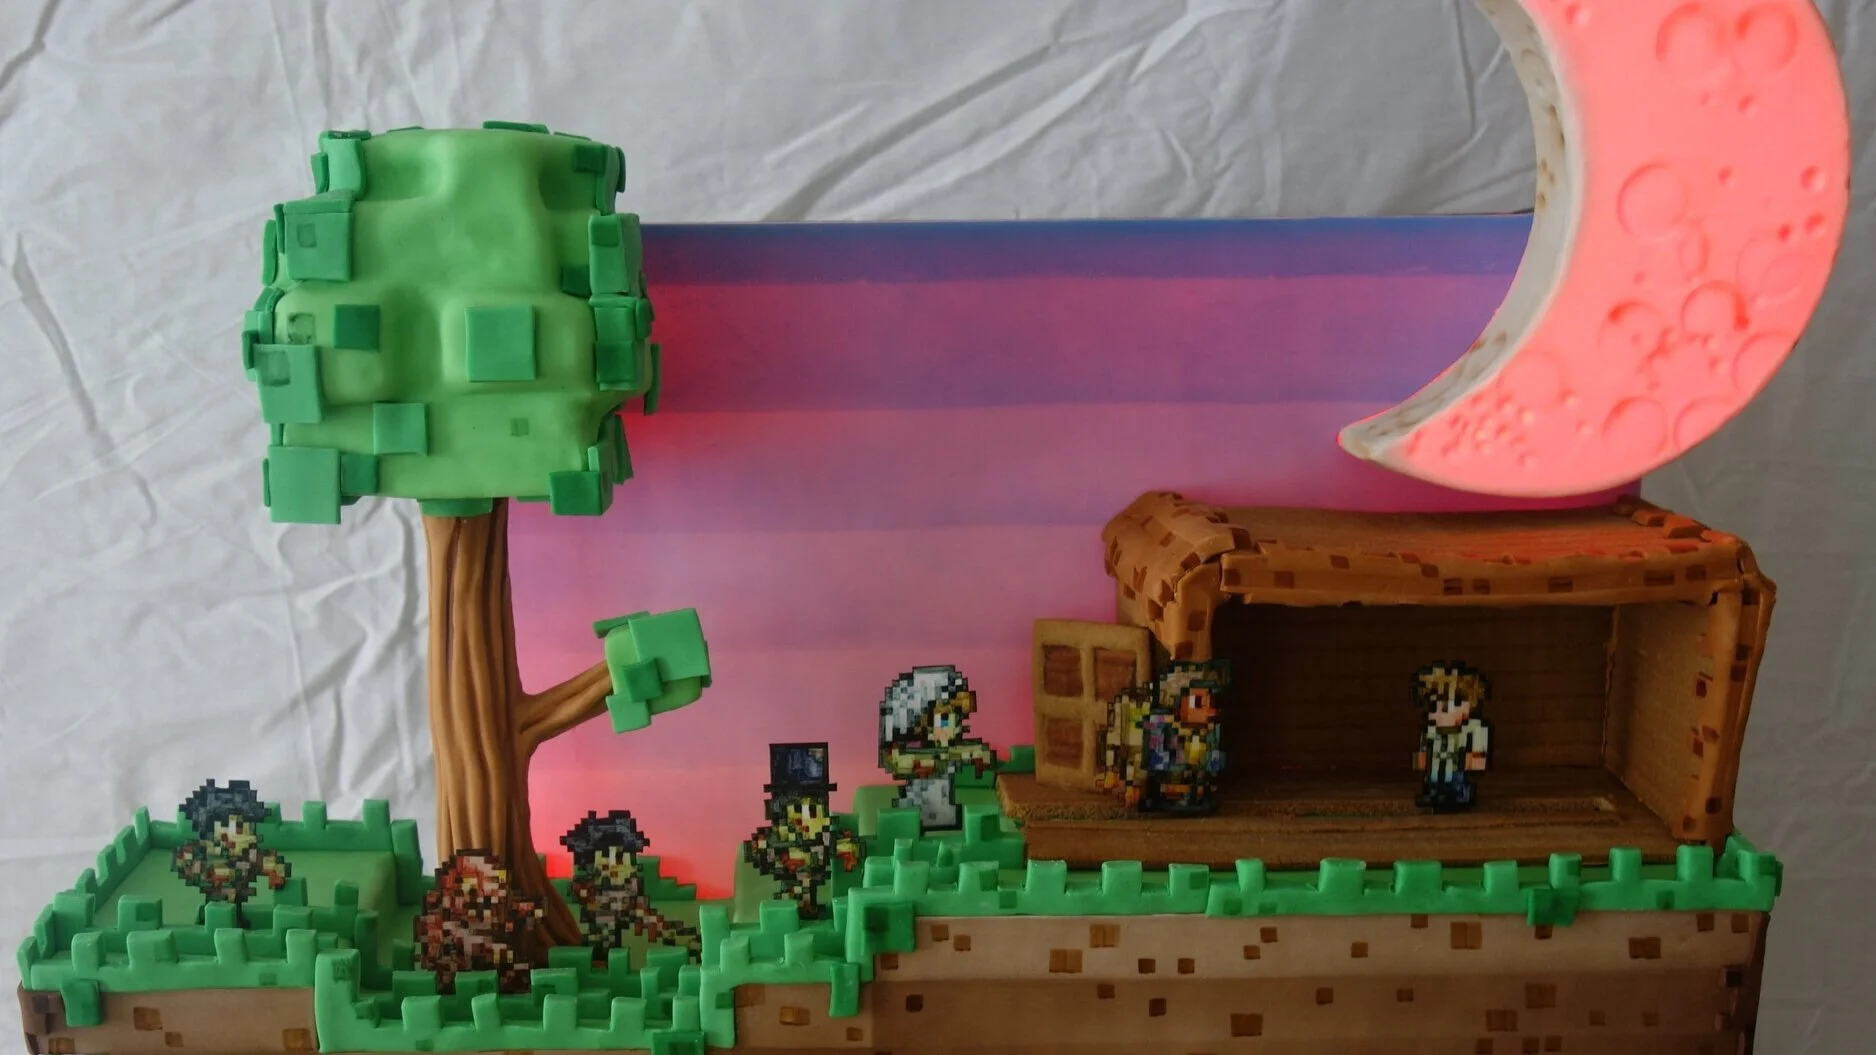
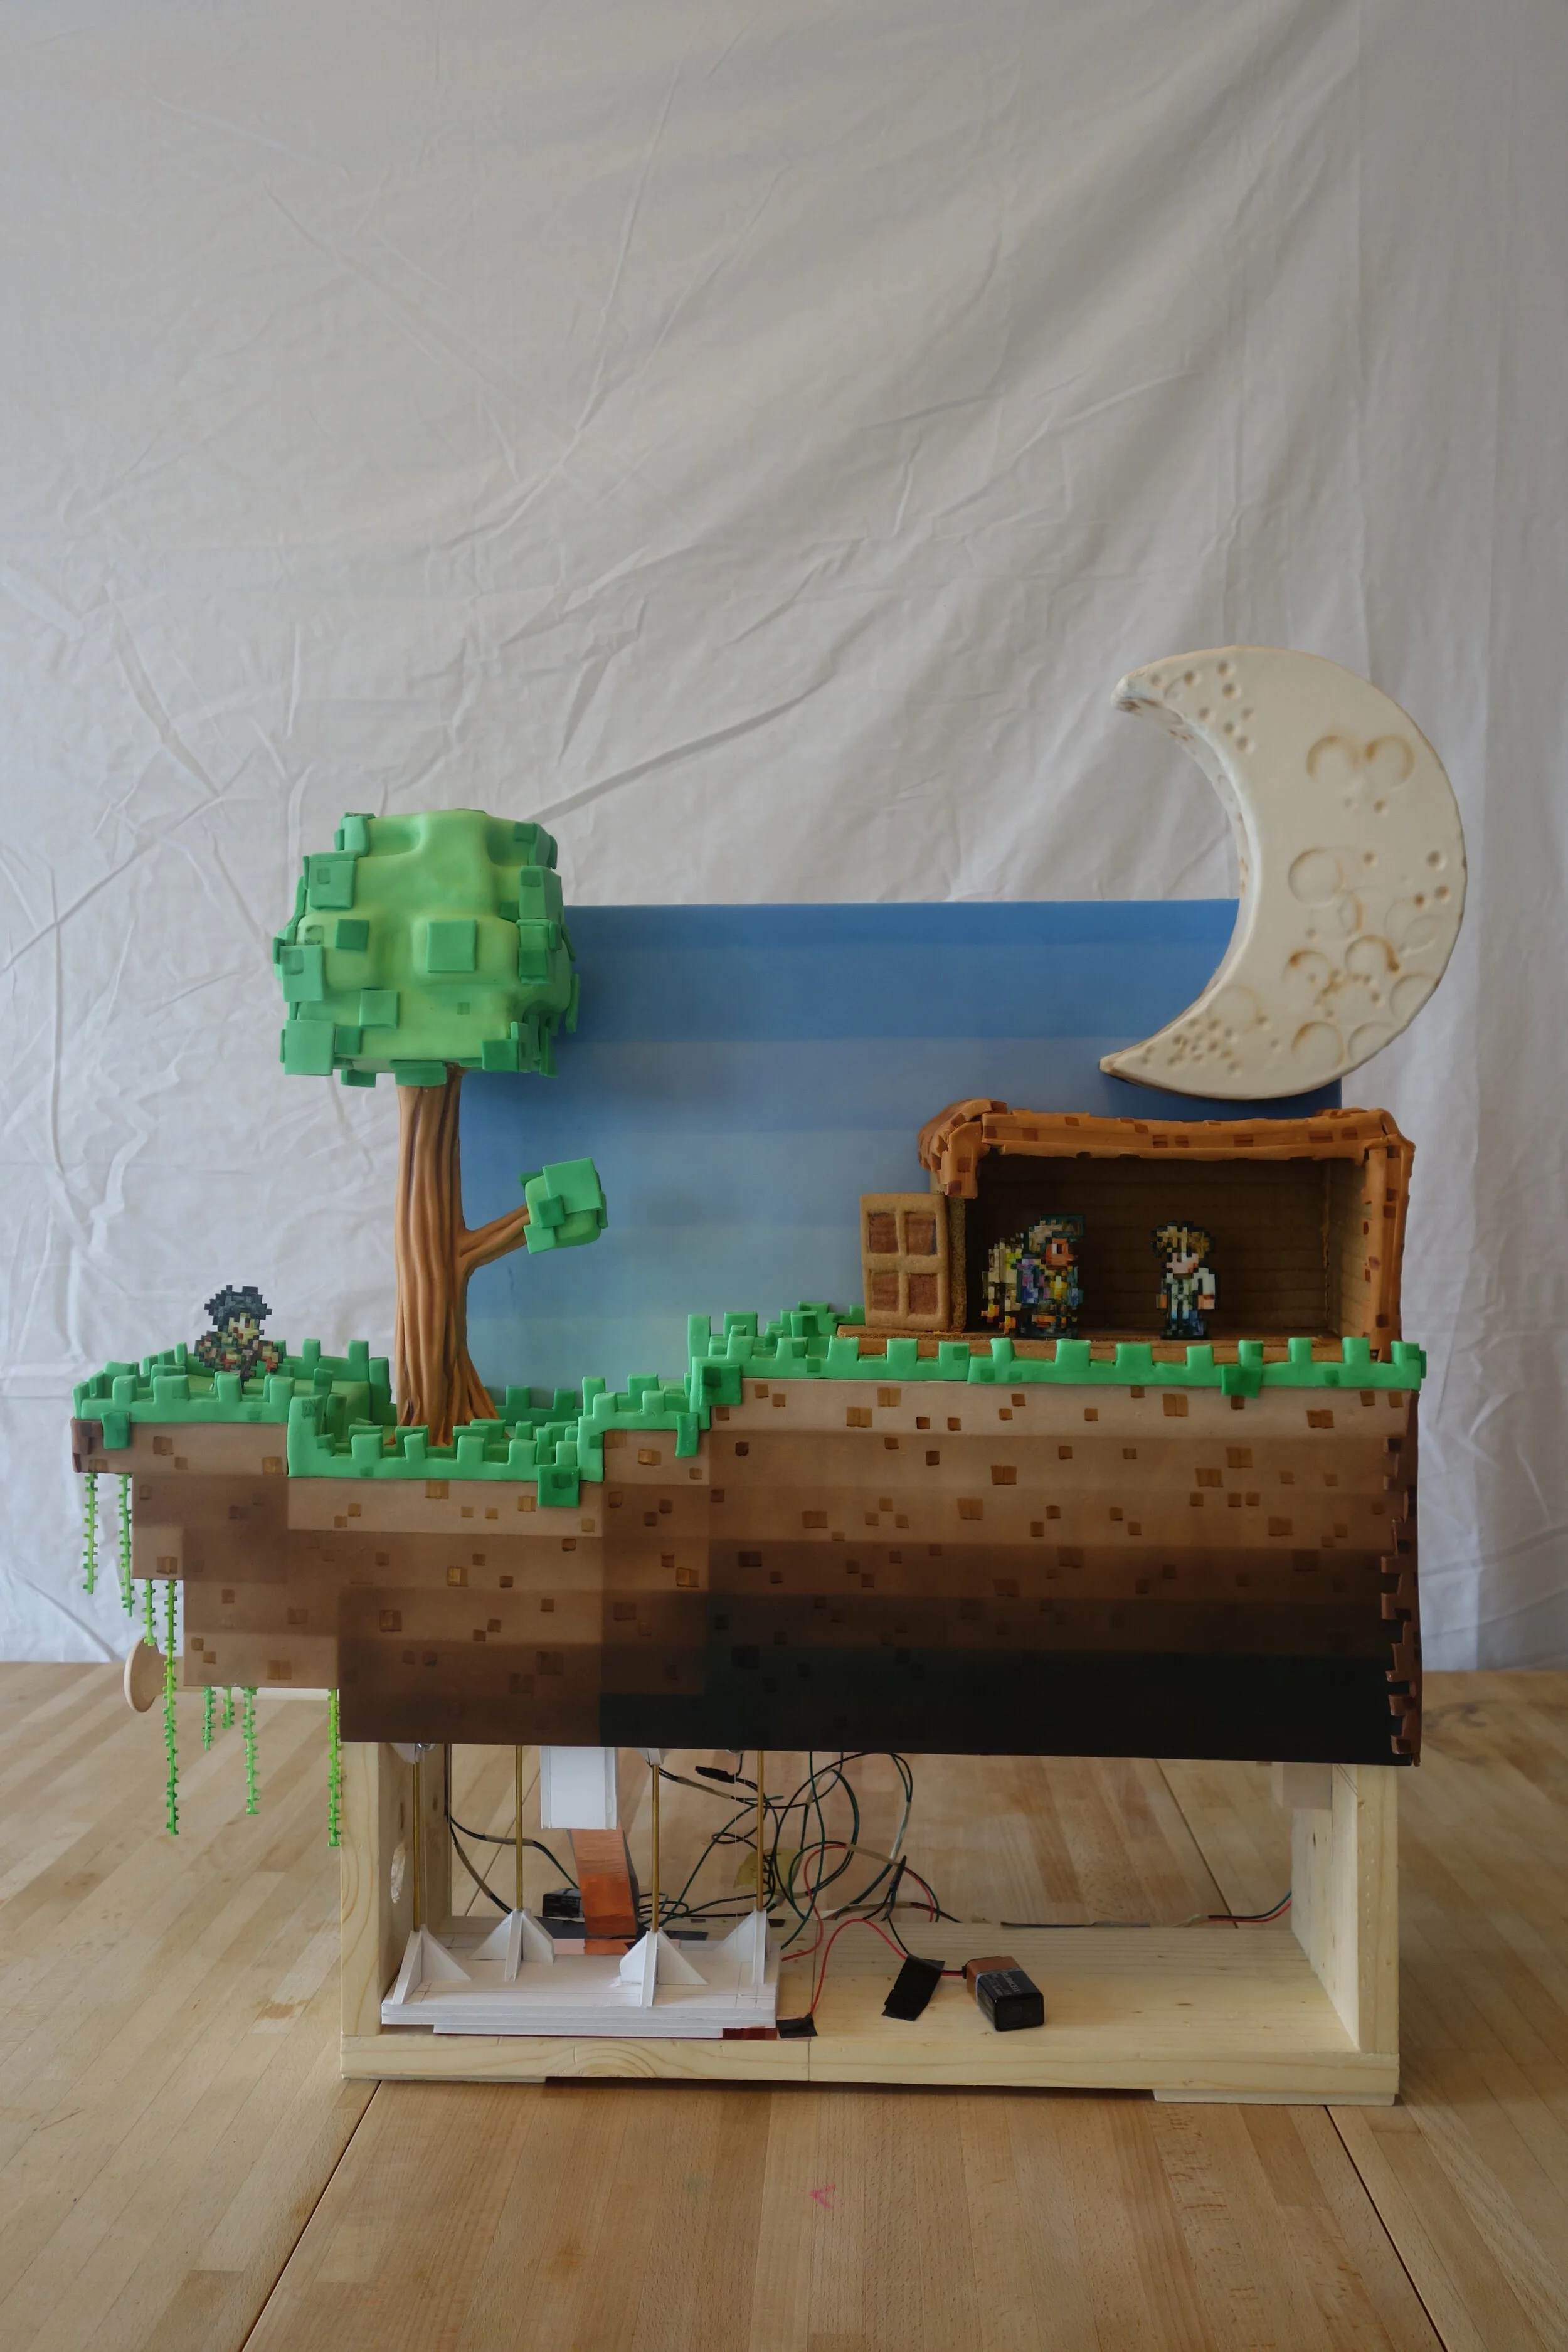
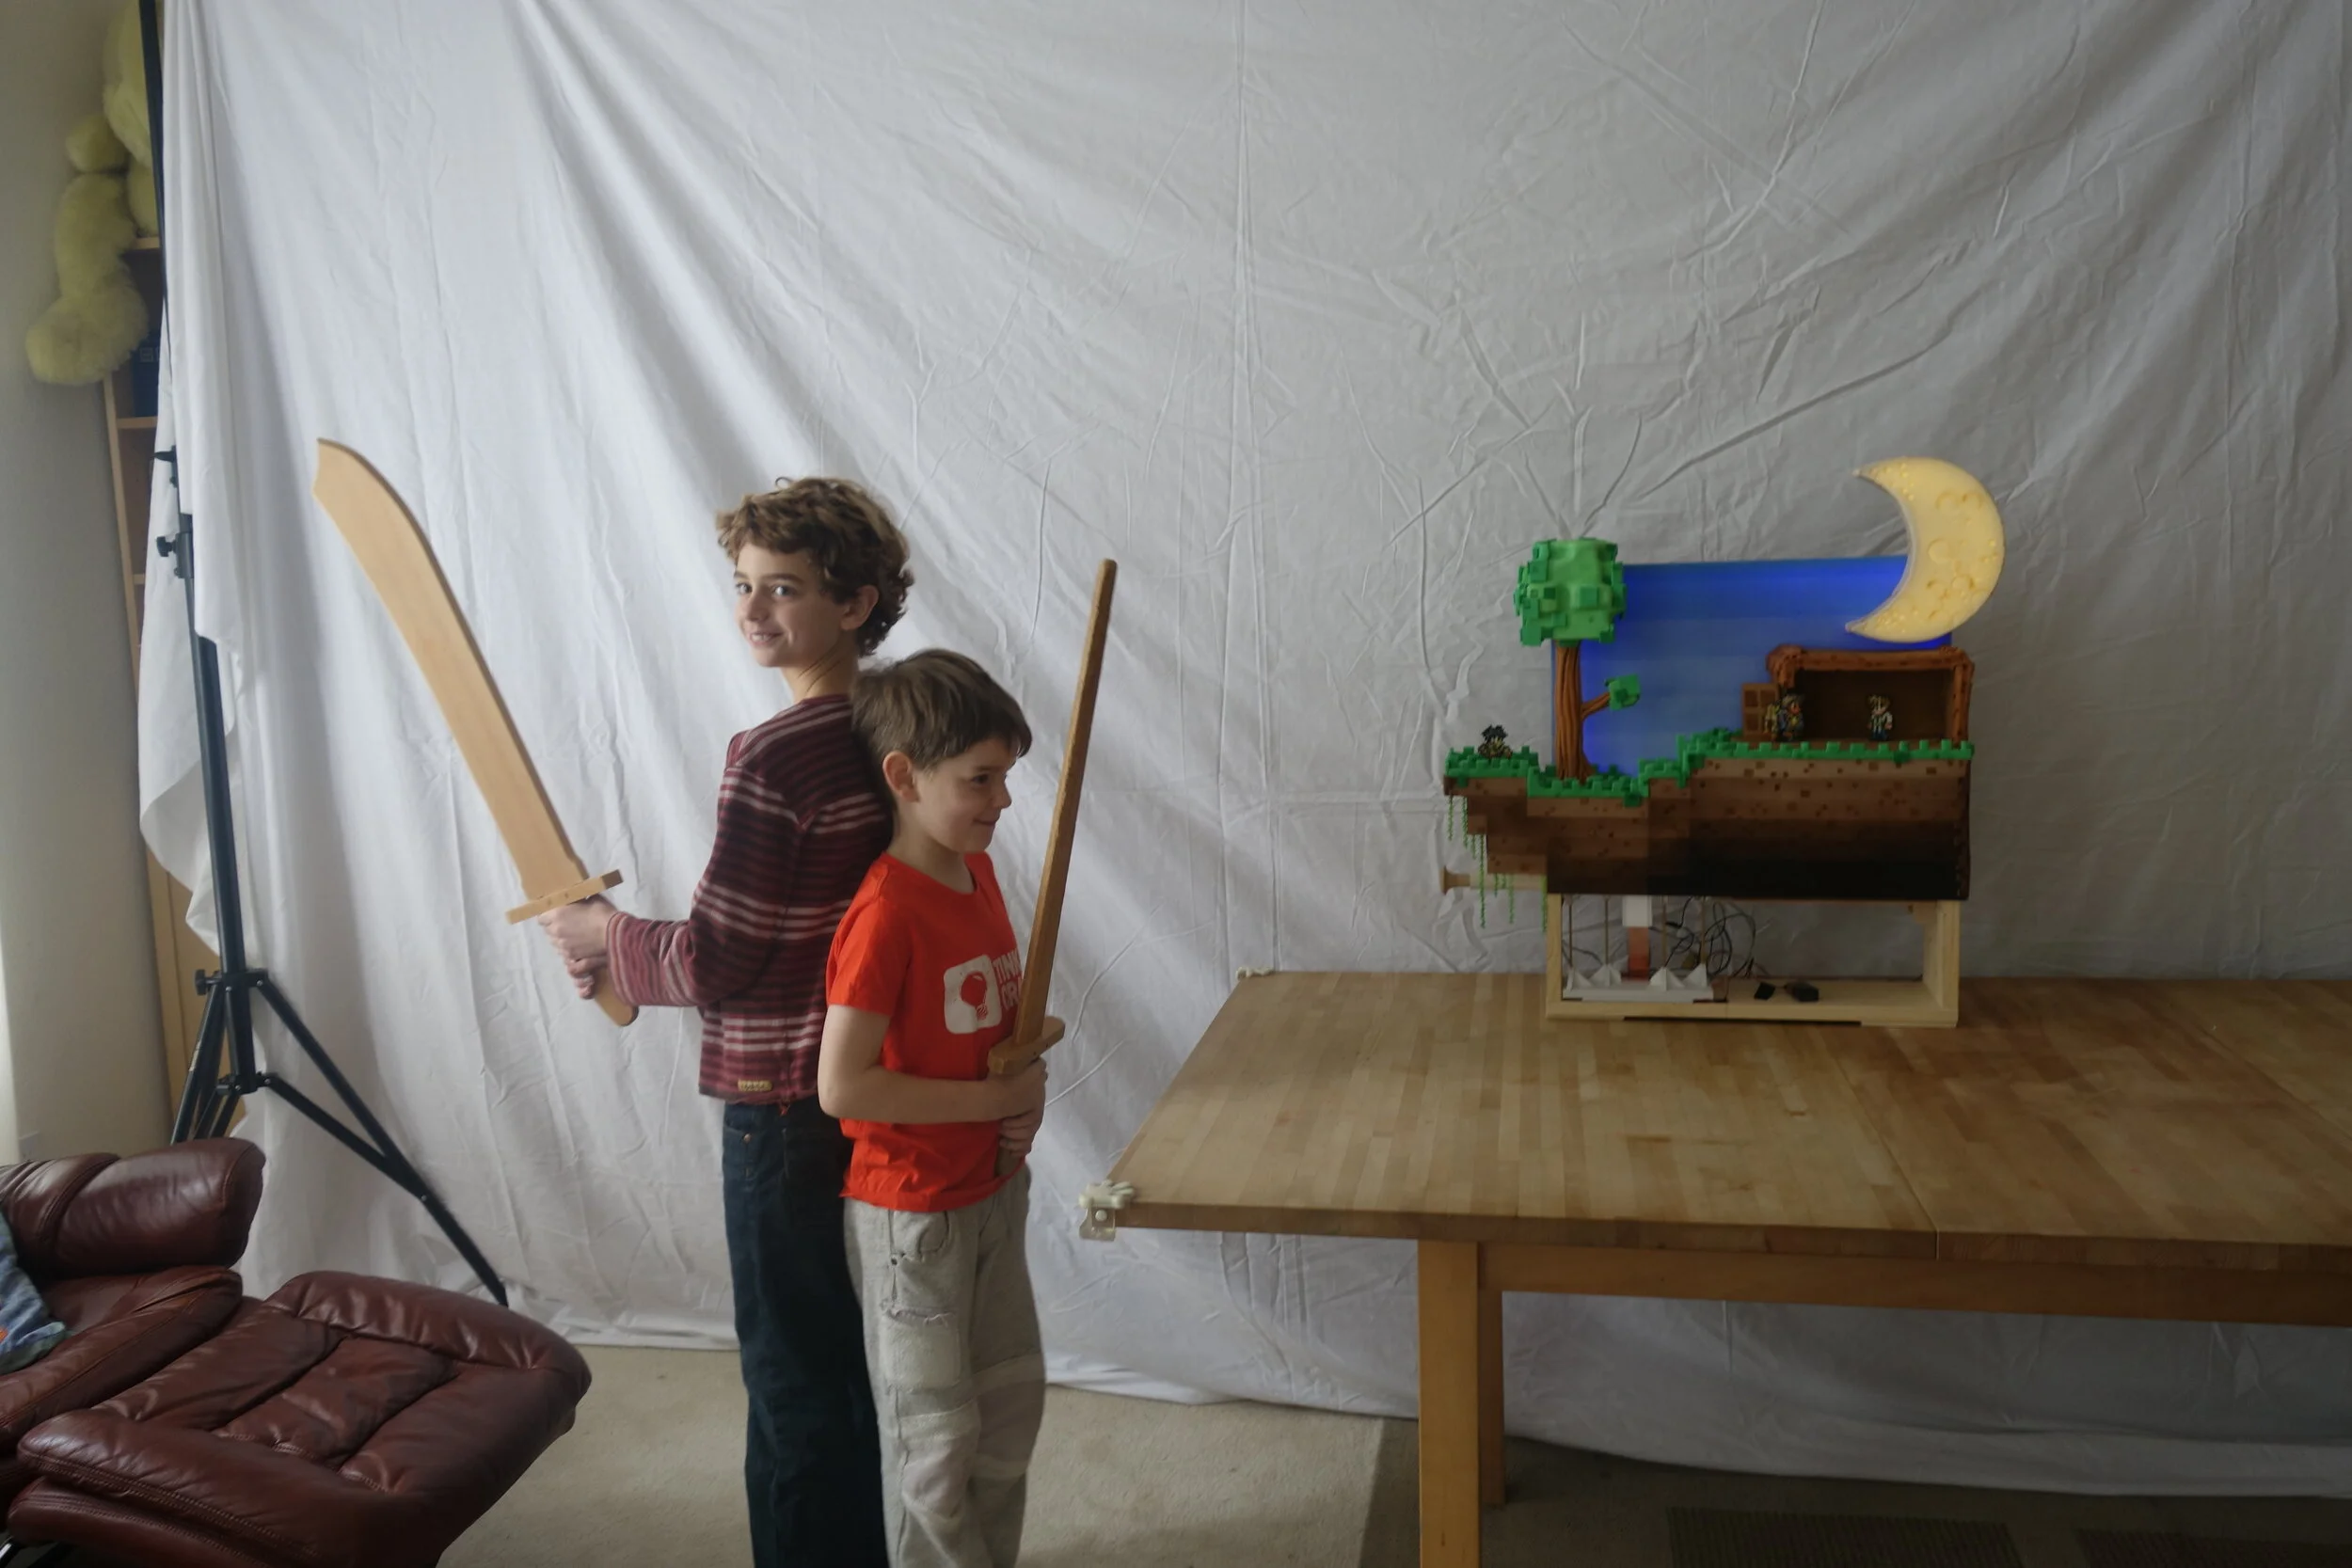
For Sam’s 7th birthday, he wanted a Terraria blood moon cake. Apparently, when there is a blood moon, a lot more zombies come out and there are some kinds of zombies that only appear in the blood moon. So we settled on a design where the moon changed from blue (regular moon) to red (blood moon) and a bunch more zombies rose up out of the ground.
For Sam’s 7th birthday, he wanted a Terraria blood moon cake. Apparently, when there is a blood moon, a lot more zombies come out and there are some kinds of zombies that only appear in the blood moon. So we settled on a design where the moon changed from blue (regular moon) to red (blood moon) and a bunch more zombies rose up out of the ground.

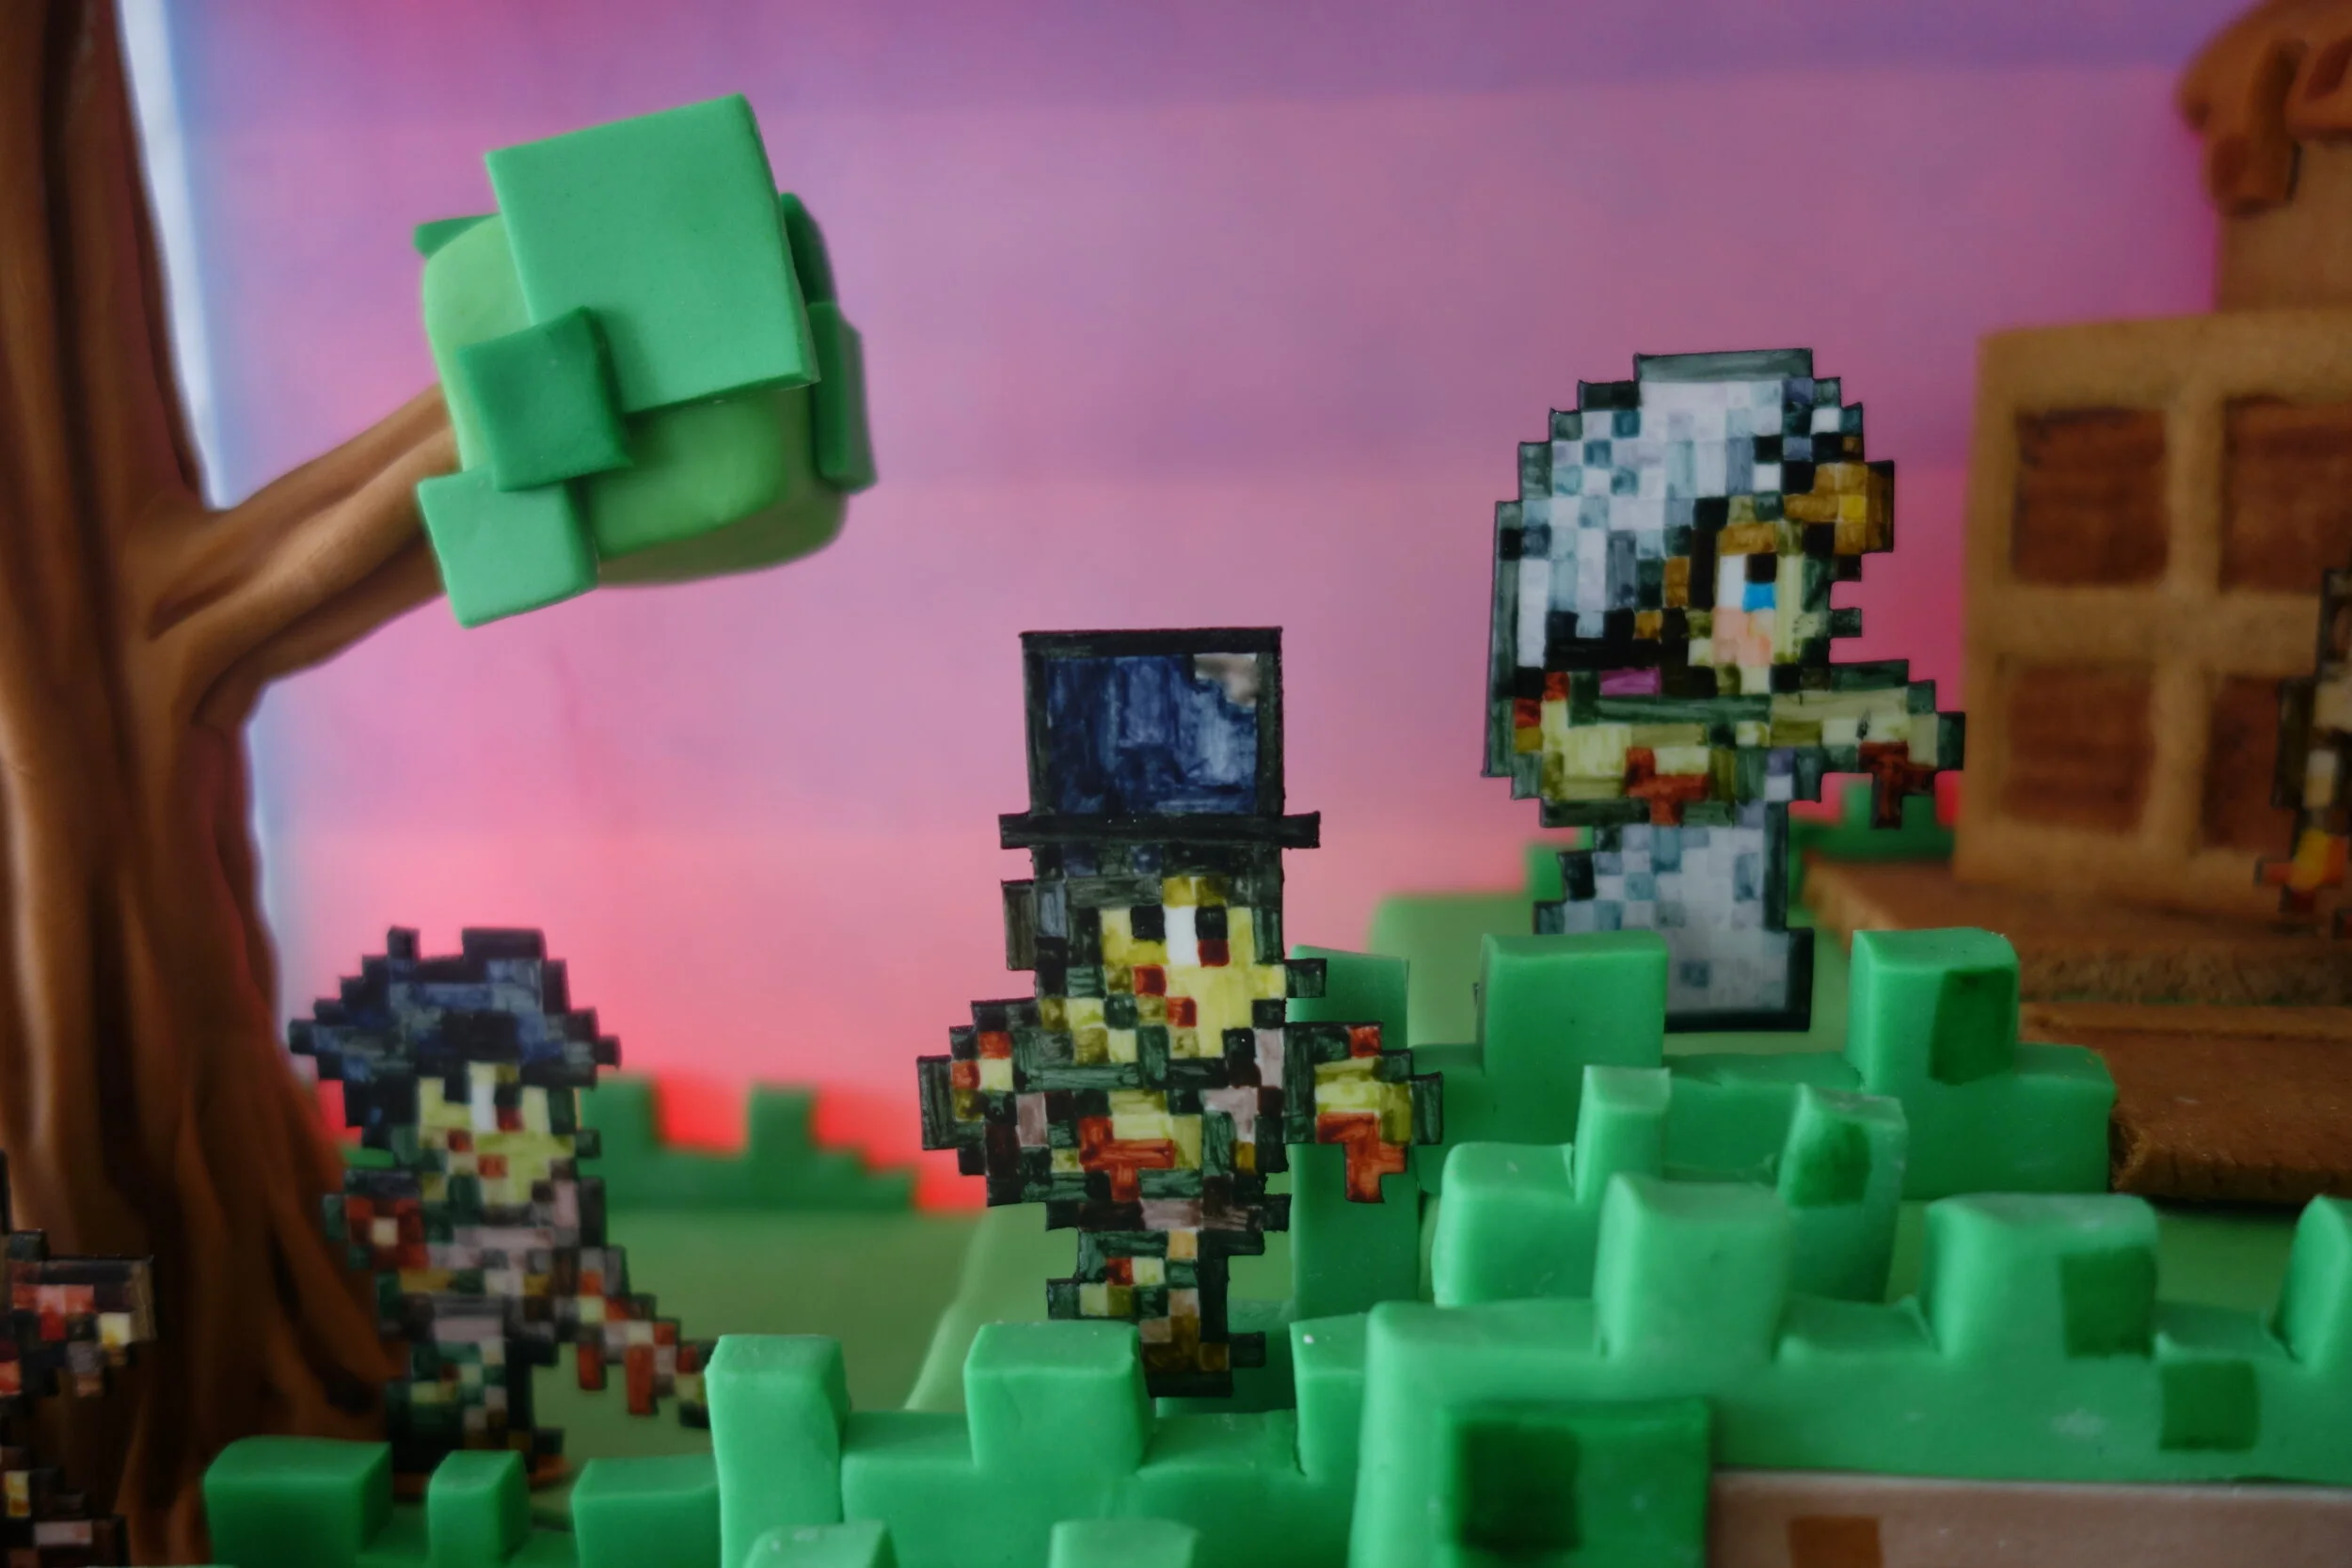
The characters are hand painted gum paste. The blood moon zombies are all mounted on metal tubes that are attached to a little platform. The platform is lifted by fishing line attached to a wooden dowel, so that when the dowel is pulled out, the zombies rise up for the blood moon and when the dowel is pushed in, the zombies sink into the ground for the regular moon.

Sam also wanted his Terraria avatar and the guide NPC, so I included a little house made of gingerbread where they can hide from the zombies and mounted them on a track so they can walk back and forth.

The backdrop and the moon are light boxes with lids of plexiglass covered with fondant. Inside, are rows of red LEDs and rows of blue LEDs. The LEDs are wired through the platform that raises and lowers the zombies, so that the blue LEDs light when the platform is down (regular moon) and the red LEDs light when the platform is up (blood moon).


Schoolhouse Rock cake
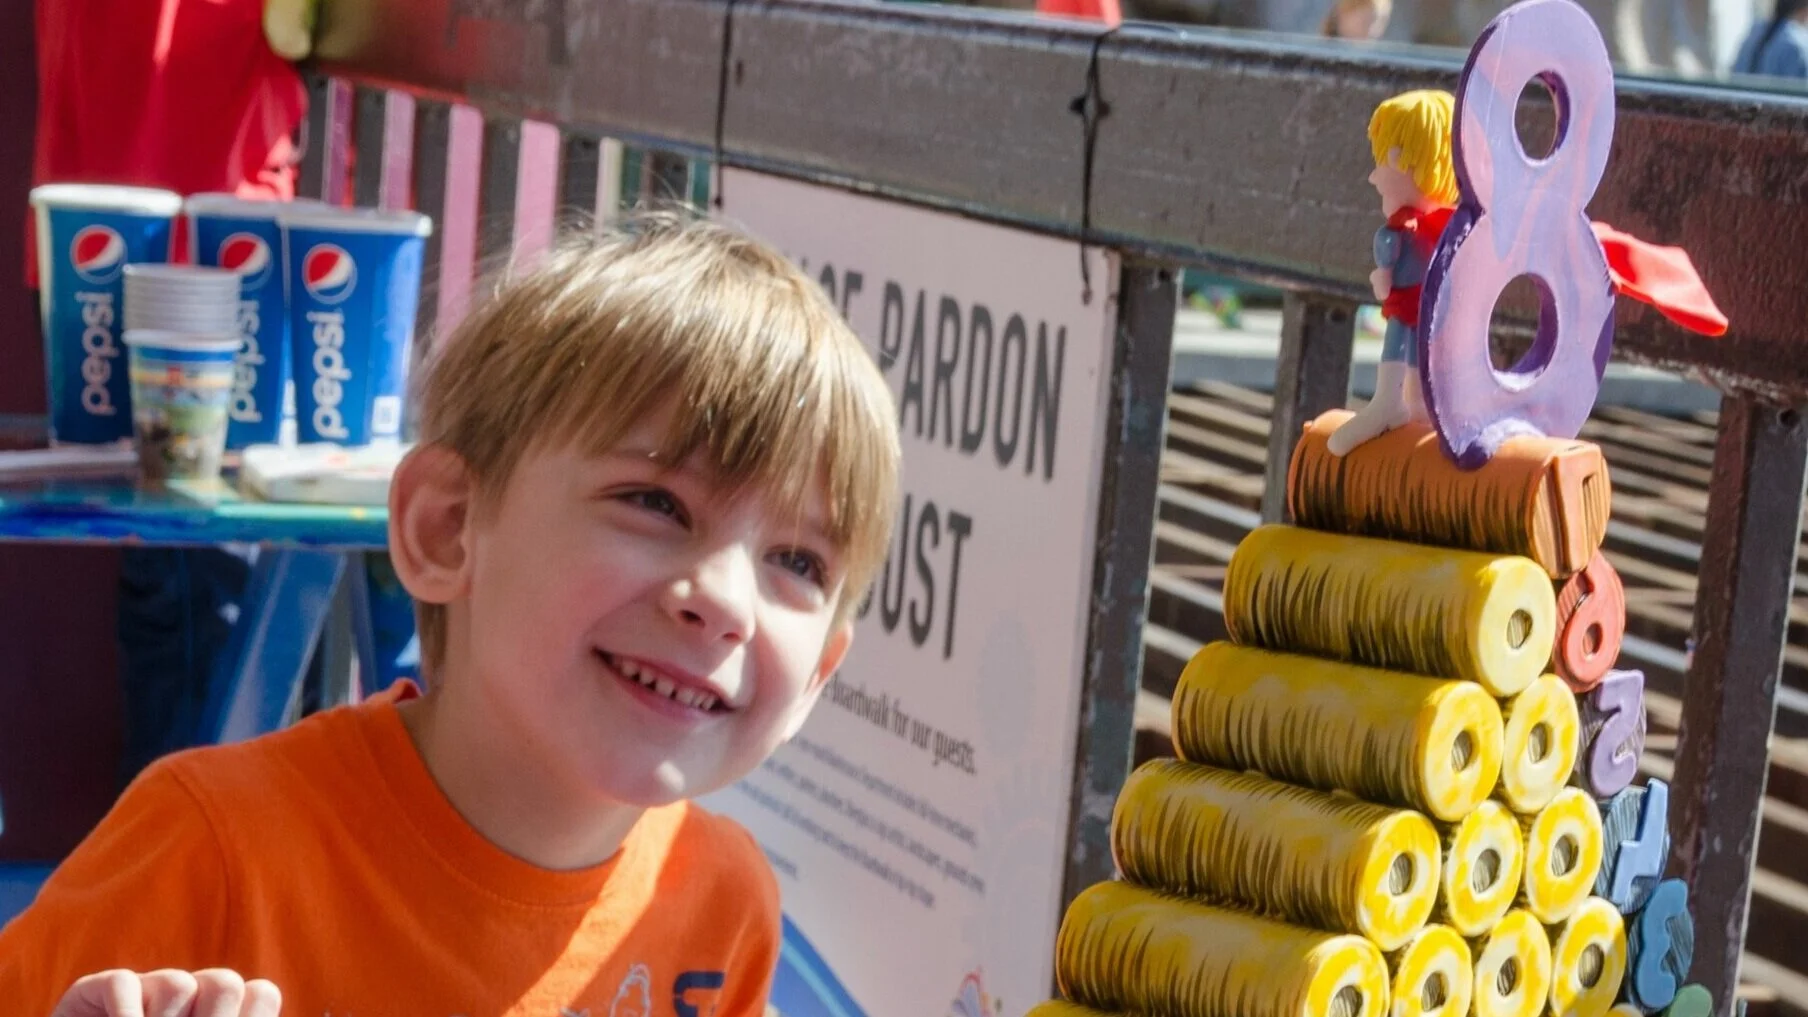
My little friend Isaac loves numbers, so for his eighth birthday we decided he should have a cake based on My Hero Zero from Schoolhouse Rock.


My little friend Isaac loves numbers, so for his eighth birthday we decided he should have a cake based on My Hero Zero from Schoolhouse Rock.

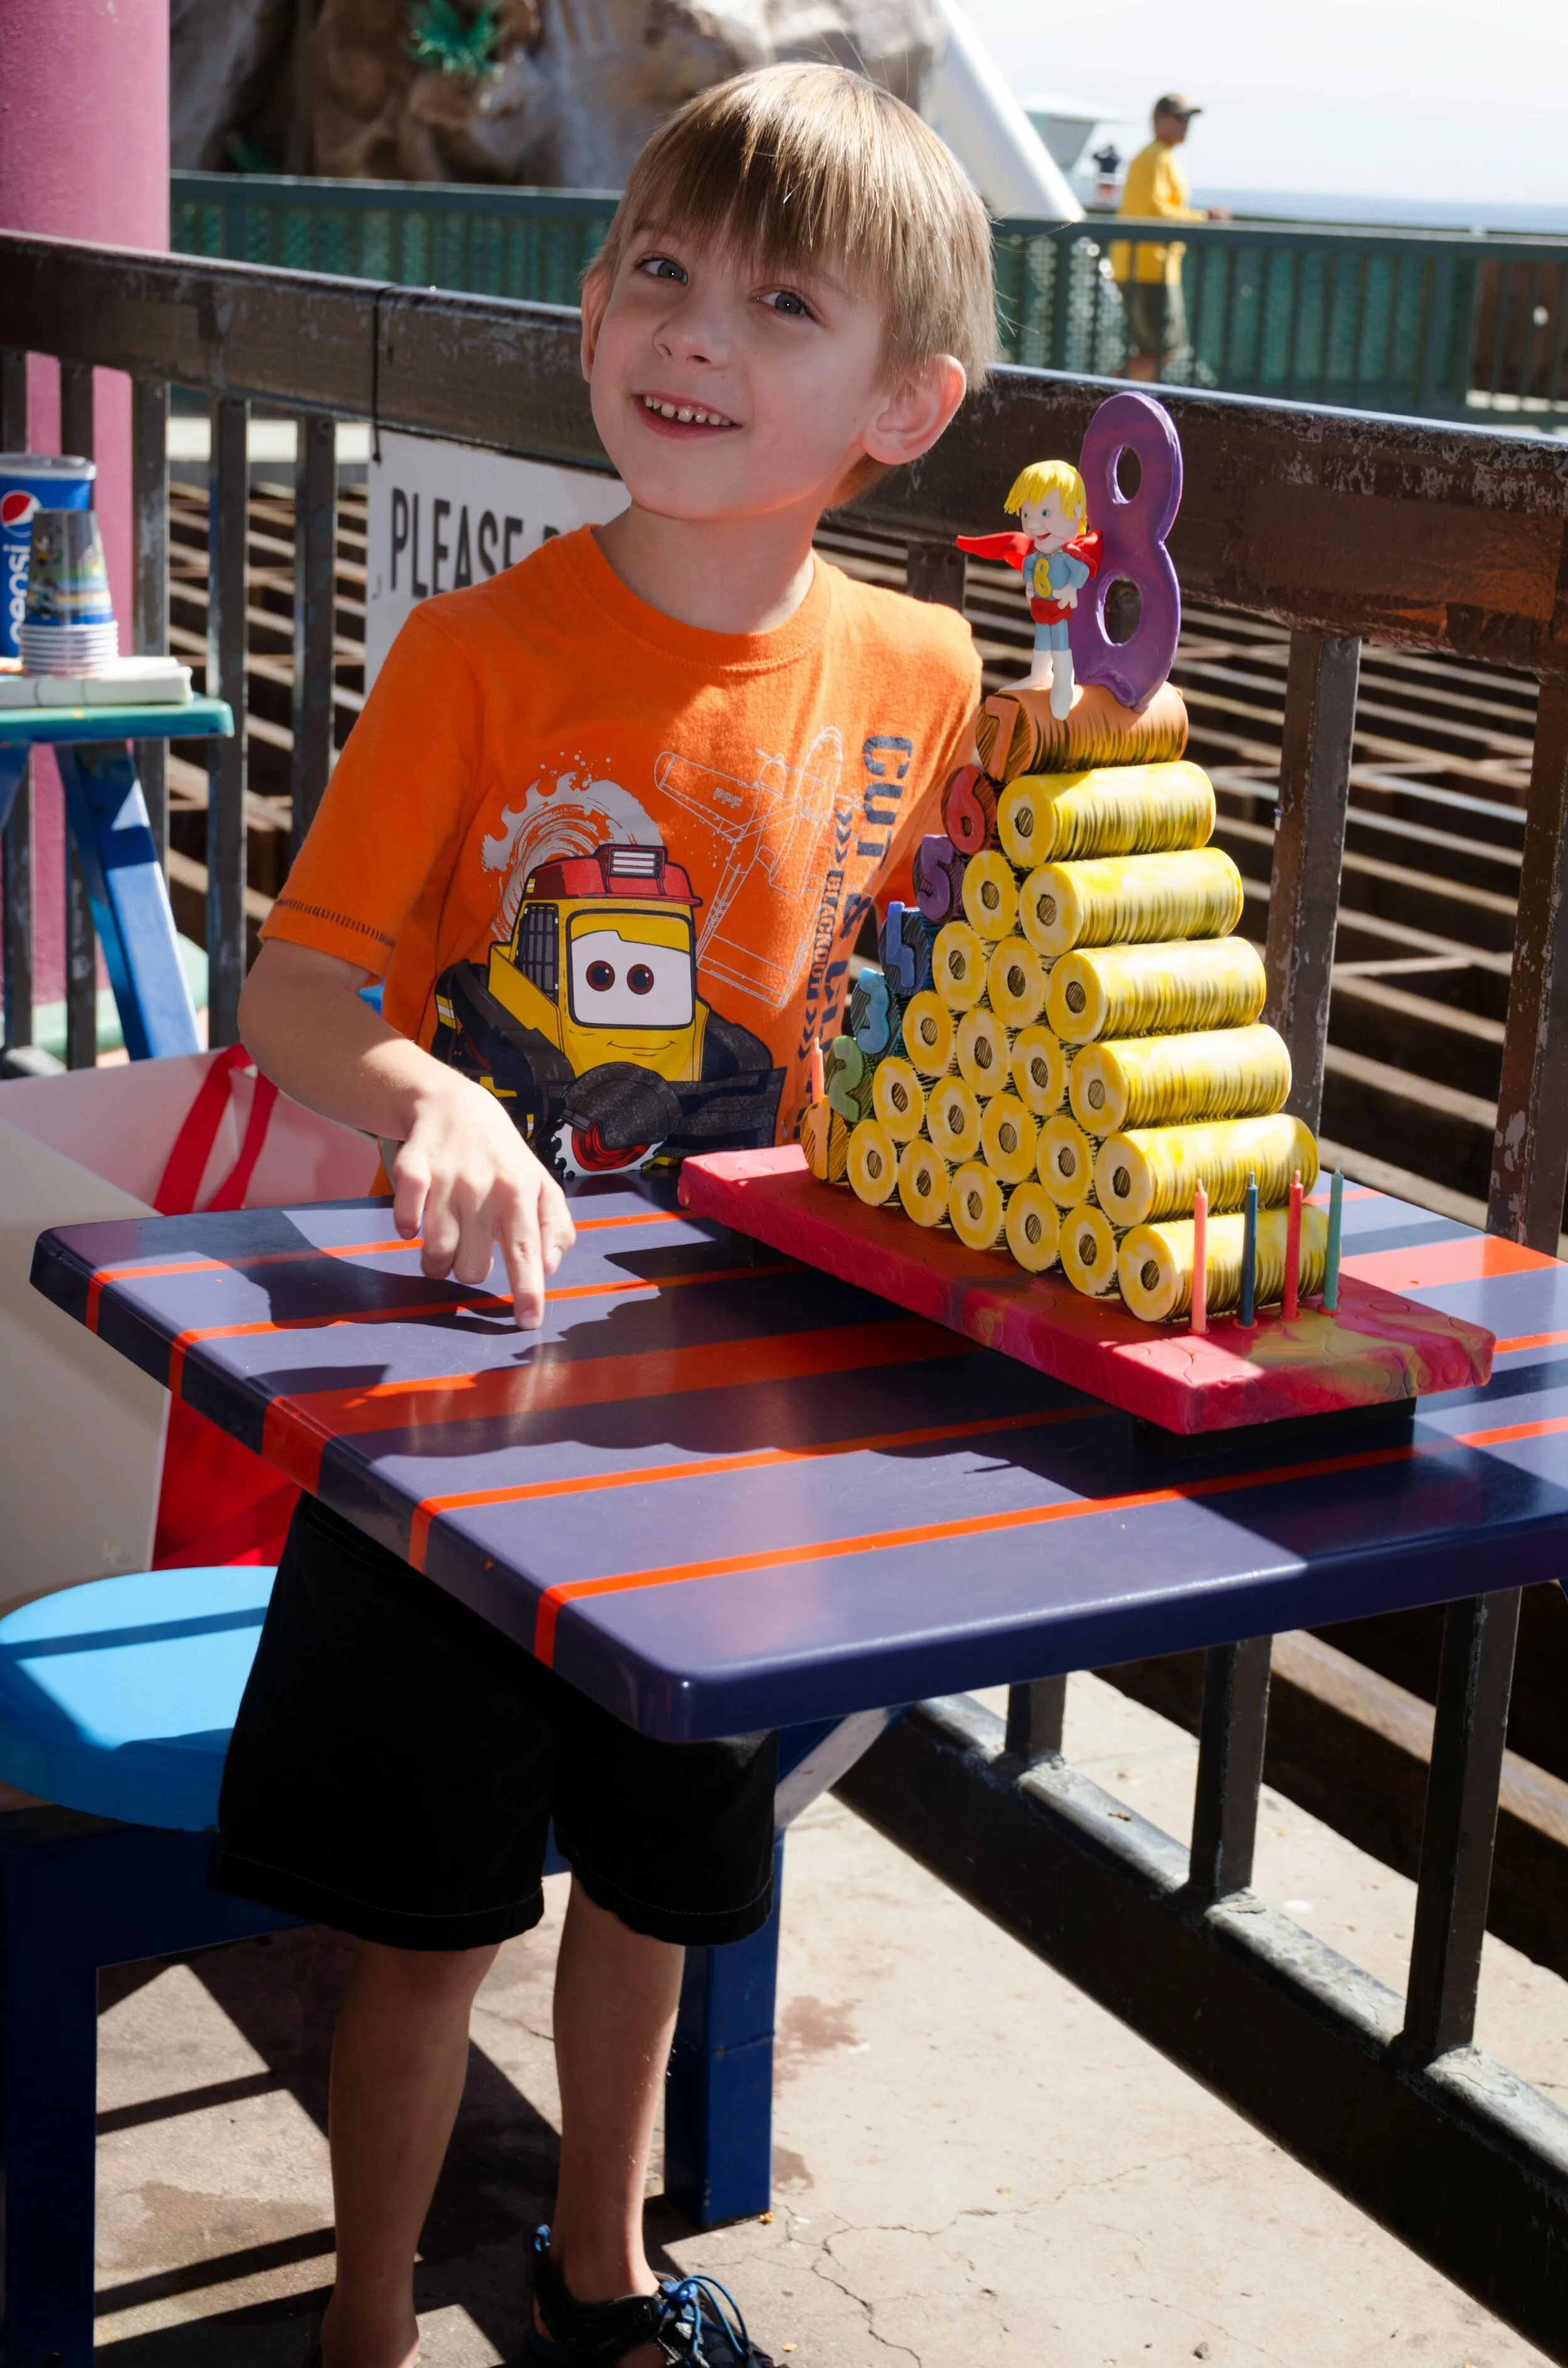
It was a really small, casual party at the Santa Cruz Beach Boardwalk, so I wanted the cake to be both entirely edible and convenient to eat without utensils. Each number was an individual cylinder of cake. I made the tubes, as well as the numbers, out of gum paste, then filled them with alternating layers of orange cake, milk chocolate ganache, and ginger cookies. The ginger cookies were structural, since the gum paste couldn’t bear the weight of seven layers of cake cylinders plus the gum paste figure.
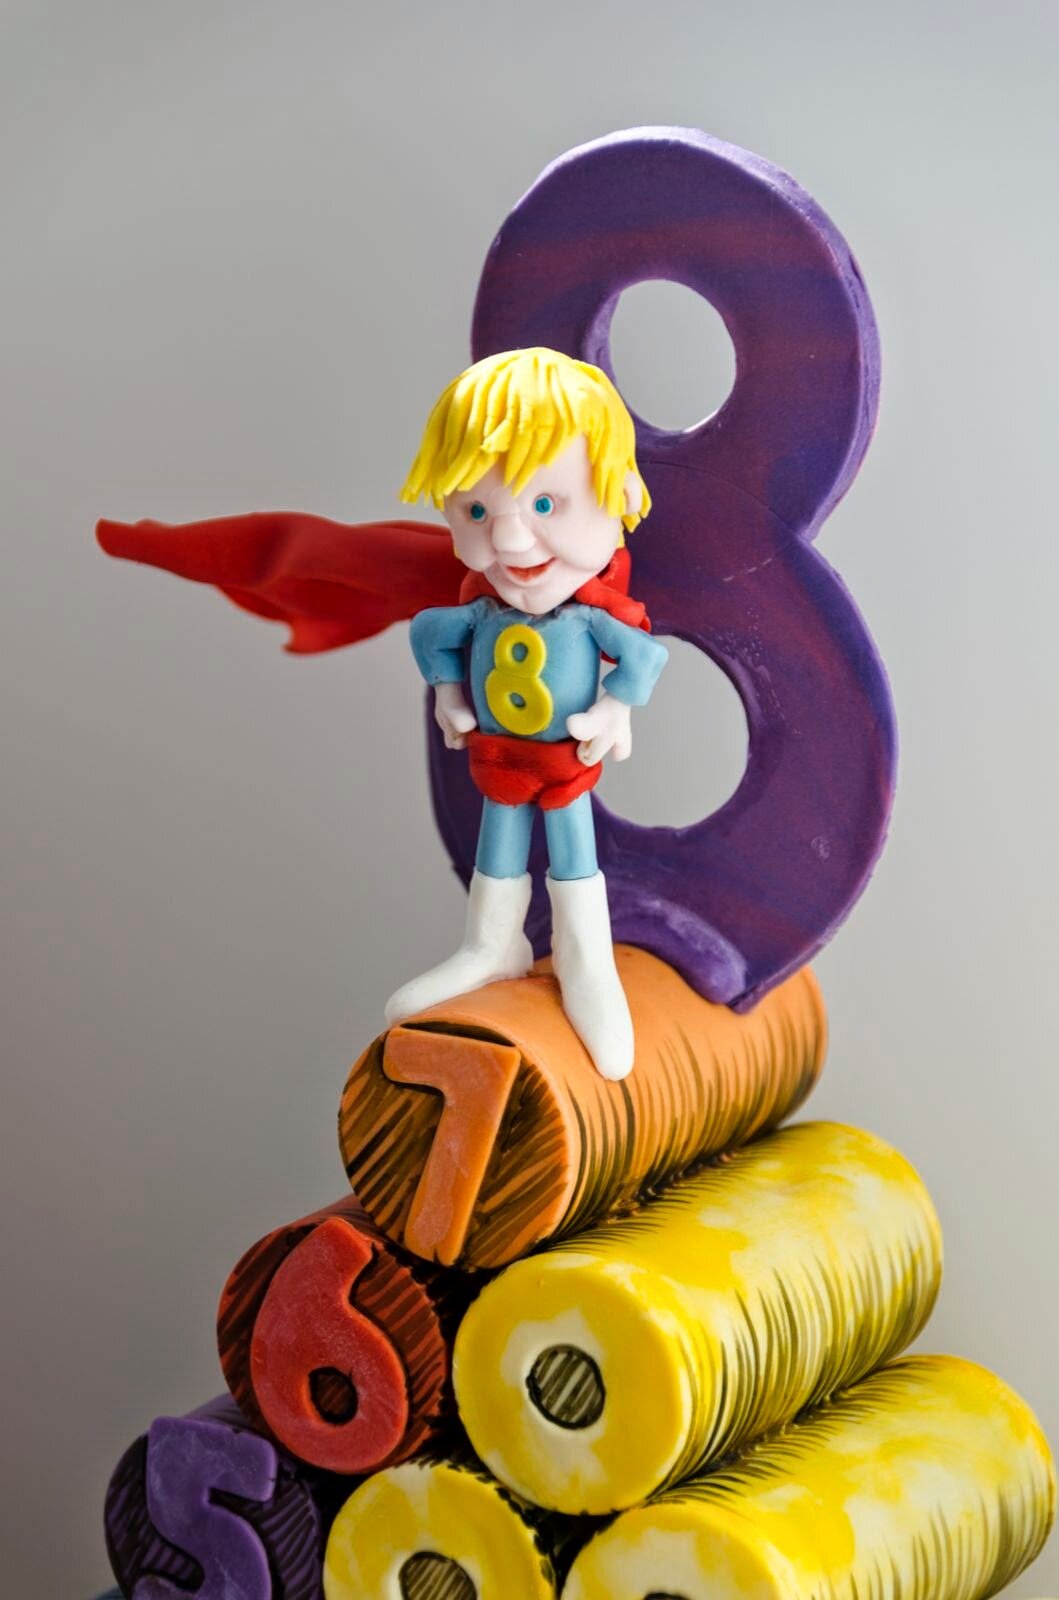
To make the figure on top of the cake entirely edible, I reinforced the gum paste with an armature of uncooked spaghetti. I send my brother-in-law to the store to get the spaghetti. He evidently read every box of spaghetti in the store to find the one with the longest cooking time, under the theory that a longer cooking time would indicate sturdier pasta.

I’m not sure I’ve ever seen Isaac as happy as when he saw this cake, and he’s generally a happy guy. I love making cakes because cakes make everyone happy. This one has to rank amongst the most gratifying cakes I’ve ever made.

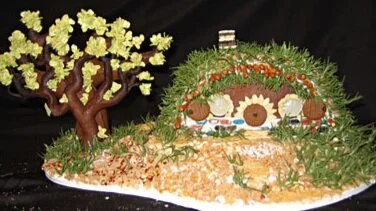
Hobbit Hole
This year I was looking to make a relatively simple gingerbread house because my time was limited, so I took it as an opportunity to experiment with some new textures. I decided to make a hobbit hole, both because I love hobbits and because it only takes 2 pieces of gingerbread to make a hobbit hole.
This year I was looking to make a relatively simple gingerbread house because my time was limited, so I took it as an opportunity to experiment with some new textures. I decided to make a hobbit hole, both because I love hobbits and because it only takes 2 pieces of gingerbread to make a hobbit hole.
While it's true that a hobbit hole can be made with only two pieces of gingerbread (one flat with round doors and windows for the front, one draped over a bowl for the hill) I actually made several more pieces of gingerbread. In order to create a smoother transition from the base to the hole I made a few irregularly shaped blobbies to build up a slight mound underneath the hole proper. I also made a few small gingerbread circles for the shutters and the door, scoring them before baking to give them a weathered woodgrain texture. Finally, I shaped two pieces of gingerbread to make a tree for the yard. I won't say that it was meant to be the Party Tree, since we all know the Party Tree was cut down, but I imagine any self-respecting hobbit would want a nice tree in the yard.

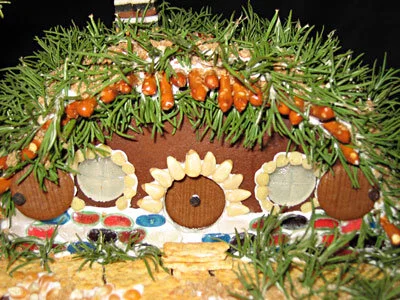
I tried a new technique for the windows - cutting a thin slice of white gum drop and carving some little mullions into it. I think it worked pretty well, though of course it's more opaque than ideal.
After assembling the hill on the base with royal icing, I kept the decor on the facade to a minimum - a few thin slices of jelly bellies for rocks plus pine nut trim around the door and windows. The finishing touch was black peppercorn knobs on the shutters, and in the exact middle of the door.

For the groundcover I really gave myself free rein to experiment with various foods for texture. Though why I didn't bother to tint my royal icing brown before I used it to stick the ground cover on I'll never know. The dirt is composed of peanuts, grape nuts, red pepper flakes, tapioca, and brown sugar. The grass is dried rosemary, which I think looks pretty awesome. I added some broken off pretzel ends to suggest some sort of log support system for the roof. The path to the front door is made of wheat thins. The chimney is made of some sort of ugly gummy candy. I probably shouldn't have used such obviously commercially manufactured candy. It didn't really go with the more organic textures of the rest of the house.
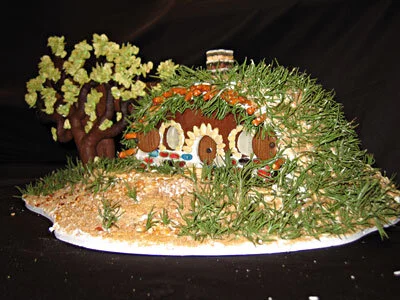
The leaves on the tree are made of raw oatmeal, tossed in a bag with some powdered green food coloring and individually applied. For whatever reason, I did bother to tint the royal icing used to apply these green, although I had failed to tint the royal icing for the ground brown.

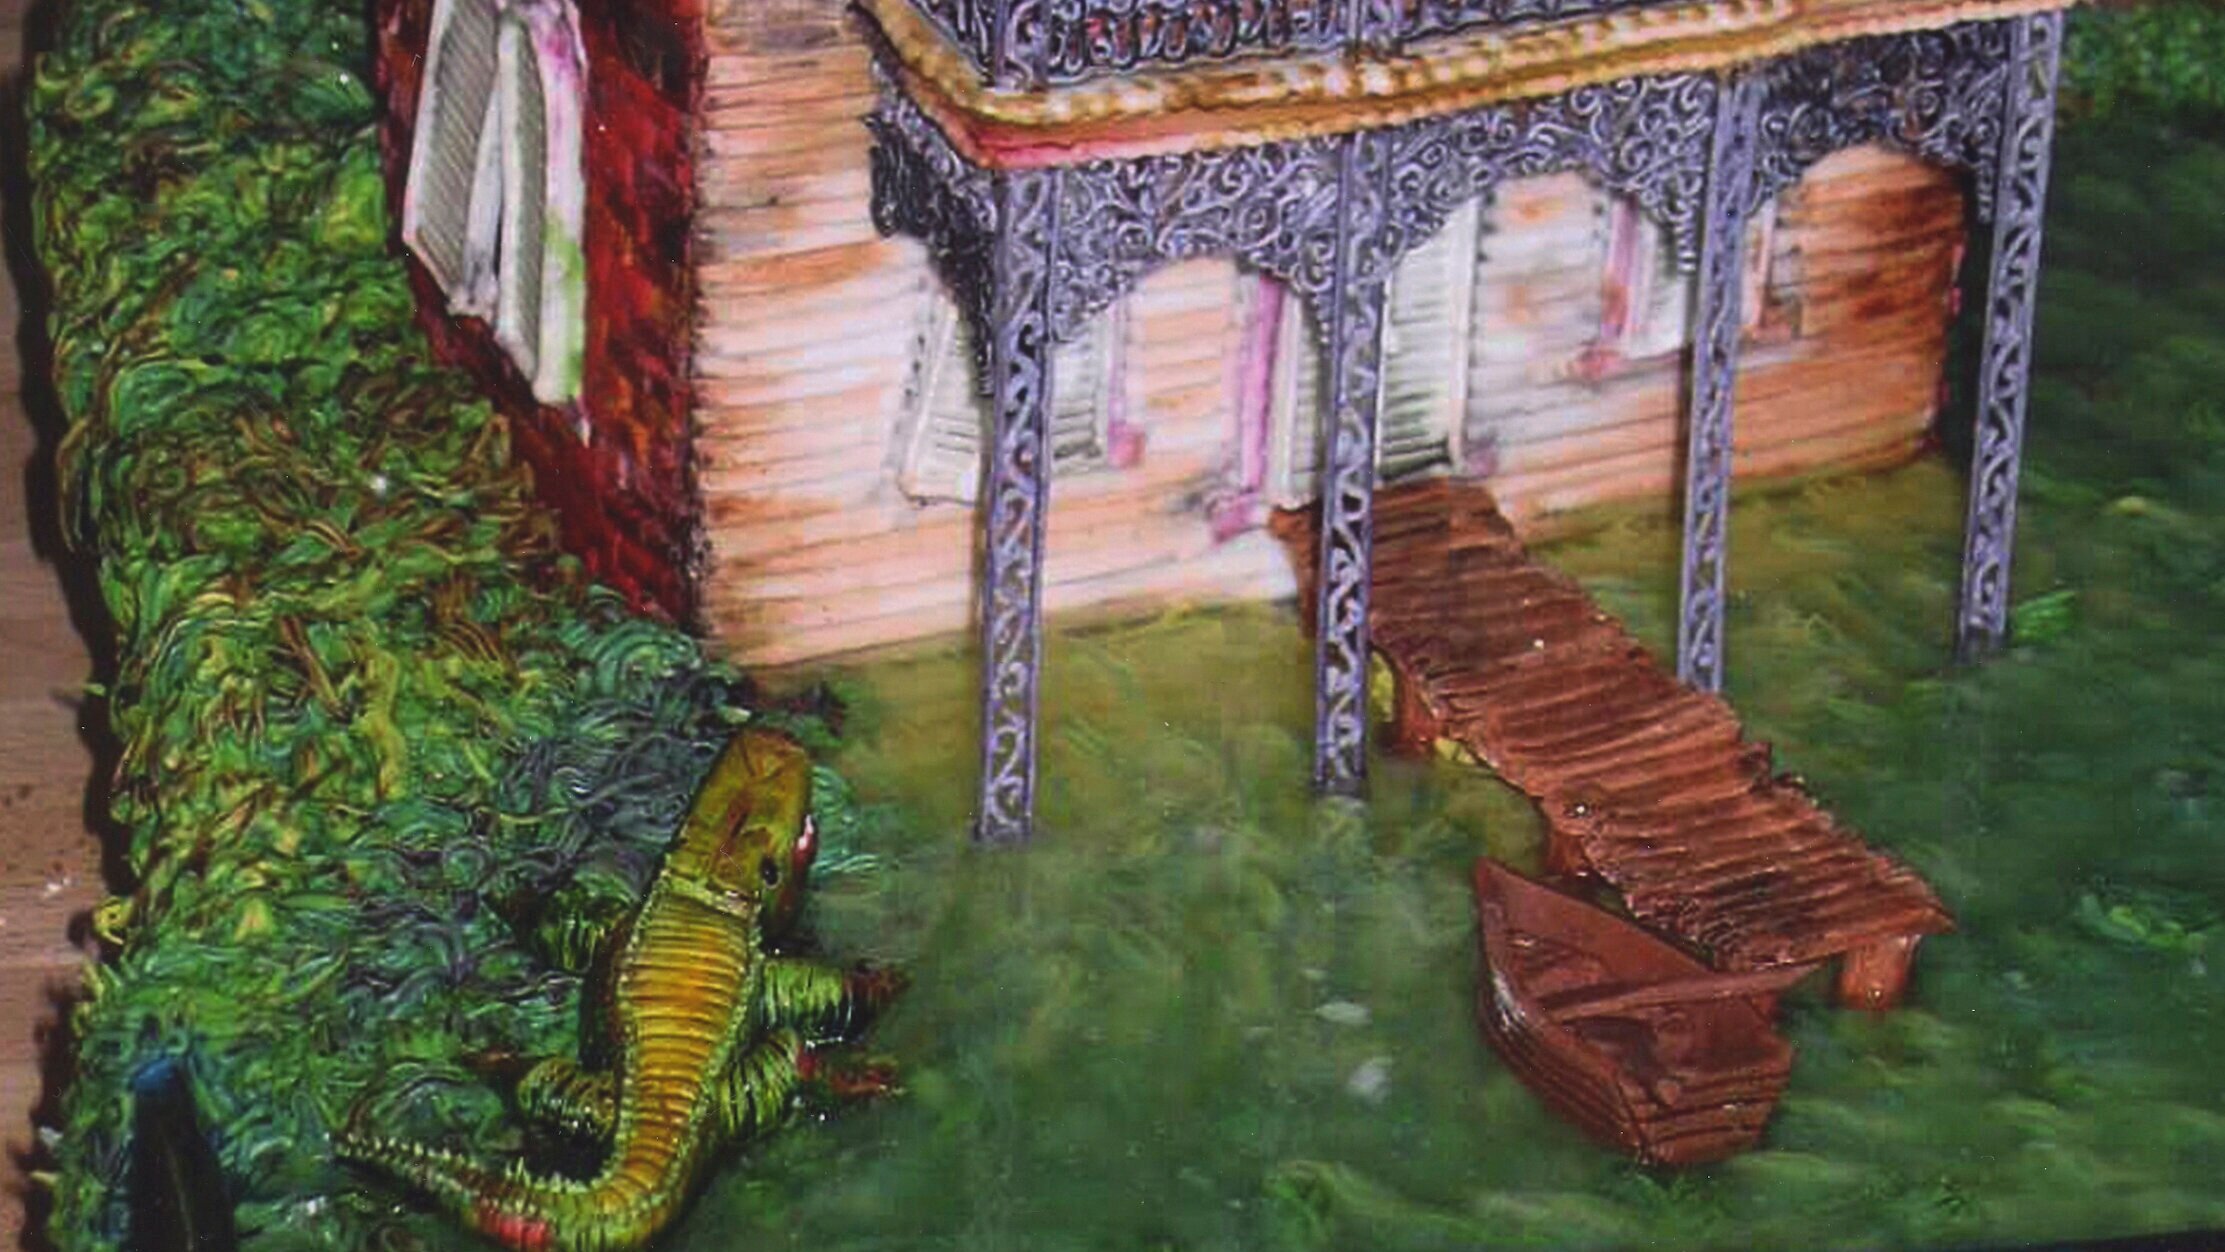
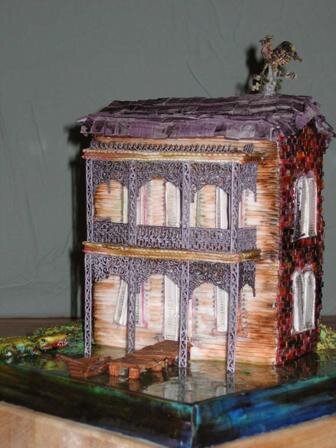
Gingerbread Swamp House
This gingerbread house was inspired by my recent trip to New Orleans. I took a walking tour of the Garden District.

This gingerbread house was inspired by my recent trip to New Orleans. I took a walking tour of the Garden District, which, by the way, I recommend to any of you should you happen to find yourselves with a free day in New Orleans. The stunning ironwork was what first caught my attention. Fortunately, my parents had just given me a digital camera for my birthday, so I spent the rest of the afternoon happily snapping close-up of delicate architectural details.
I'm not very good at making nice, normal, friendly gingerbread houses, so, naturally, I decided that this should be a dilapidated bayou house, complete with alligator, rowboat, and swamp water.
The basic pattern of the house was remarkably easy (Though not so easy that I didn't manage to cut the roof pieces too short, but that's a story for later on in my gingerbread saga.), consisting simply of four sides, two rectangular balconies, and four long roof pieces. It took me almost no time to draft the patterns for those, which was good because it took me hours to draft the patterns for the intricate railing and decorative grillwork I had planned for the balconies.

That was all the prep work I could do until the week before Christmas, as I was planning to spend Christmas in California with my sister and royal icing balcony rails can hardly be expected to survive a trip across a room, let alone a trip across the country.
Finally, my big travel day arrived and, gingerbread plans carefully packing in my carry-on bag (so I wouldn't have to do without them for even a day in the event that there was a problem with my checked luggage) I hied myself to LaGuardia and boarded my plane.
Within but a few hours of my arrival in San Francisco (where I rendezvoused with our parents, who had flown in from Michigan for the occasion) I was hard at work rolling and cutting gingerbread pieces. You see, I had to have them baked and ready, as Gingerbreadfest was the next day! Gingerbreadfest is the biggest of our annual craft parties. We have to provide all of our friends with pre-made gingerbread house pieces, all manner of candy decorations, and approximately twenty gallons of royal icing with which to stick everything together.

Actually, it turned out that it really didn't matter that I had the gingerbread pieces baked in time for Gingerbreadfest, as it took me all day just to pipe the tiny royal icing grillwork, using a #1 tip. Frankly, Gingerbreadfest isn't a great time for either my sister or I to get much work done on our own gingerbread houses, as we have to spend most of the time replenishing candy bowls, mixing batches of icing, and assembling everyone's houses. It's all worth it though, just to see what everyone comes up with. The undisputed triumph of Gingerbreadfest this year was the gingerbread rebel stronghold, complete with guard tower and bomb shelter entrance, which our youngest guest (age five) made out of the little leftover pieces (doors, chimneys, etc.) of other houses. I helped.
Even the day after Gingerbreadfest, the only thing I had a chance to do to the gingerbread pieces themselves was to glue the balconies to the front of the house with some thick royal icing. I then spent most of the day running Christmas related errands, so all I had time to do that evening was cut fifty sticks of peppermint chewing gum into tiny bricks, then paint them various shades of brown and red.
Once I finally started decorating the actual house, things went quite smoothly. The balconies were the first pieces I tackled. I frosted both sides of these with slightly thin, brown royal icing, and then scored the icing with a toothpick to create planking. For maximum verisimilitude, I tinted some of the boards with various shades of red and yellow food coloring.
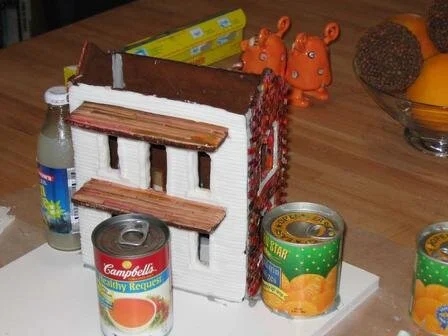
I glued the chewing gum bricks to the side and back pieces with a thin layer of grey royal icing and covered the front of the house with slats made of thinly rolled fondant. I also made shutters for all the windows out of rolled fondant, scored with a toothpick. I then piped royal icing frames around all the windows, doors, and shutters using a wide, flat decorating tip while watching the thematically appropriate, yet woefully incomprehensible movie Eaten Alive.
Finally, the exciting moment of assembly arrived! I had cut a one-foot square base out of 3/8" foamcore, to which I glued first the back, then the sides and front of the house. It went together pretty well. I always get a certain amount of warping and curvature in the gingerbread pieces as they bake, which results in some gaps in the assembled structure. I understand that some people recut each piece after baking before the pieces is cooled for greater accuracy. I should try that next year. In this case, however, the gaps were minimal and easily covered with the careful application of a few more chewing gum bricks.
Now we come to my greatest error in judgment - the roof pieces. I'm not quite sure whether the house was more out of whack than it looked or whether I just cut the roof pieces too small, but when I went to attach the roof pieces, they were too short to sit on top of the sides of the house as they were intended to. If I had been clever I could have built up the sides with some royal icing and allowed that to dry prior to attaching the roof pieces. I'm not that clever, so I just glooped on a whole mess of royal icing to fill the gaps and held my breath until it dried, hoping that the entire roof wouldn't just sink into the body of the house. In the end, the problems with the roof turned out to be rather fortuitous, as one end of the roof sagged threateningly and greatly enhanced the dilapidated look of the house, which was, of course, what I was going for in the first place.

With roof pieces safely in place, I set about tiling the roof using little squares of fondant, about 1/2" on each side. I made two colors of tile, one a deep purple marbled with some black, the other a deep green, also marbled with black. Then I applied the two colors at random, to nice effect. I also attached the shutters at this point, some open, some closed, some on the verge of falling off entirely.
With the structure of the house in place, it was time to paint! I distressed everything, using mostly green, red, black, yellow, and brown food coloring. Prior to this point, the siding on the front of the house, the window trim, and the shutters were pristine white. By the time I was done, they looked like they had been sitting in the swamp for a century. I also ran a coat of water across the roof to give a damp sheen to the fondant tiles.
Now it was time to make the finishing touches - a little rowboat and oars, the pier for it to dock at, and the giant alligator to menace anyone who might be foolish enough to venture forth into the ominous swamp around the house. All these I sculpted from fondant, white for the alligator, marbleized brown for the rowboat and pier.
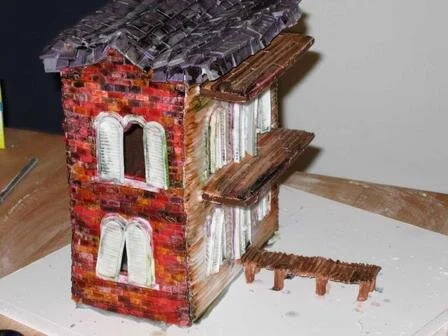
The pier was easily made by rolling out a strip of fondant and scoring it with a toothpick to make individual boards. I also distressed the ends of the boards for that all-important aged look. The legs of the pier are simply little rolled cylinders of fondant. The boat was also quite simple to make, but took a little longer, mostly because the first one I made was ridiculously out of scale so I had to make another one.
The alligator was, of course, my biggest sculptural challenge of this project, but fortunately I made gum paste frogs a few months ago for a friend's wedding cake, and the skills are quite similar. I pulled a good research picture off the internet and set to work. Once I had the basic shape of the body and head, I added textural detail to the hide with a toothpick and with a star decorating tip. I made eyeballs by gently pressing in a #8 decorating tip and nostrils with, I believe, a #3. I then propped the mouth open with a folded bit of was paper and left it to dry.
The first step in landscaping around the house was to build up a hill in back of it with a wad of fondant, so it appeared to be fronting on the swamp, while the land rose behind the house. Then I attached the pier leading to the front door. In retrospect, it might have been easier to pipe the grass under the pier before I attached the pier, but it's too late for that now.

I used a grass tip to cover the entire area around the house with two shades of slightly unhealthy green icing and one of sickly yellow icing. While I was doing this, I also attached the delicate grilles to the front of the house. To say that it was nerve wracking working with those tiny, fragile pieces would be a tremendous understatement, particularly as I had neglected to make any extras of one section of the grille. To be more accurate, I made two sets of everything, thinking I would then have extras in case anything broke, forgetting that I needed two sets of some pieces anyway. Astonishingly, nothing broke except one tiny edge, which was easily repaired. Once I was breathing normally again, I finished piping all of the grass, then added and painted a little royal icing trim around the tops of the decorative grilles.

My plan for the swamp was to use Jell-O. In order to prevent the hot, liquid Jell-O from simply pouring over the side of the house's base and onto my sister's new table I had to made a dam around the edge of the base. I first tried to do this with royal icing, but I didn't like the results, so I scraped it off and made a new dam out of thick fondant, cut into strips and painted deep blues, greens, and blacks.
I decided to experiment with the Jell-O before pouring it onto the front of the actual house. I'm extremely glad I did, because it turns out that Jell-O is totally incompatible both with royal icing and with fondant. My experimental bowls wound up looking like hideous biological specimens in Petri dishes. The Jell-O dissolved both the royal icing and the fondant, then failed to set up properly, resulting in a gooey, bubbling mess, made all the grosser by the fact that I had added altogether too much blue food coloring to the Jell-O.

Scrapping the Jell-O, I turned to Plan B - piping gel. I had no idea that piping gel could be made at home, having always purchased it ready made from a cake decorating store, but Mom suggested that I look for a recipe online. She was right. I found a recipe in no time, which is a very good thing, because by this time it was Christmas, so it wasn't as if I could just run out and buy piping gel. My first batch of piping gel turned out too thin. I wanted it to be thin enough to flow under the pier and around the grillwork posts, but not thin enough that it would never set up. I tried again and the second batch seemed more promising.
After the Jell-O fiasco, I was careful to experiment with the piping gel before applying it to the house. This time, all went well. The royal icing and fondant samples seemed to suffer no ill effects from the piping gel, so I called it a go. This time I only added a smidgen of blue coloring to the gel.
I wanted to place the alligator before piping the gel onto the actual house. That way it could appear to be partially submerged, as if it were in the process of emerging from the swamp. In the end, I think I chickened out a little because I was afraid the detail of the alligator would be obscured by the piping gel, so it only ended up with one foot in the swamp.

Before I could place the alligator I had to paint it. I used shades of yellow, red, brown, and green food coloring, then added tiny royal icing ridges to his back and royal icing teeth to his mouth with a #1 decorator tip. He was then ready to effectively menace the inhabitants of the swamp house! I set him in place on the edge of the swamp.
The big swamp water moment had arrived! I dumped the whole sticky mess of piping gel into a piping bag with a #8 tip, and started slowly piping the gel in front of the house. Everything was going well until I hit one of the grillwork columns with my decorating tip and smashed it! There ensued an extremely tense period in which I performed some emergency surgery to replace the broken piece with a spare column, a process which involved very carefully trimming the new piece down to size with a pair of tweezers. I'm proud to report that the operation was a complete success!
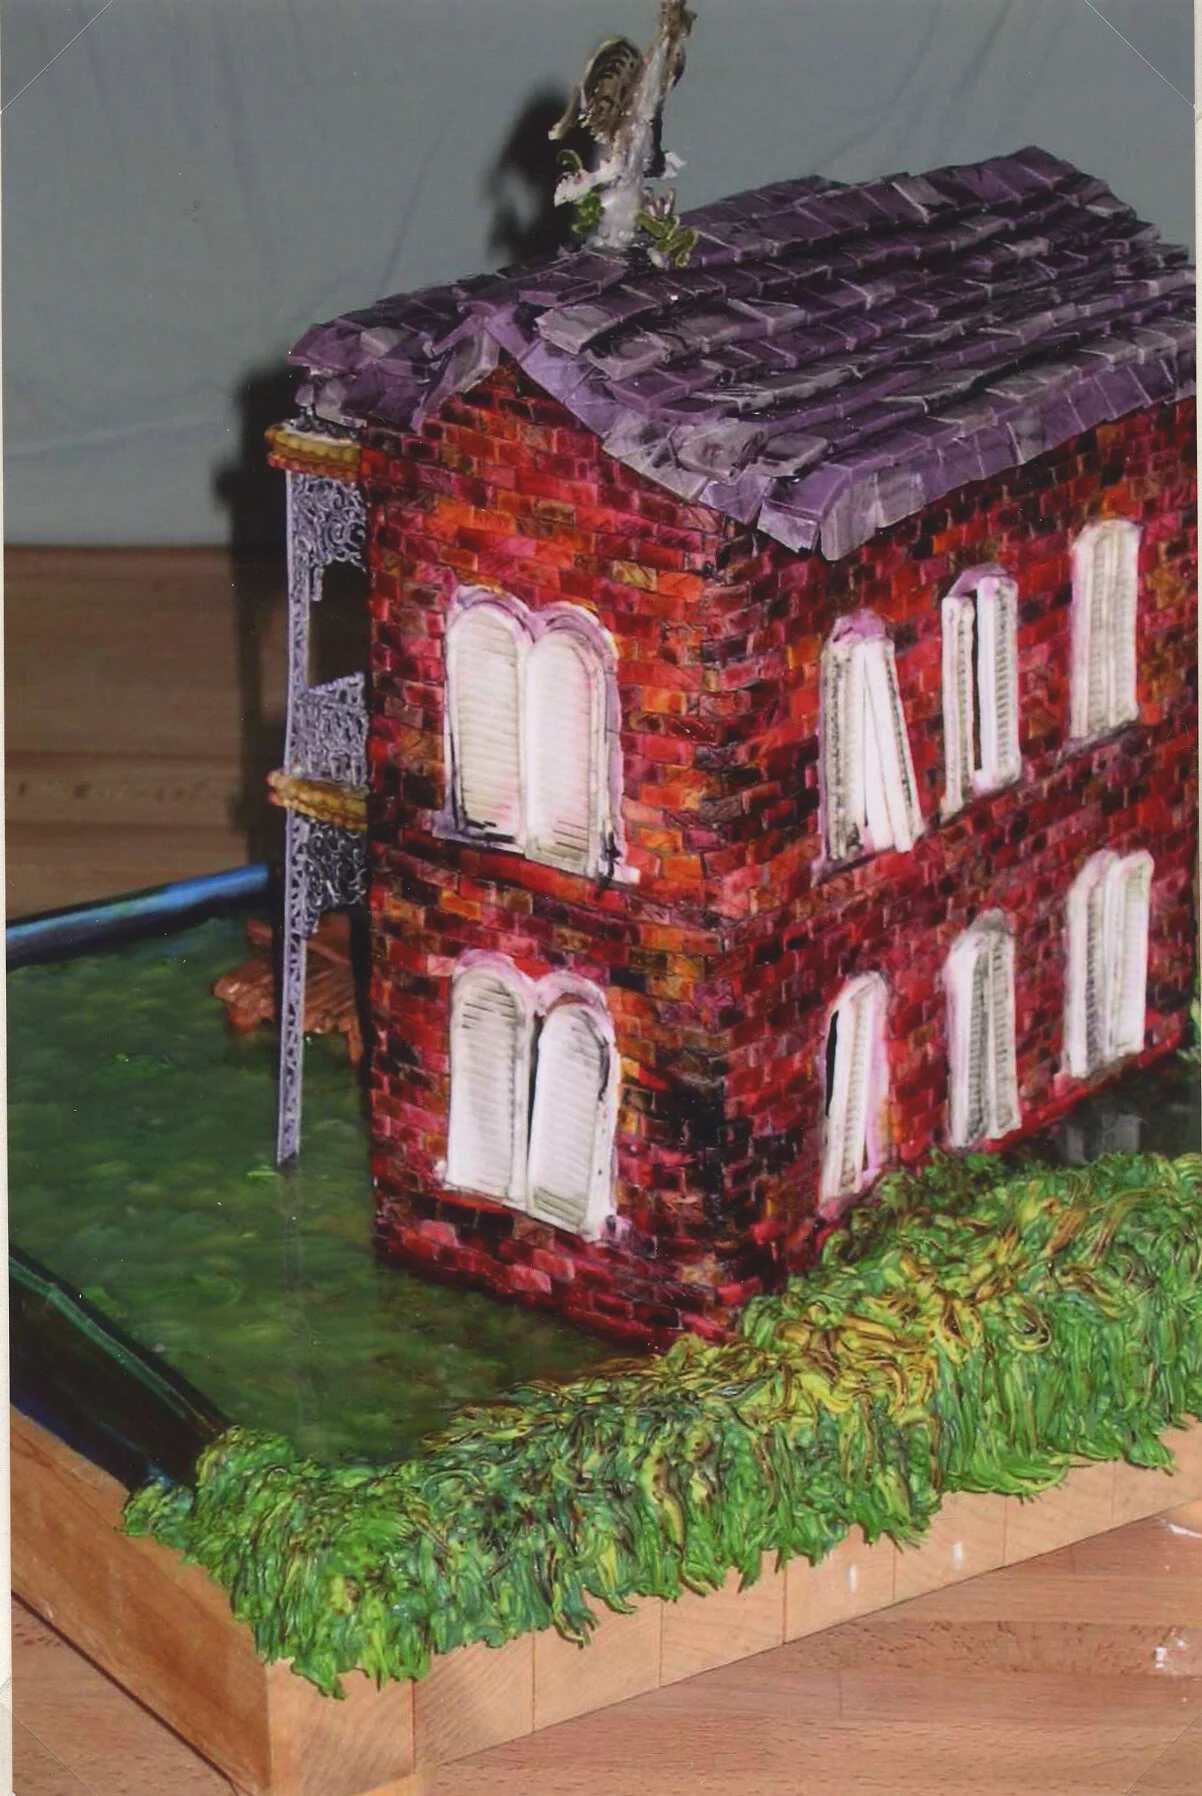
With infinitely more care, I continued piping in the gel until the entire swamp in front of the house was full, as well as little sinkhole in the back of the house. It looked great, if I do say so myself. The royal icing grass was visible beneath the surface, and I could even see reflections of the house in the surface of the piping gel! Now, two weeks later, the gel still has yet to set up completely, but I don't think that's really a big deal.
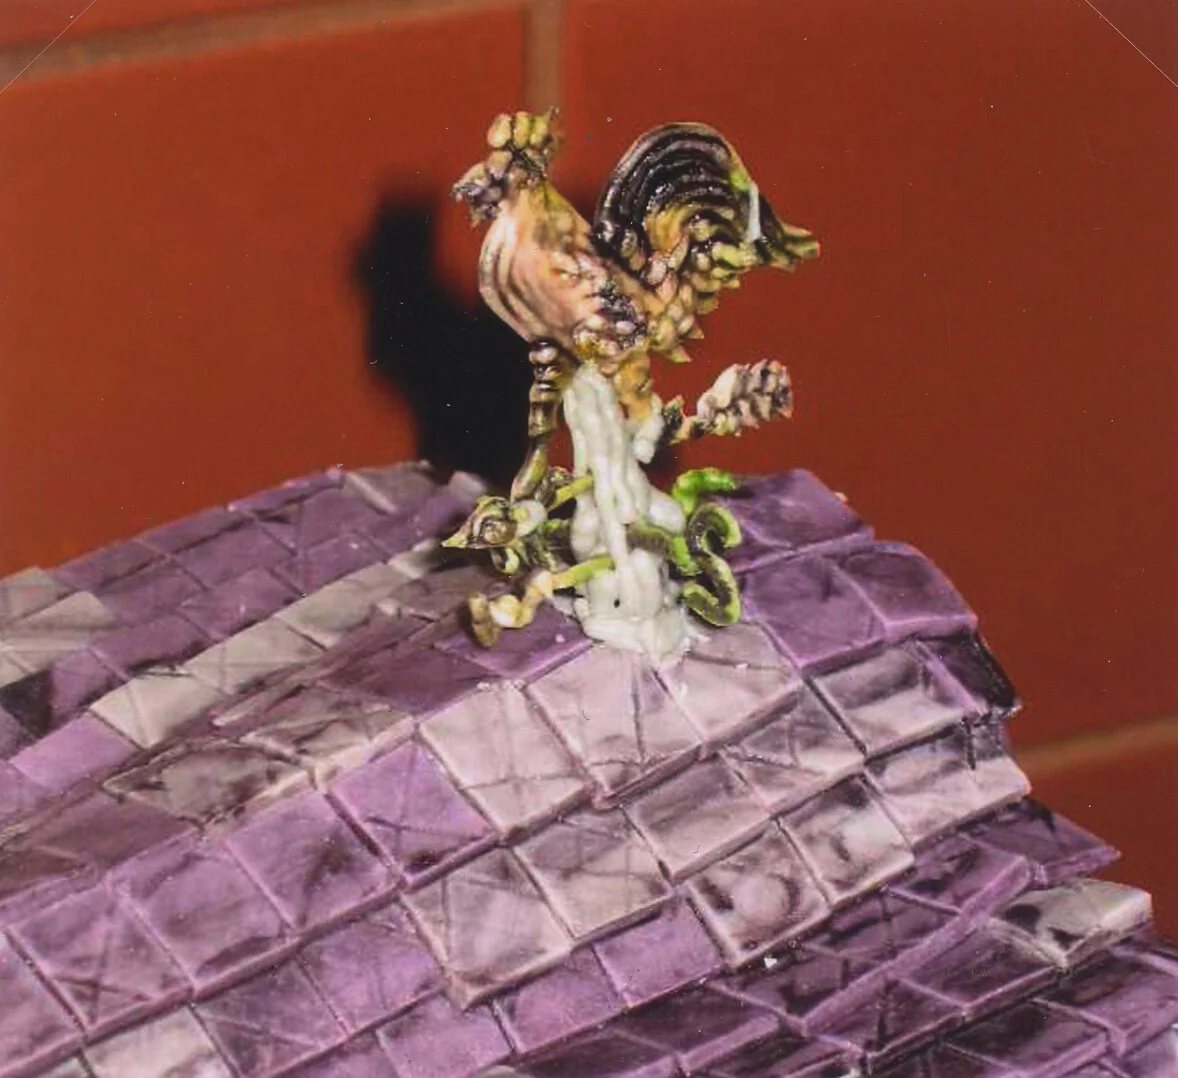
The house was almost done, but something was still missing. I thought about putting some sort of decoration along the ridge of the roof, but then my sister and I hit on the answer - a weather vane! After settling on the traditional rooster design, I piped a weather vane in royal icing onto some wax paper. Once dry, and painted green and black, the weathervane proved exceedingly fragile and difficult to attach to the roof, but, six or seven repairs later, I finally had it in place.
I was finished at last! And it was still Christmas day! Between the success of my gingerbread house, the awesome quilt my sister made for me, and my parents' gift of another trip to the fabulous Wilton School ofCake Decorating, I think it was my best Christmas yet!
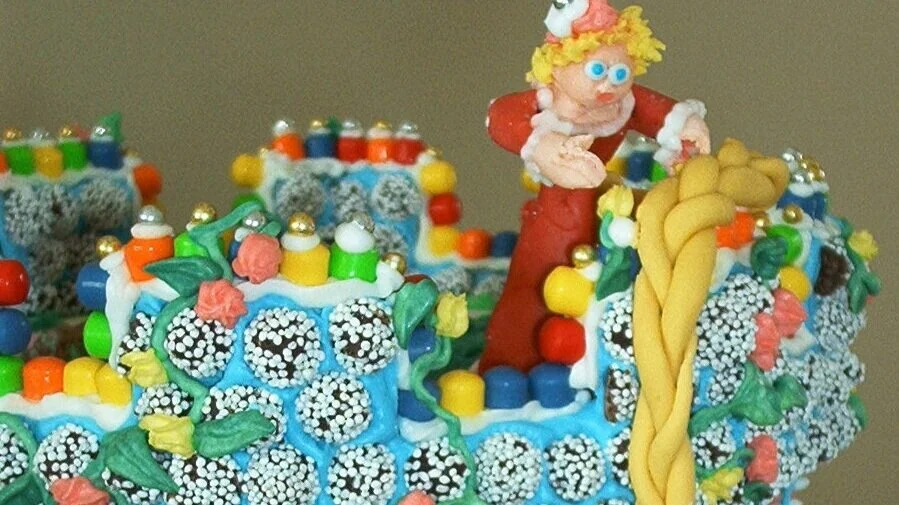
Rapunzel's Castle
Candies used: Large and small jelly beans, pink and white mint lozenges, Snowcaps, large and small non-pariels, Necco wafers, chocolate rocks, Tart N Tinies, gold and silver dragees, rainbow sprinkles, royal icing, rolled fondant.

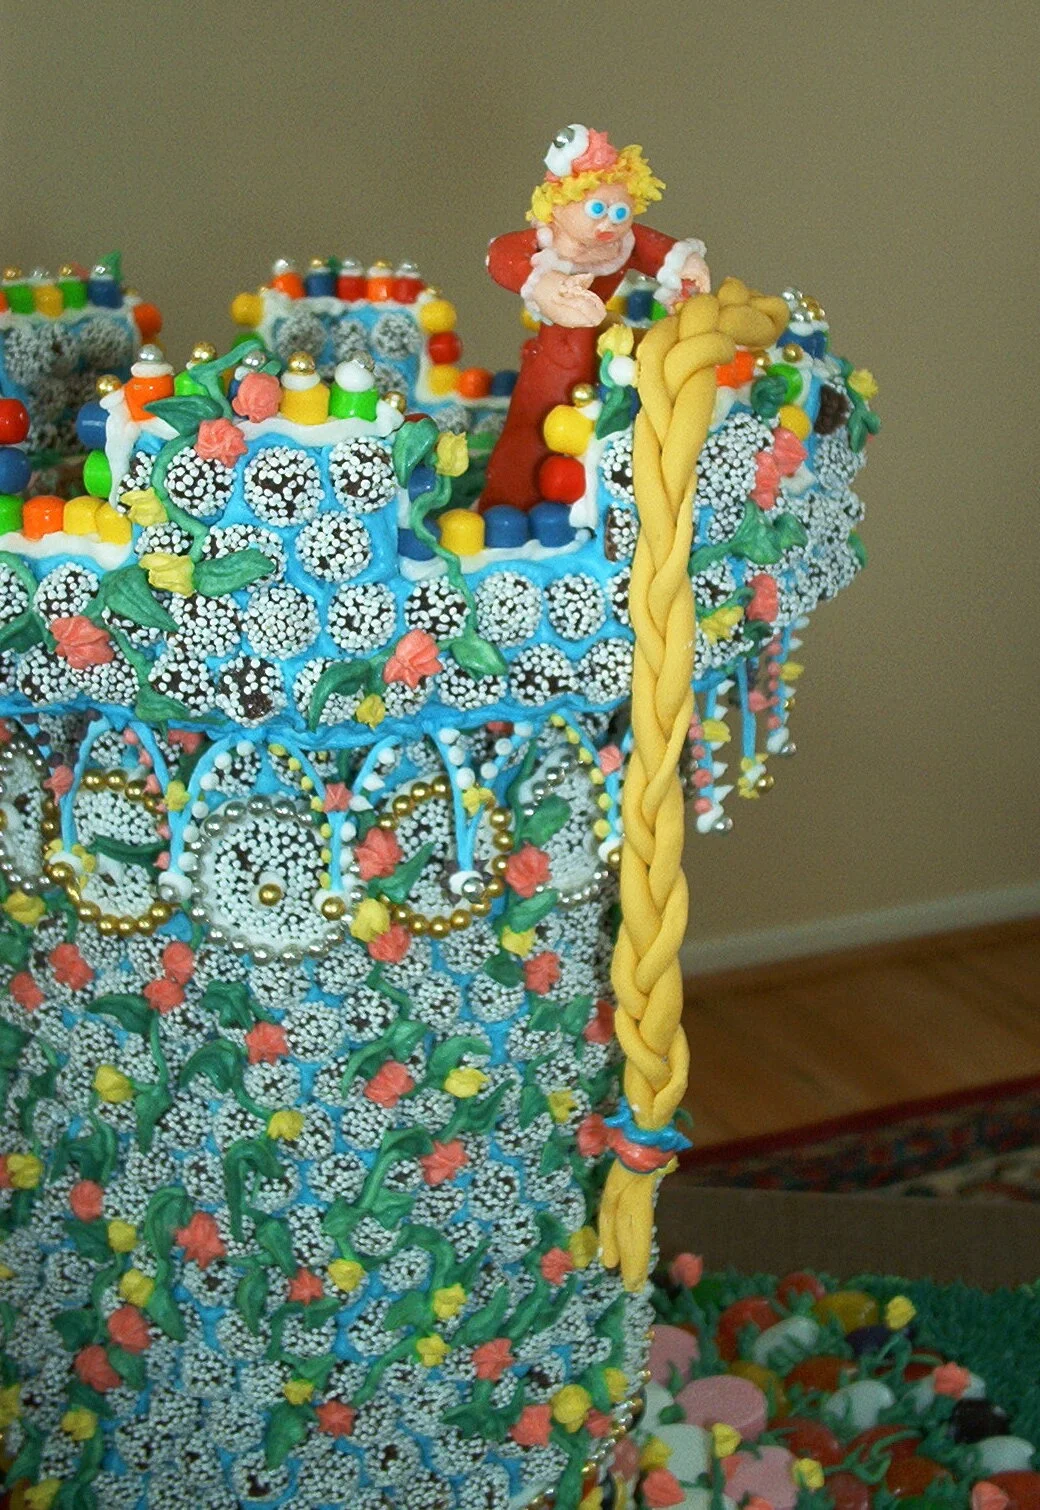
Candies used: Large and small jelly beans, pink and white mint lozenges, Snowcaps, large and small nonpareils, Necco wafers, chocolate rocks, Tart N Tinies, gold and silver dragees, rainbow sprinkles, royal icing, rolled fondant. I assembled the tower then covered it with jelly beans and nonpareils. I then added details like Tart N Tinies and dragees and drew vines and flowers on the tower with royal icing. I drew the flowers and the hanging tower details with royal icing on wax paper. After they dried, I attached them. The grass is royal icing, applied with a grass decorating tip, with individual blades added between the "paving stones." Rapunzel, the prince, and the witch are colored rolled fondant, which I made from scratch, with royal icing details and rainbow sprinkle irises.