Fancy 18th Birthday Entremets
For their 18th birthday, instead of a cake, my niece requested a triple layer (dark chocolate, milk chocolate, white chocolate) mousse that I sometimes make, but fancy enough to celebrate such an important birthday.
For their 18th birthday, instead of a cake, my niece requested a triple layer (dark chocolate, milk chocolate, white chocolate) mousse that I sometimes make, but fancy enough to celebrate such an important birthday. This is what I came up with.
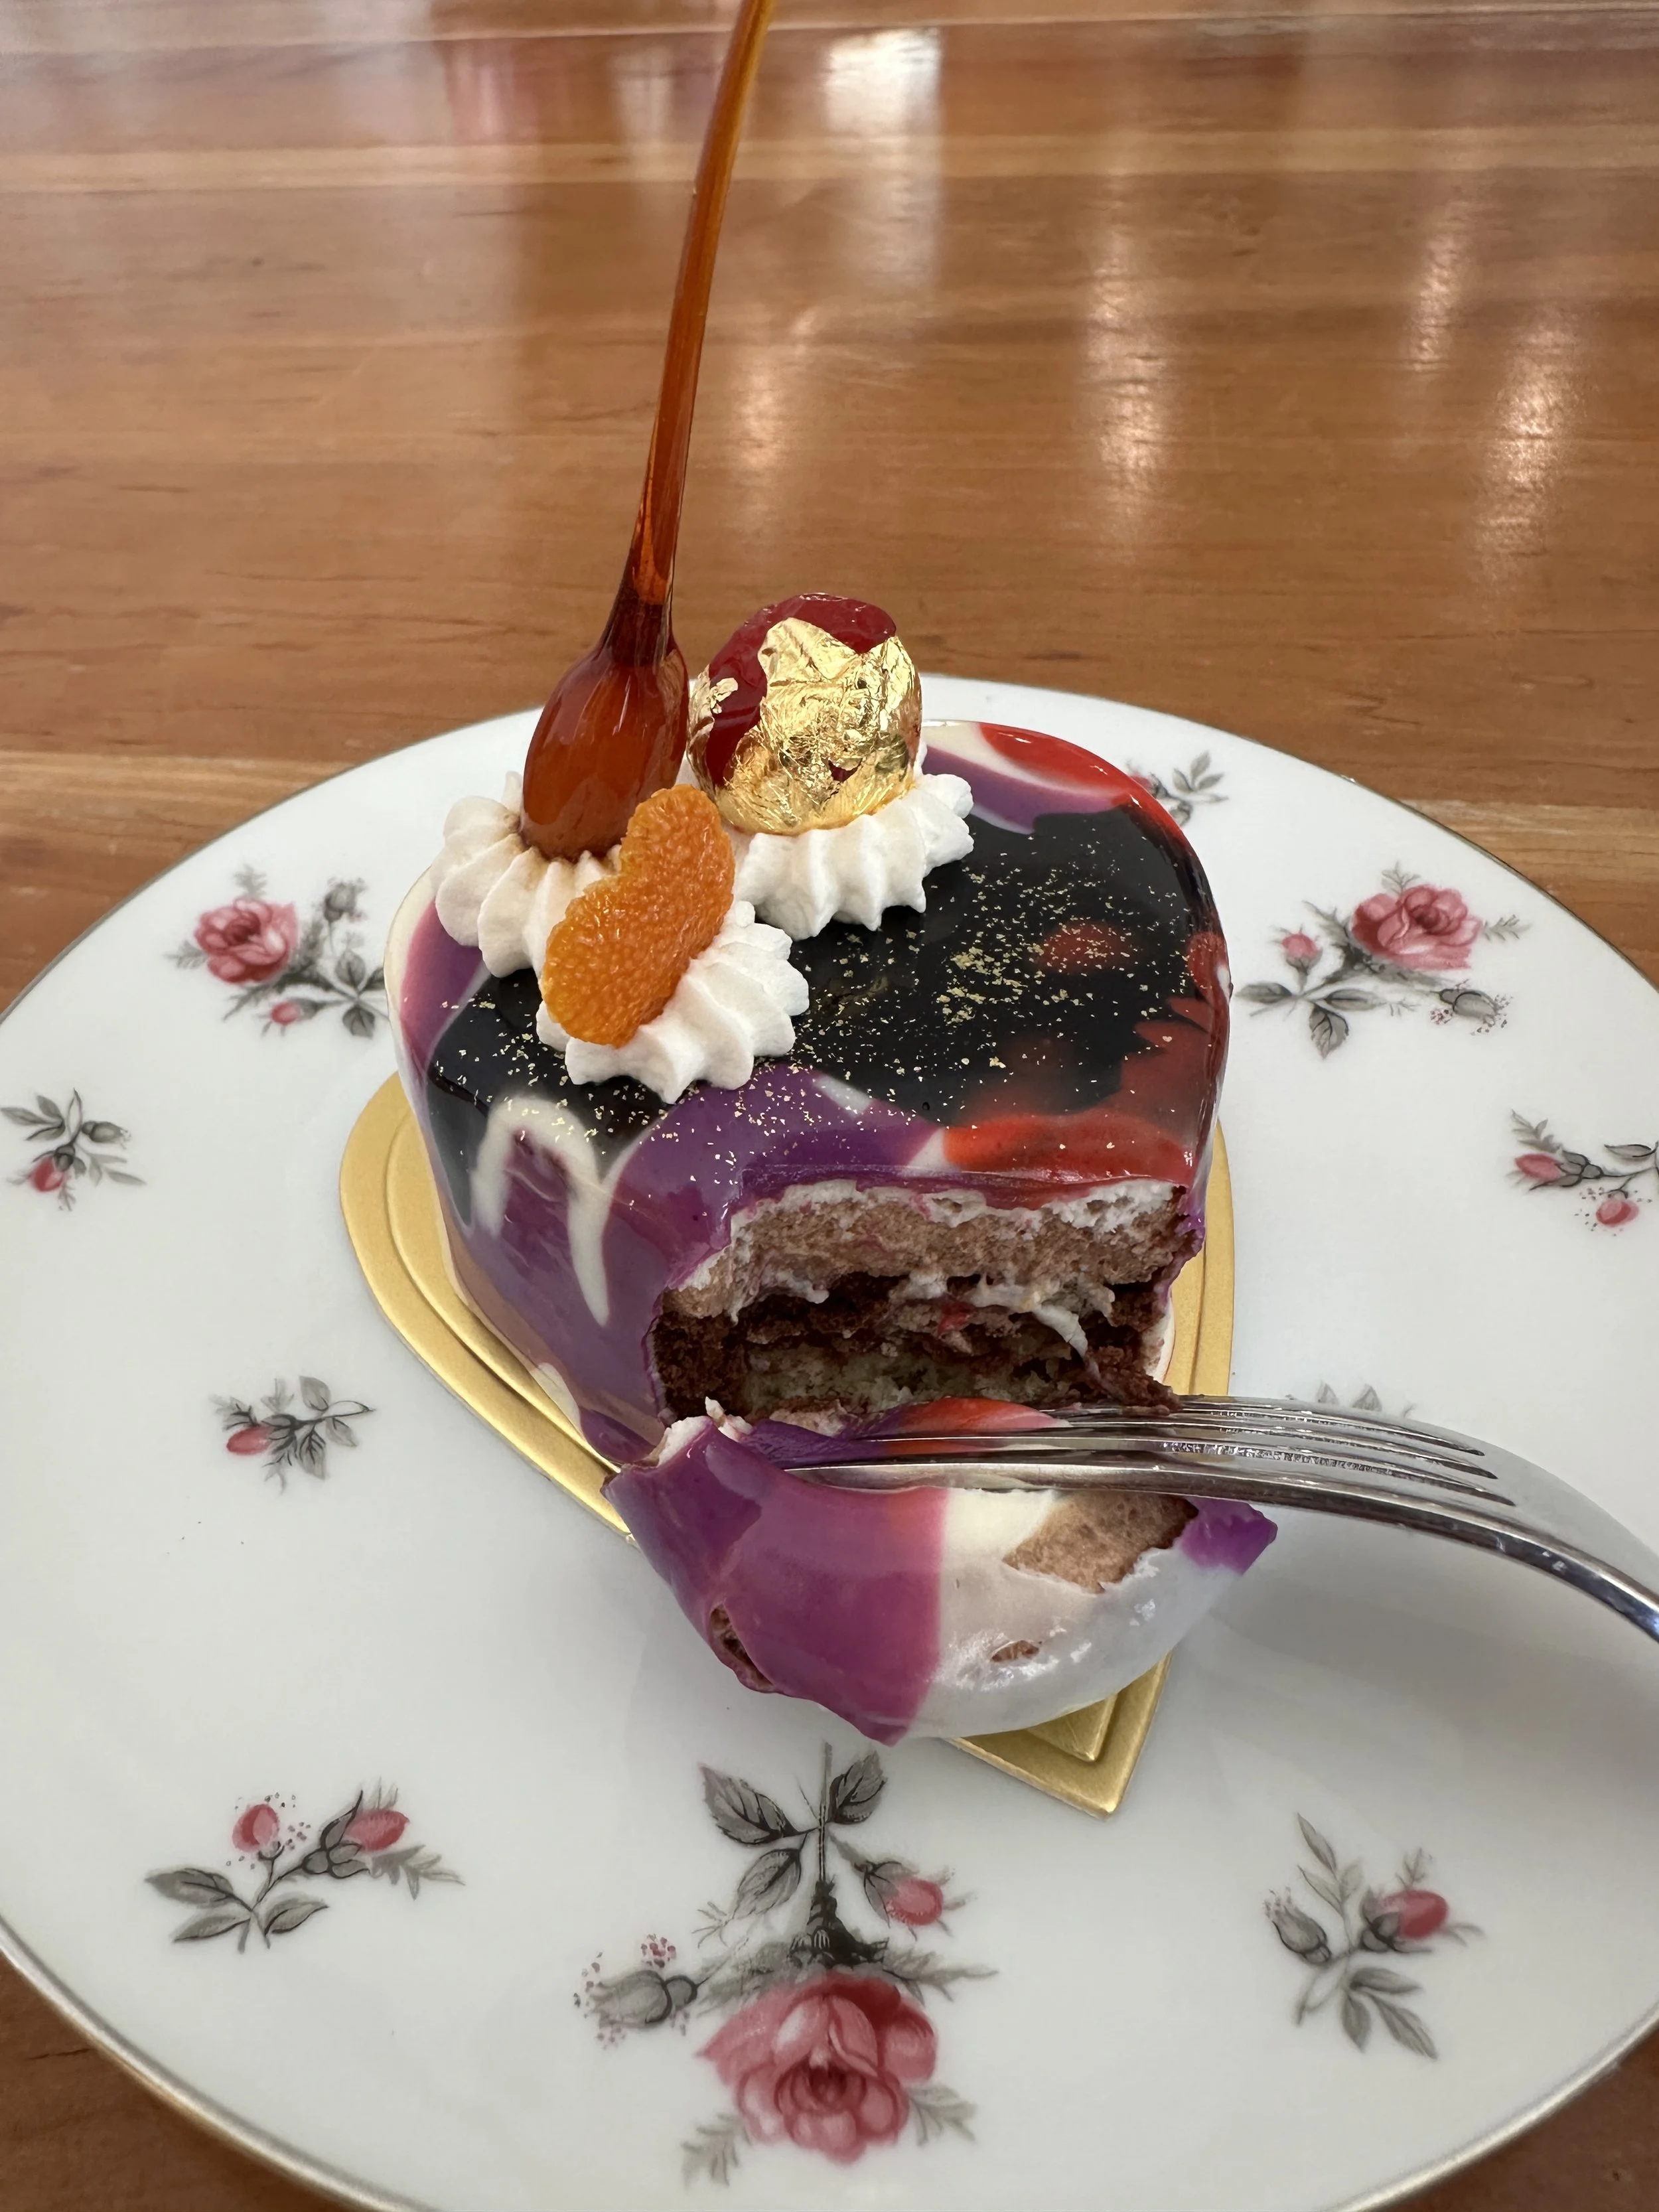
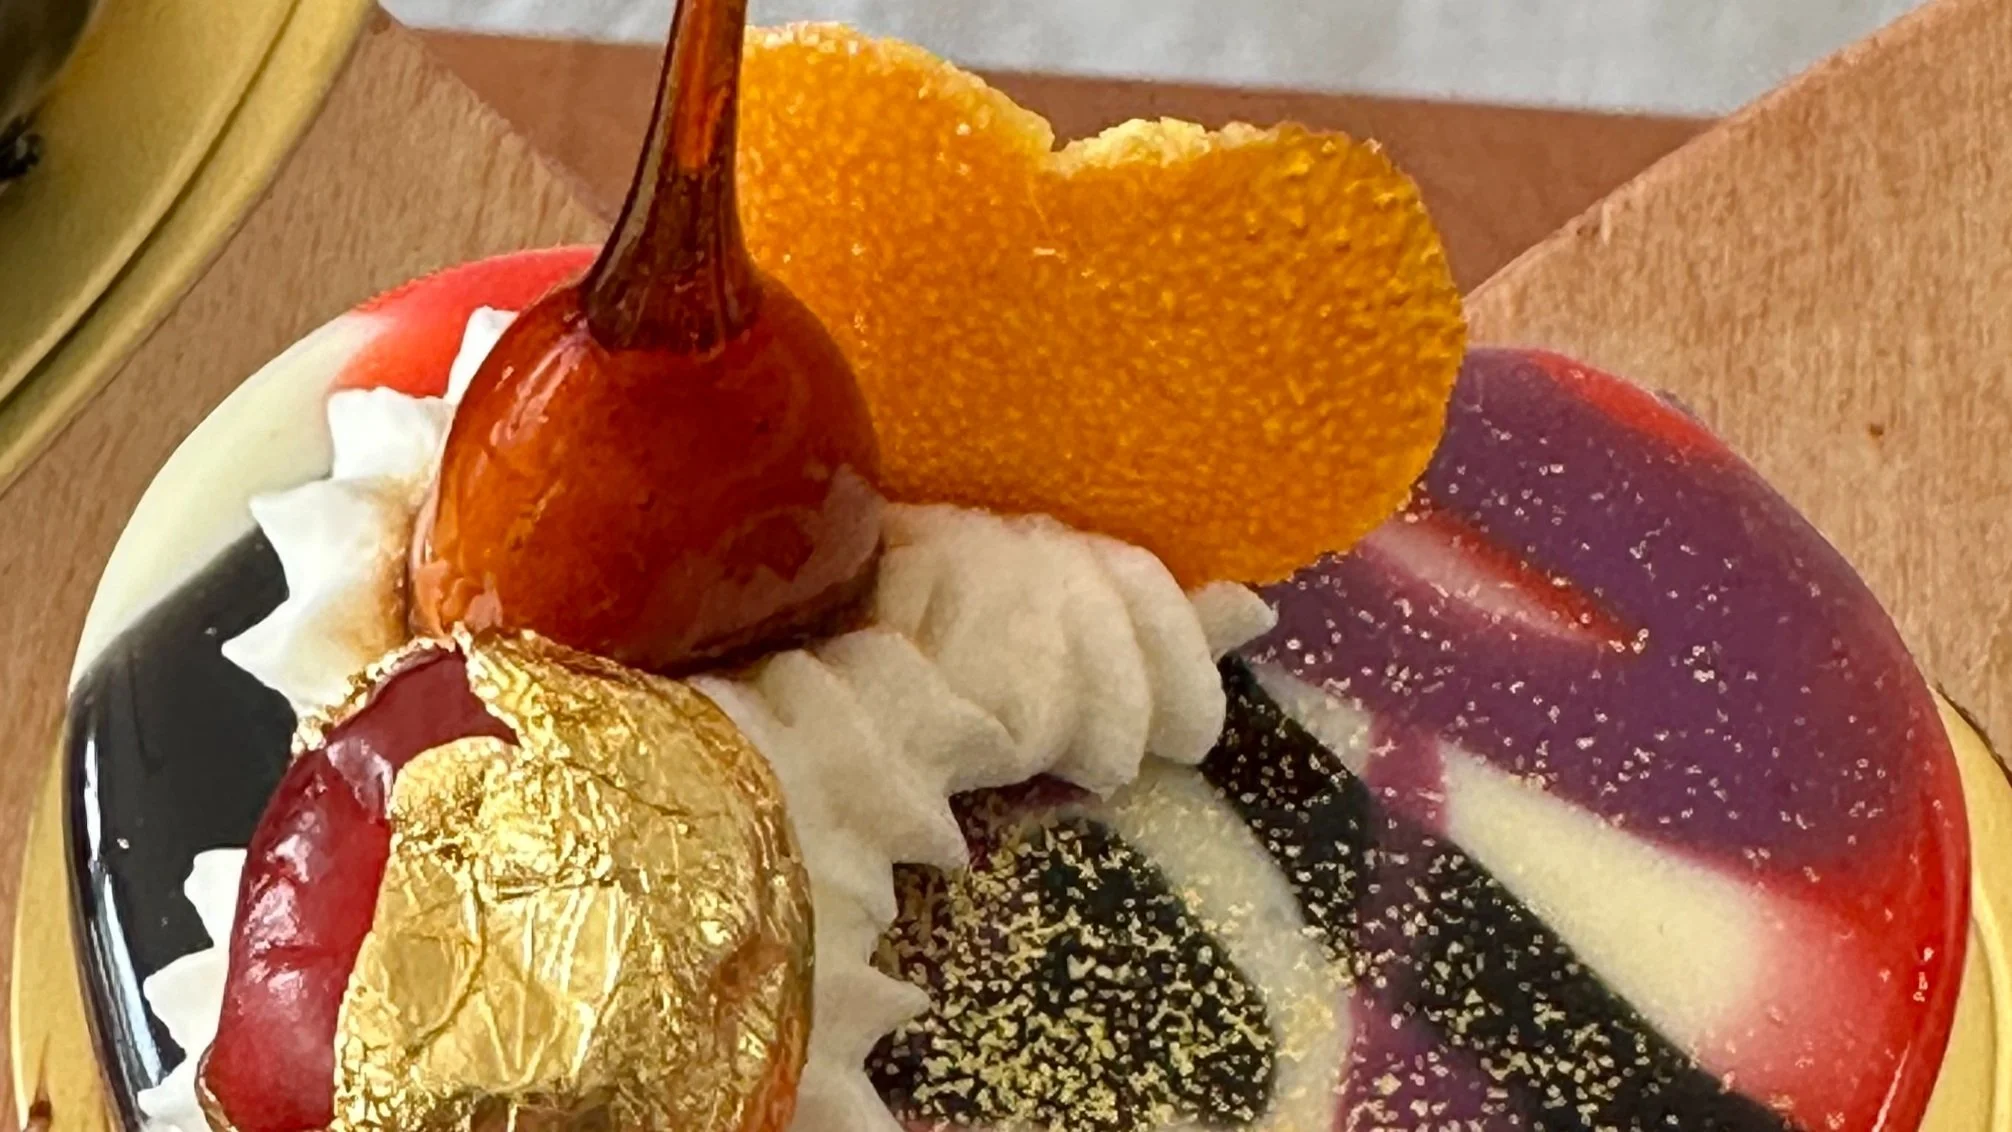
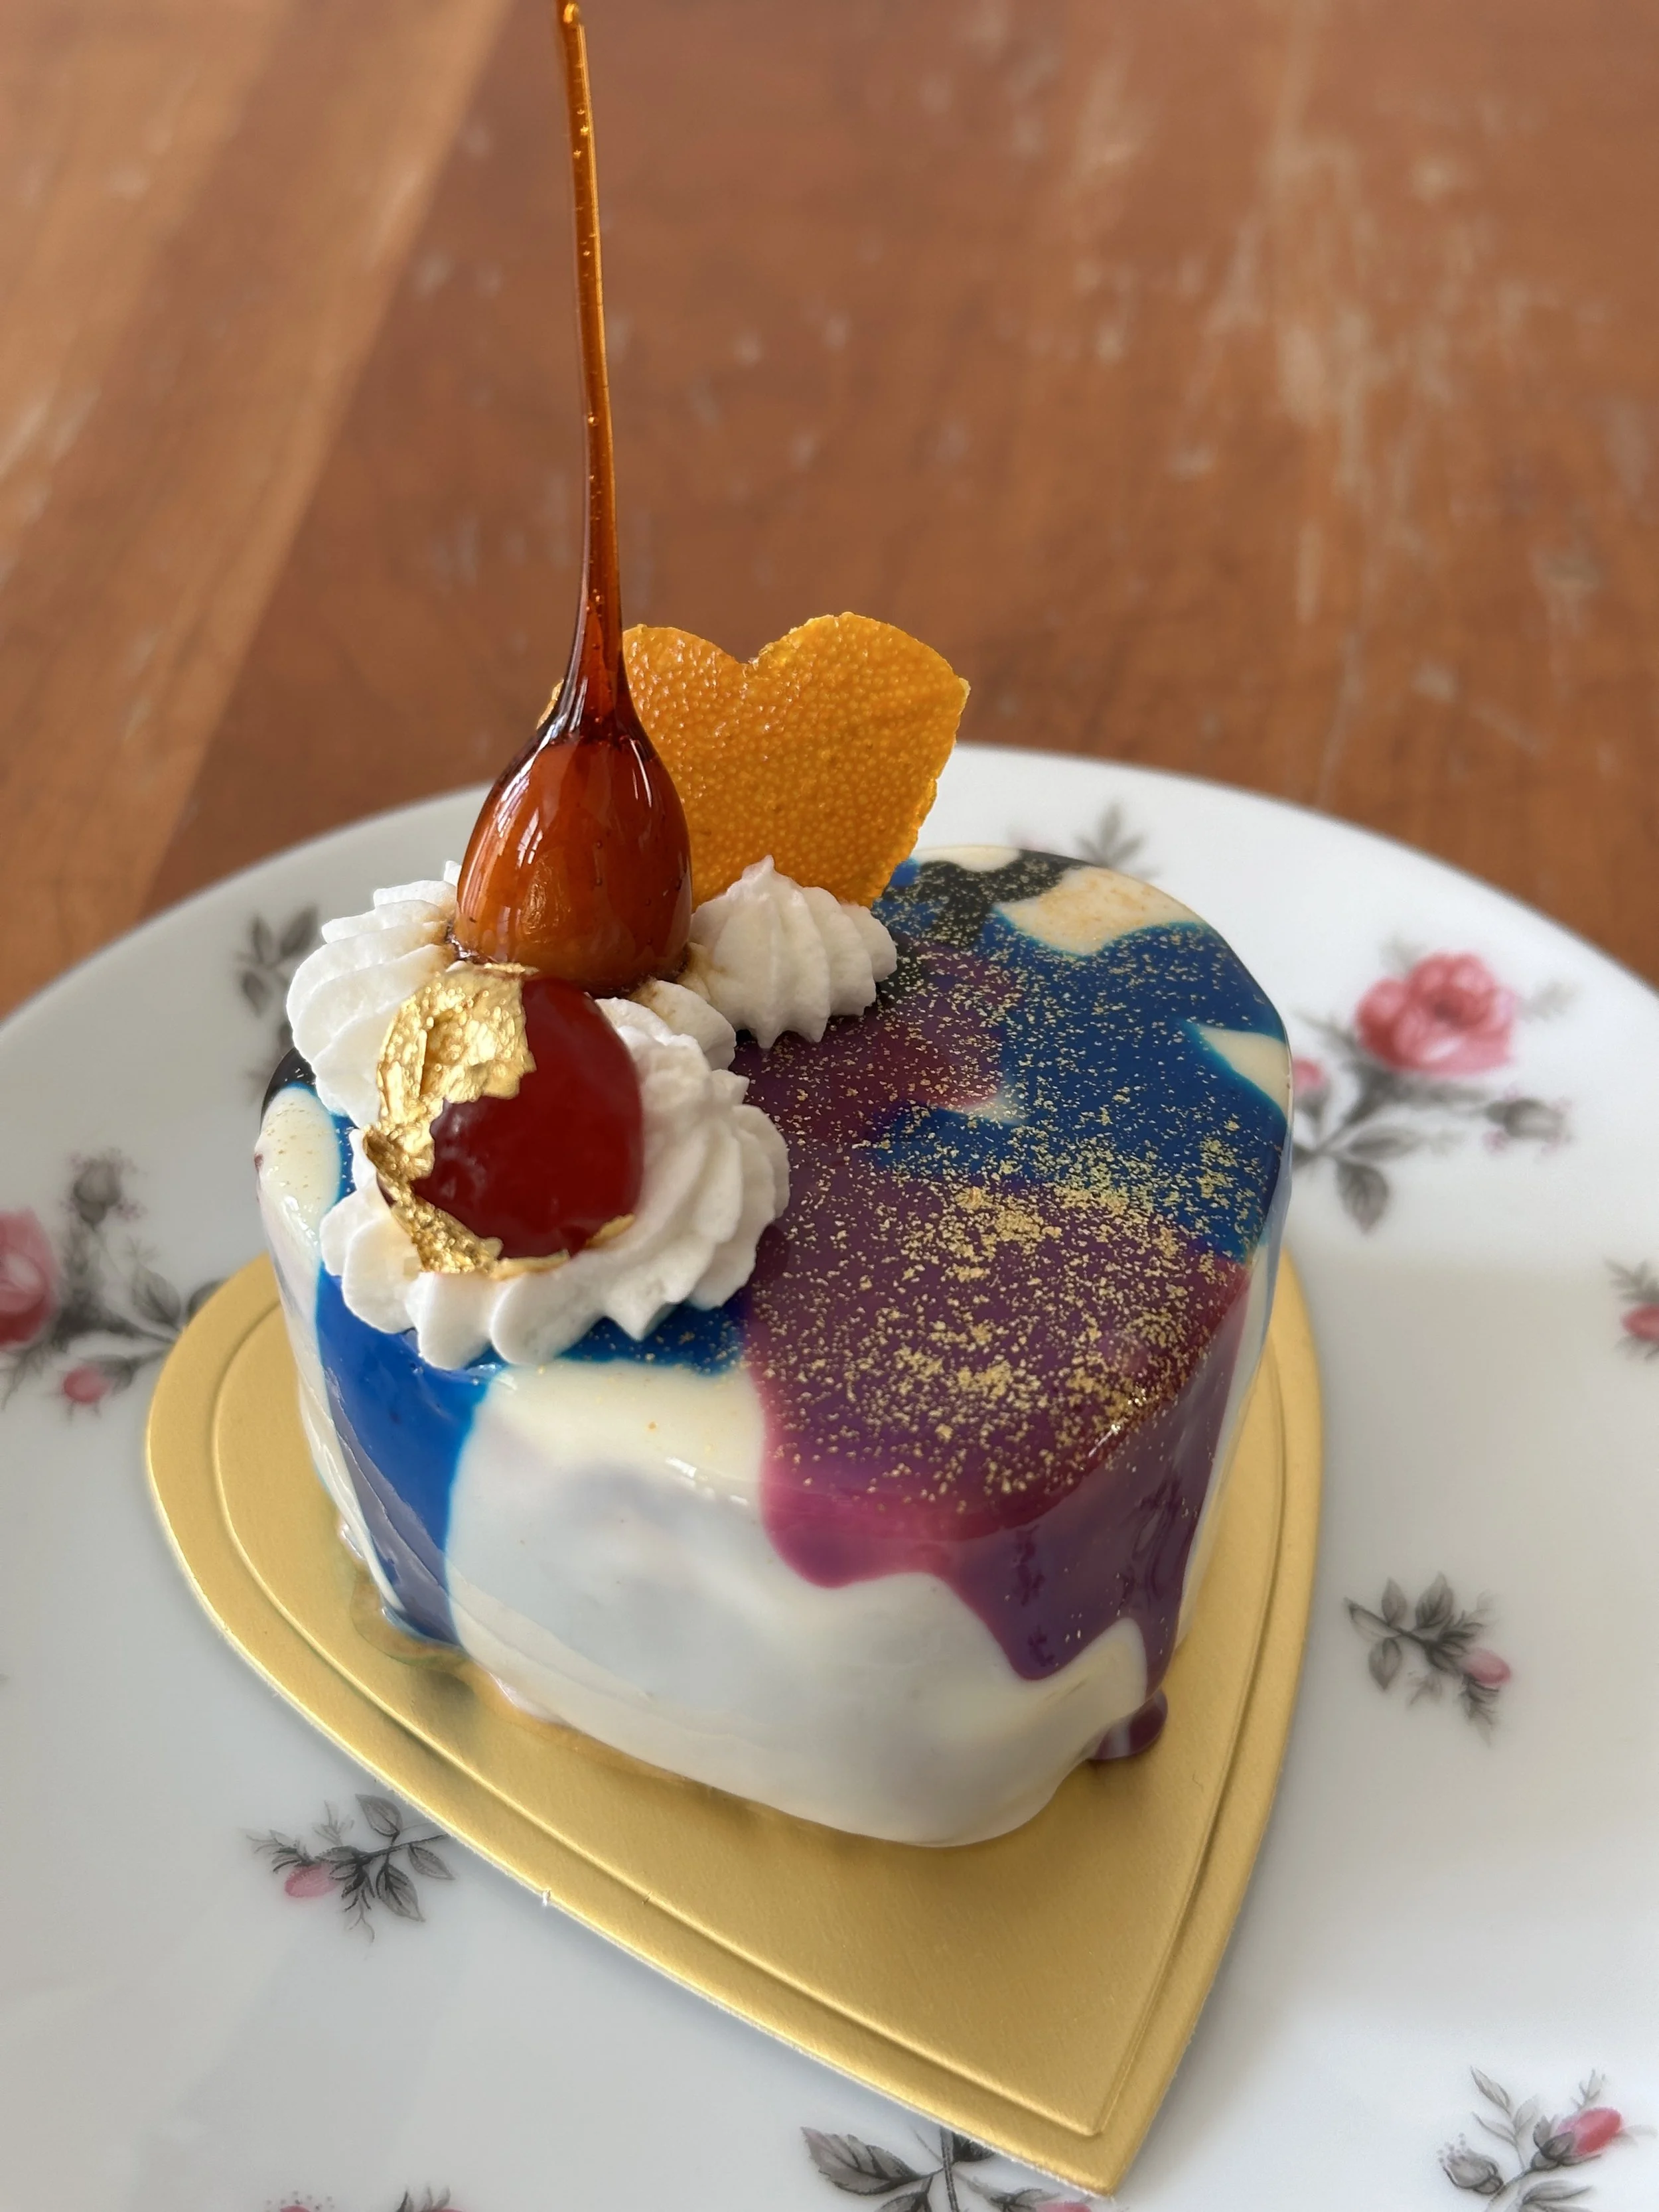
Inside, there is almond genoise, dark chocolate marquise, milk chocolate mousse, and white chocolate mousse. The outside is mirror glaze, with colors inspired by Acheron, a new character in Honkai: Star Rail that my niece is excited about. The decorations are a caramel almond, a candied orange rind heart, and a gold leafed maraschino cherry.
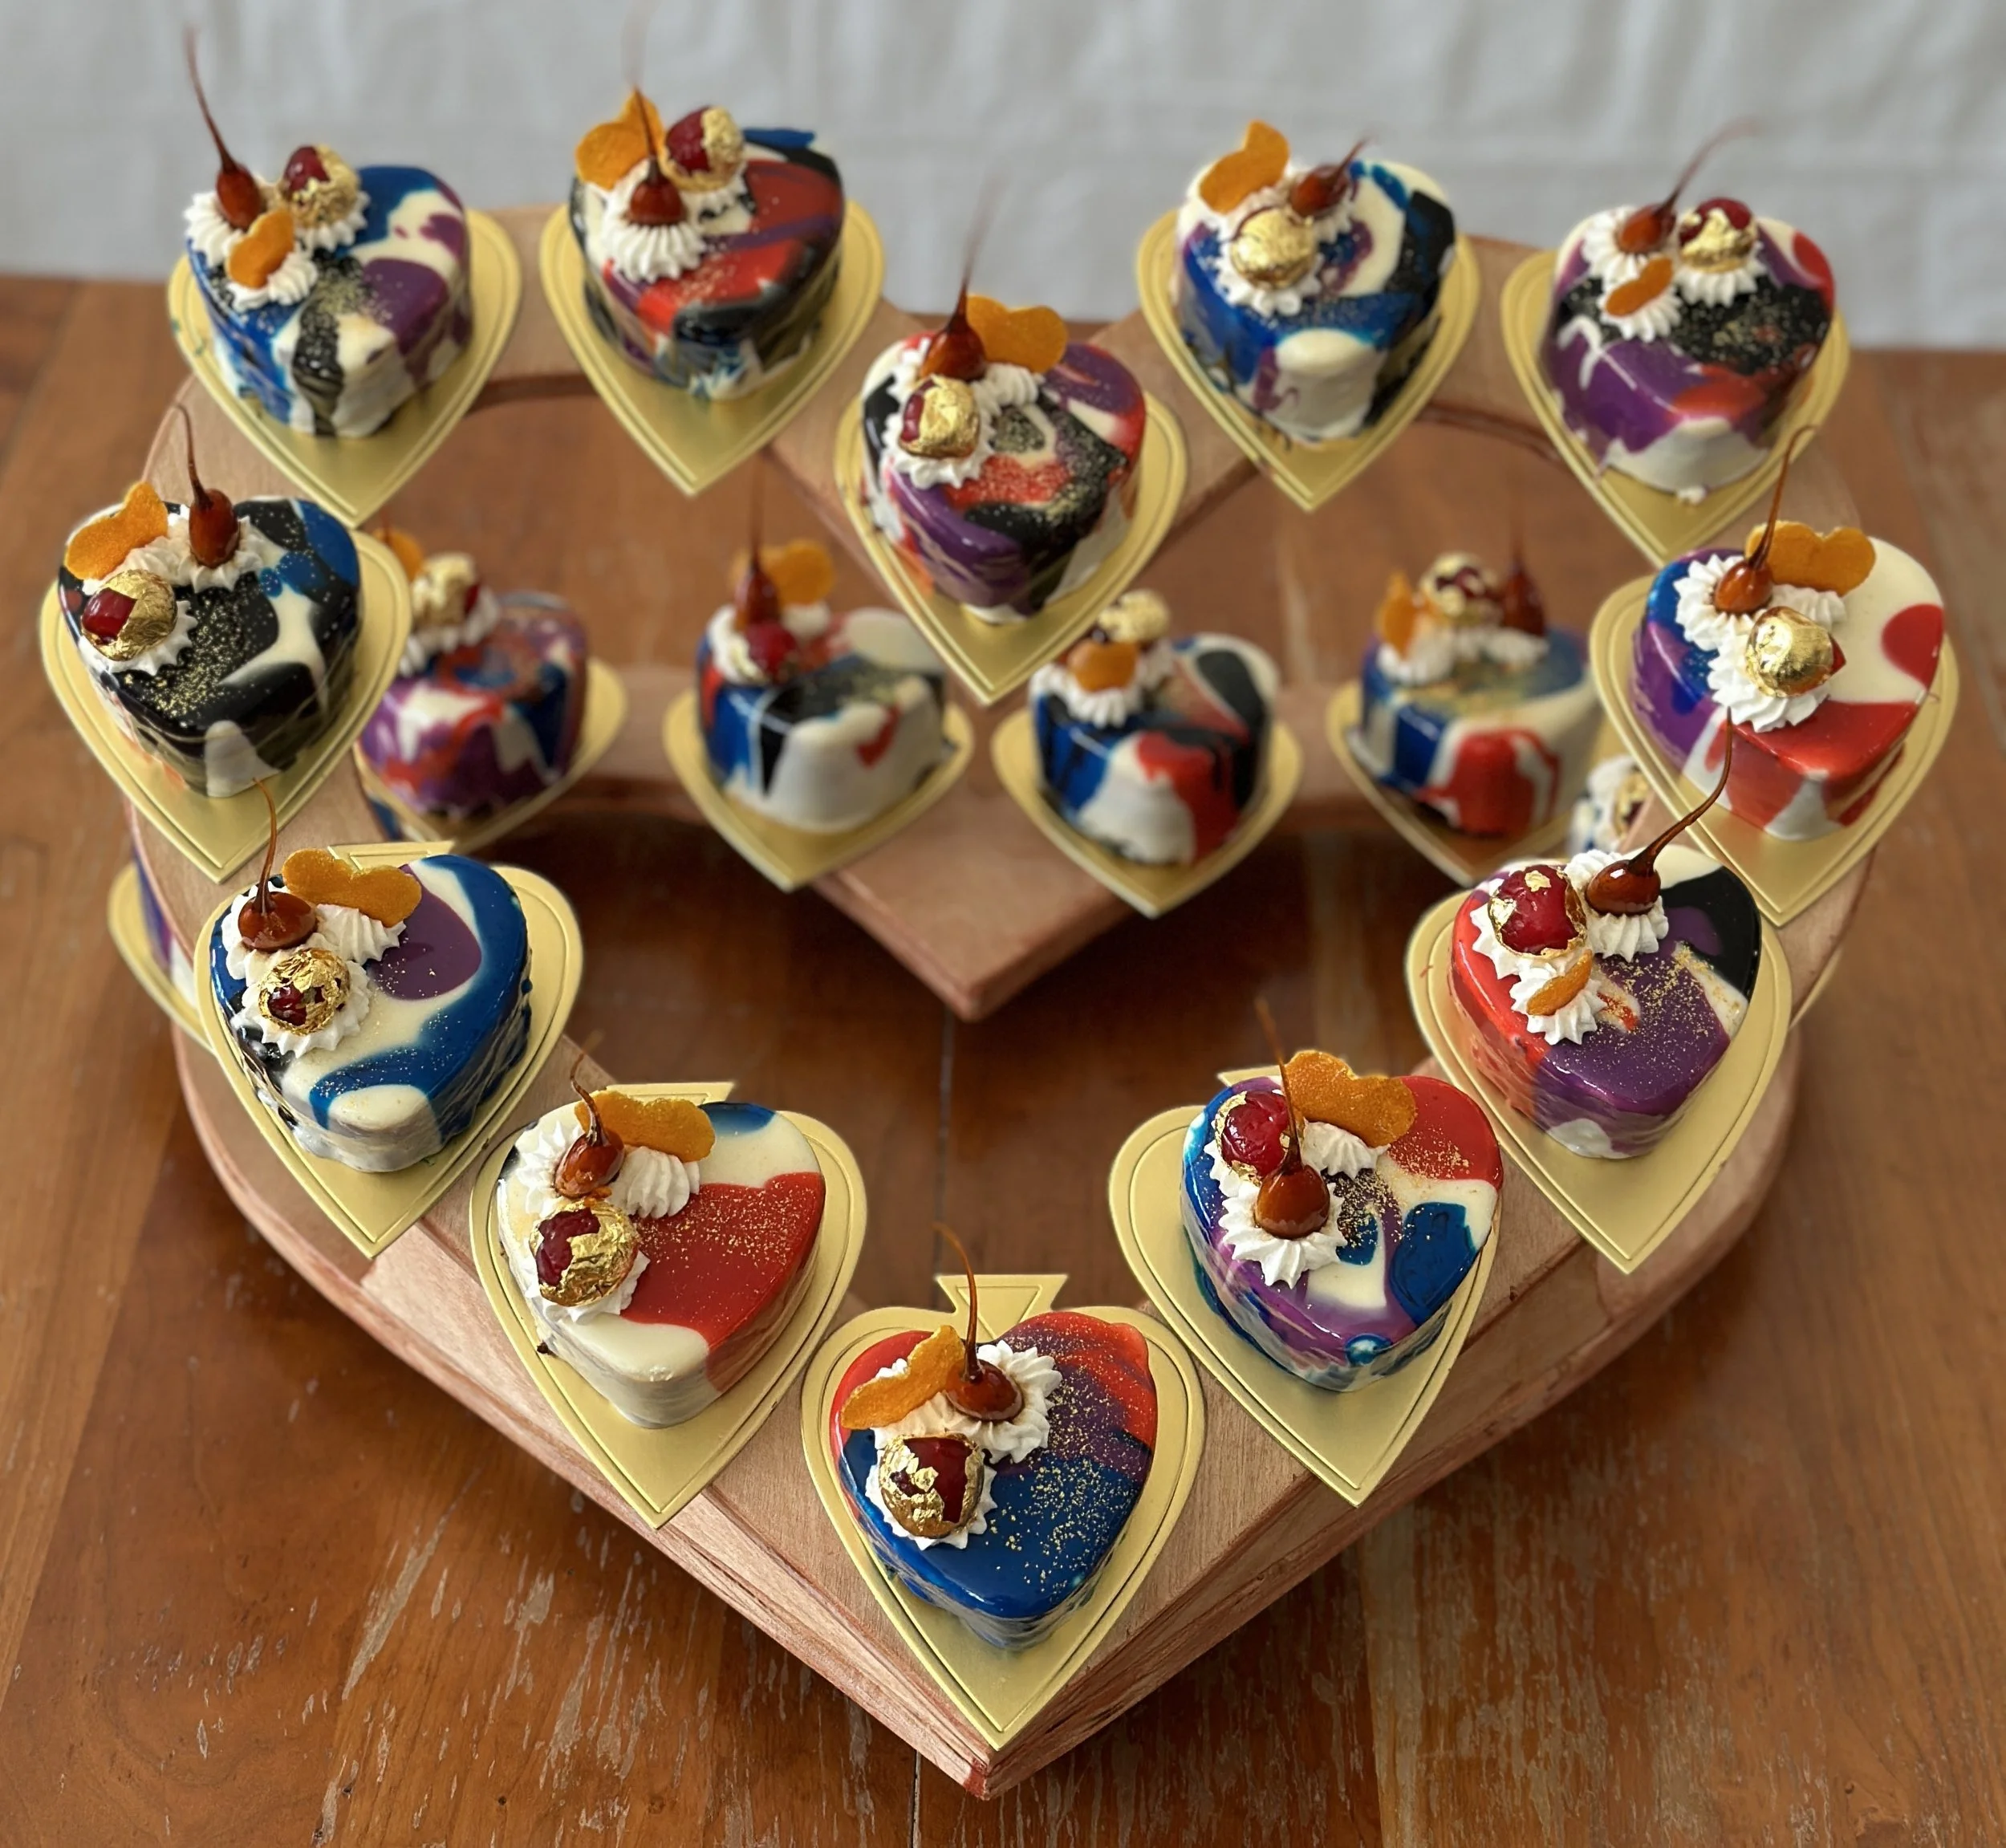
I served them on a custom two-tier heart-shaped stand, designed to fit 18 entremets for 18 years. It looked nice, but I should have made it slightly less sloped because I got scared that they would slip off so I used double-stick tape to hold them in place.
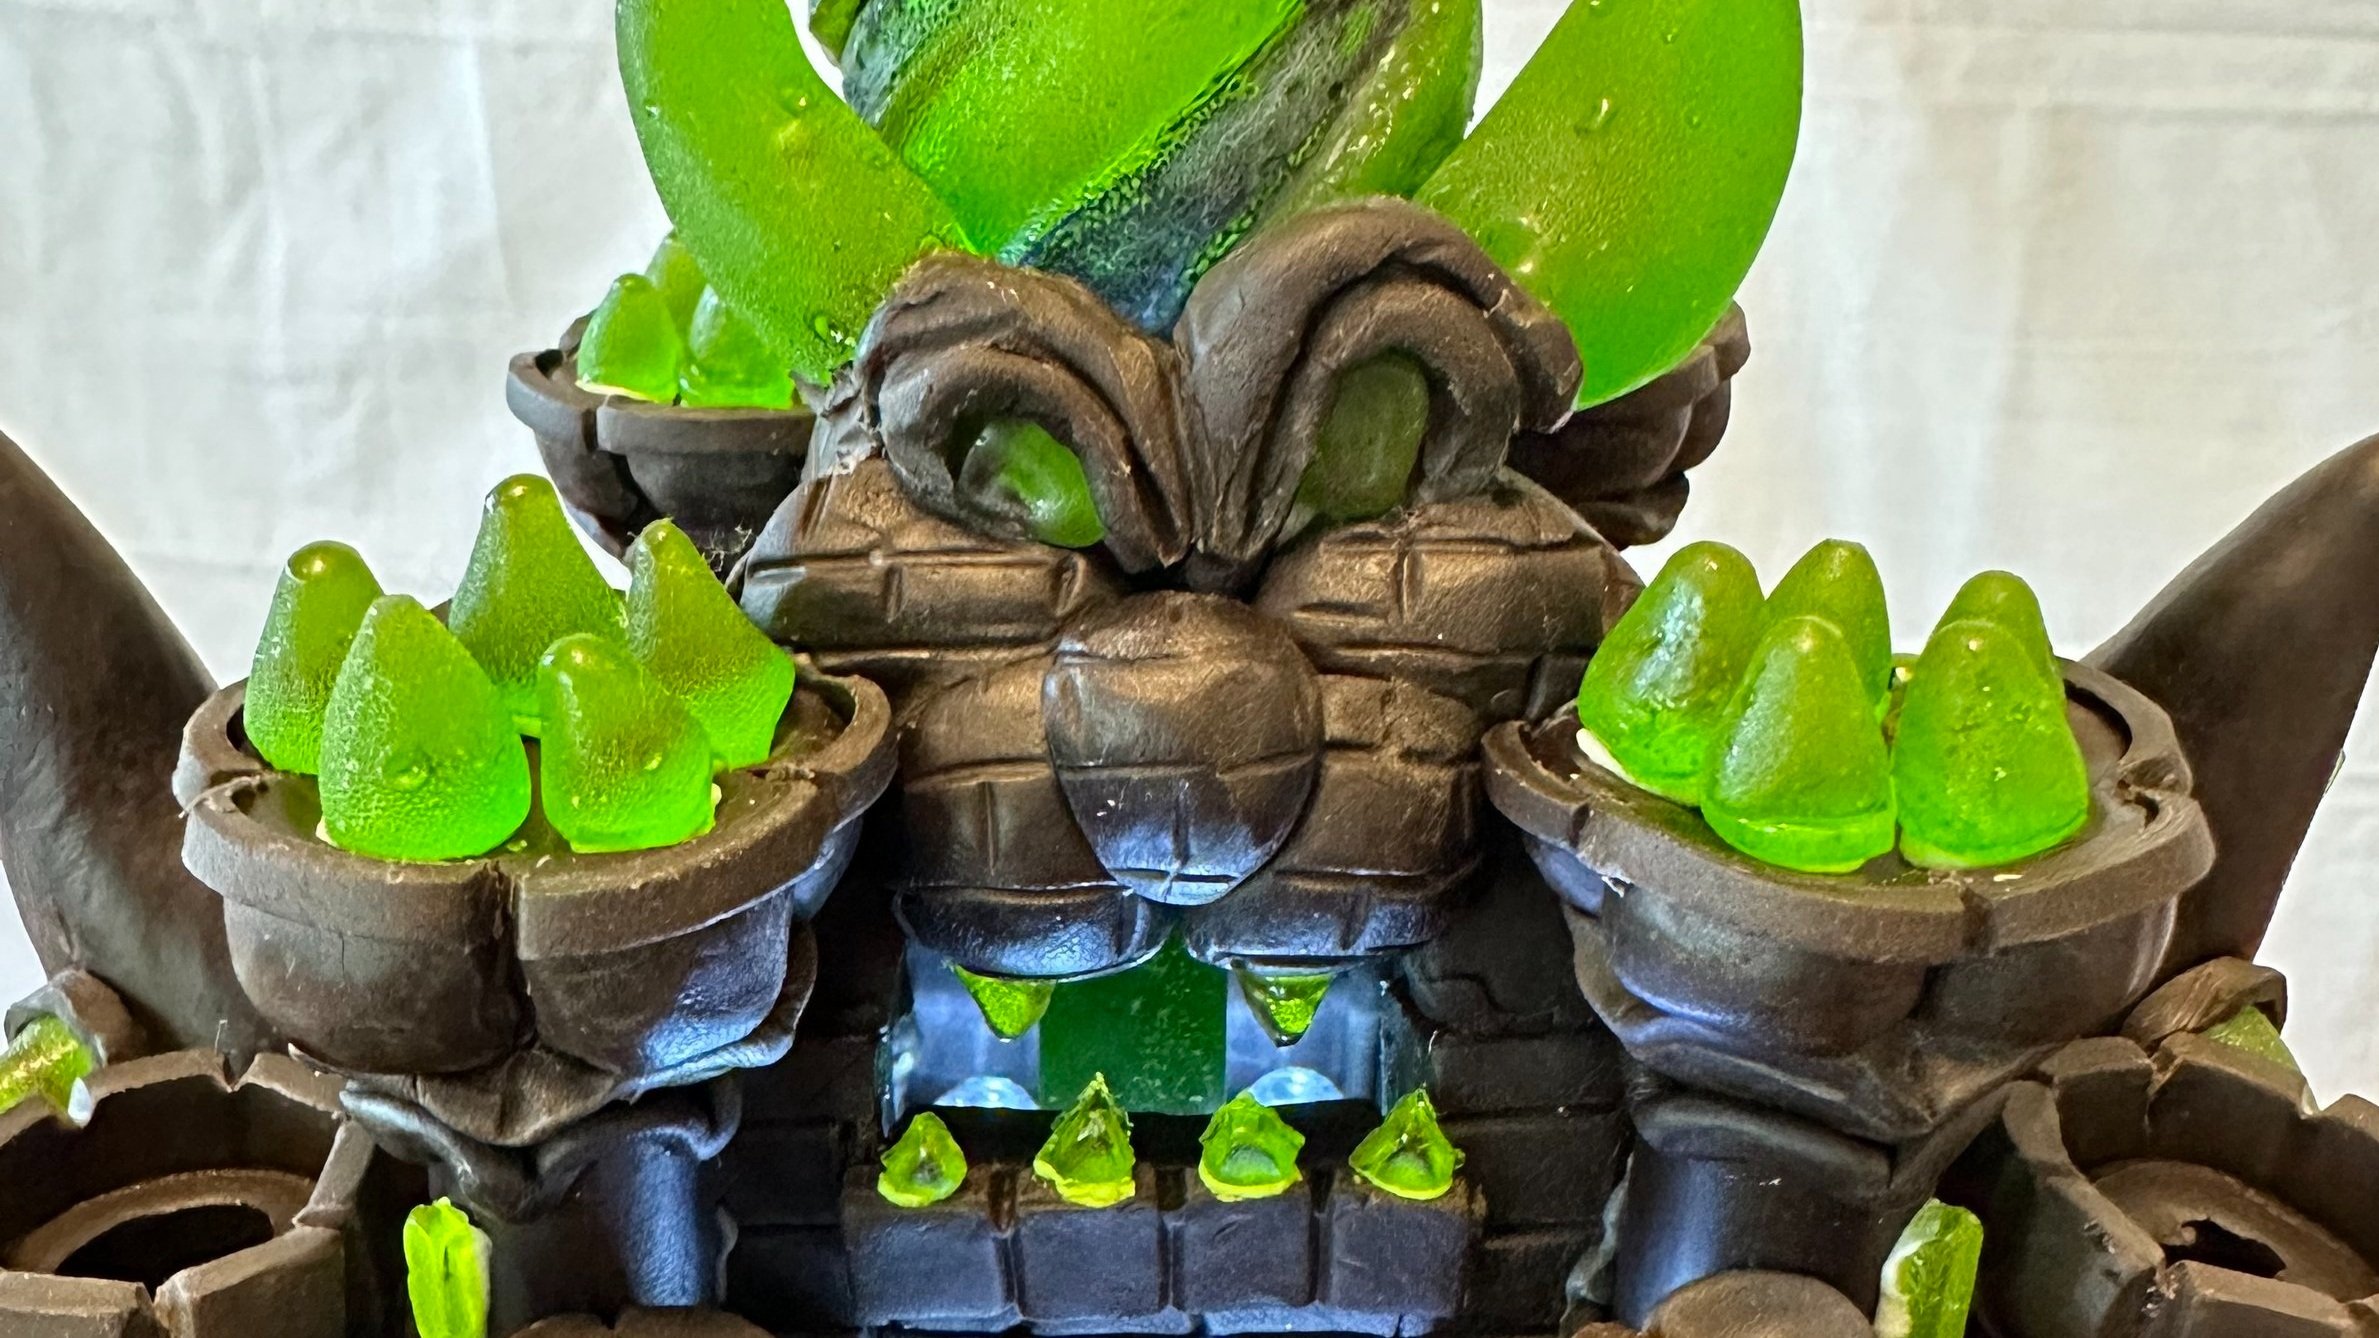
Castle Bowser Cake
For his birthday, my nephew asked for Castle Bowser from Super Mario Bros. Wonder.
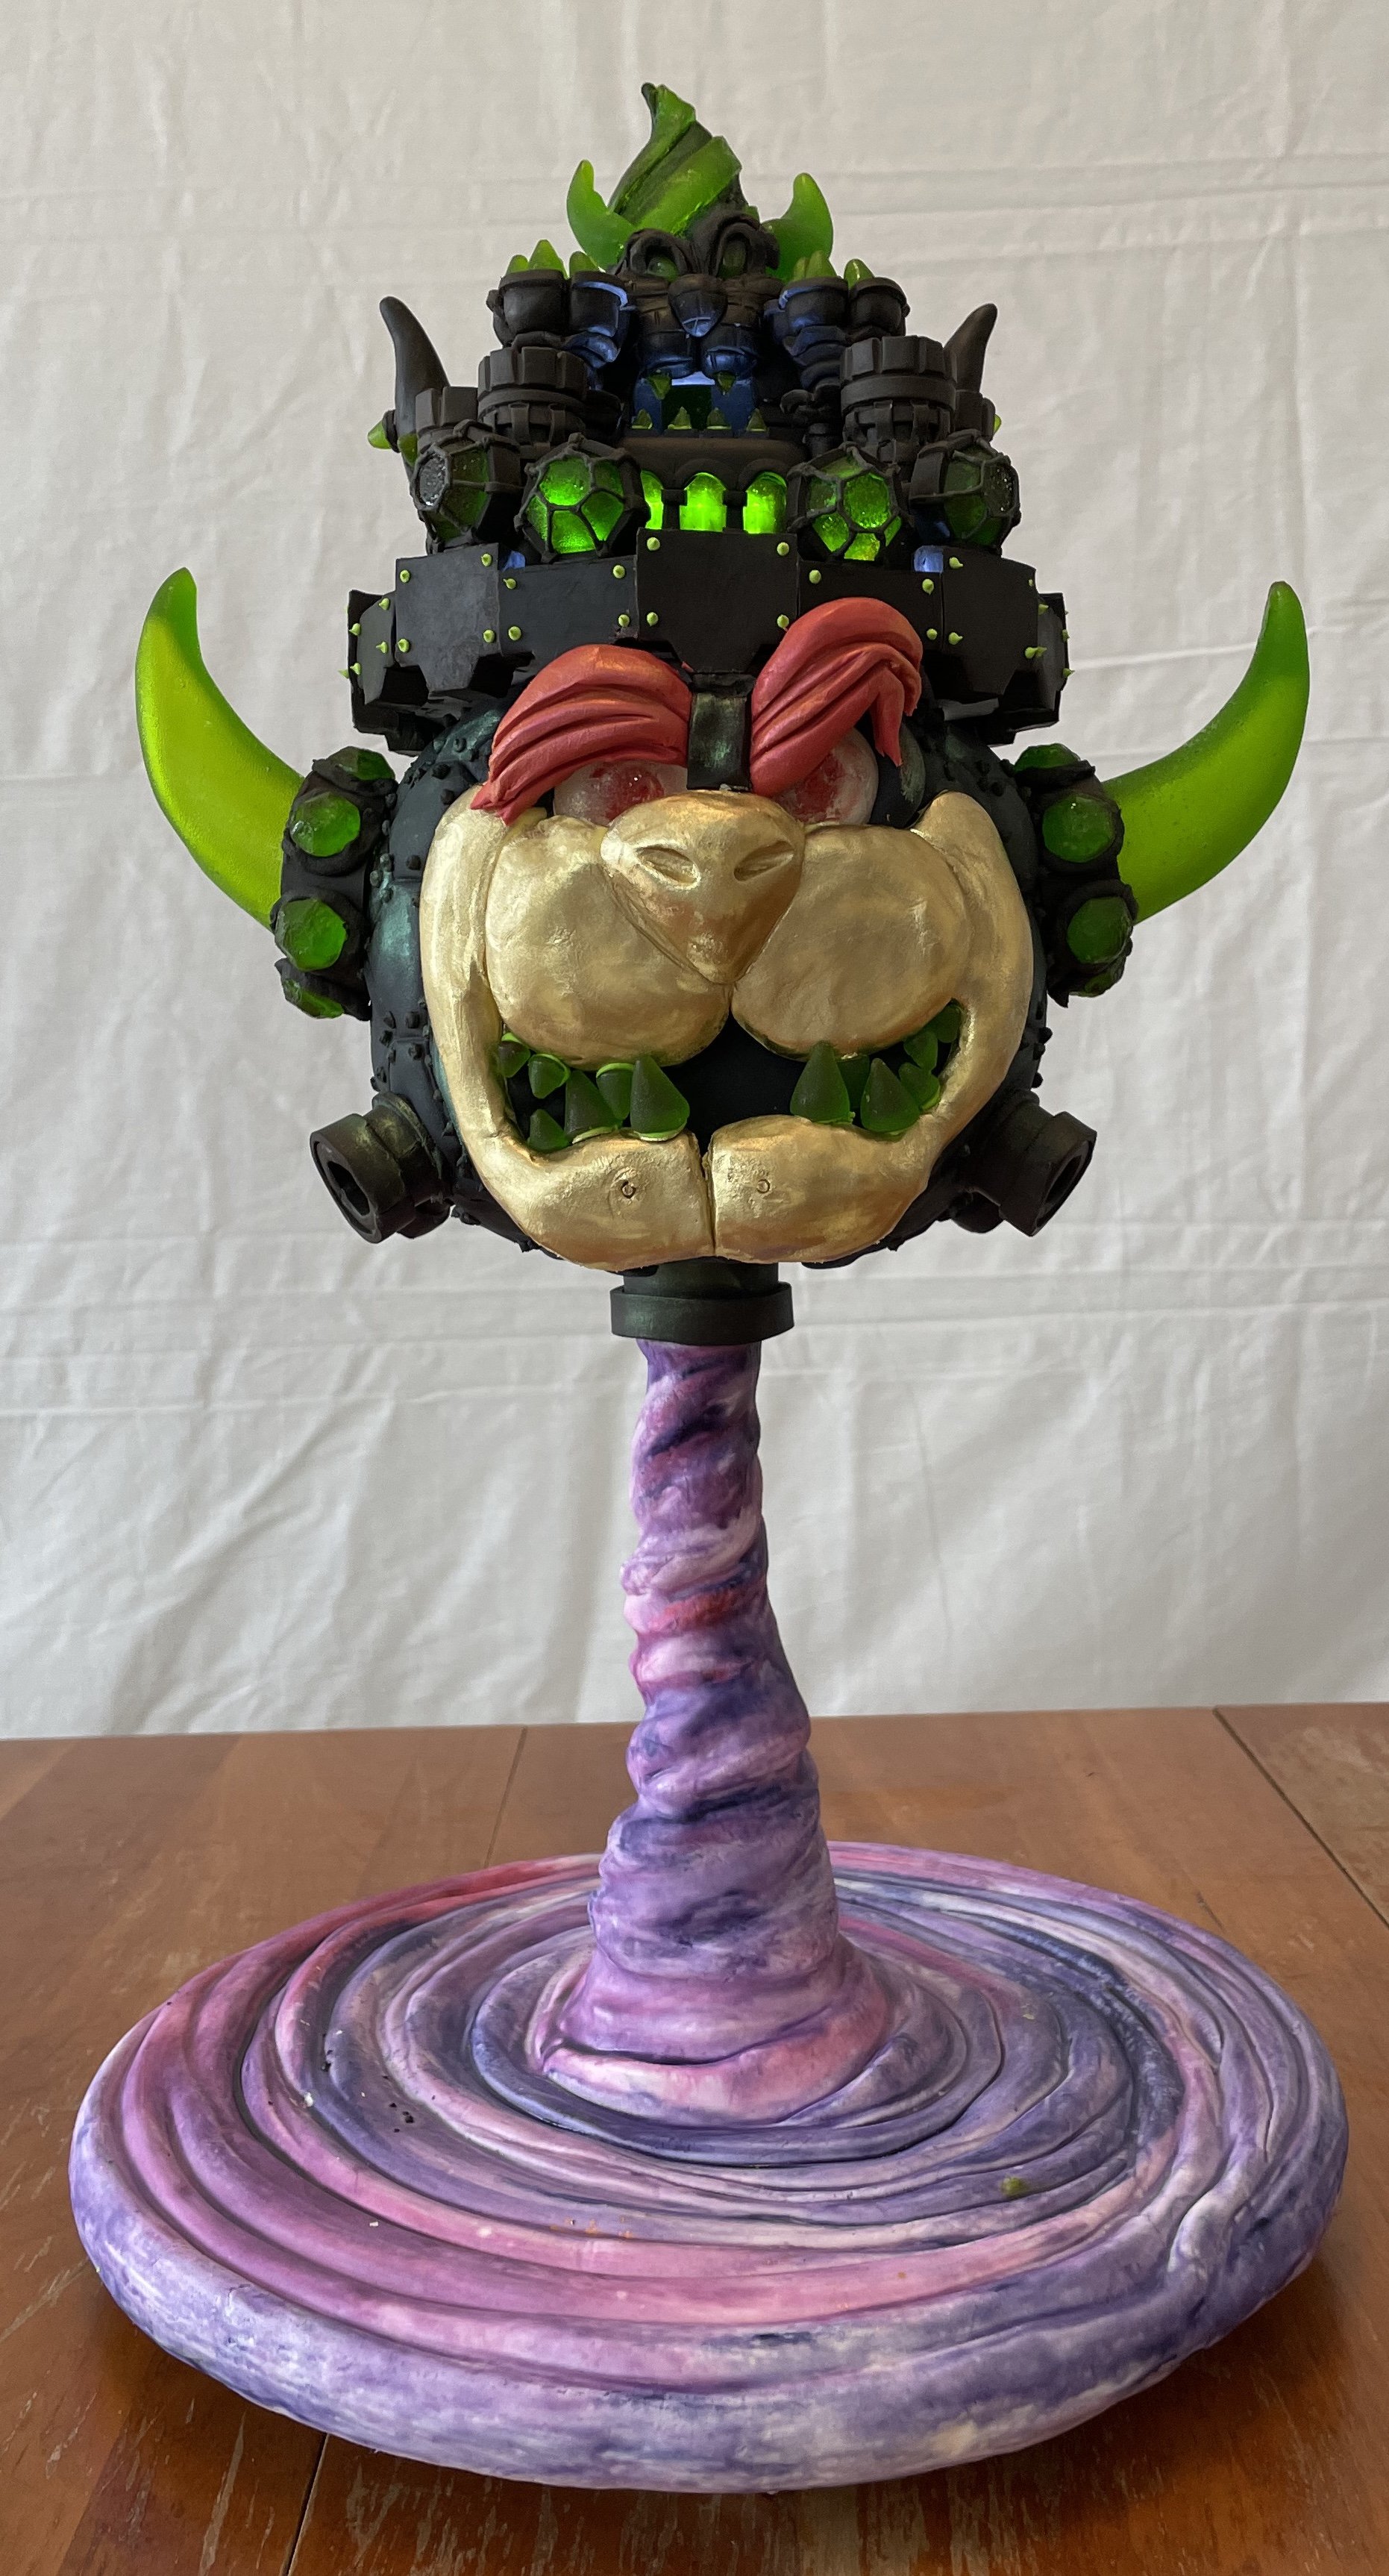
For his birthday, my nephew asked for Castle Bowser from Super Mario Bros. Wonder.
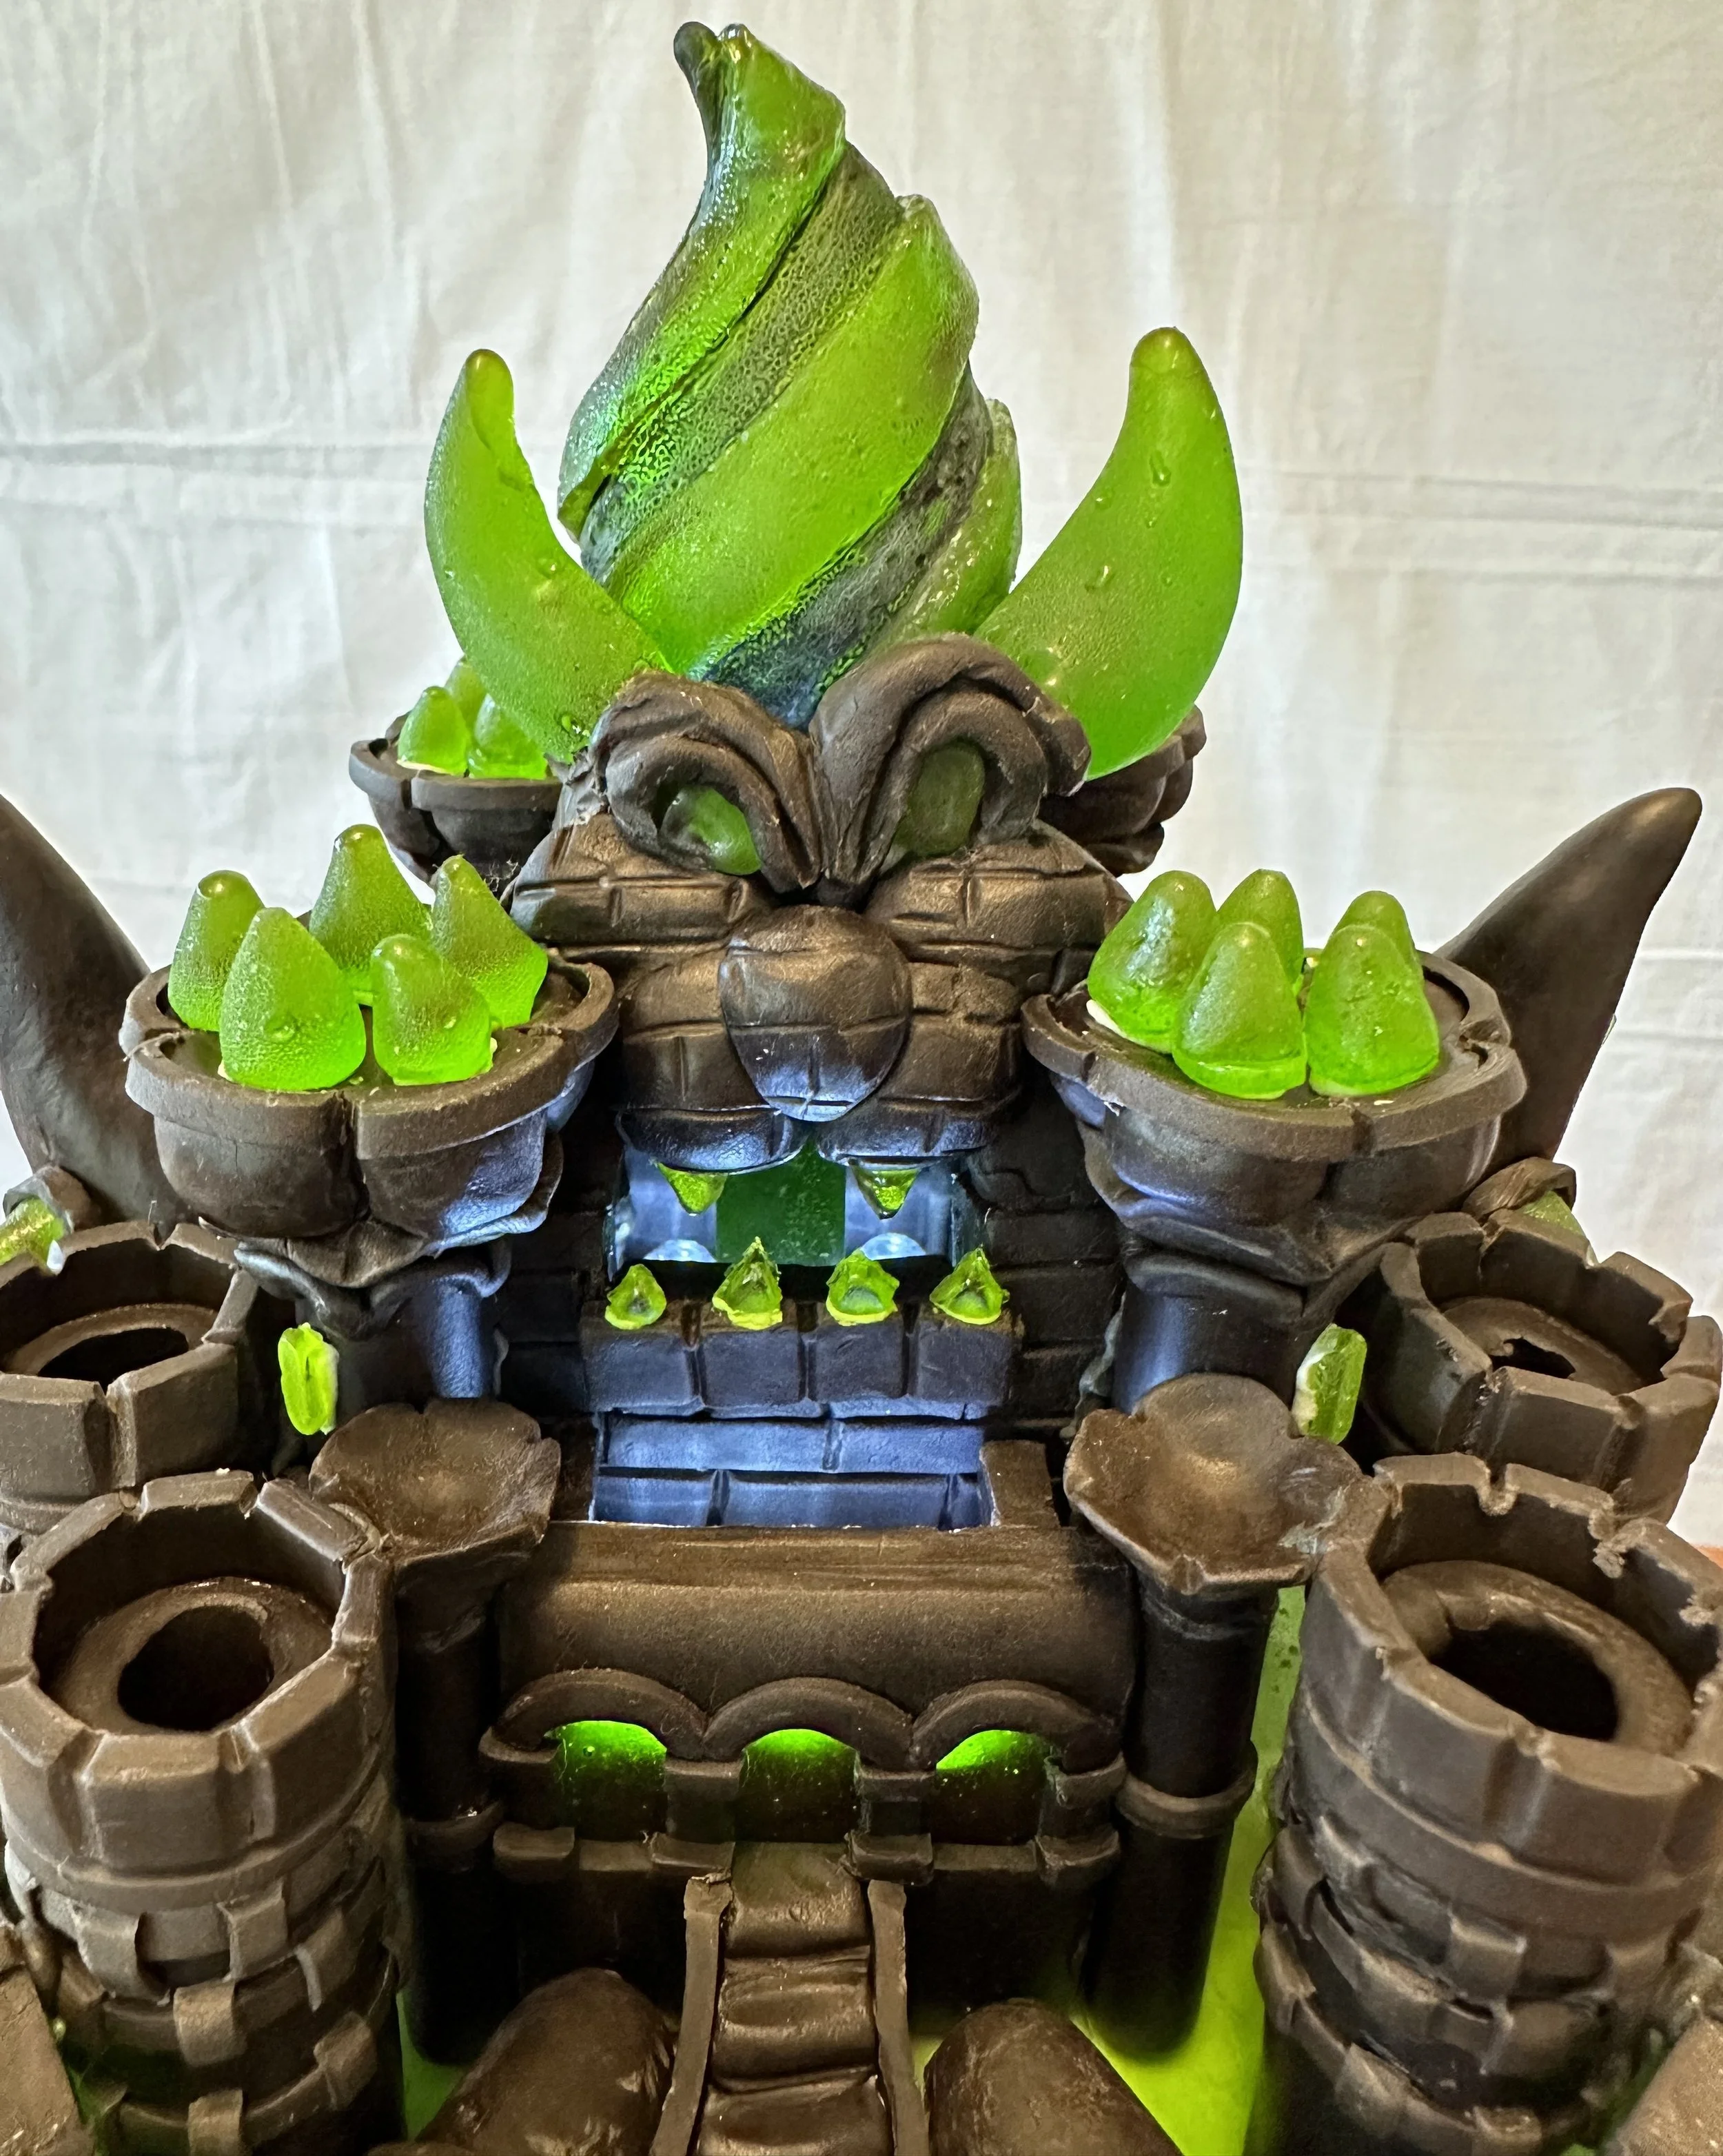
Most of the detail is modeling chocolate, with isomalt accents.
Inside, it’s chocolate cake with bright green mint icing.

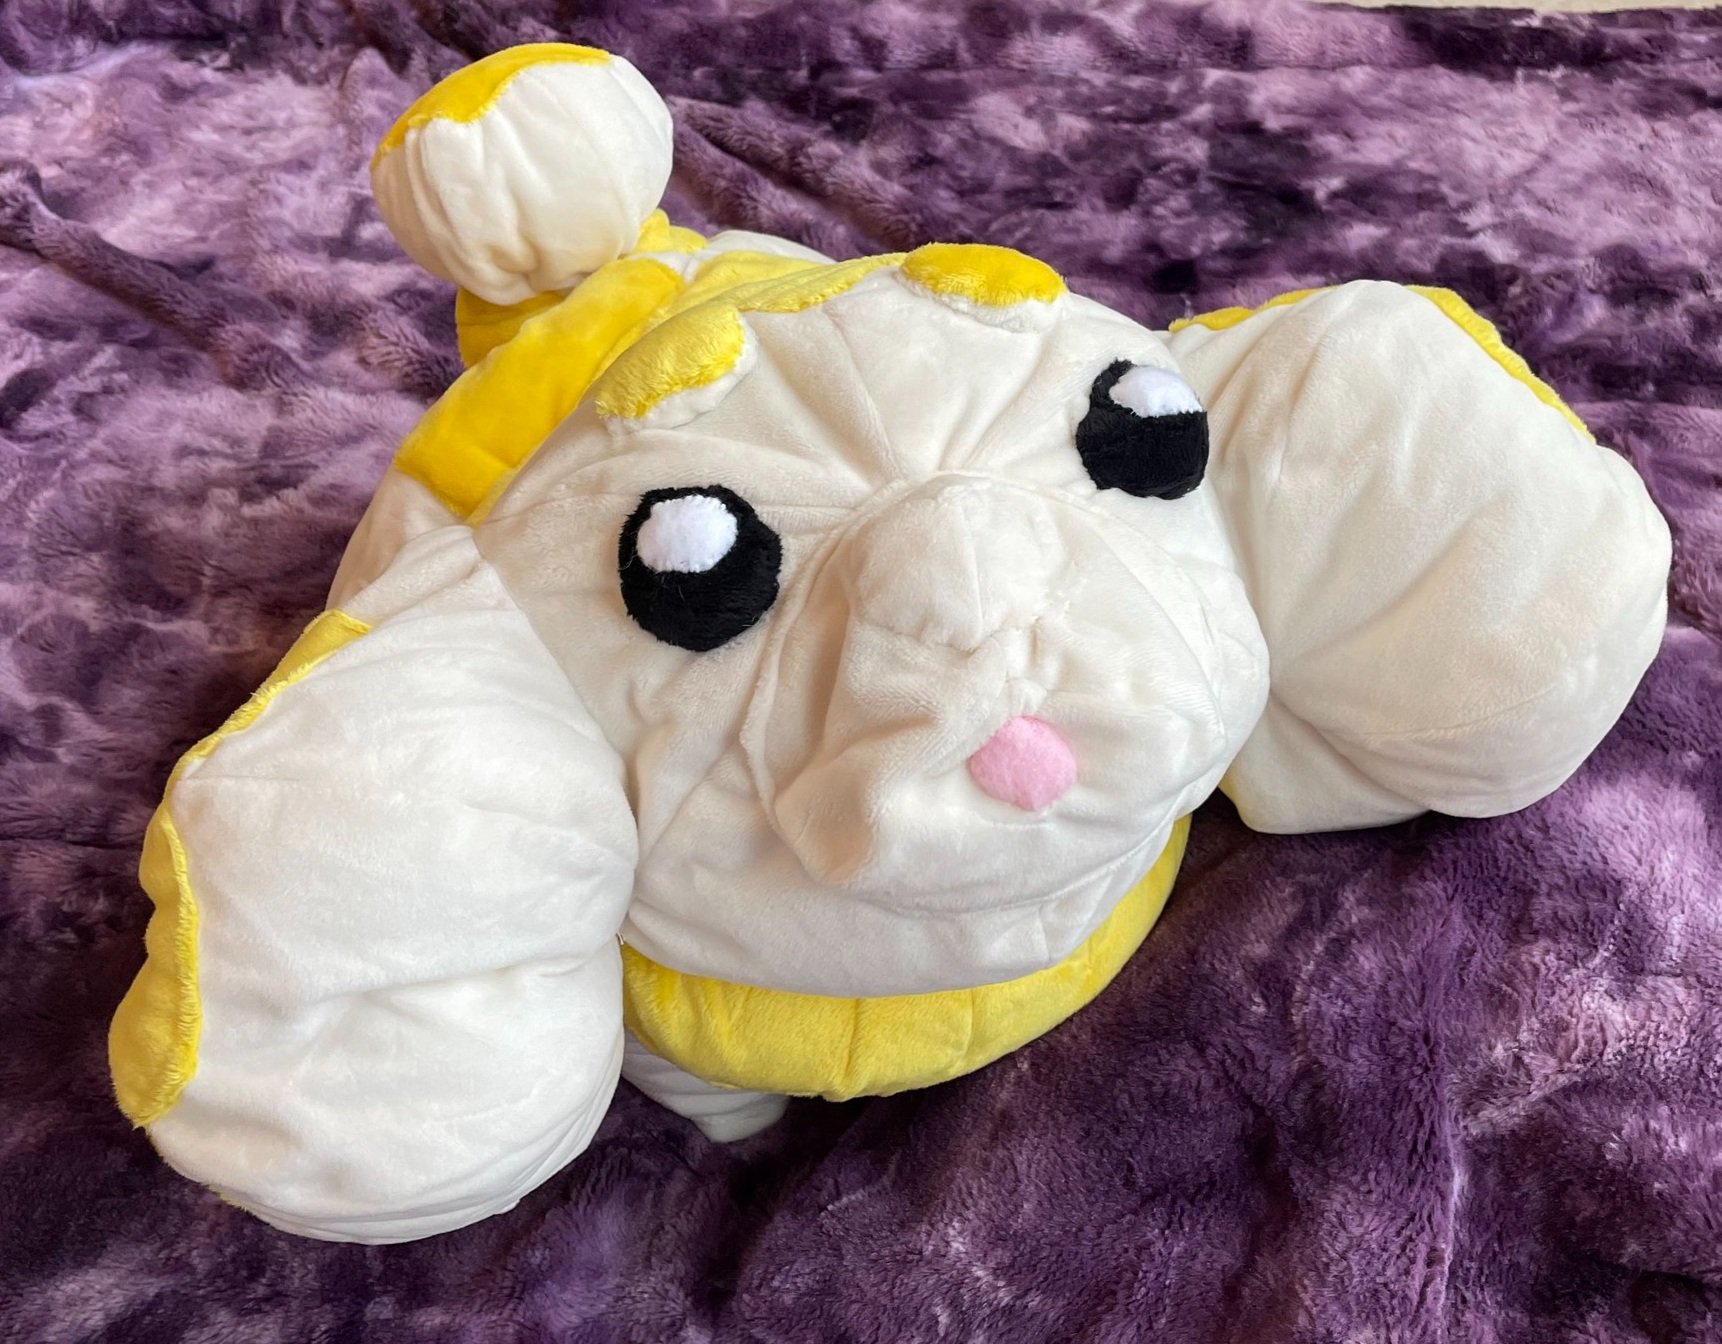
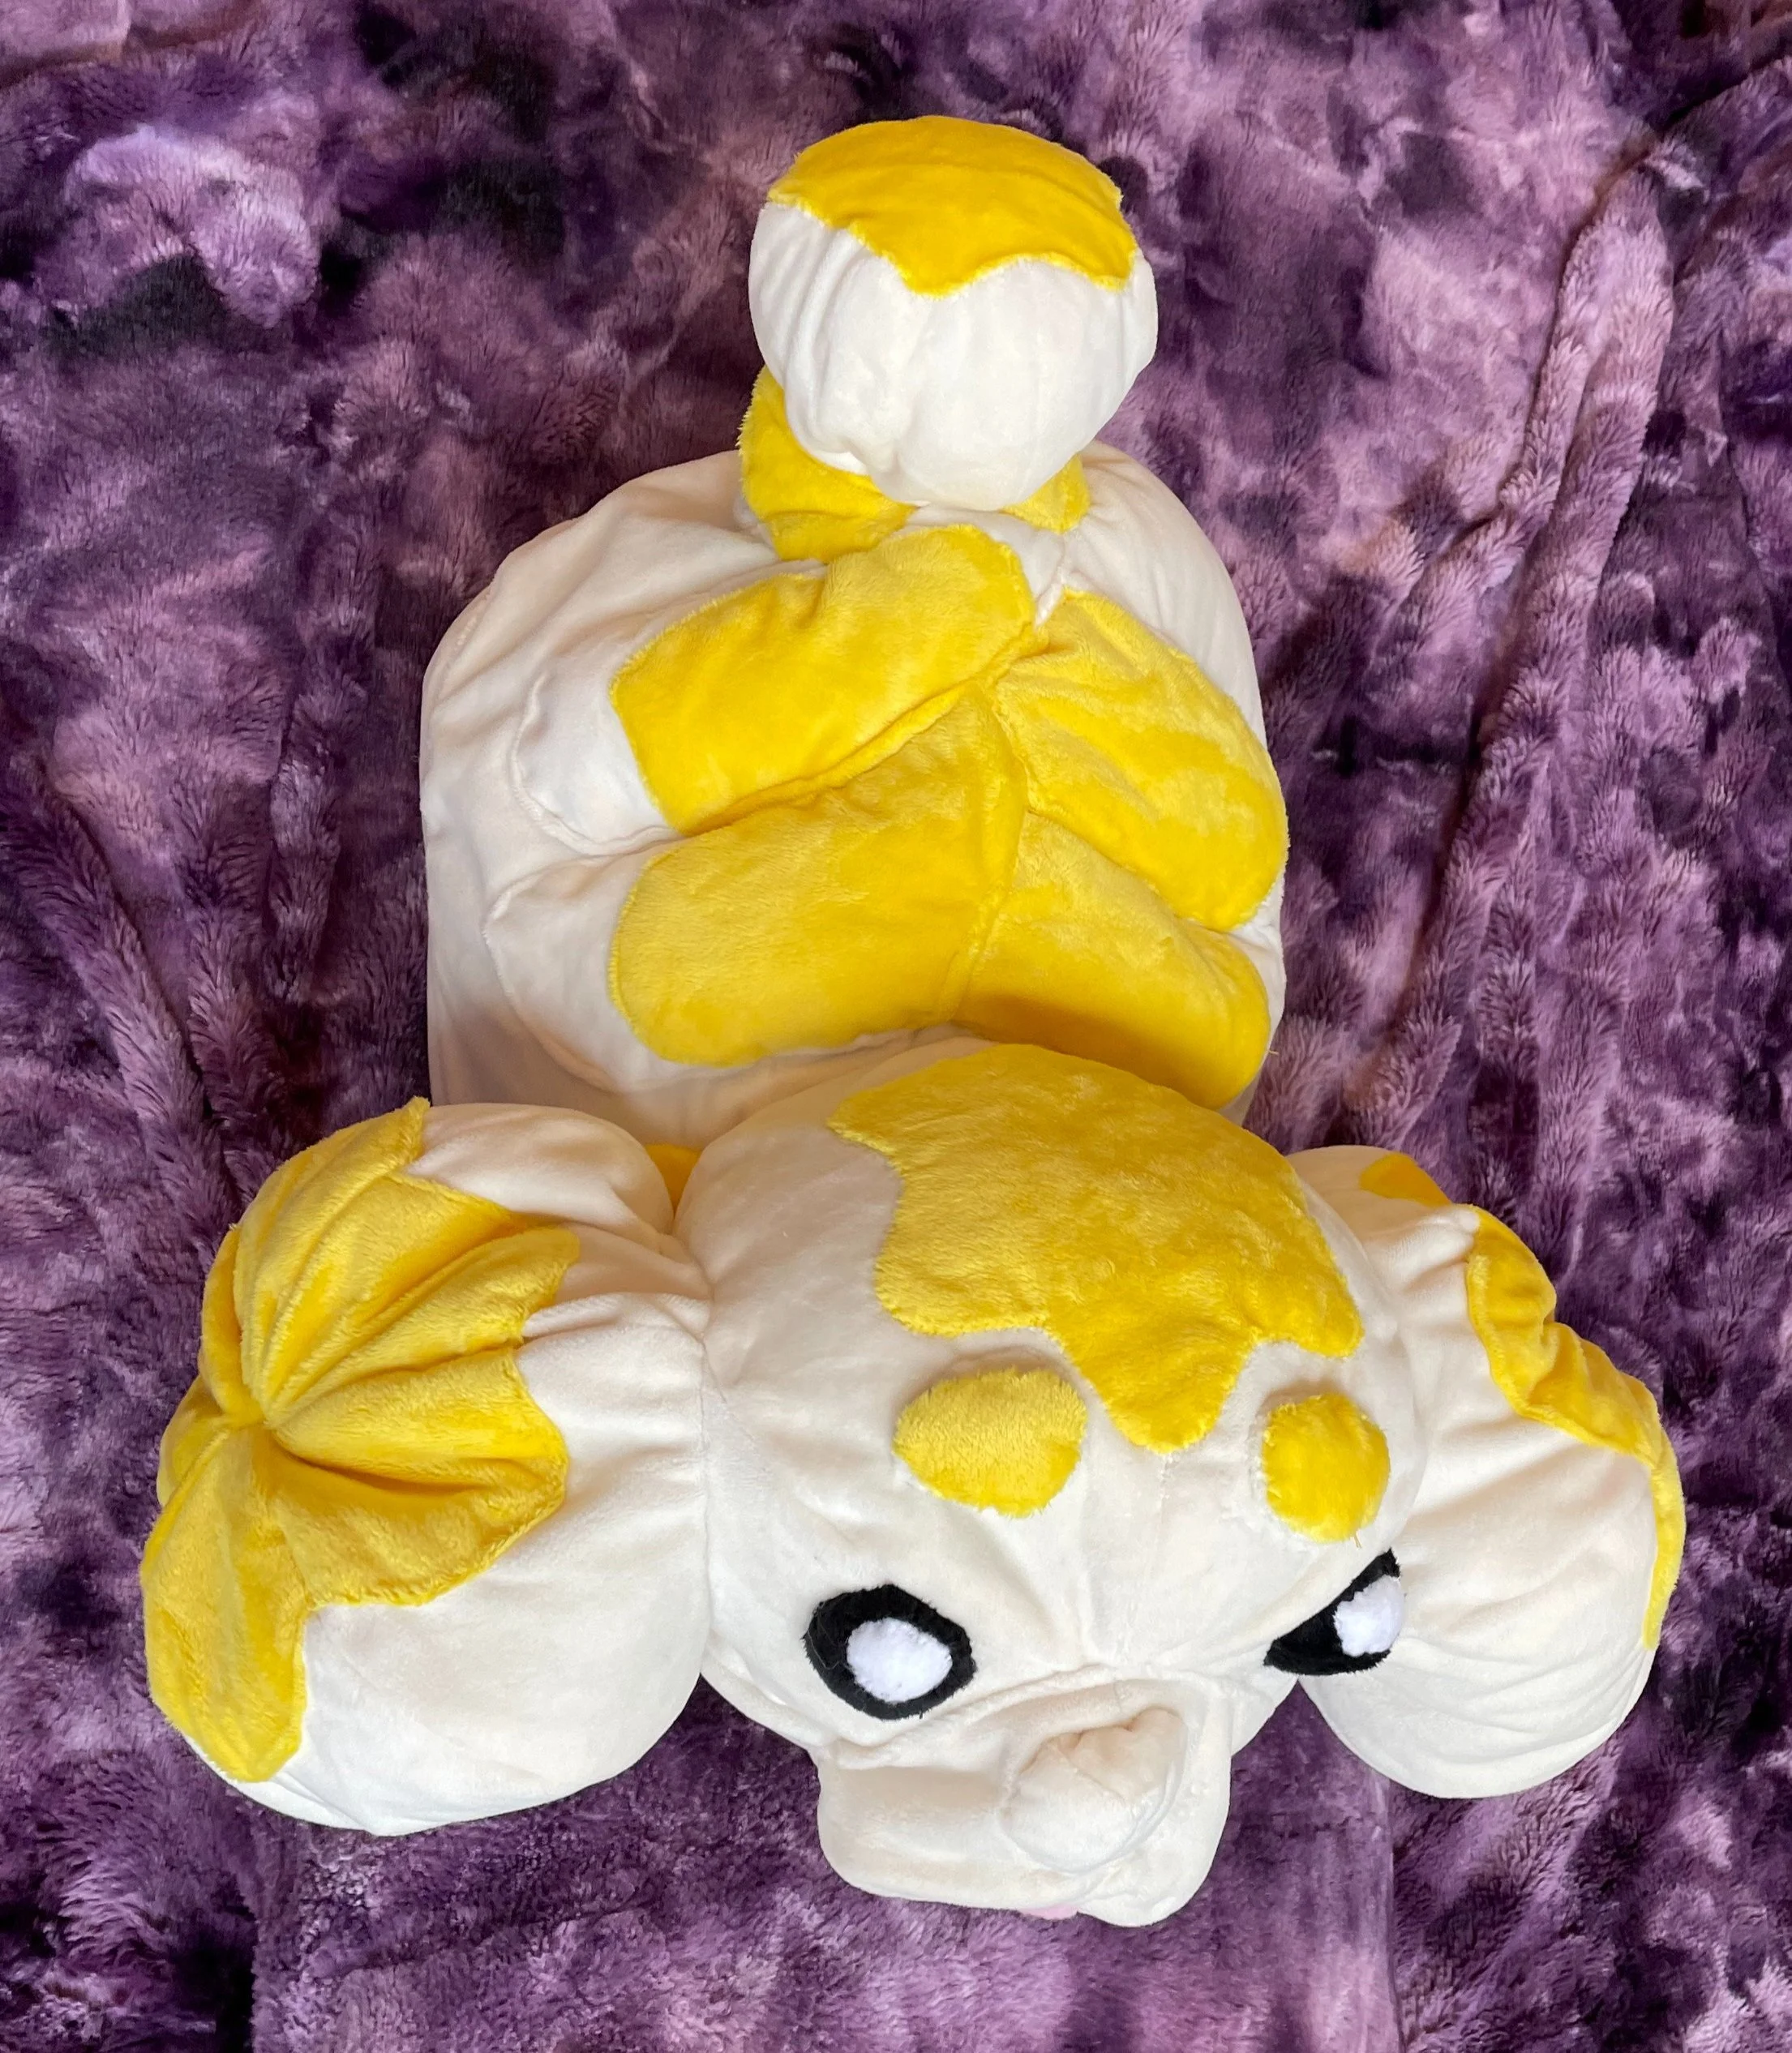
Terastal Form Terapagos
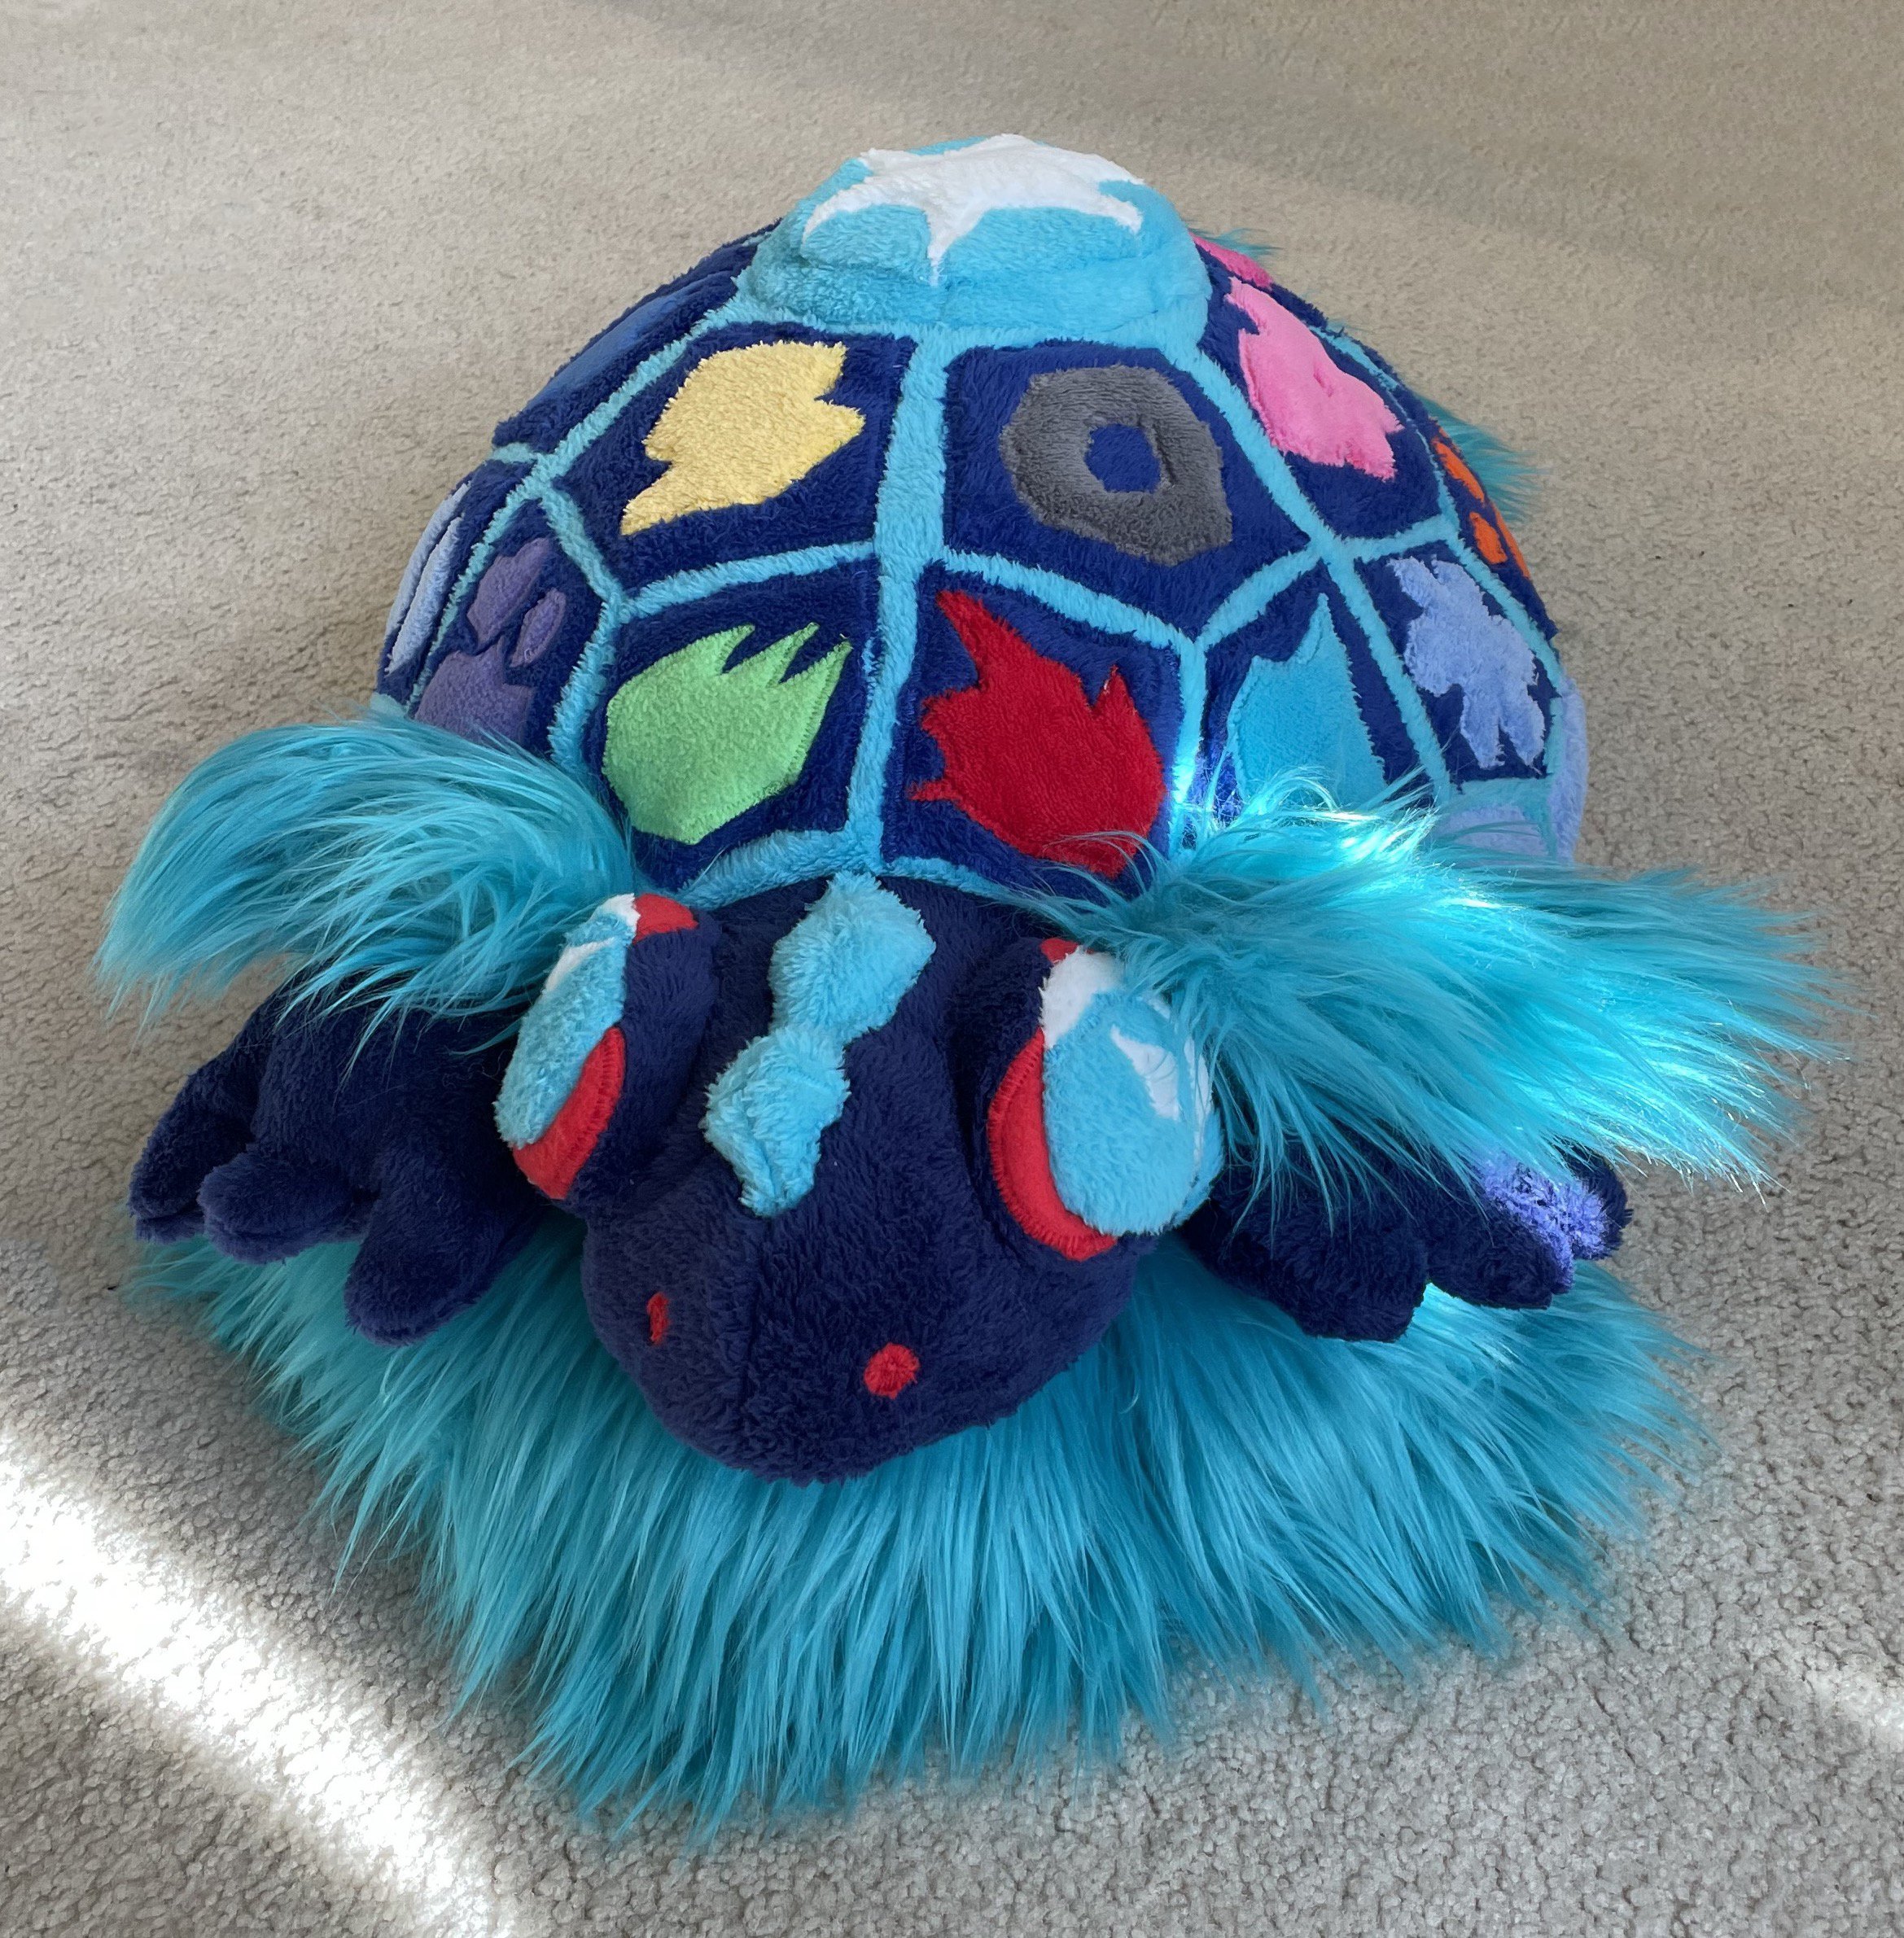
This year for Christmas, my nephew asked for a stuffie terastal form Teragos, because he has been playing the Indigo Disk DLC for Pokémon Scarlet and Violet.

This year for Christmas, my nephew asked for a stuffie terastal form Teragos, because he has been playing the Indigo Disk DLC for Pokémon Scarlet and Violet.
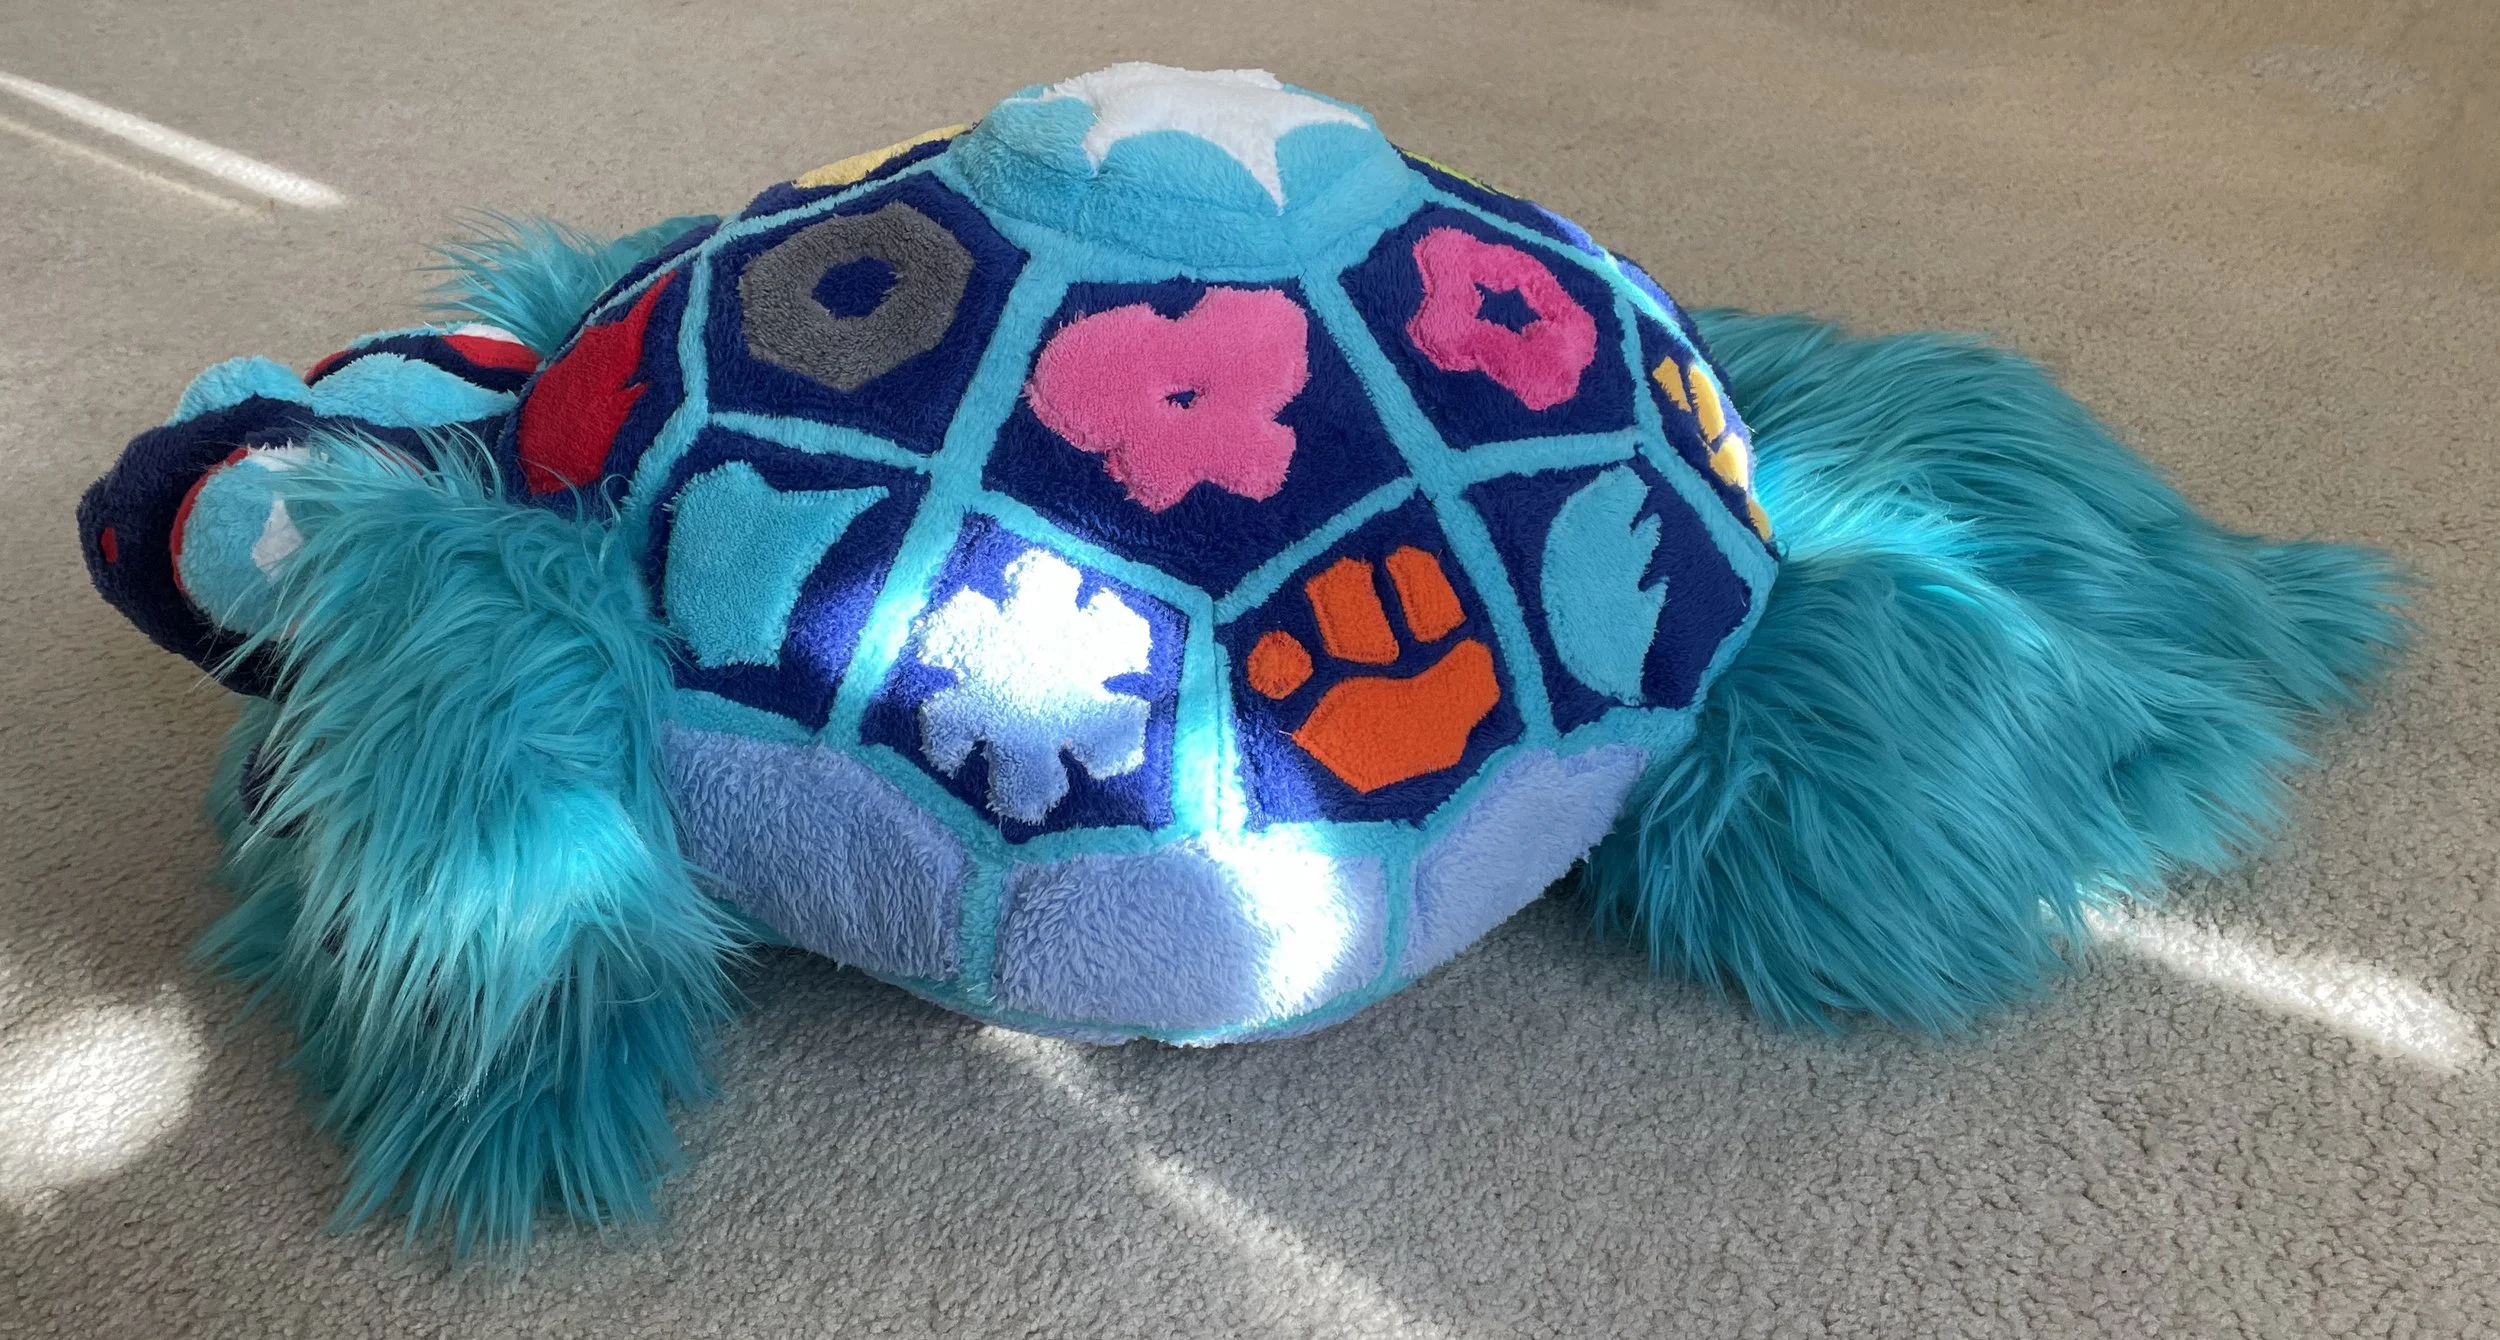
I’m quite pleased with how this one turned out, especially all the appliqués on the shell.
Holiday Candy 2023
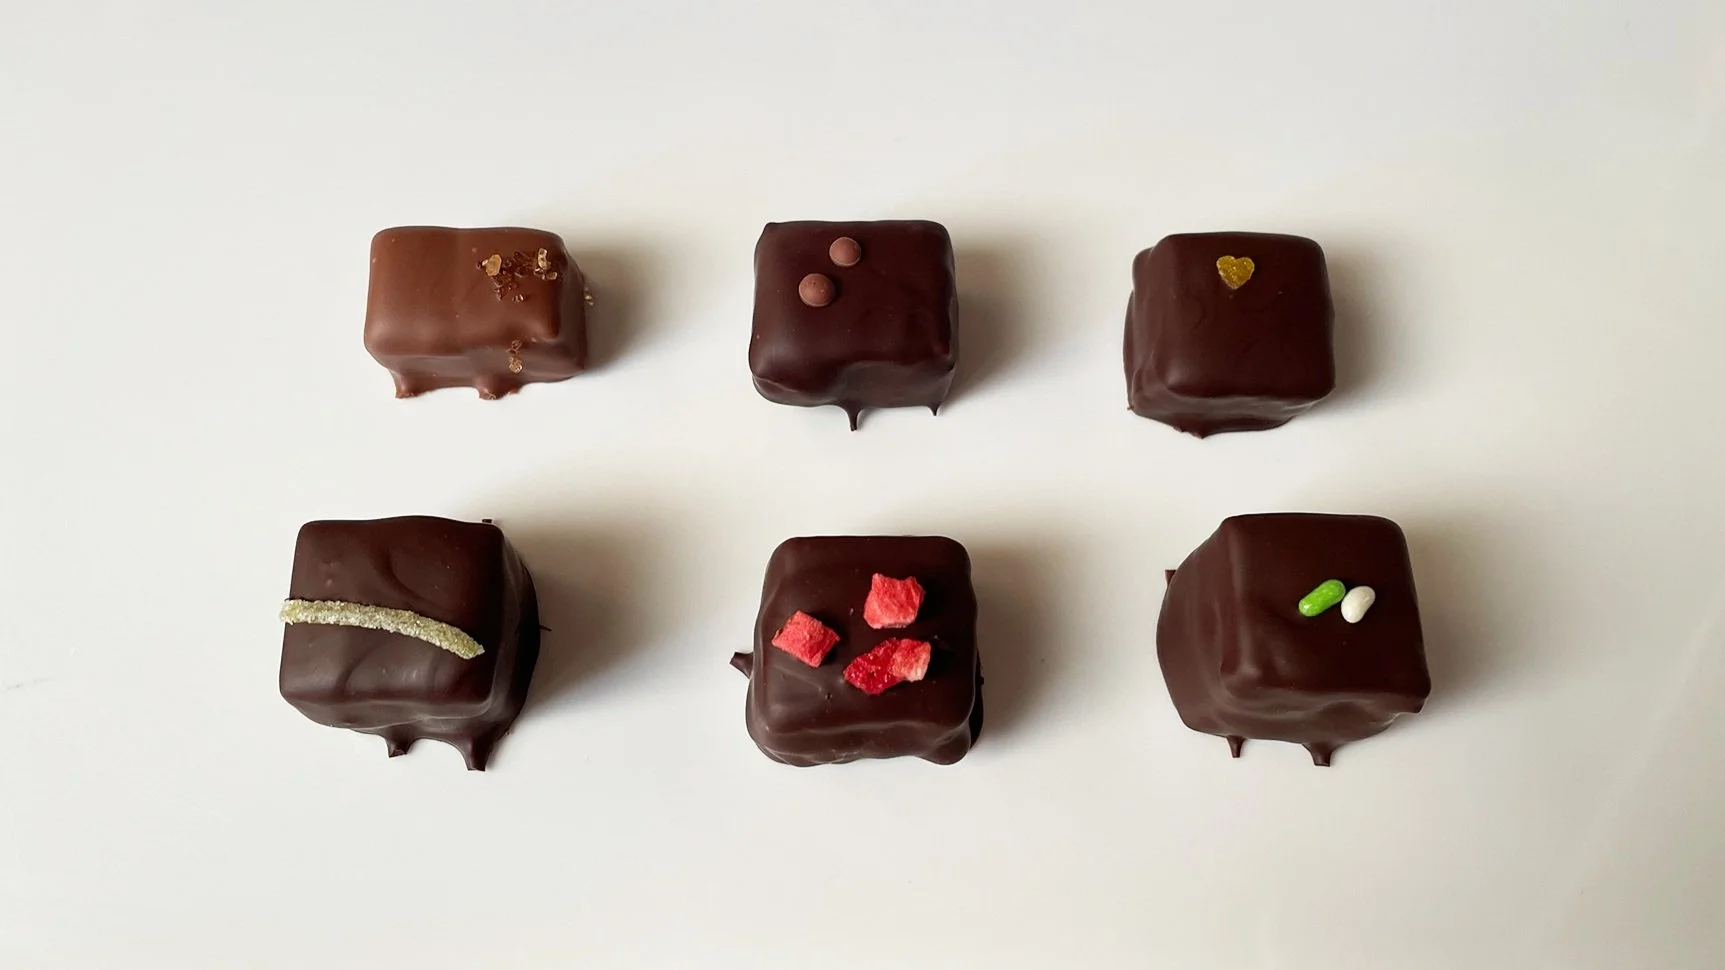
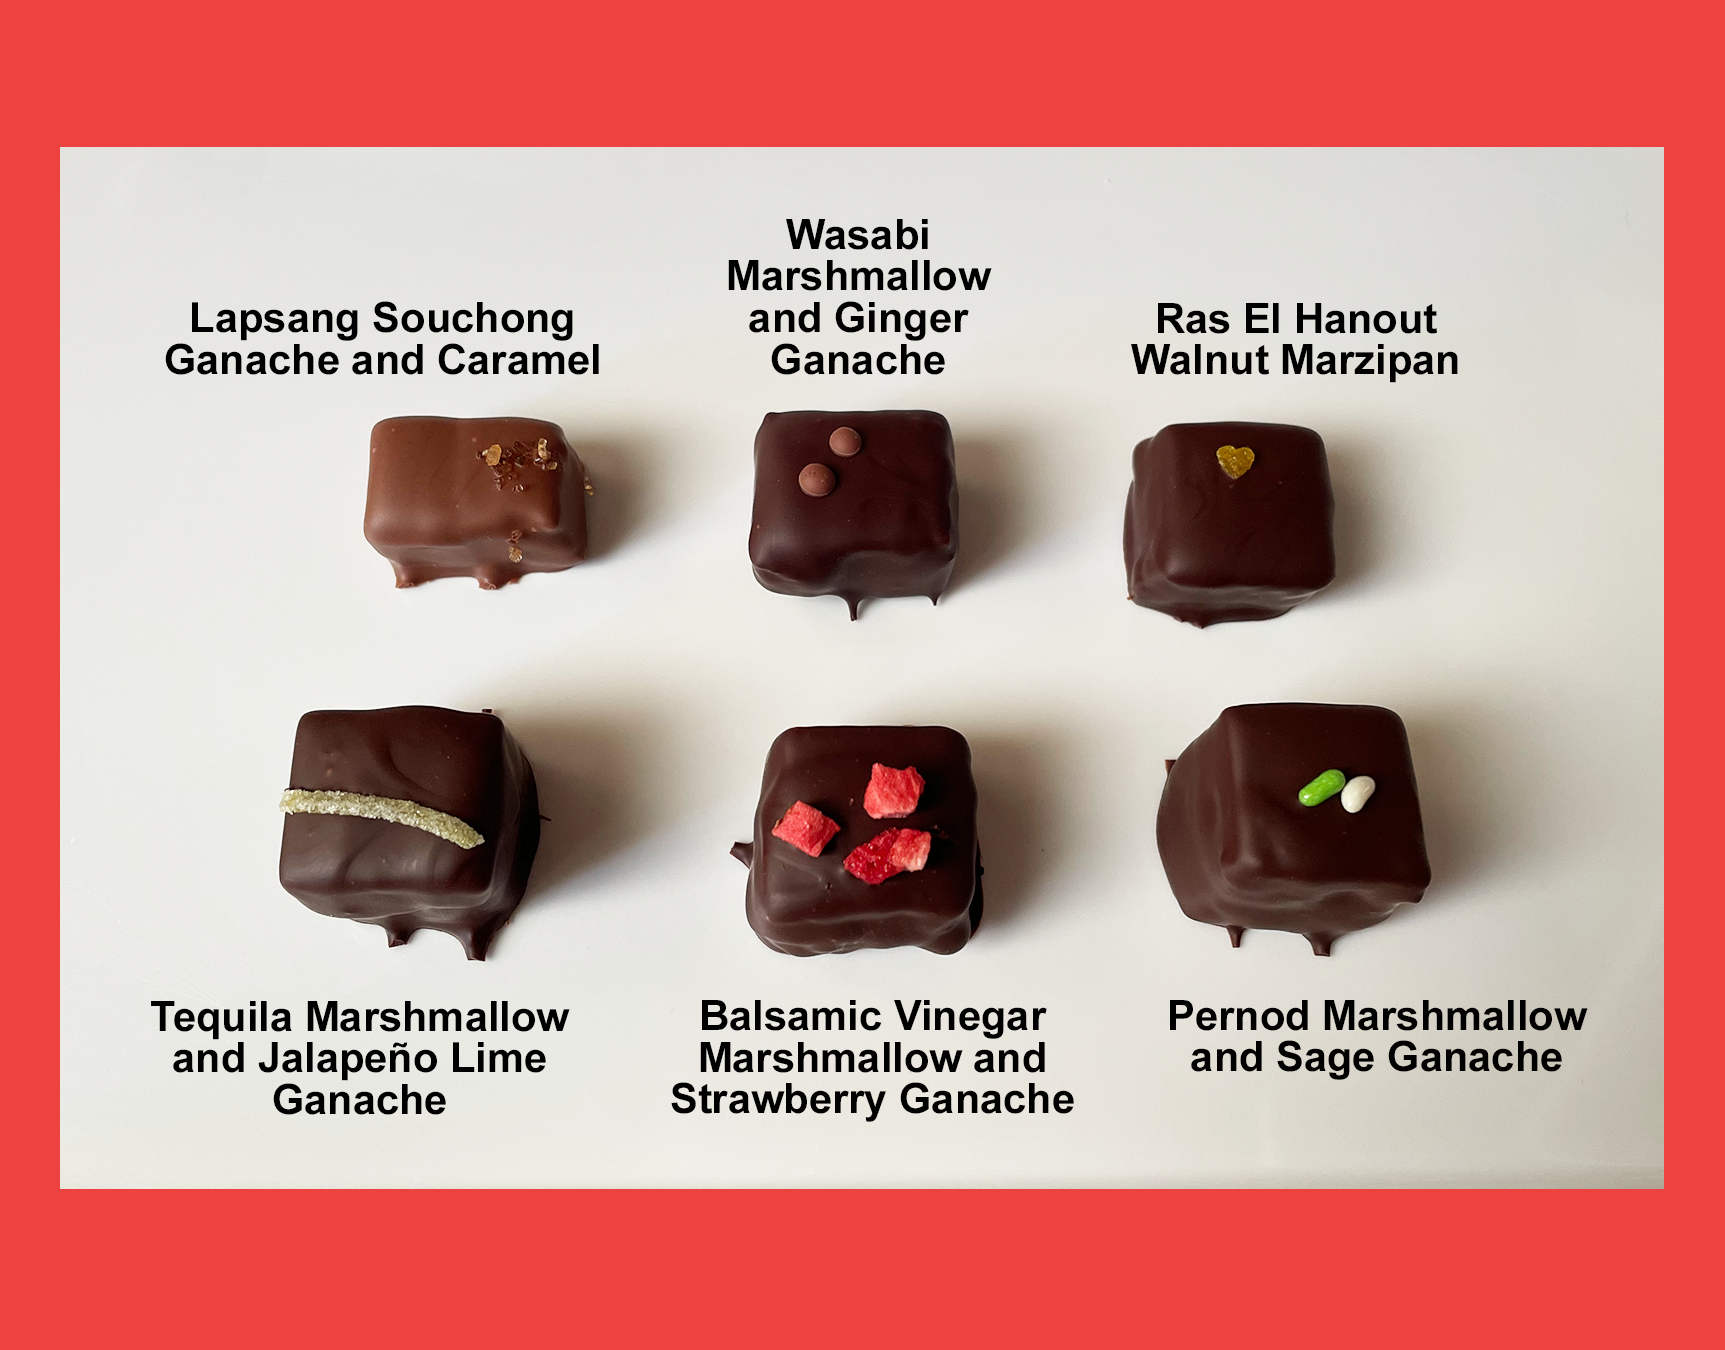
This year’s candy included lapsang souchong ganache and caramel, wasabi marshmallow and ginger ganache, ras el hanout walnut marzipan, tequila marshmallow and jalapeños lime ganache, balsamic vinegar marshmallow and strawberry ganache, and pernod marshmallow and sage ganache.
This year’s candy included lapsang souchong ganache and caramel, wasabi marshmallow and ginger ganache, ras el hanout walnut marzipan, tequila marshmallow and jalapeños lime ganache, balsamic vinegar marshmallow and strawberry ganache, and pernod marshmallow and sage ganache.
Trobbio
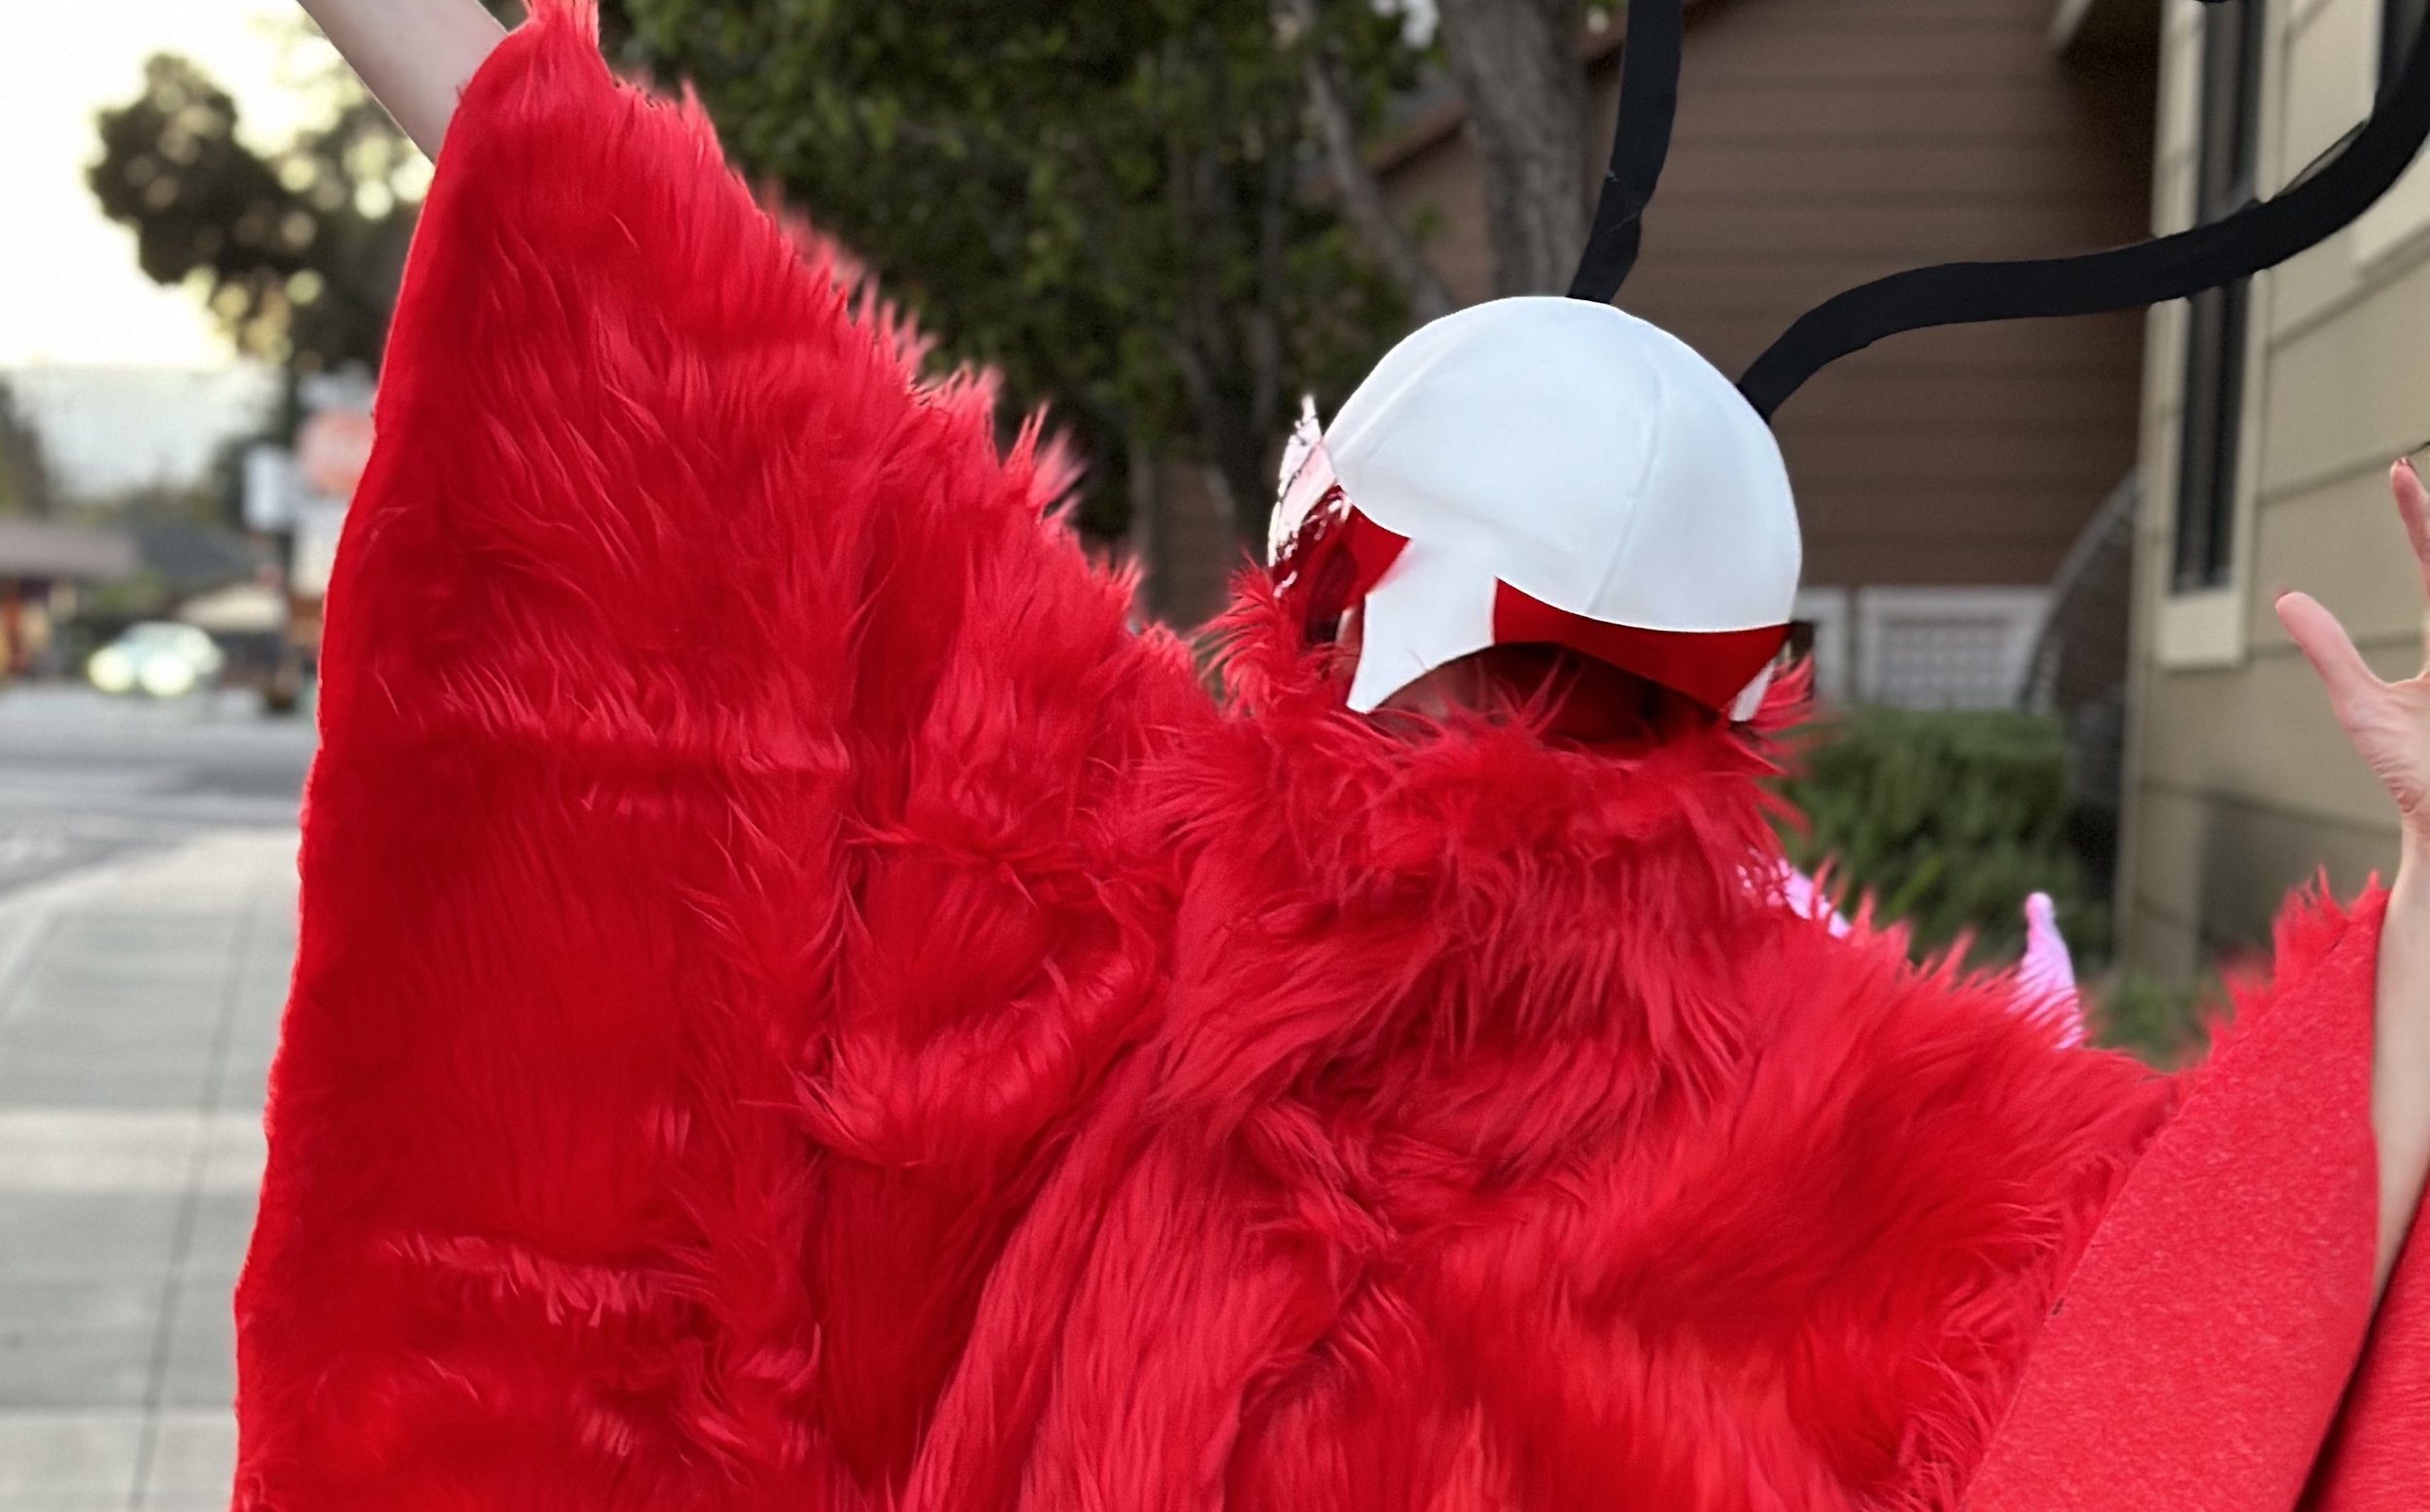
This is my nephew dressed as Trobbio from Hollow Knight: Silksong. Hollow Knight: Silksong is notably not yet released, so this is a character he knows about only from the trailers.
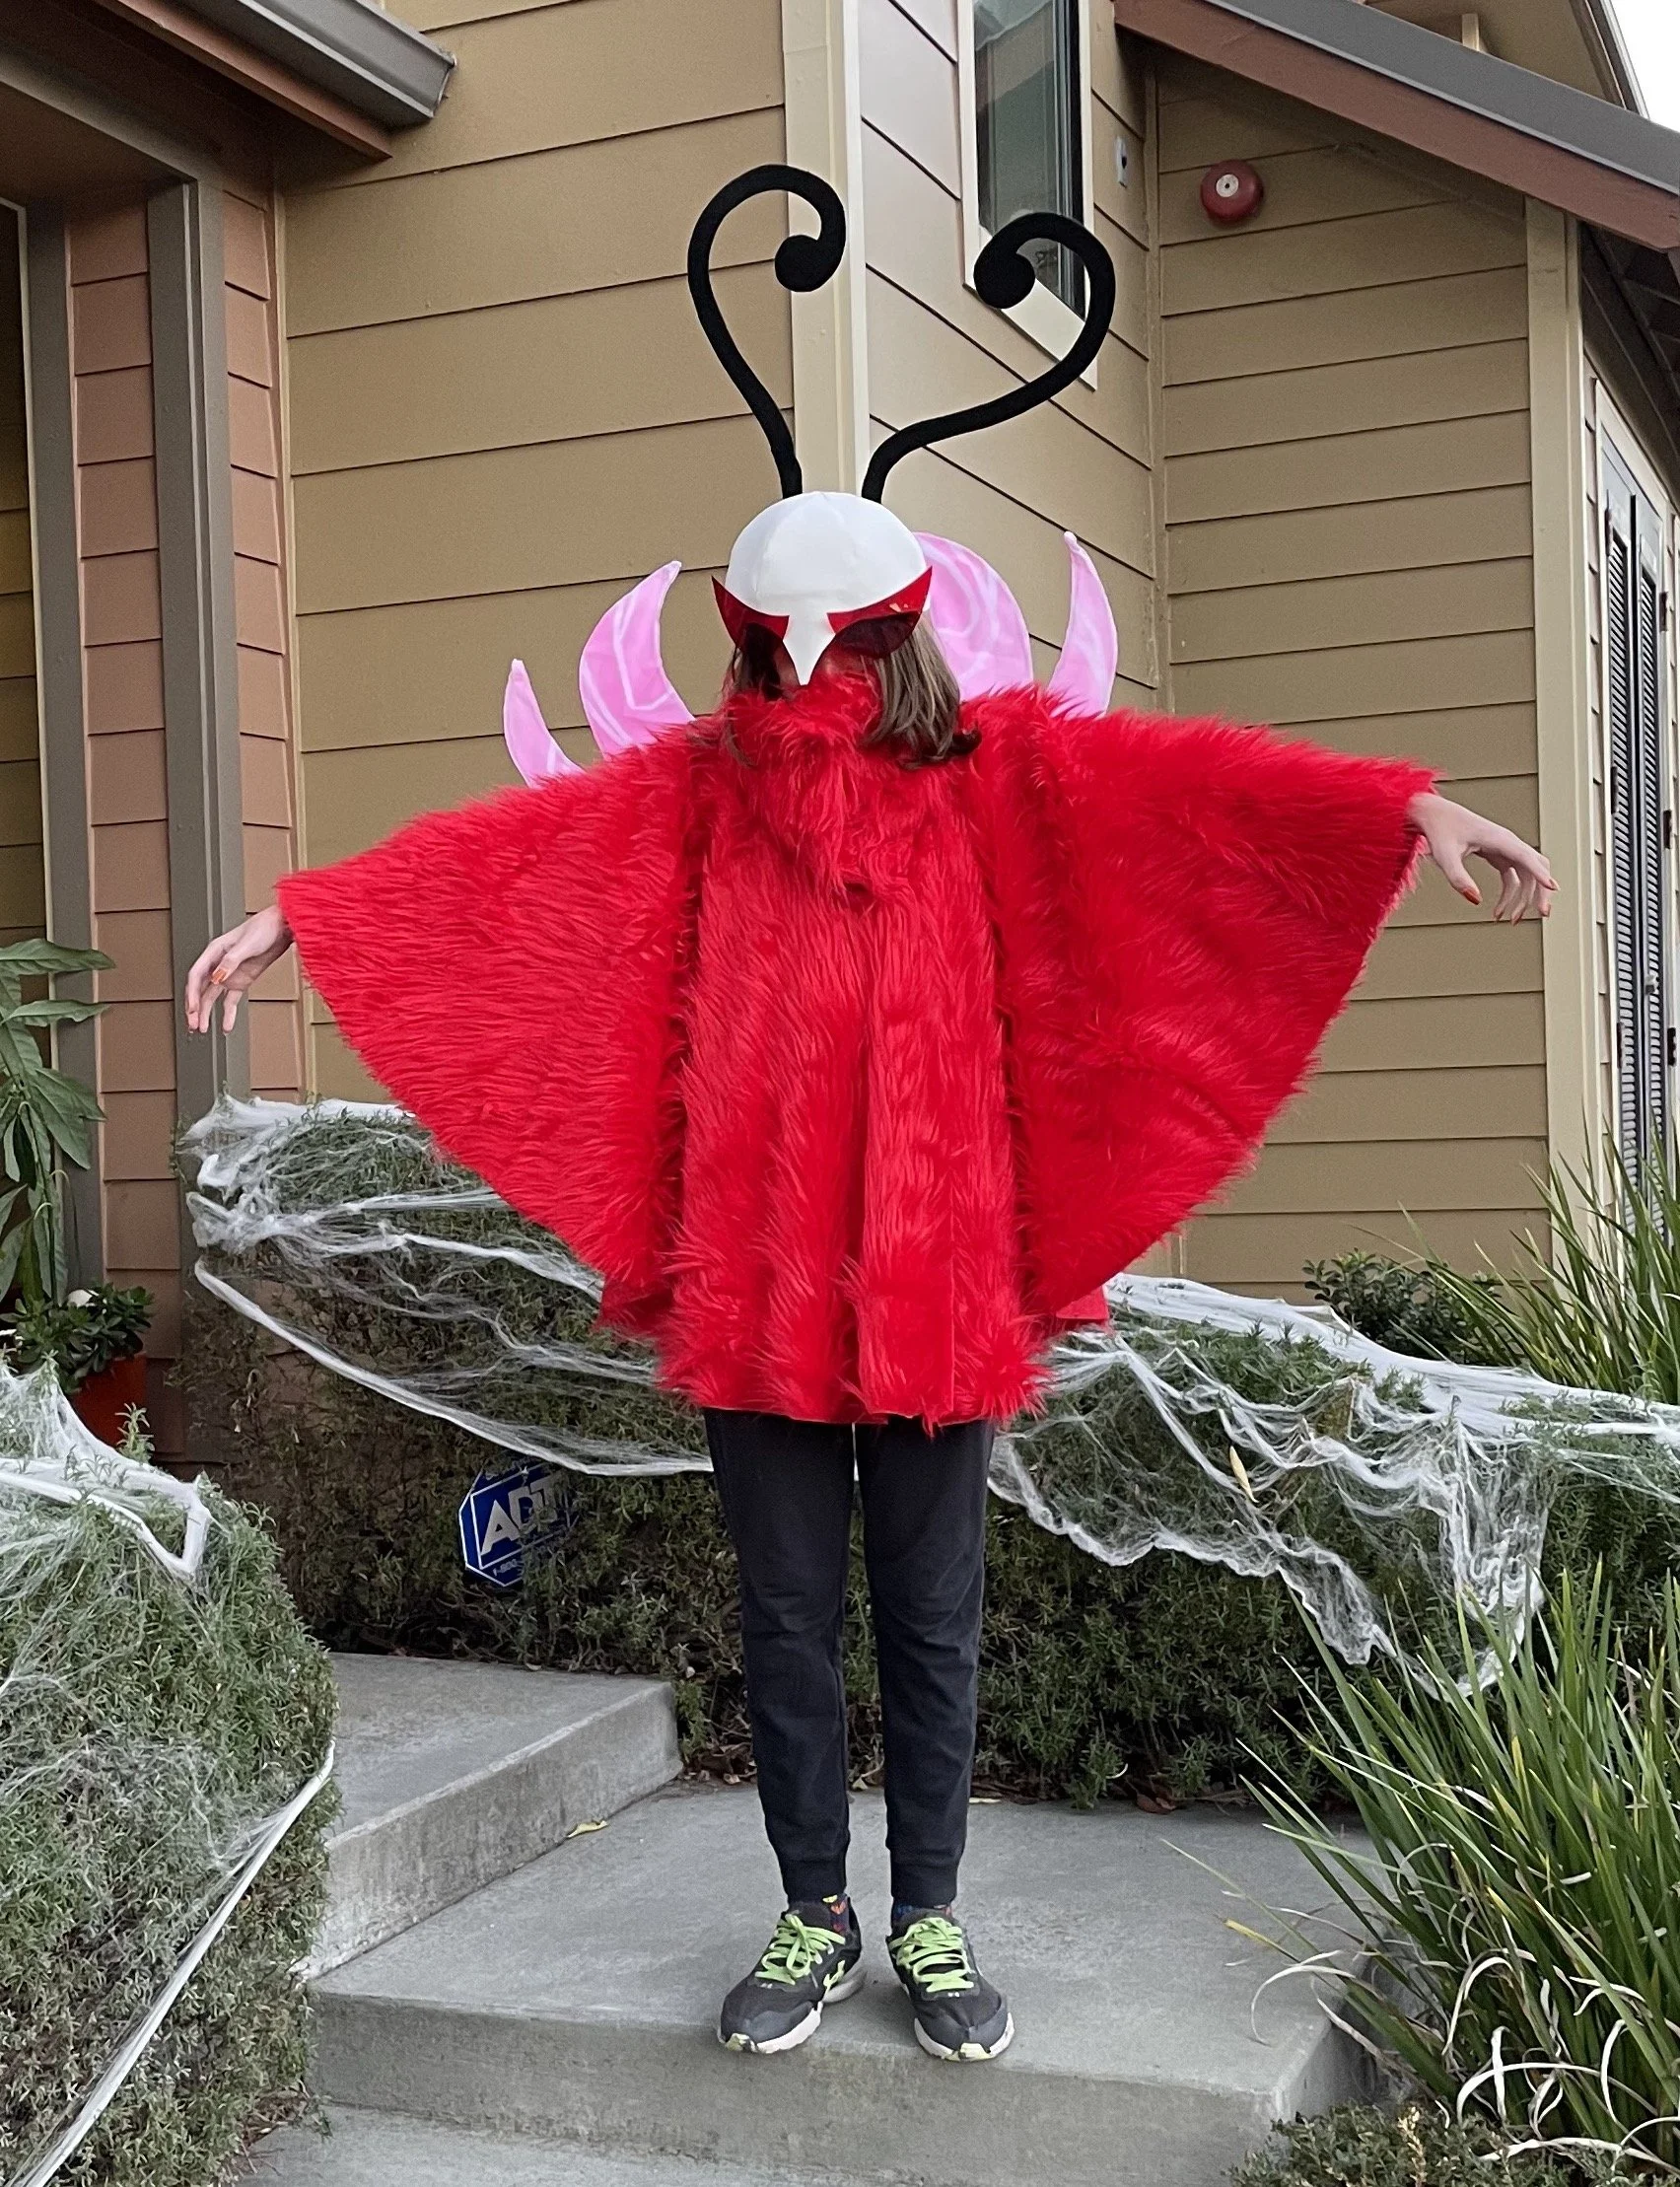
This is my nephew dressed as Trobbio from Hollow Knight: Silksong. Hollow Knight: Silksong is notably not yet released, so this is a character he knows about only from the trailers. He also dressed as a character from Hollow Knight: Silksong in 2021, so you can tell how long he has been anxiously awaiting the release of this game!
Fundraiser Candy
I’m on the Board of Director of a fantastic little theater company called Teatro Visión. For our annual fundraiser this year, I made candies as a thank you to our donors.

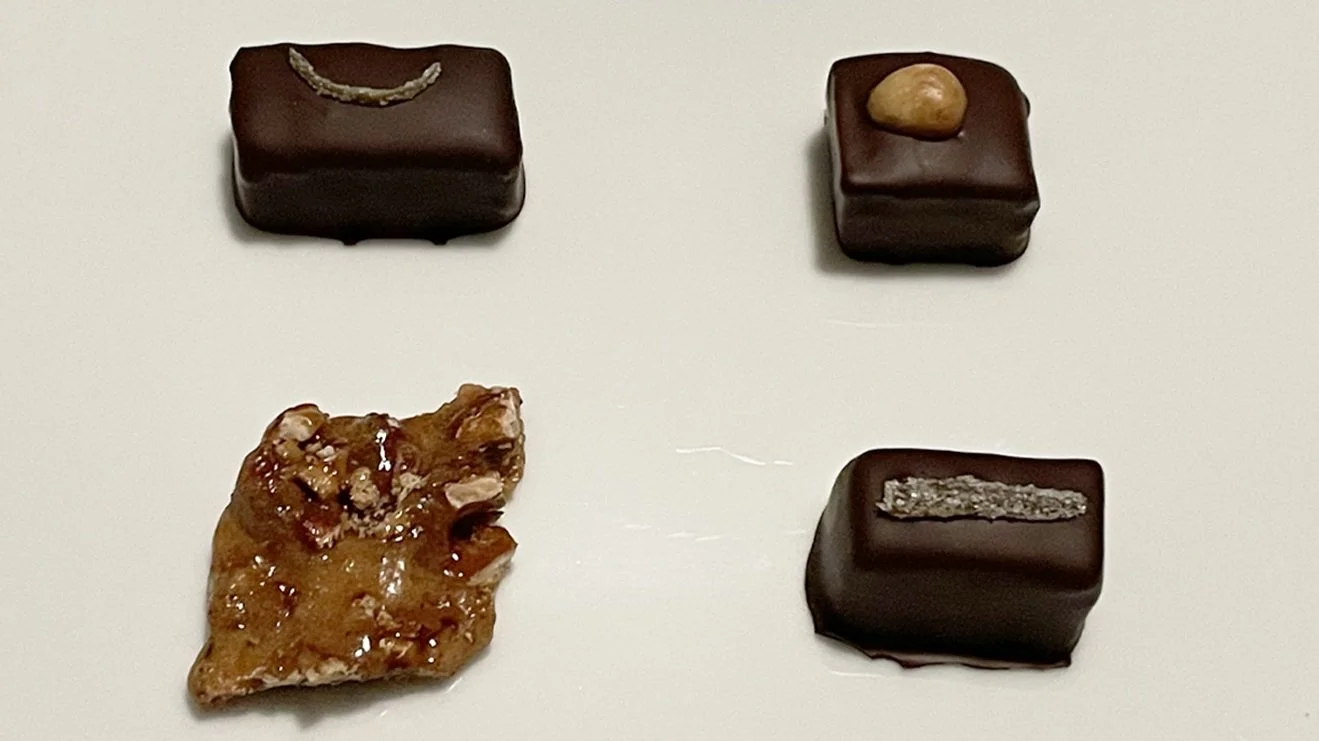
I’m on the Board of Director of a fantastic little theater company called Teatro Visión. For our annual fundraiser this year, I made candies as a thank you to our donors. Flavors were habañero lime white chocolate ganache, coffee dark chocolate & hazelnut milk chocolate ganache, chipotle pecan brittle, and ube marshmallow with candied ginger on top.

The Phantom Planet cross stitch
This is a quote from The Phantom Planet, a delightful episode of Mystery Science Theater 3000, which I made for my friend.

This is a quote from The Phantom Planet, a delightful episode of Mystery Science Theater 3000, which I made for my friend. The design is based on the poster from the movie. The best part is that I initially stitched it as “attentioin” and had to pick it out so I could spell “attention” correctly.
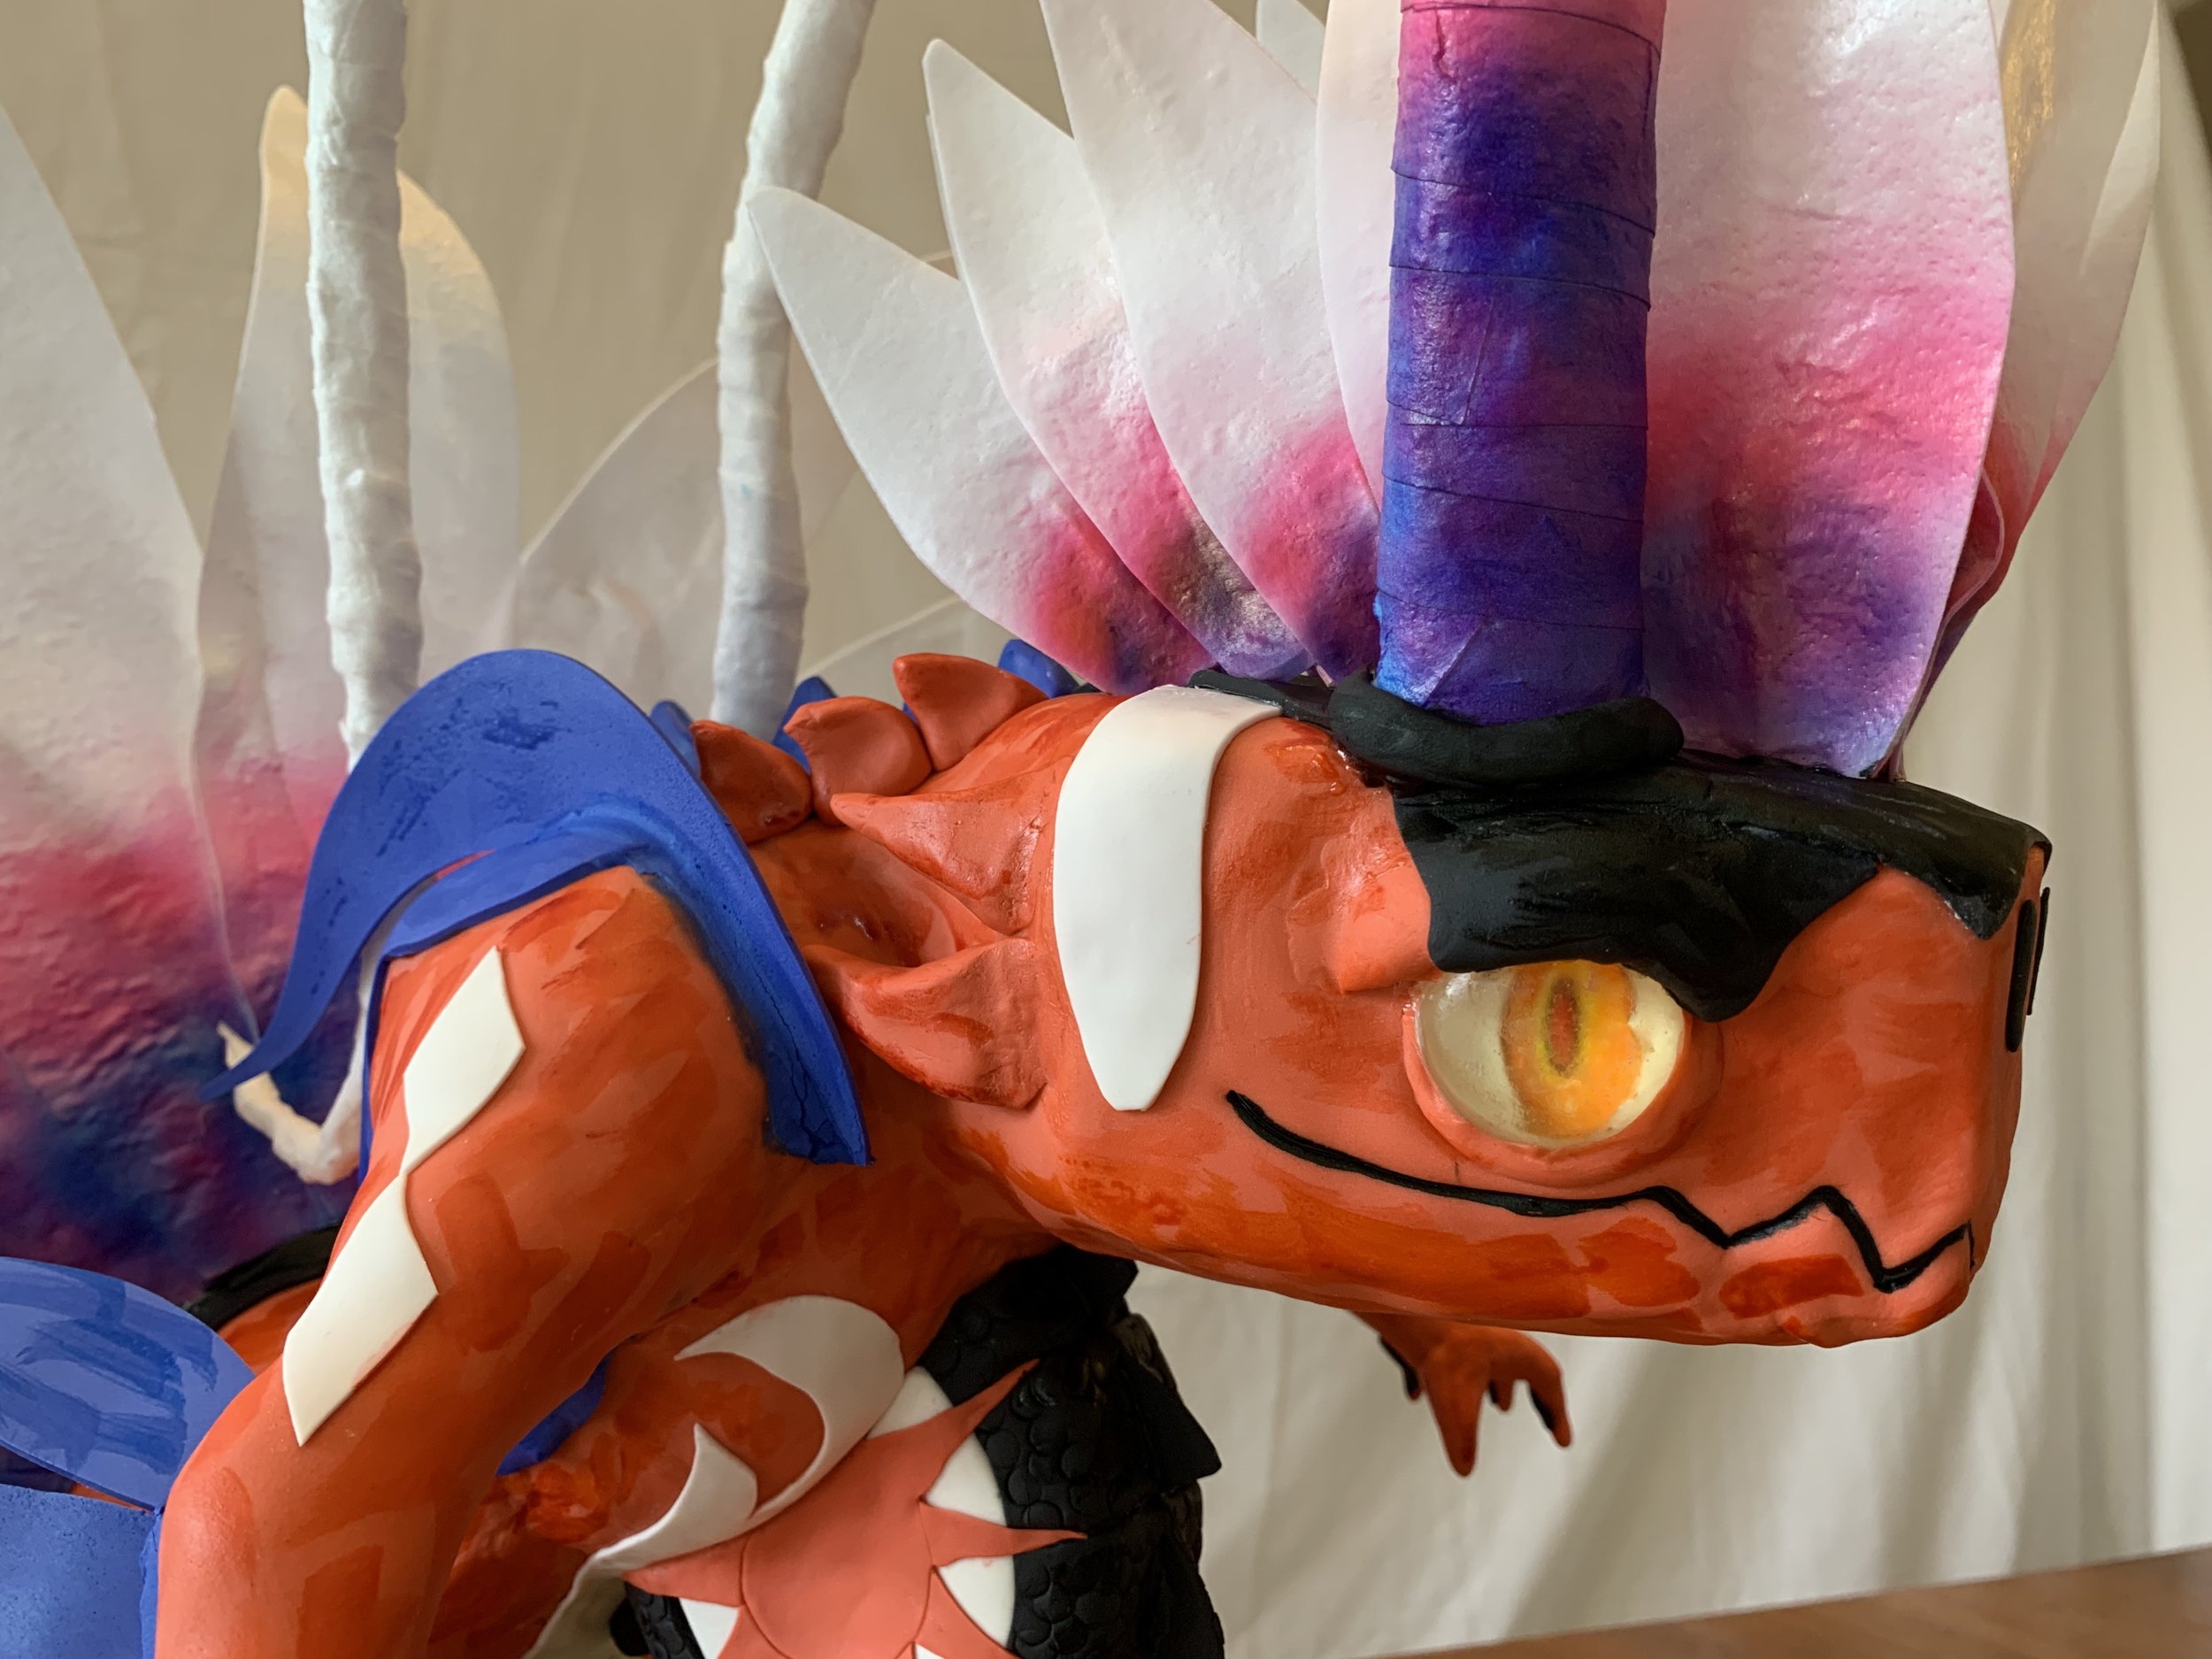
Koraidon Cake
Koraidon is a Pokémon from the new Pokémon Scarlet game. My nephew wanted him in his battle form for his birthday cake.
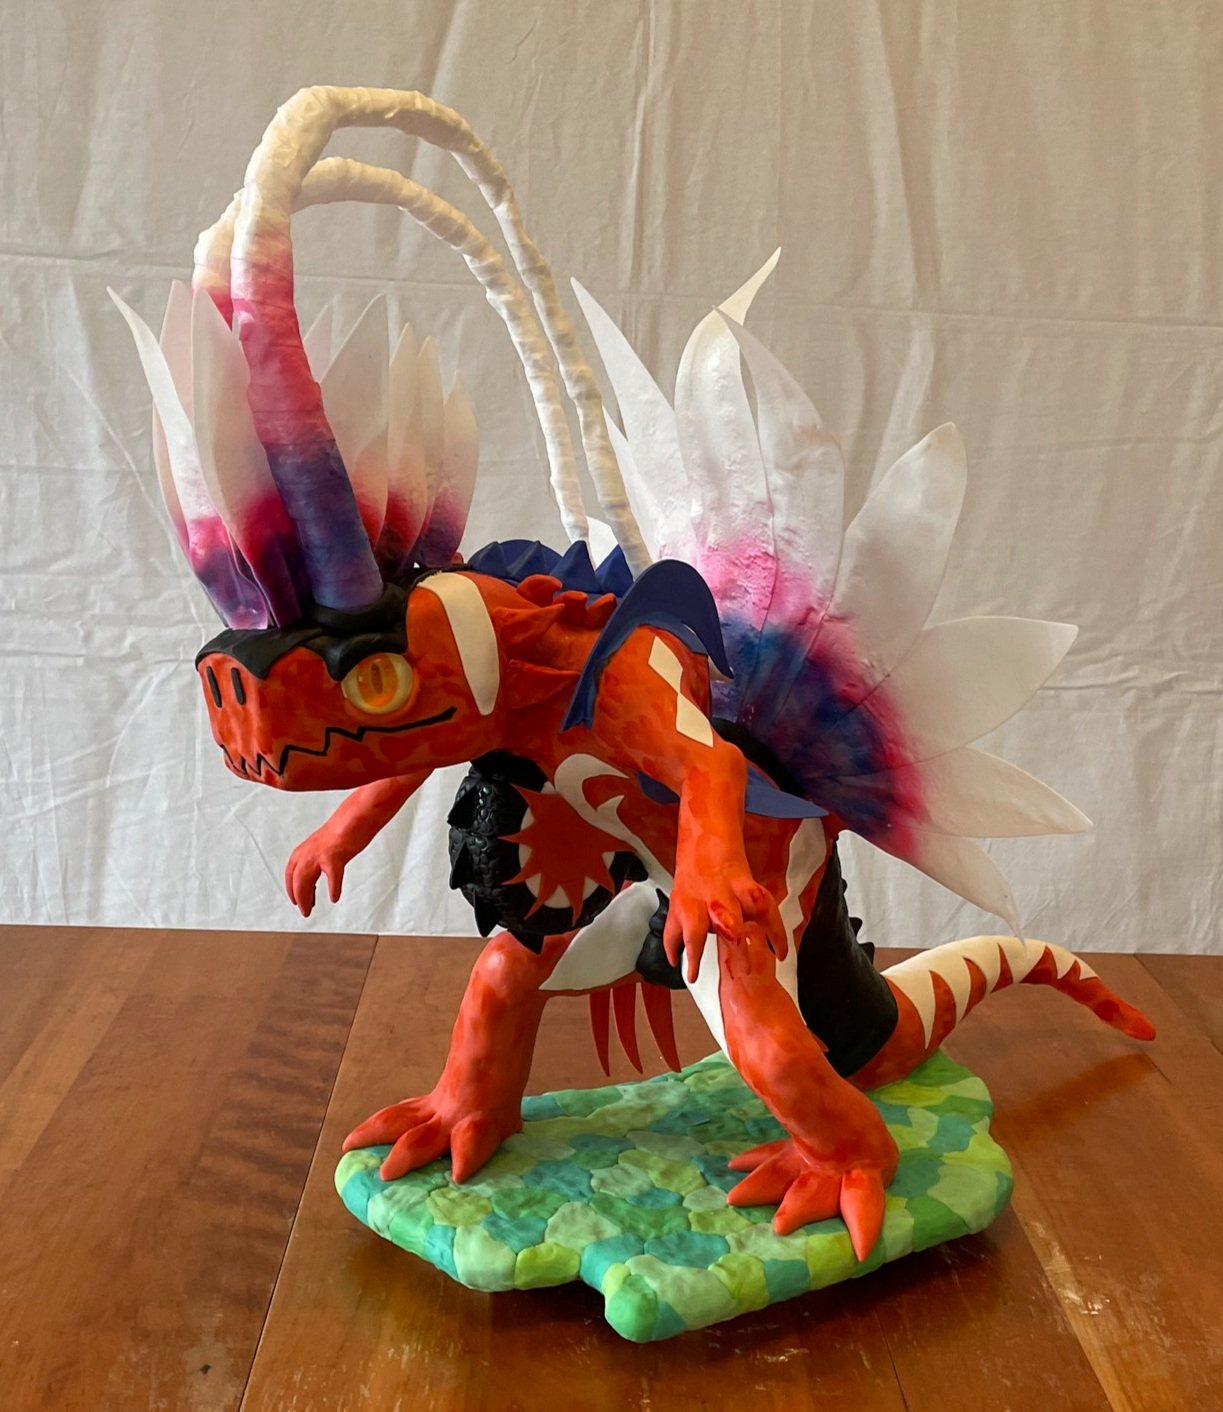
Koraidon is a Pokémon from the new Pokémon Scarlet game. My nephew wanted him in his battle form for his birthday cake.
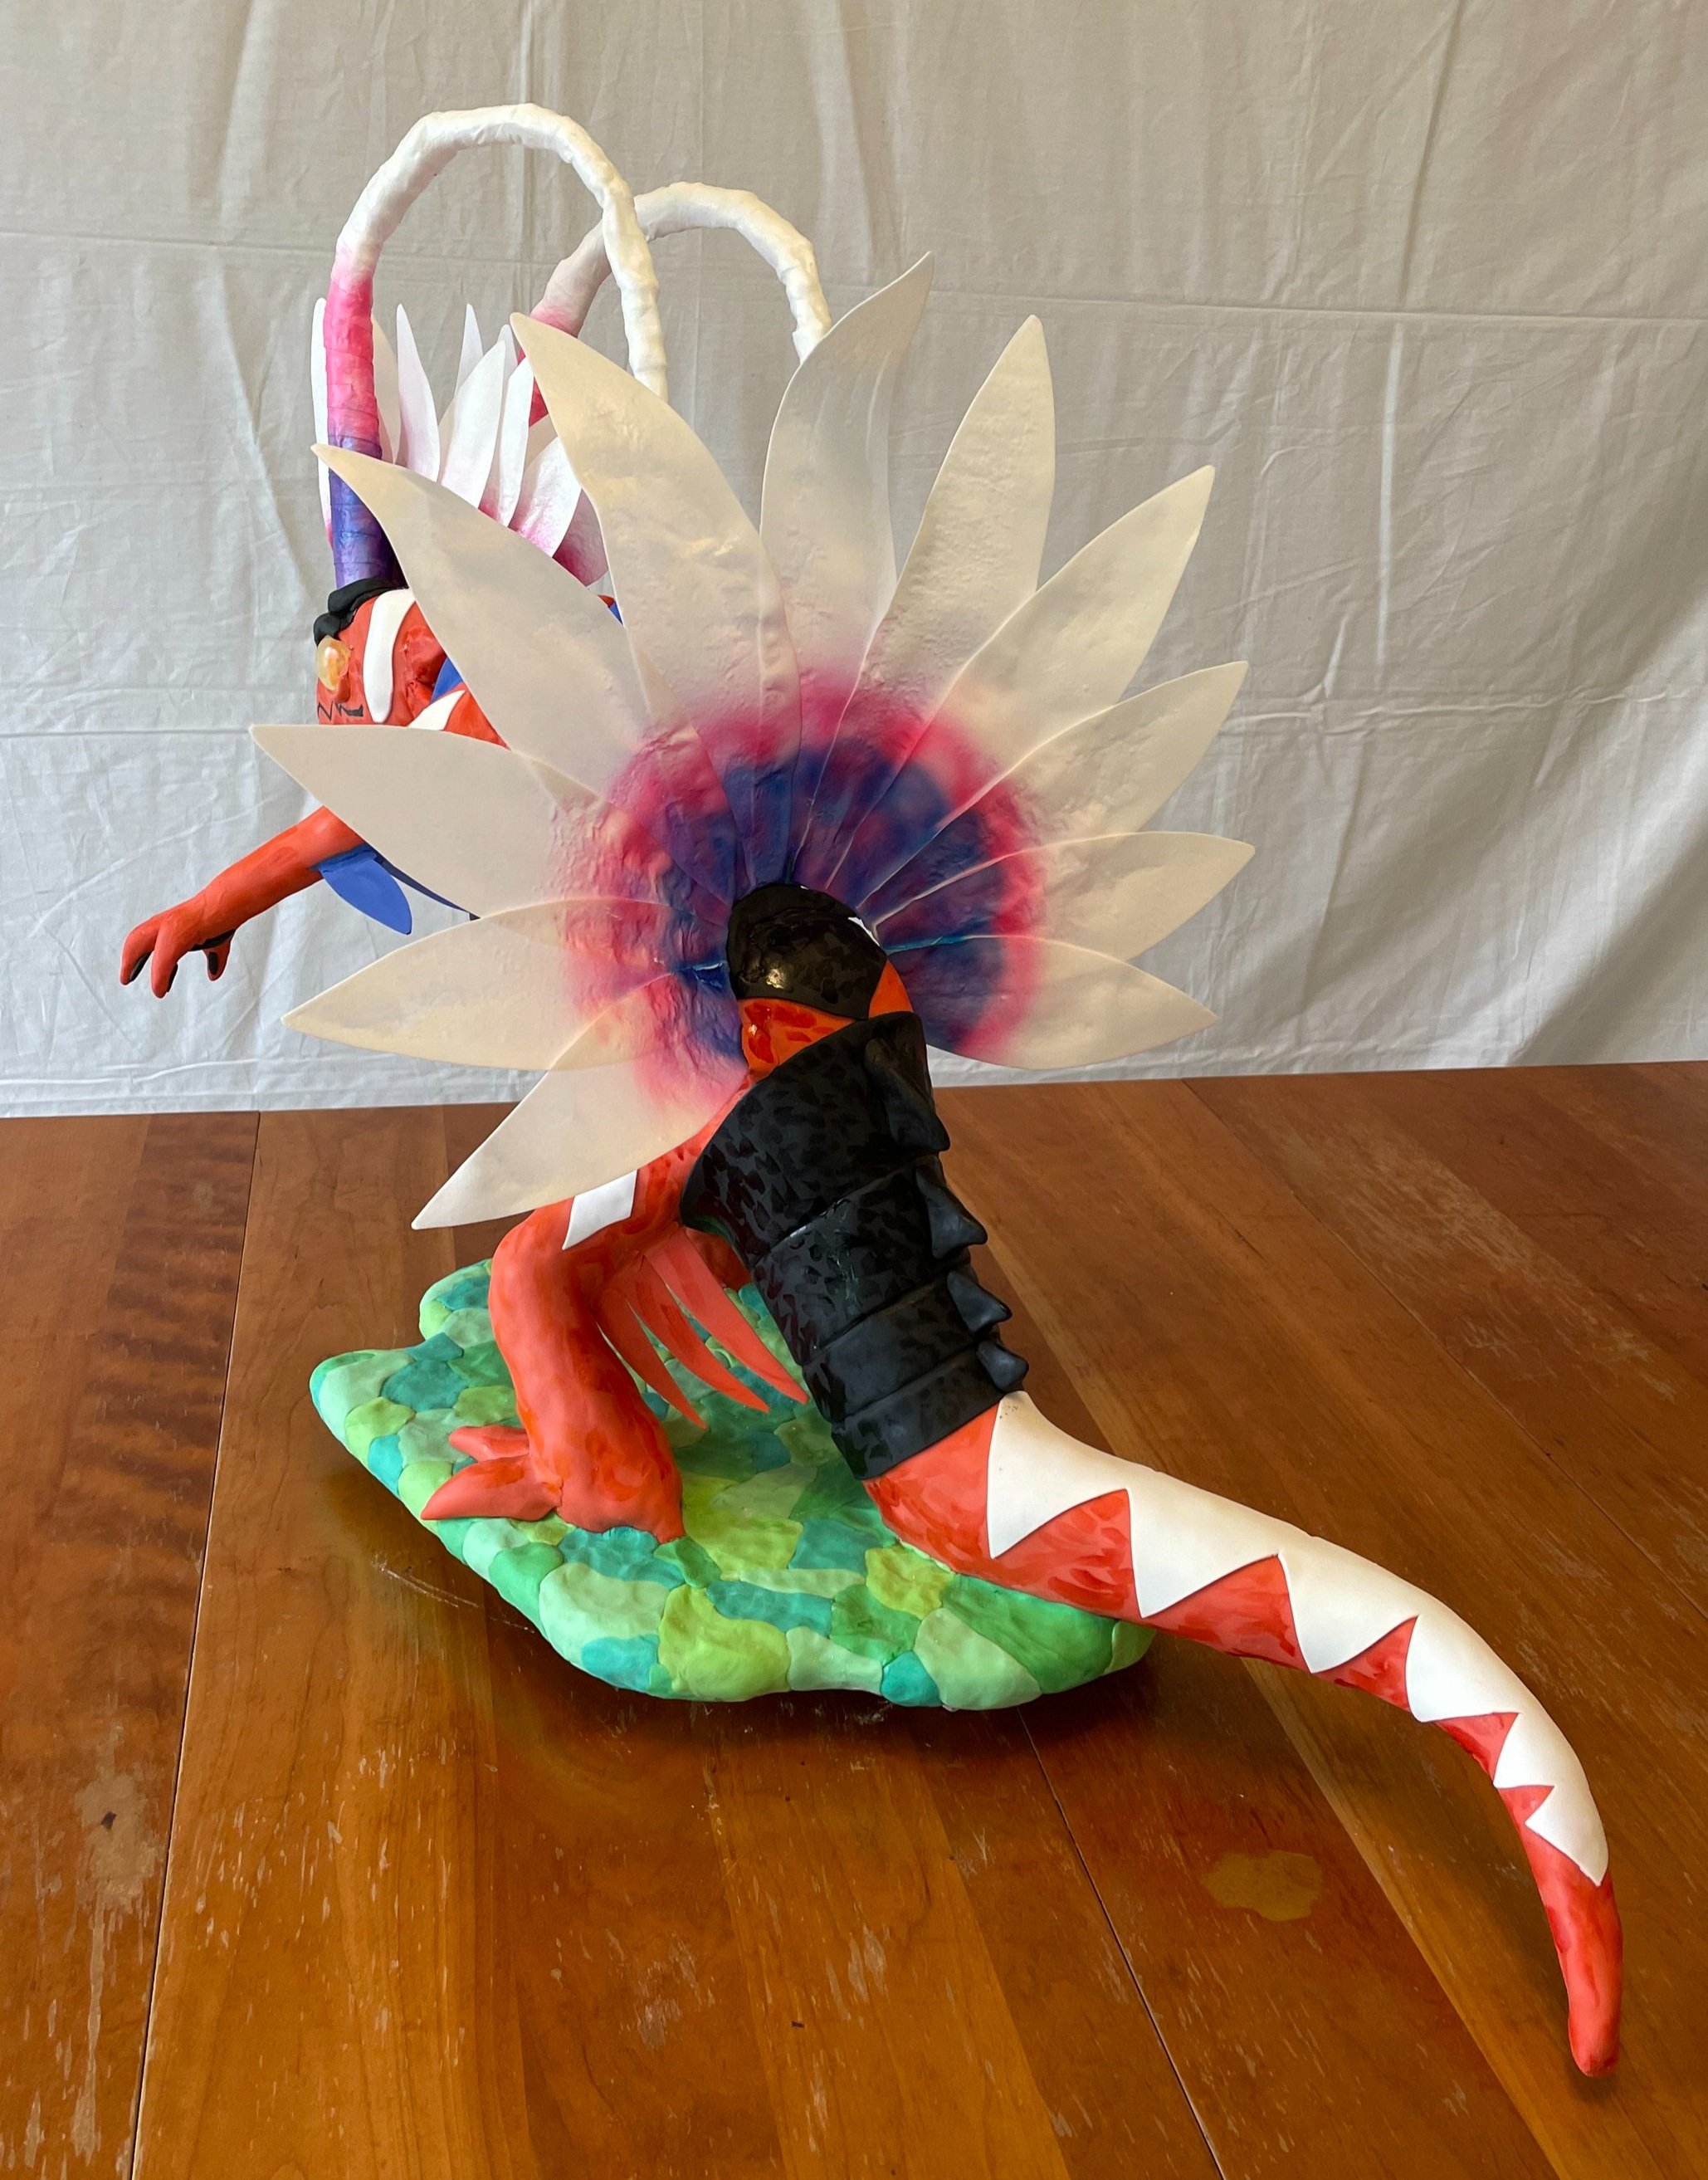
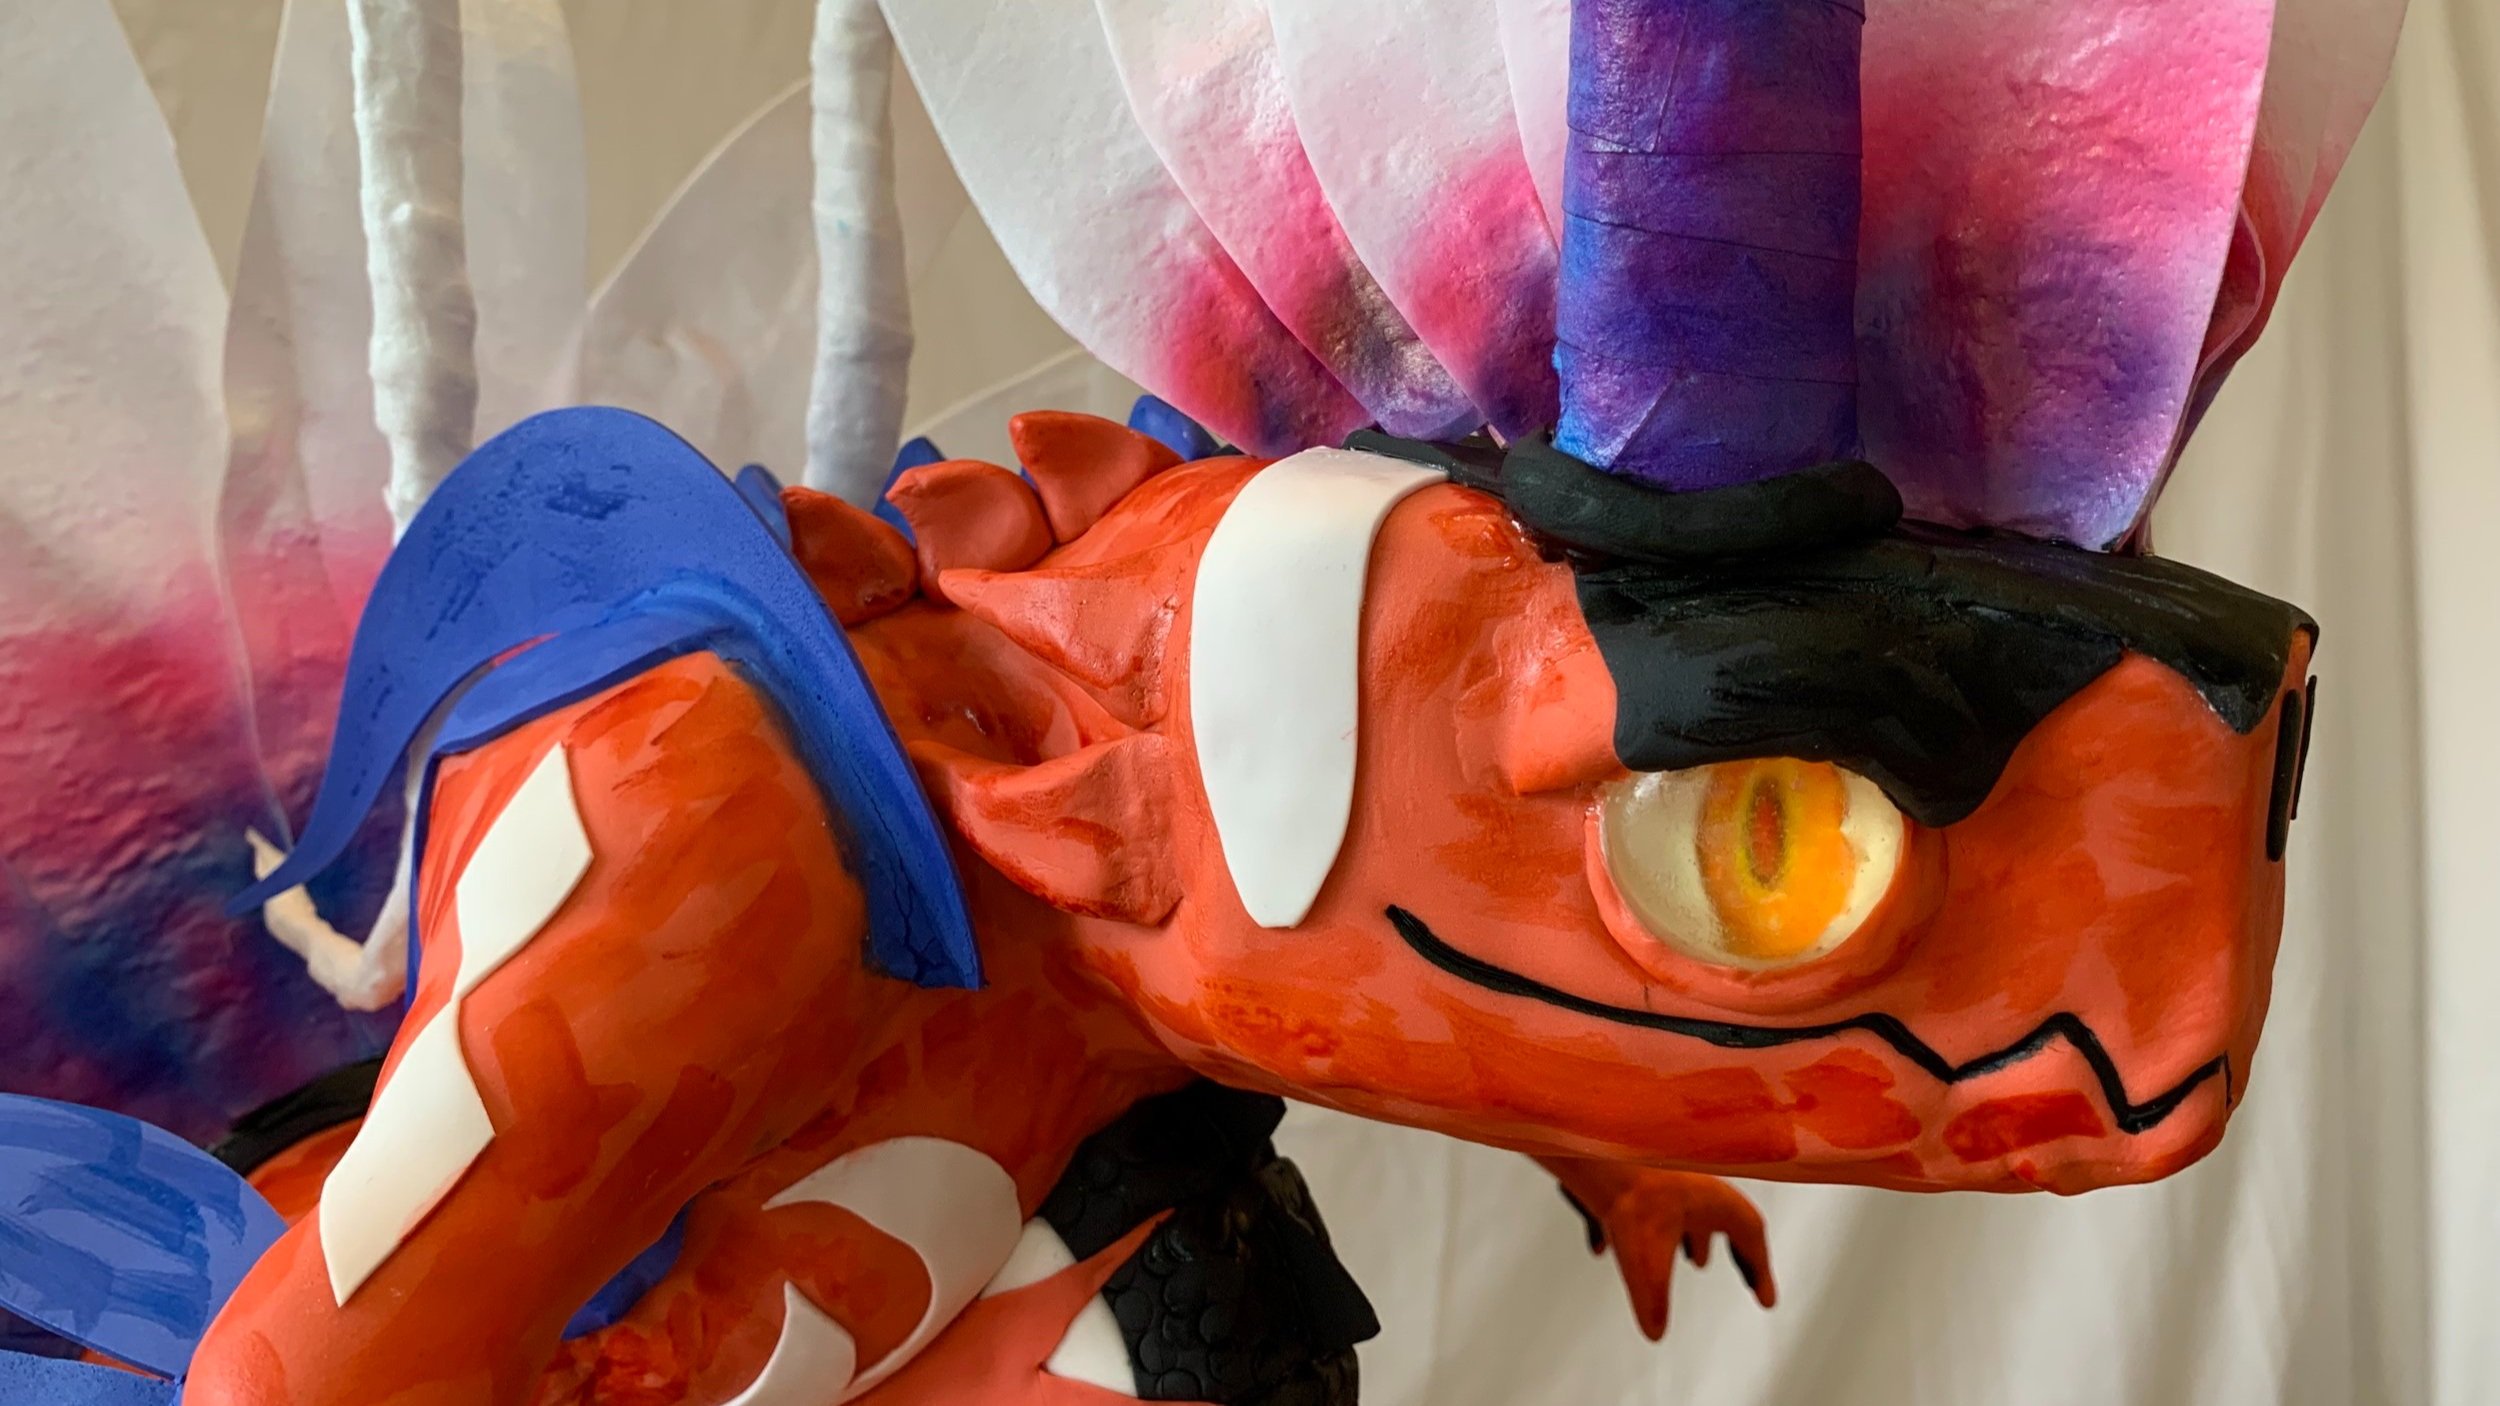
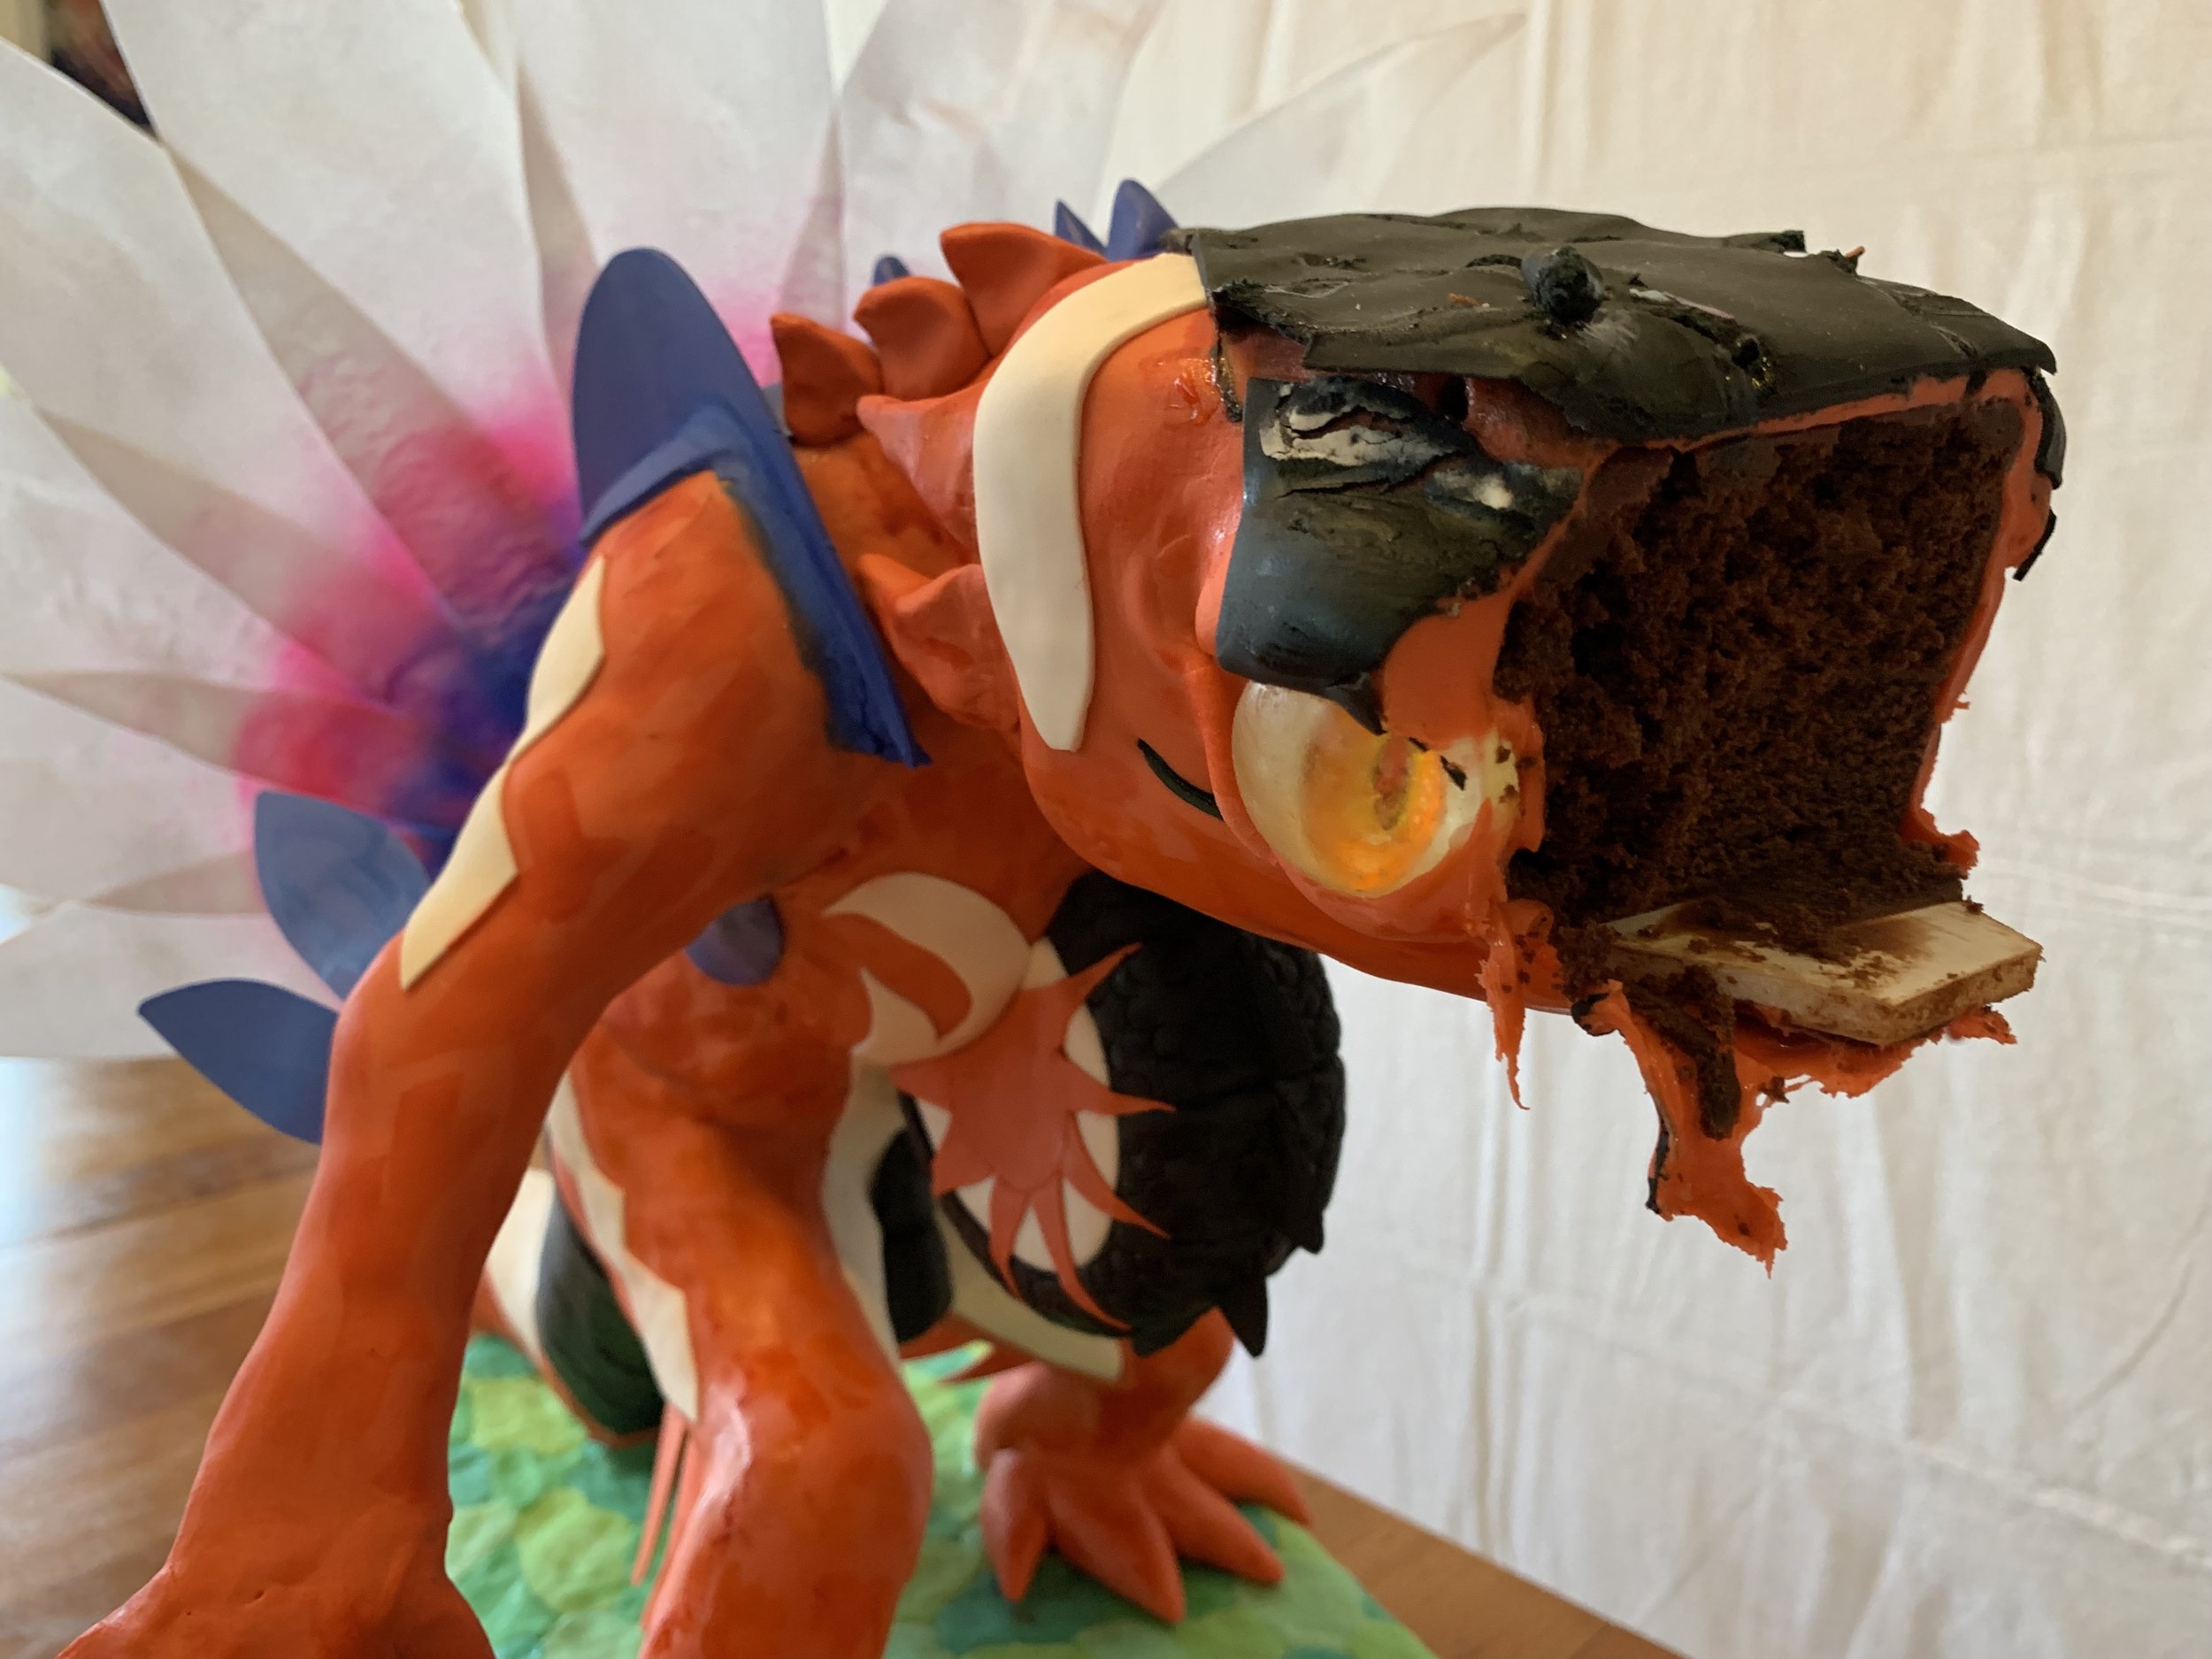
The cake is chocolate with chocolate ganache. The tire in his chest is chocolate cast in a donut mold, covered with gum paste. The feathers and horns are wafer paper. The eyes are isomalt with wafer paper pupils.
As usual, I made about four times as much cake as the occasion required, so we only got through the head at the party.

Sword of Khaine
For Christmas this year, my niece requested the Sword of Khaine from Total Warhammer.
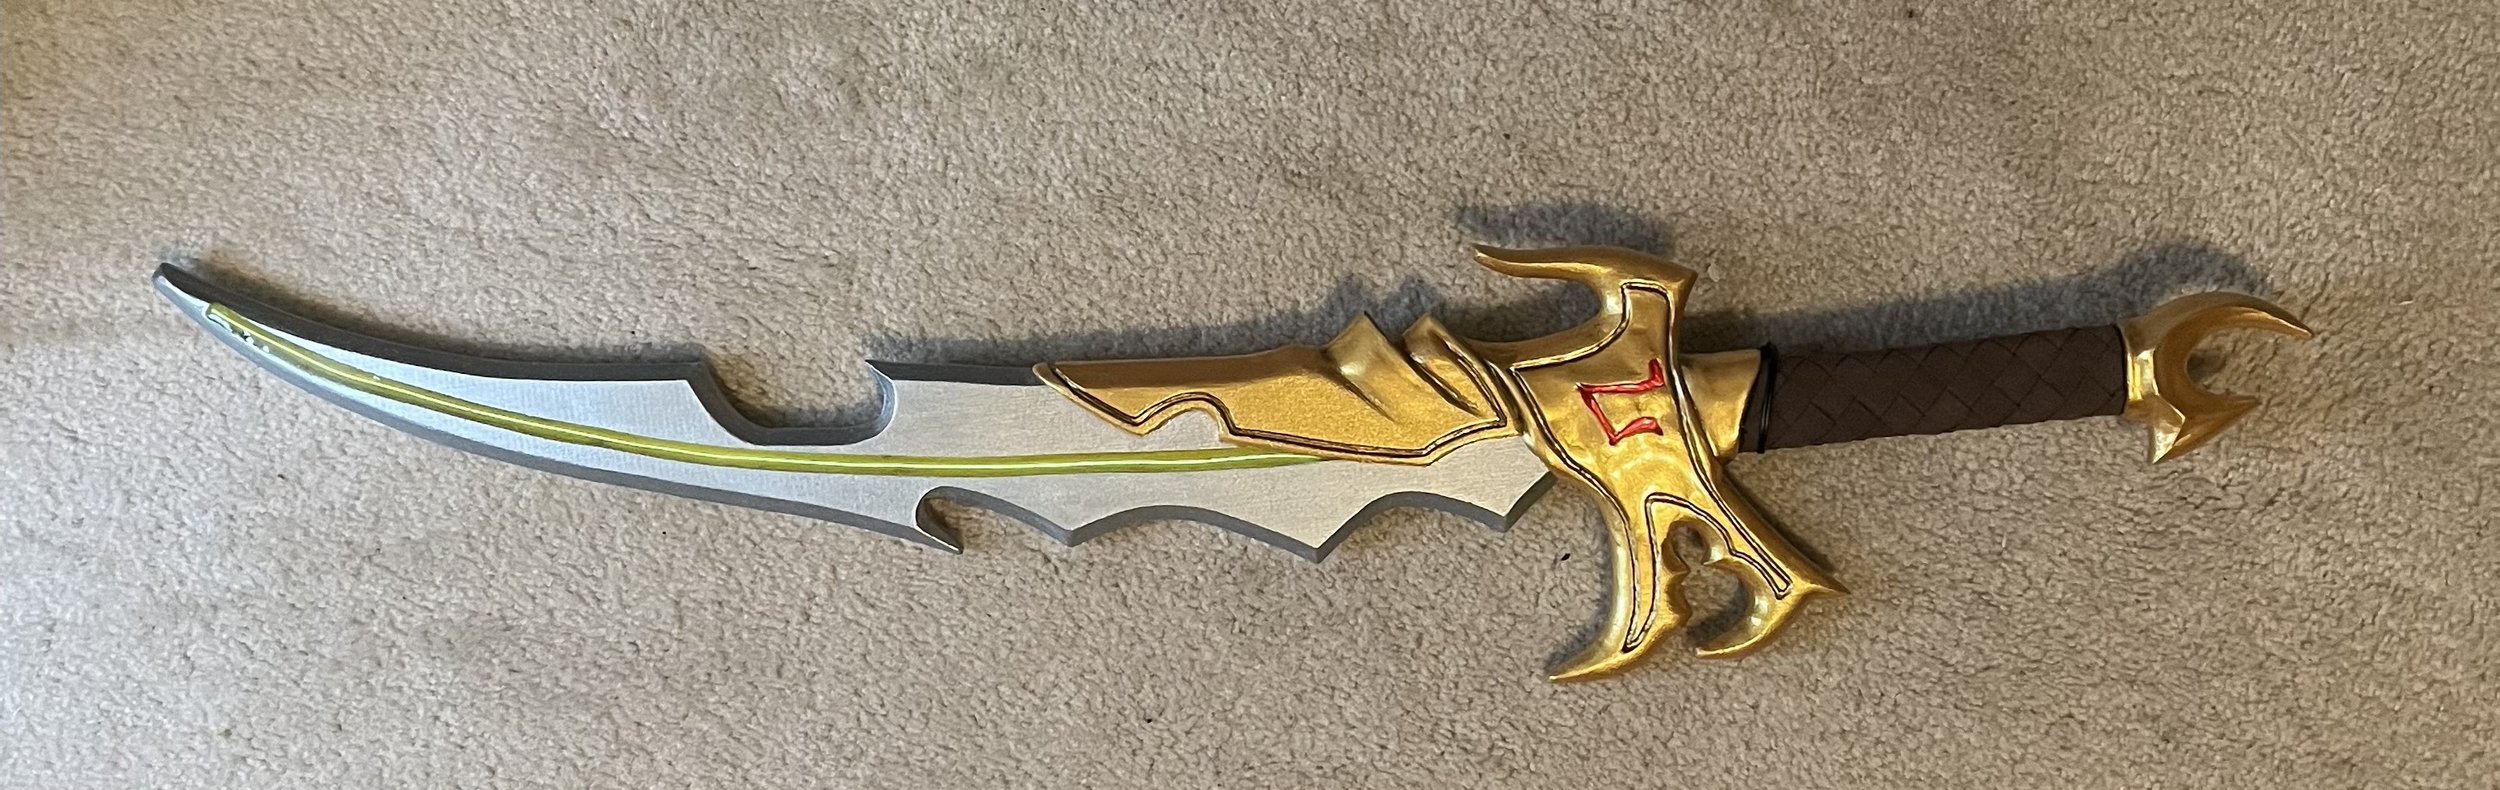
For Christmas this year, my niece requested the Sword of Khaine from Total Warhammer. It’s made of poplar with Apoxy Sculpt details and EL wire embedded in resin.

Fidough
Fidough is a new Pokémon in Pokémon Scarlett and Violet. My nephew asked for a stuffie Fidough for Christmas.
Fidough is a new Pokémon in Pokémon Scarlett and Violet. My nephew asked for a stuffie Fidough for Christmas.

It’s a pretty complicated shape. I think it turned out pretty well, but its head is so much bigger than the body that it keels over forward whenever you put it down.
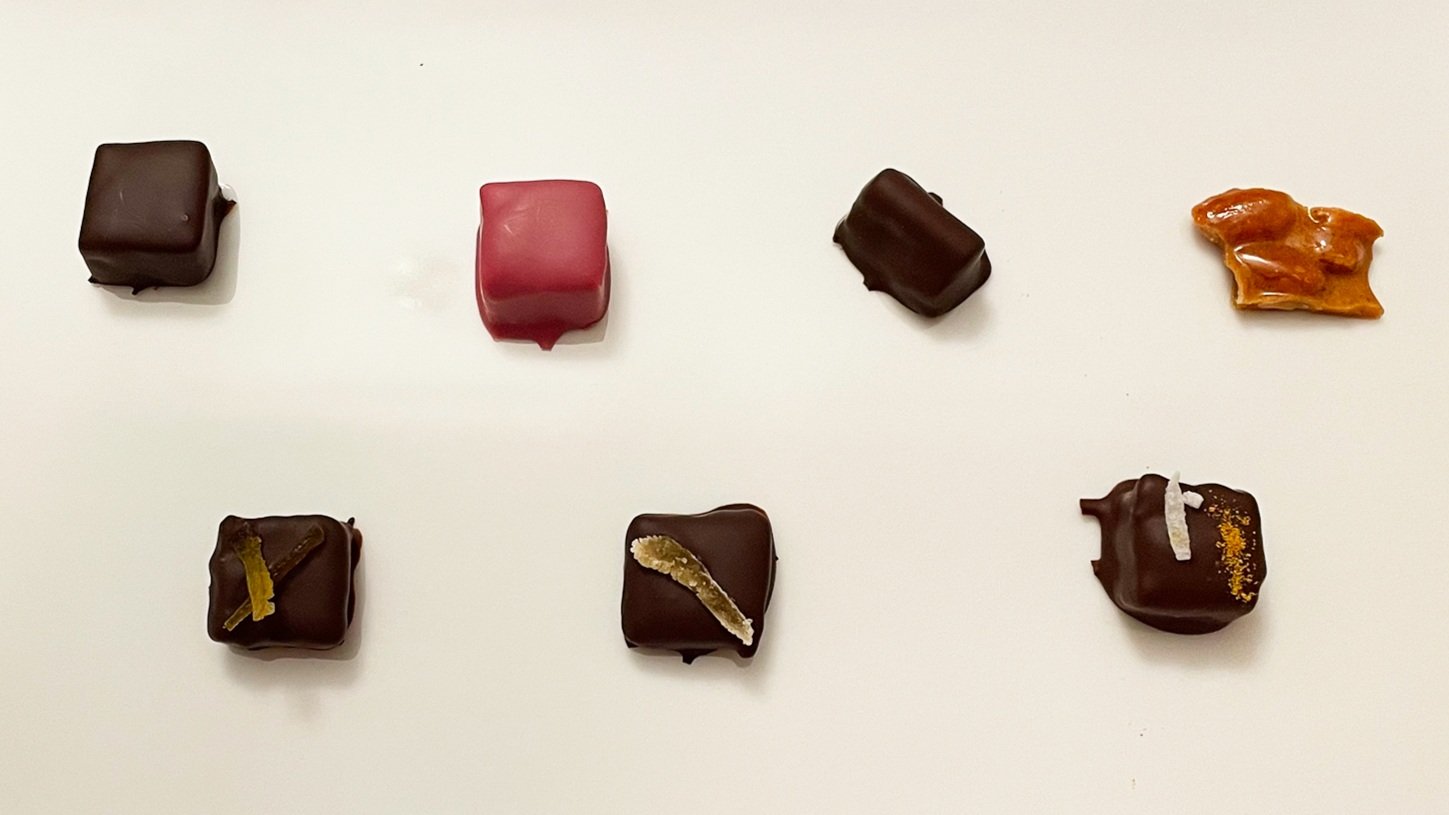
Holiday Candy 2022
This year’s candy included anise black pepper marshmallows, coffee nutmeg marshmallows, spiced cinnamon ganache, paprika cinnamon toasted almond brittle, tarragon ganache with candied grapefruit peel, ginger caramel ganache, and coconut curry black sesame ganache.
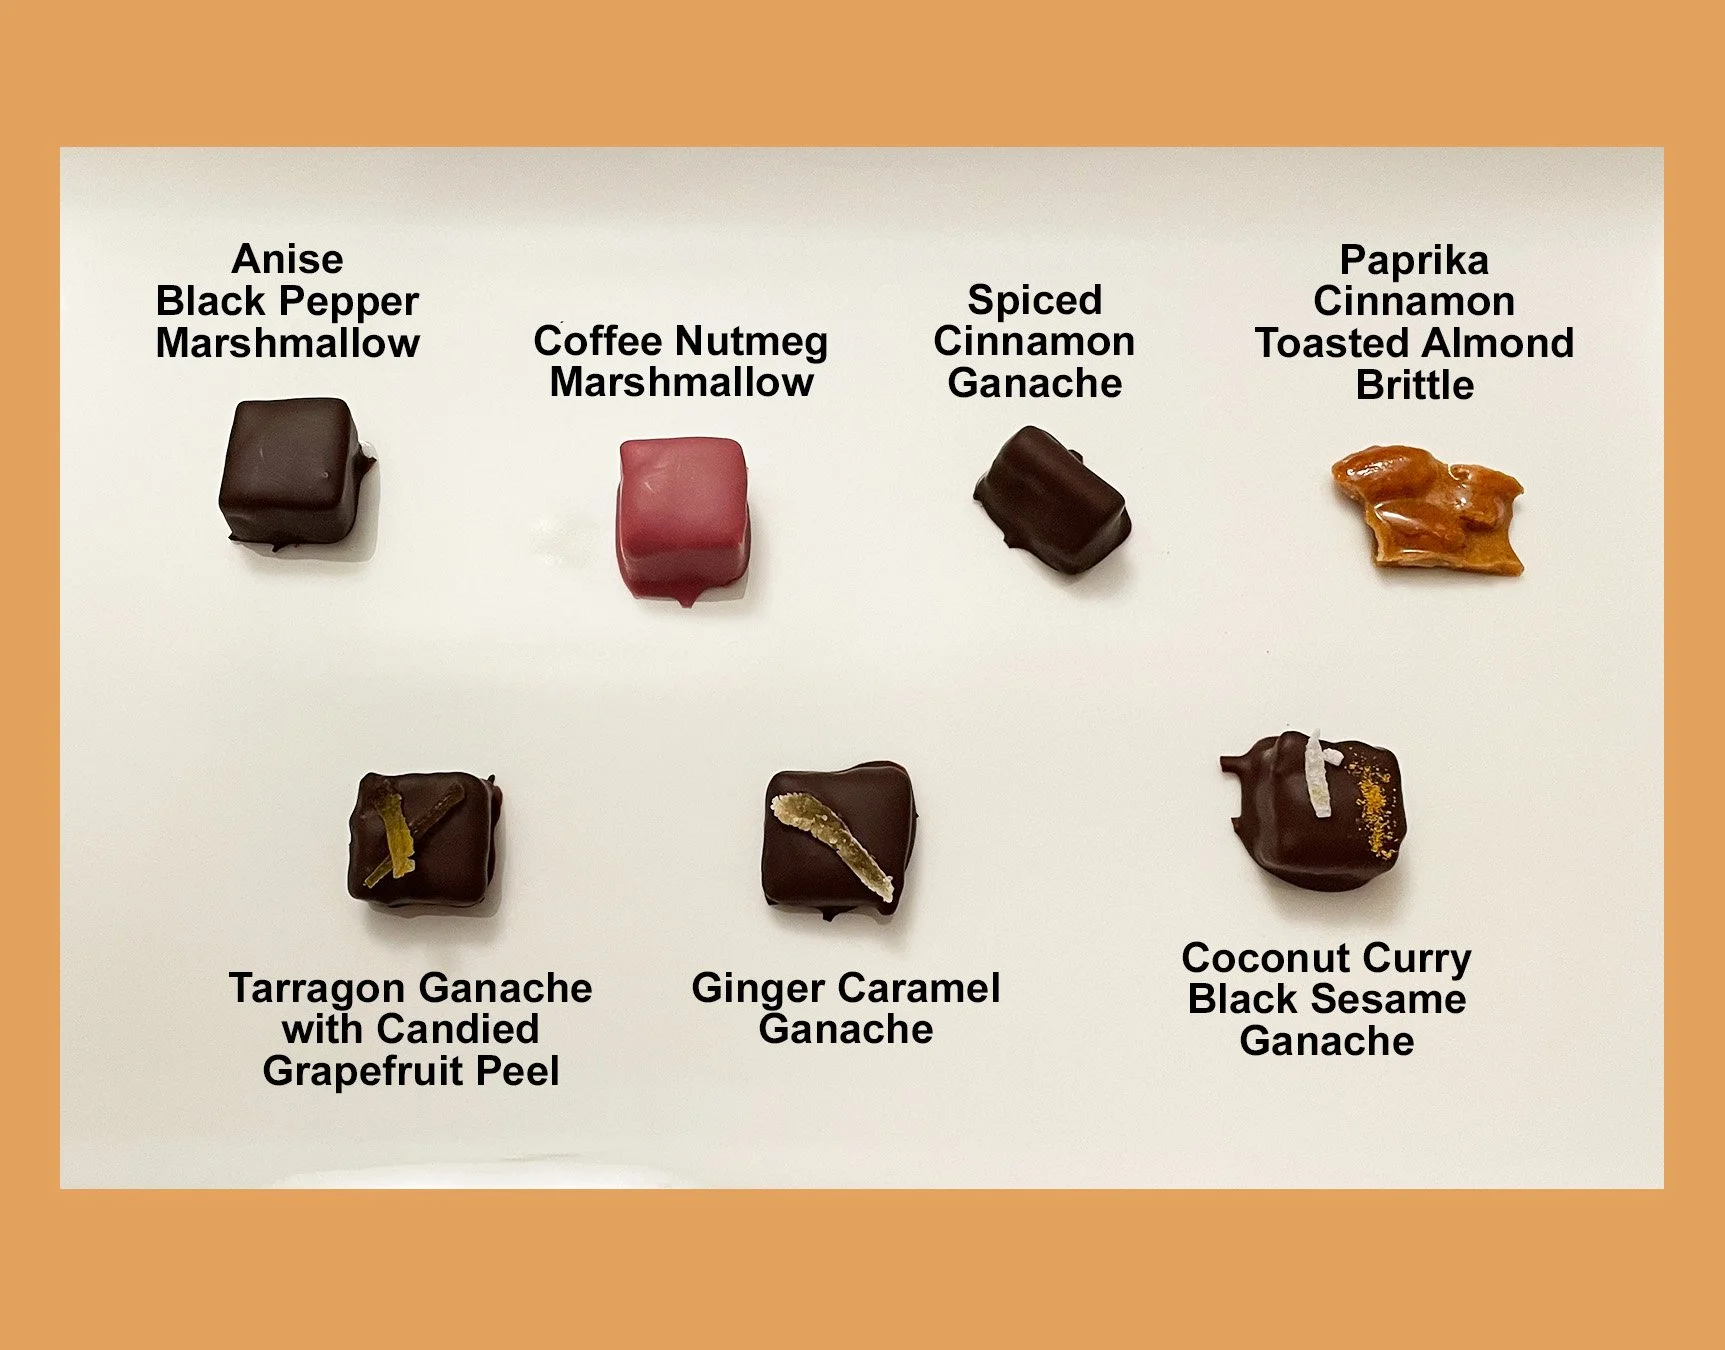
This year’s candy included anise black pepper marshmallows, coffee nutmeg marshmallows, spiced cinnamon ganache, paprika cinnamon toasted almond brittle, tarragon ganache with candied grapefruit peel, ginger caramel ganache, and coconut curry black sesame ganache.
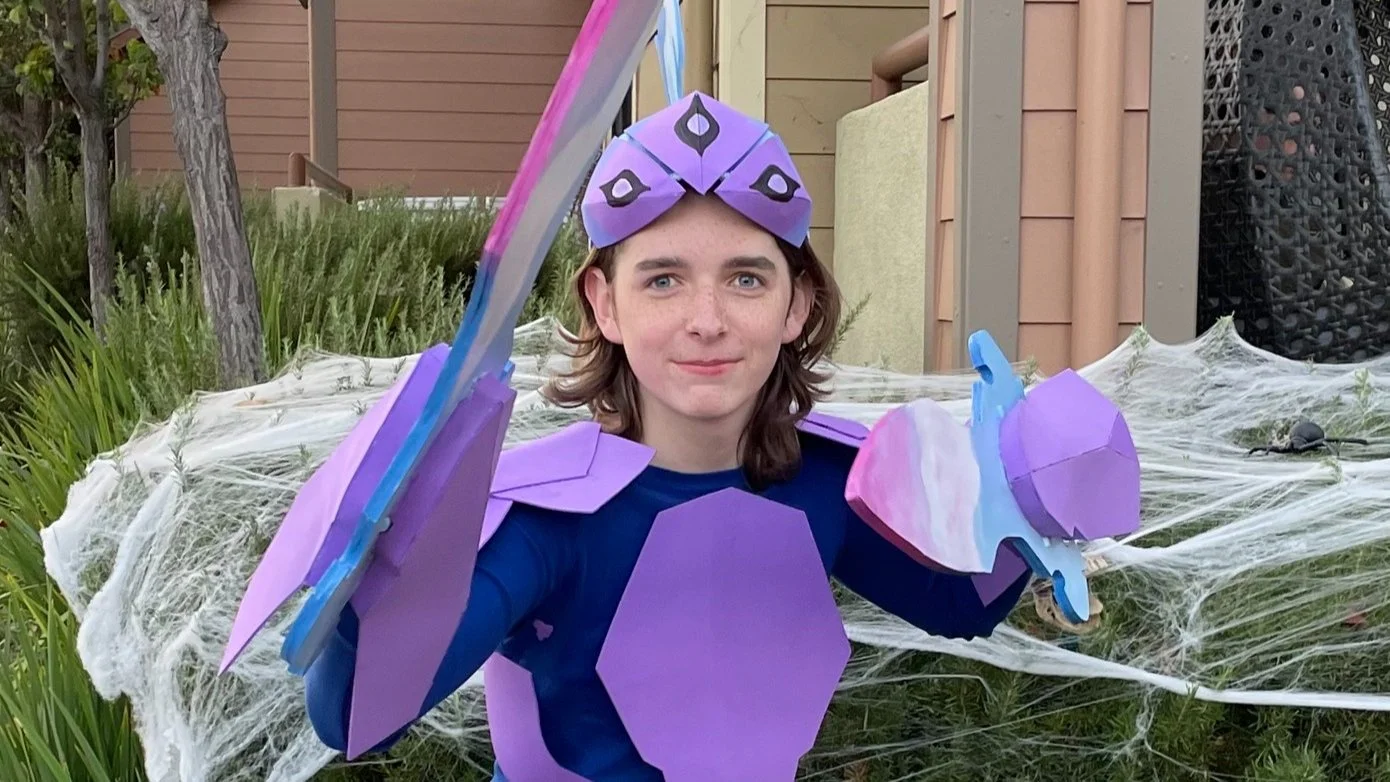
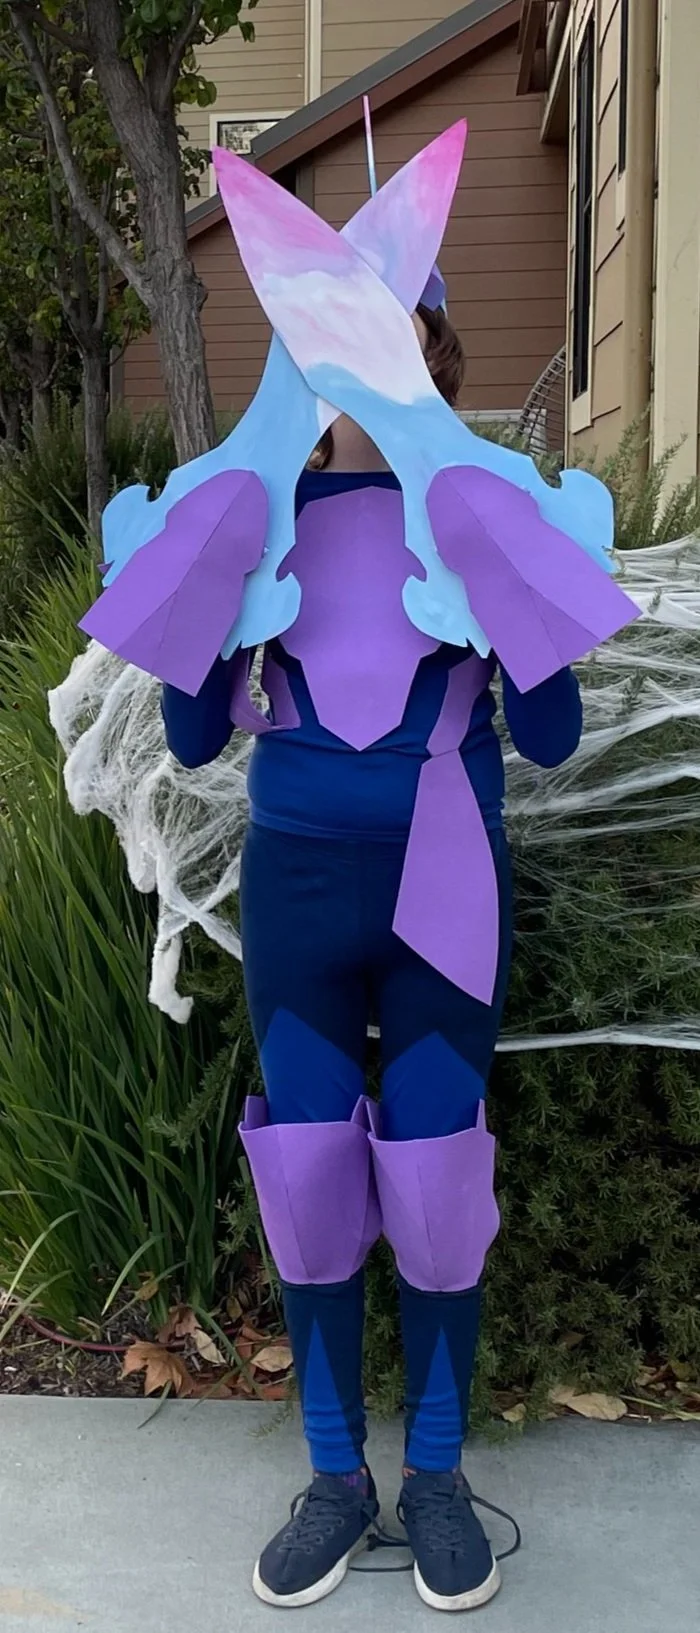
Ceruledge
Ceruledge is a new Pokémon in Pokémon Violet. Since Violet didn’t release until November, this marks the second Halloween in a row for which my nephew has dressed as a character from an as-yet unreleased video game.
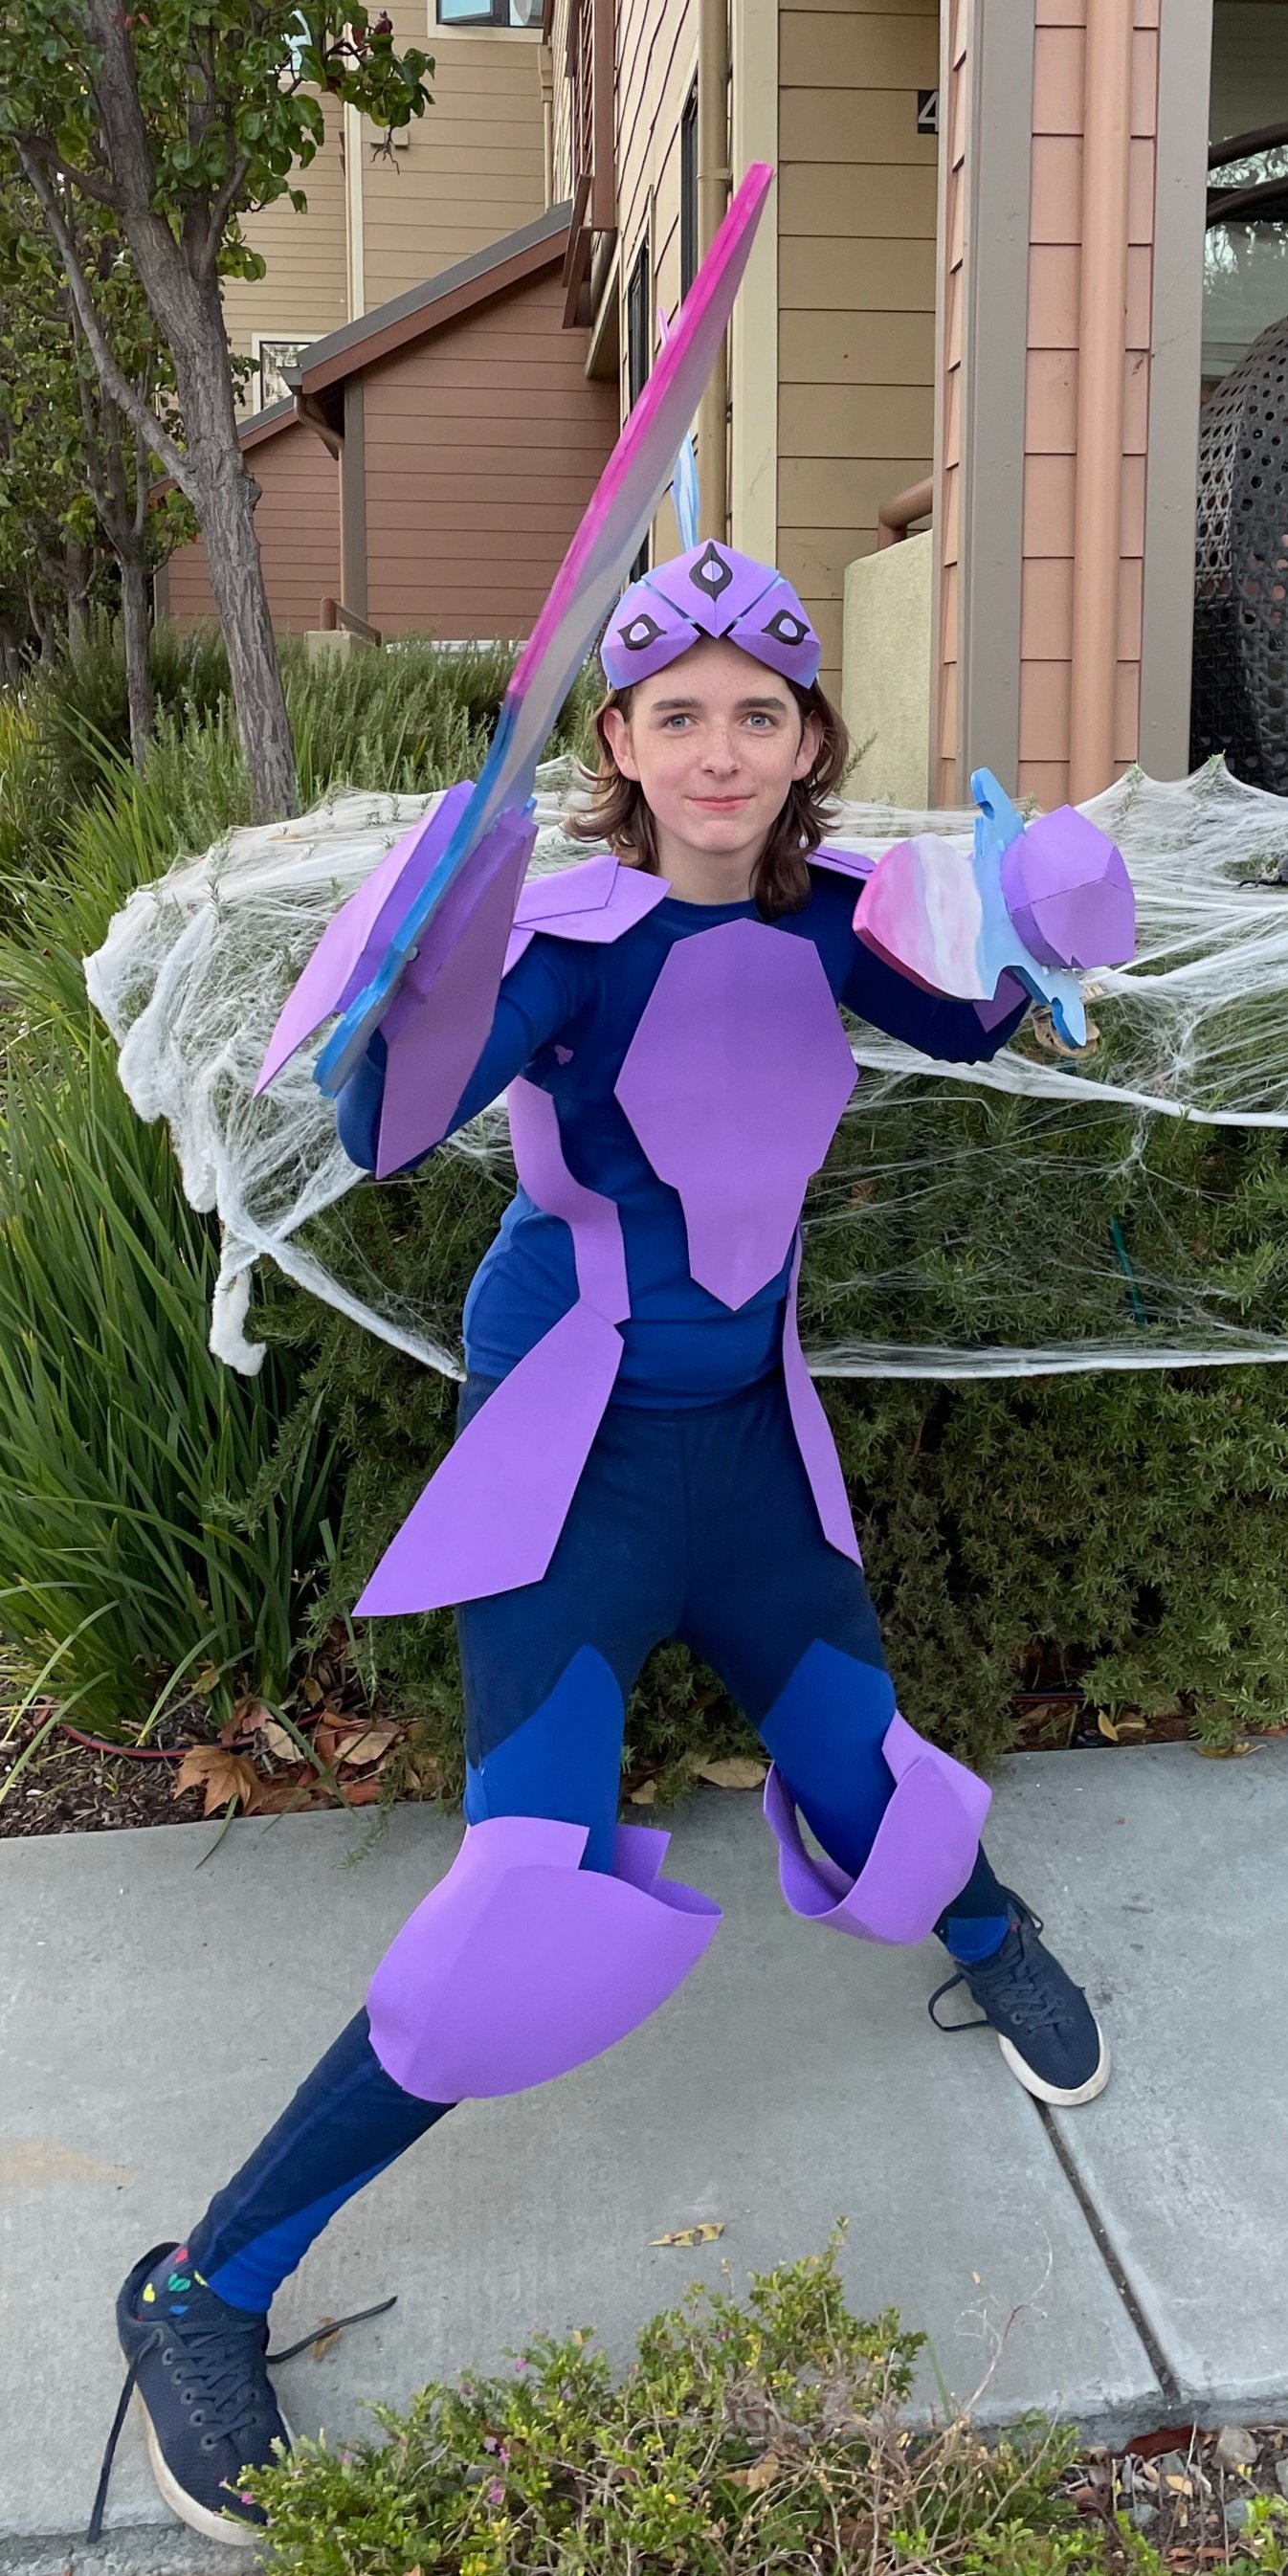
Ceruledge is a new Pokémon in Pokémon Violet. Since Violet didn’t release until November, this marks the second Halloween in a row for which my nephew has dressed as a character from an as-yet unreleased video game. Most of the armor is foam sheets. The swords are foam core so they would nice and light for him to carry.
Empress of Light
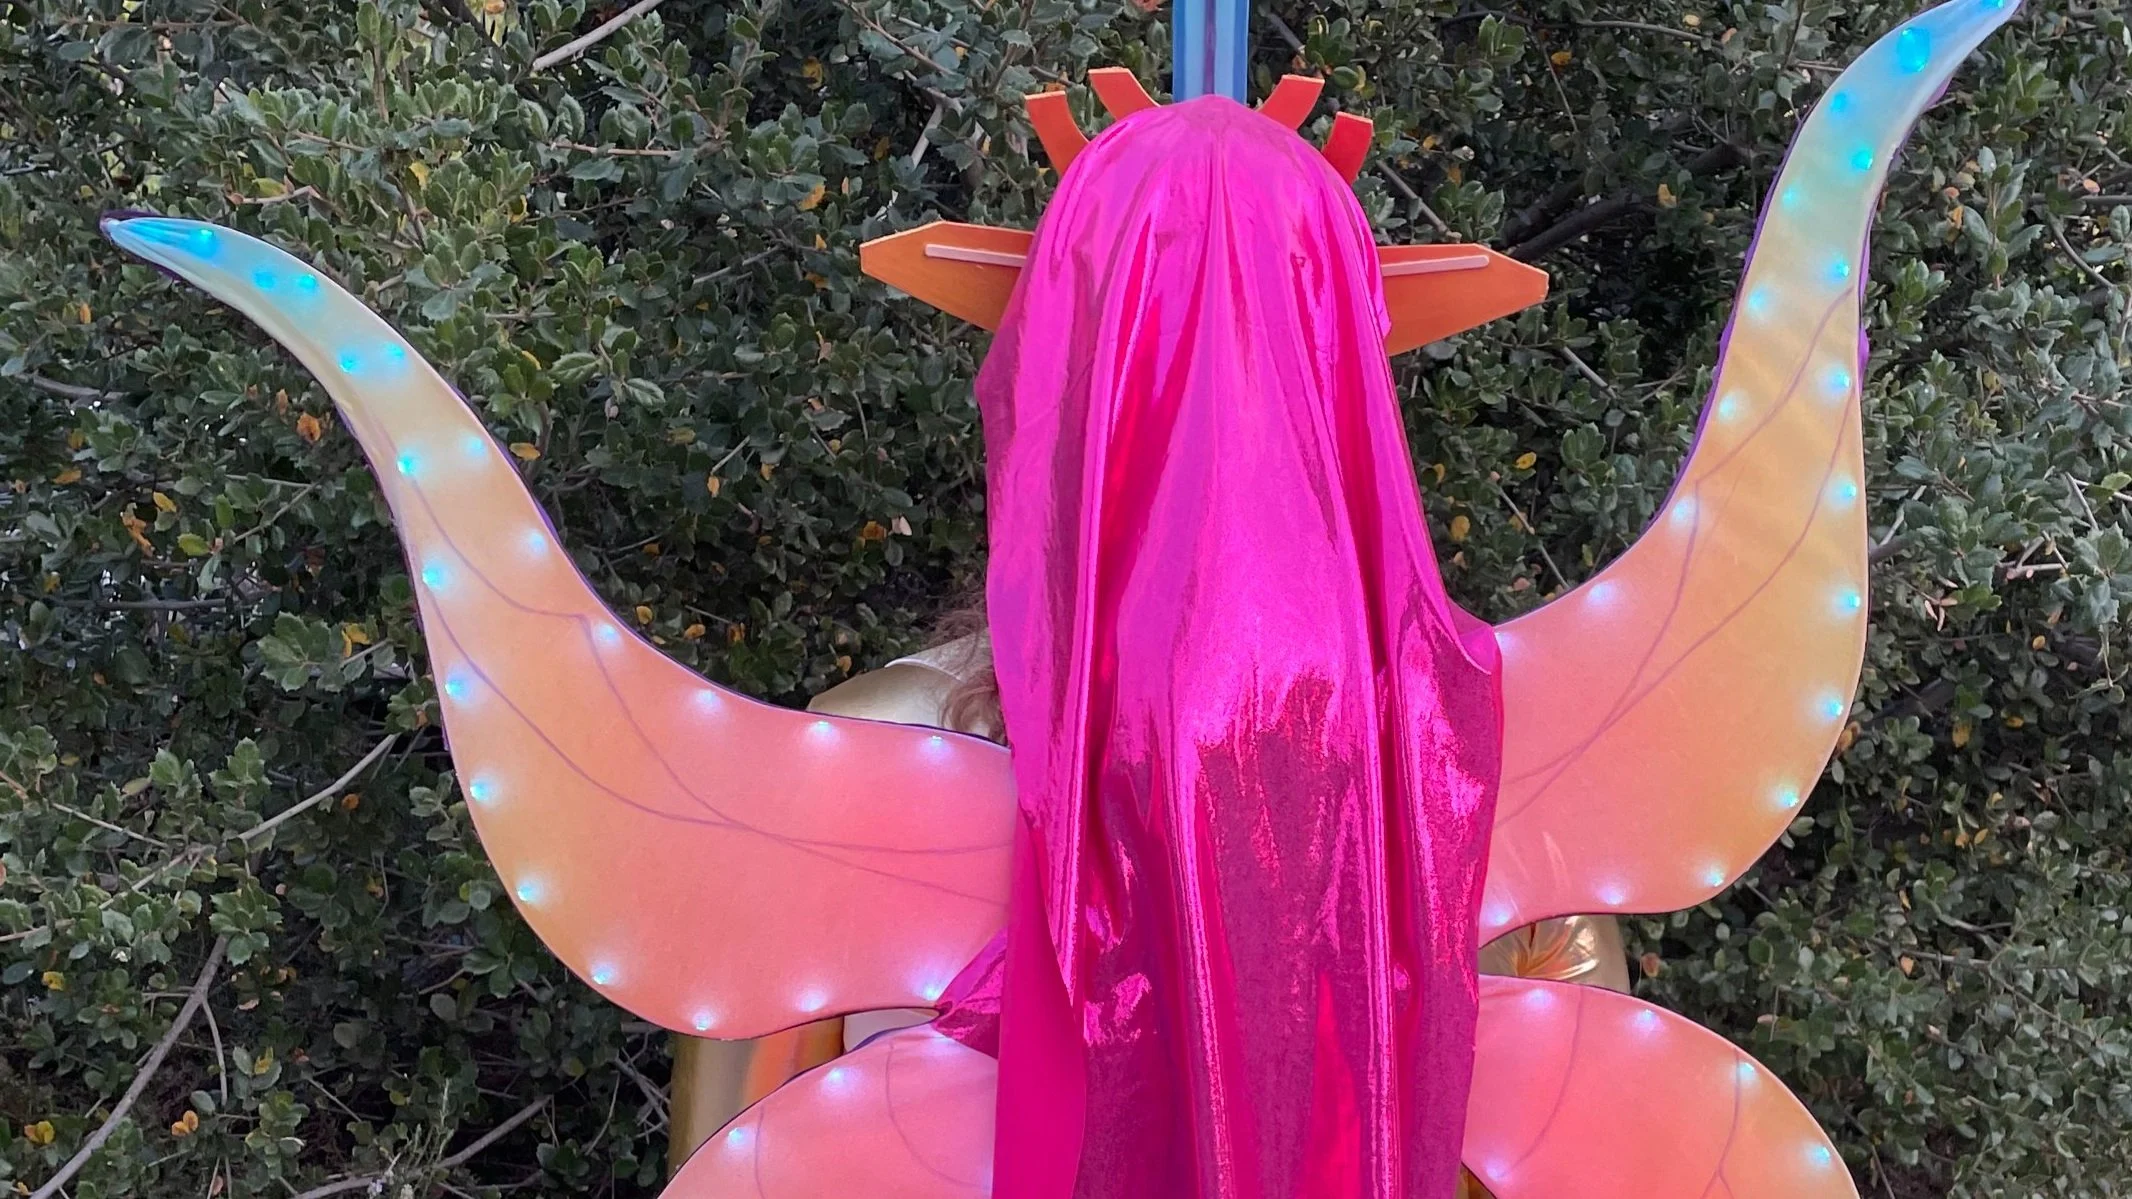
My niece went as the Empress of Light from Terraria for Halloween this year.
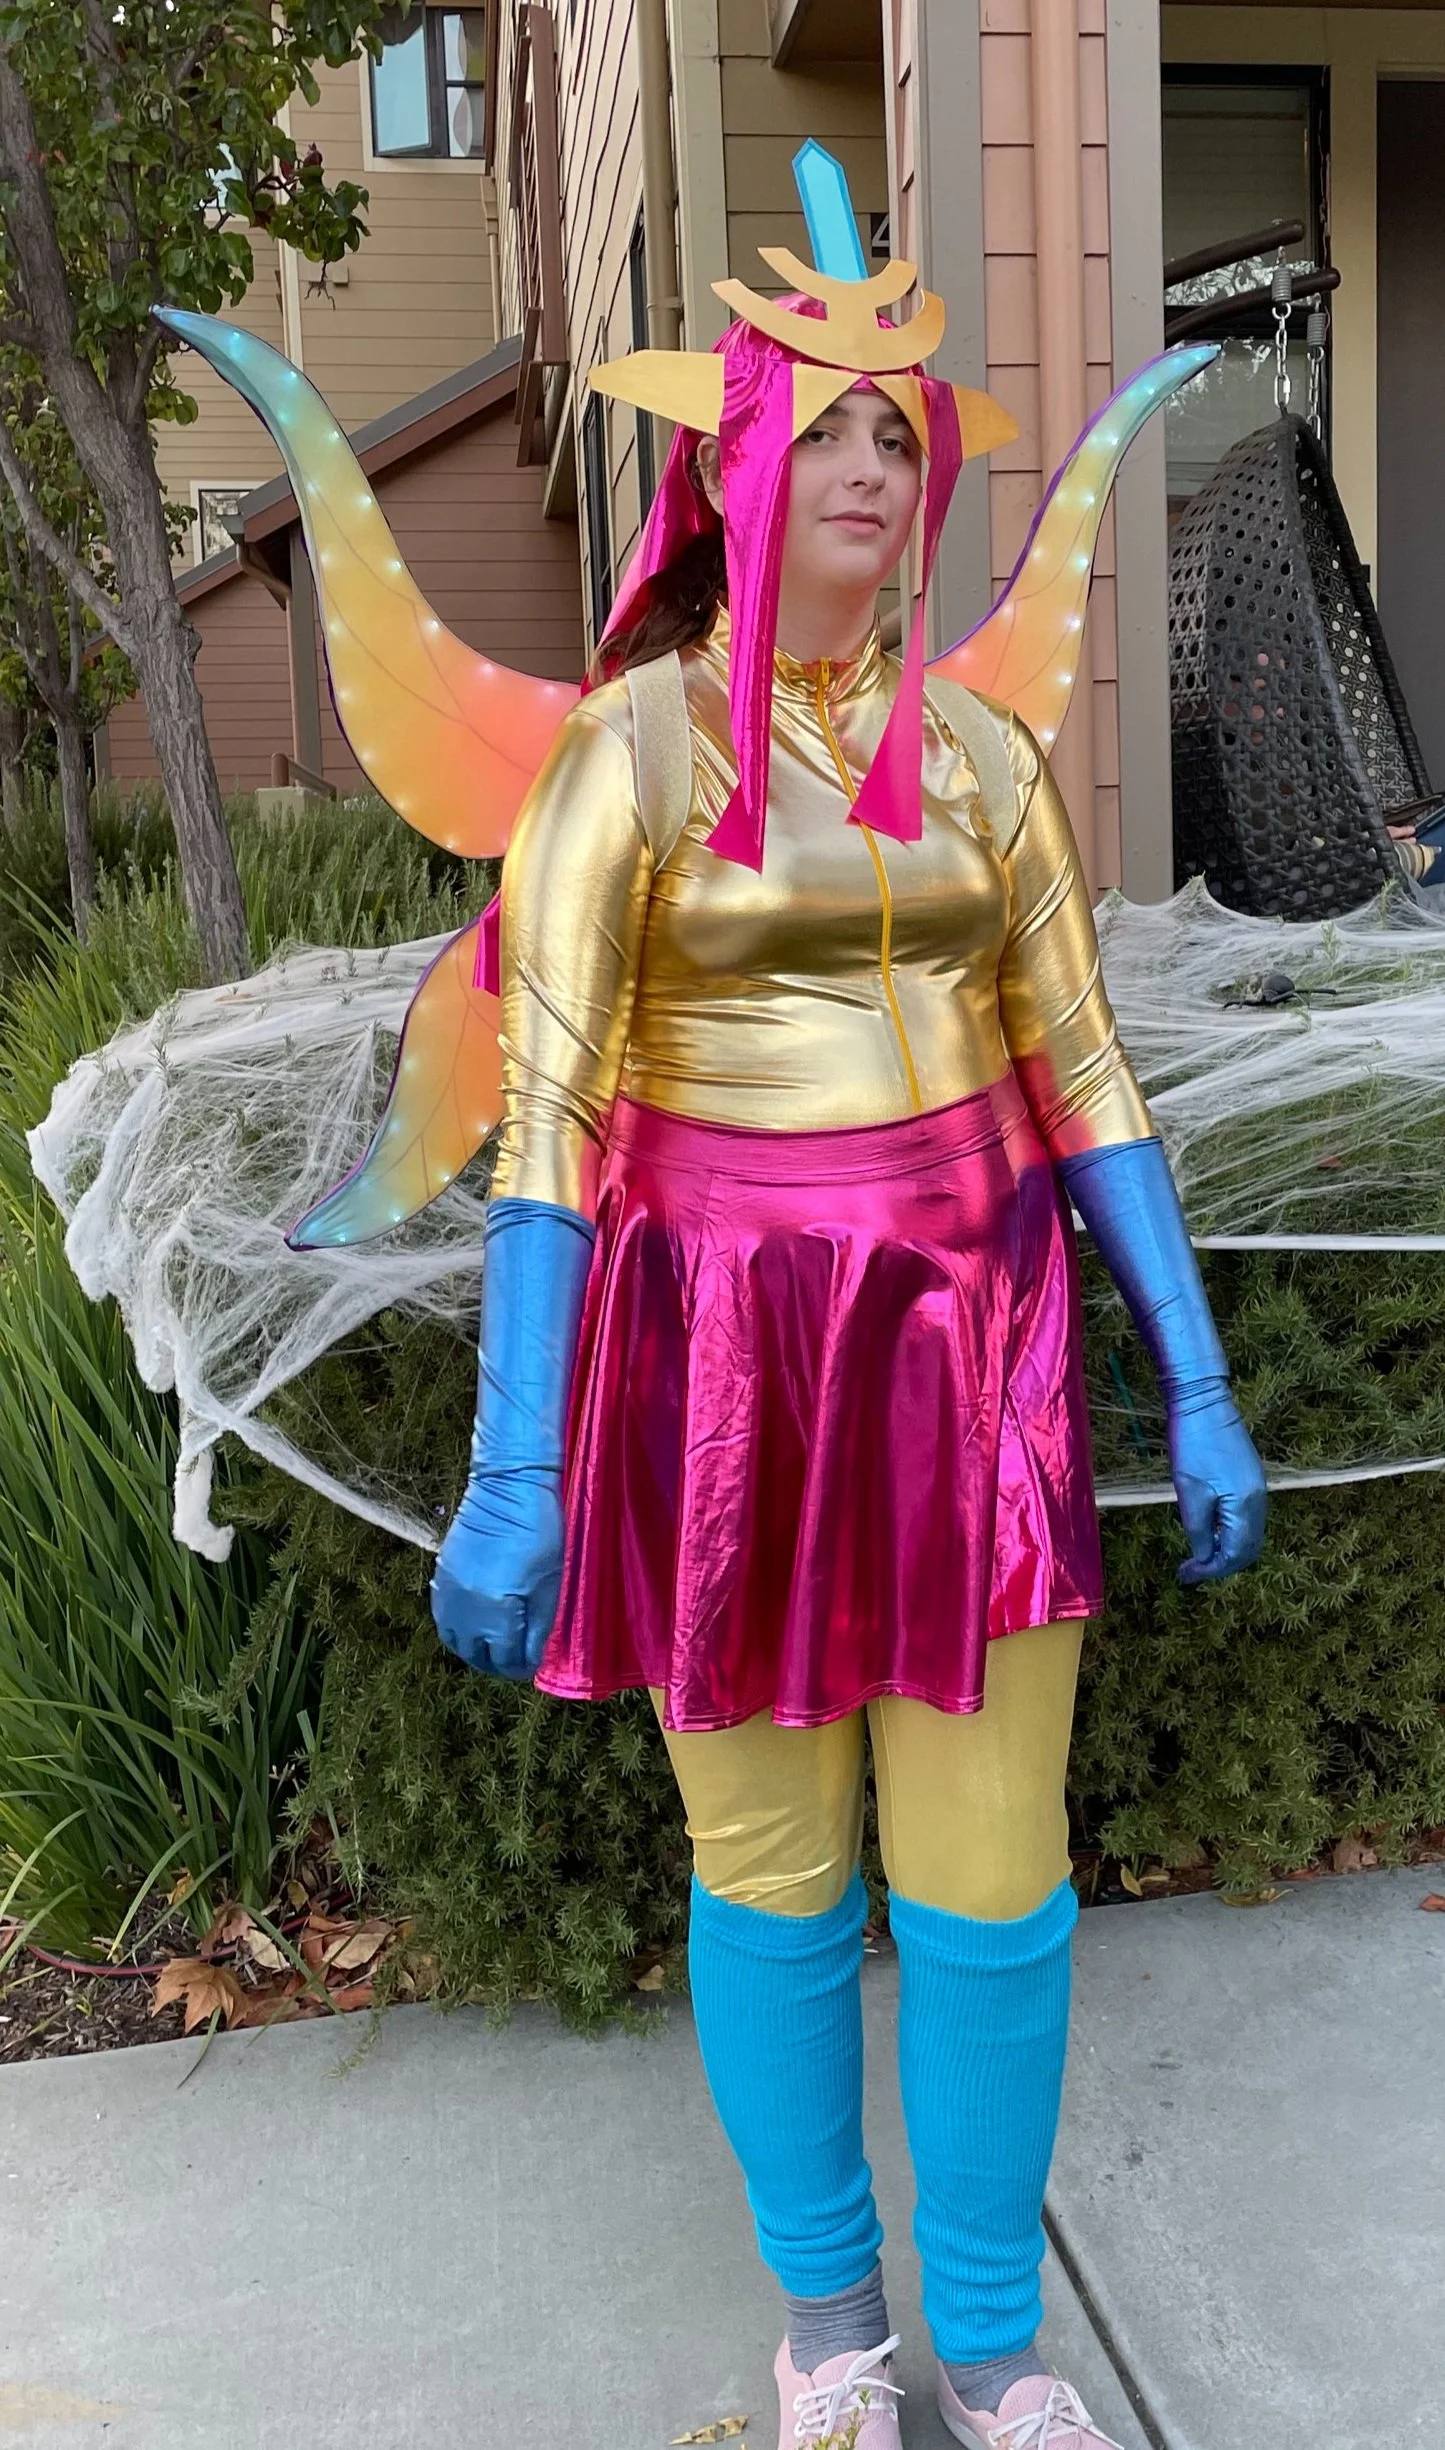
My niece went as the Empress of Light from Terraria for Halloween this year. We had to simplify the costume a bit because I didn’t have as much time to work on it as I would have liked, so it’s all store-bought clothes except for the crown and the wings. The wings are an aluminum frame lined with color-changing LEDs with nylons stretched over them.


Outrageous Pumpkins
Good news - I’m back on Food Network! This time, I’m carving pumpkins on Outrageous Pumpkins!
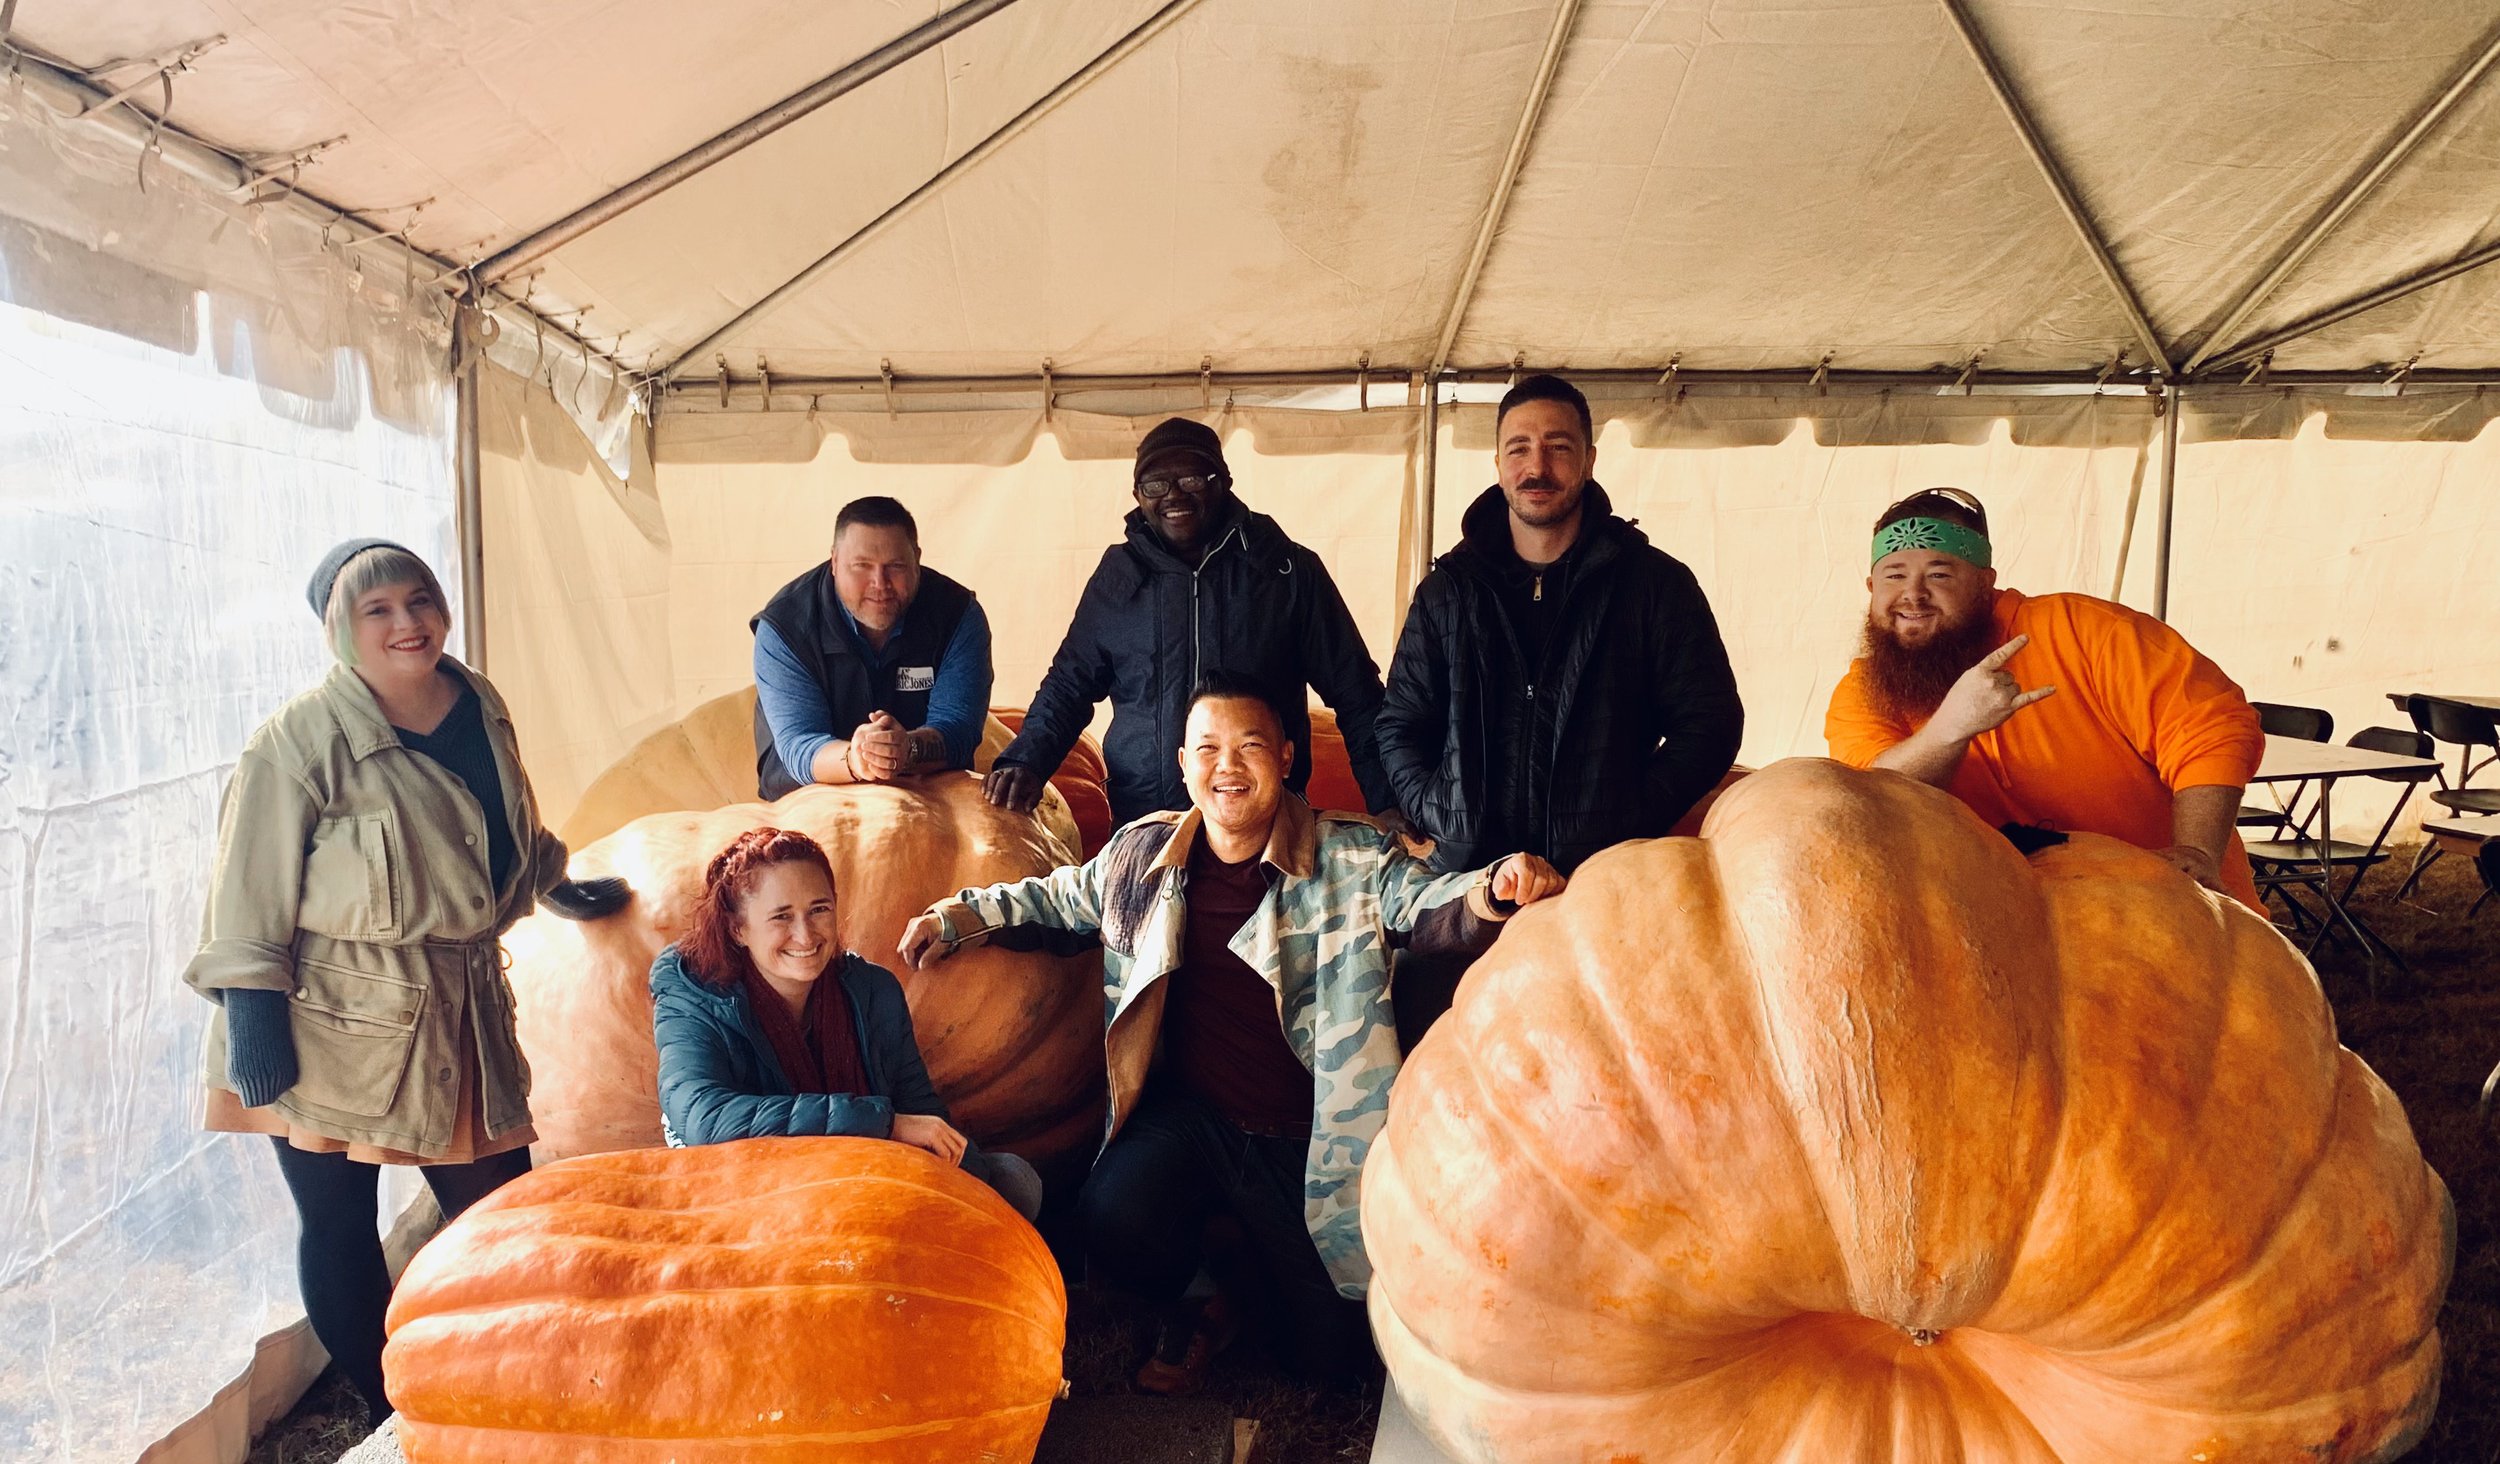
Good news - I’m back on Food Network! This time, I’m carving pumpkins on Outrageous Pumpkins! I didn’t win, but I made it to the finale, I carved some very cool pumpkins, I got to work with a great production crew, and I met six other fantastic artists. So overall a fantastic experience!
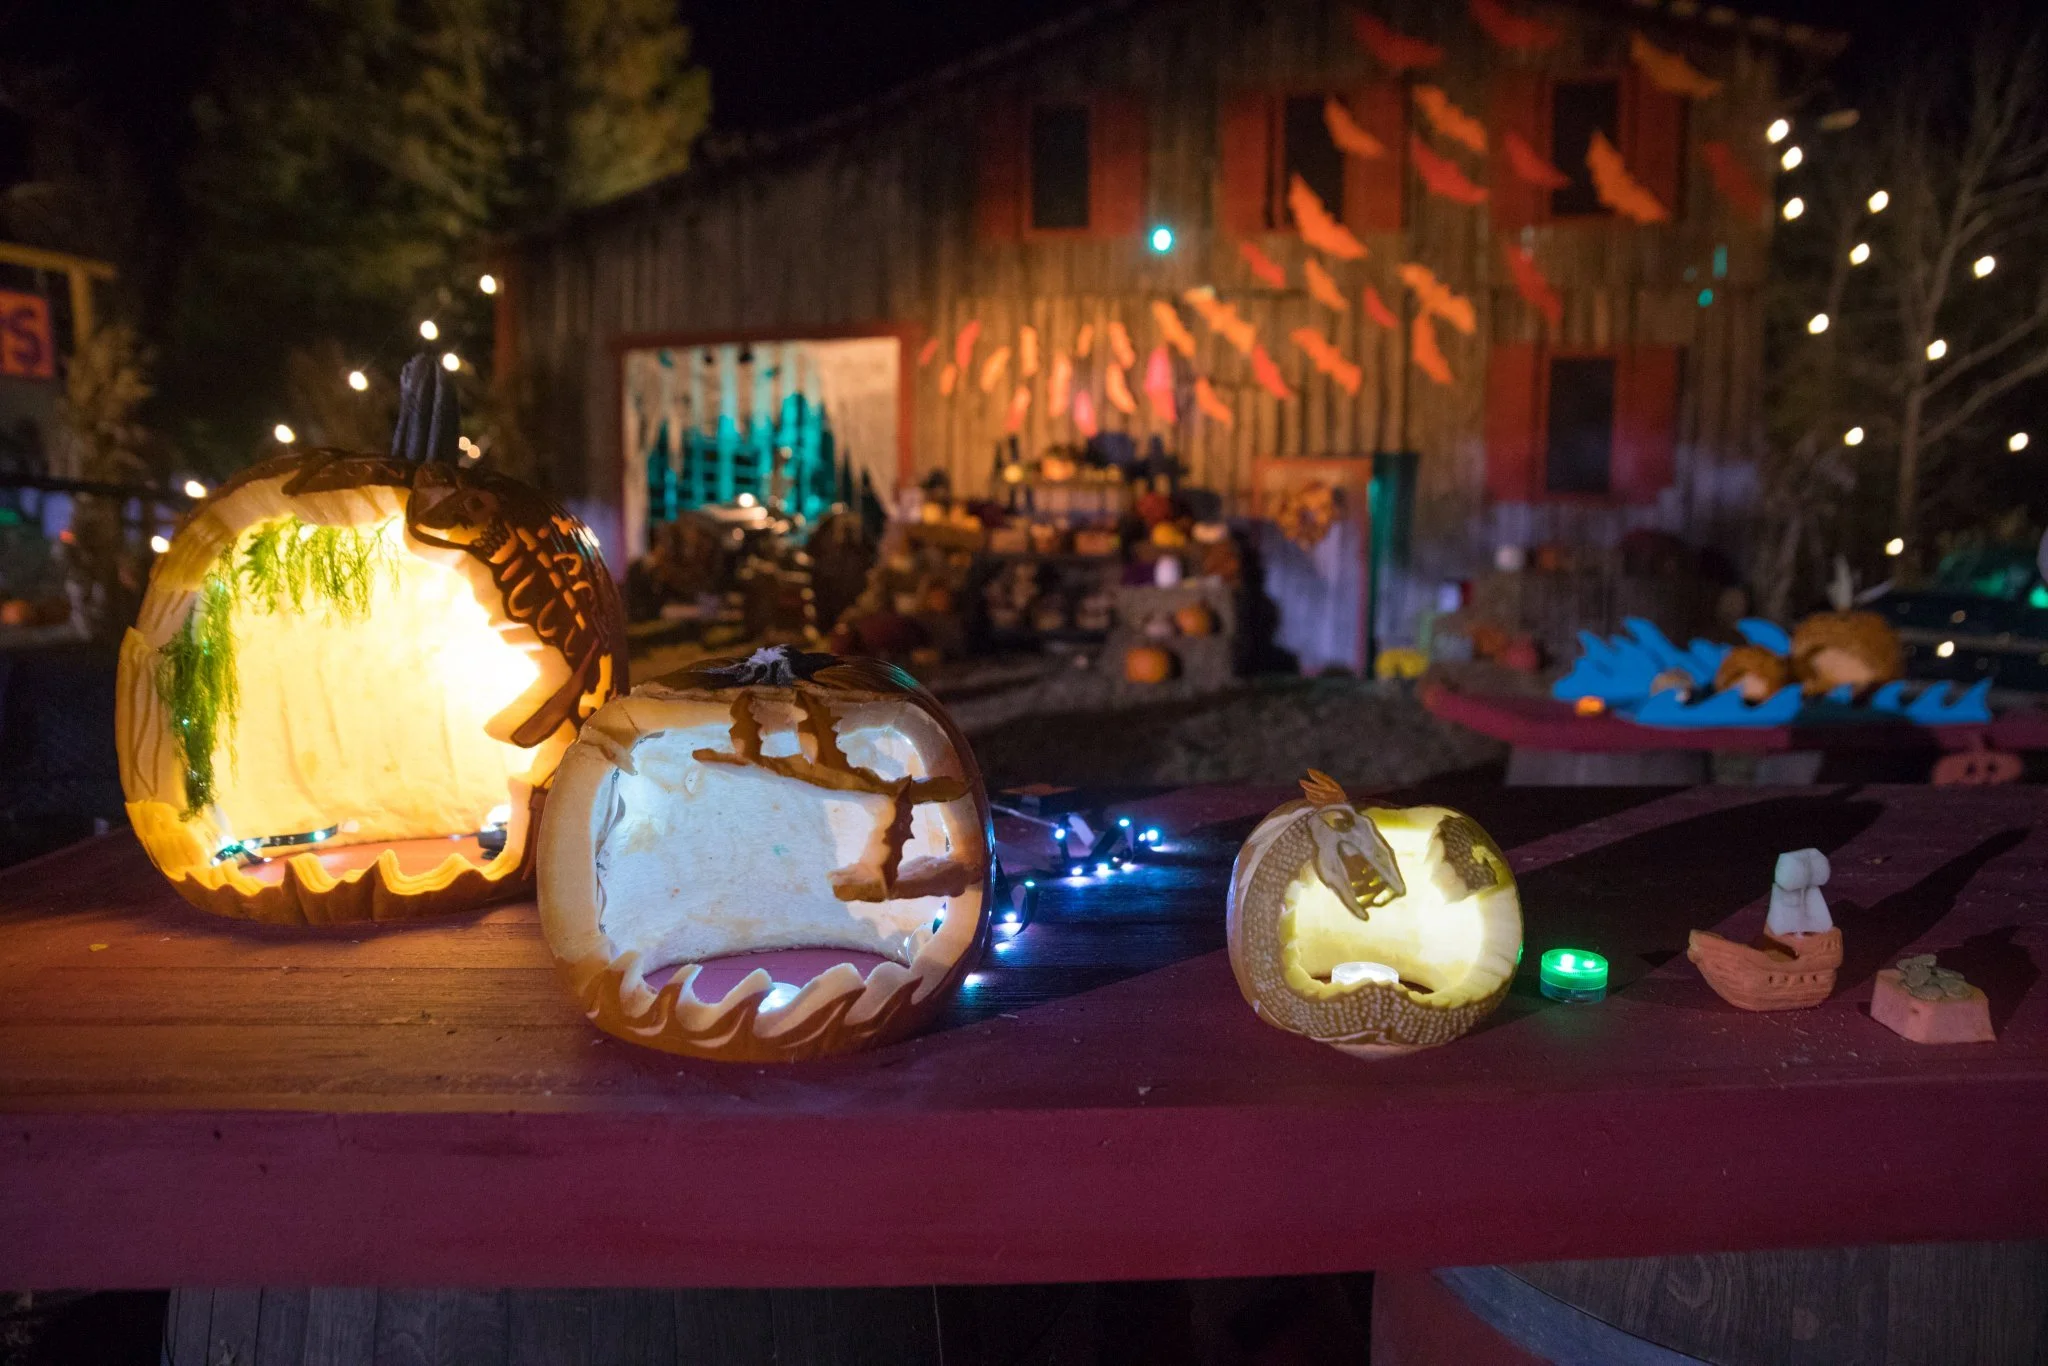
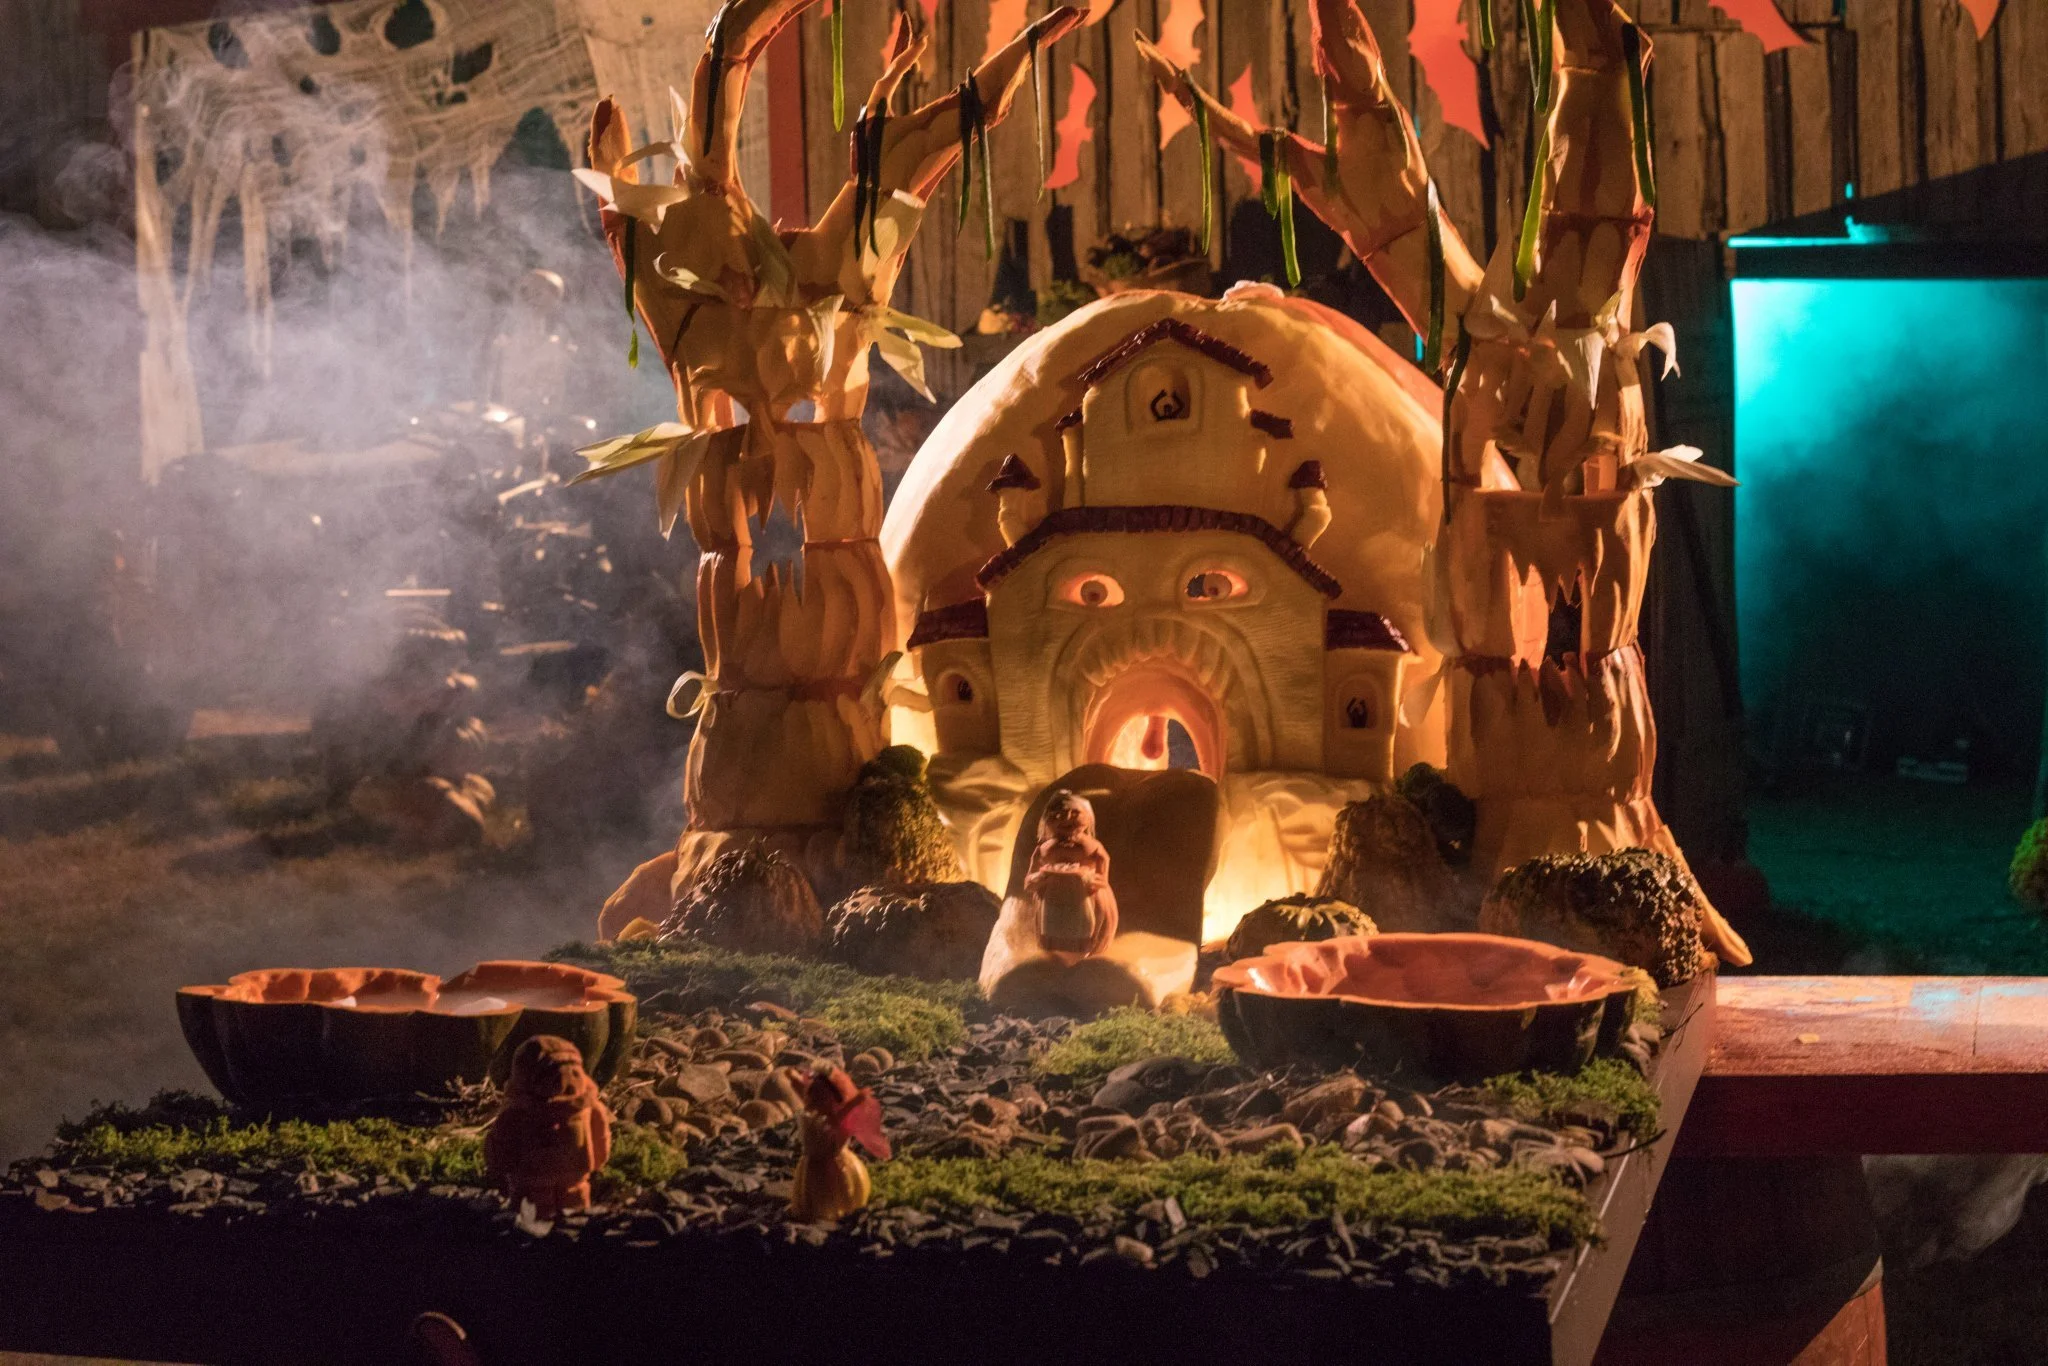
I won the first challenge with my jack-o-lantern ghost story!

My nesting jack-o-lanterns got me through to the next episode!
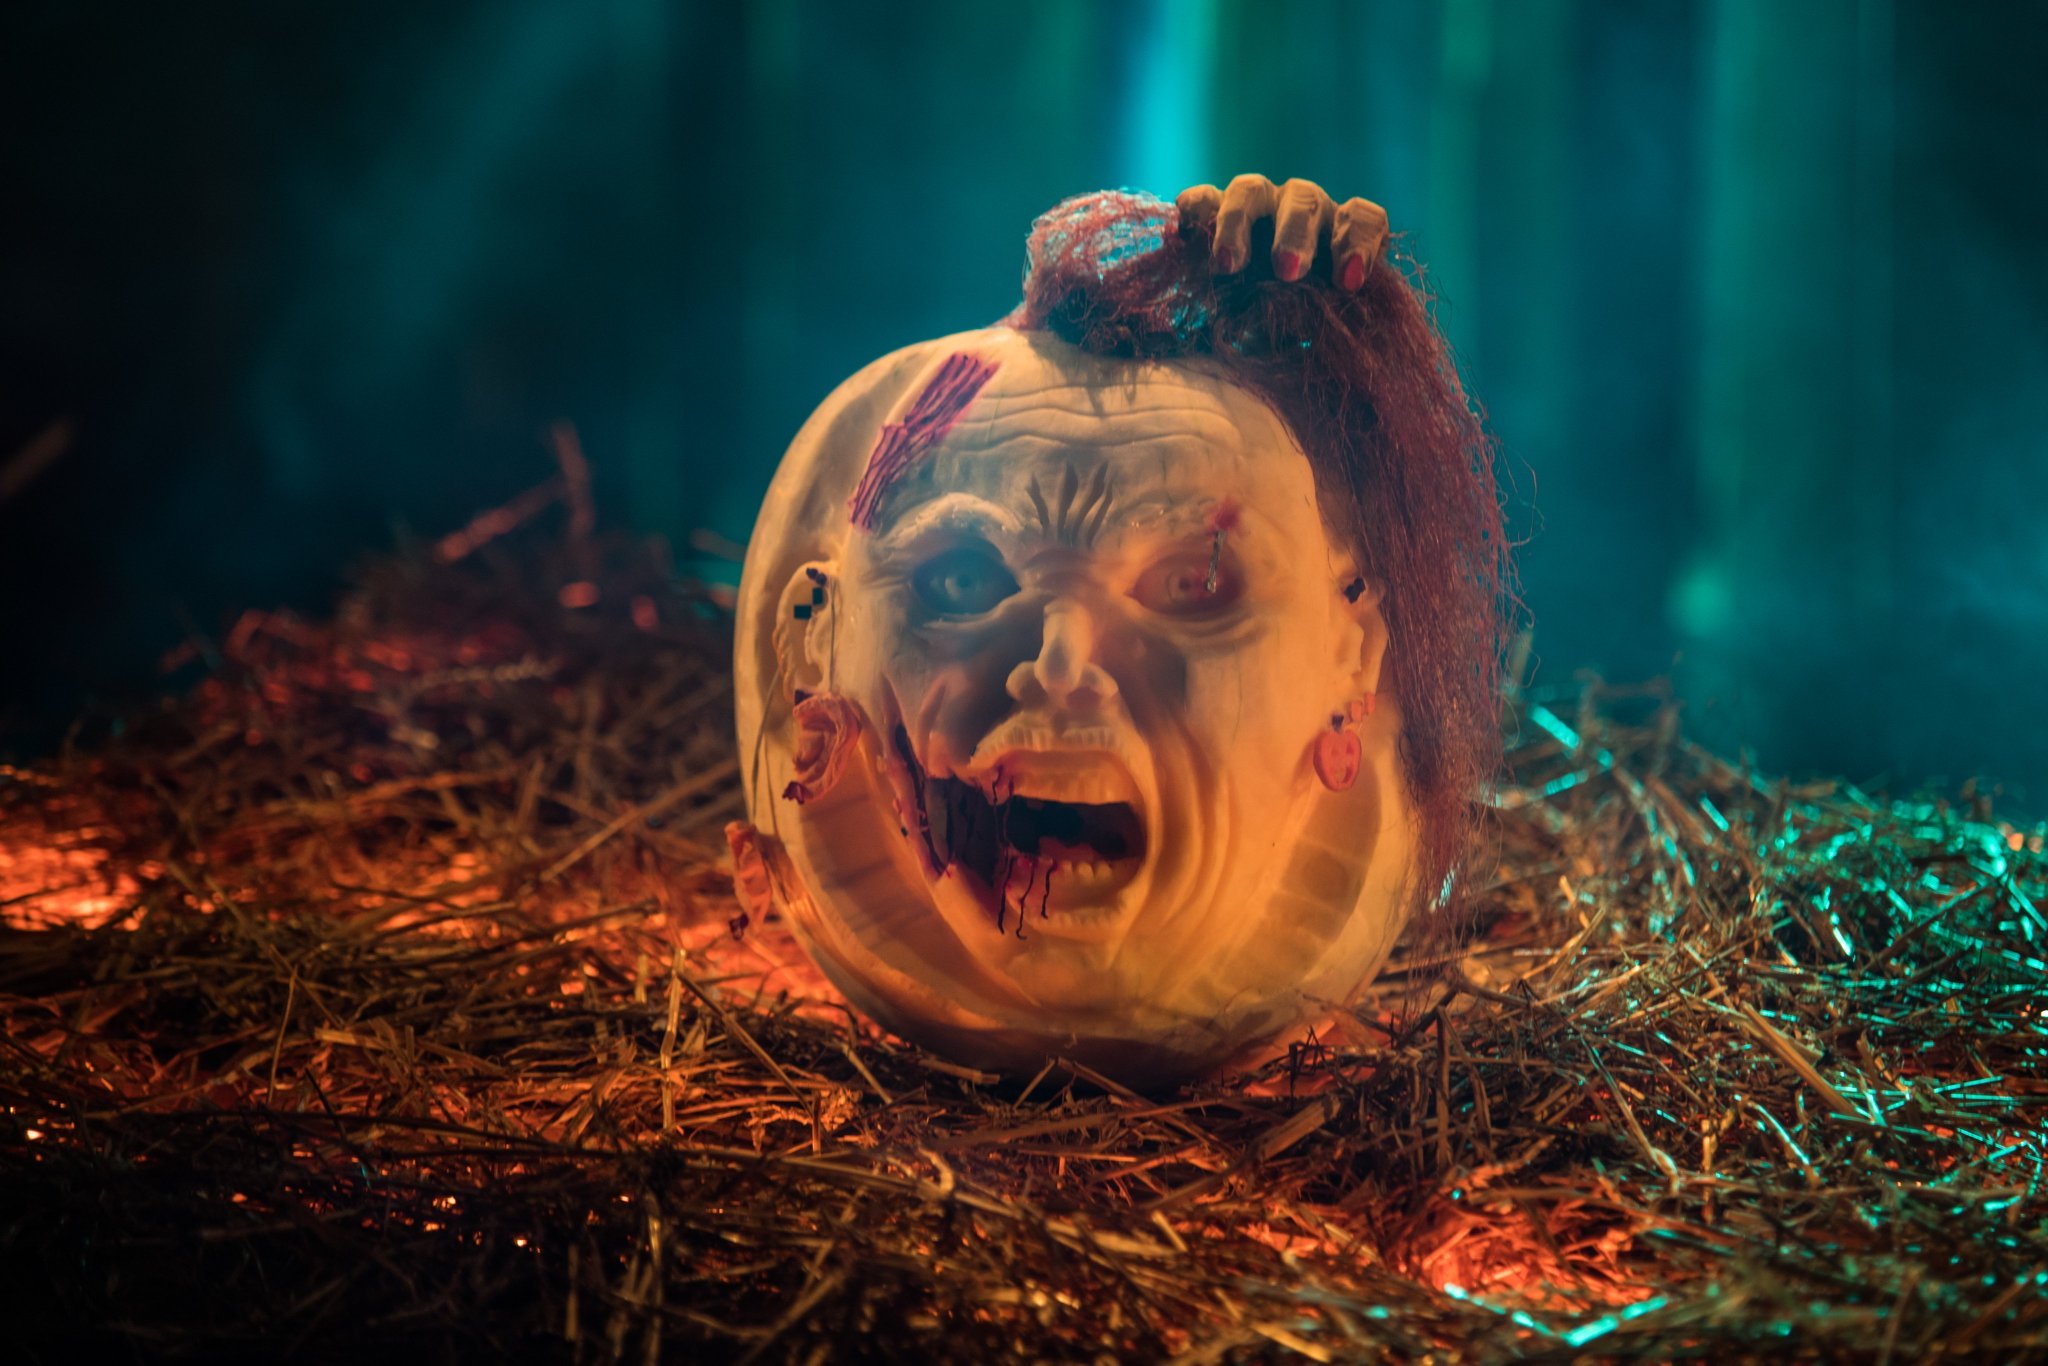
Very happy with my zombie self-portrait.
The group haunted house challenge was a challenge, but we won our way through to the next episode.
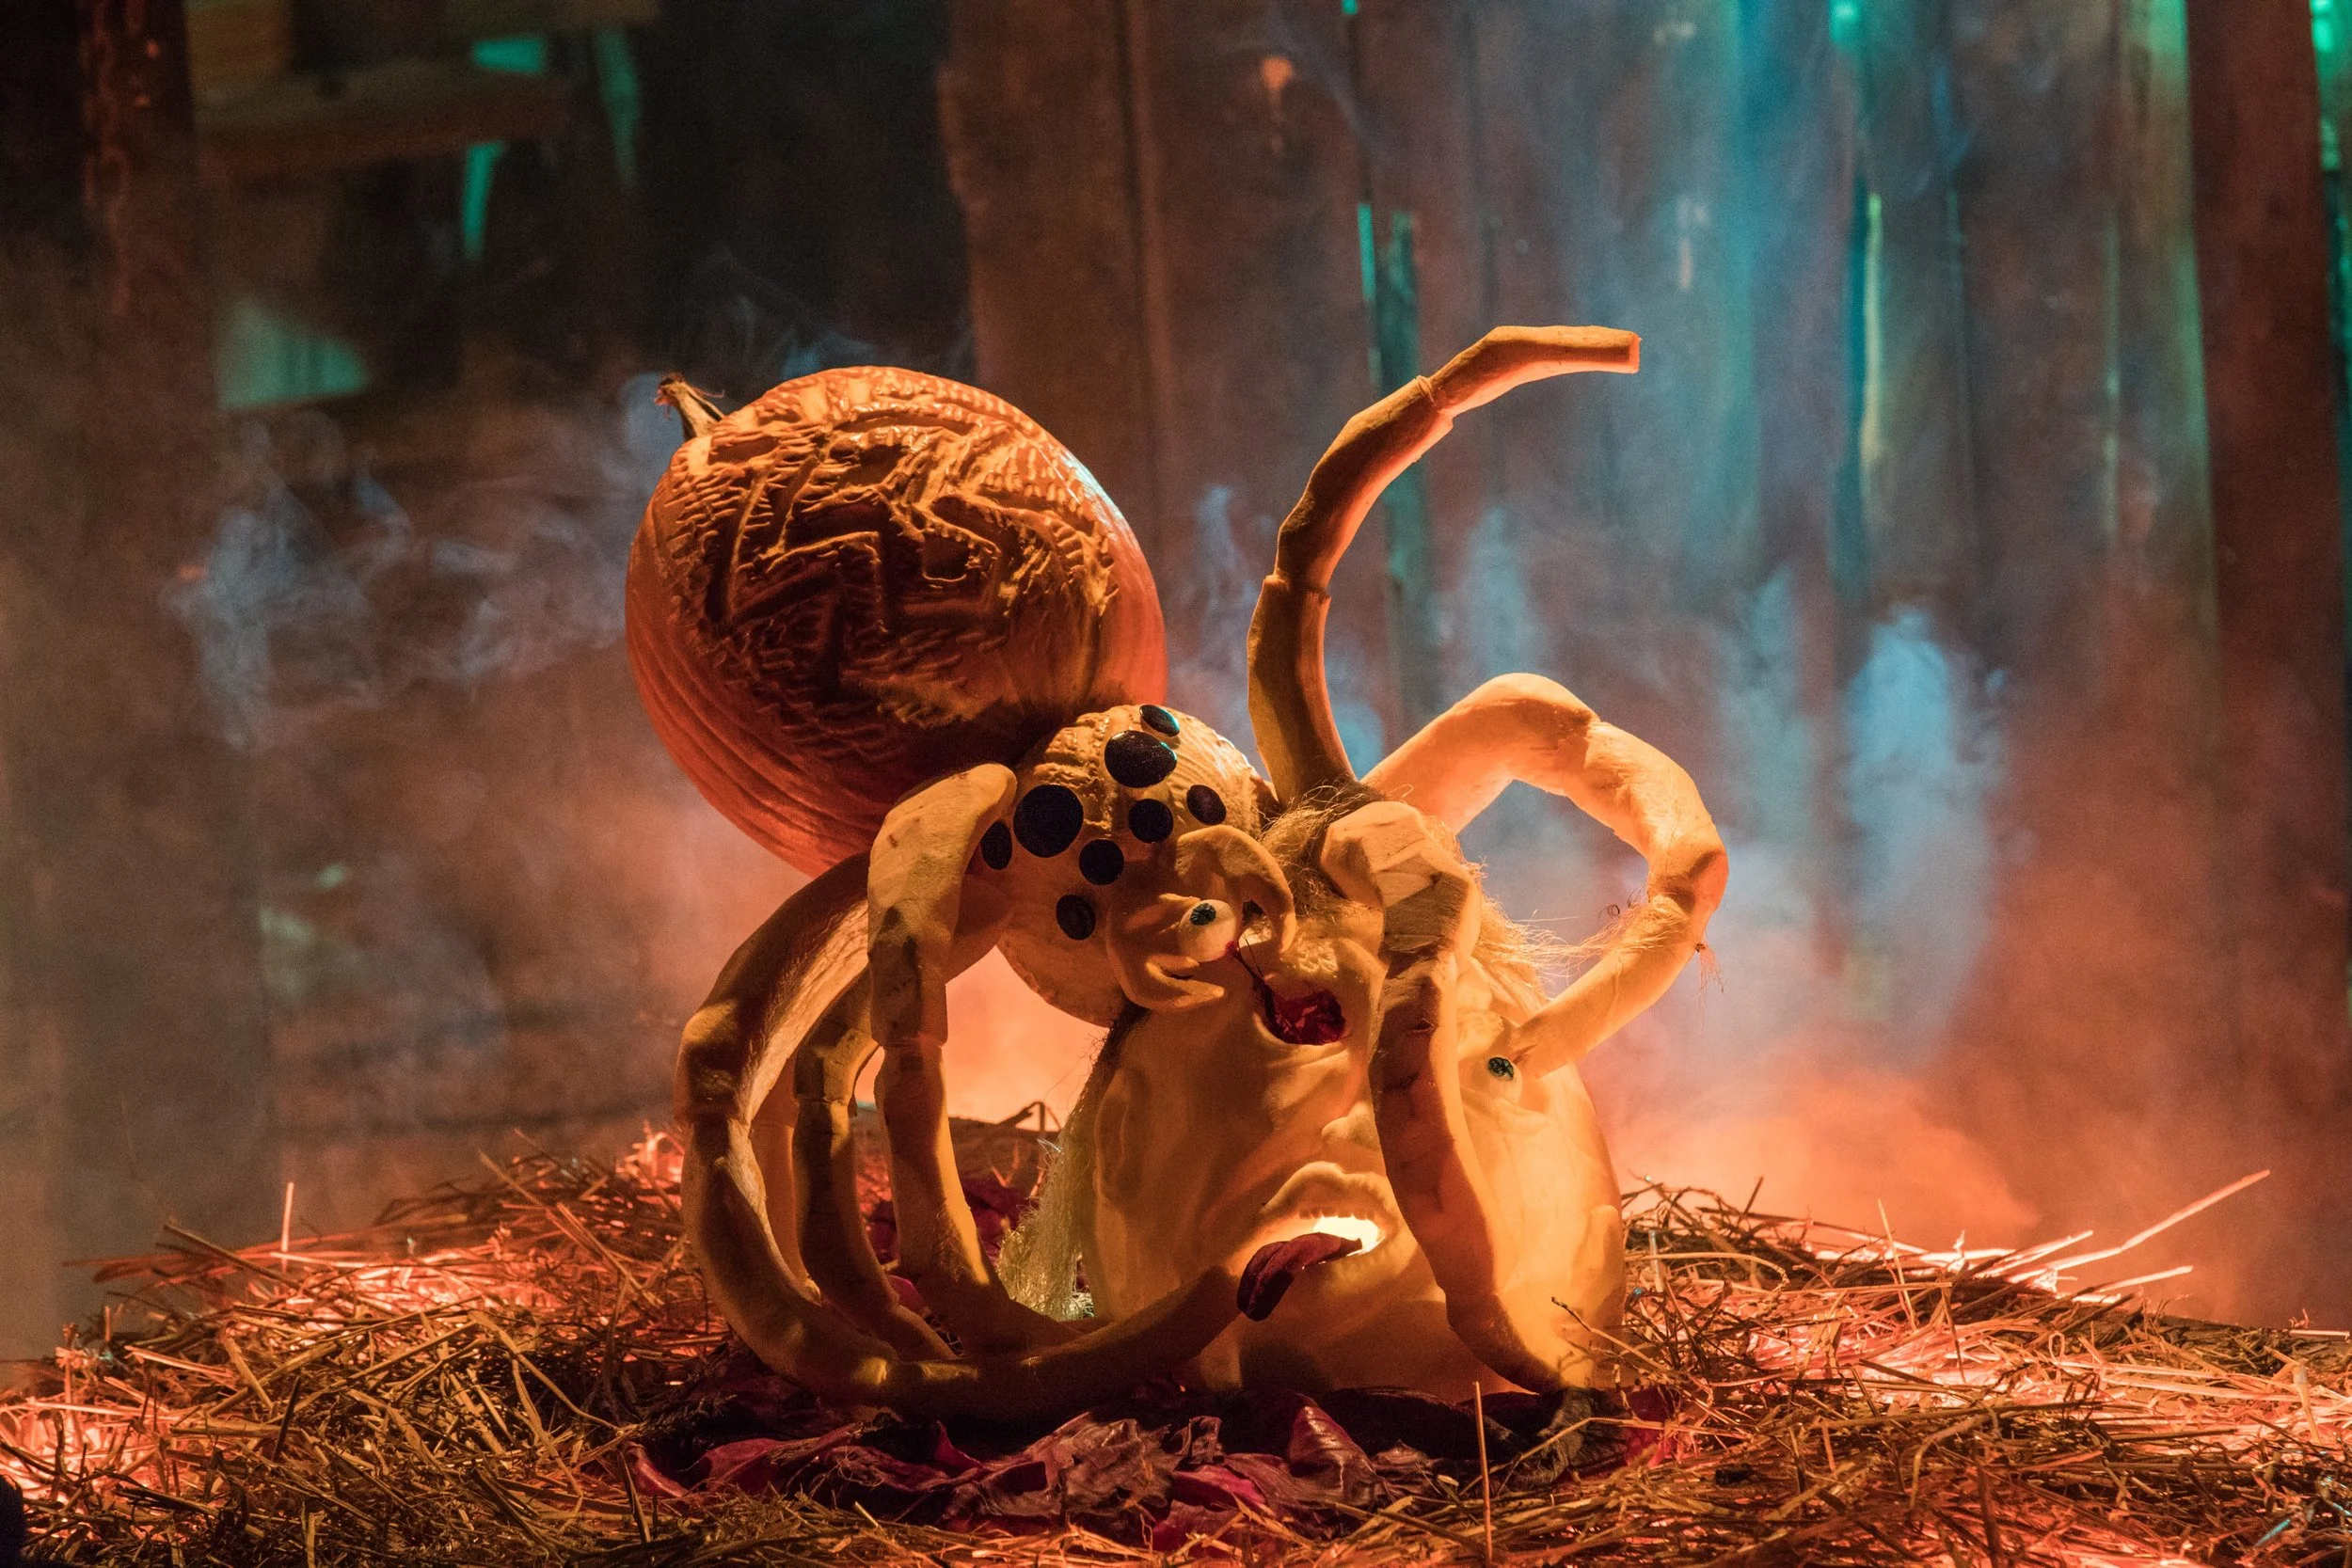
My arachnophobia pumpkin with a spider eating someone’s eyeball.
The structure of my contortionist pumpkin get me through the the finale!

Pumpkin carving inspired by a toy.
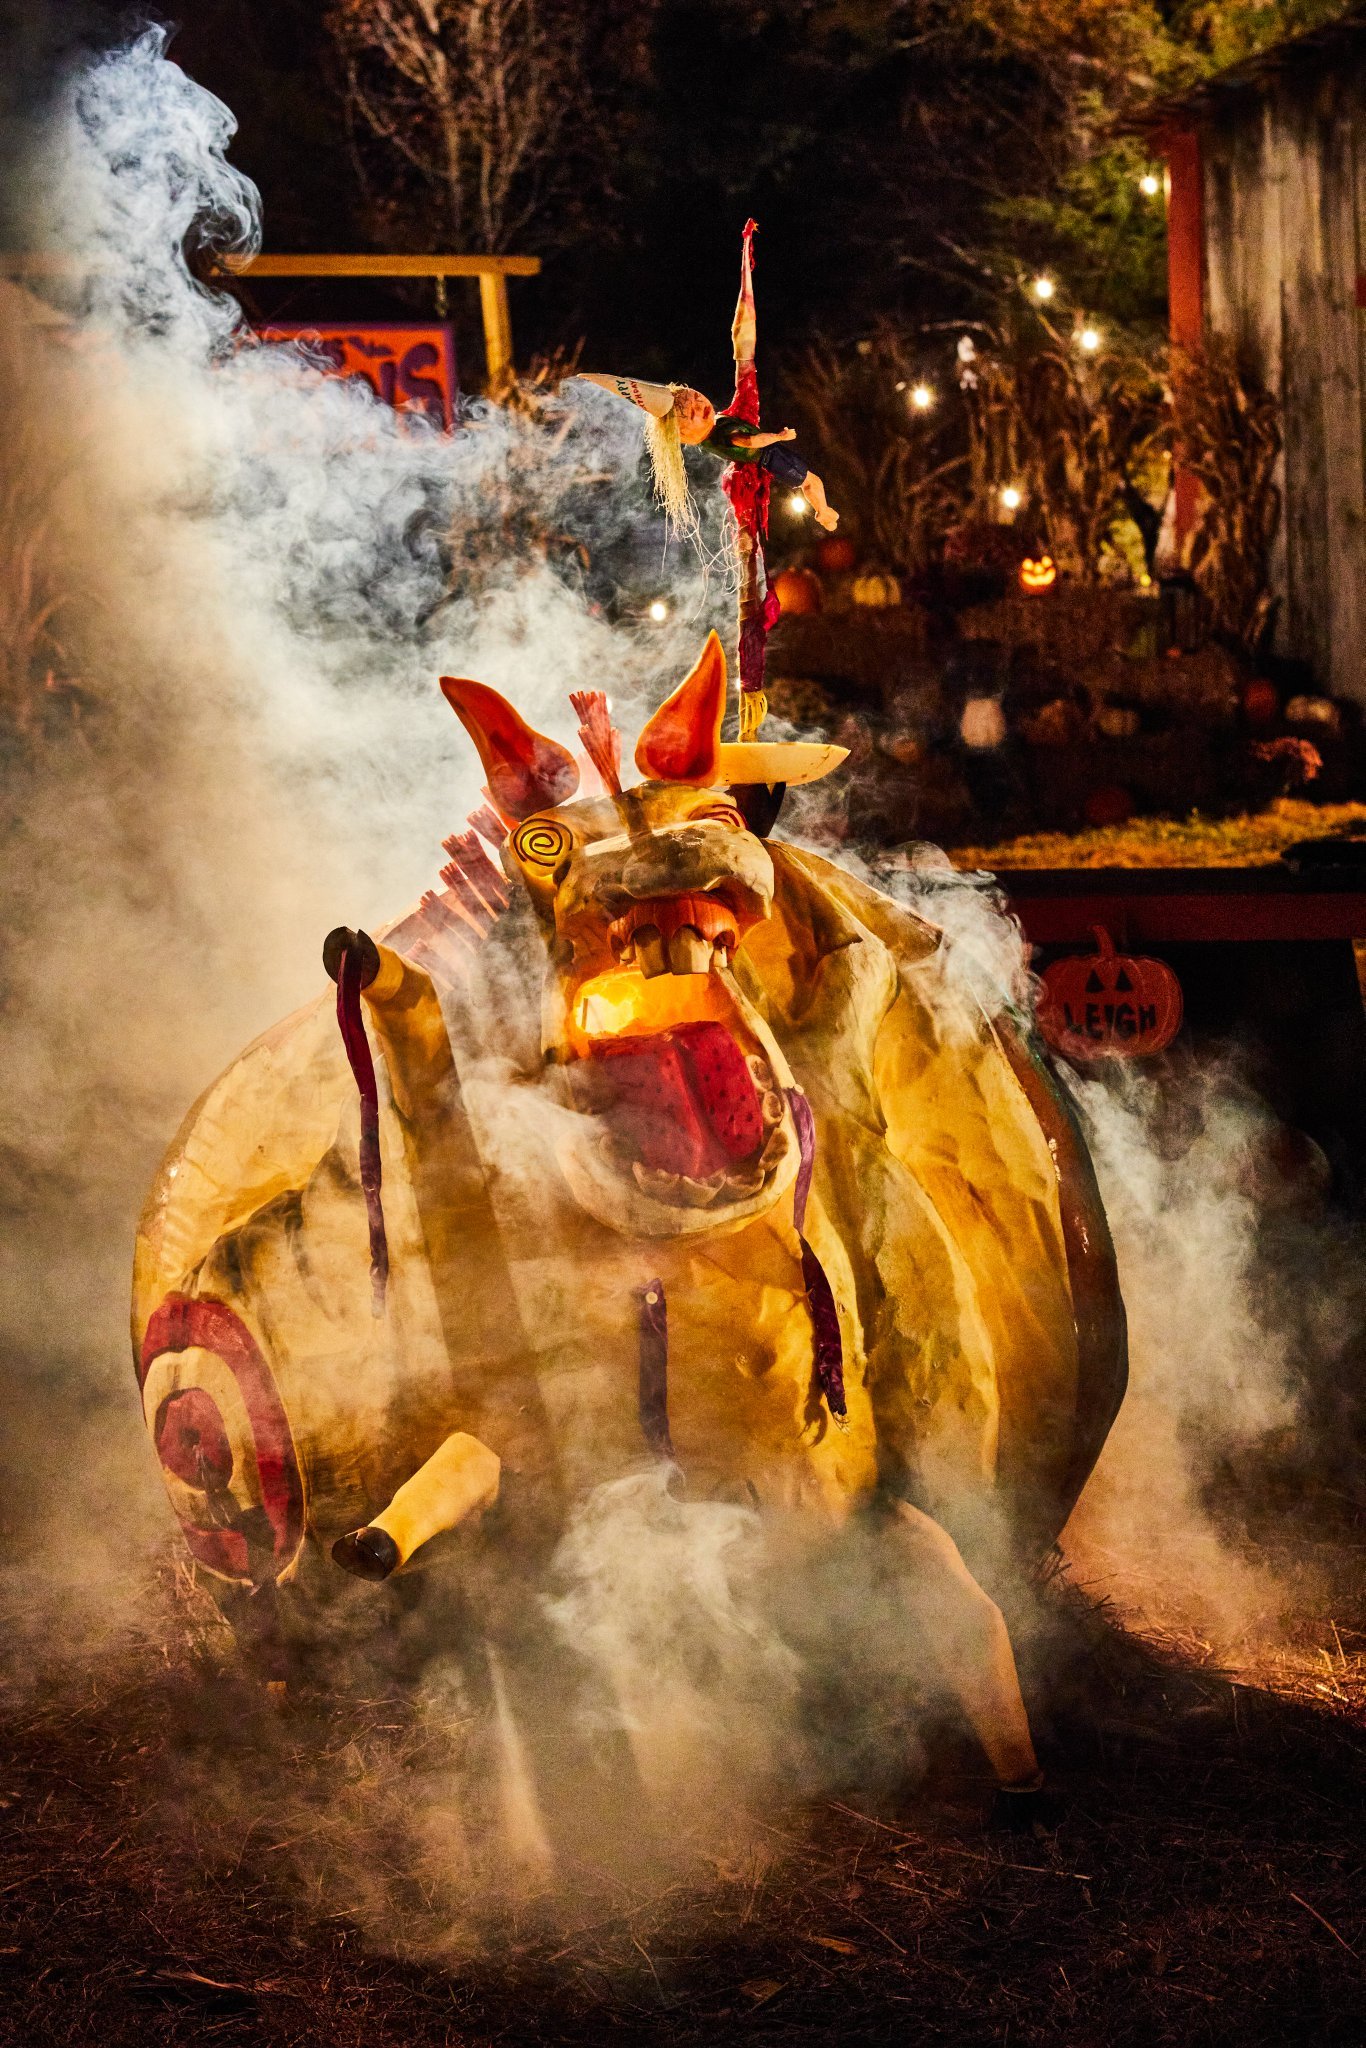
My first time carving an Atlantic Giant! Pin-the-tail-on-the-donkey come to life and impaled the birthday kid.
Genuinely one of the most fun shows I’ve ever been involved in!

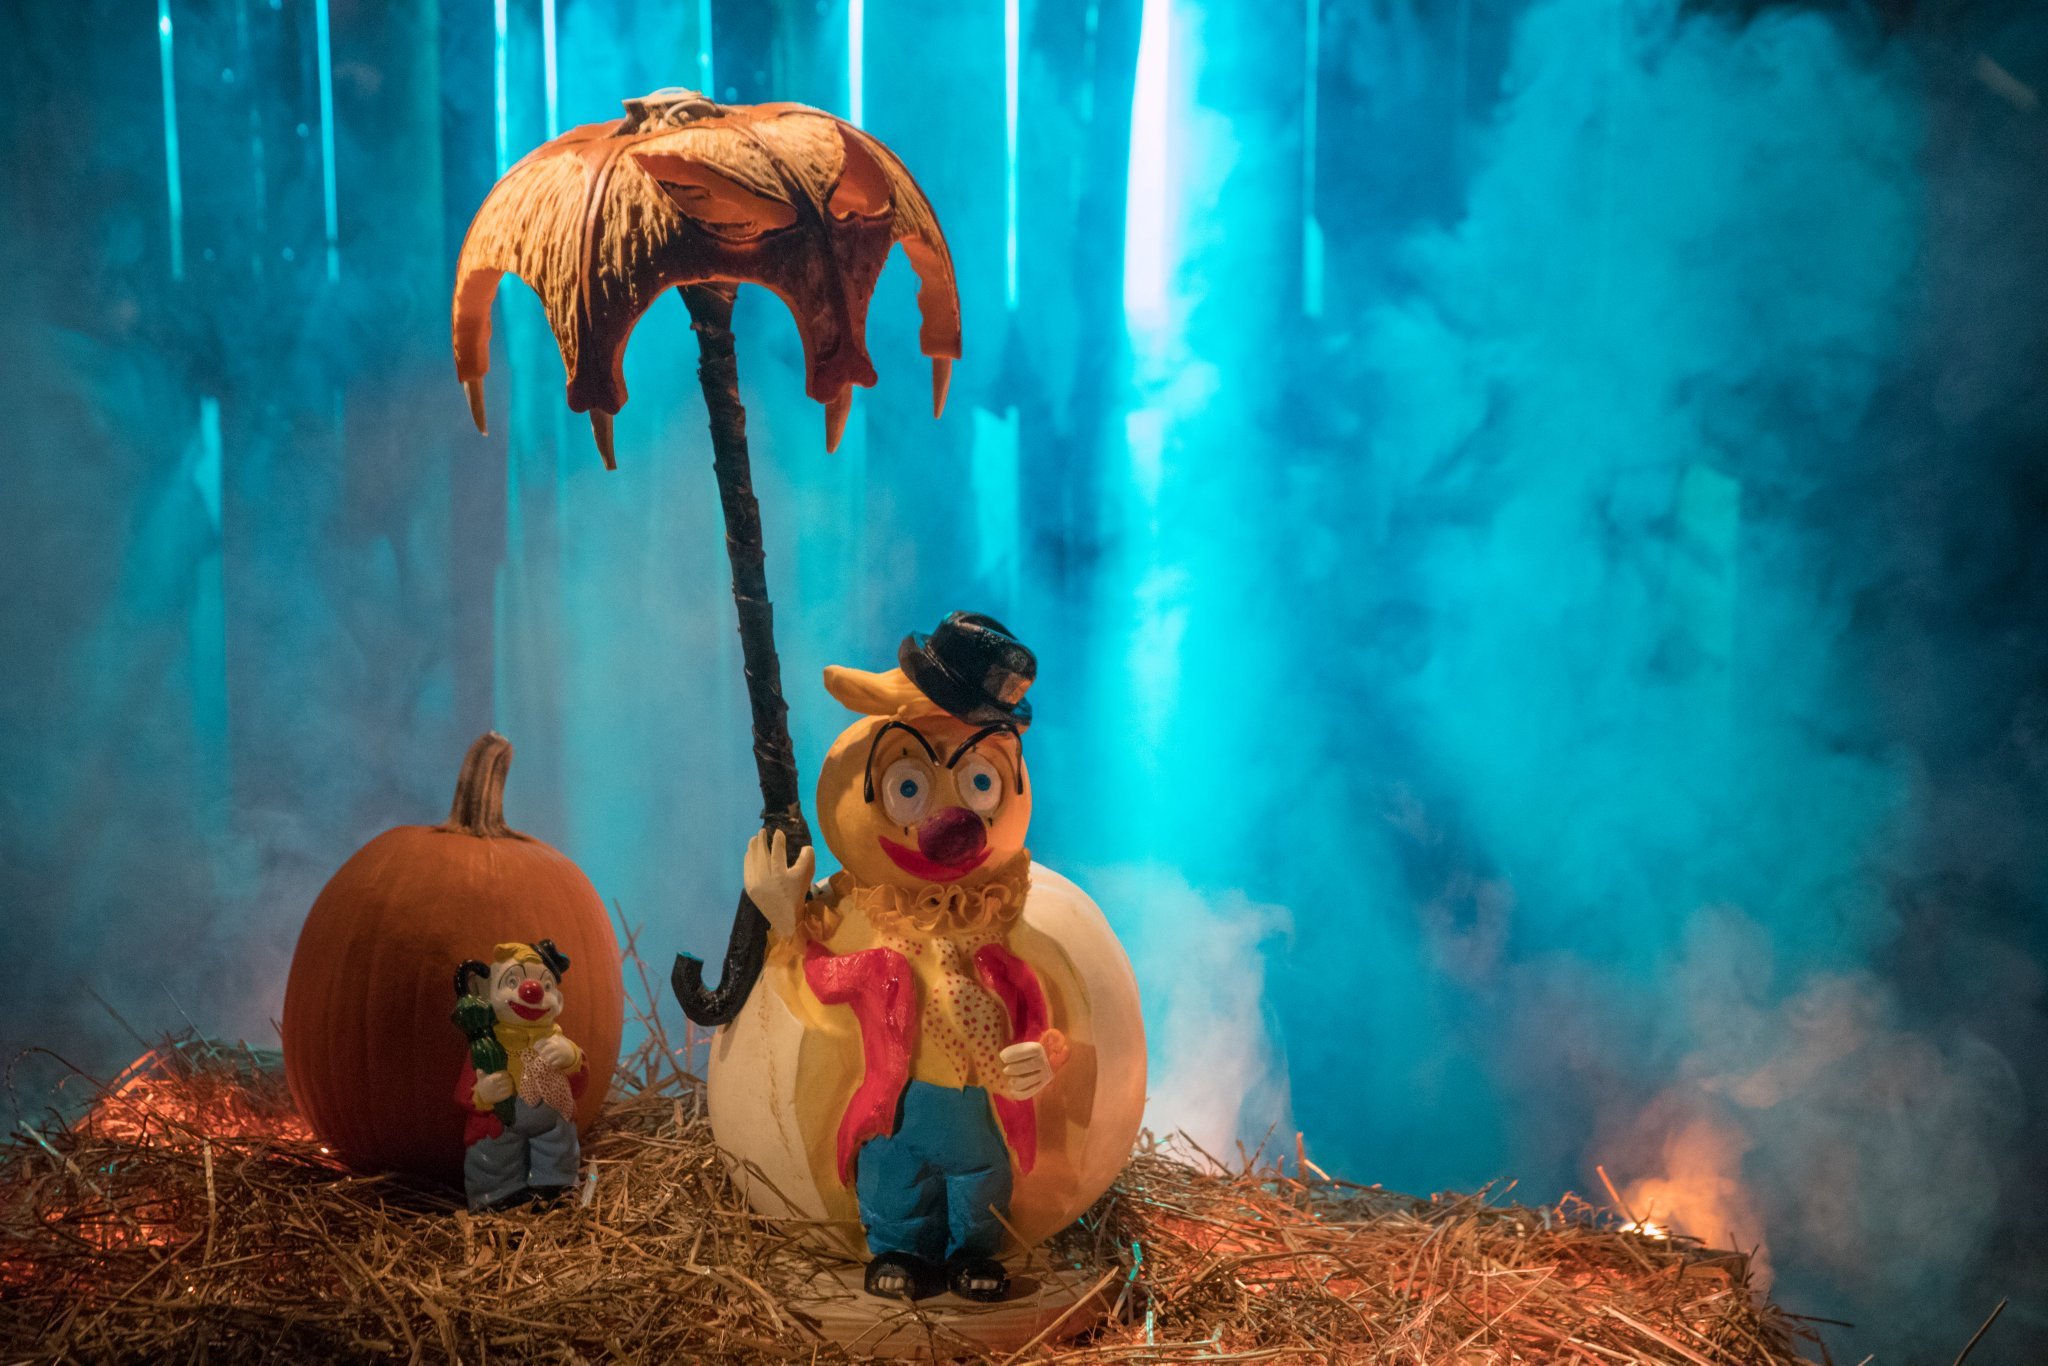
Creepy Clown Pumpkin
I carved this pumpkins for an interview on local television, as a way of demonstrating how to use other fruits and vegetables in a pumpkin carve.
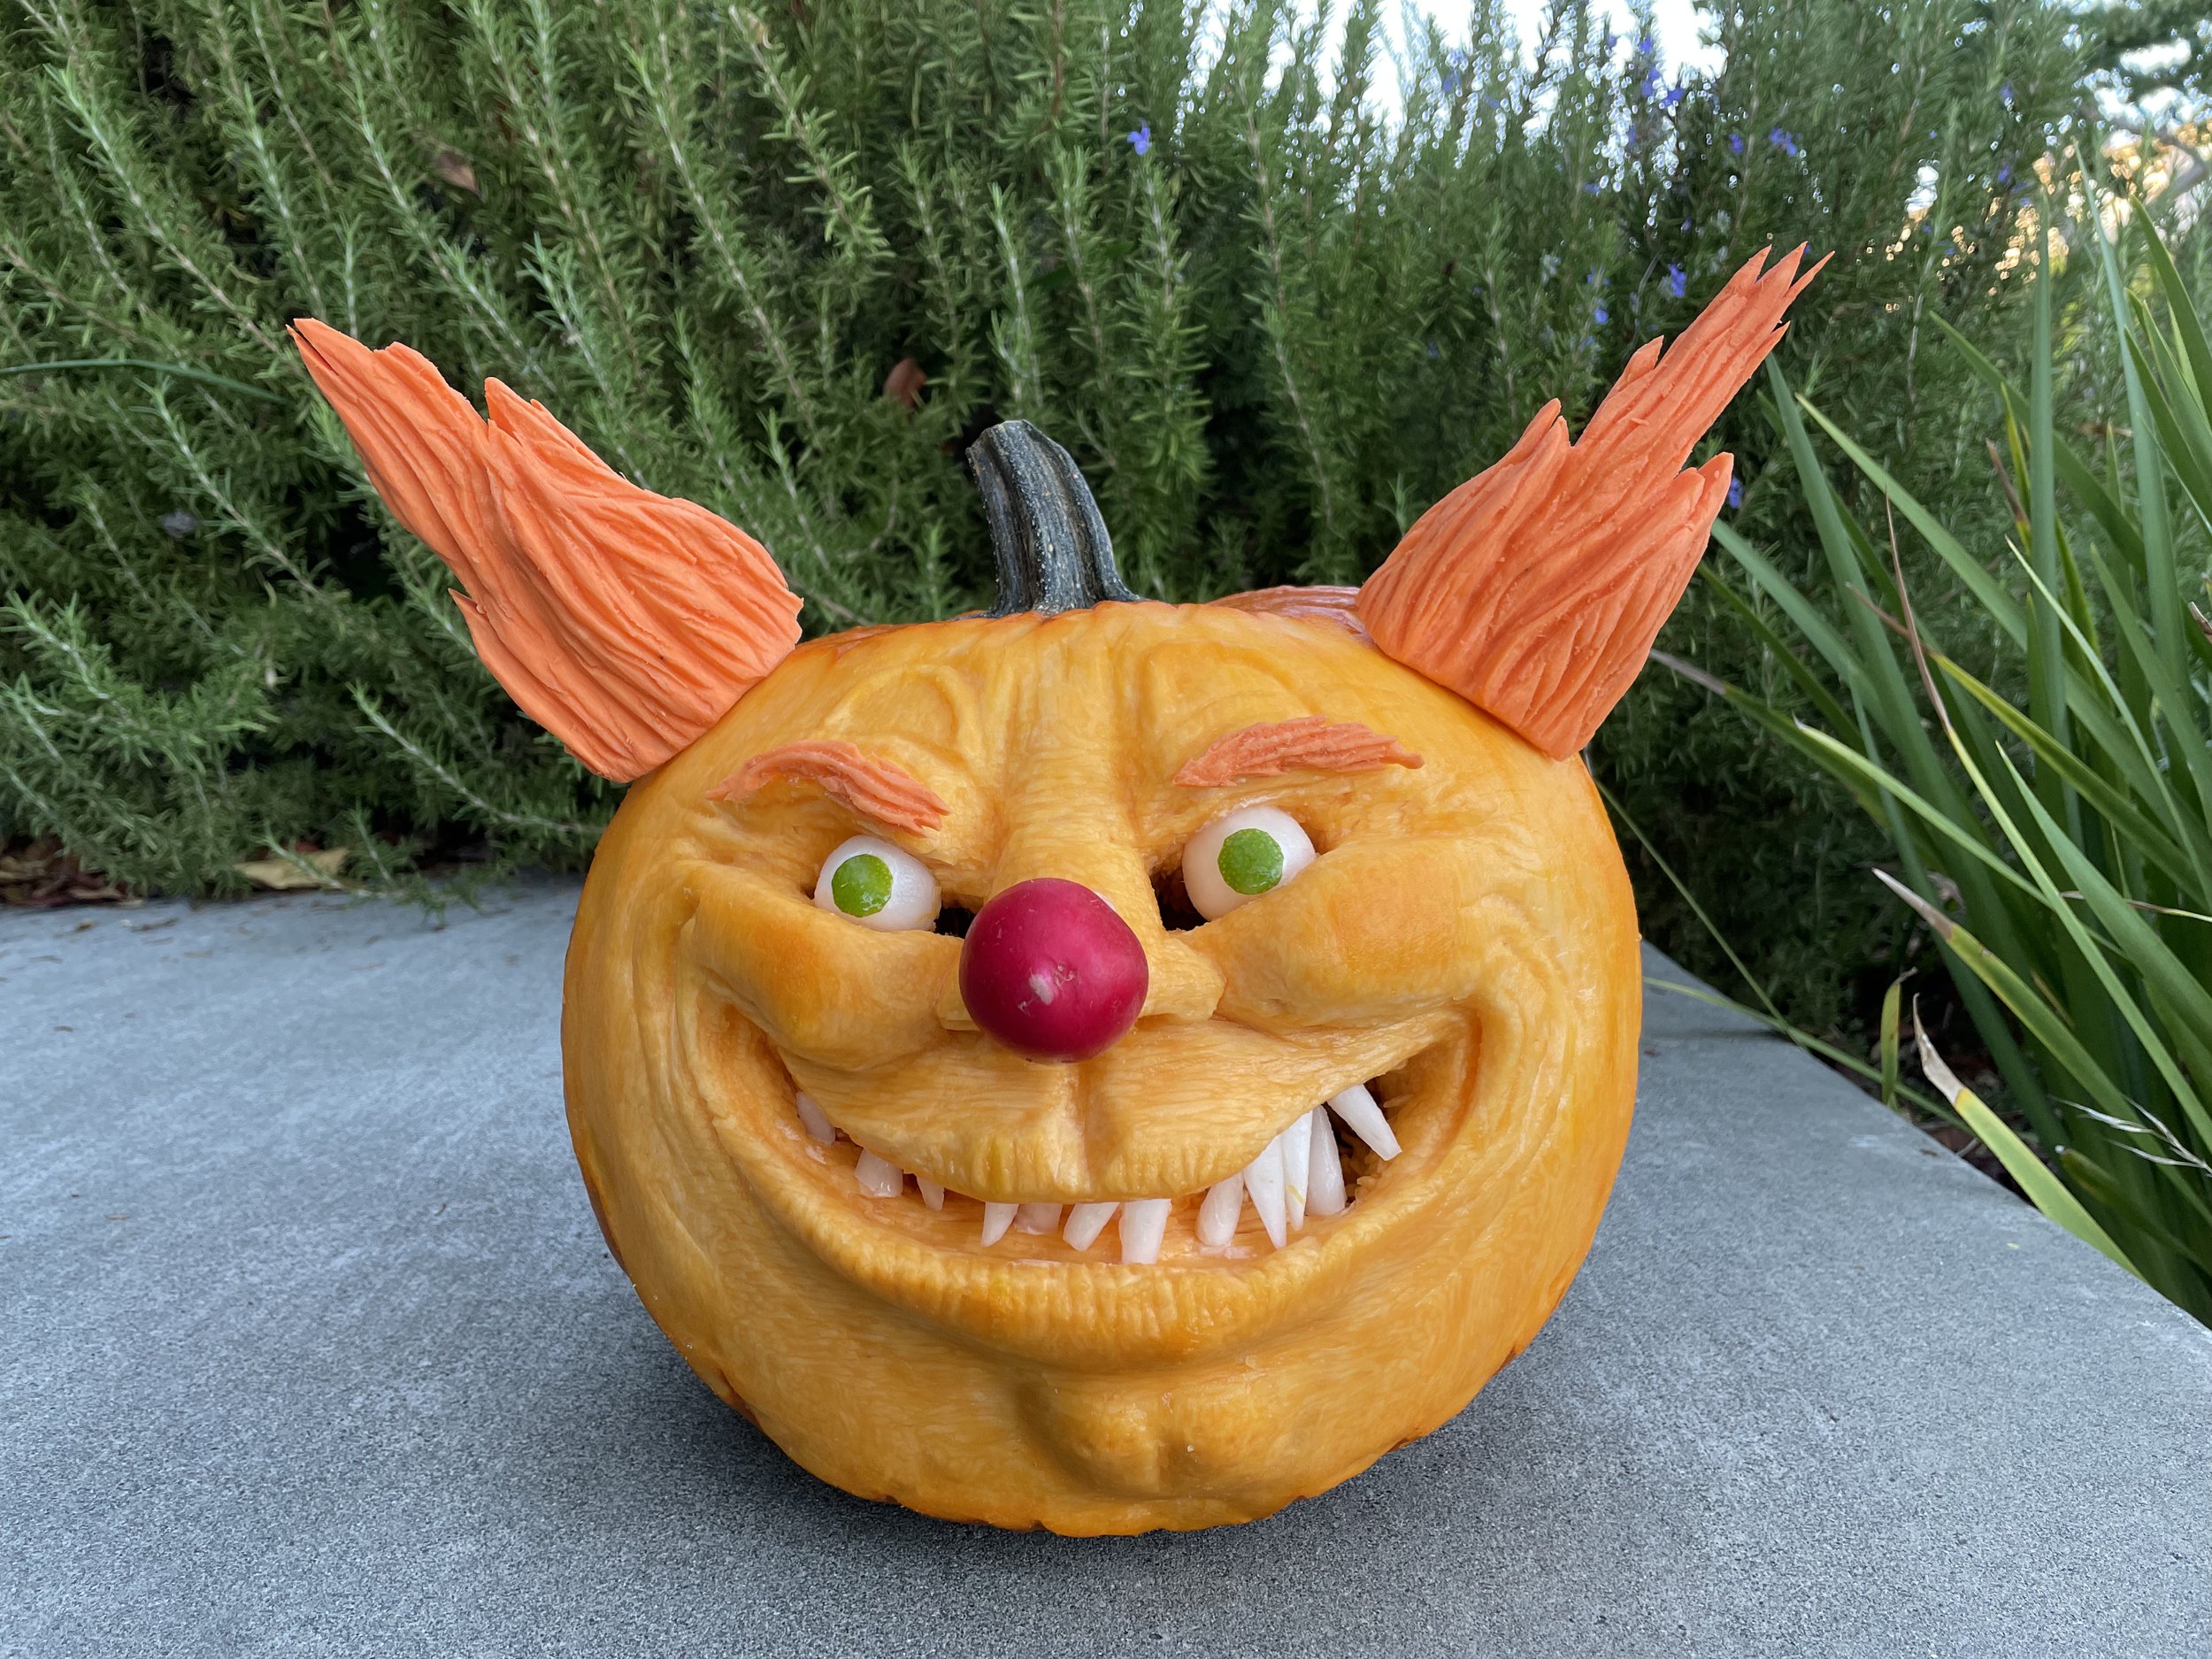
I carved this pumpkins for an interview on local television, as a way of demonstrating how to use other fruits and vegetables in a pumpkin carve. The hair is sweet potato, the nose, teeth, and eyeballs are radishes, and the irises are lime peel.

Rainbow Cake
My niece wanted a simple rainbow-shaped rainbow cake. I’m not very good at simple.
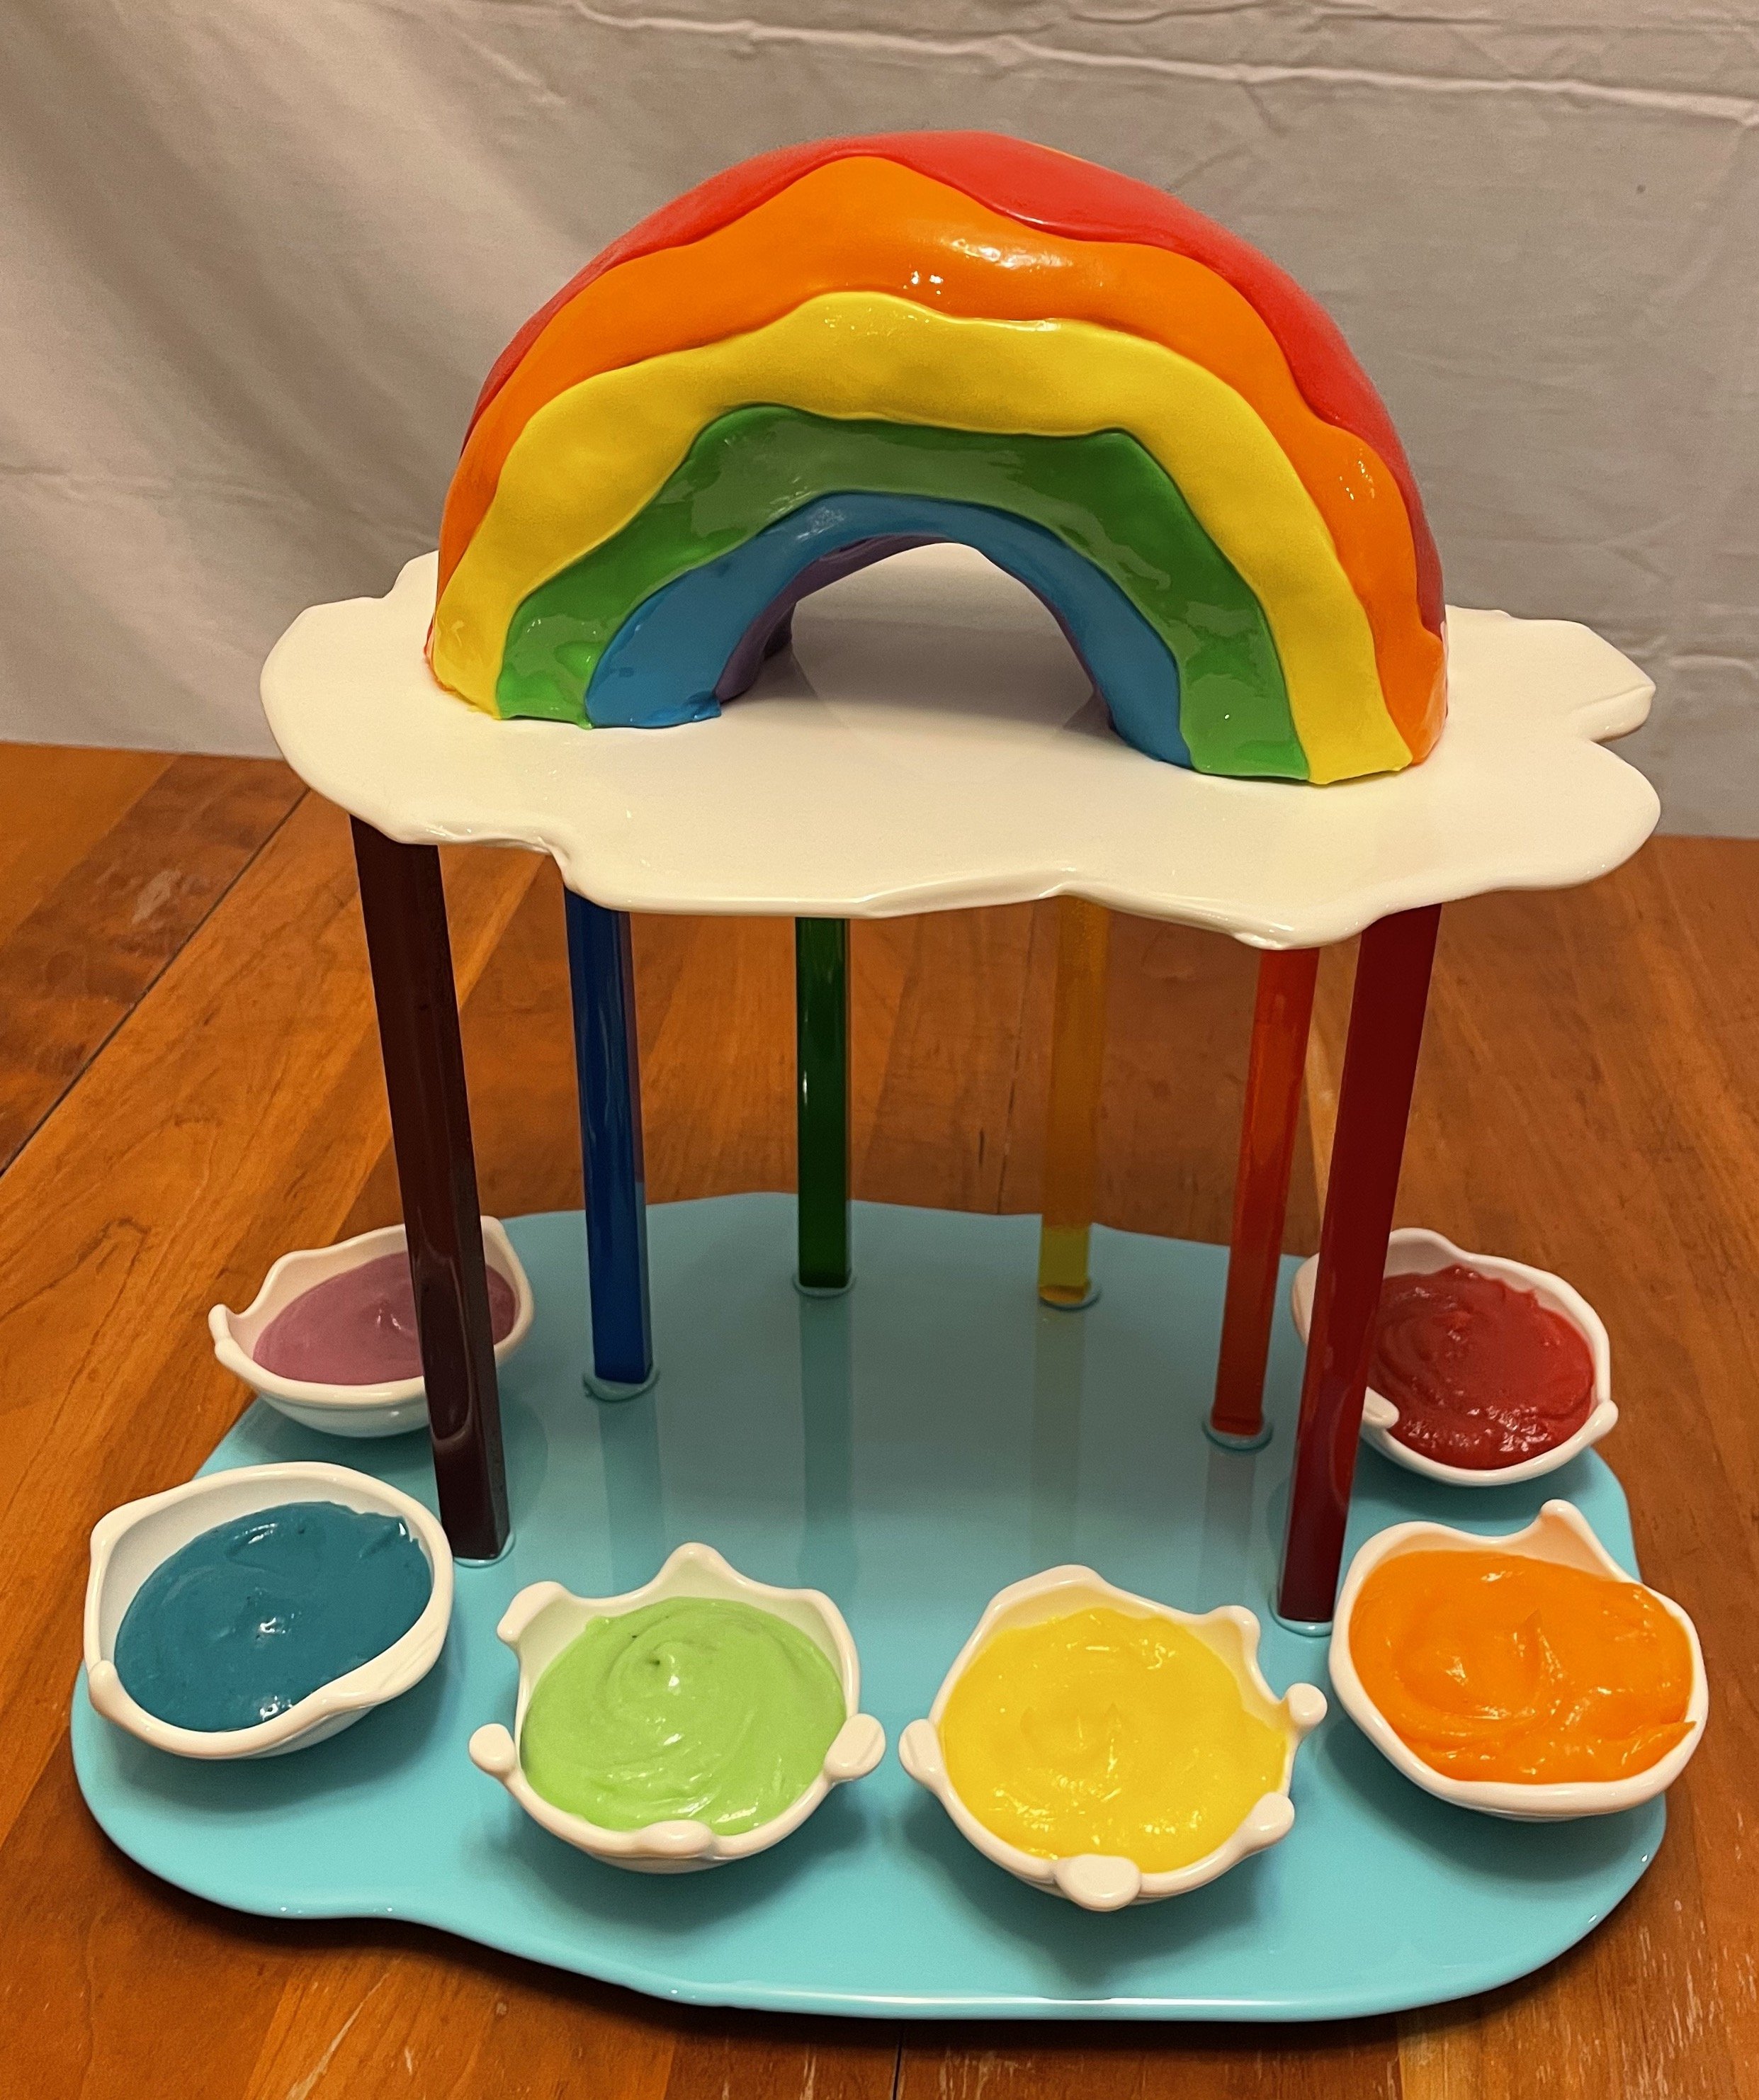
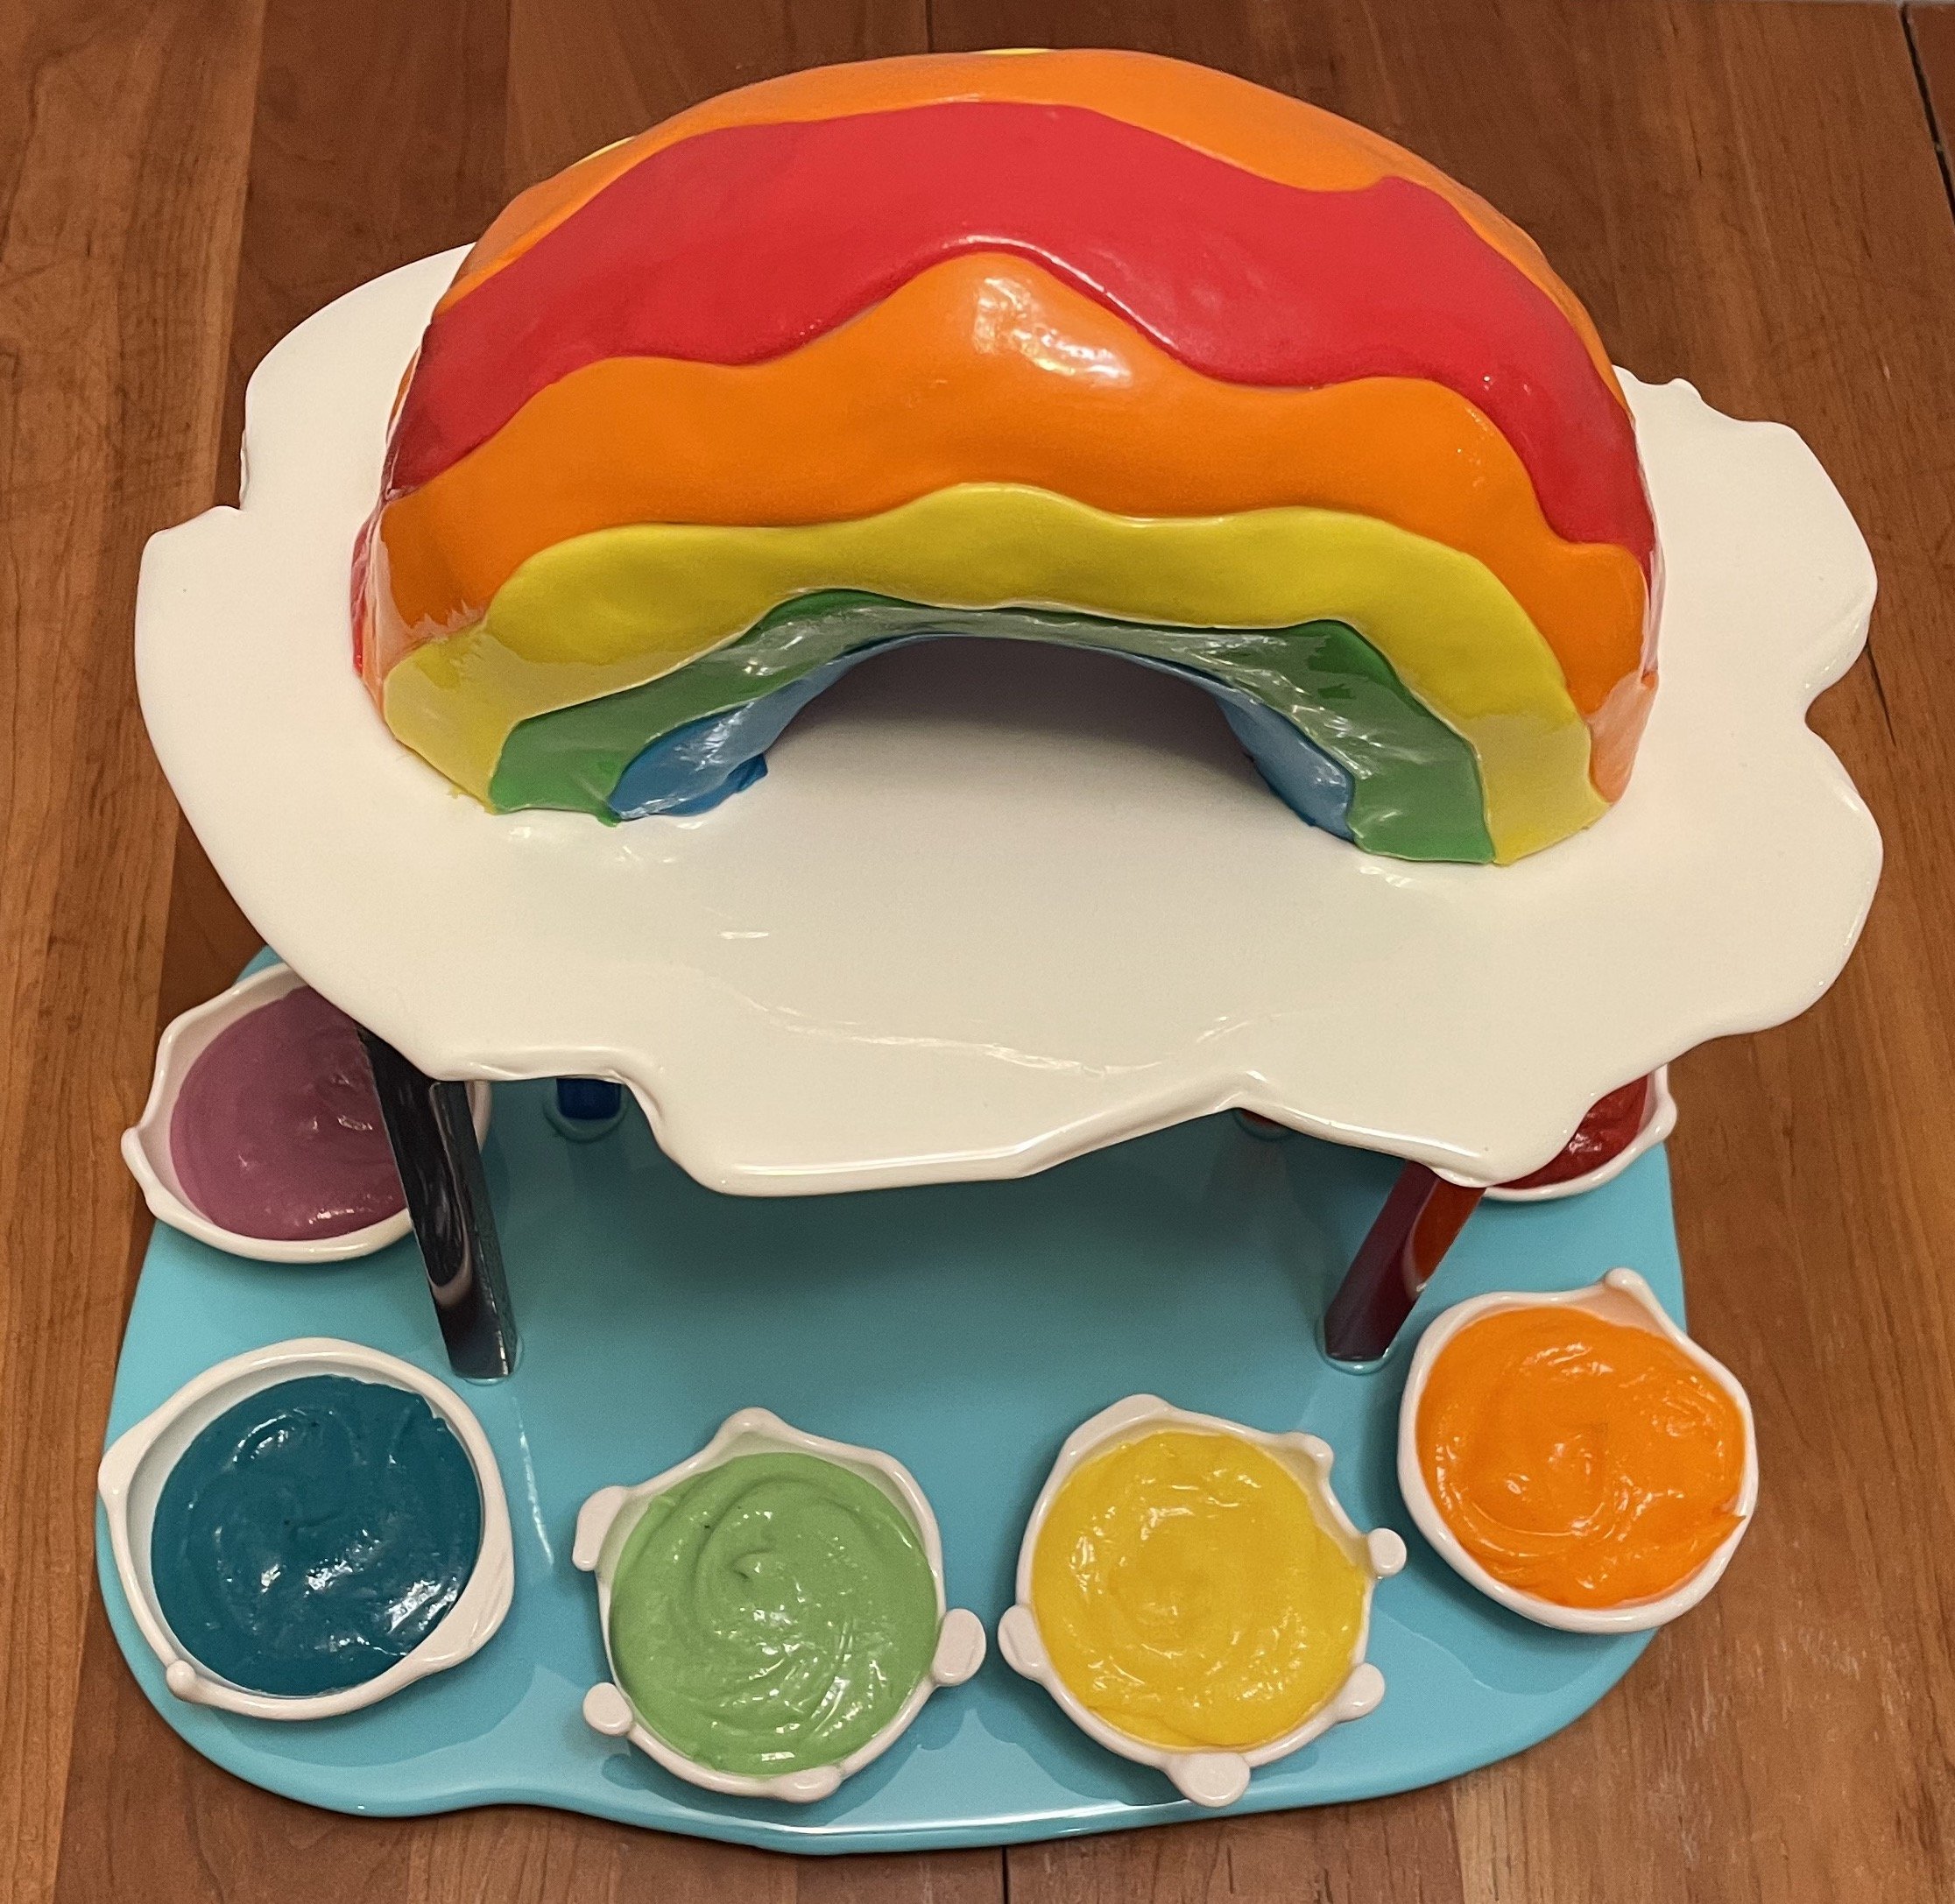
My niece wanted a simple rainbow-shaped rainbow cake. I wanted to give her what she wanted but I’m very bad at simple, so I made a rainbow-shaped rainbow cake on top of an isomalt cloud with rainbow isomalt supports surrounded by little isomalt bowls full of a rainbow of different fruit curds.
The fruit curds, from left to right, are grape, blueberry, kiwi-lime, lemon, kumquat, raspberry. They were all pretty good, but there is definitely a reason that citrus curds are the most popular.
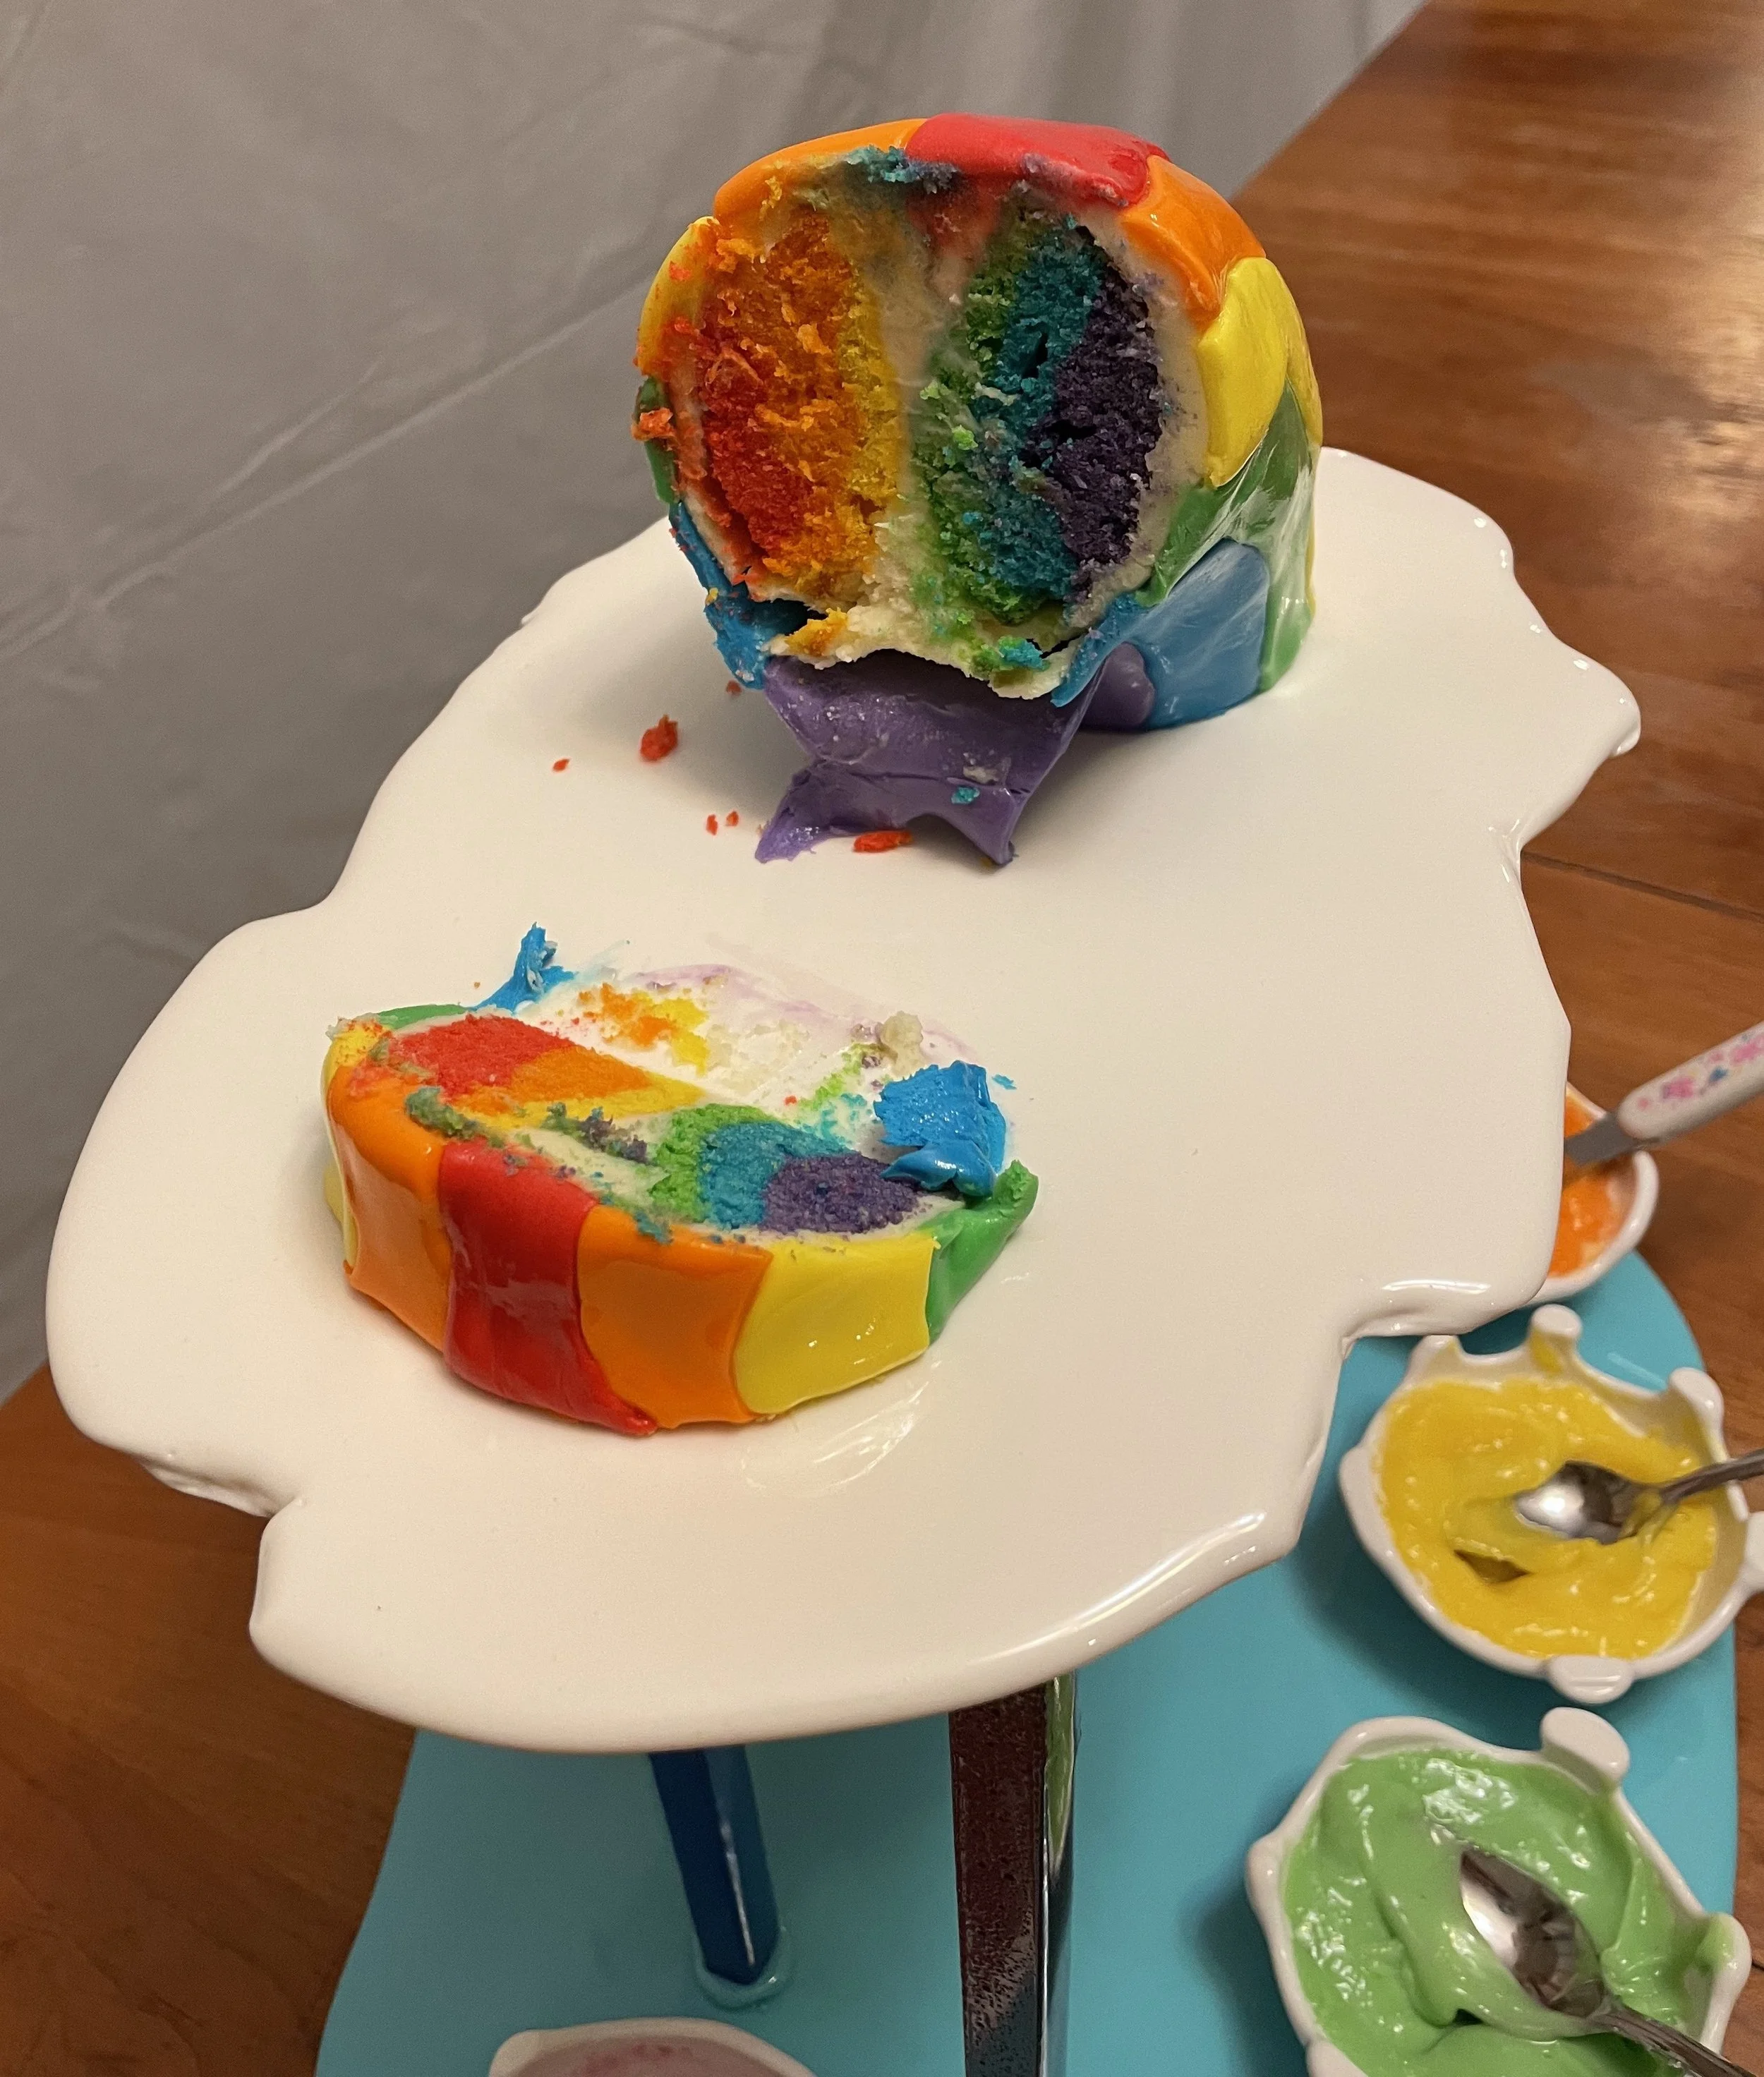
Inside, it’s a pound cake that I baked in a ring cake pan. I poured the batter into the pan in rainbow layers, so that it was rainbow on the inside as well as the outside.
Julia’s Cake
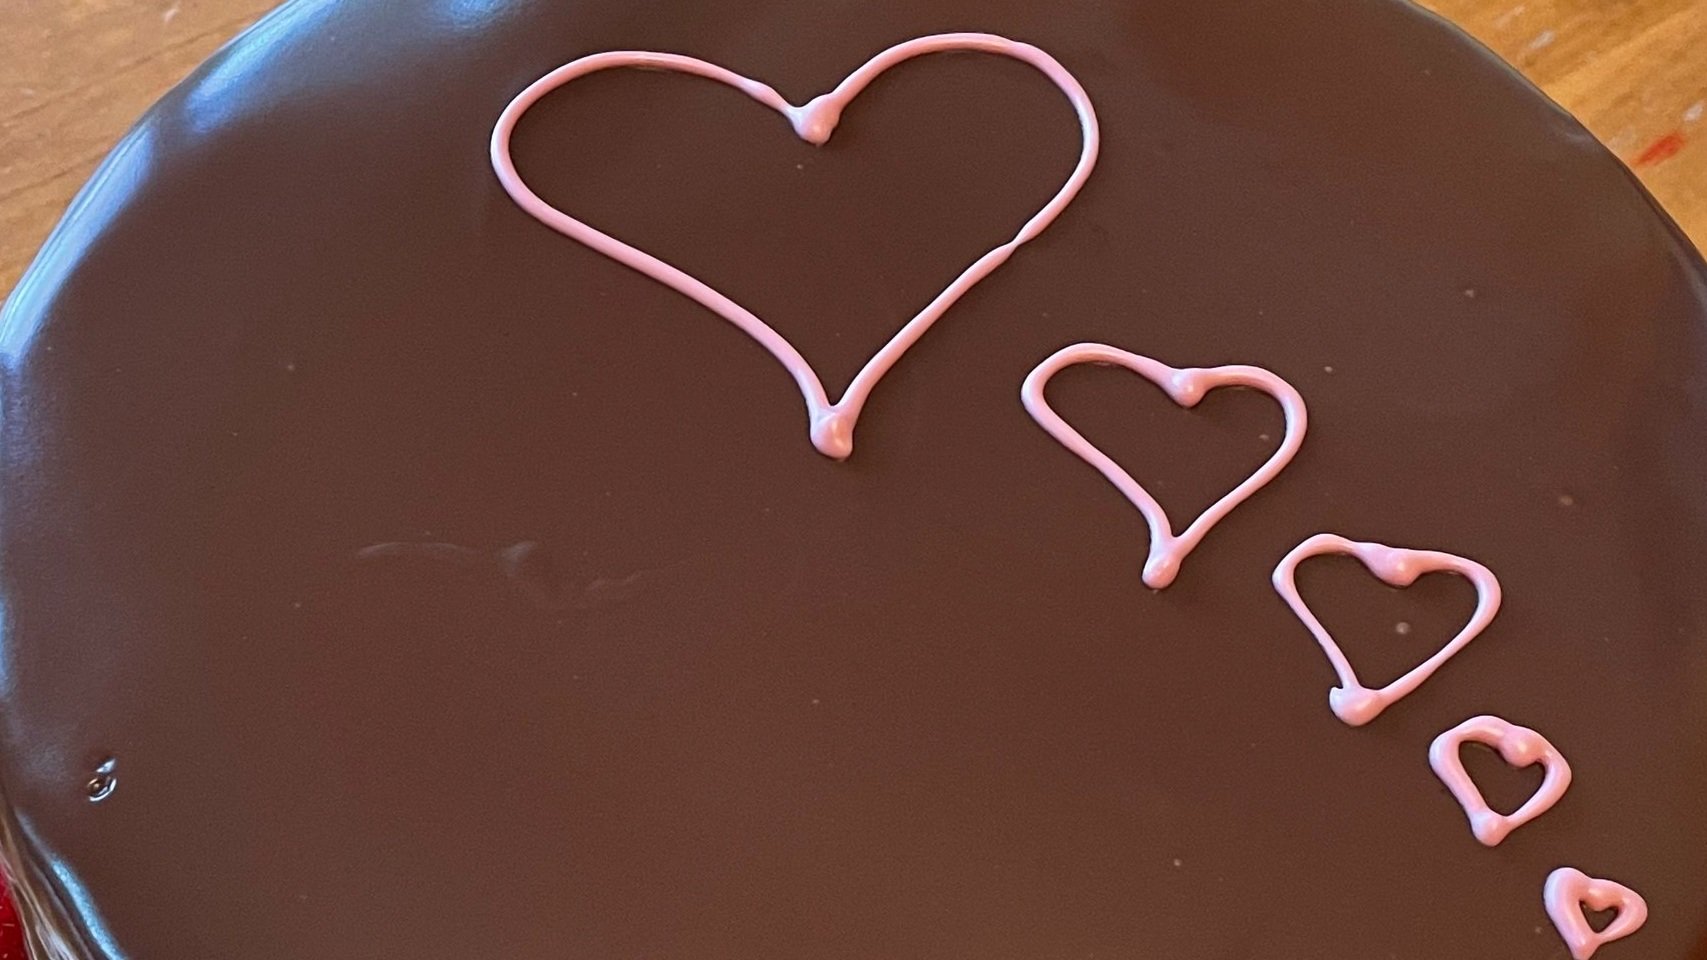
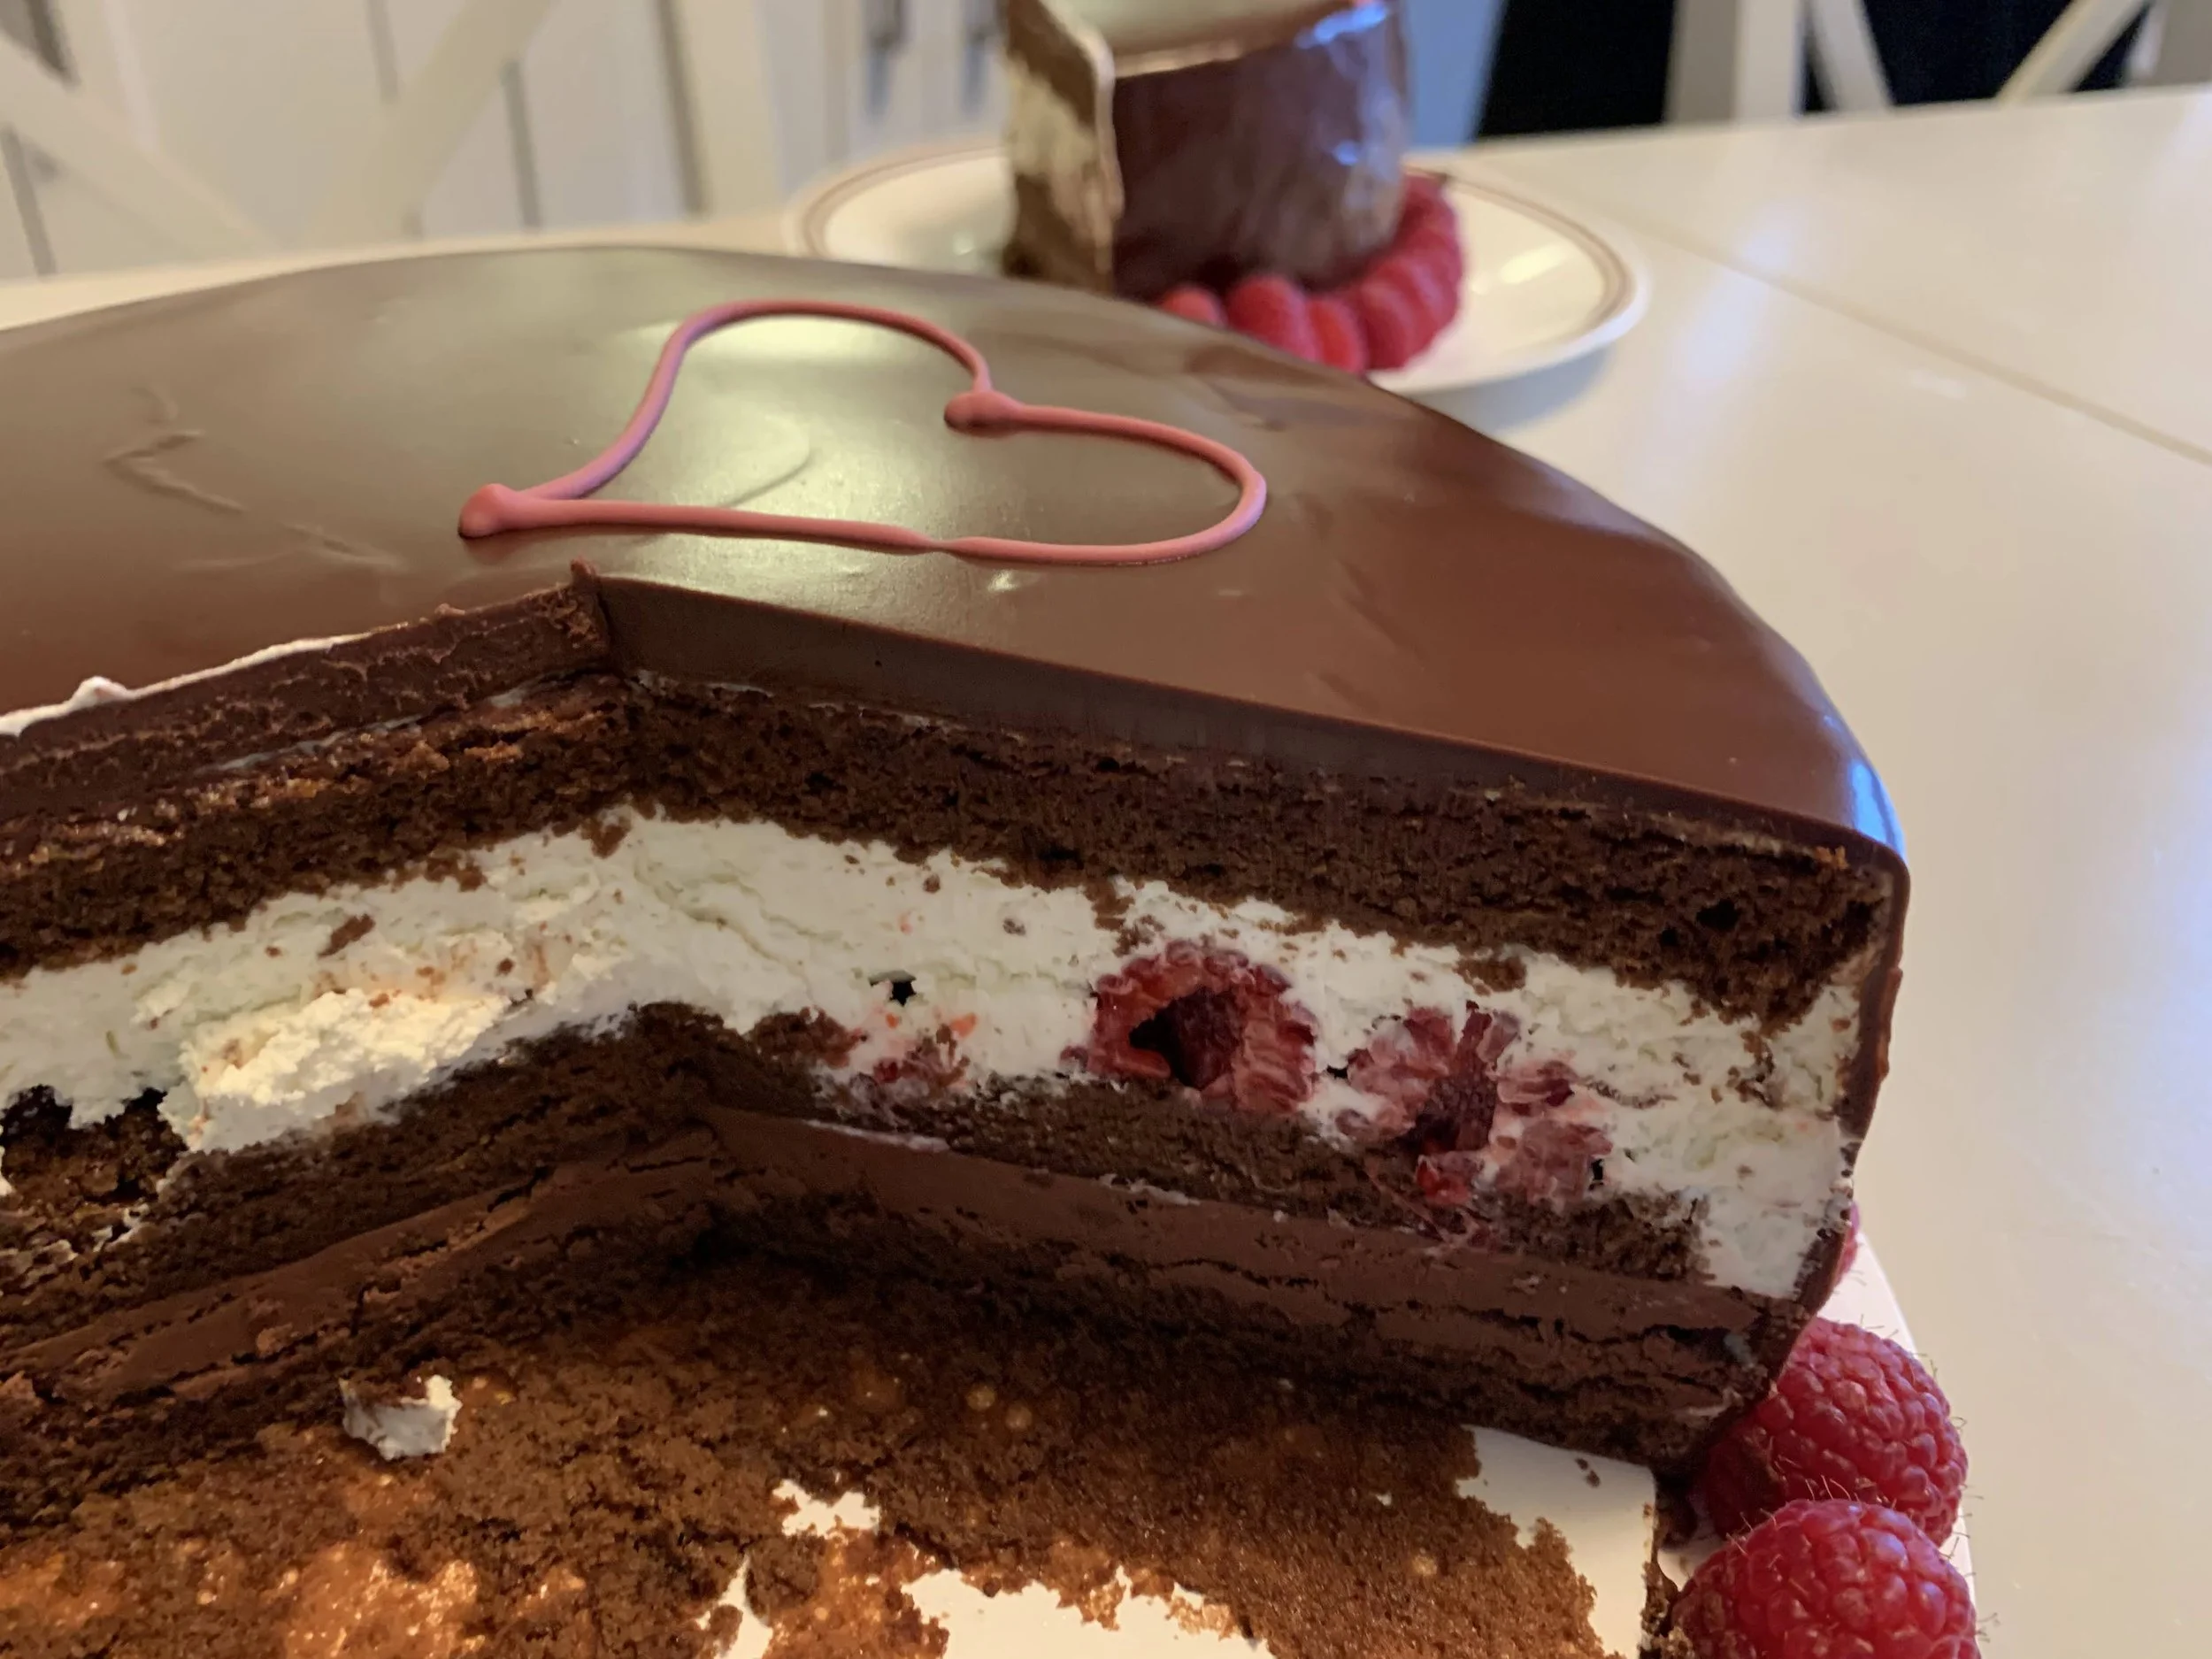
It’s chocolate genoise, soaked with Chambord, with chocolate crème fraîche, vanilla crème fraîche, and fresh raspberries inside, with a chocolate glaze, decorated with more fresh raspberries and ruby chocolate hearts. I made it for my dad’s birthday.
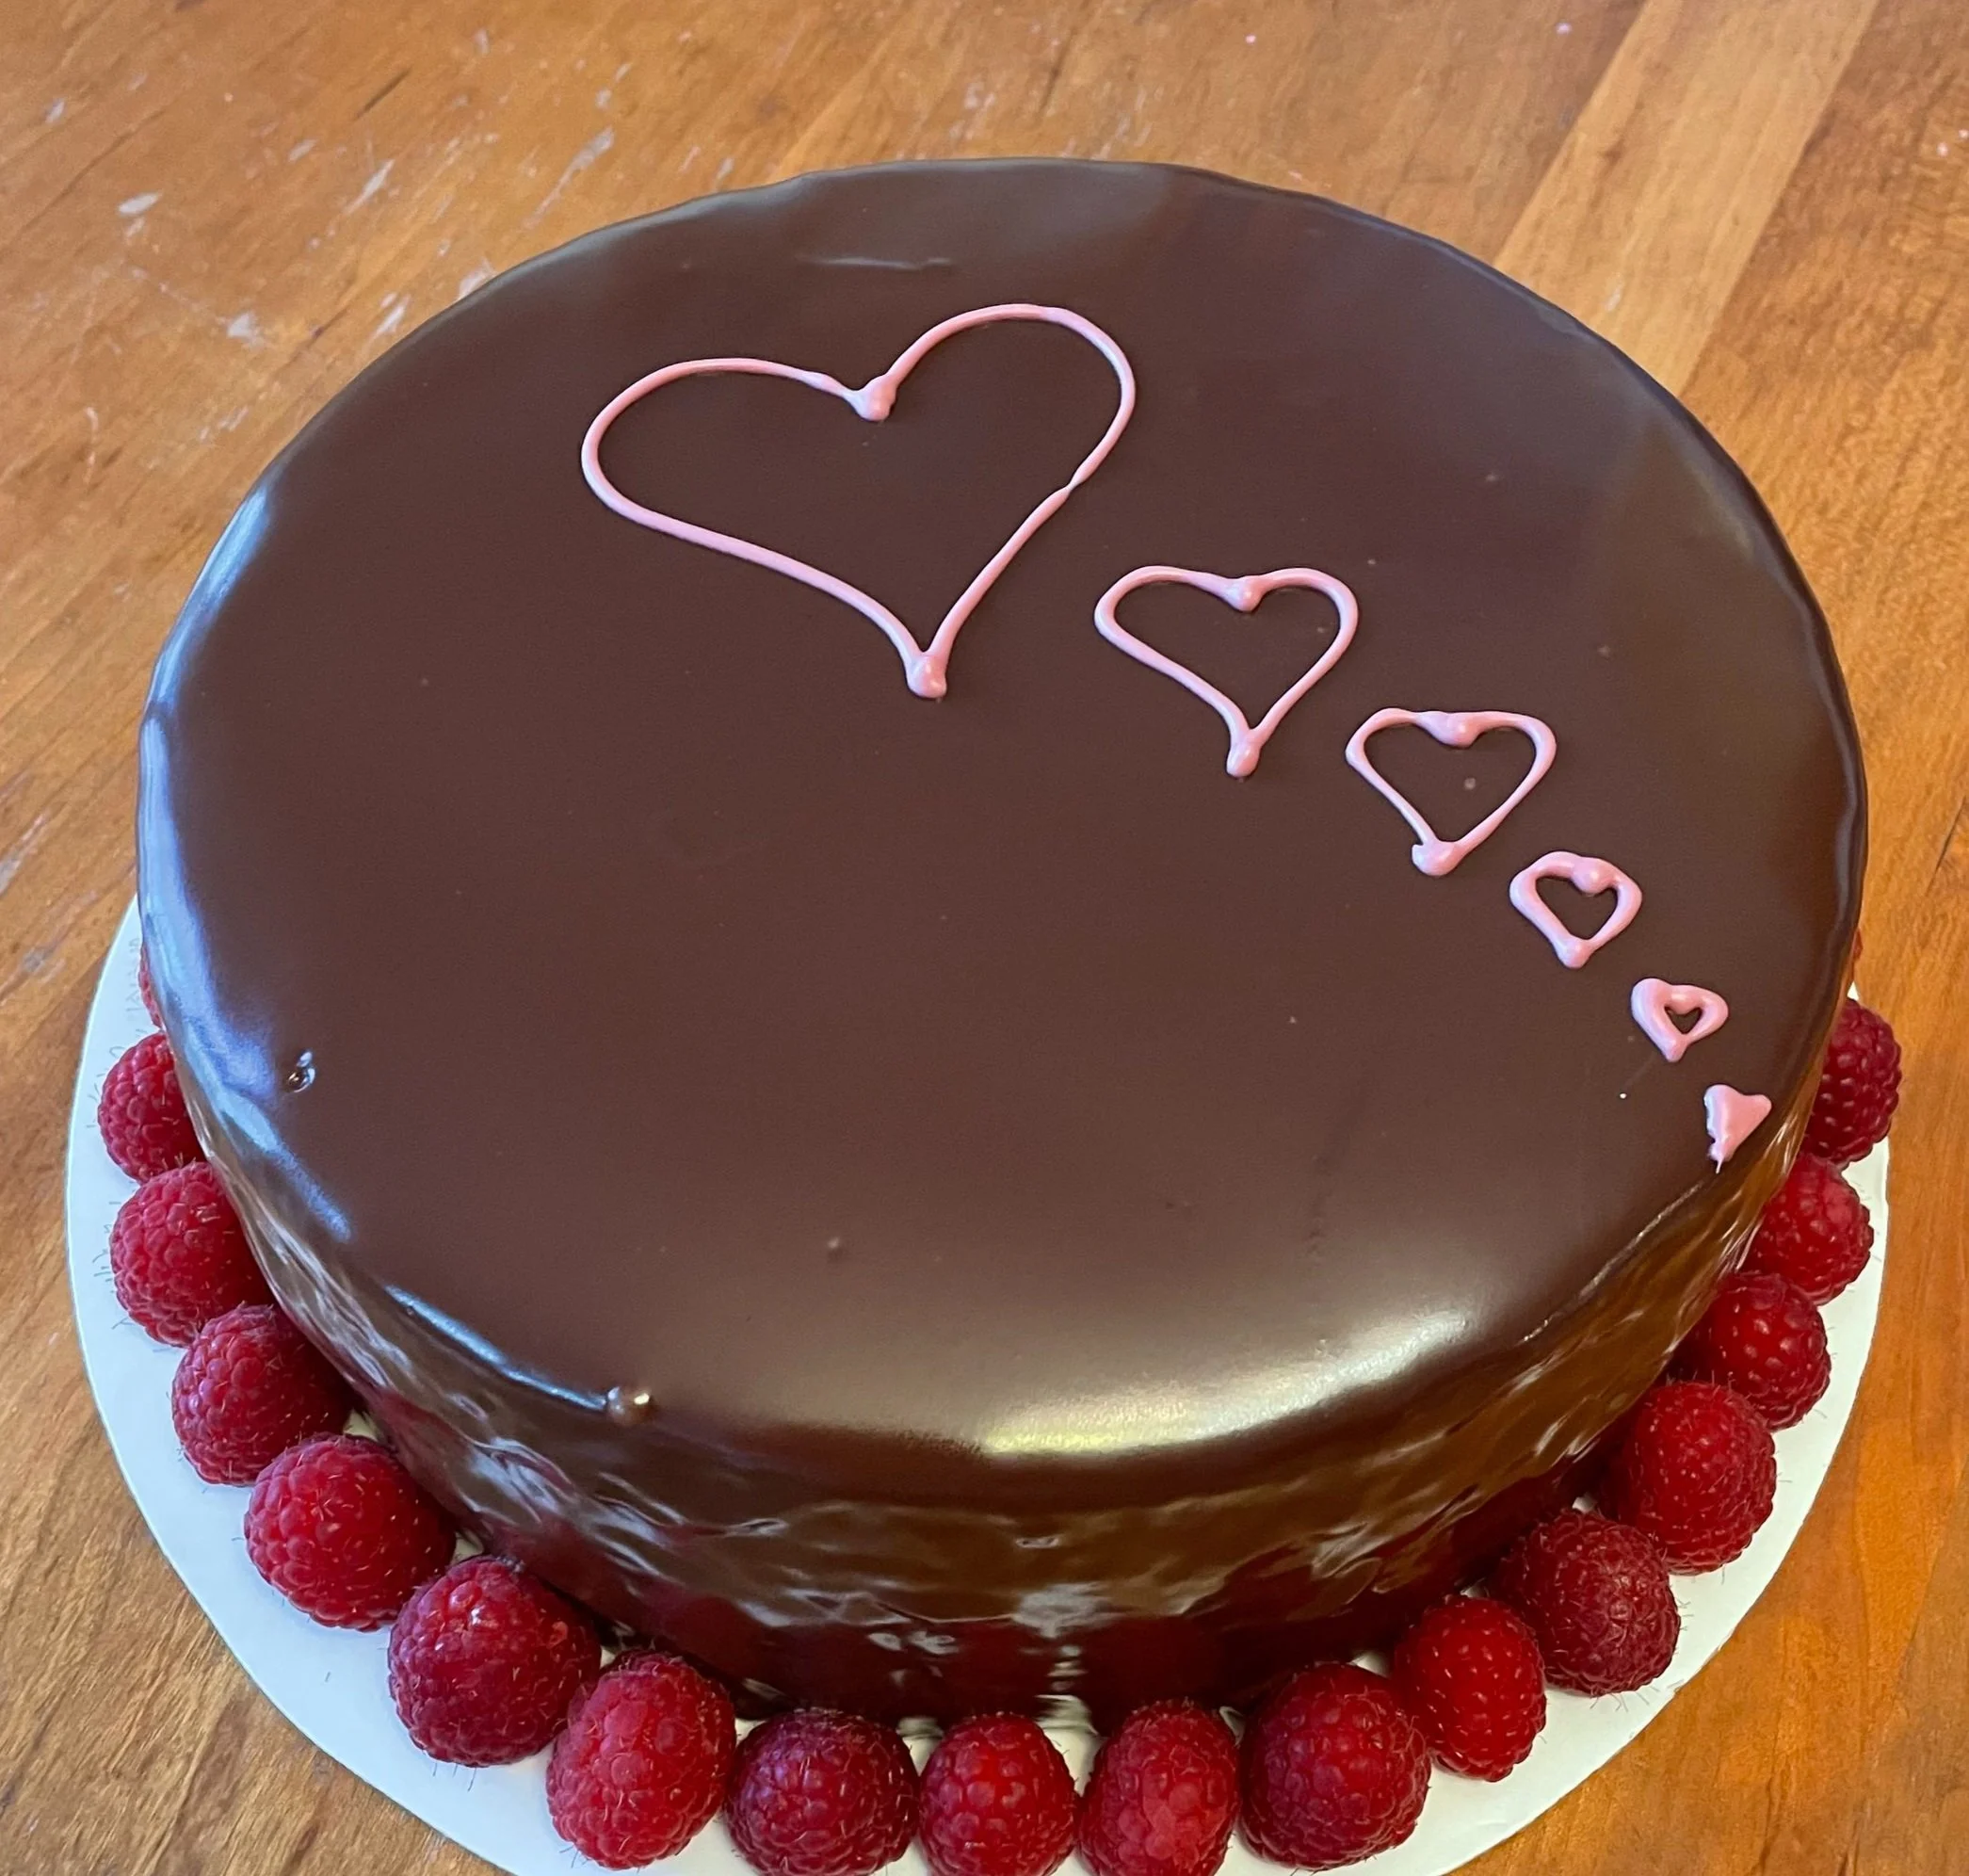
The book I got this from, Alice Medrich’s Bittersweet, calls this Julia’s Cake. It’s chocolate genoise, soaked with Chambord, with chocolate crème fraîche, vanilla crème fraîche, and fresh raspberries inside, with a chocolate glaze, decorated with more fresh raspberries and ruby chocolate hearts. I made it for my dad’s birthday.

Meatloaf Cake
My sister had to make a meatloaf decorated like a cake for work, so I volunteered to do the decorating. The icing is mashed potatoes colored with beet juice.
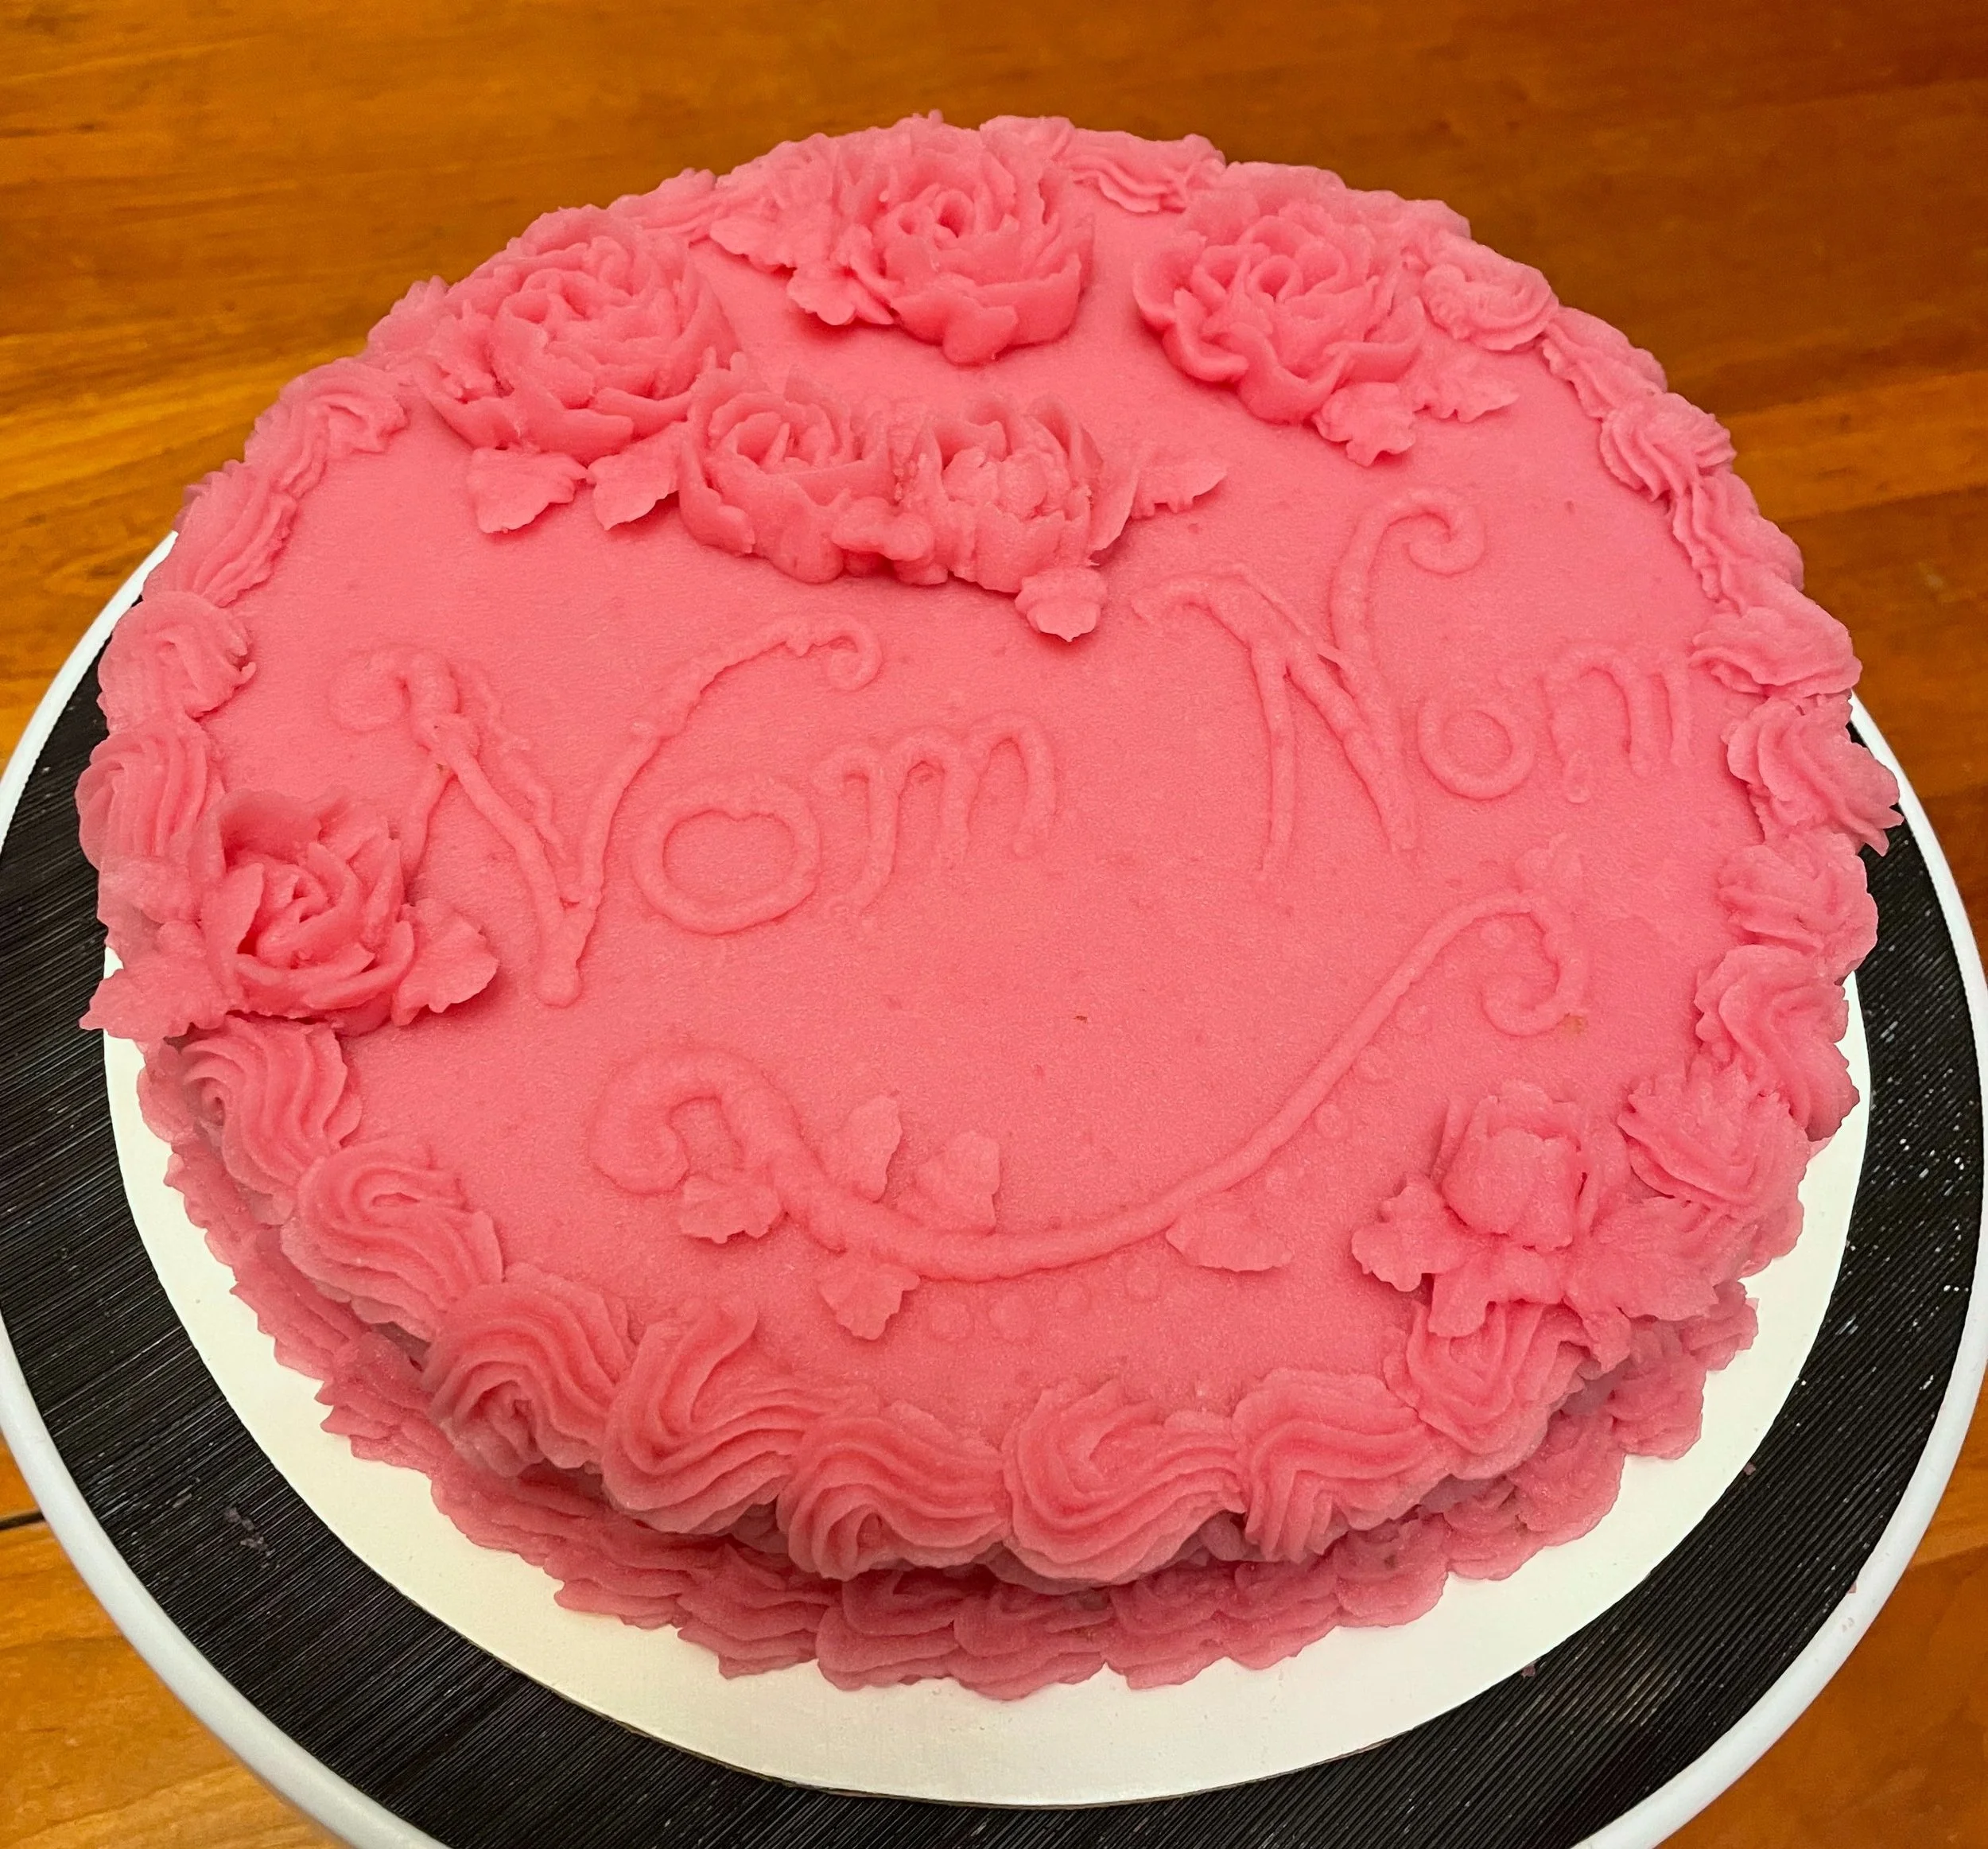
My sister had to make a meatloaf decorated like a cake for work, so I volunteered to do the decorating. It gave me an excuse to get my flower nail out, which I haven’t used in years because I’m not usually a buttercream rose kind of cake decorator. The icing is mashed potatoes colored with beet juice, which piped better than I expected, though not as well as icing. Once I got down to the #2 tip, the texture really became a challenge.

The really unsettling thing was that, while it looked very much like a cake, it smelled not at all like a cake.

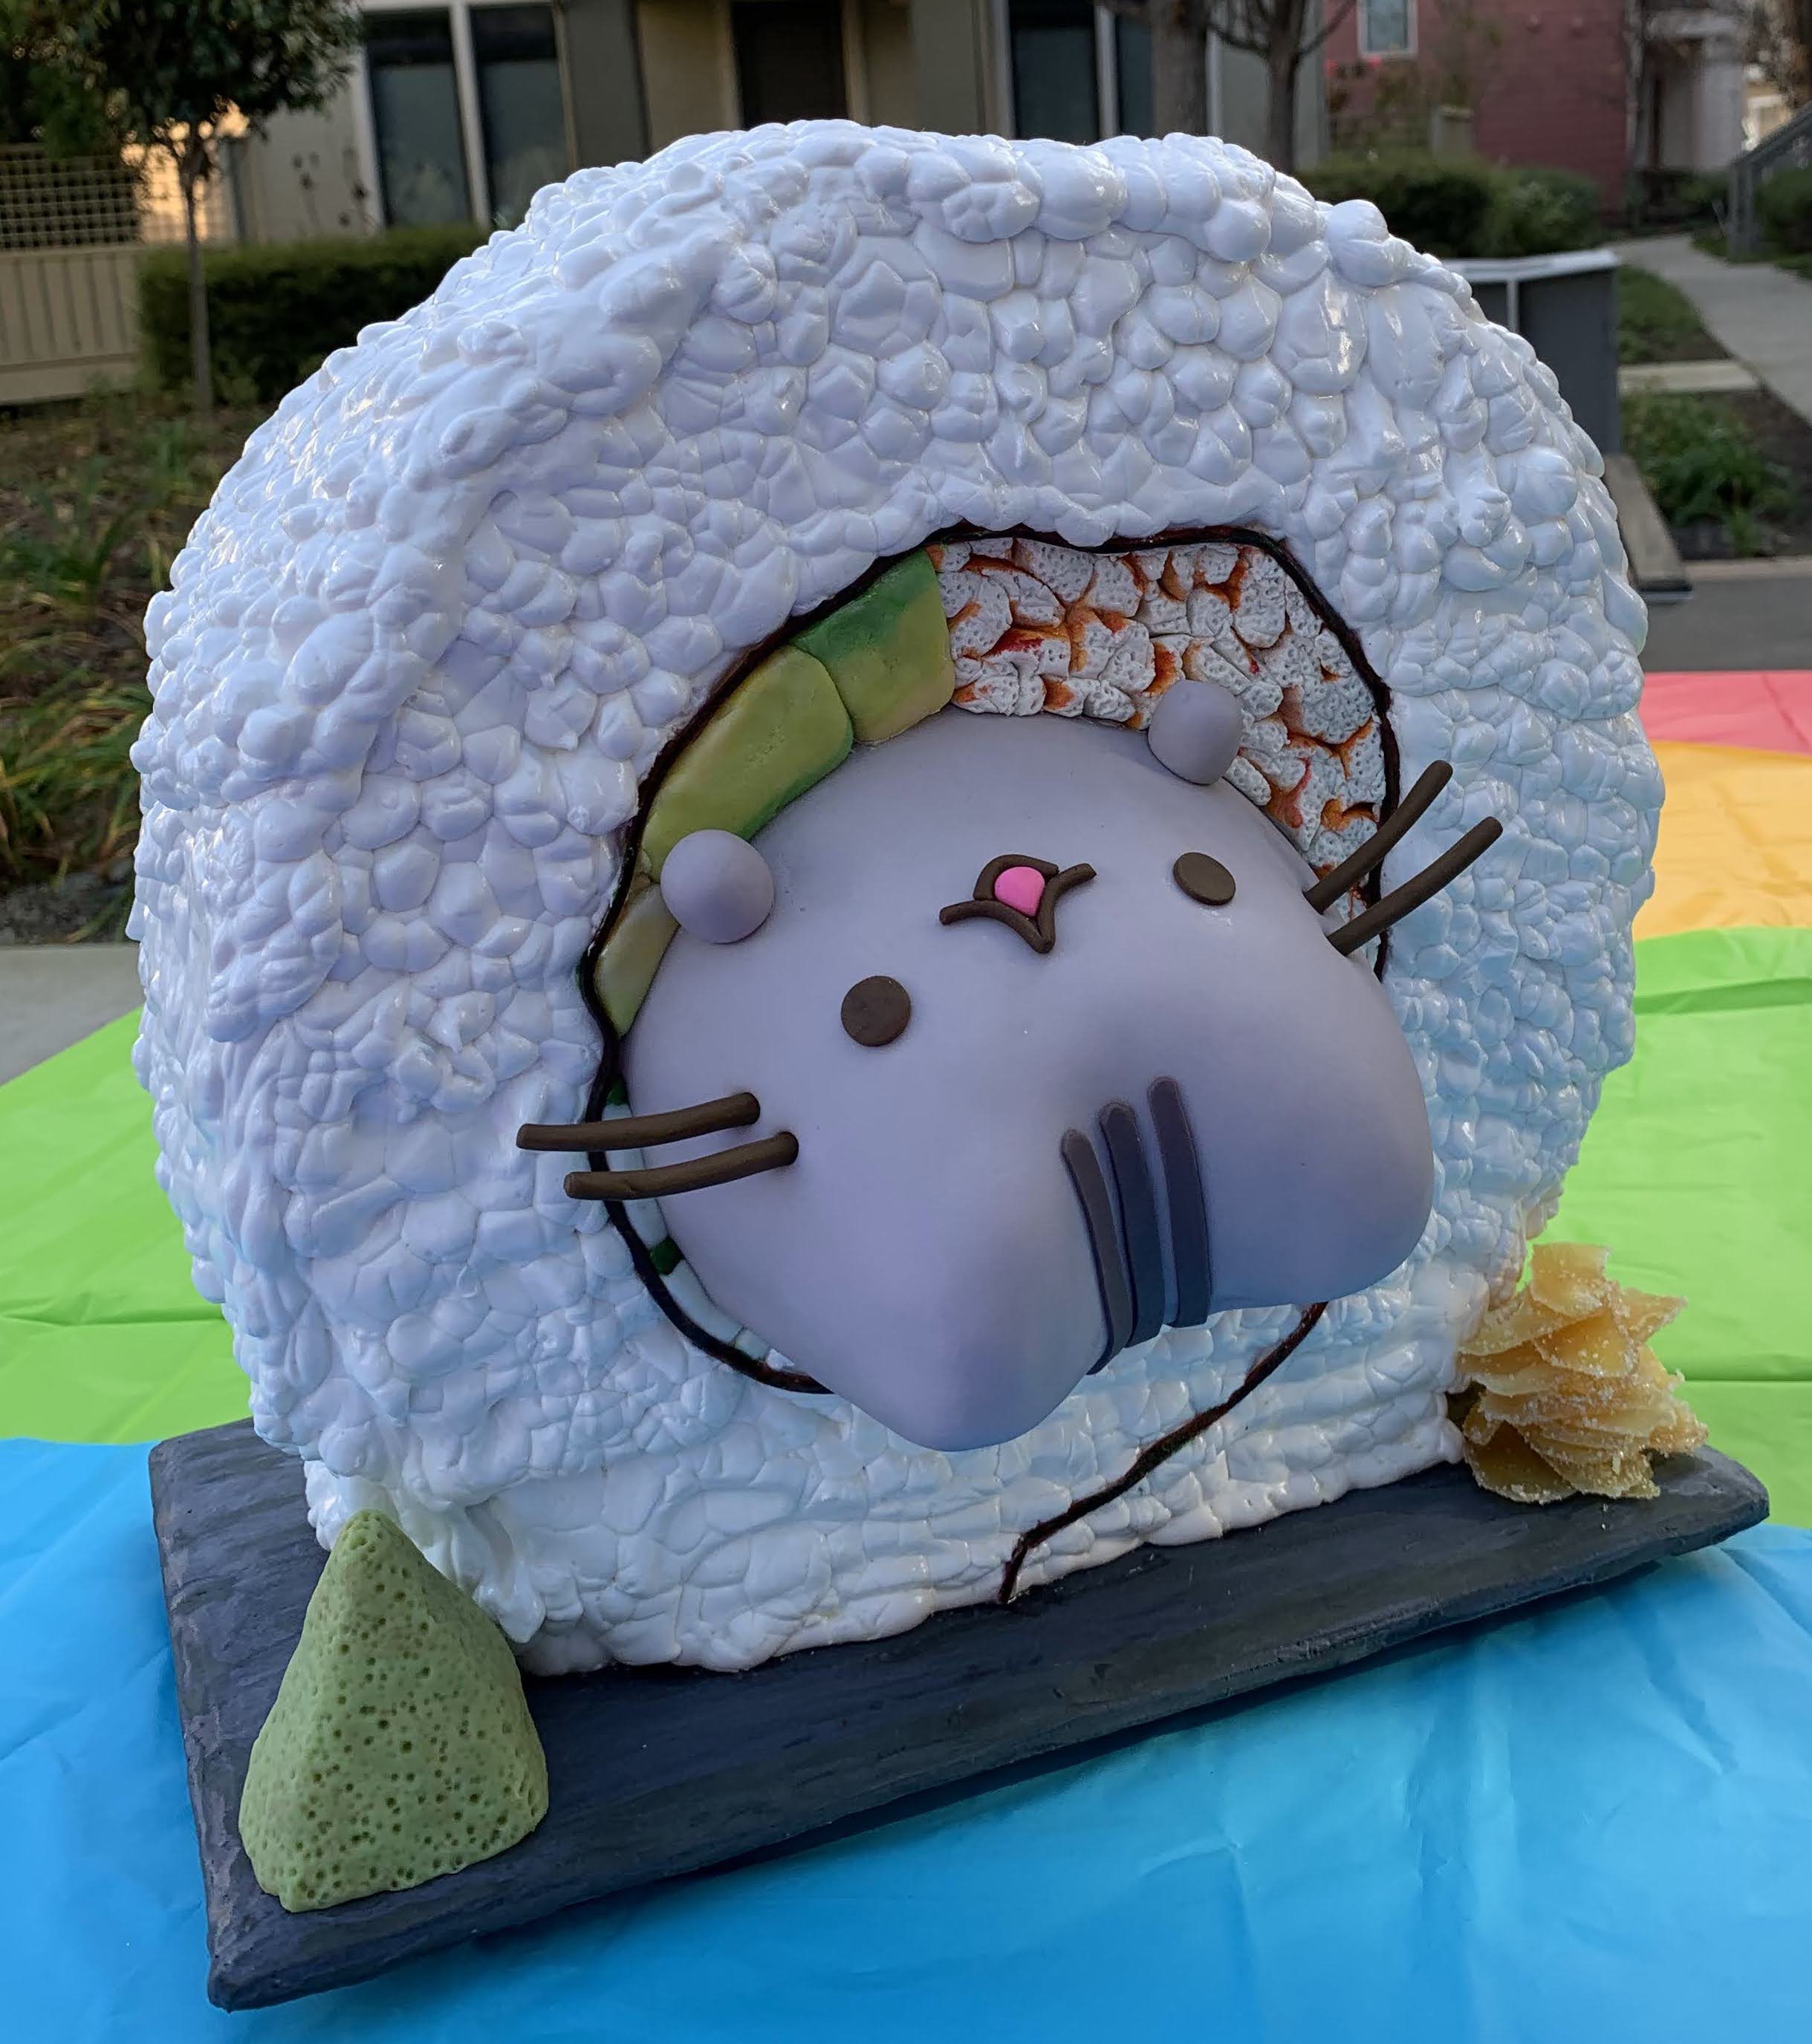
Sushi Pusheen Cake
My nephew loves sushi and he loves Pusheen, so his request for his birthday cake was Pusheen wrapped up in a California roll (otherwise known as Susheen).
My nephew loves sushi and he loves Pusheen, so his request for his birthday cake was Pusheen wrapped up in a California roll (otherwise known as Susheen).
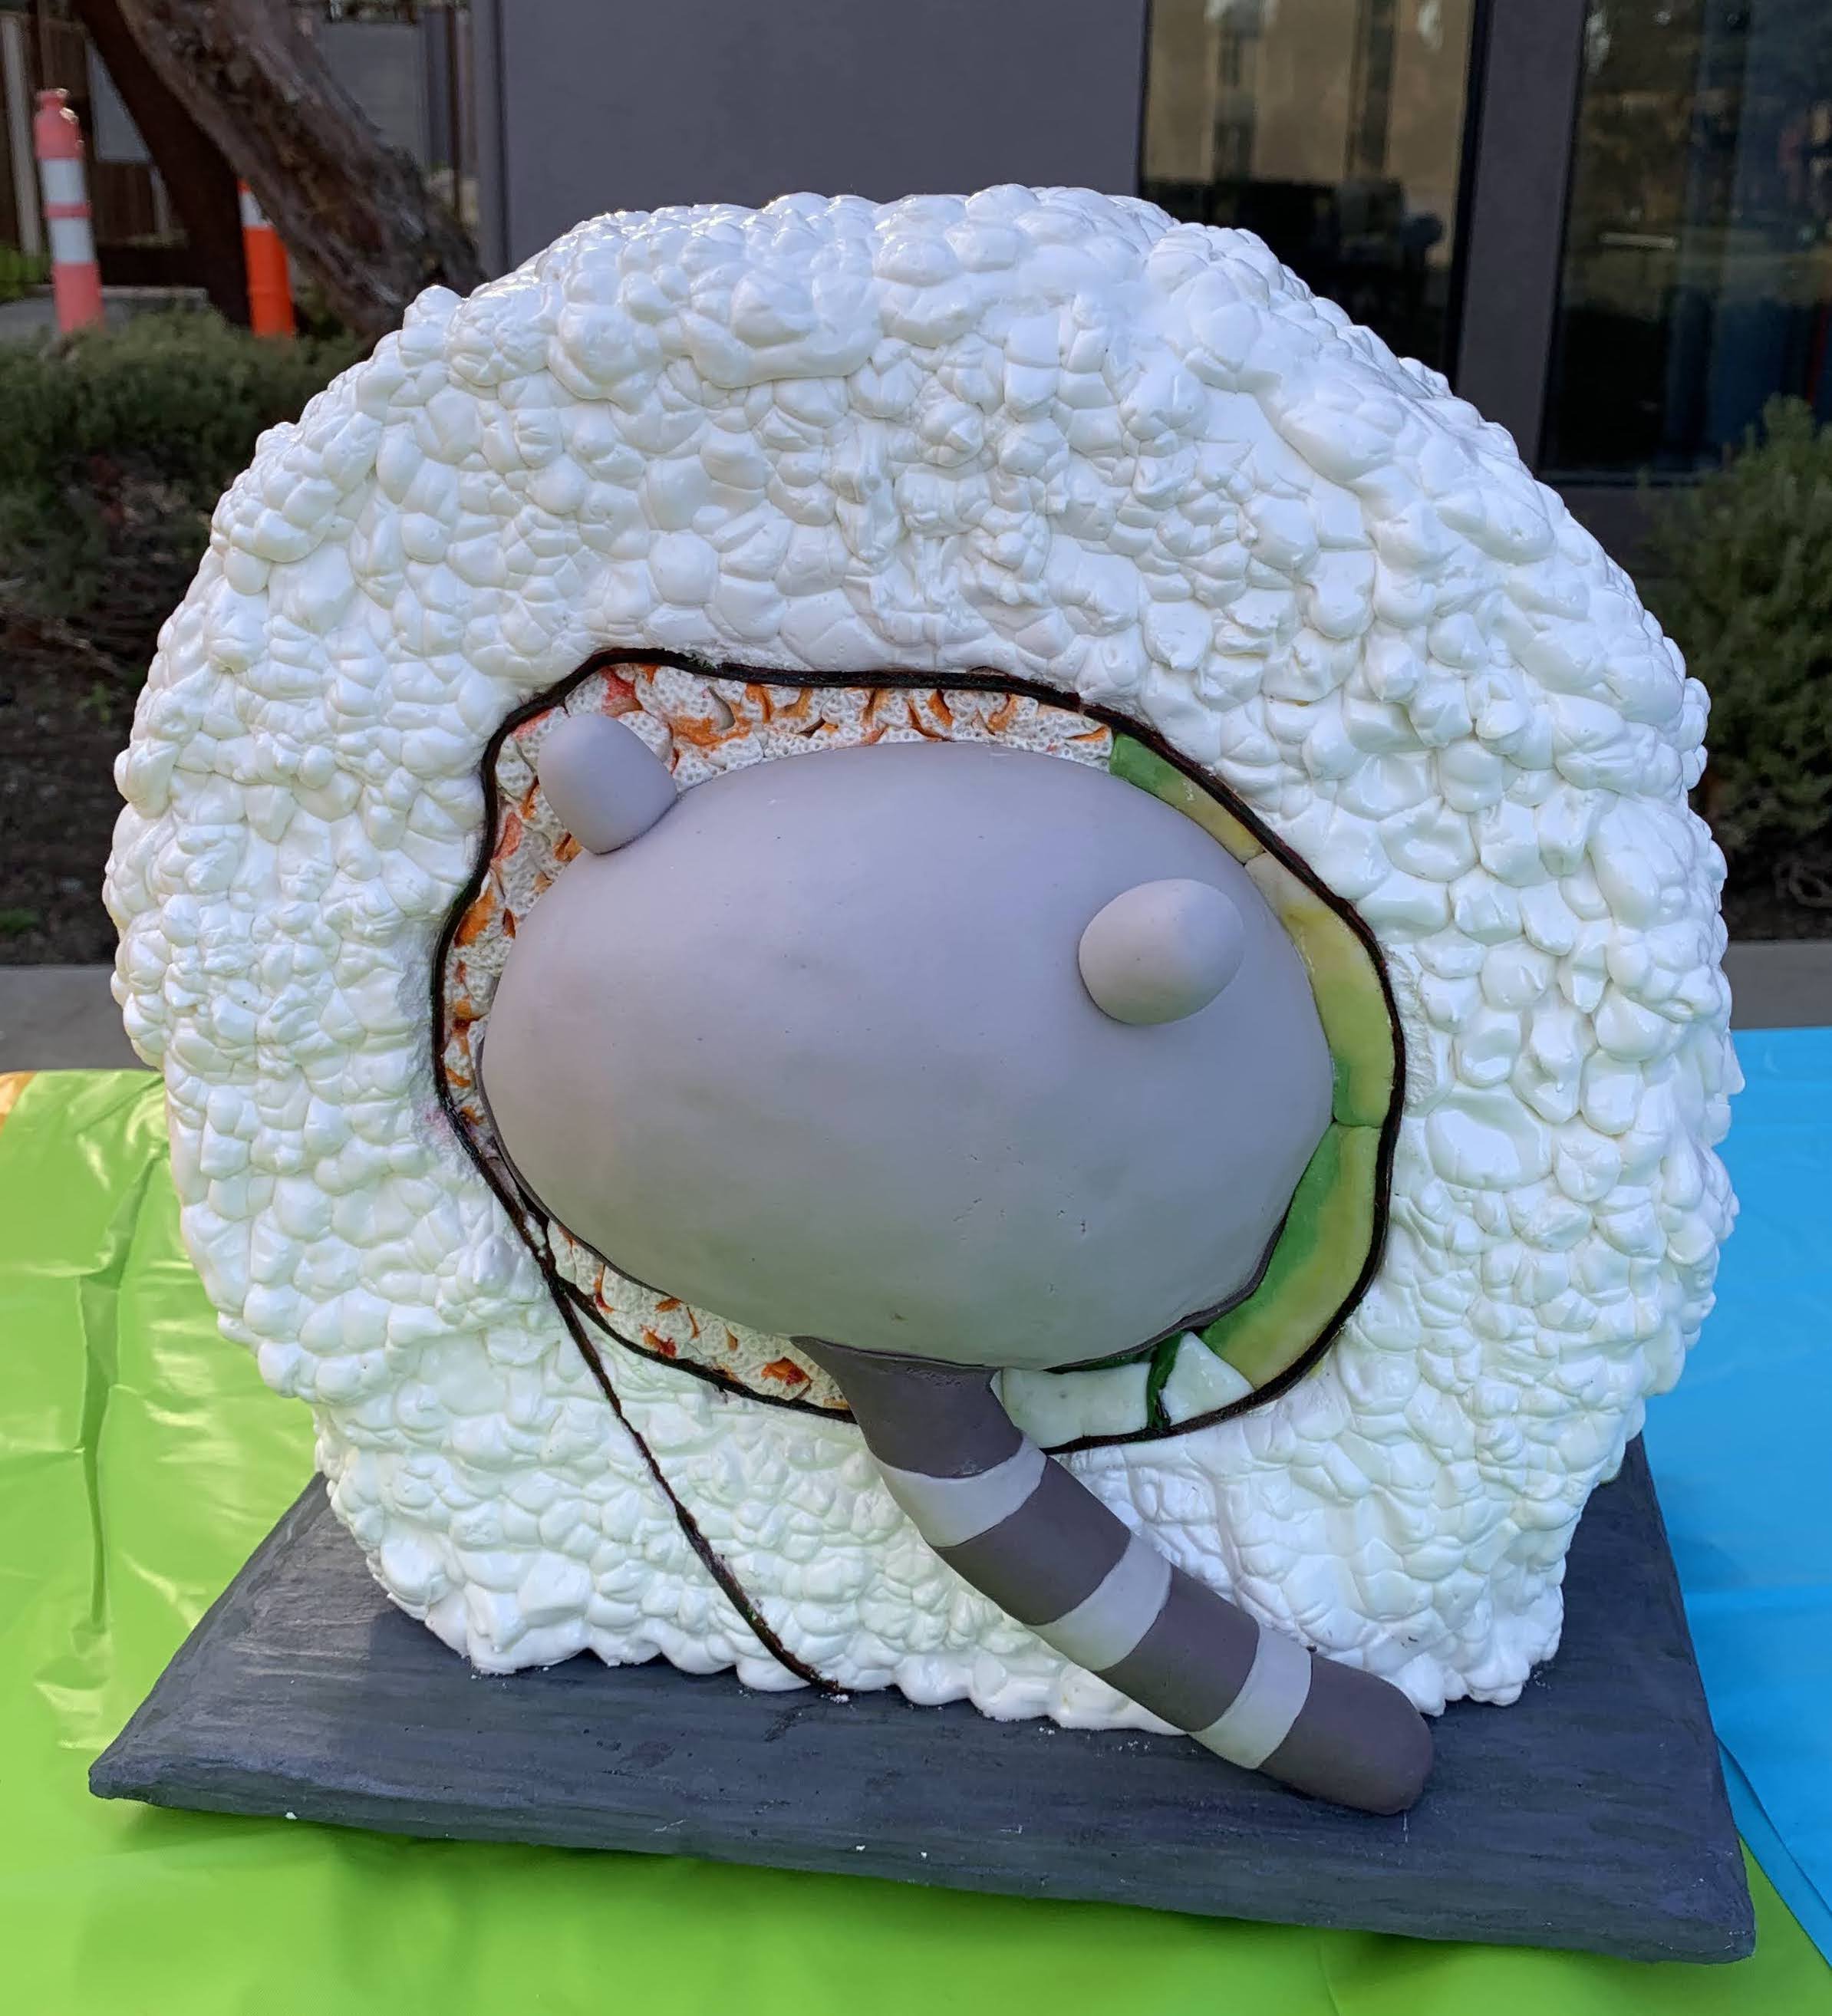
The rice is marshmallow piped over top of a chocolate cookie structure. I made the Pusheen cake separately, inserted it into the middle of the rice tube, then filled in the space between the rice and the Pusheen with marzipan krab and avocado and fondant cucumber. The nori is fruit leather, painted with green food coloring. The wasabi is also marzipan and the ginger is just thinly sliced candied ginger. The base is covered with royal icing and is supposed to look like a slate serving tray.
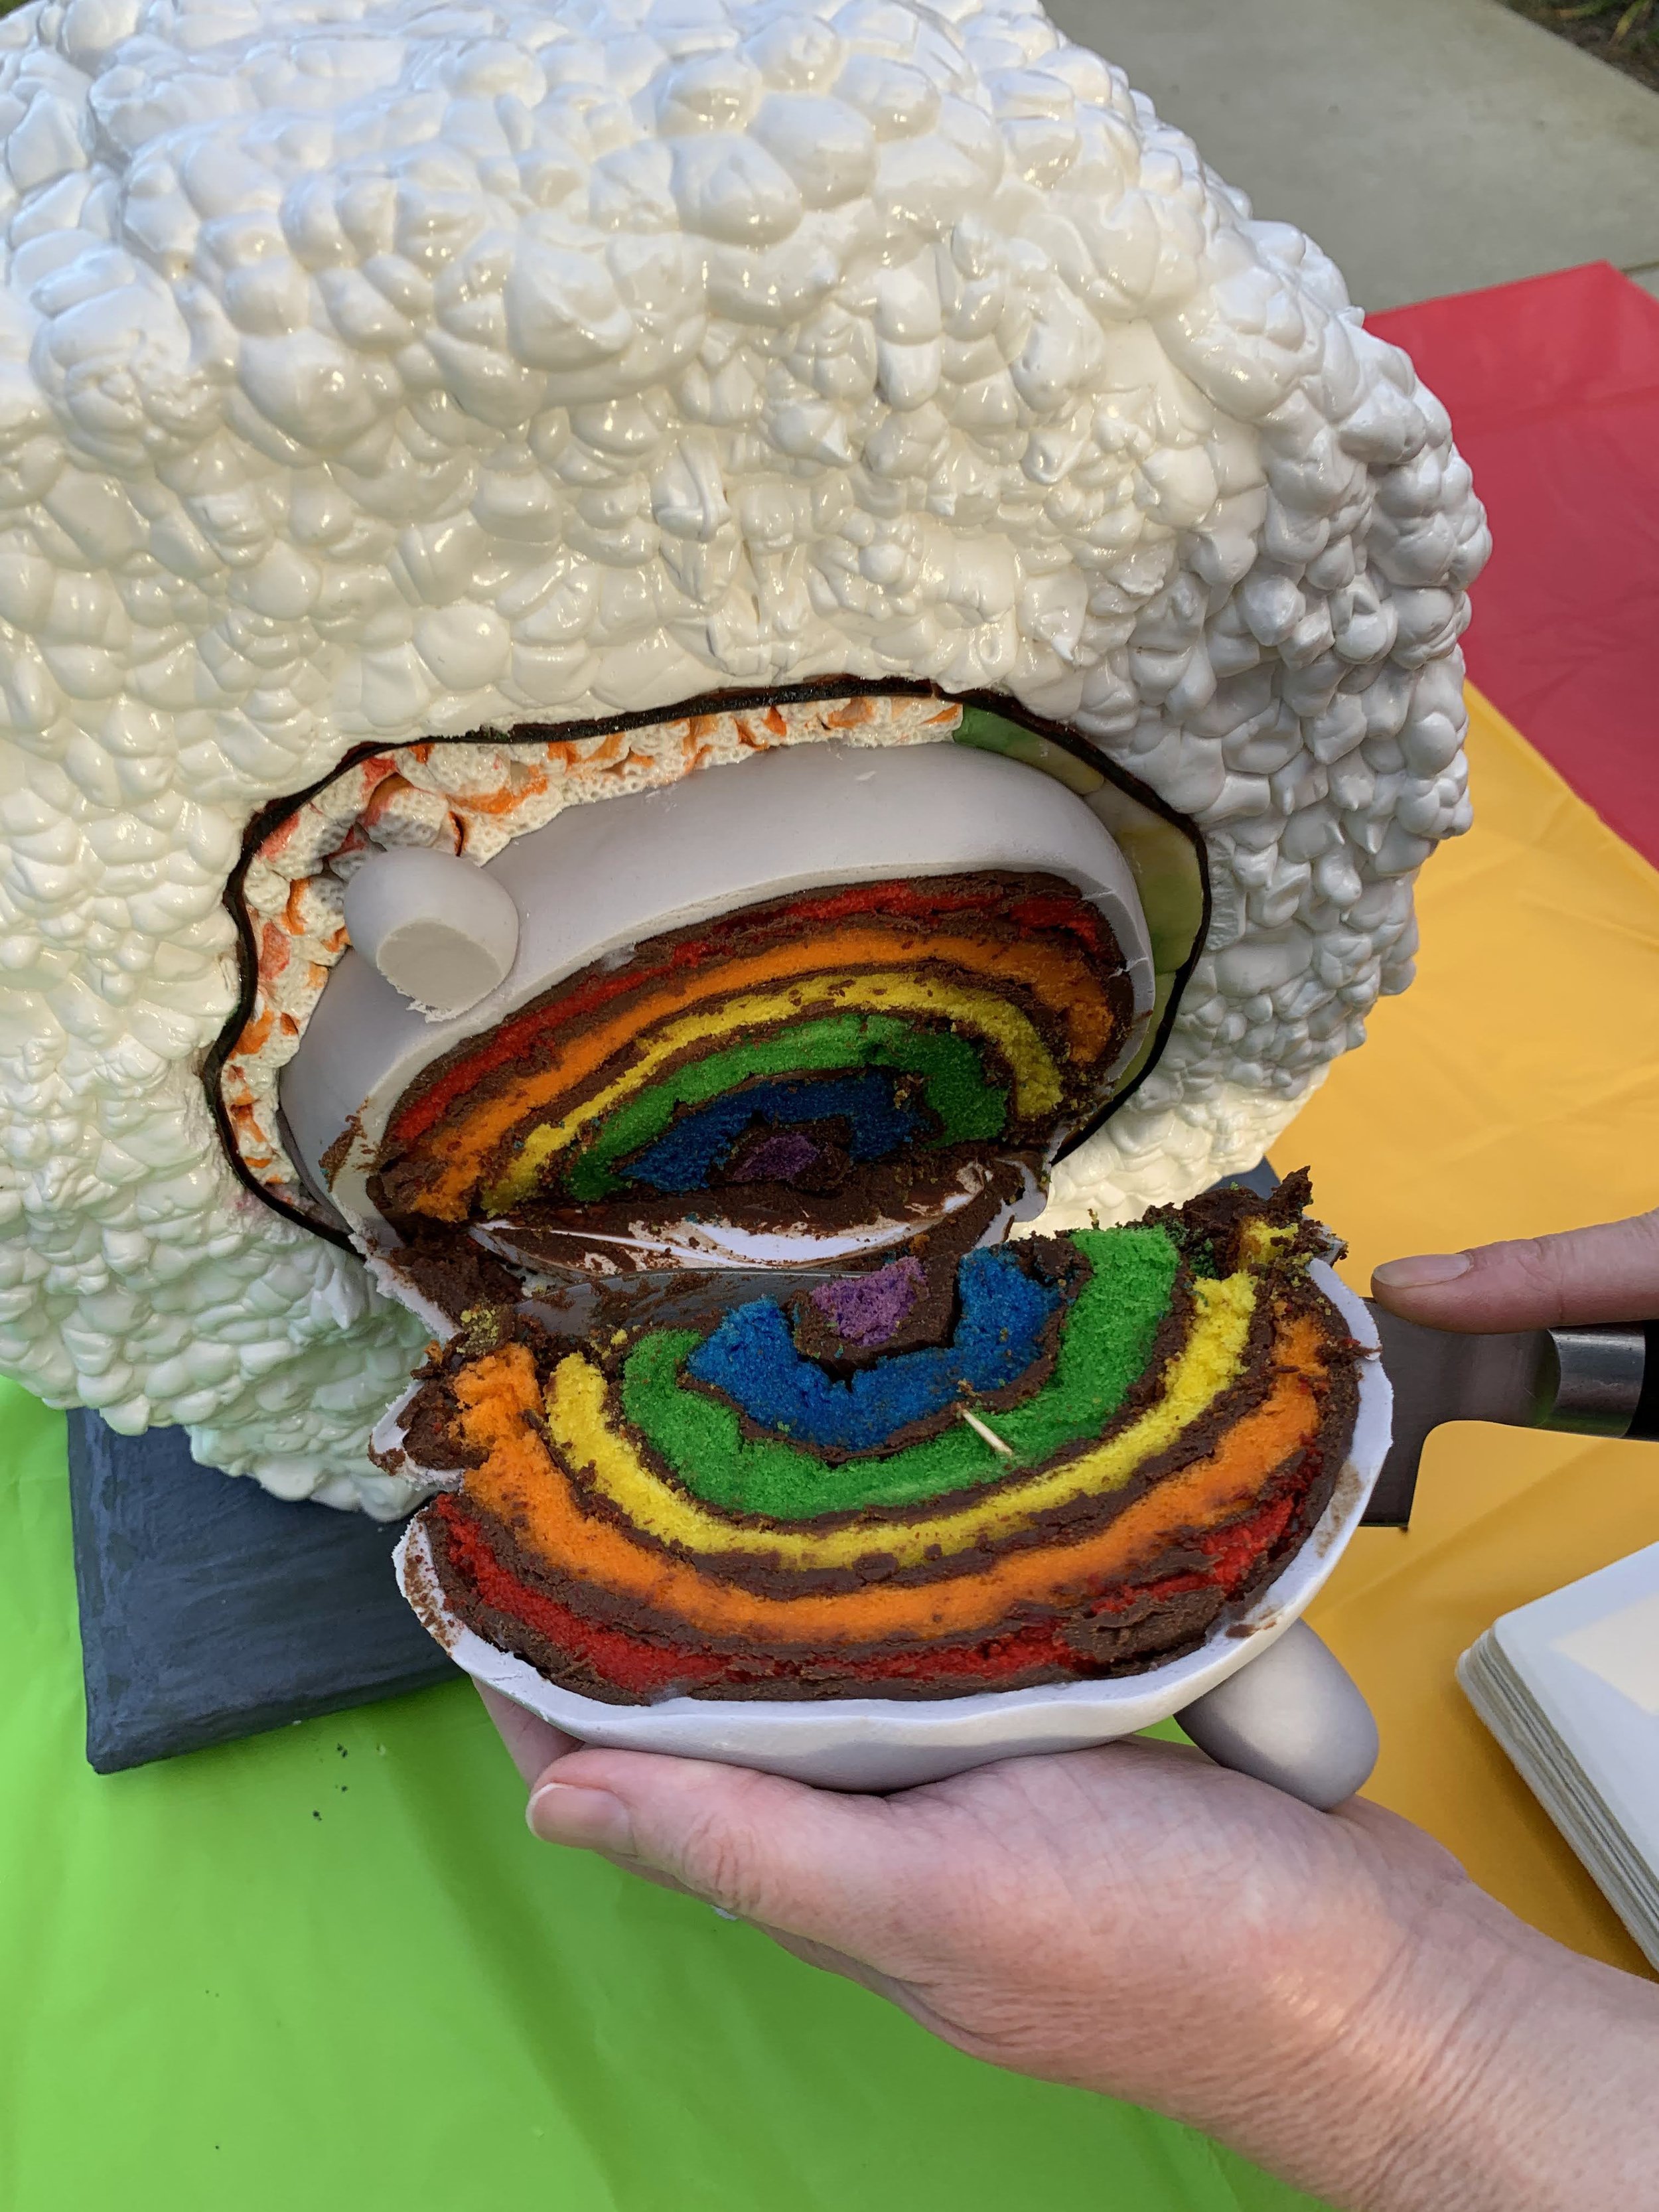
When I made my Rainbow Unicorn Pusheen Cake and my Valkyr Pusheen Cake, they were rainbow colored inside, but the layers of the cake were still flat. This time I decided to make the inside rainbow shaped as well as rainbow colored.
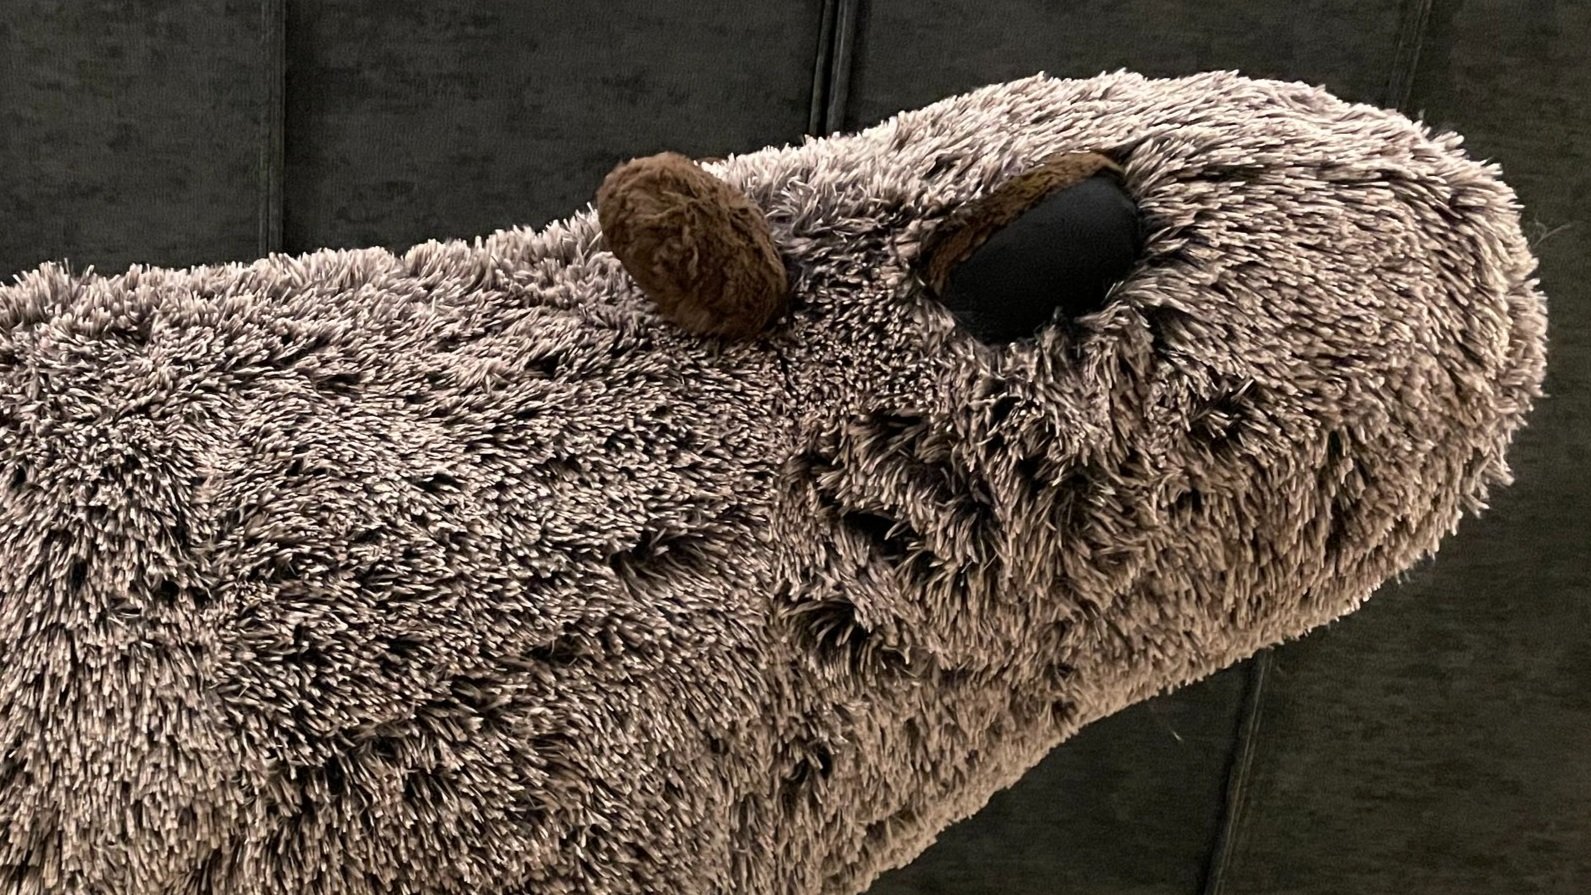
Stuffed Capybara
It’s not quite life size, but it is pretty close.
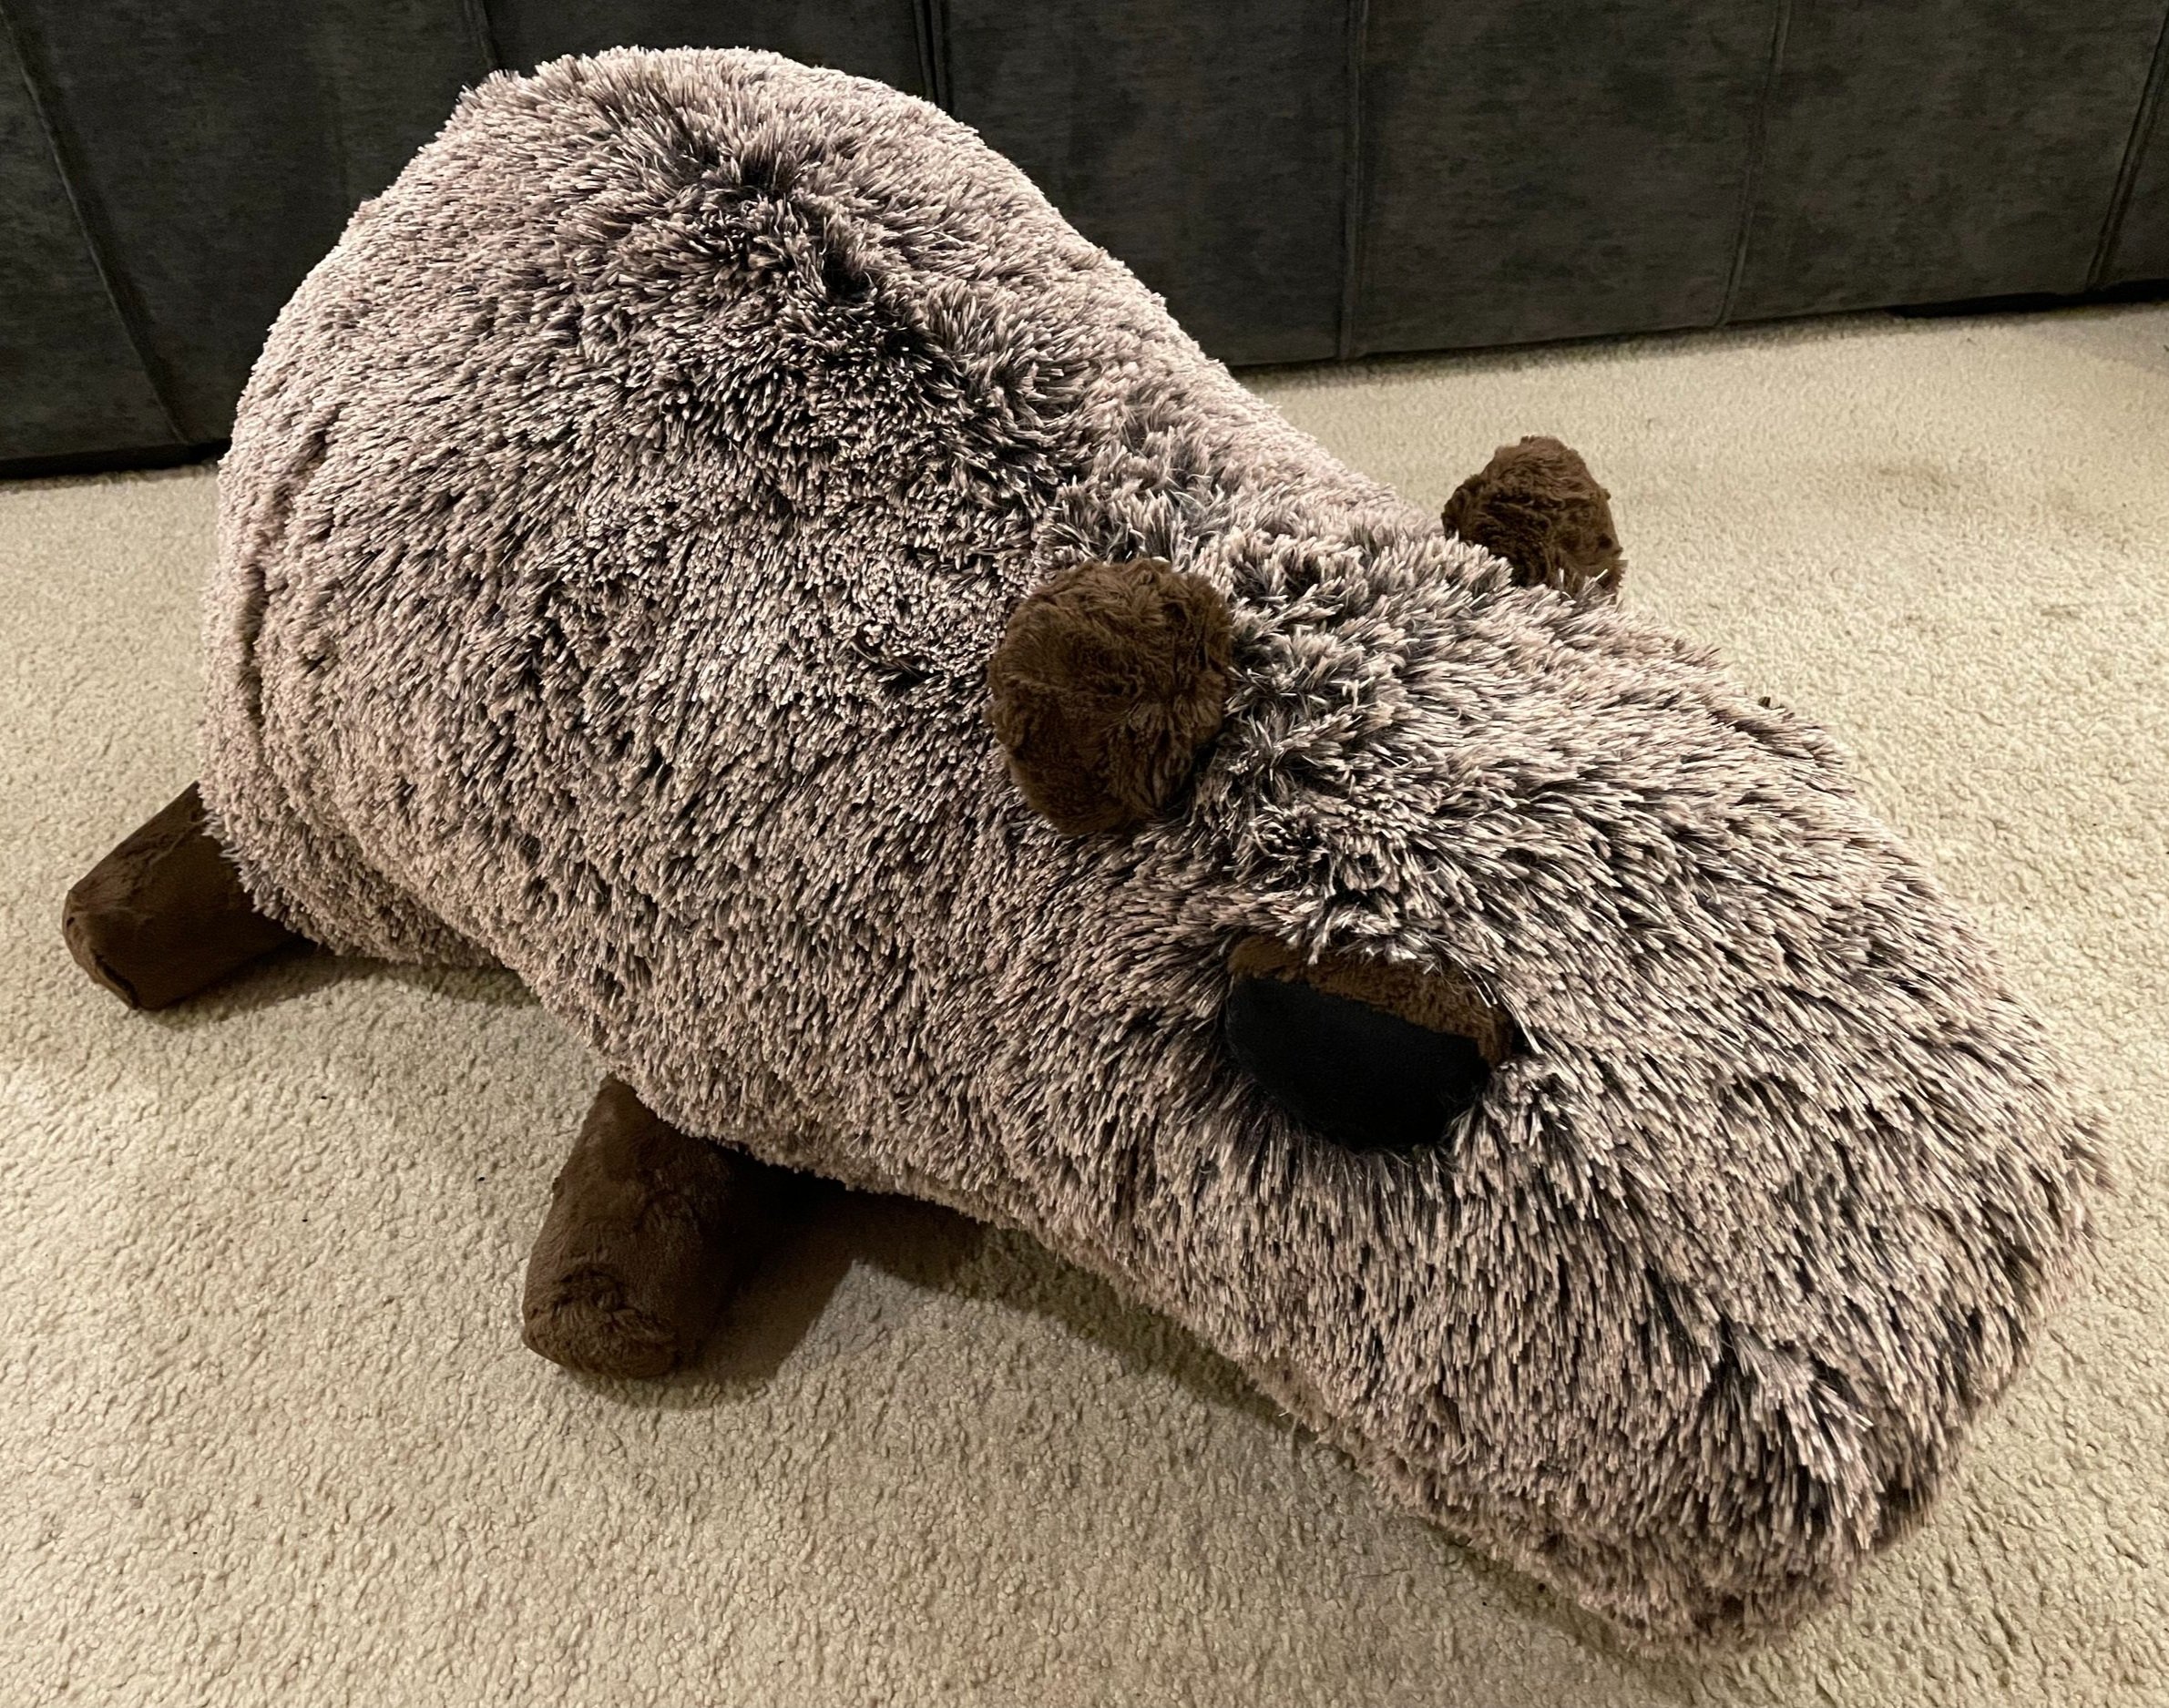
It’s not quite life size, but it is pretty close.
