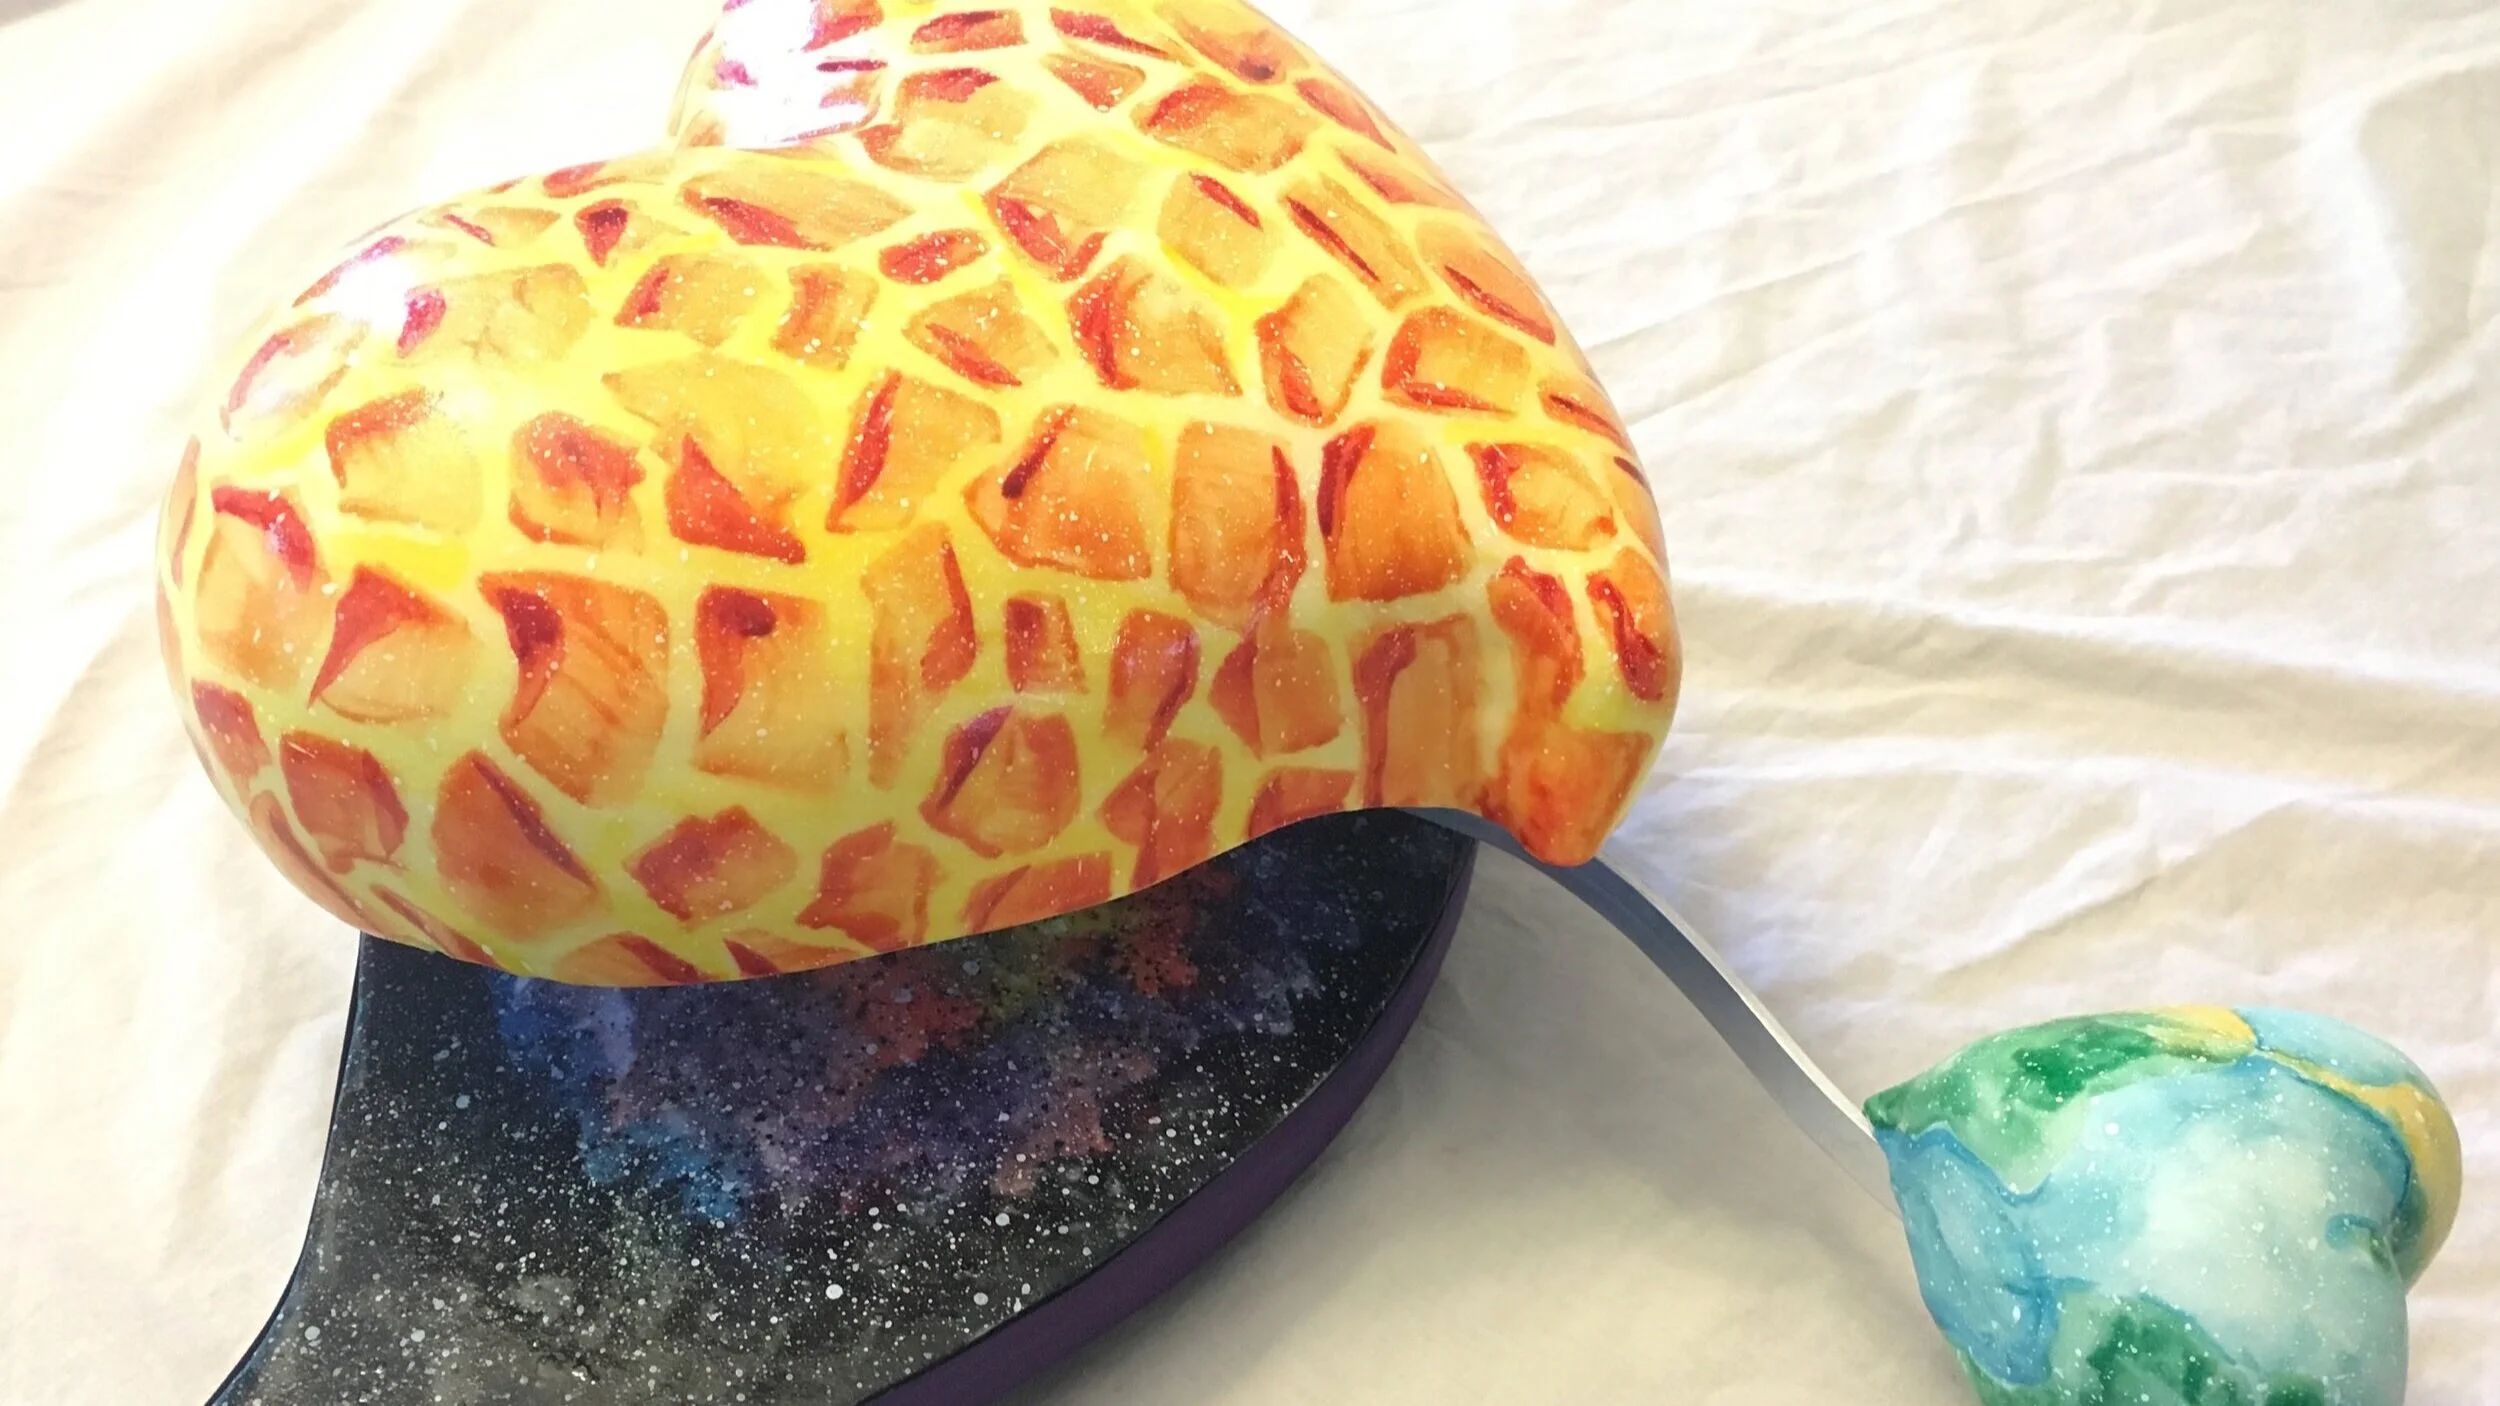
Love Makes the World Go Round Cake
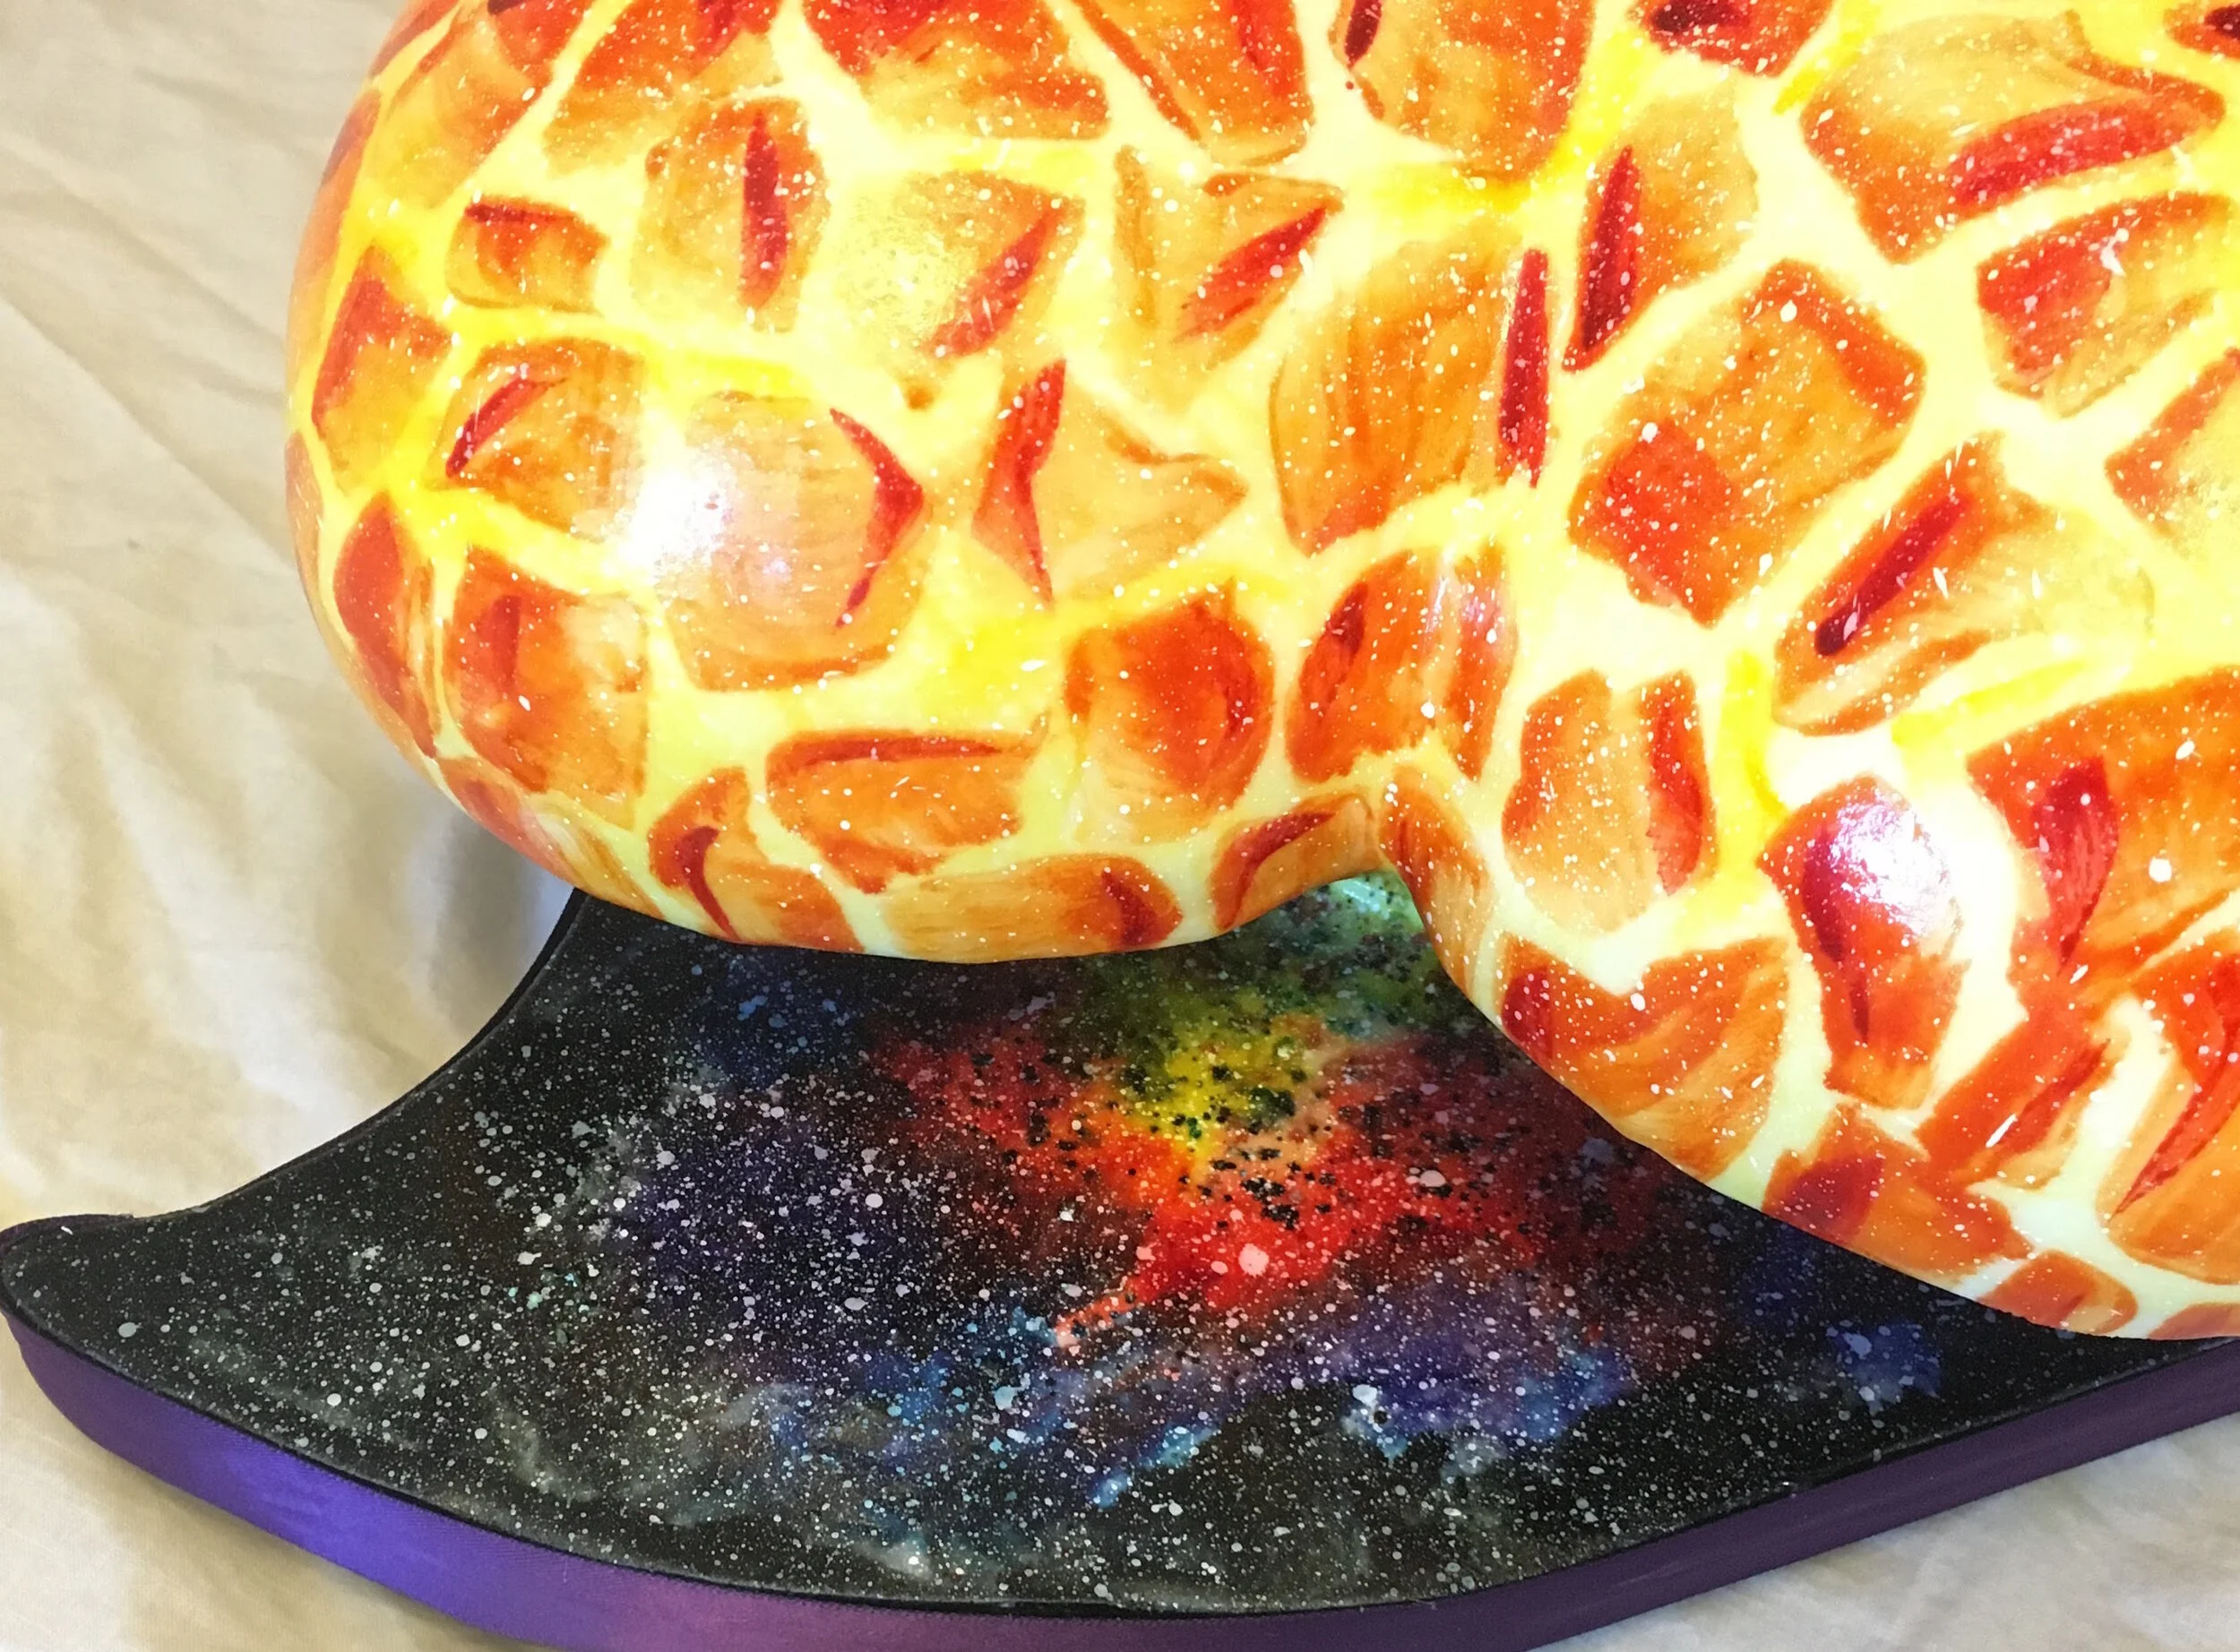
My friend’s granddaughter’s birthday party theme was Love Makes the World Go Round. So I came up with this cake, which is meant to suggest the earth traveling around the sun on an outer space cake board.
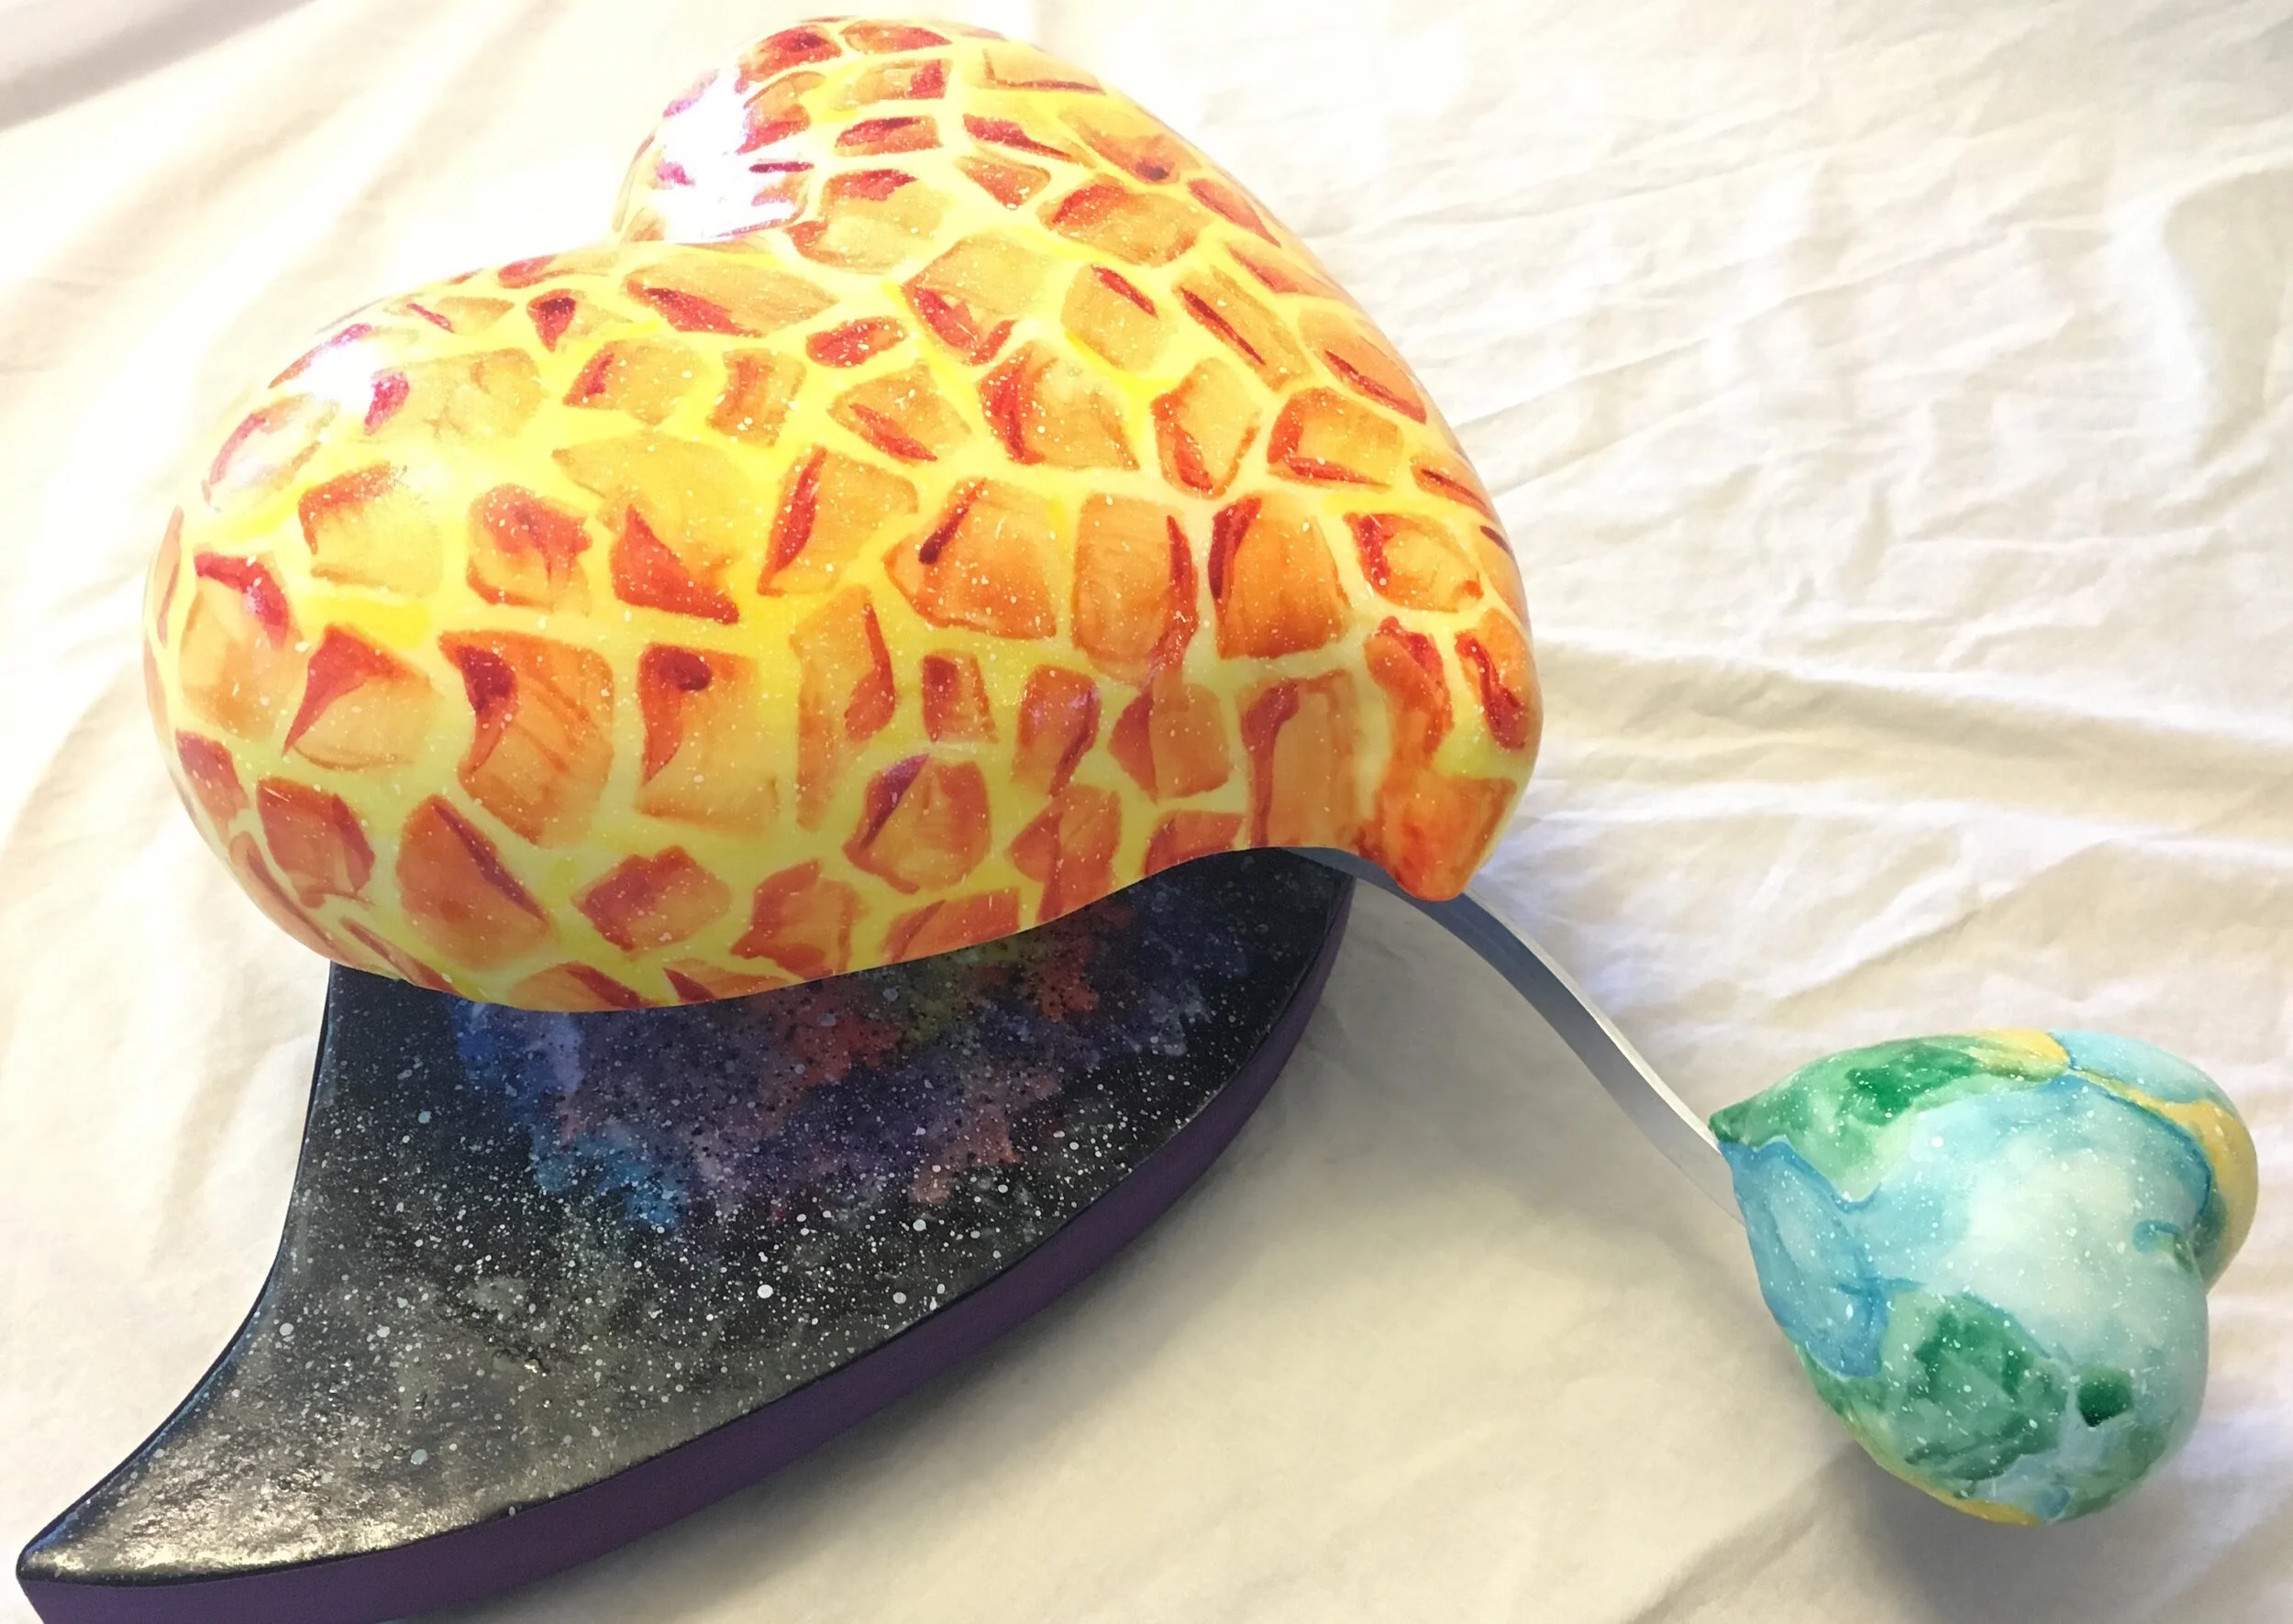
My friend’s granddaughter’s birthday party theme was Love Makes the World Go Round. So I came up with this cake, which is meant to suggest the earth traveling around the sun on an outer space cake board.
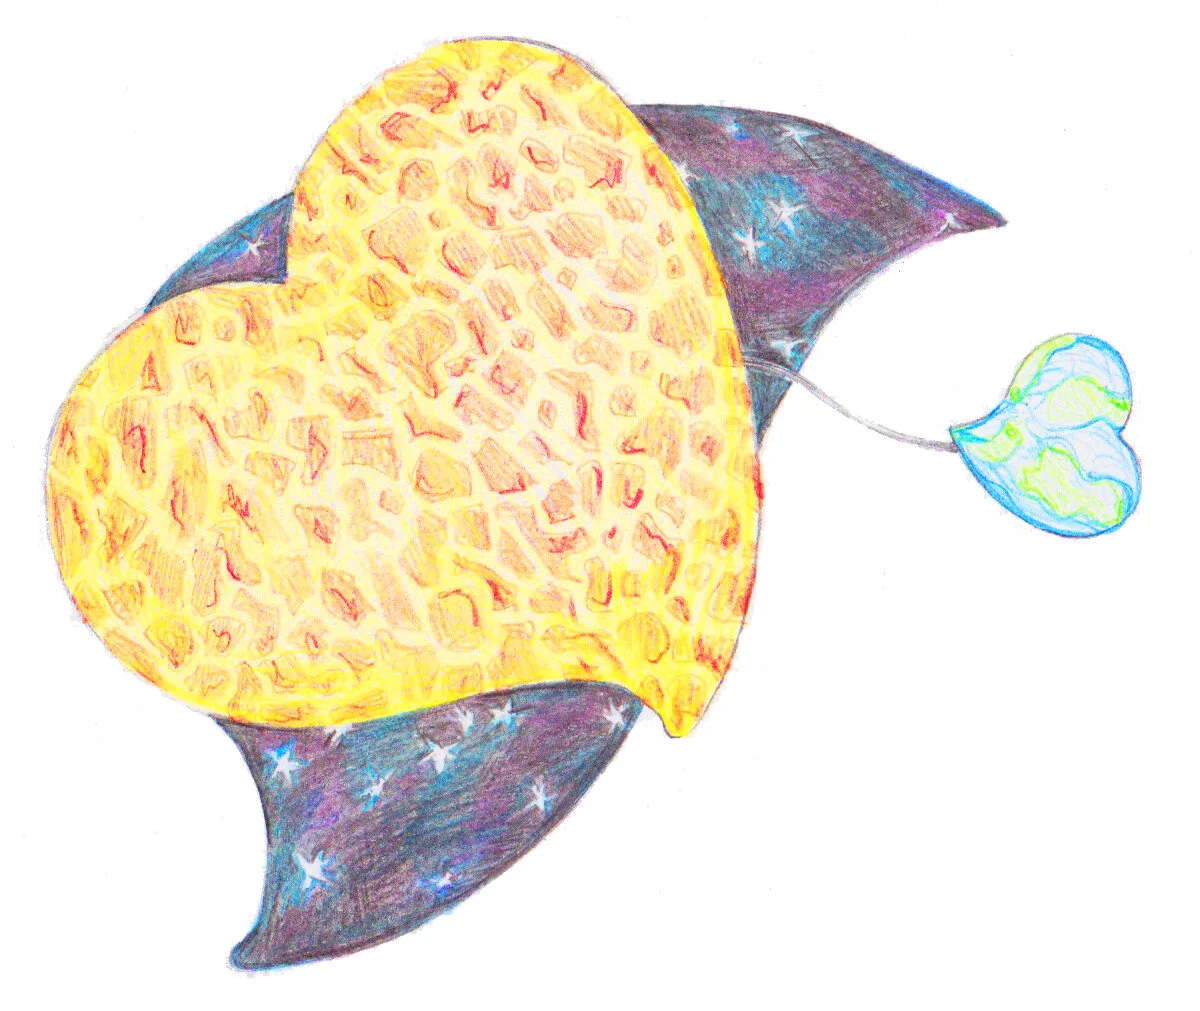
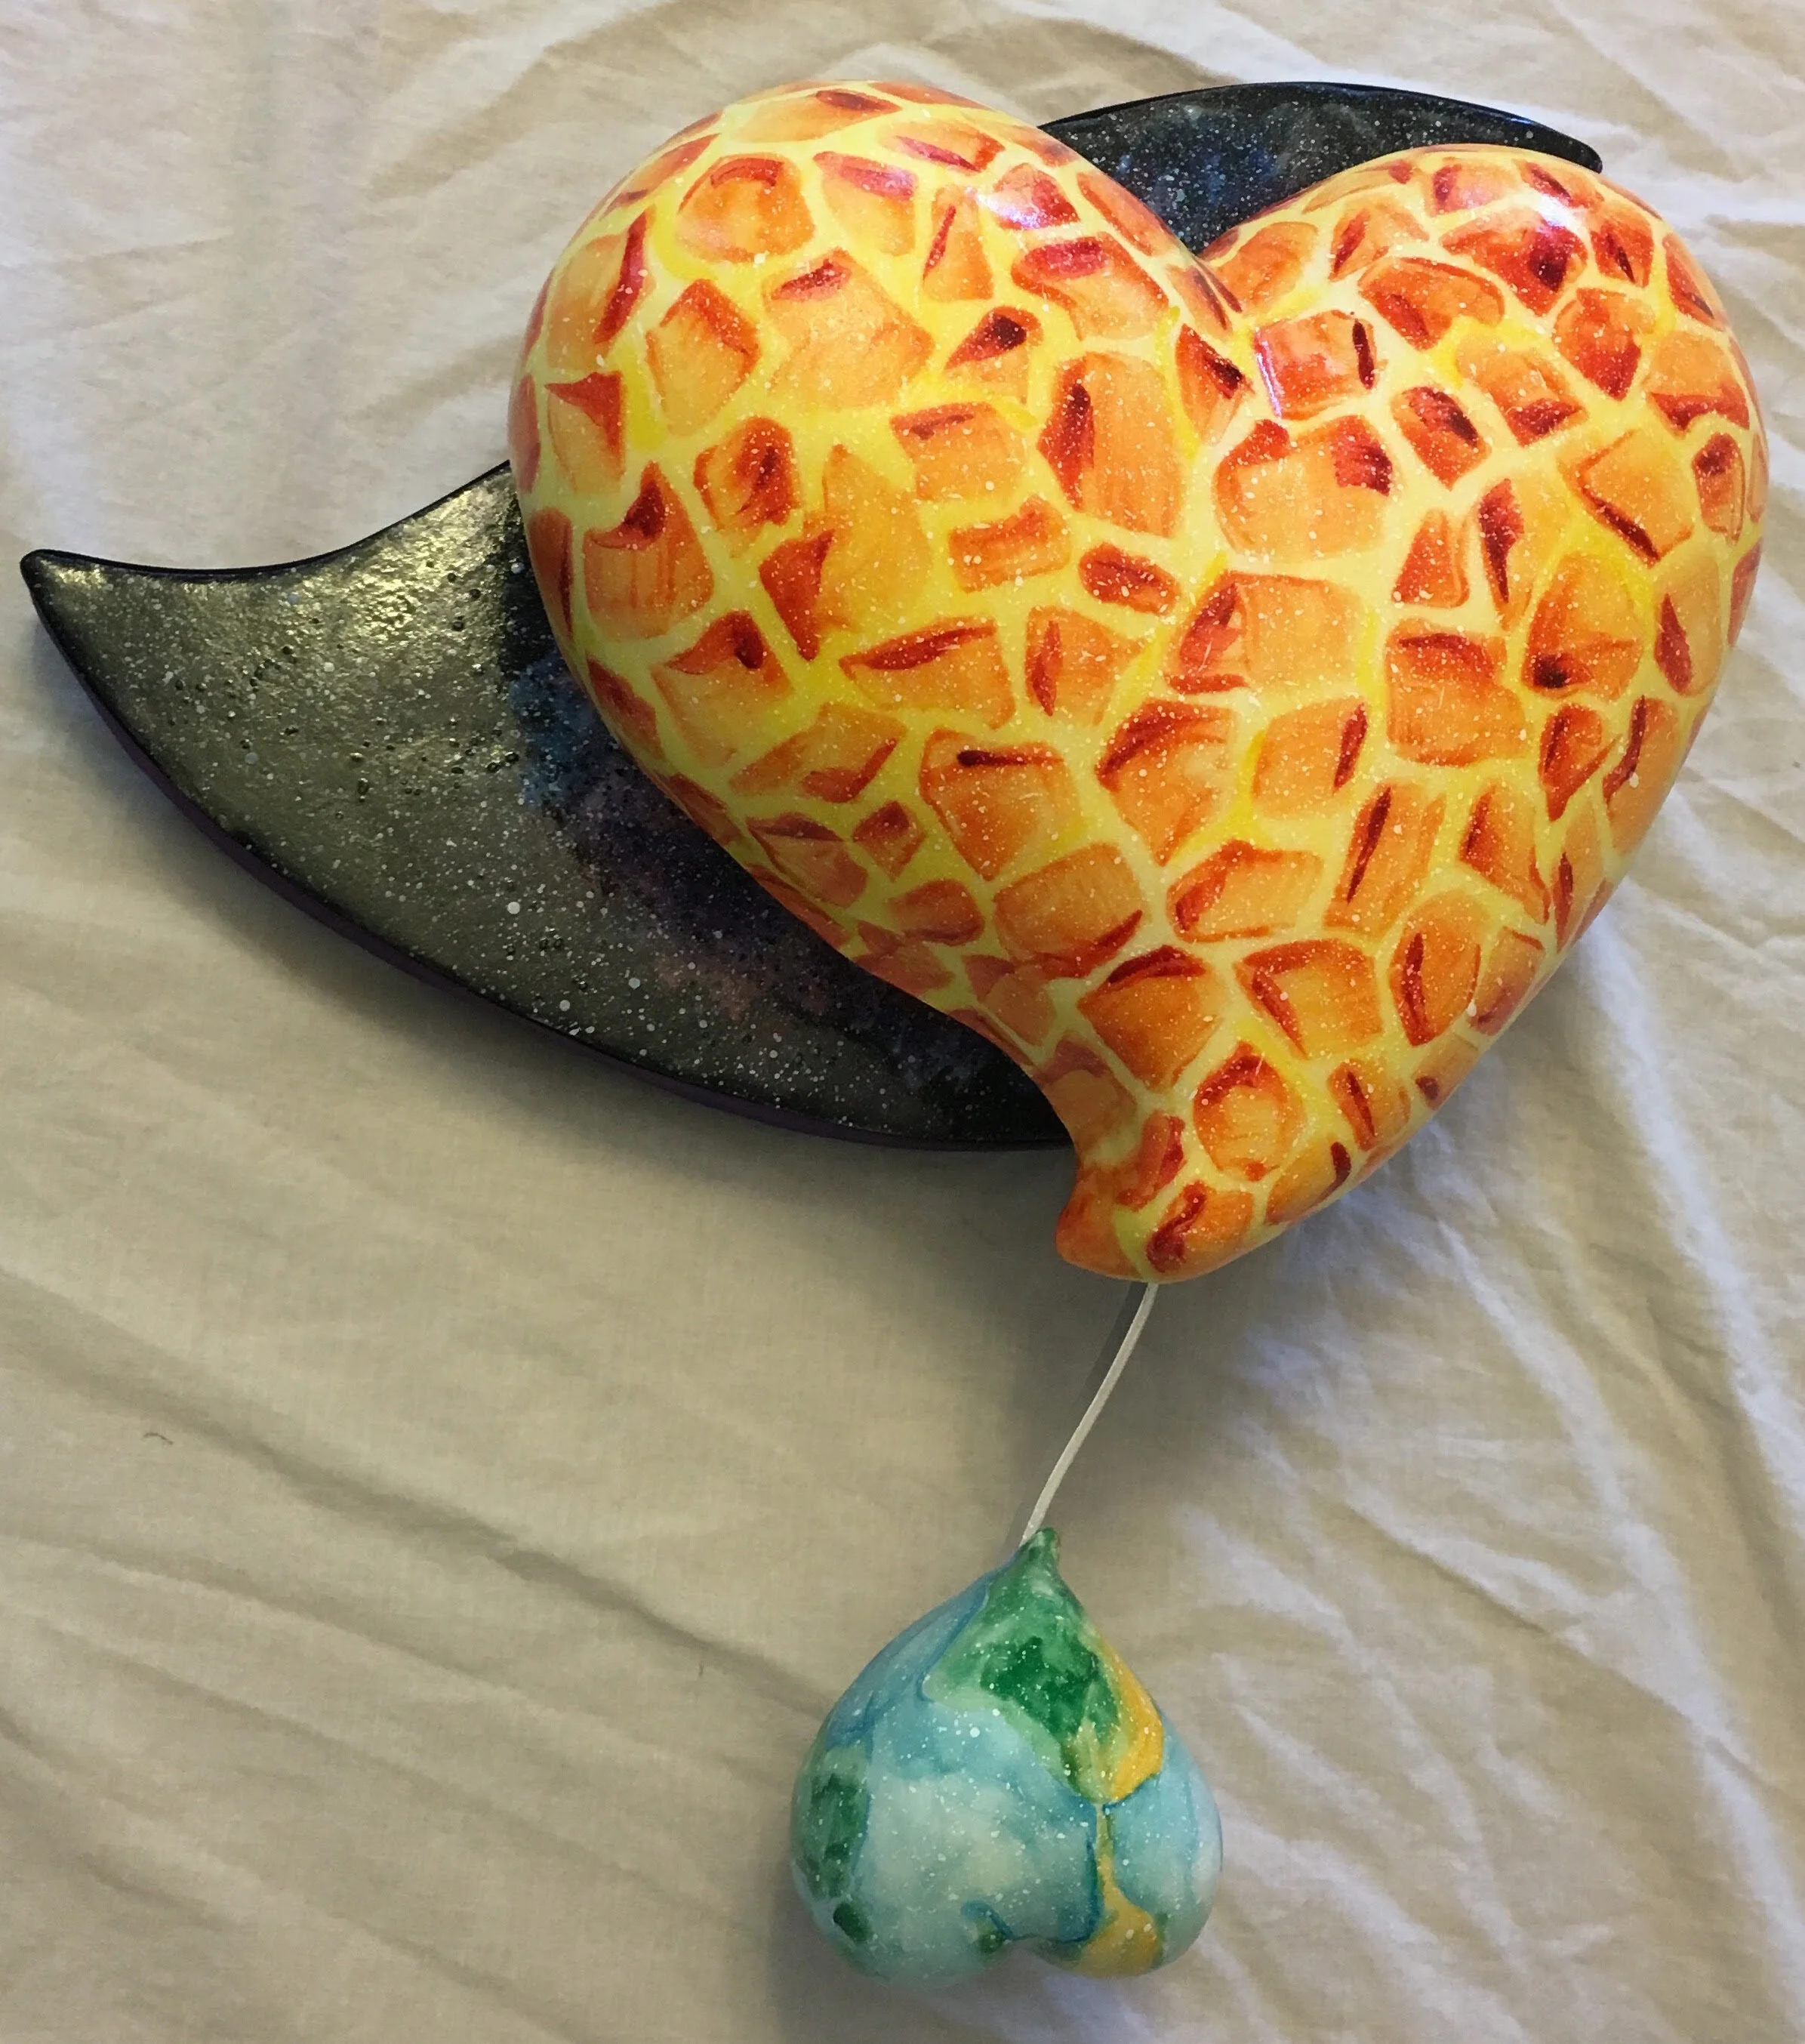
The color is all hand painted. The sun came out looking maybe a little more like a giraffe than a sun, but at least the overall effect is fun and colorful.
The earth is mounted on an aluminum strip that rotated freely around the post supporting the sun, so you can make the earth orbit around the sun.
Terraria Celestial Event Cake
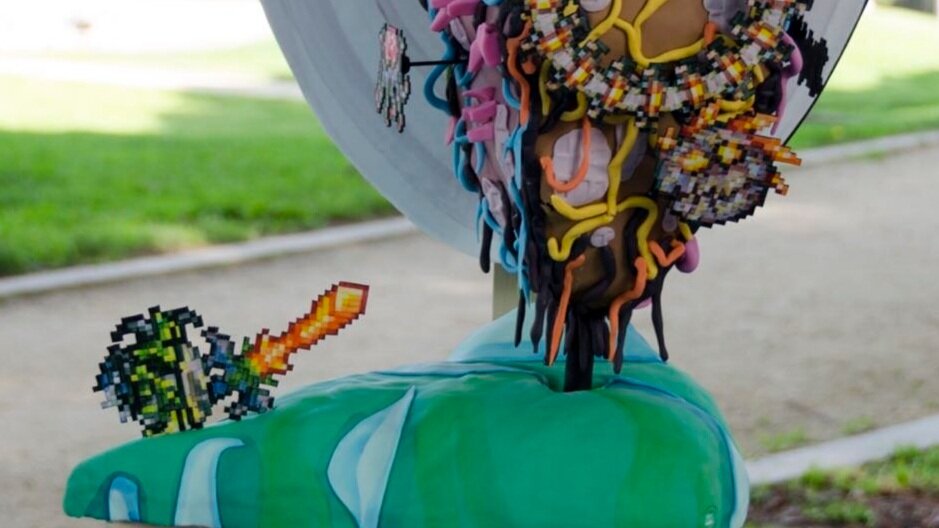
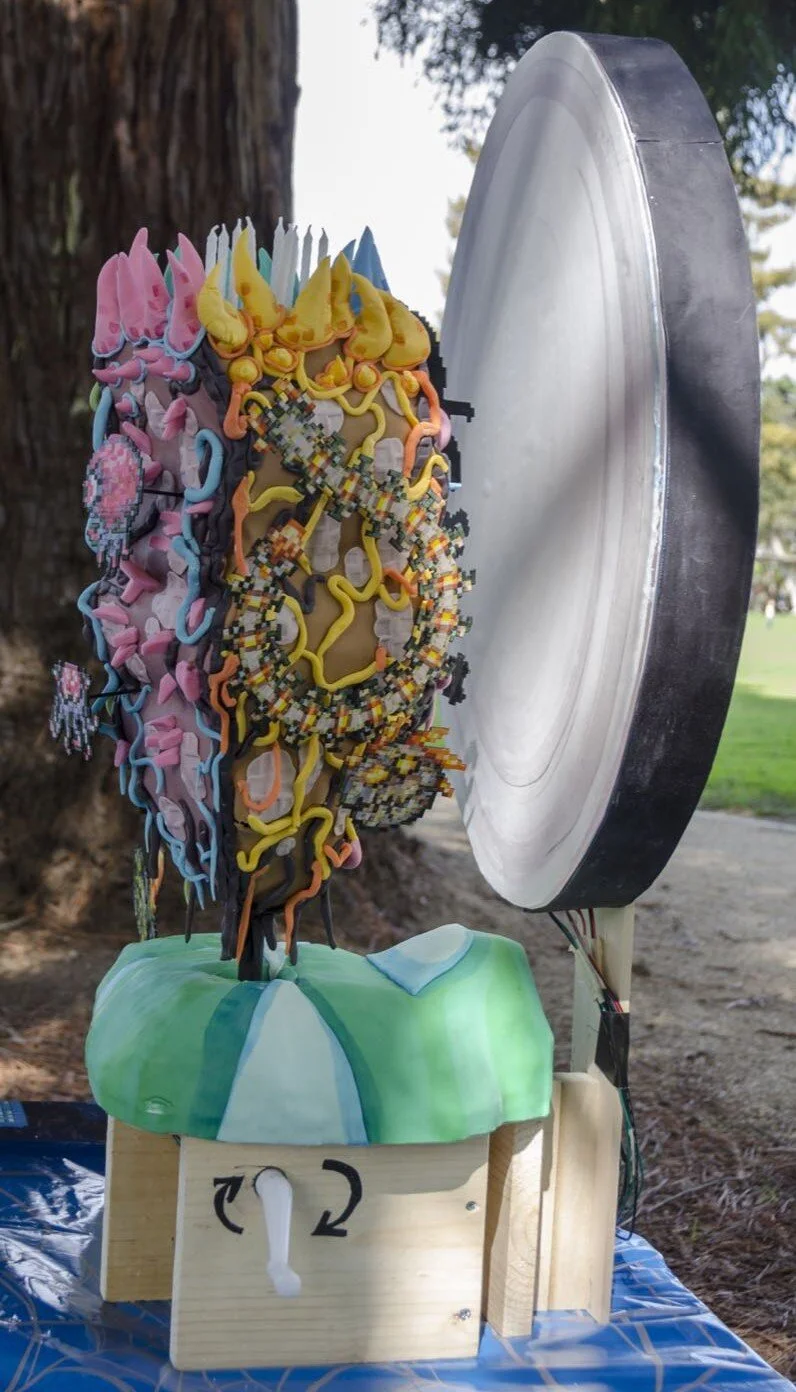
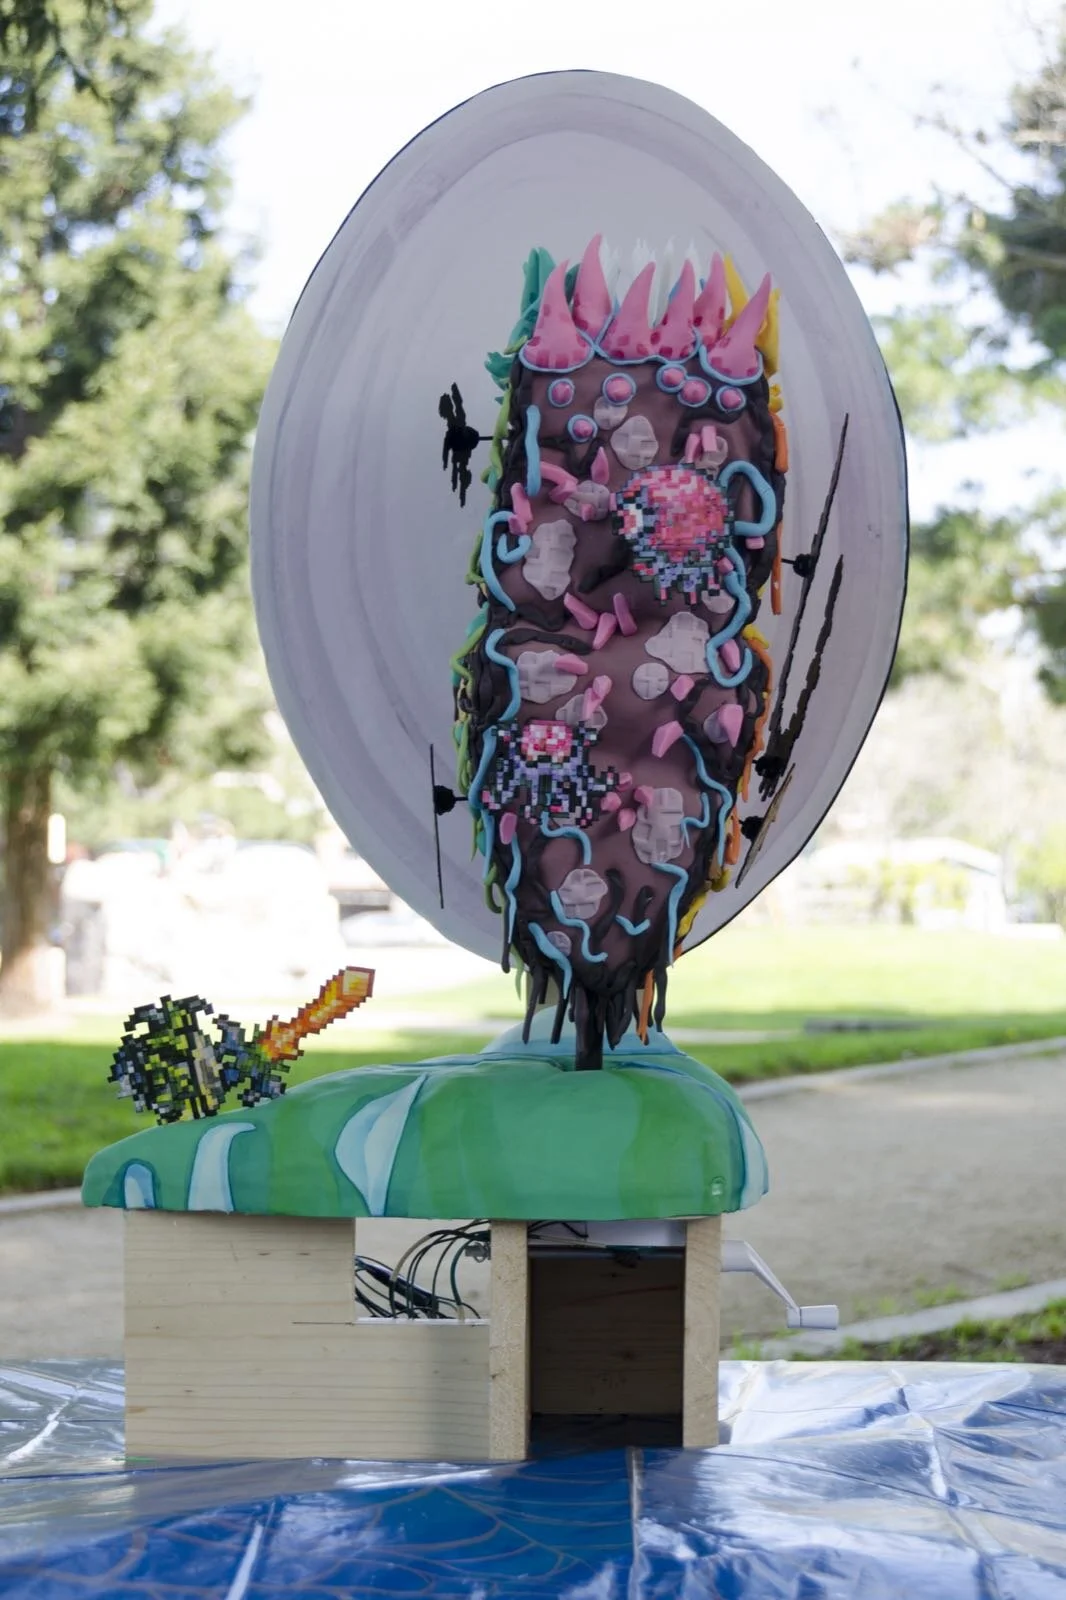
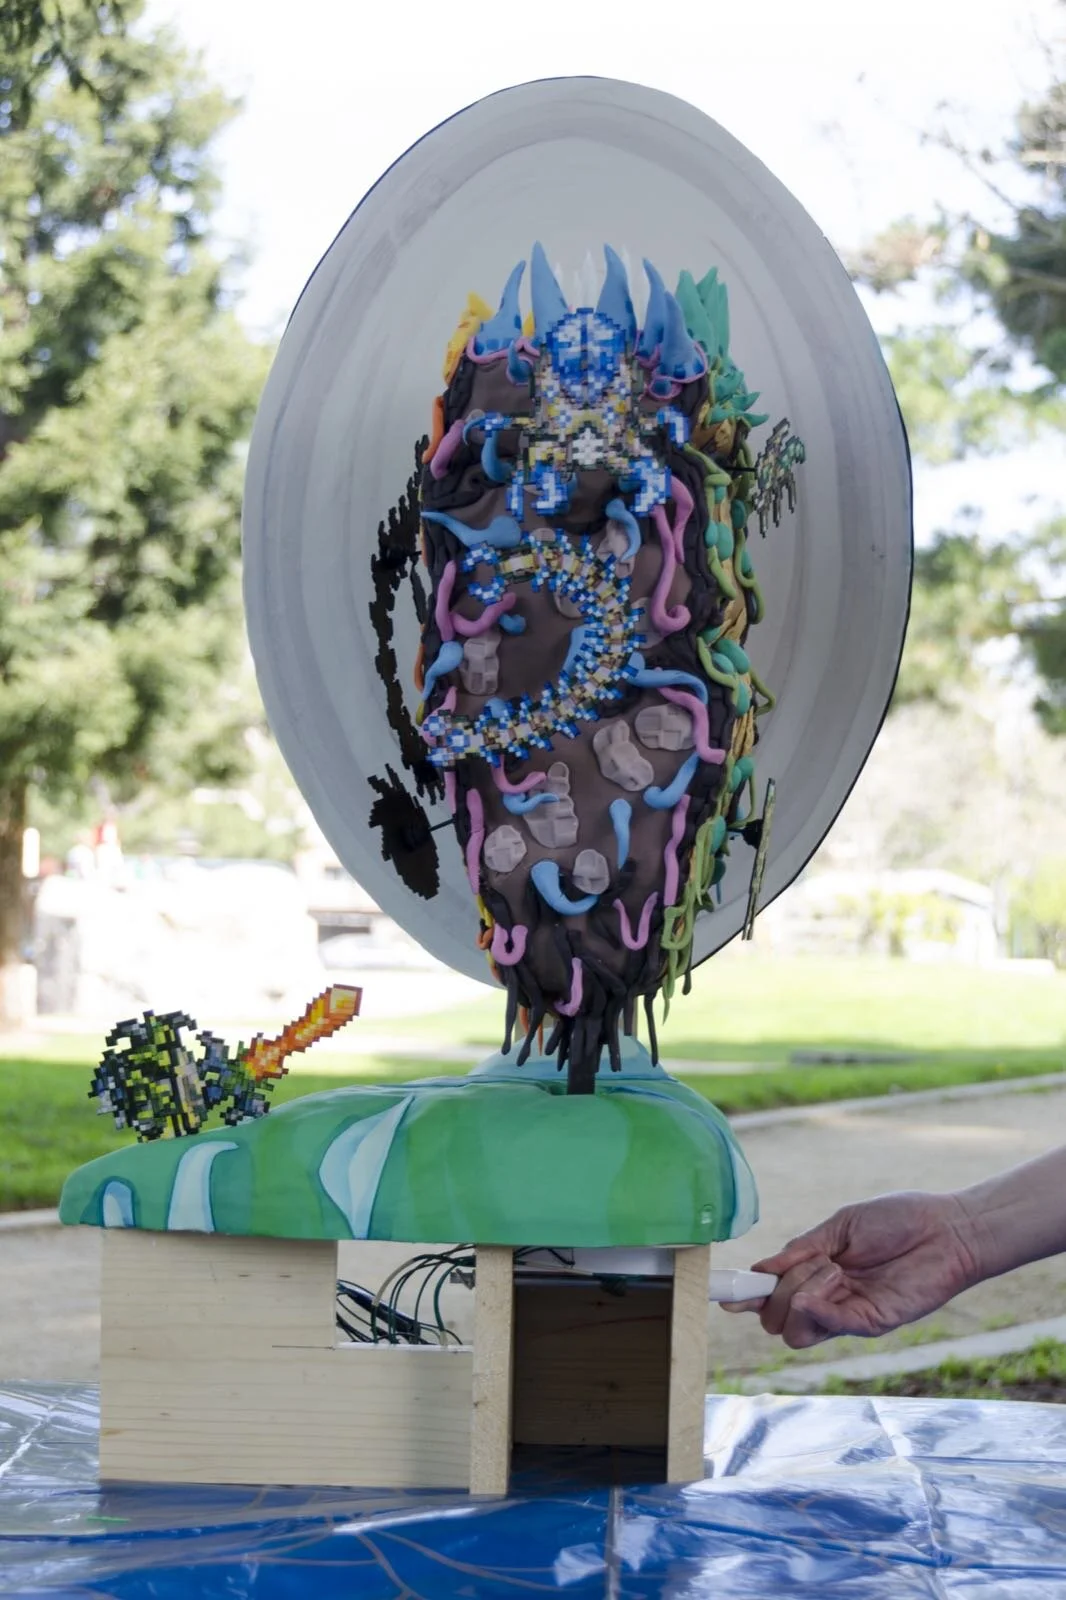
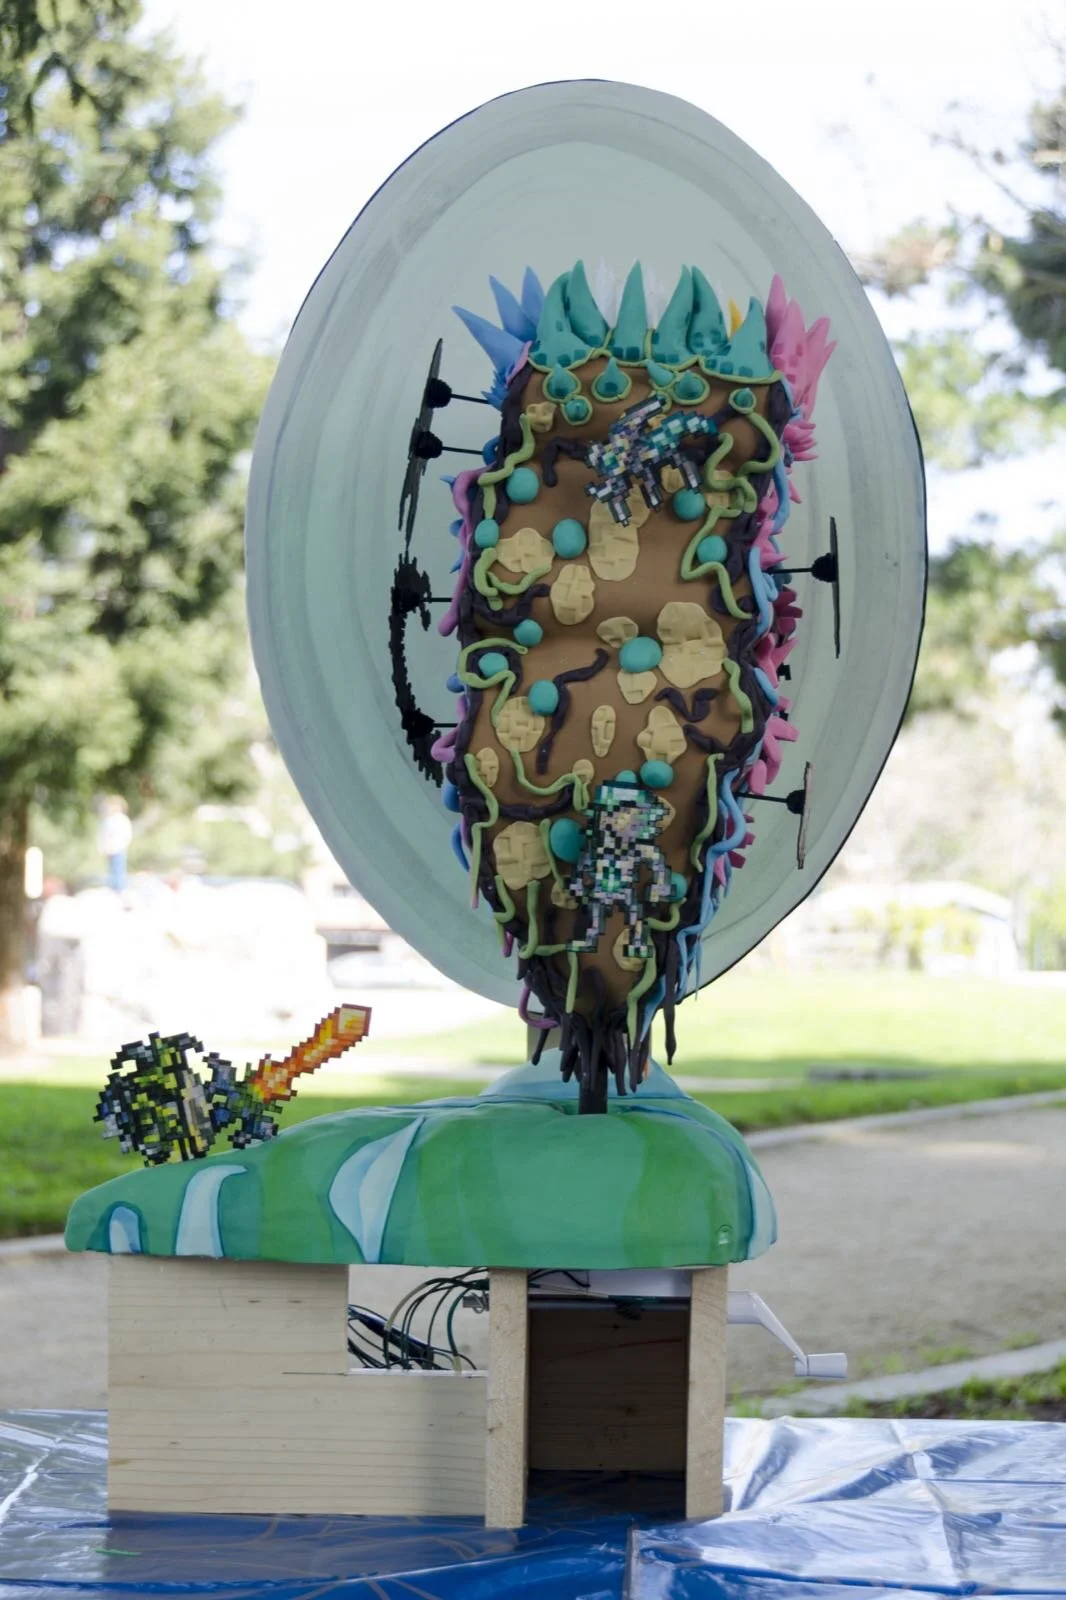
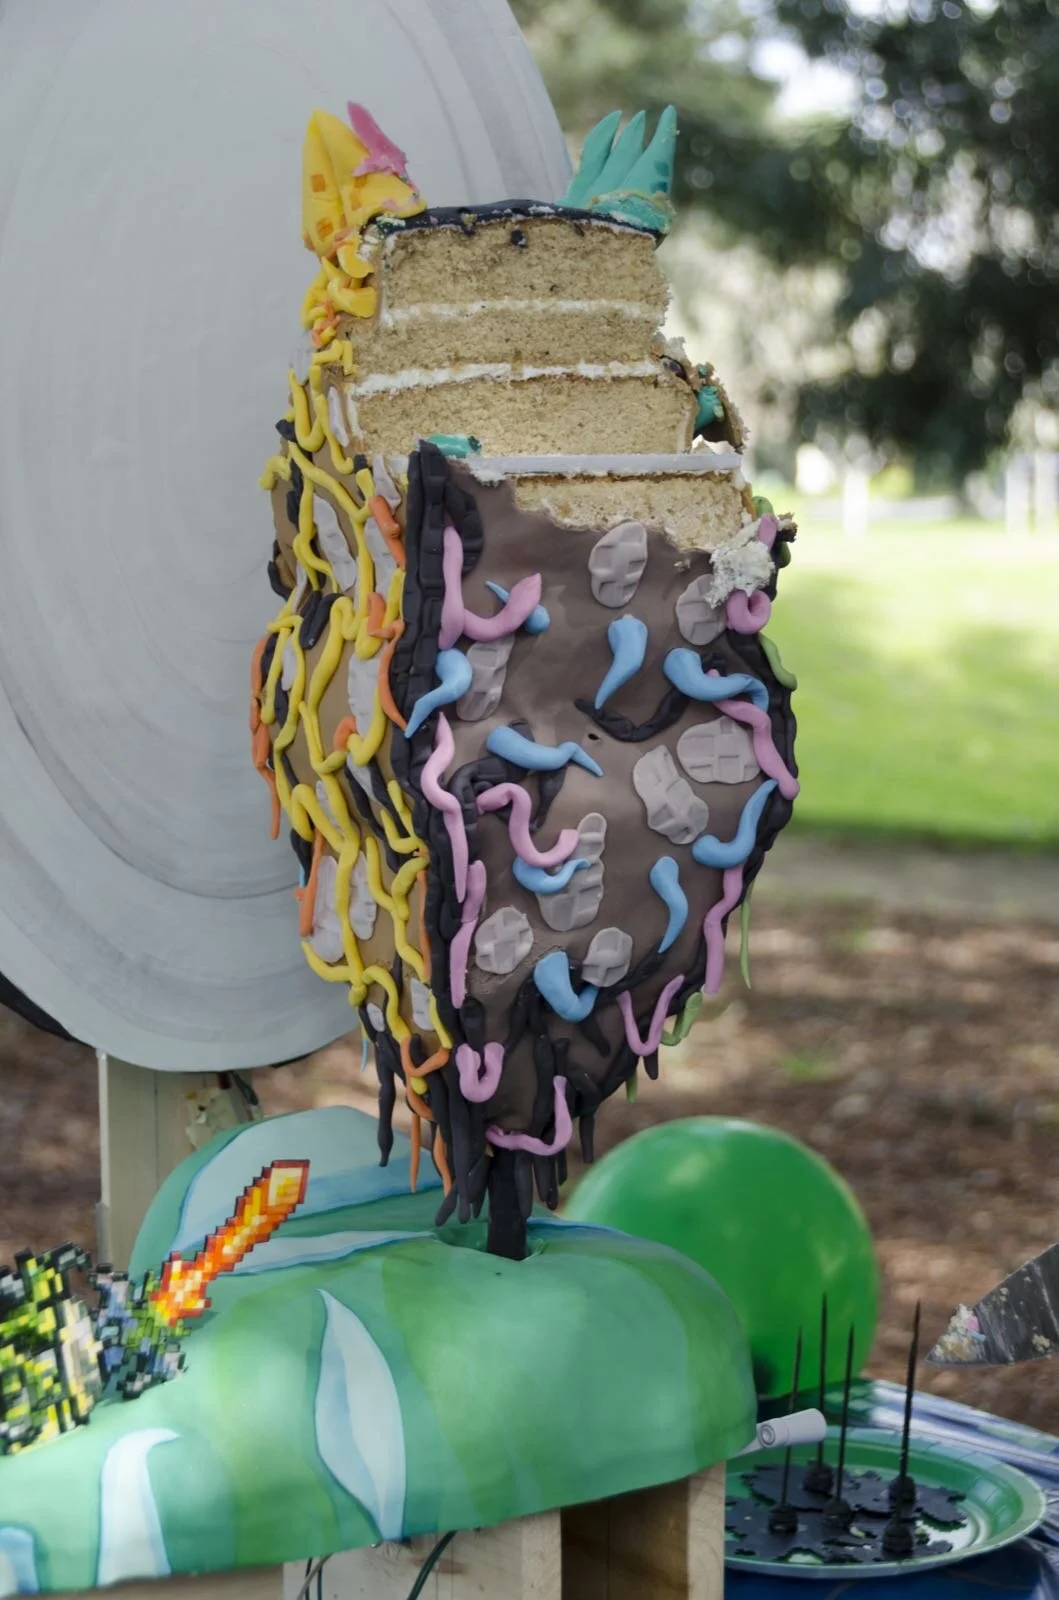
Alex, for her 10th birthday, requested a Terraria celestial event cake, with a four-sided pillar, each side of which corresponds to a phase of the celestial event – Nebula, Stardust, Vortex, and Solar – and includes the appropriate monsters.

Alex, for her 10th birthday, requested a Terraria celestial event cake, with a four-sided pillar, each side of which corresponds to a phase of the celestial event – Nebula, Stardust, Vortex, and Solar – and includes the appropriate monsters.
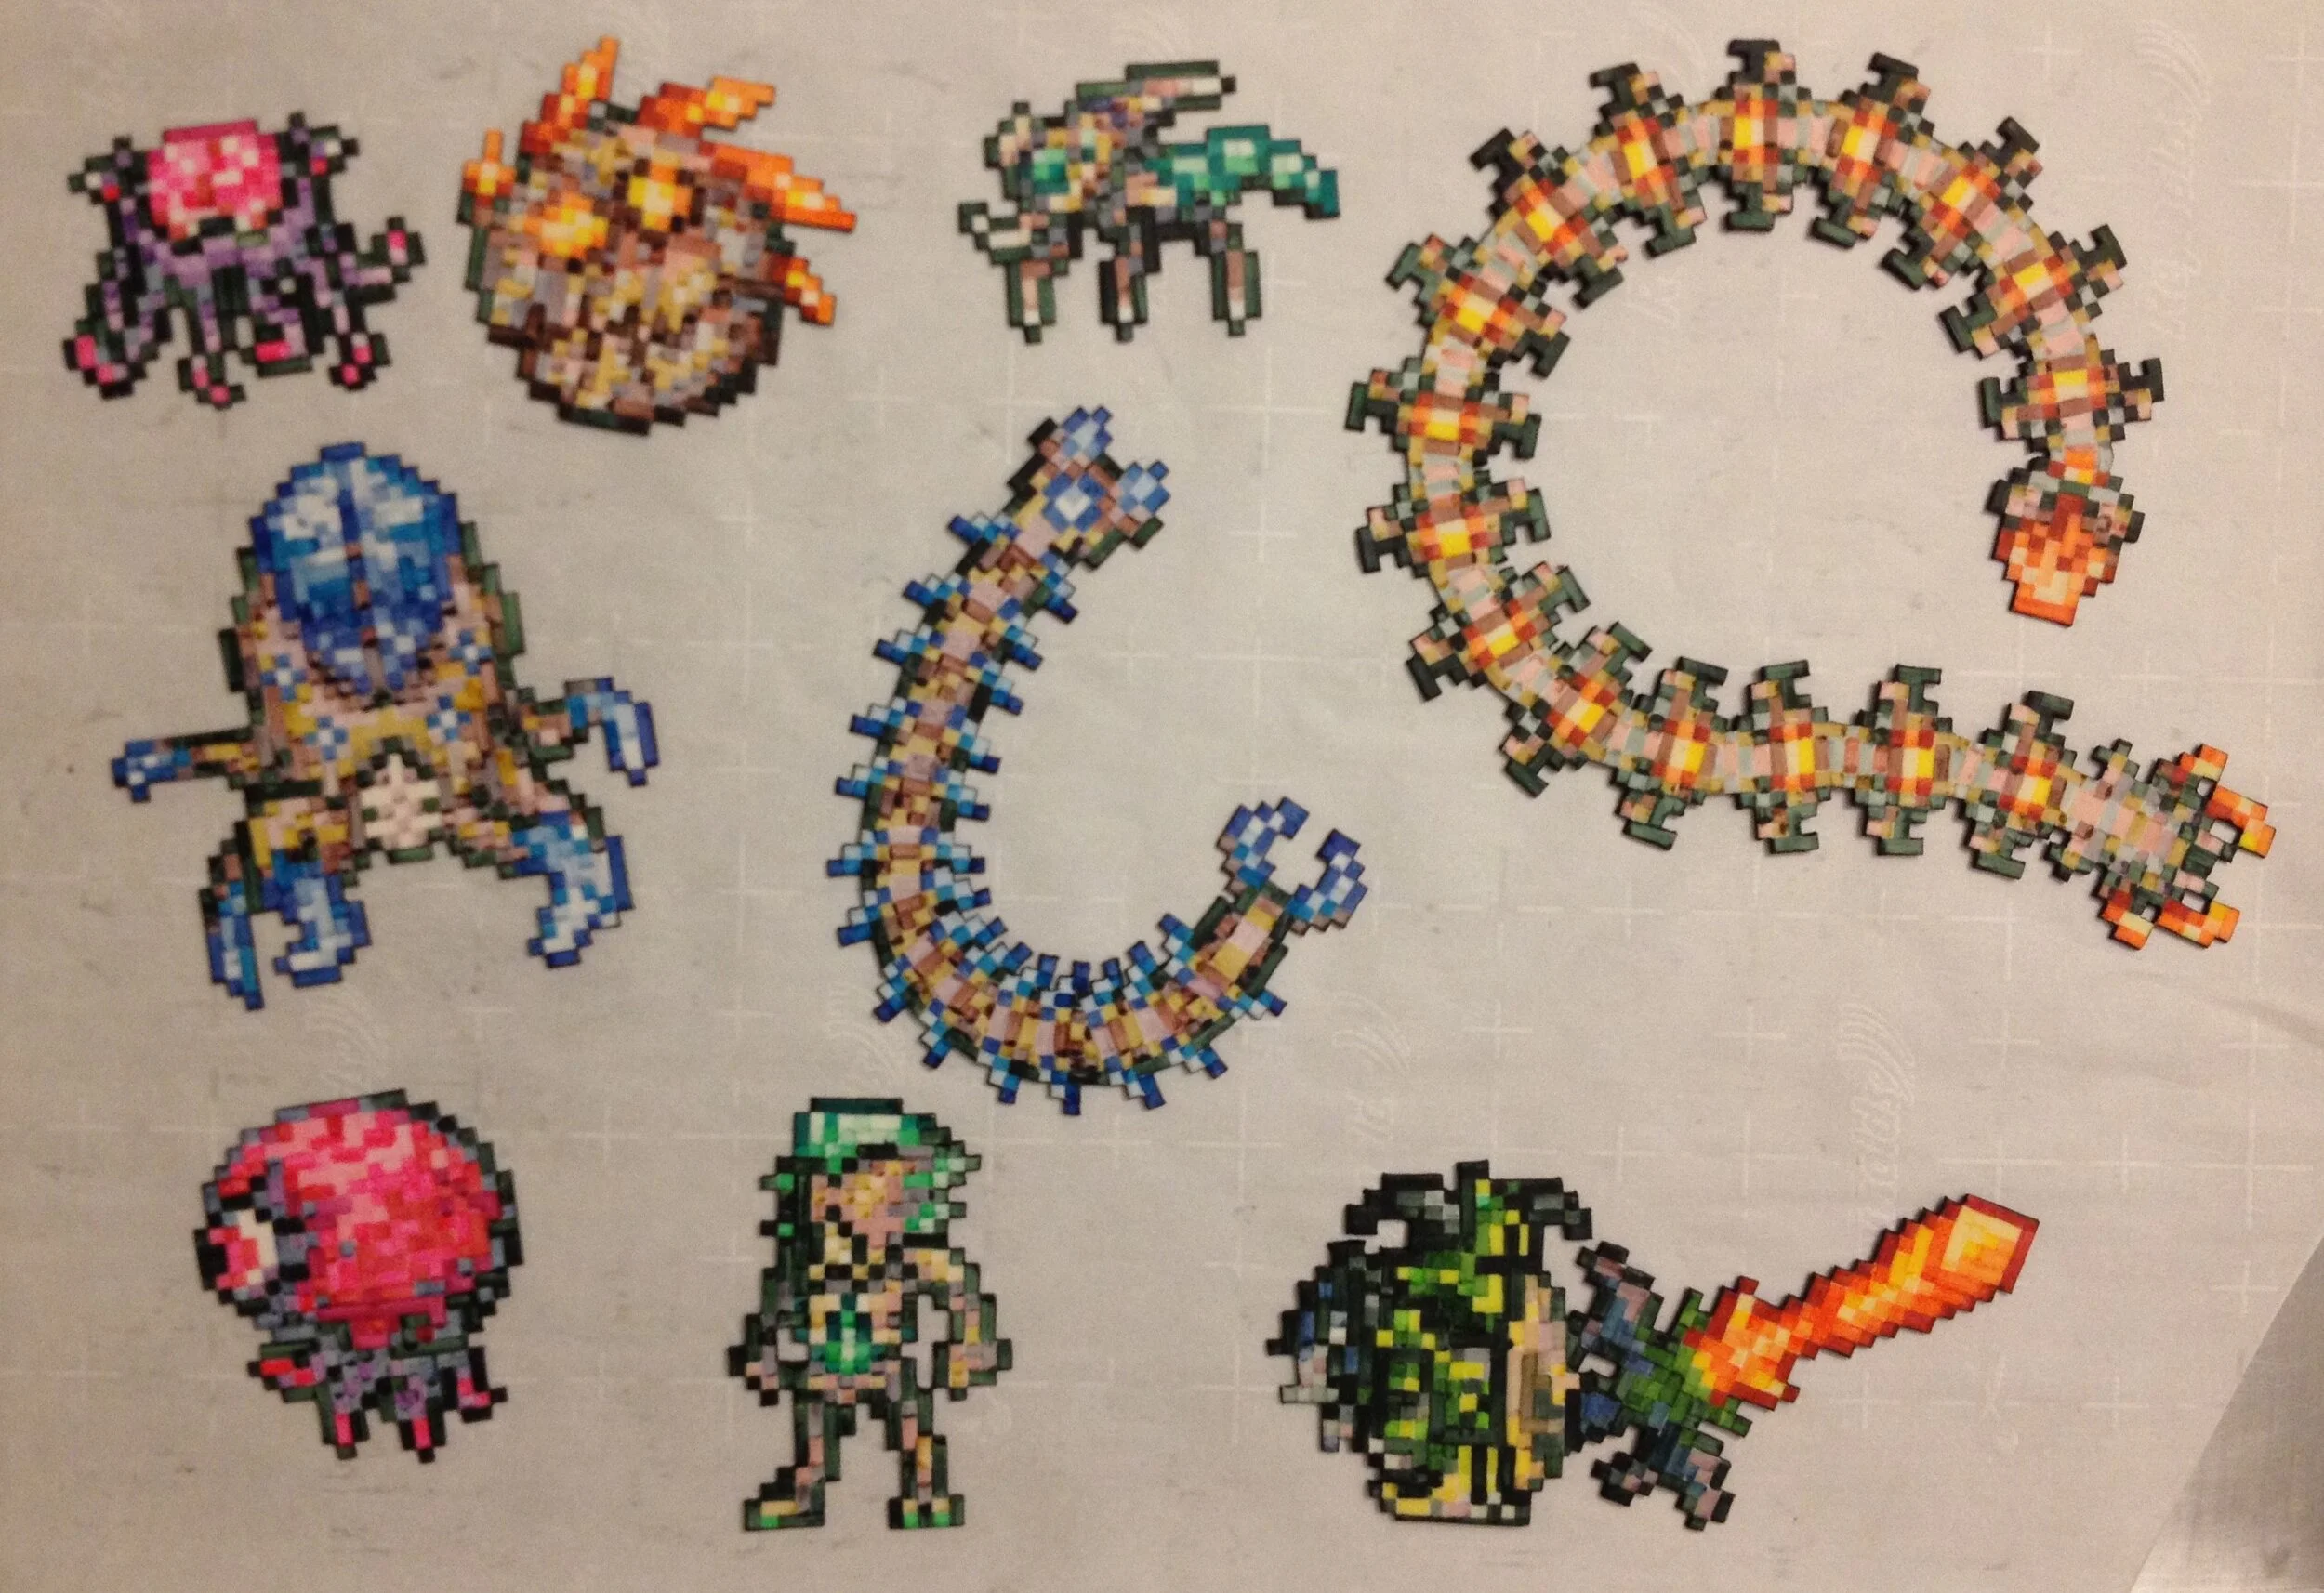
Fortunately, after Sam’s last Terraria cake, I am expert at painting pixel-y gum paste Terraria characters. The guy on the side is Alex’s avatar, with a Horseman’s Blade, which she specifically requested.

The tower is cake, mounted on a pipe connected to a bevel gear, so that the cake can be turned with a crank.
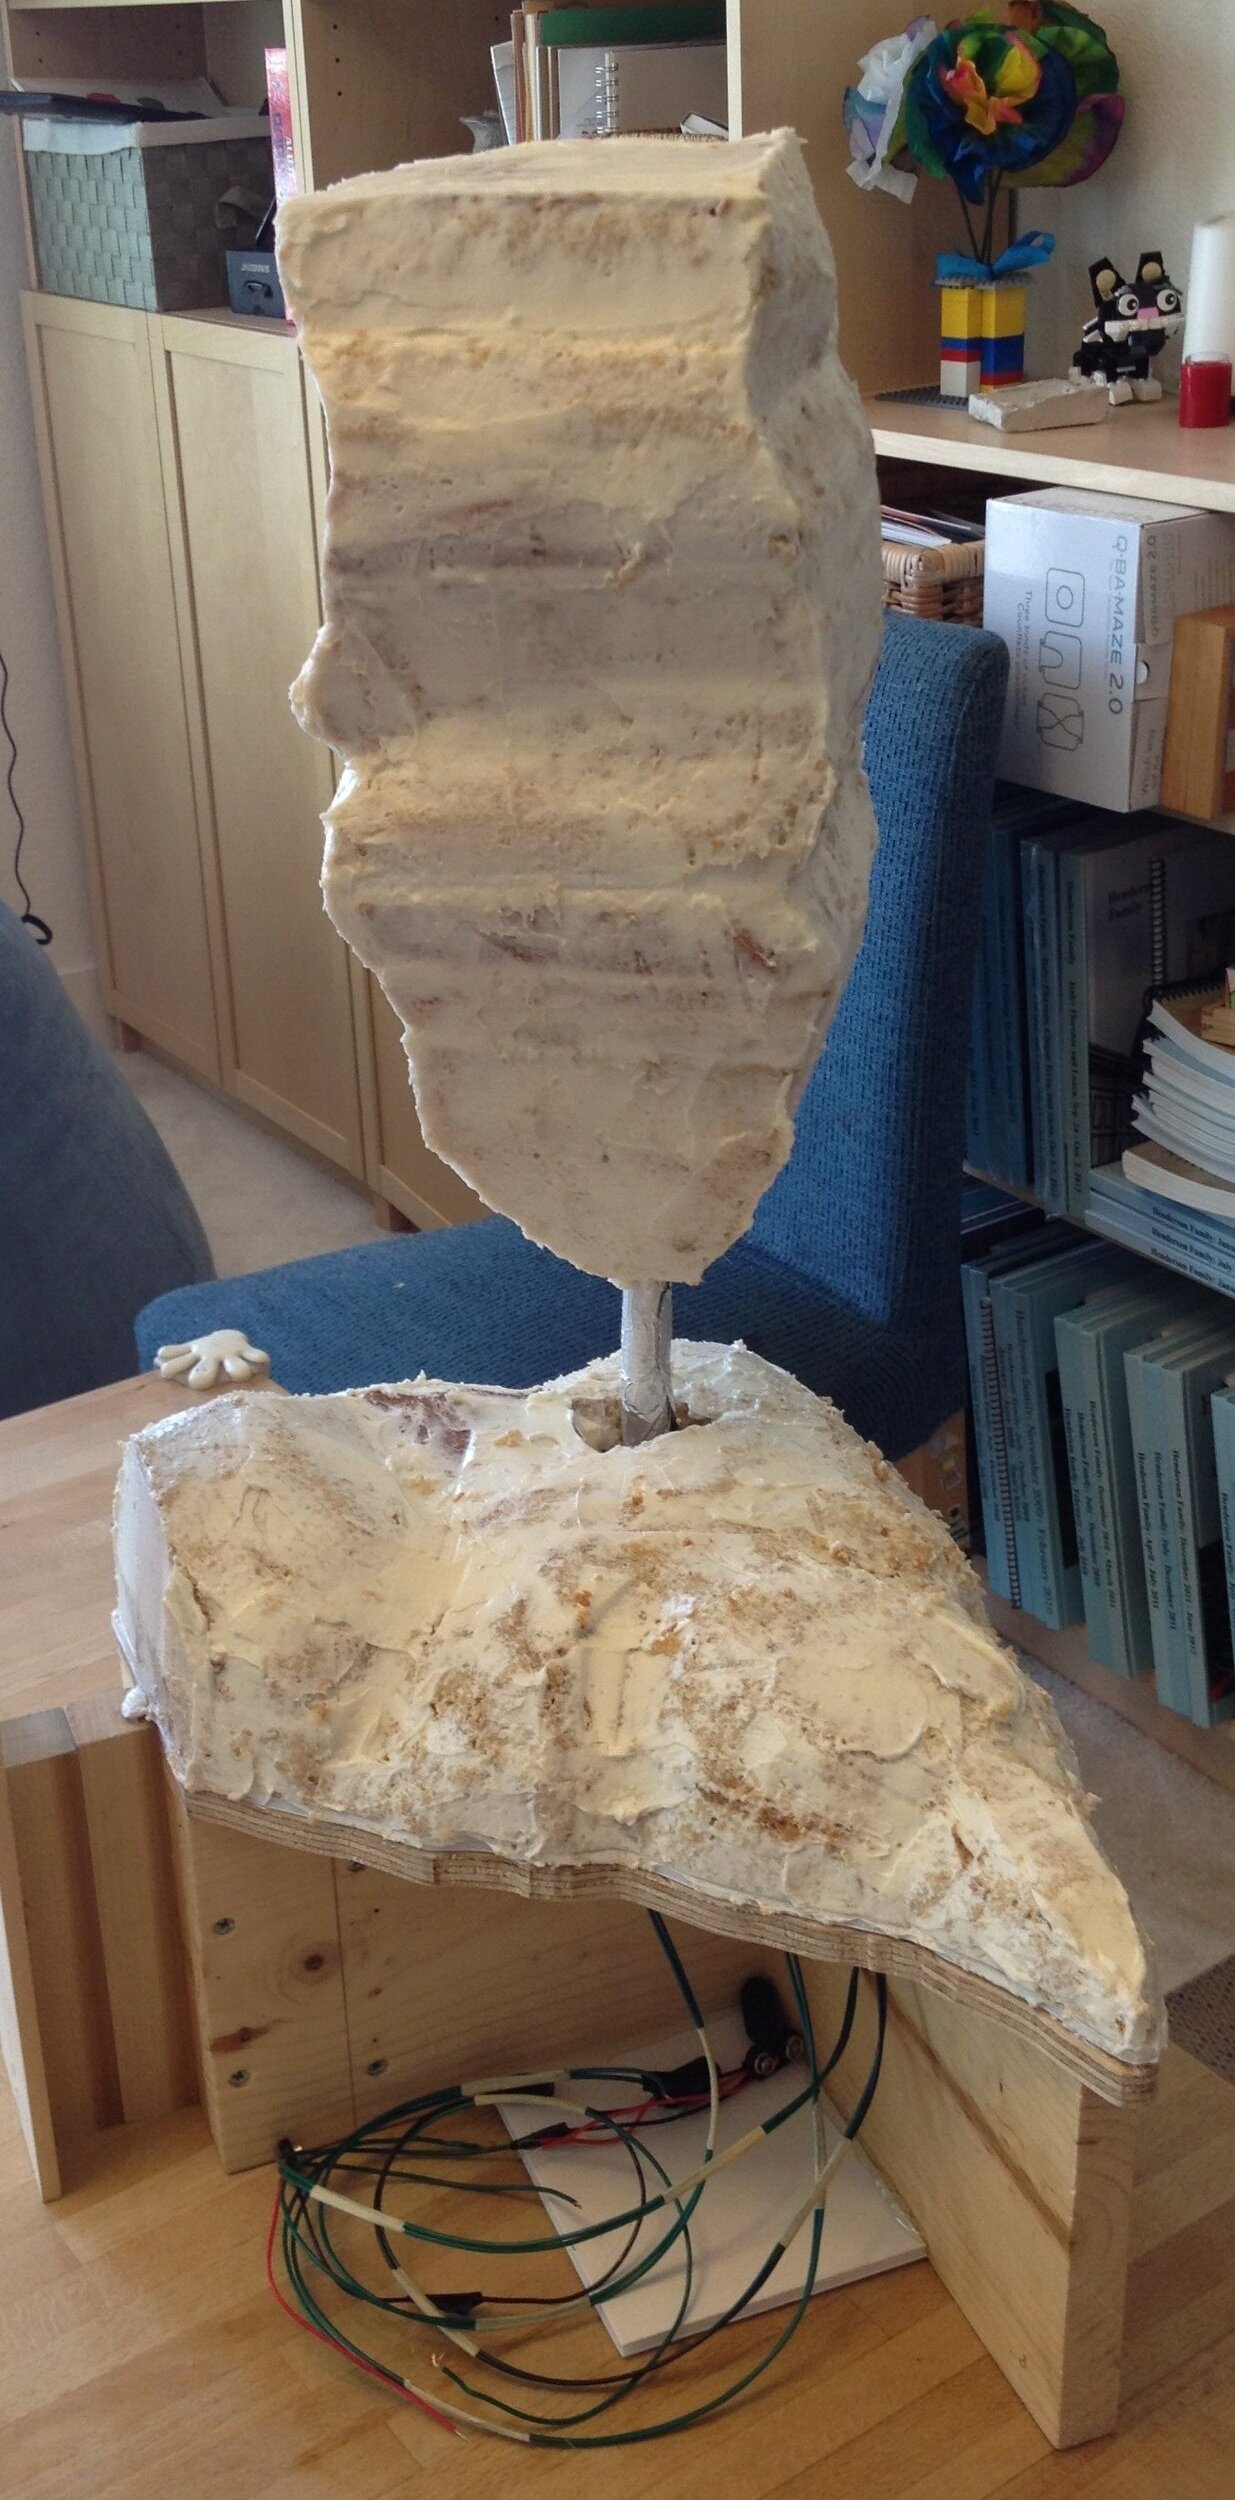
I wanted to make the backdrop change color to correspond with the celestial event phase, so I made a light box like the one I made for the Terraria Blood Moon Cake. Inside are strips of LED tape in pink, yellow, blue, and green. When the cake turned, a strip of copper tape on the gear created electrical connections that lit the appropriate color LEDs as each side of the pillar came to the fore. It quite well at home, but the party was outside on a sunny day, so with that much ambient light the color change was virtually imperceptible.

As usual, I made about four times as much cake as the party required.
Clash of Clans Cake
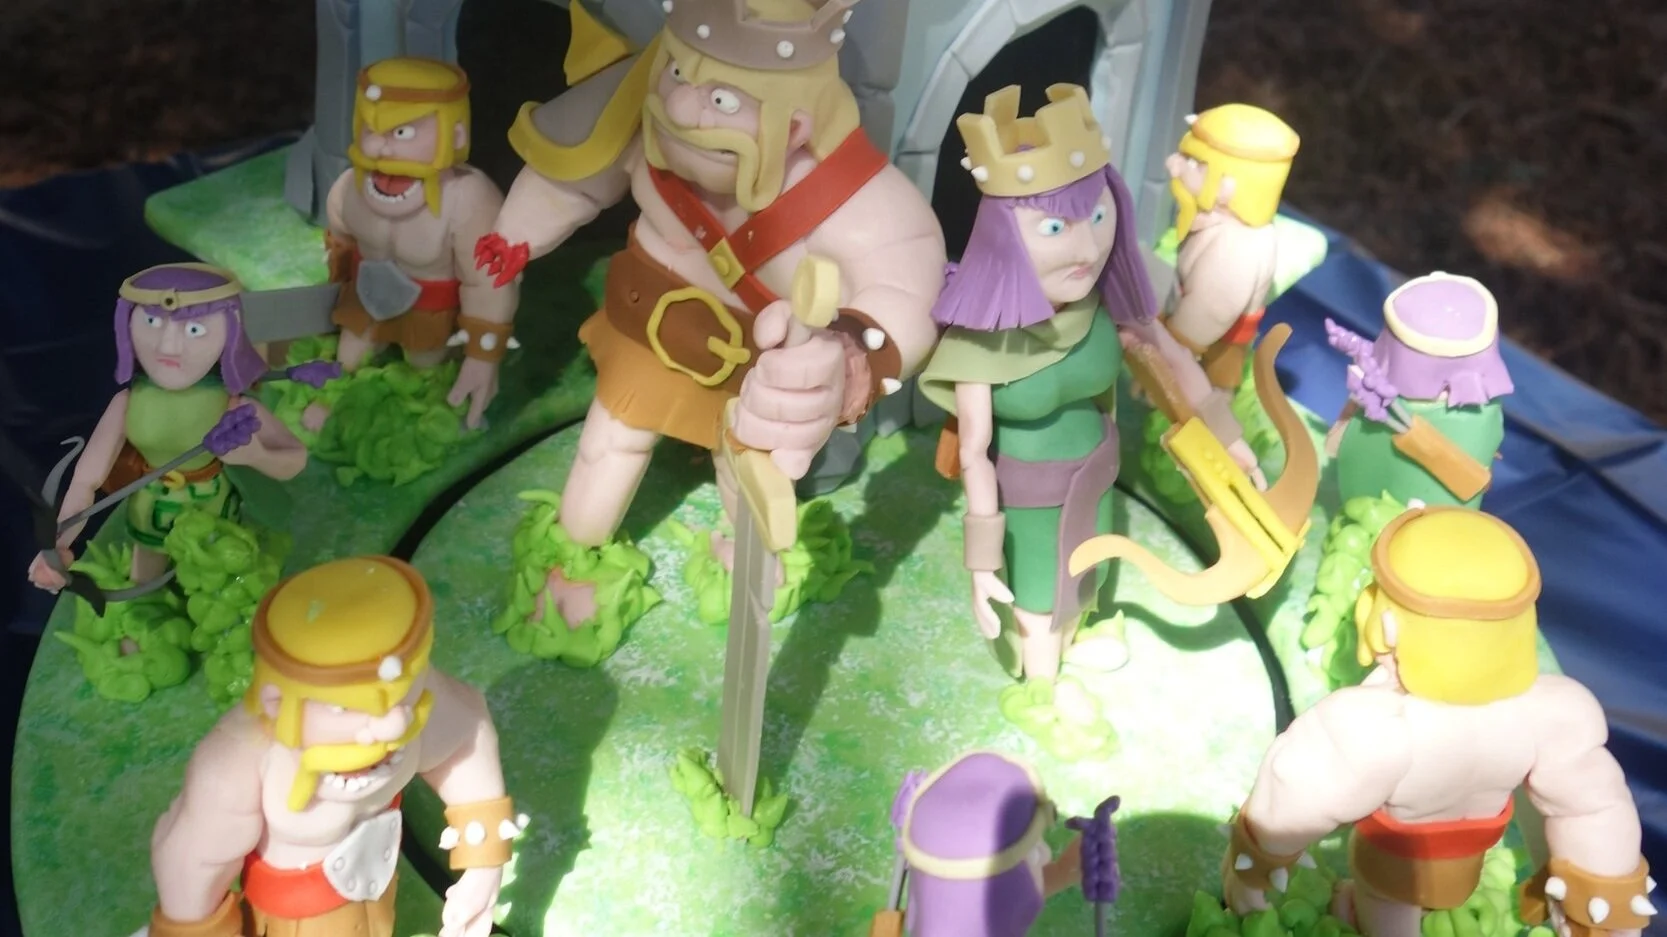
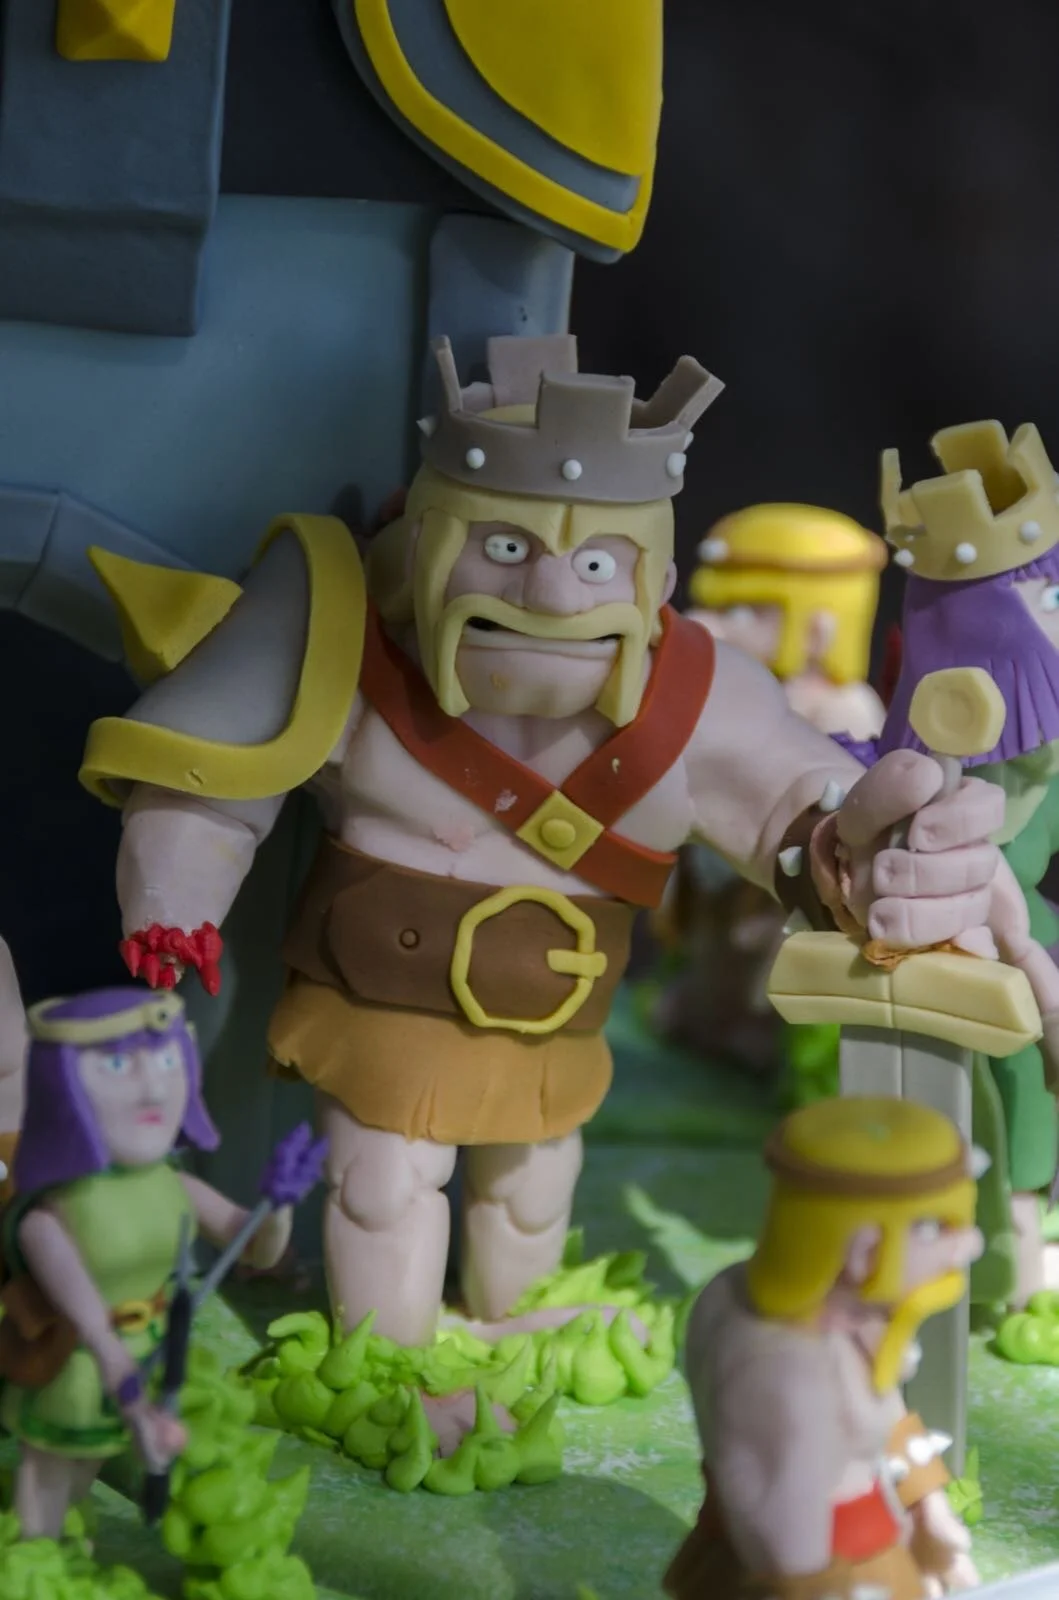
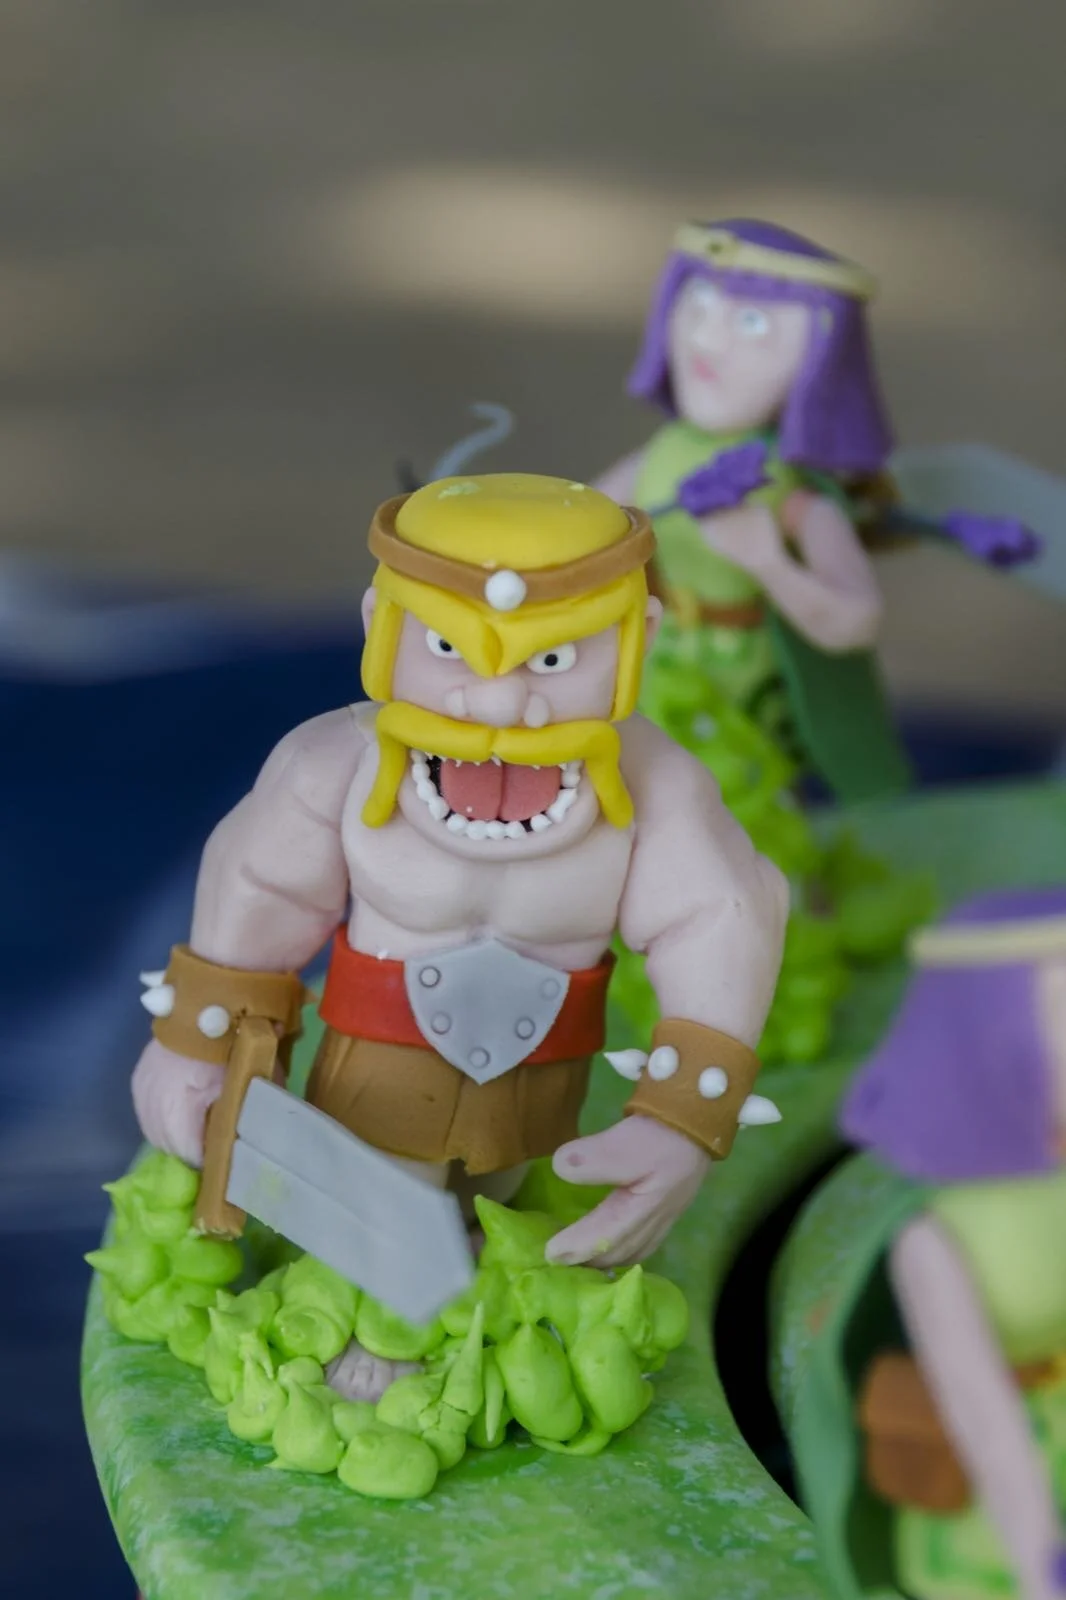
For her 9th birthday, my niece had very specific requirements – a Level 6 Clan Castle from Clash of Clans with an Archer Queen and Barbarian King as well as archers and barbarians.
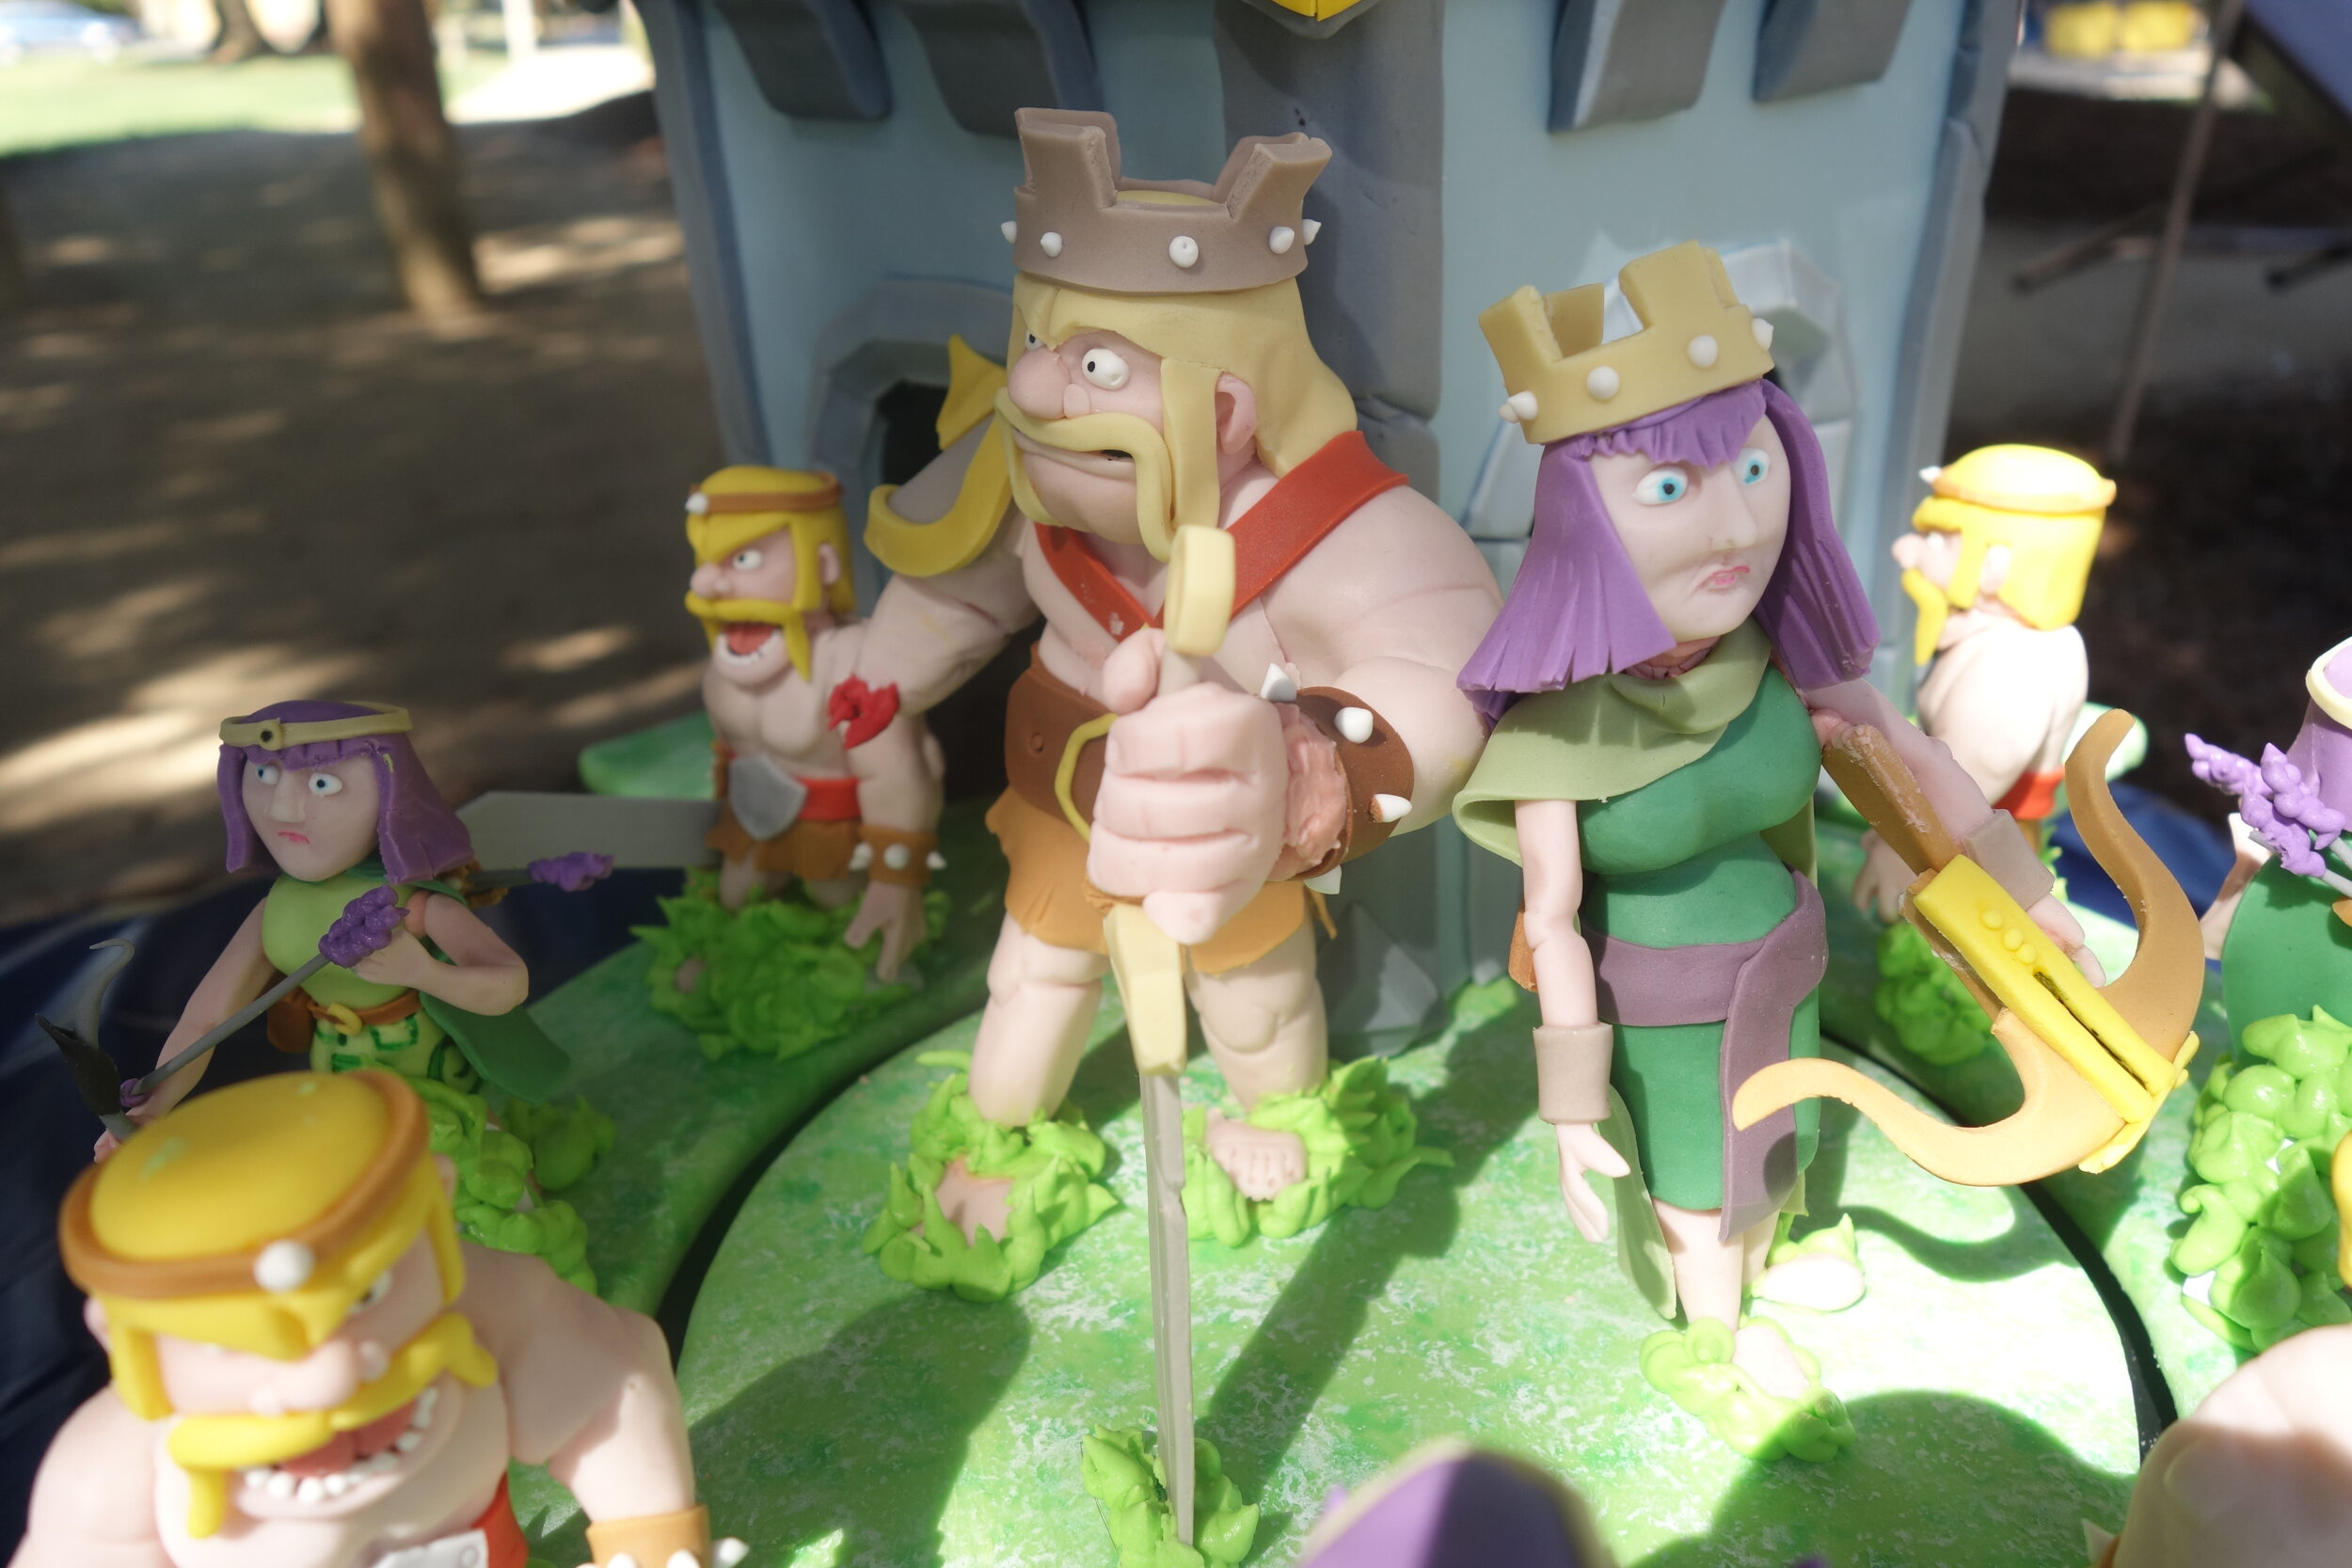
For her 9th birthday, my niece had very specific requirements – a Level 6 Clan Castle from Clash of Clans with an Archer Queen and Barbarian King as well as archers and barbarians. This is actually a fairly reasonable cake request, especially since Clan Castles are nice and square, and therefore quite conducive to being sculpted in cake. I, of course, decided to make it more difficult for myself by trying to make the archers and barbarians march in and out of the castle.

I think I actually built a pretty cool turntable mechanism out of 5-gallon buckets and rubber bands, but sadly once I got all the weight of the figures on it, it didn’t really turn. Oh well.
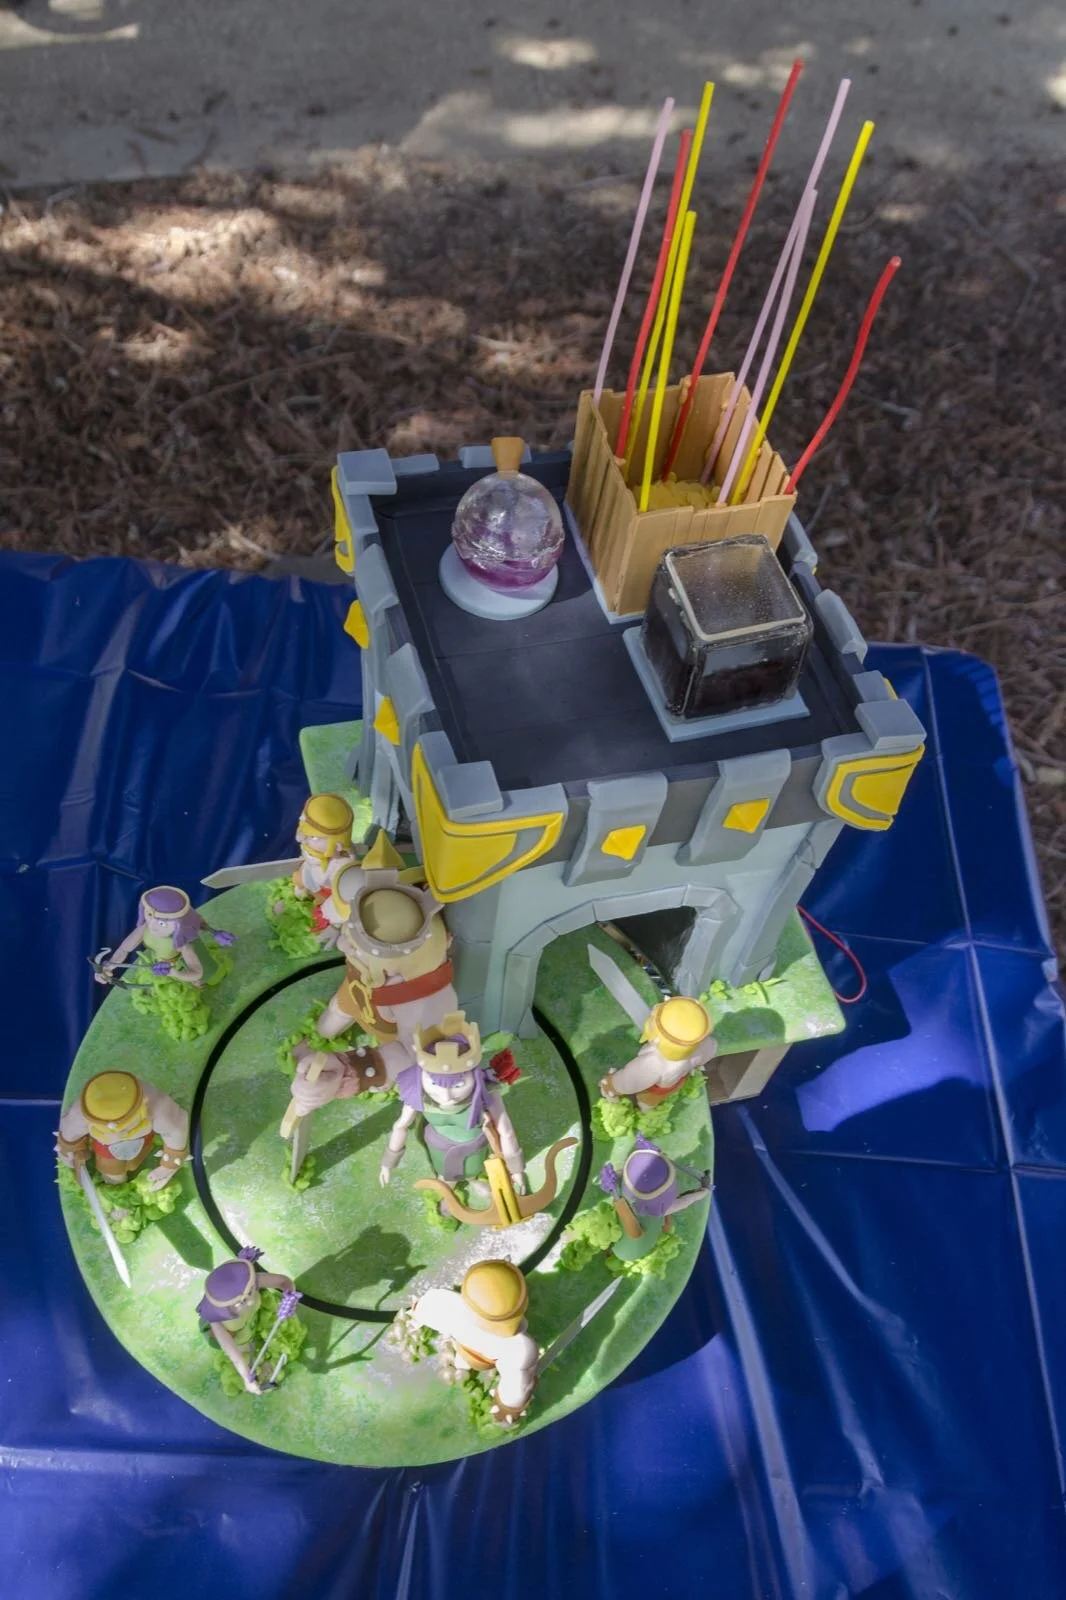
I also had more problems than usual with getting the figures put together. Partially this was because I just didn’t have enough time so the gum paste wasn’t totally dry, but I also had problems with royal icing that just didn’t want to dry. I still don’t know exactly what the problem was. I think I must have mixed it wrong somehow because I’ve never had that problem before. I had so much trouble attaching the Barbarian King’s hand that I ultimately had to leave it off and add some red royal icing so it looked like his hand had been chopped off in battle.
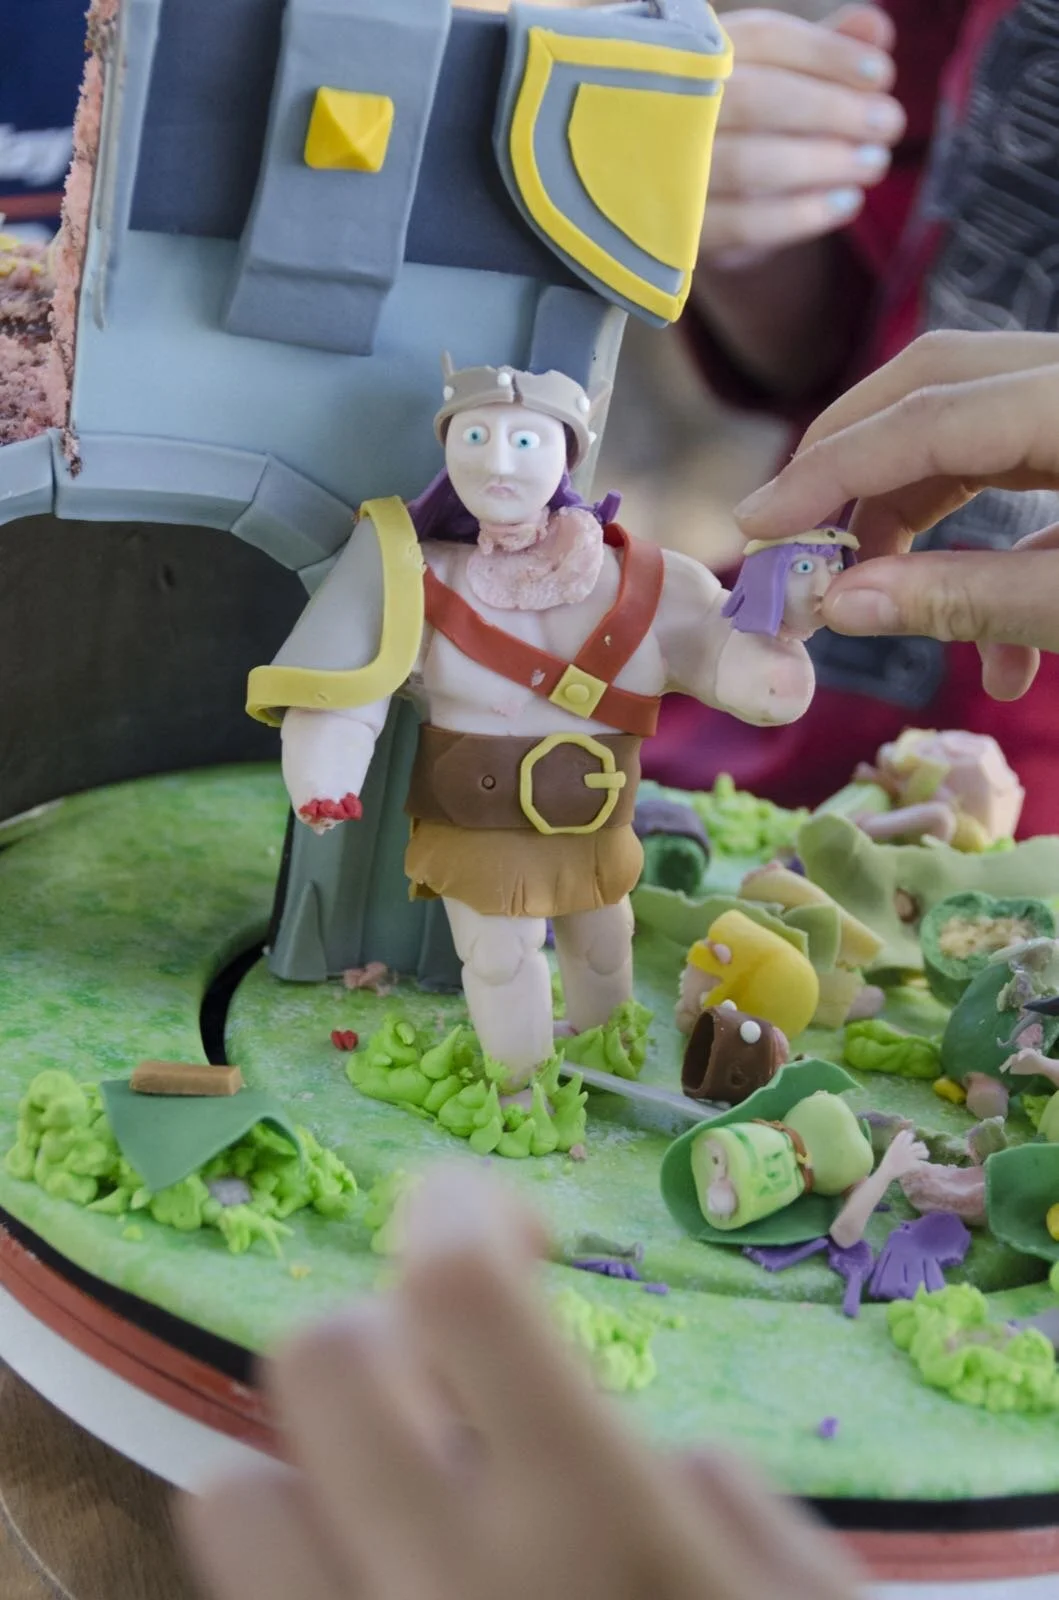
By the time we got the cake to the park for the party I was pretty frustrated, but I did eventually get all the figures standing up. I had to prop some of them up with bits of foam core concealed under green royal icing so that they wound up looking like they were knee-deep in unusually large tufts of grass.
The kids loved it, though, which is the important thing. The best part was after the cake was served when a bunch of the kids dismembered and reassembled the figures like a bunch of miniature Doctor Frankensteins.

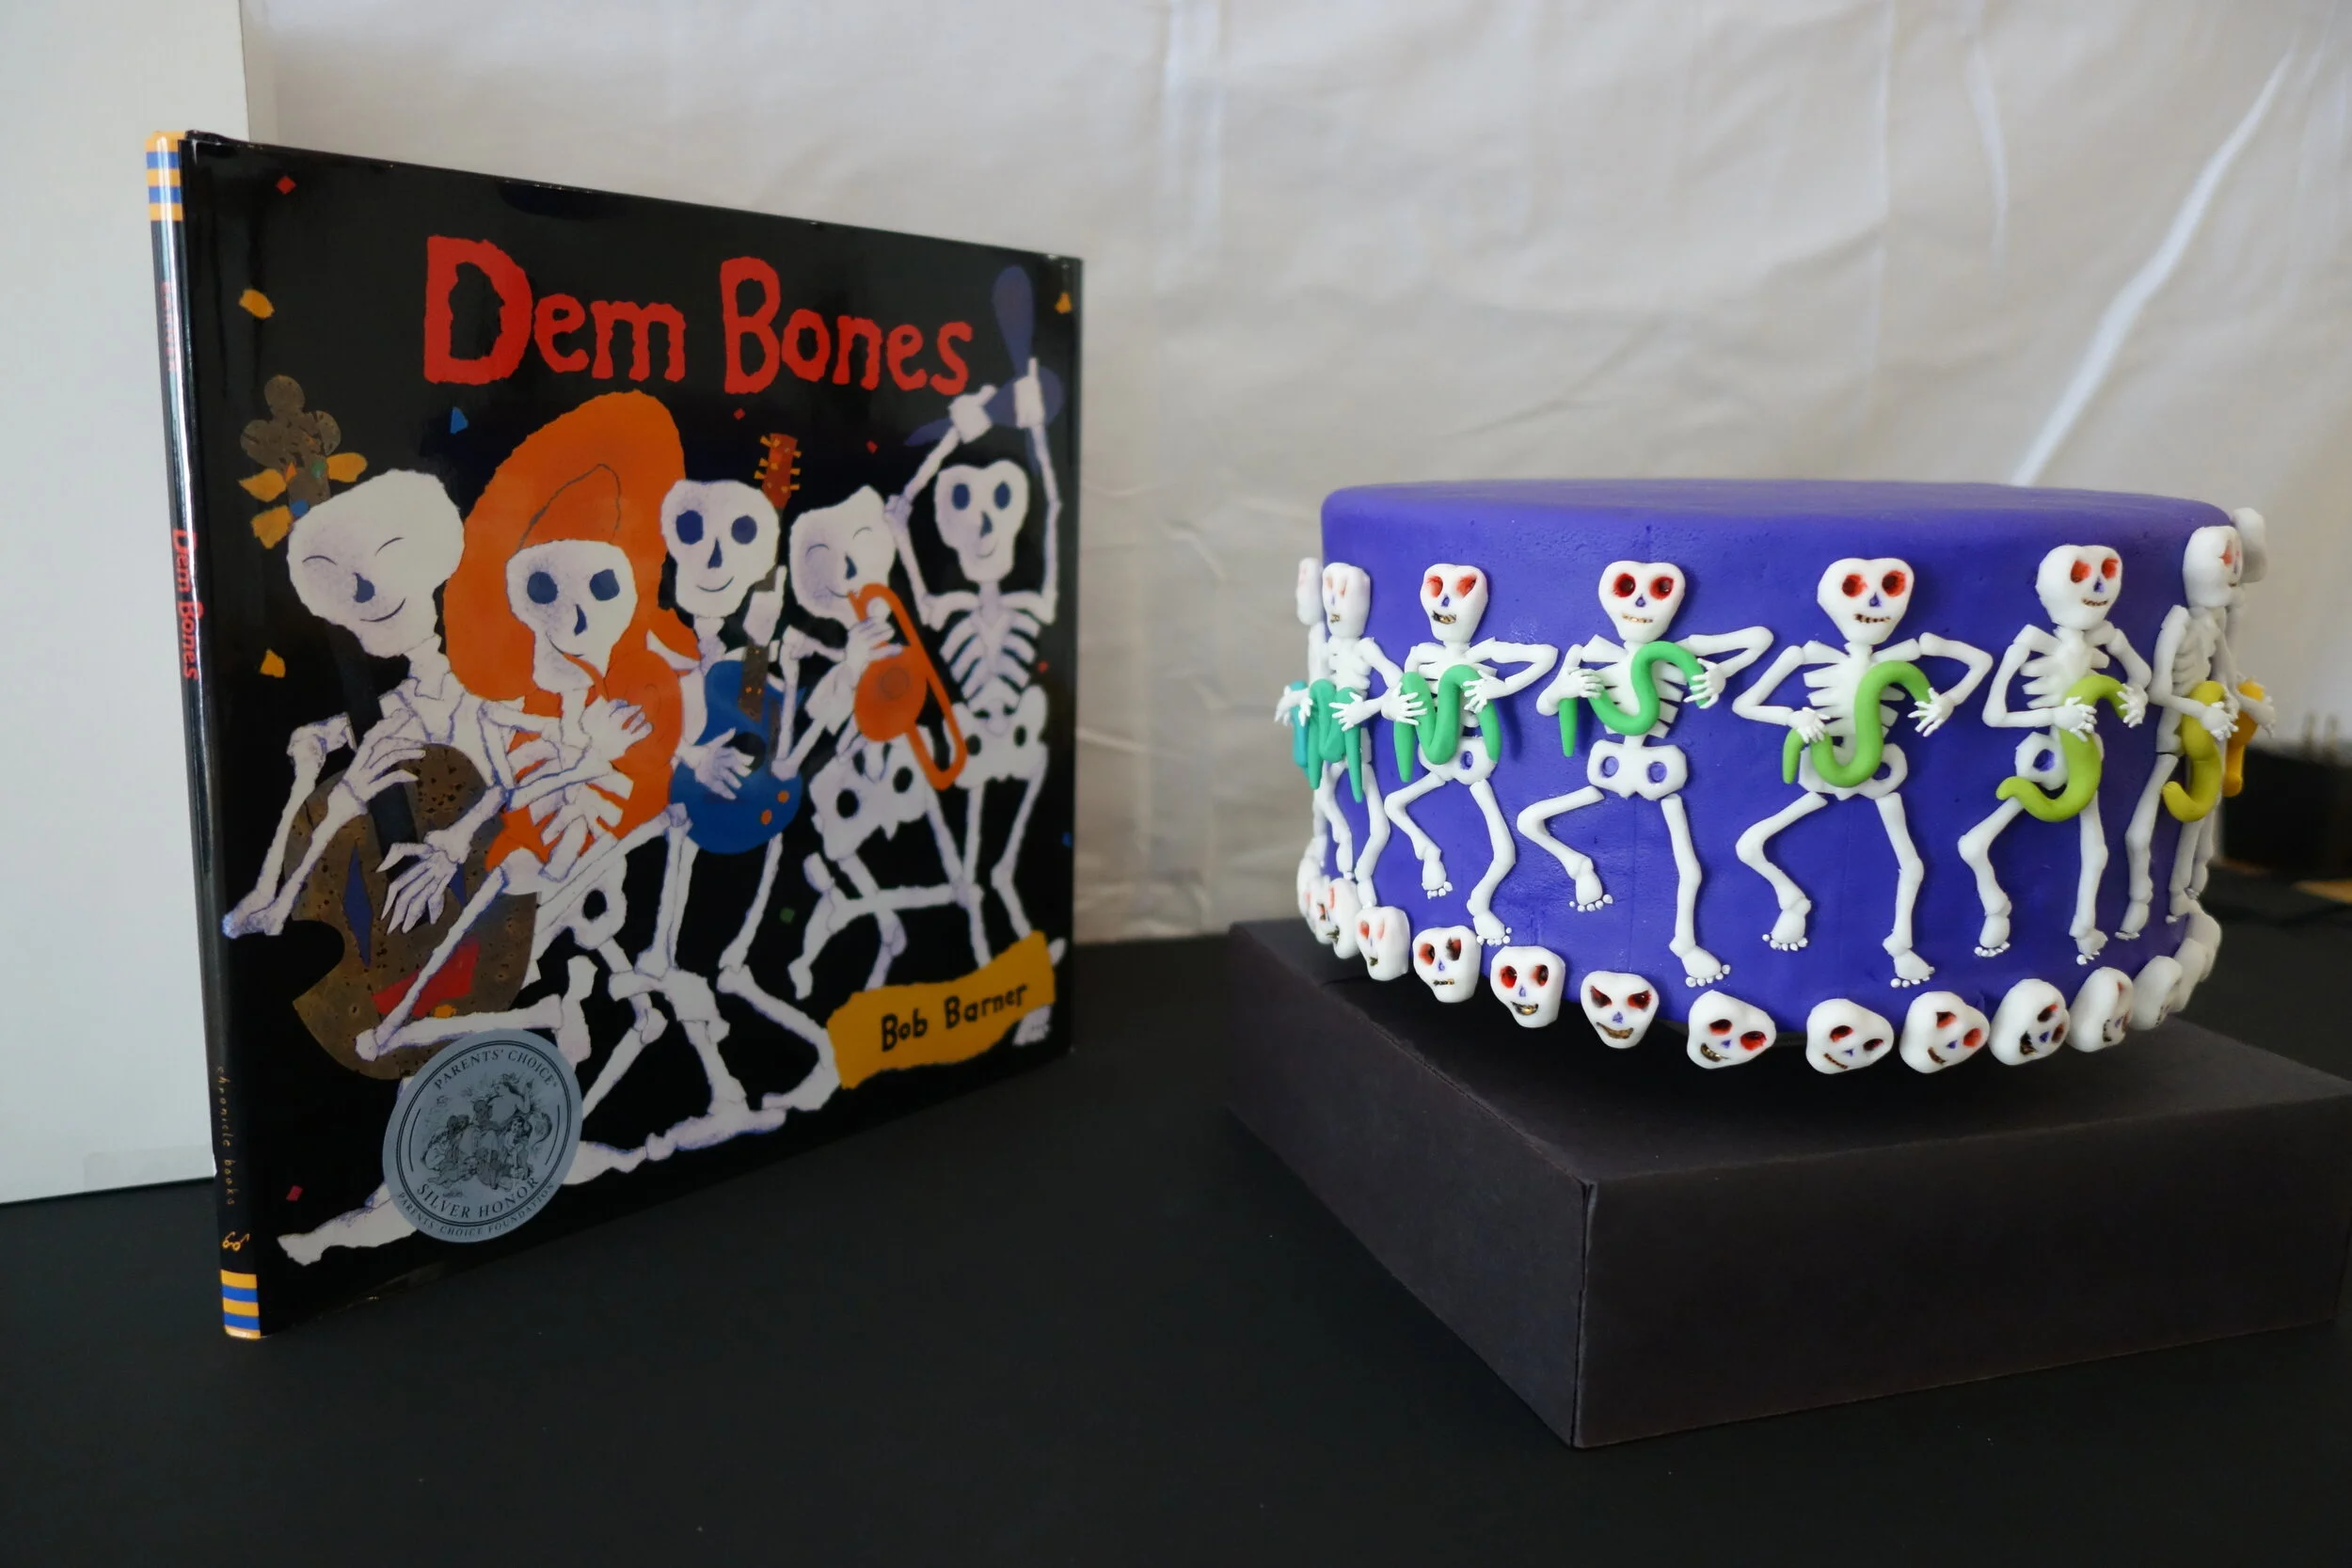
Dem Bones Cake
My niece and nephew’s preschool has the delightful tradition of having the pre-K kids perform a little skit based on one of their favorite books as part of the end-of-the-year graduation ceremony. This year, Sam’s class chose Dem Bones as their book so, of course, I made him a Dem Bones cake. Ever since I saw this video, I’ve been wanting to try to make a zoetrope cake, so this seemed like the perfect opportunity.
My niece and nephew’s preschool has the delightful tradition of having the pre-K kids perform a little skit based on one of their favorite books as part of the end-of-the-year graduation ceremony. Three years ago, Alex’s class performed Dr. Suess’s The Sneetches, so I made her a Sneetch cake. This year, Sam’s class chose Dem Bones as their book so, of course, I made him a Dem Bones cake.
Ever since I saw this video, I’ve been wanting to try to make a zoetrope cake, so this seemed like the perfect opportunity. Unfortunately, I don’t actually know anything about constructing a zoetrope, so it didn’t totally work. Next time I’ll have to do my research a little better.
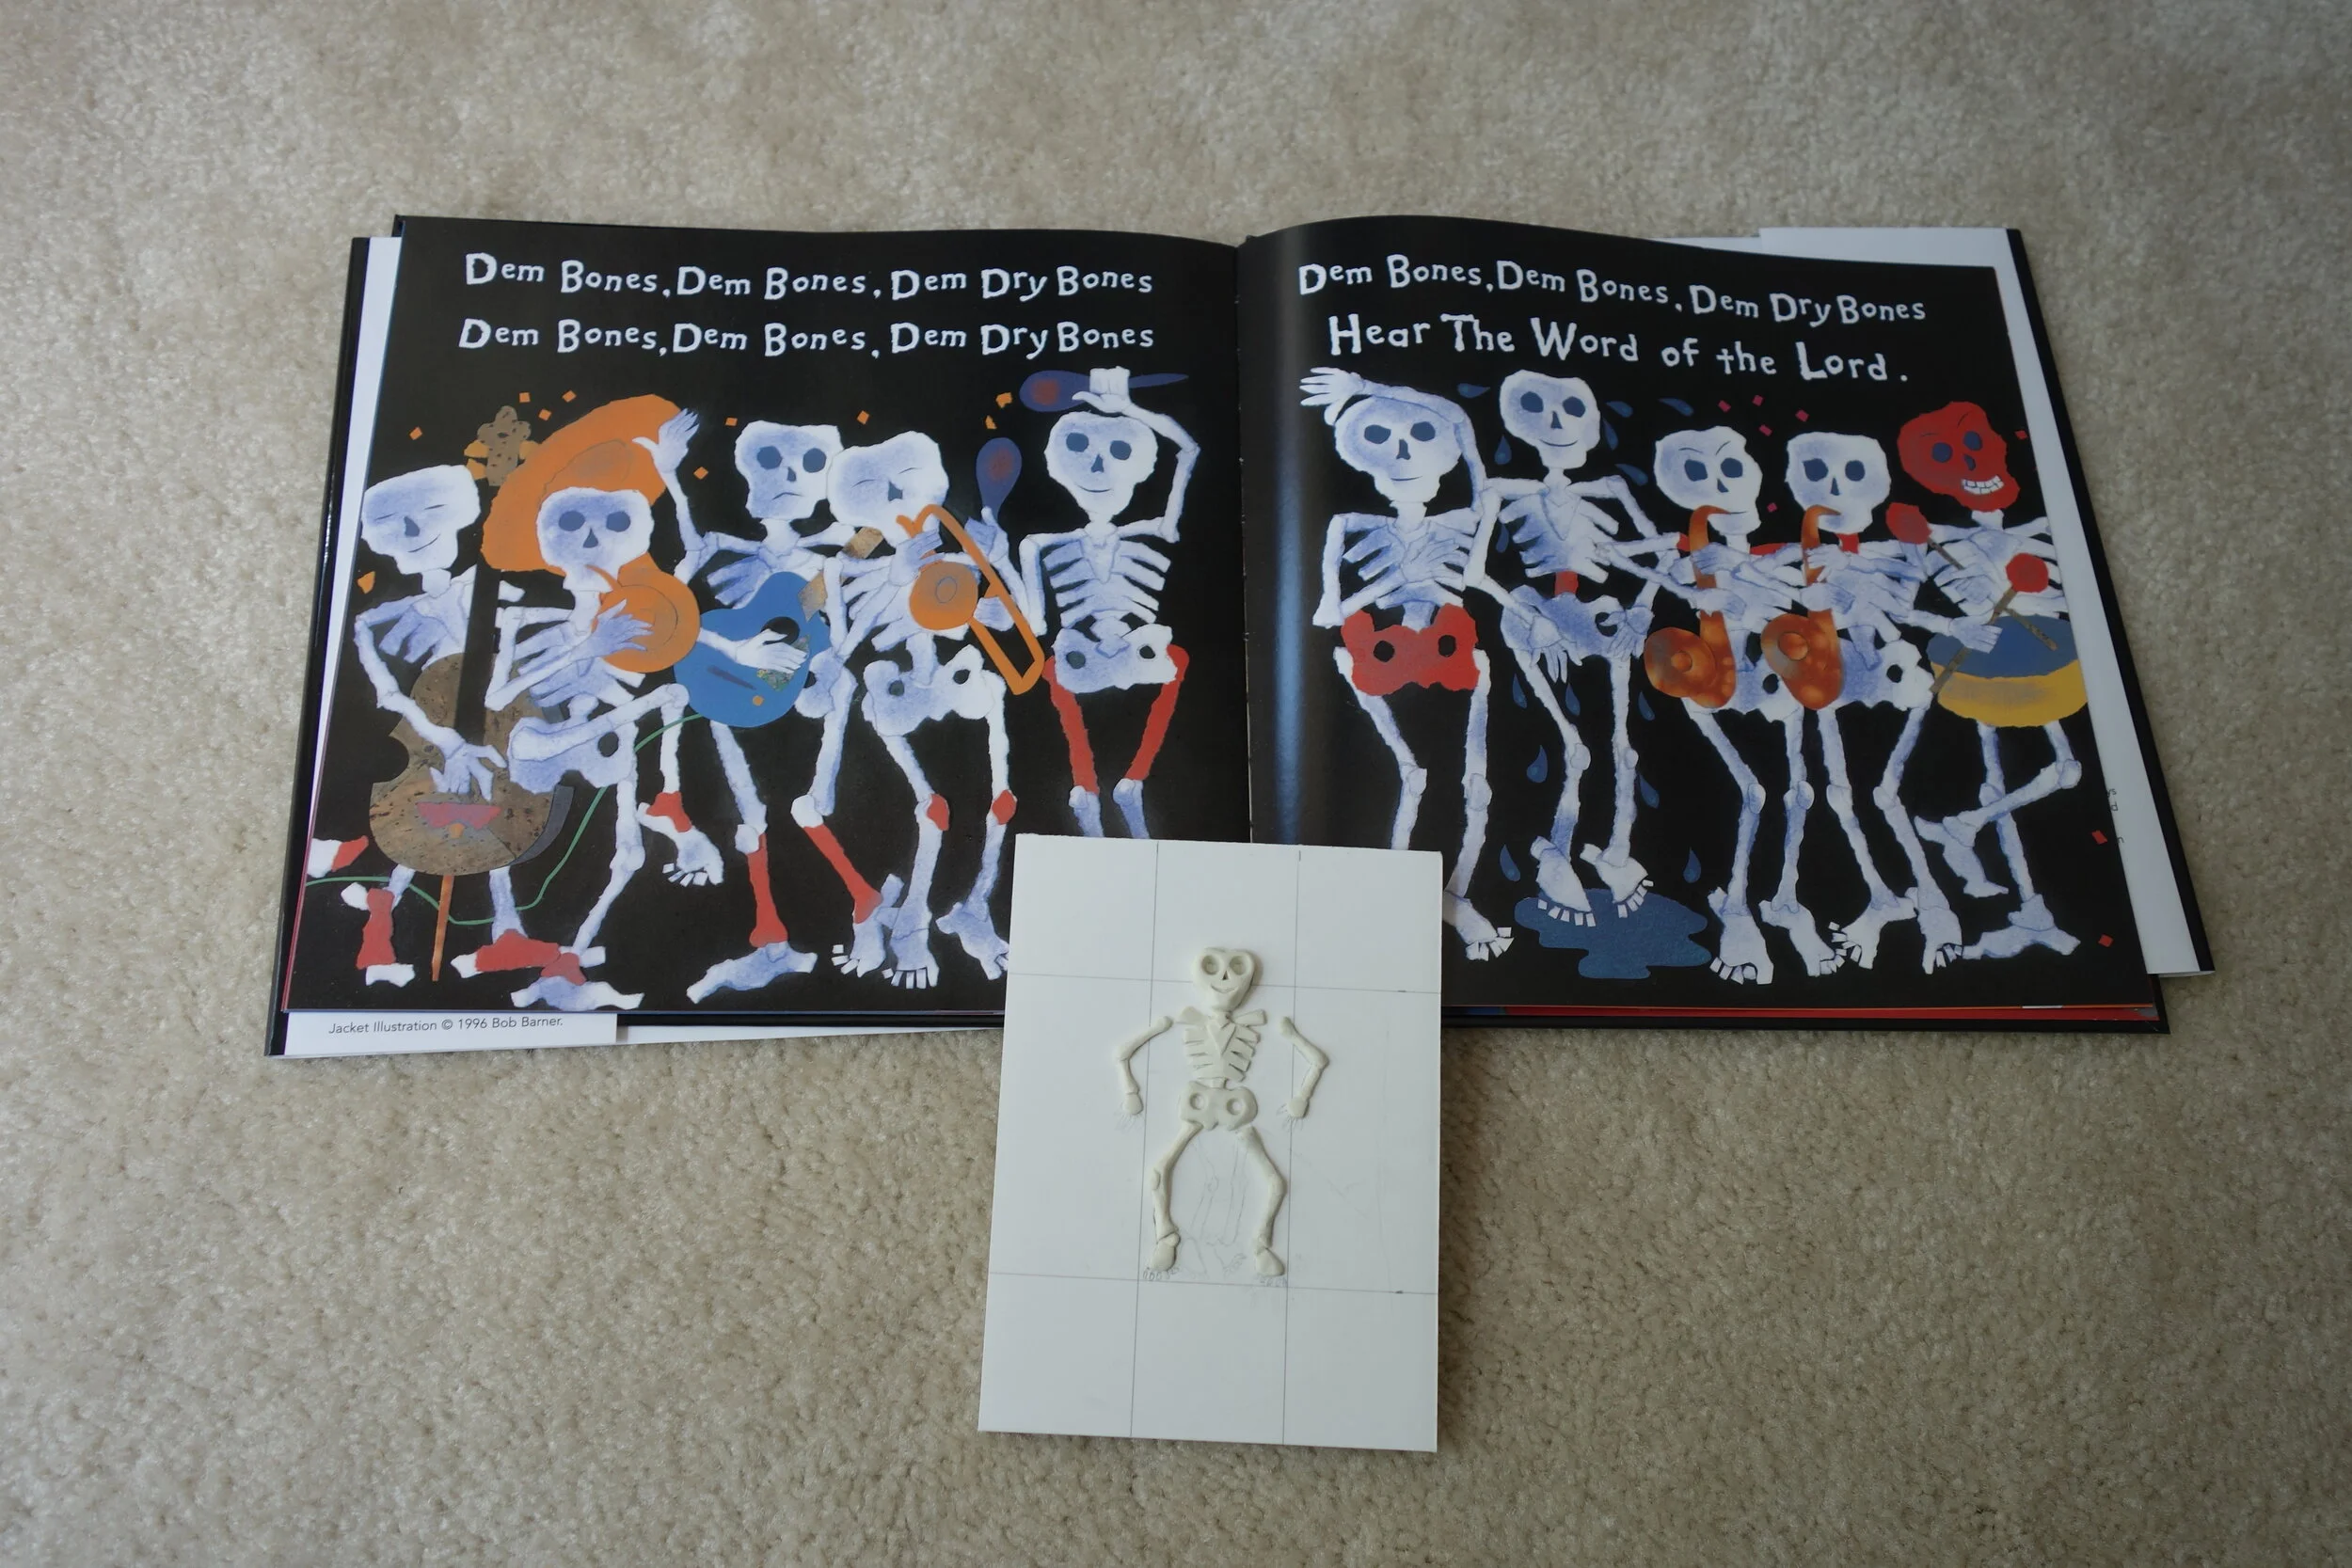
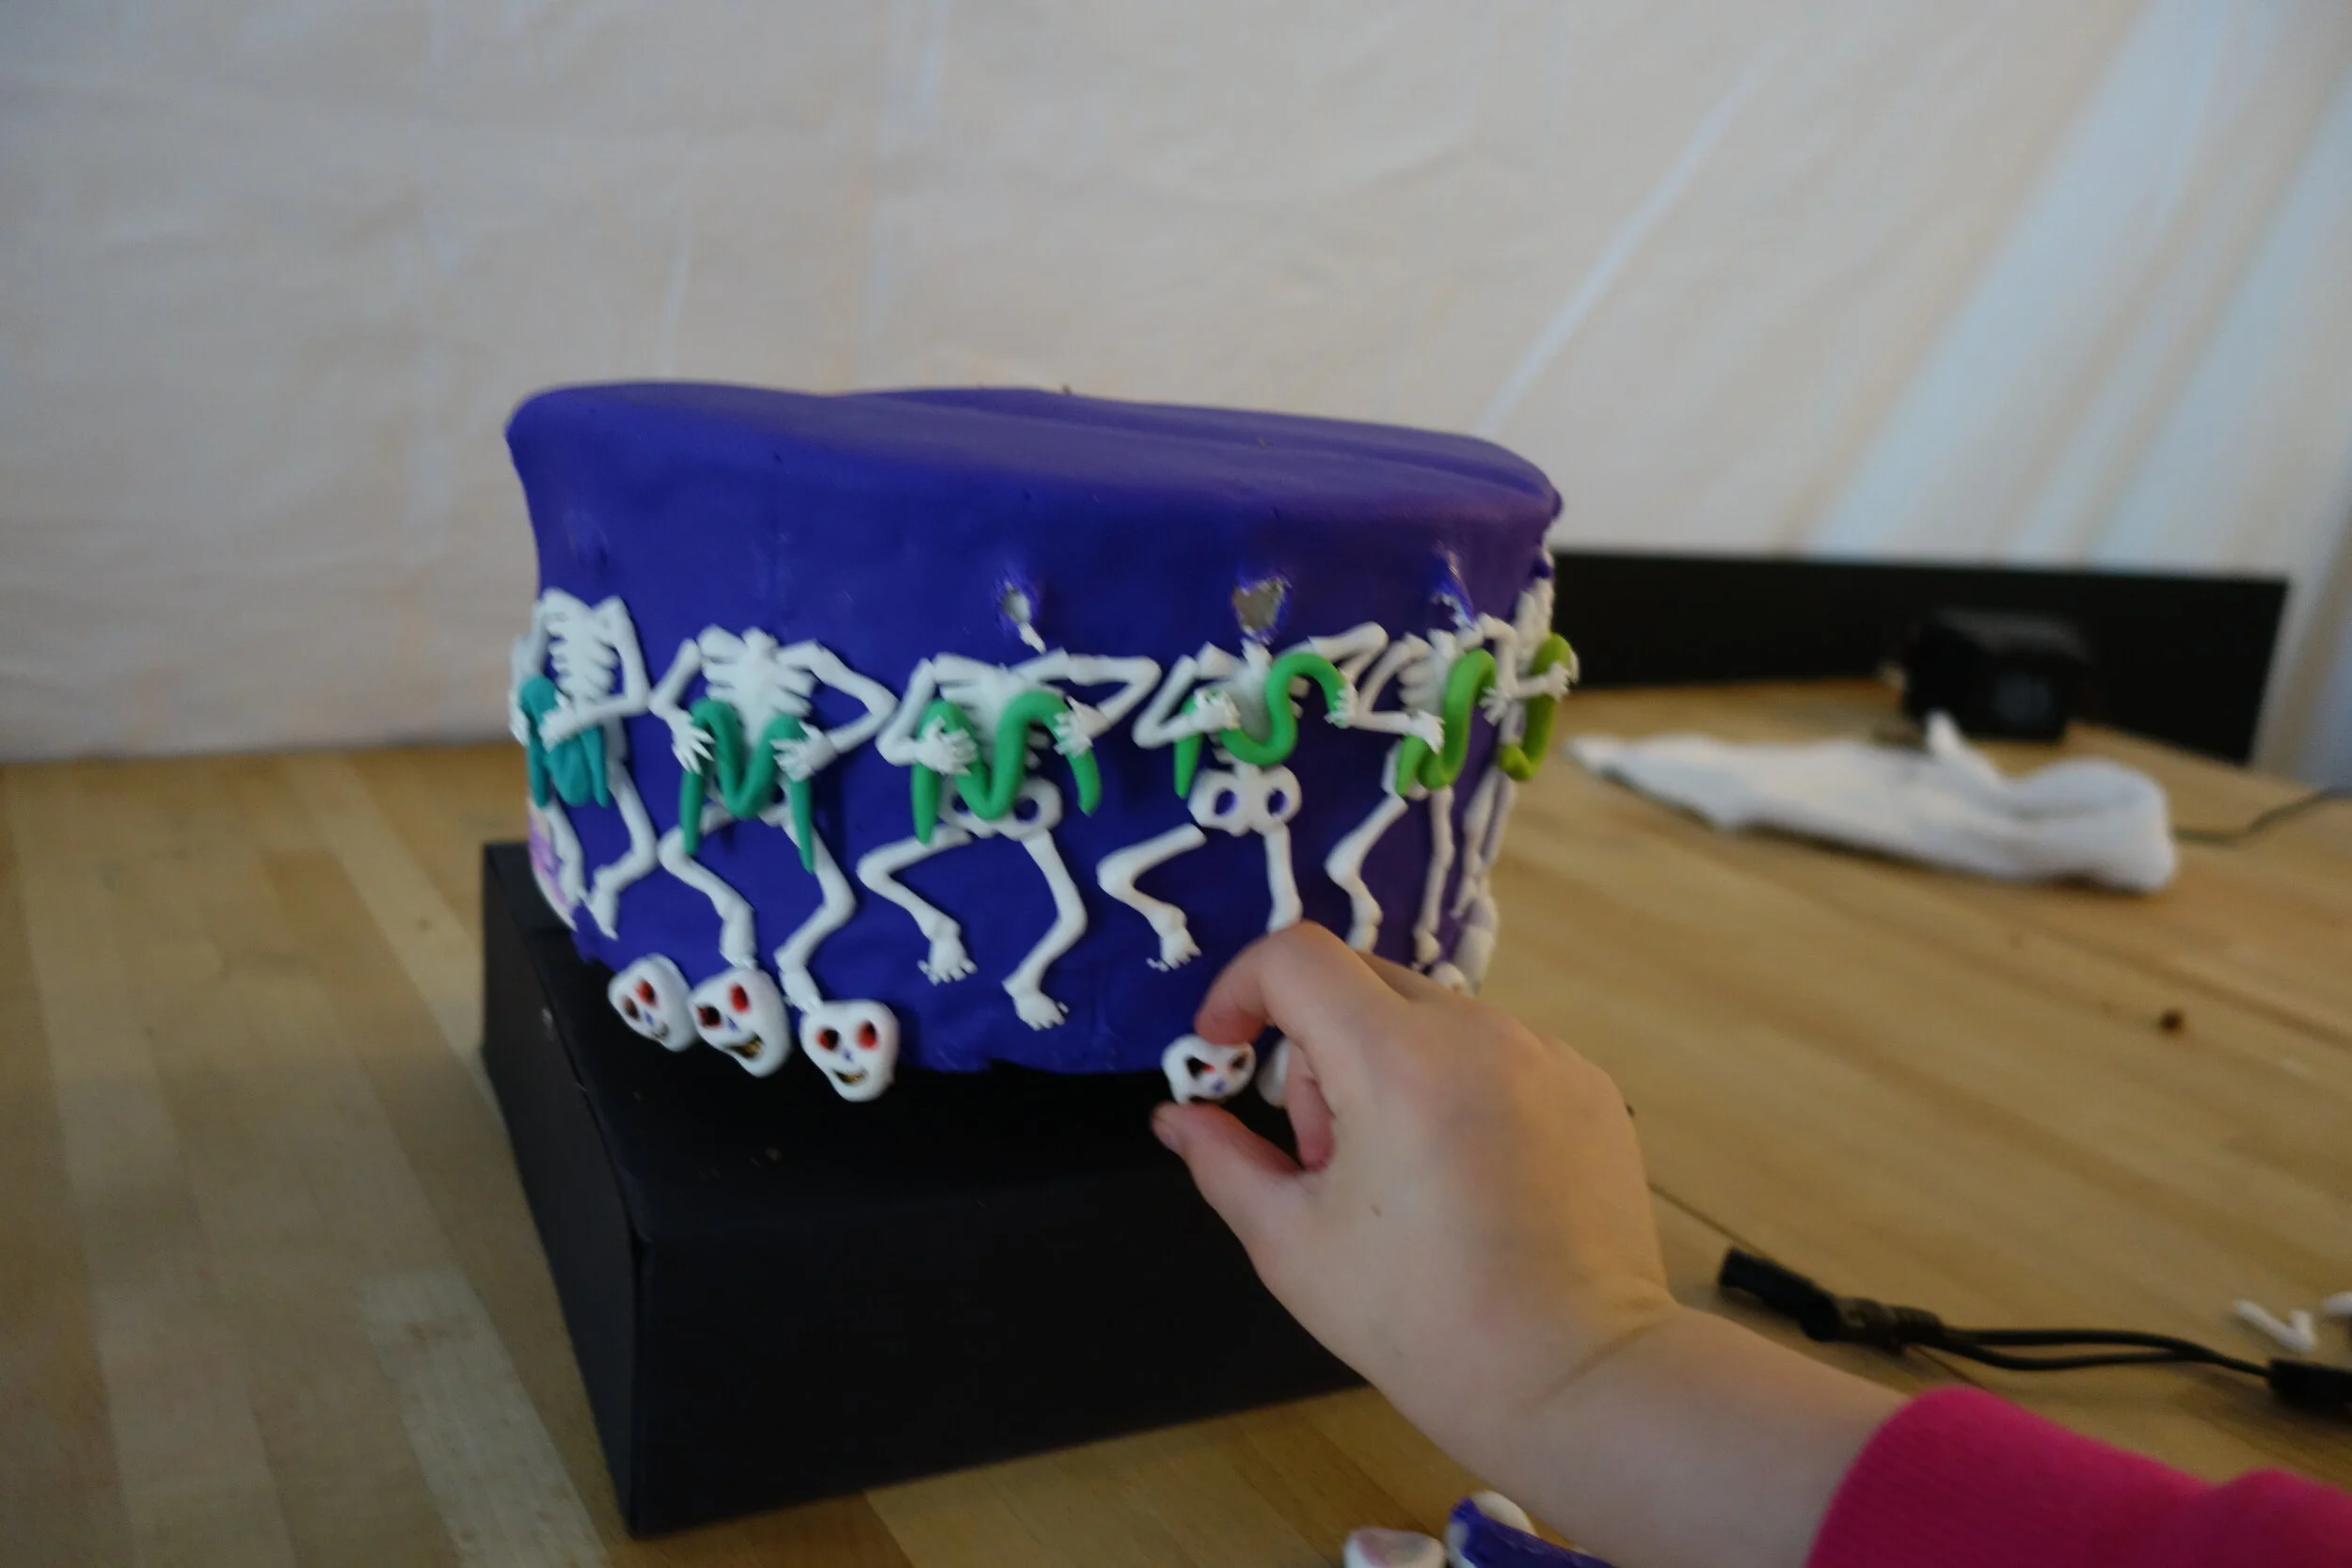
In order to make the sixteen skeletons around the sides of the cake, I sculpted one skeleton and then made a mold using food-safe silicon.

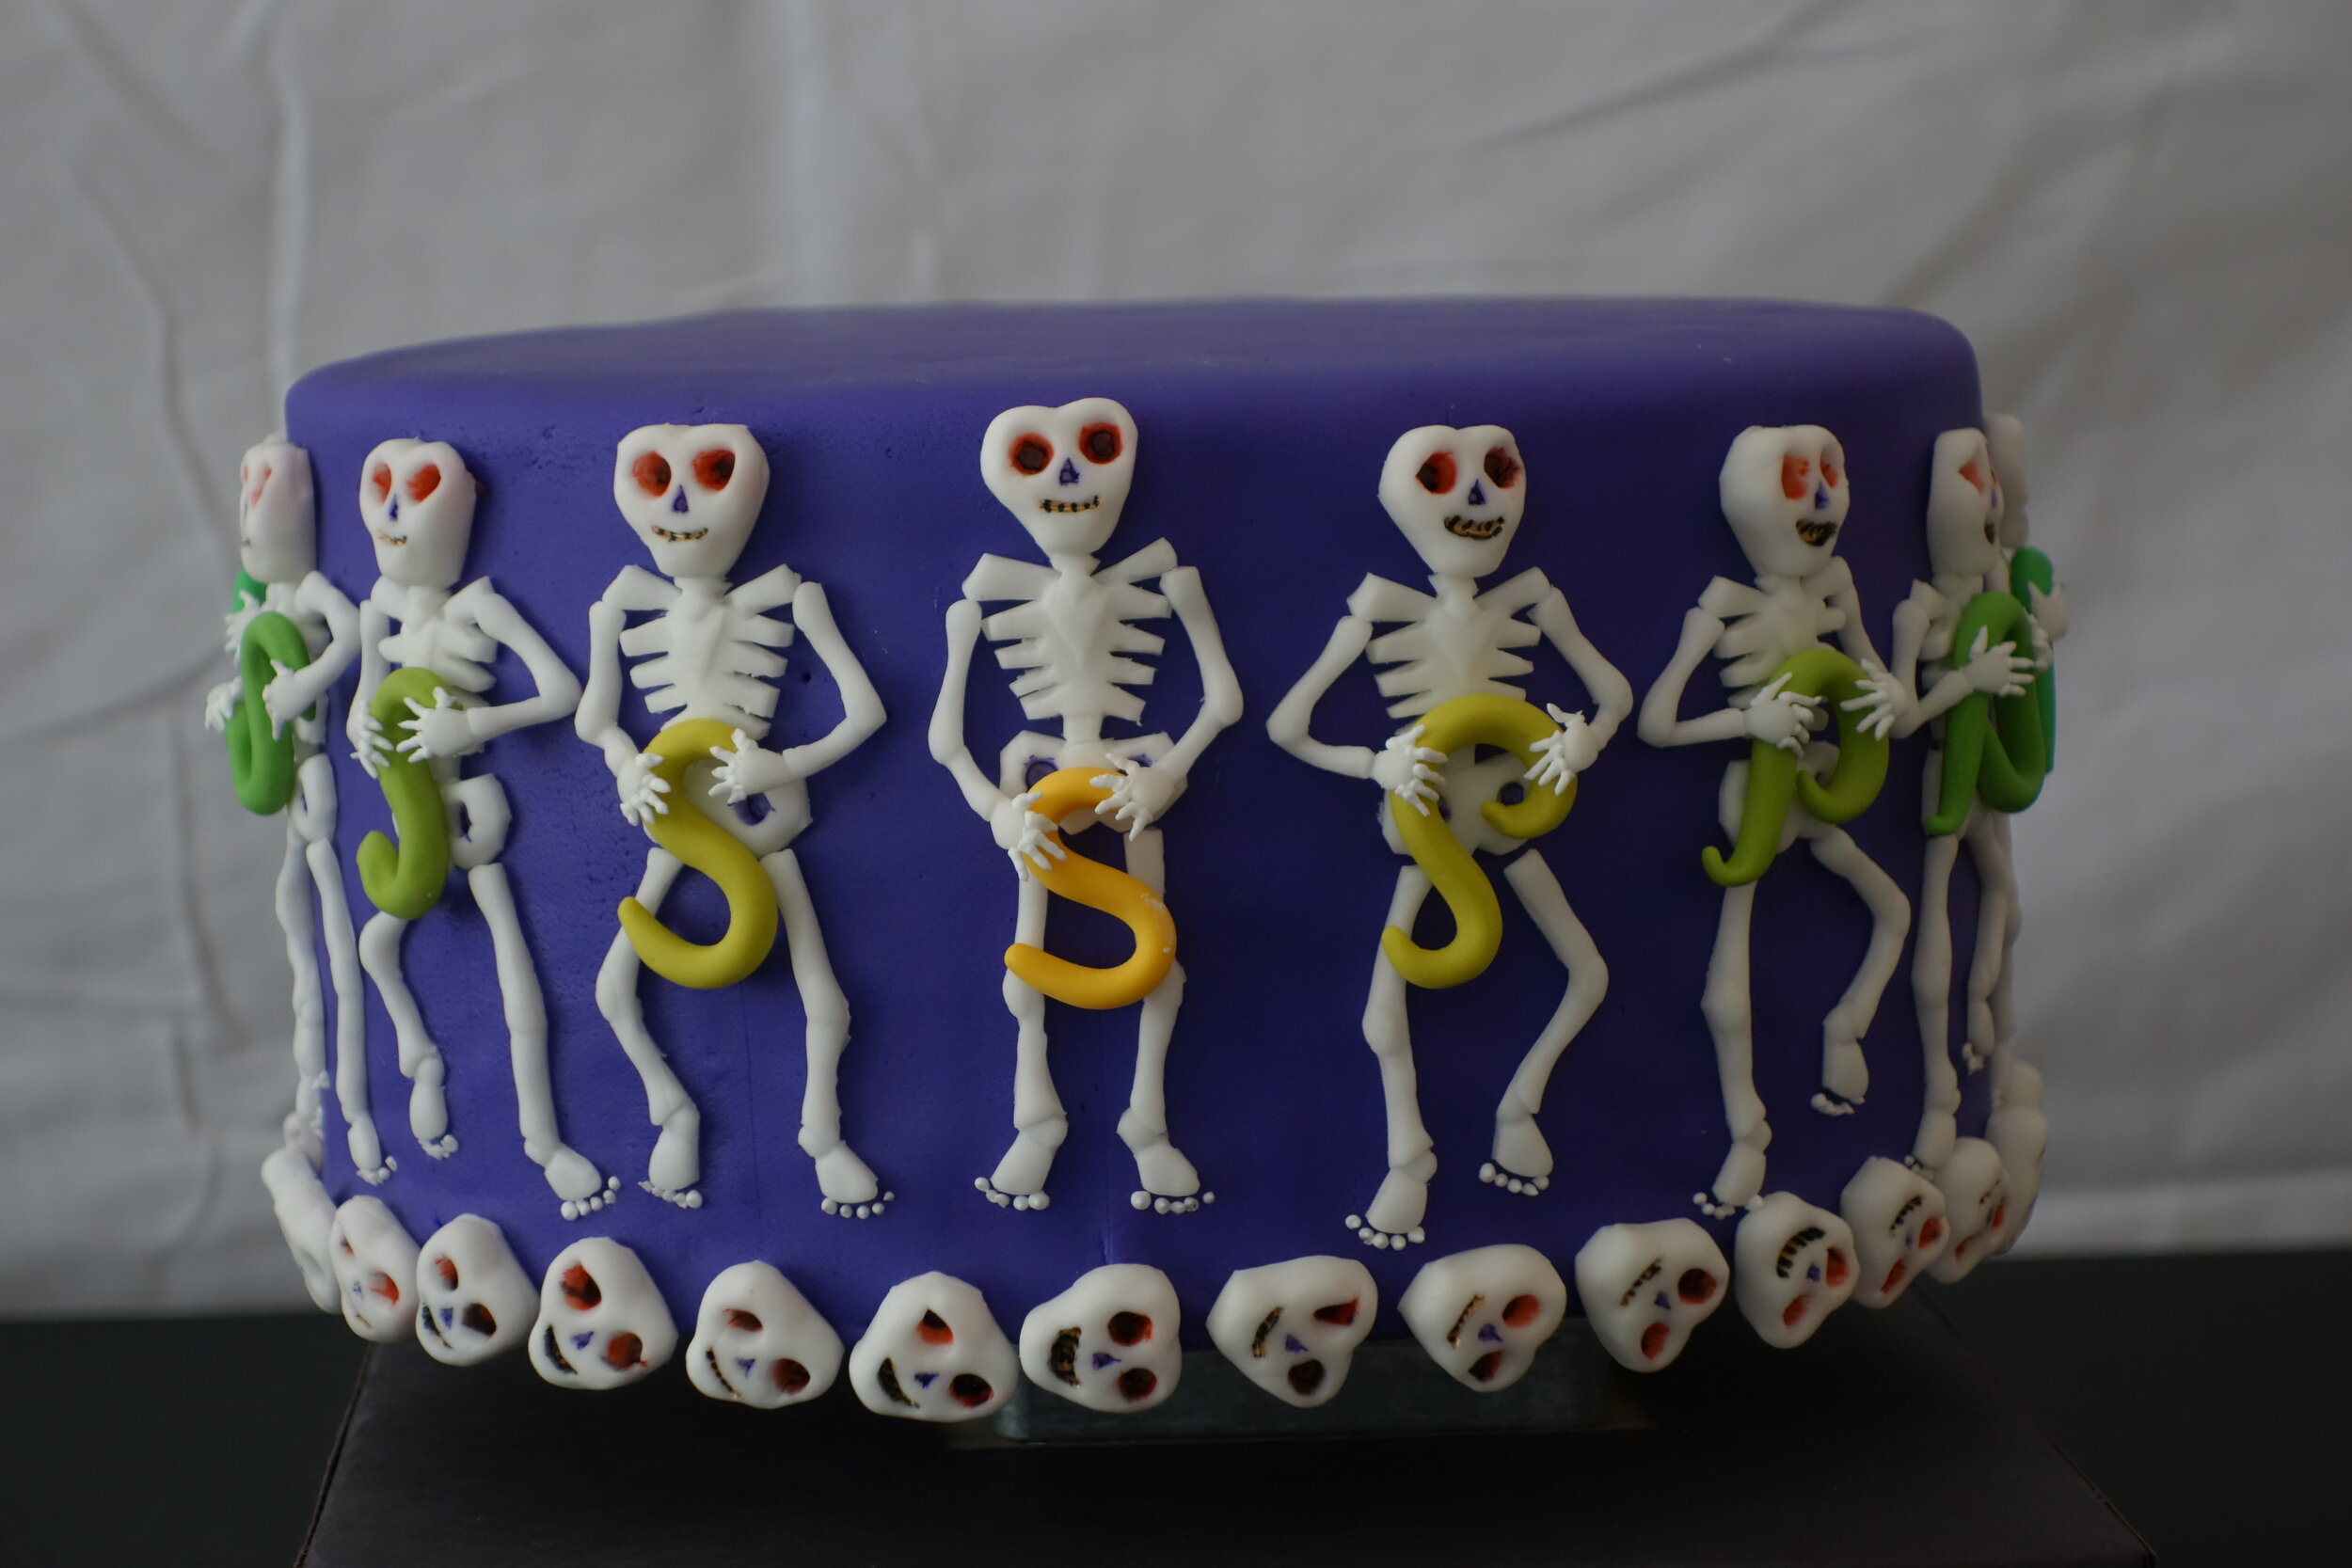
I could then make the skeletons by pushing pieces of white fondant into the mold and sticking them onto the cake. The skeletons are holding letters that morph from the letter “S” to the letter “A” to the letter “M” to spell “Sam.”
The turntable I built for the cake worked perfectly, but I never got it synchronized with the strobe light or viewing slit well enough for the zoetrope illusion to really work. It sort of works if I animate all these photos together like this, though.
Ultimately, it didn't matter whether or not the zoetrope effect worked, since Sam absolutely loved the cake.

He especially loved the skeleton heads and by the end of the party he had eaten the heads off of all the remaining skeletons on the cake.
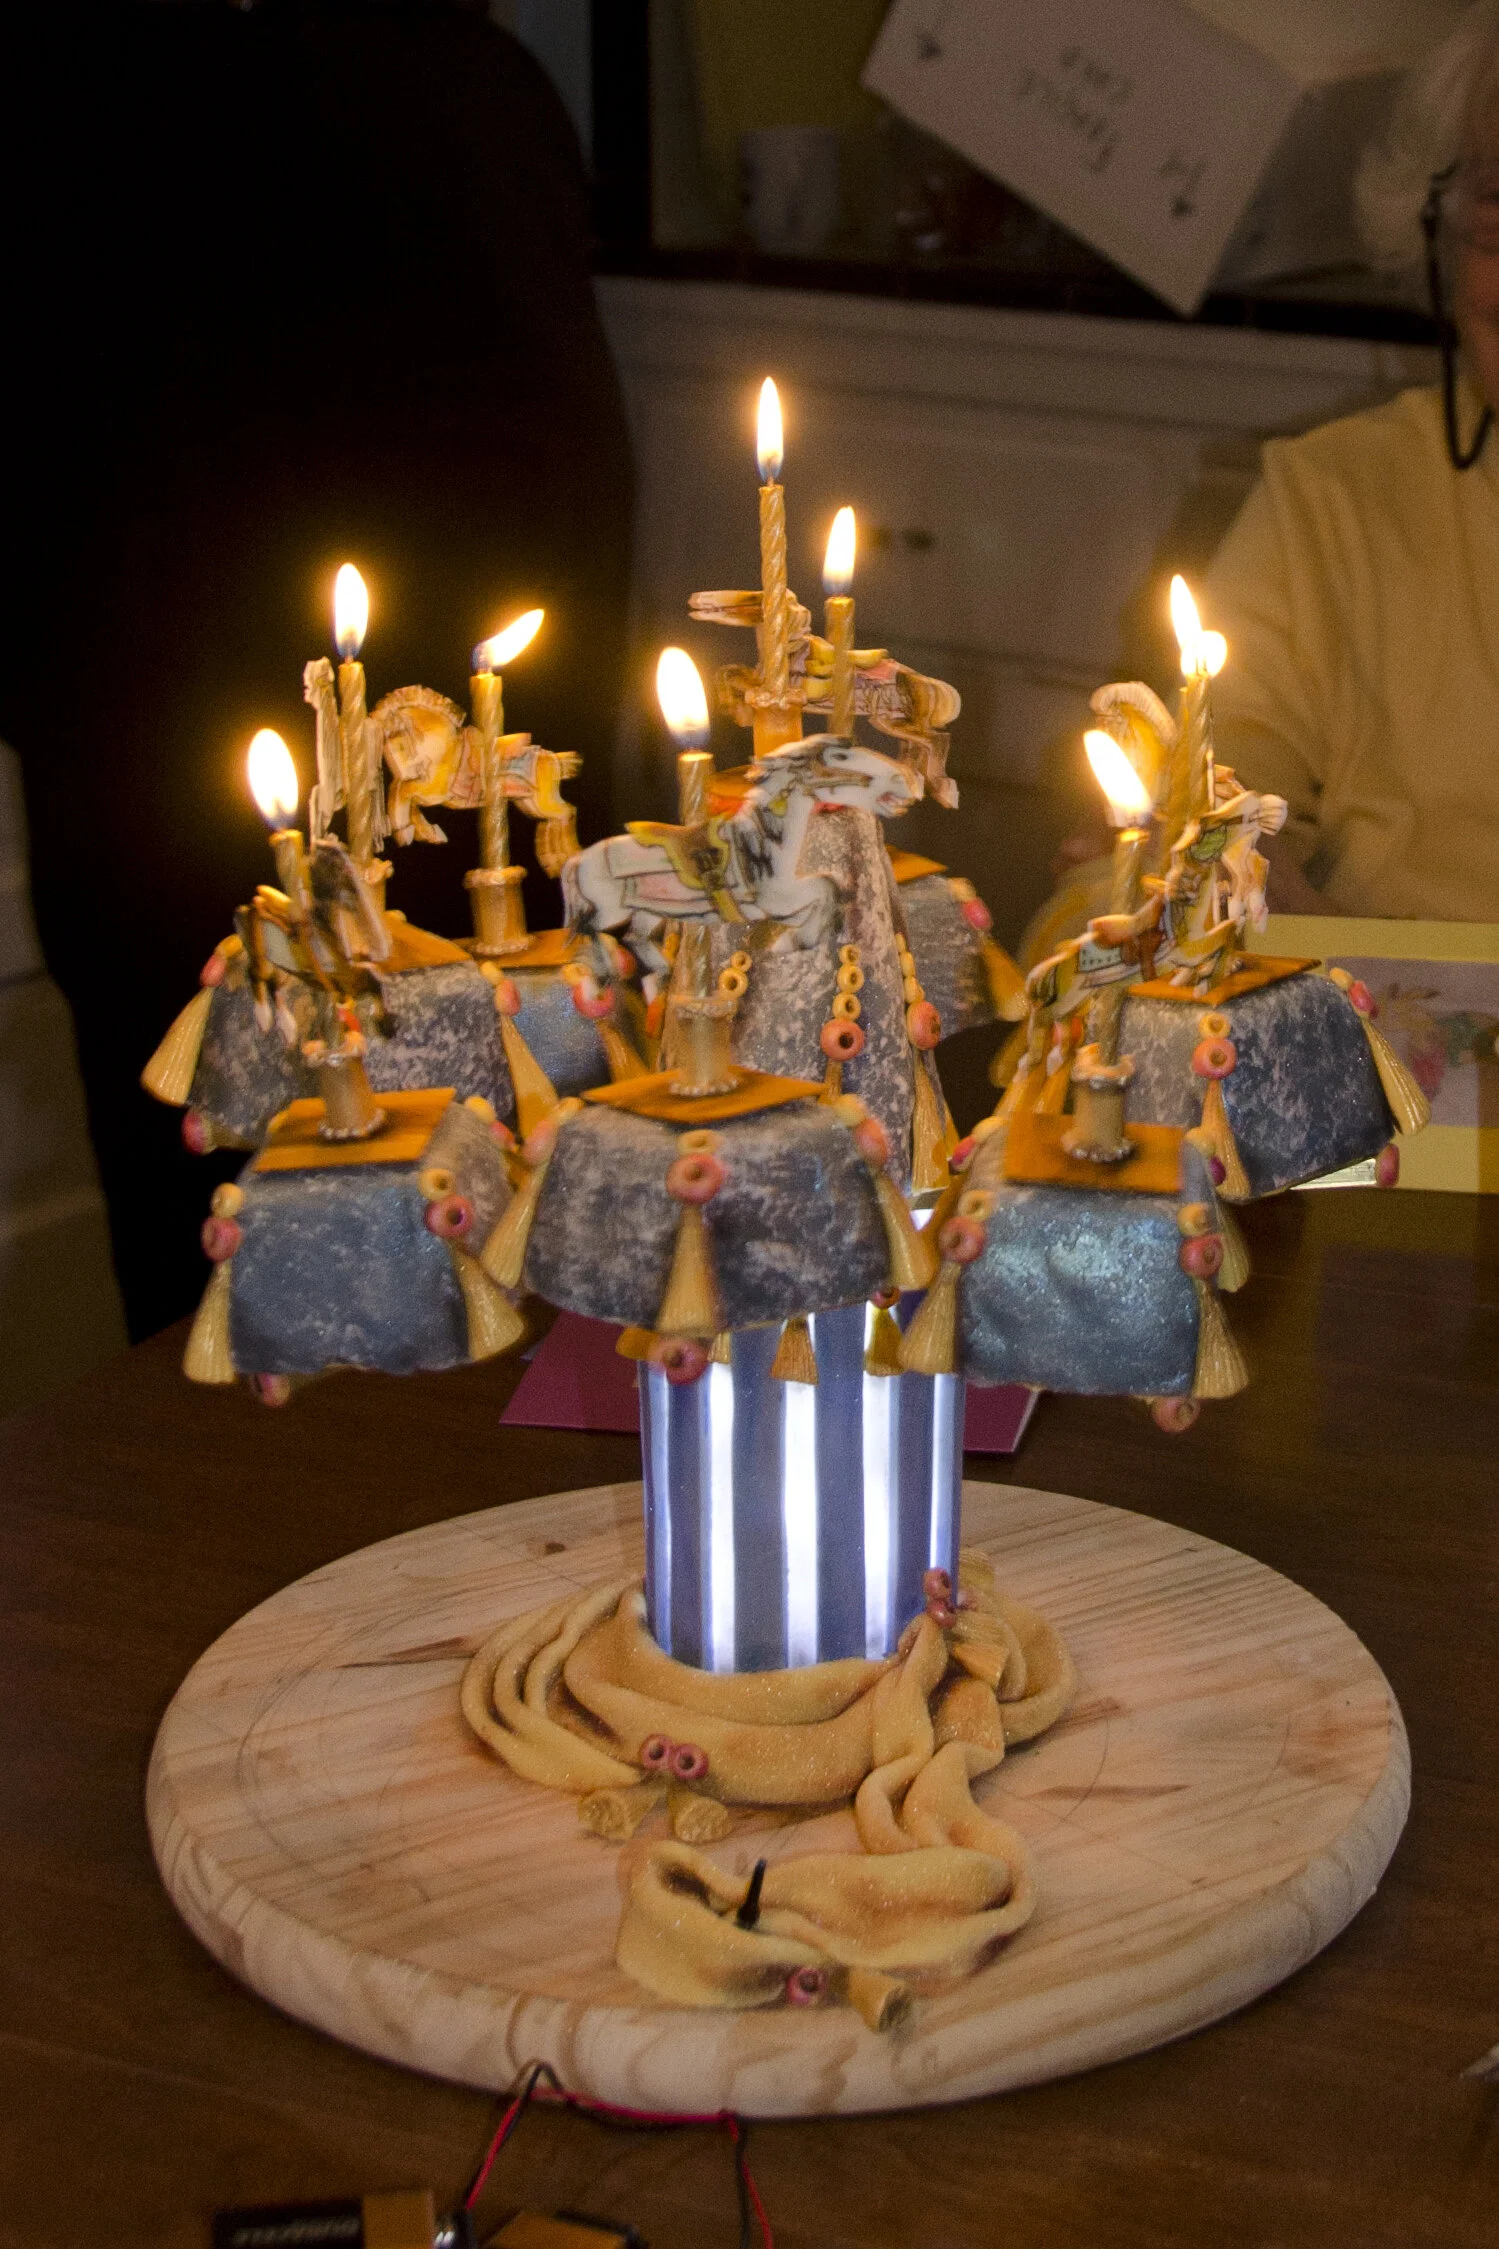
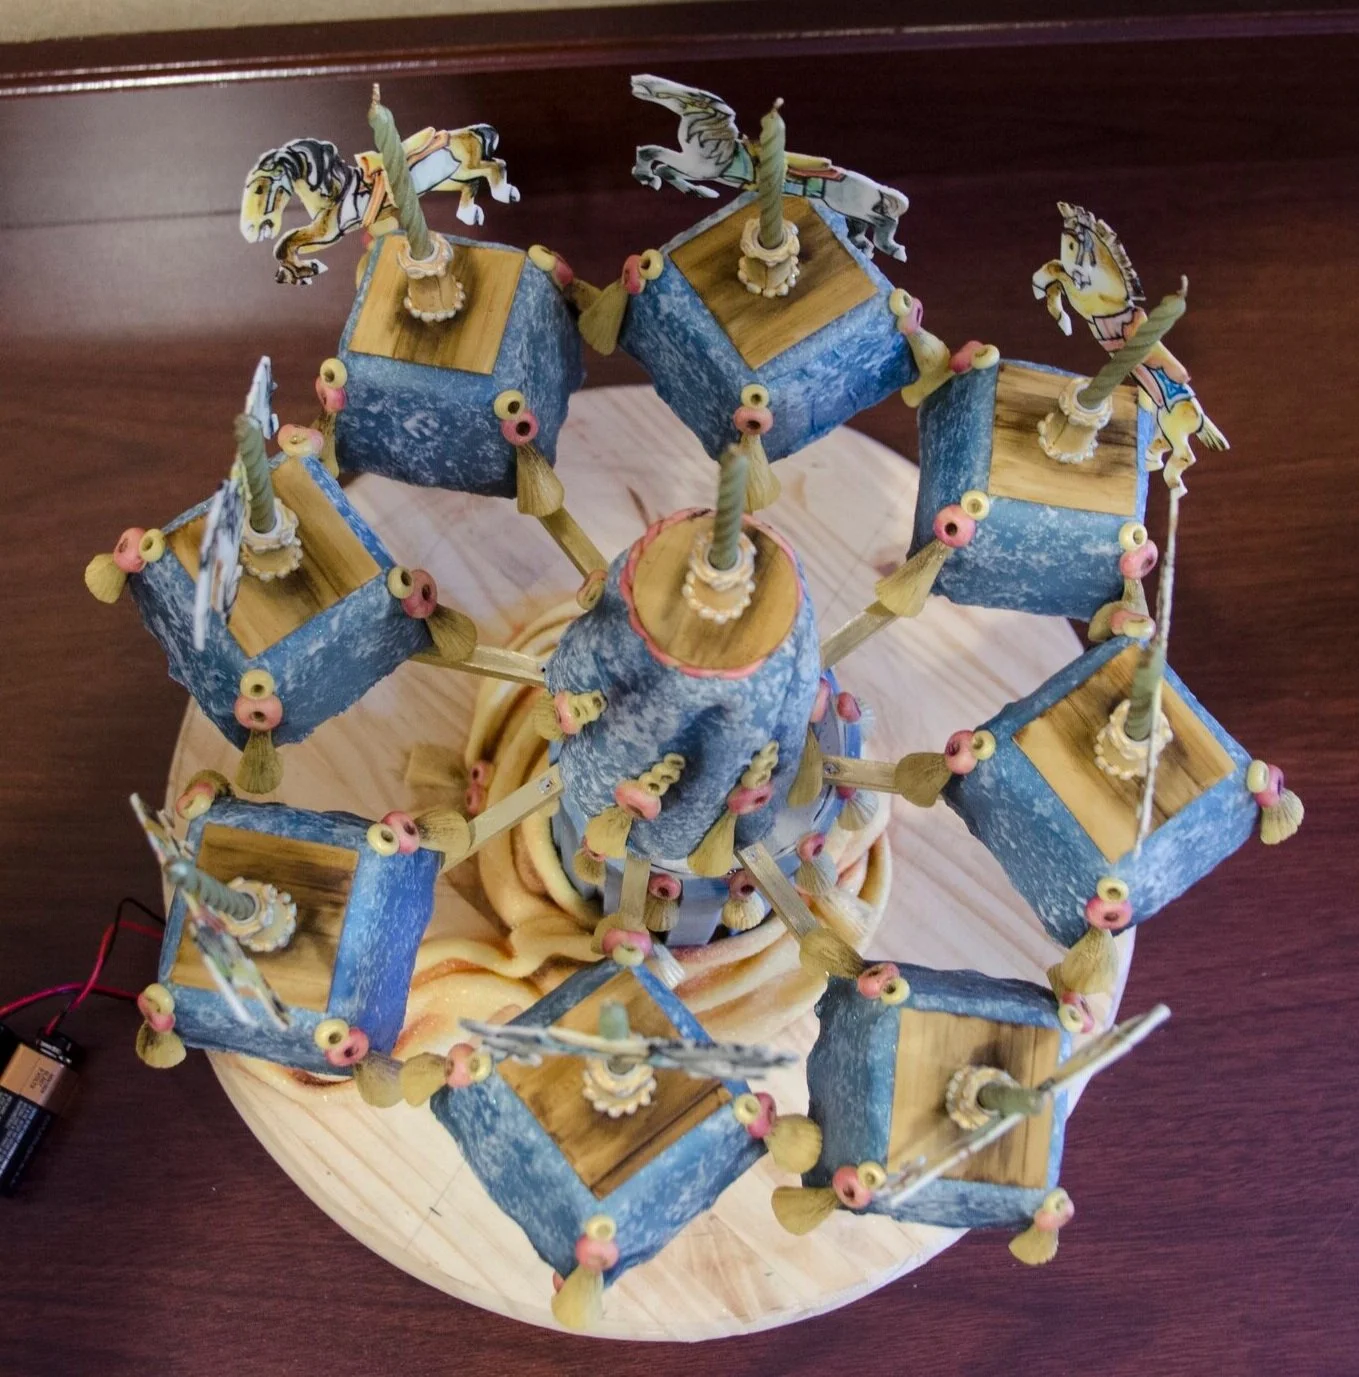
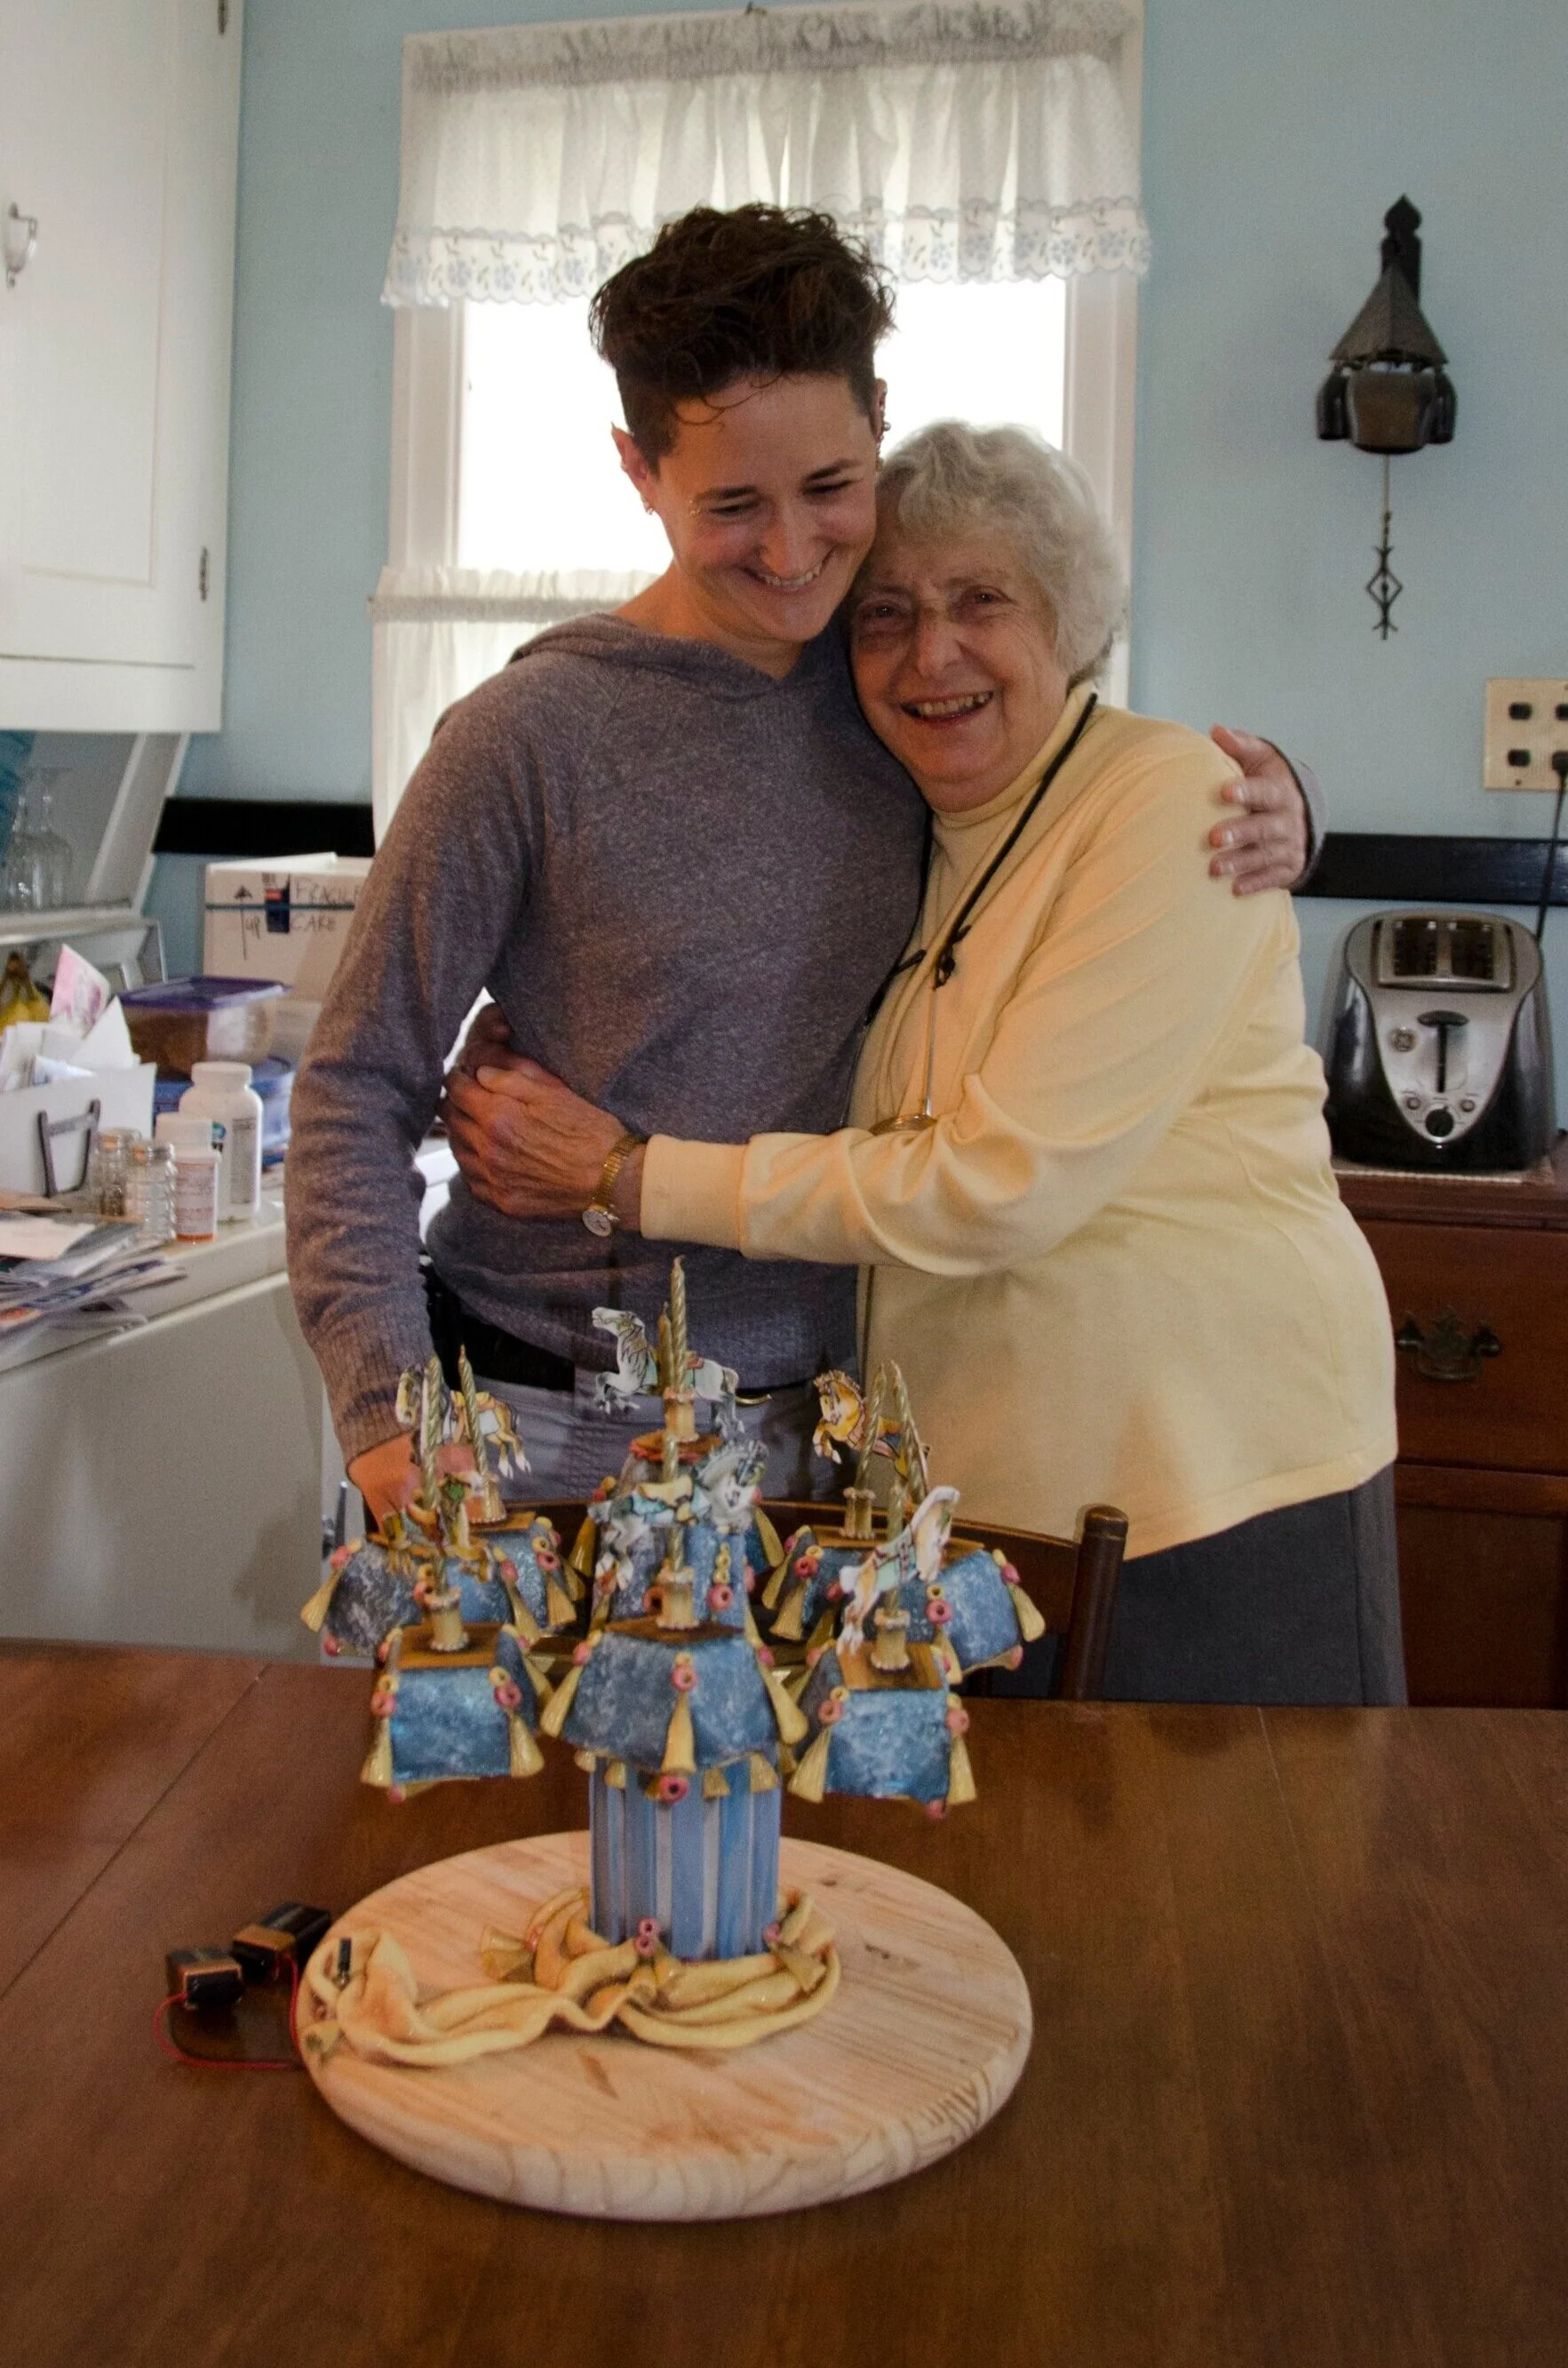
Carousel Cake
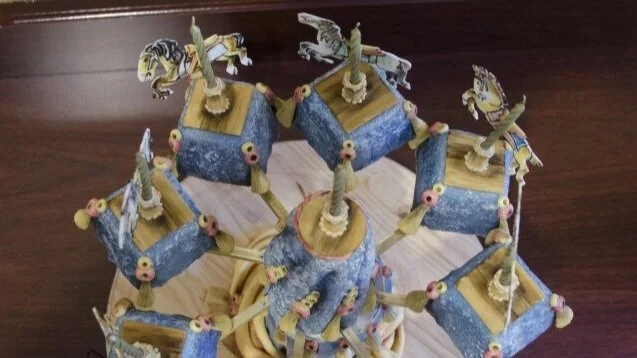
My grandmother lives near a beautiful old carousel from the 1920s. When we visited her when we little, she would always take us to ride it. When I was designing her 90th birthday cake, I got to thinking about riding the carousel with her, and this is the result.
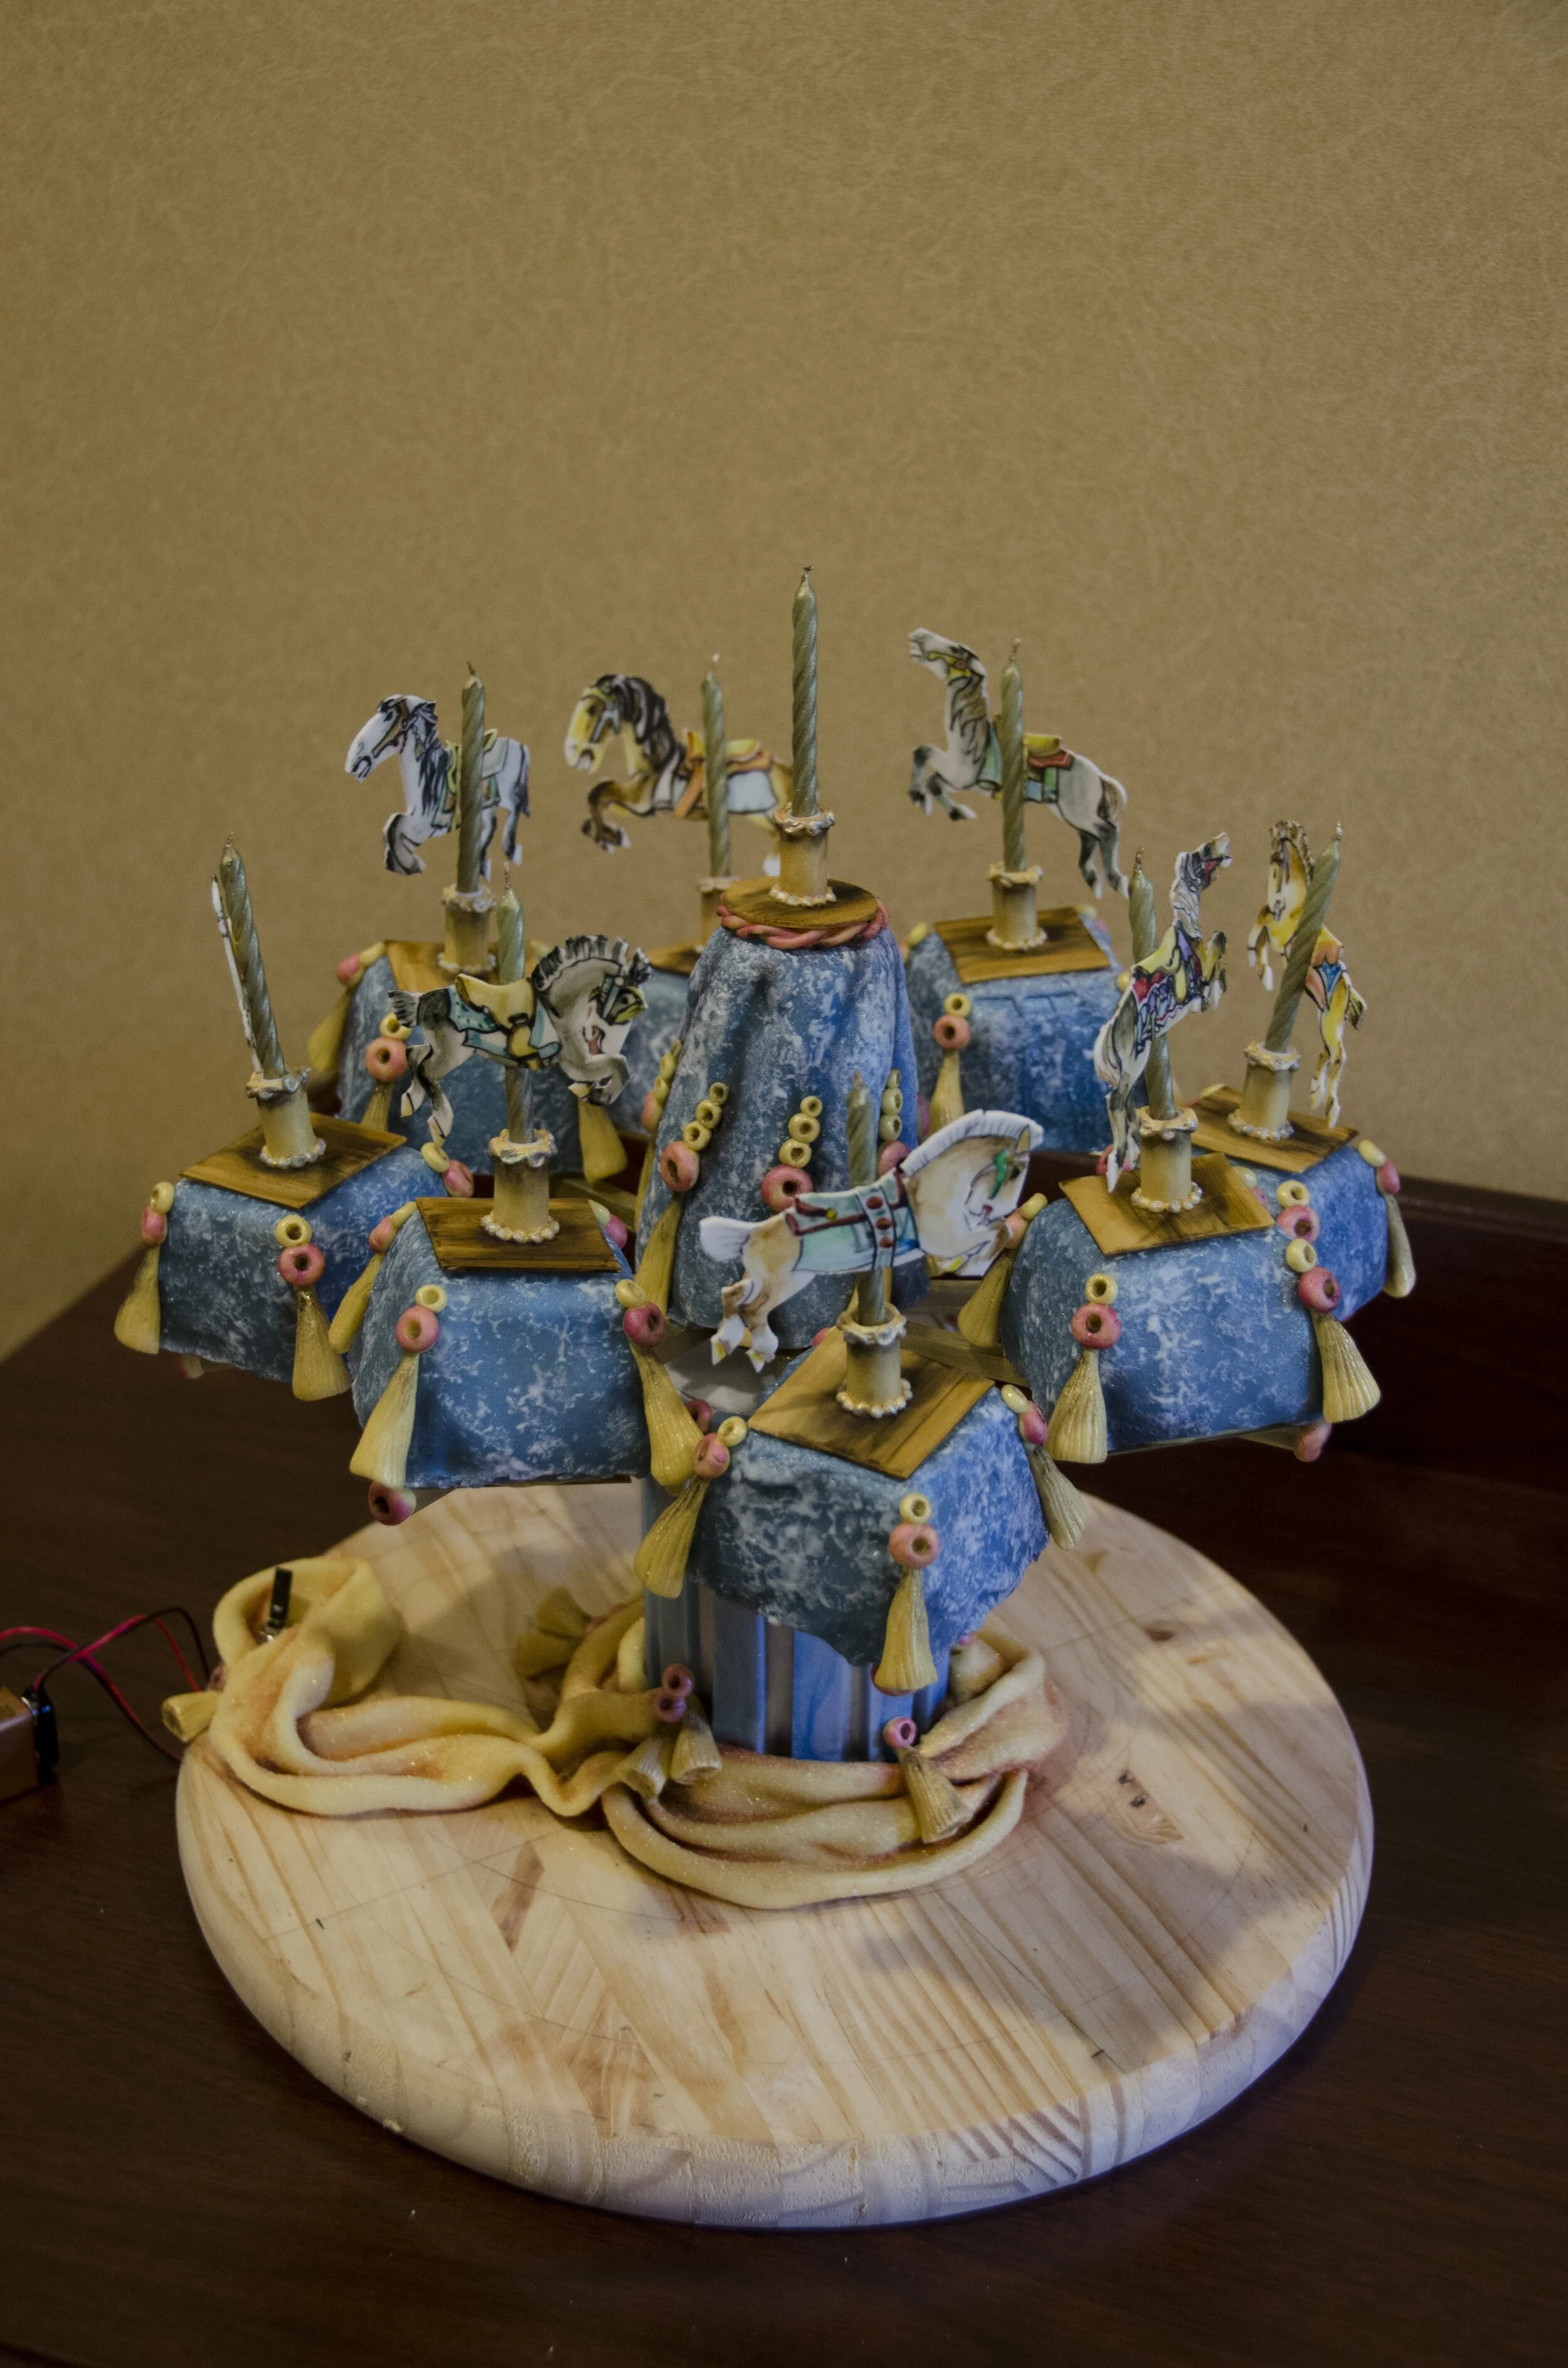
My grandmother lives near a beautiful old carousel from the 1920s. When we visited her when were little, she would always take us to ride it. When I was designing her 90th birthday cake, I got to thinking about riding the carousel with her, and this is the result.
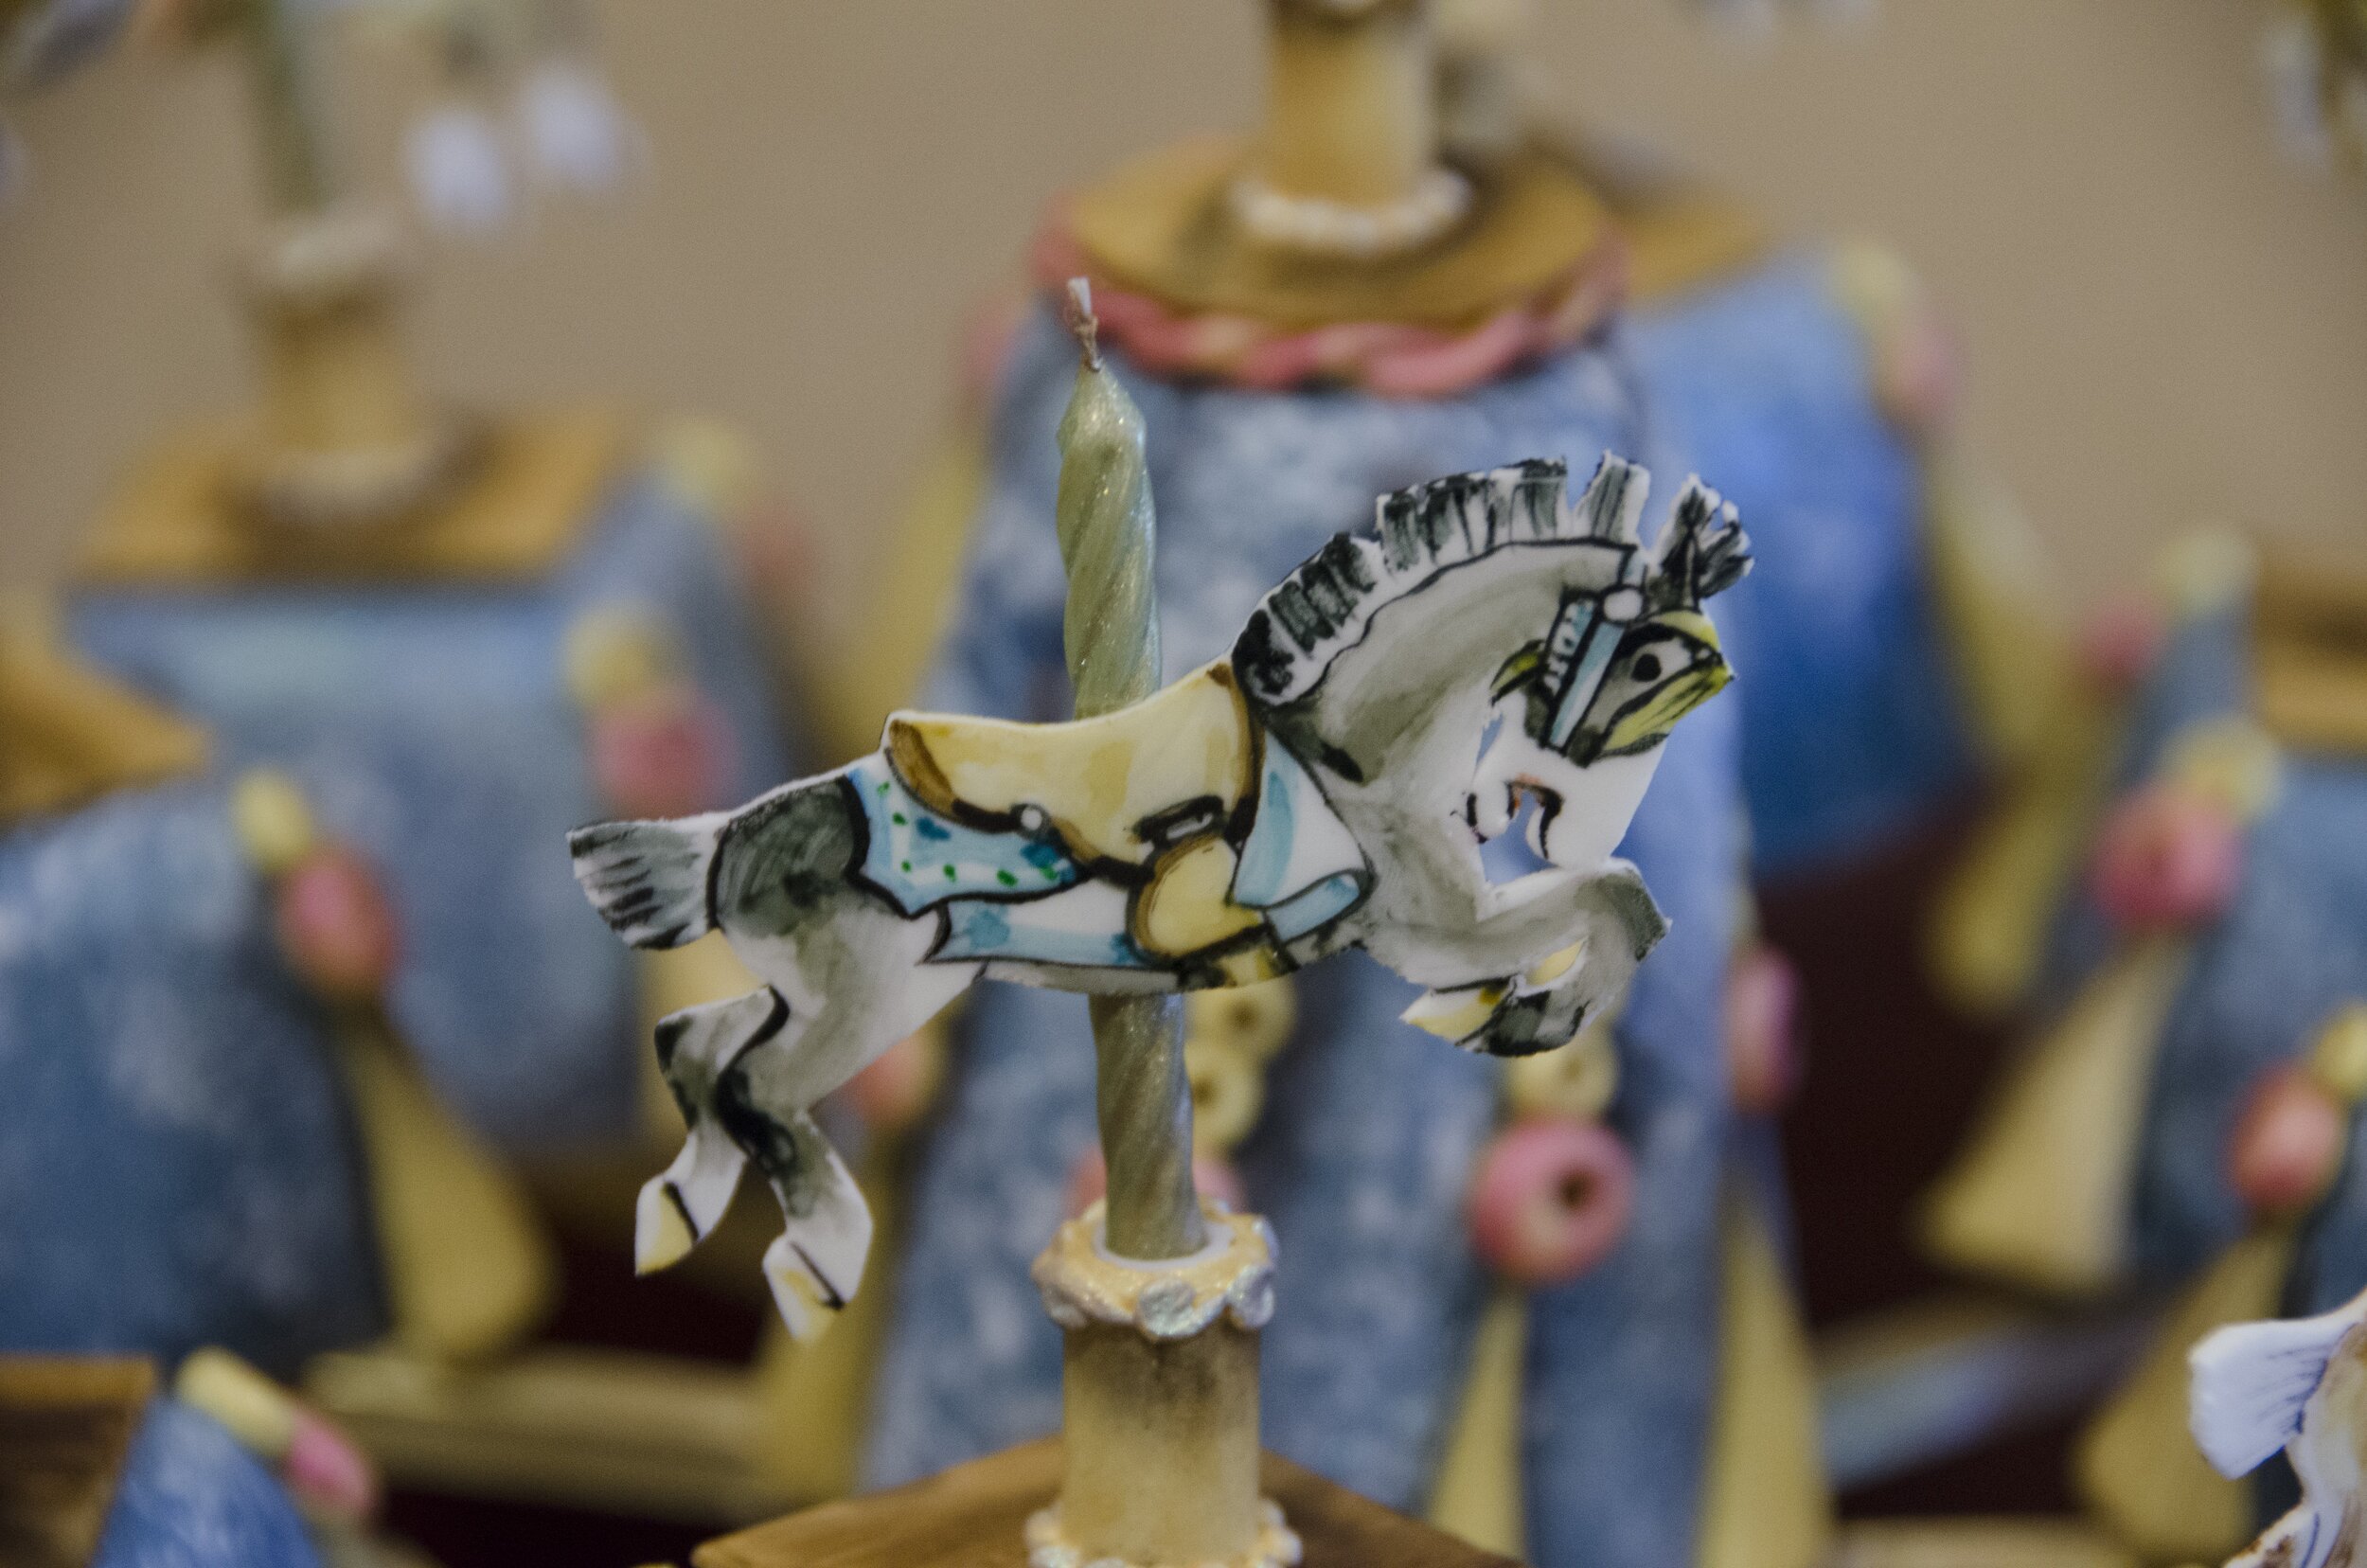
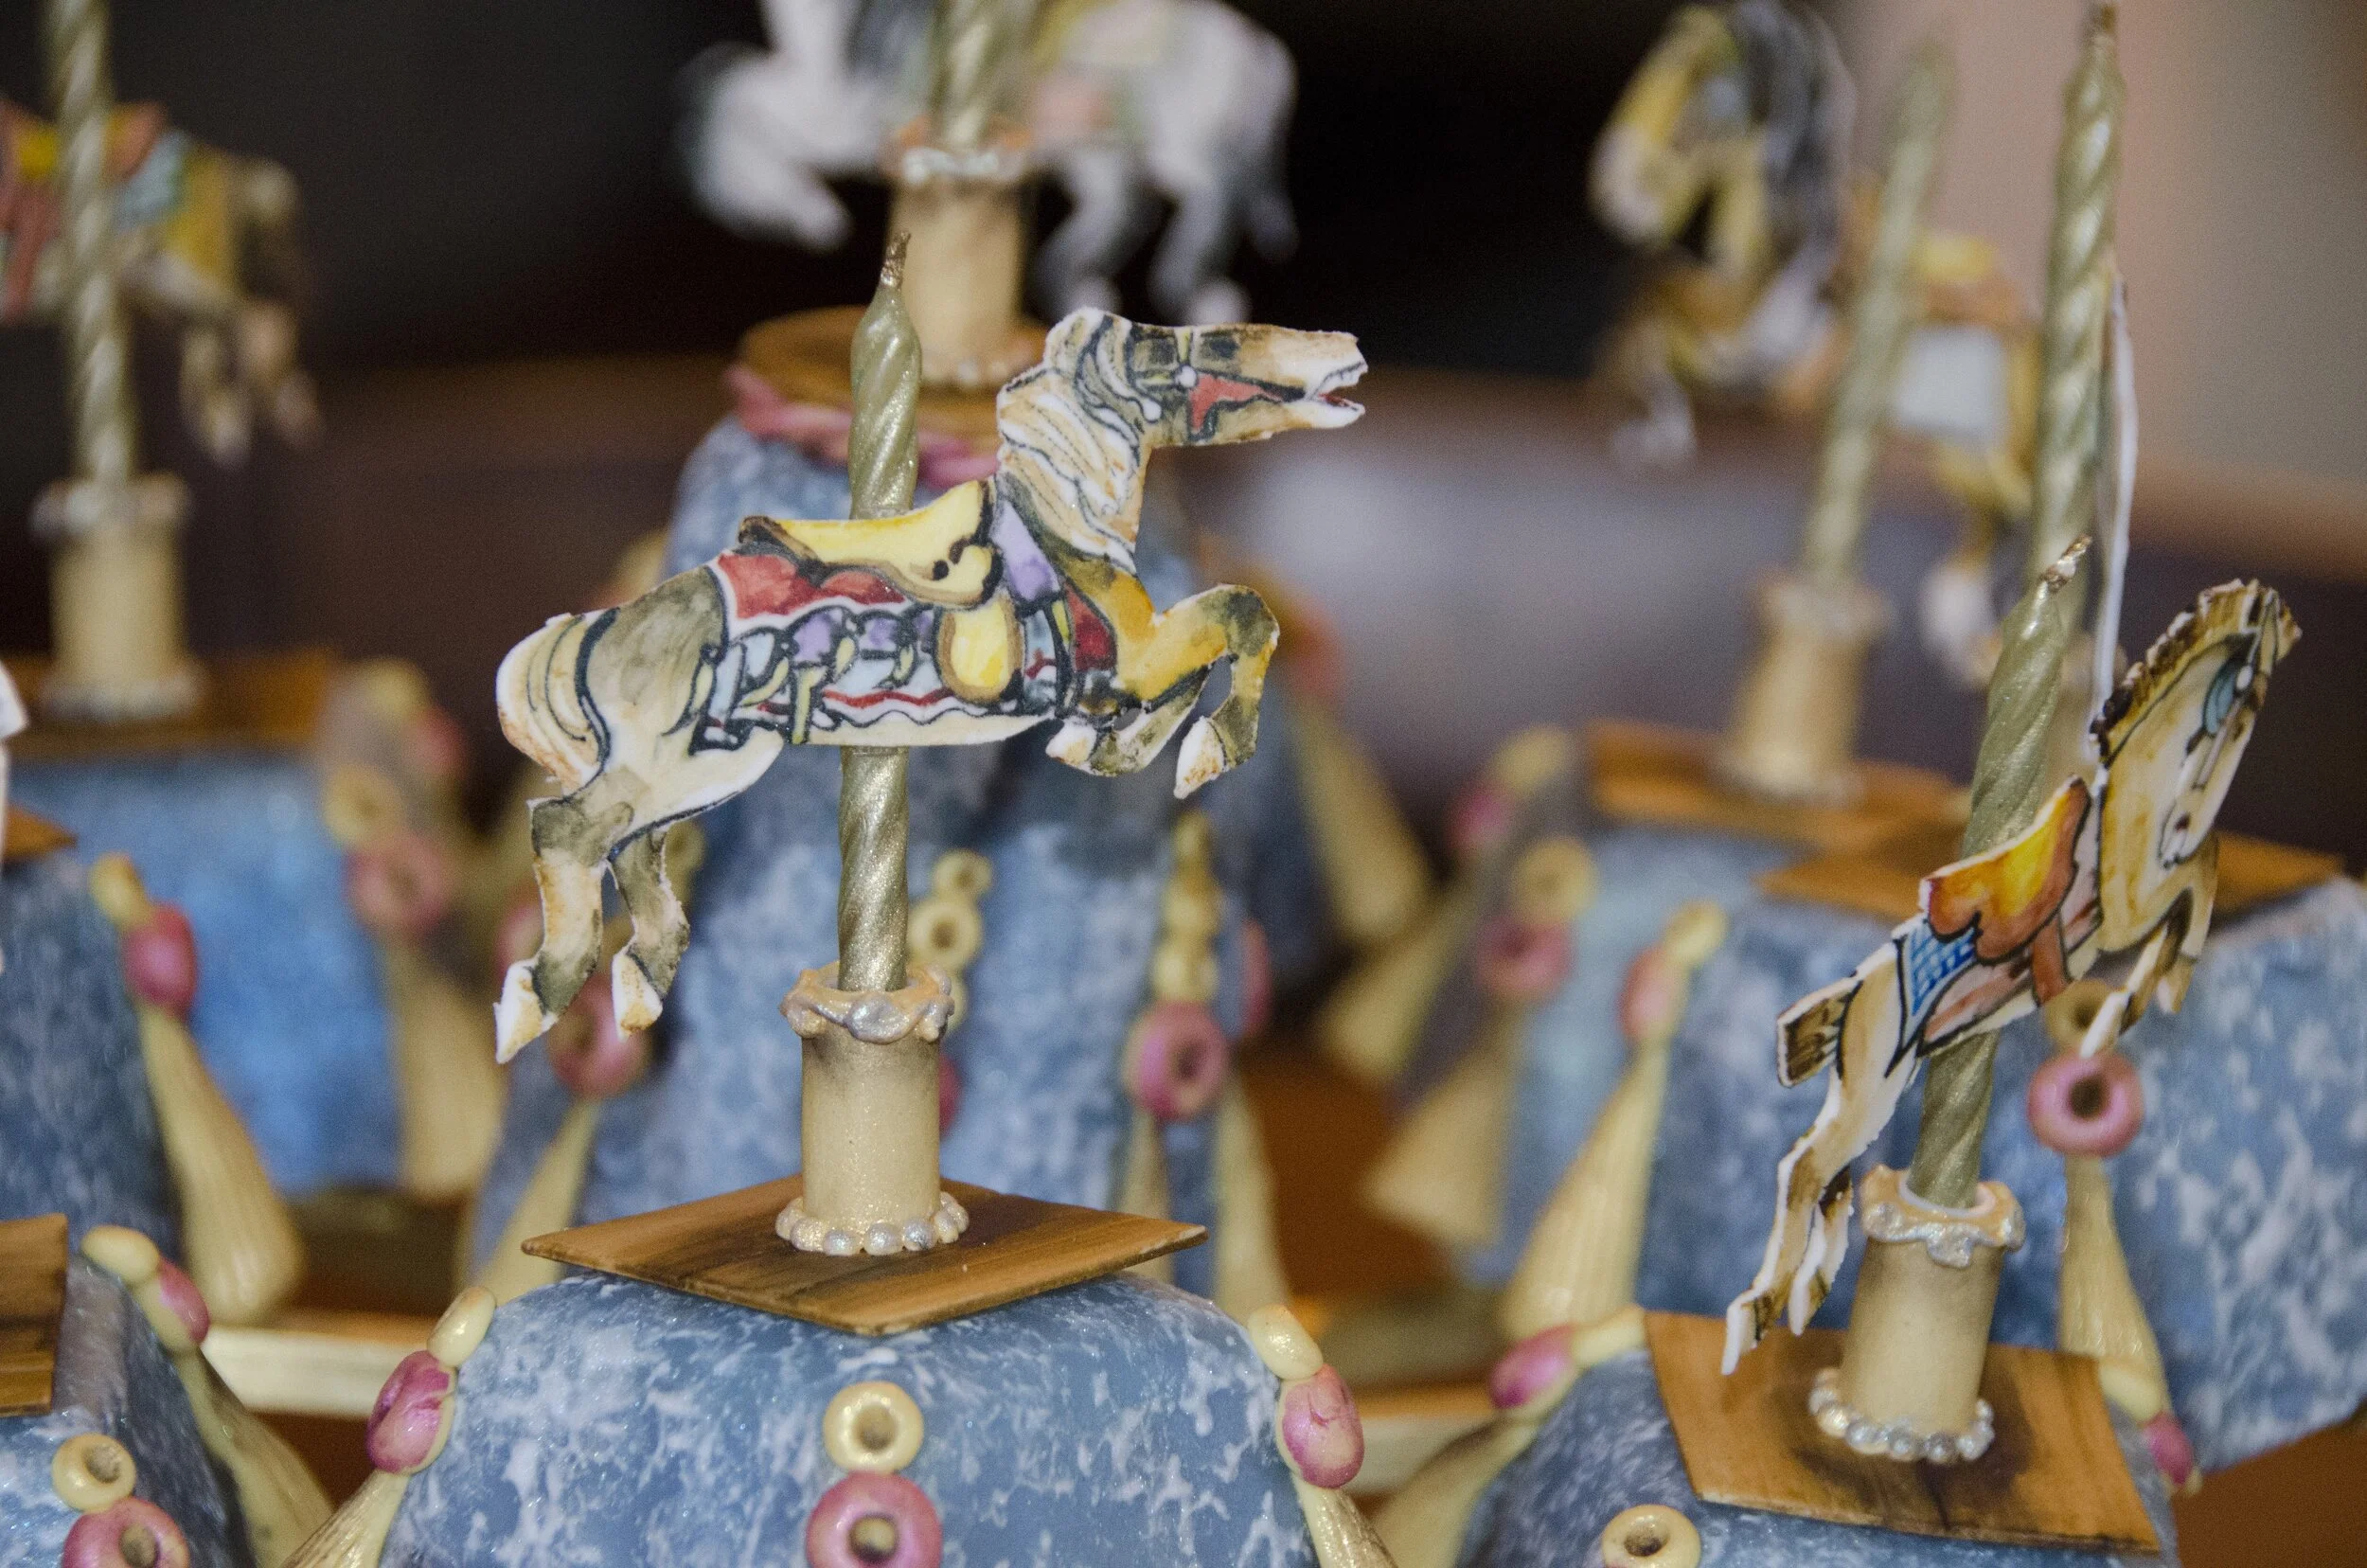
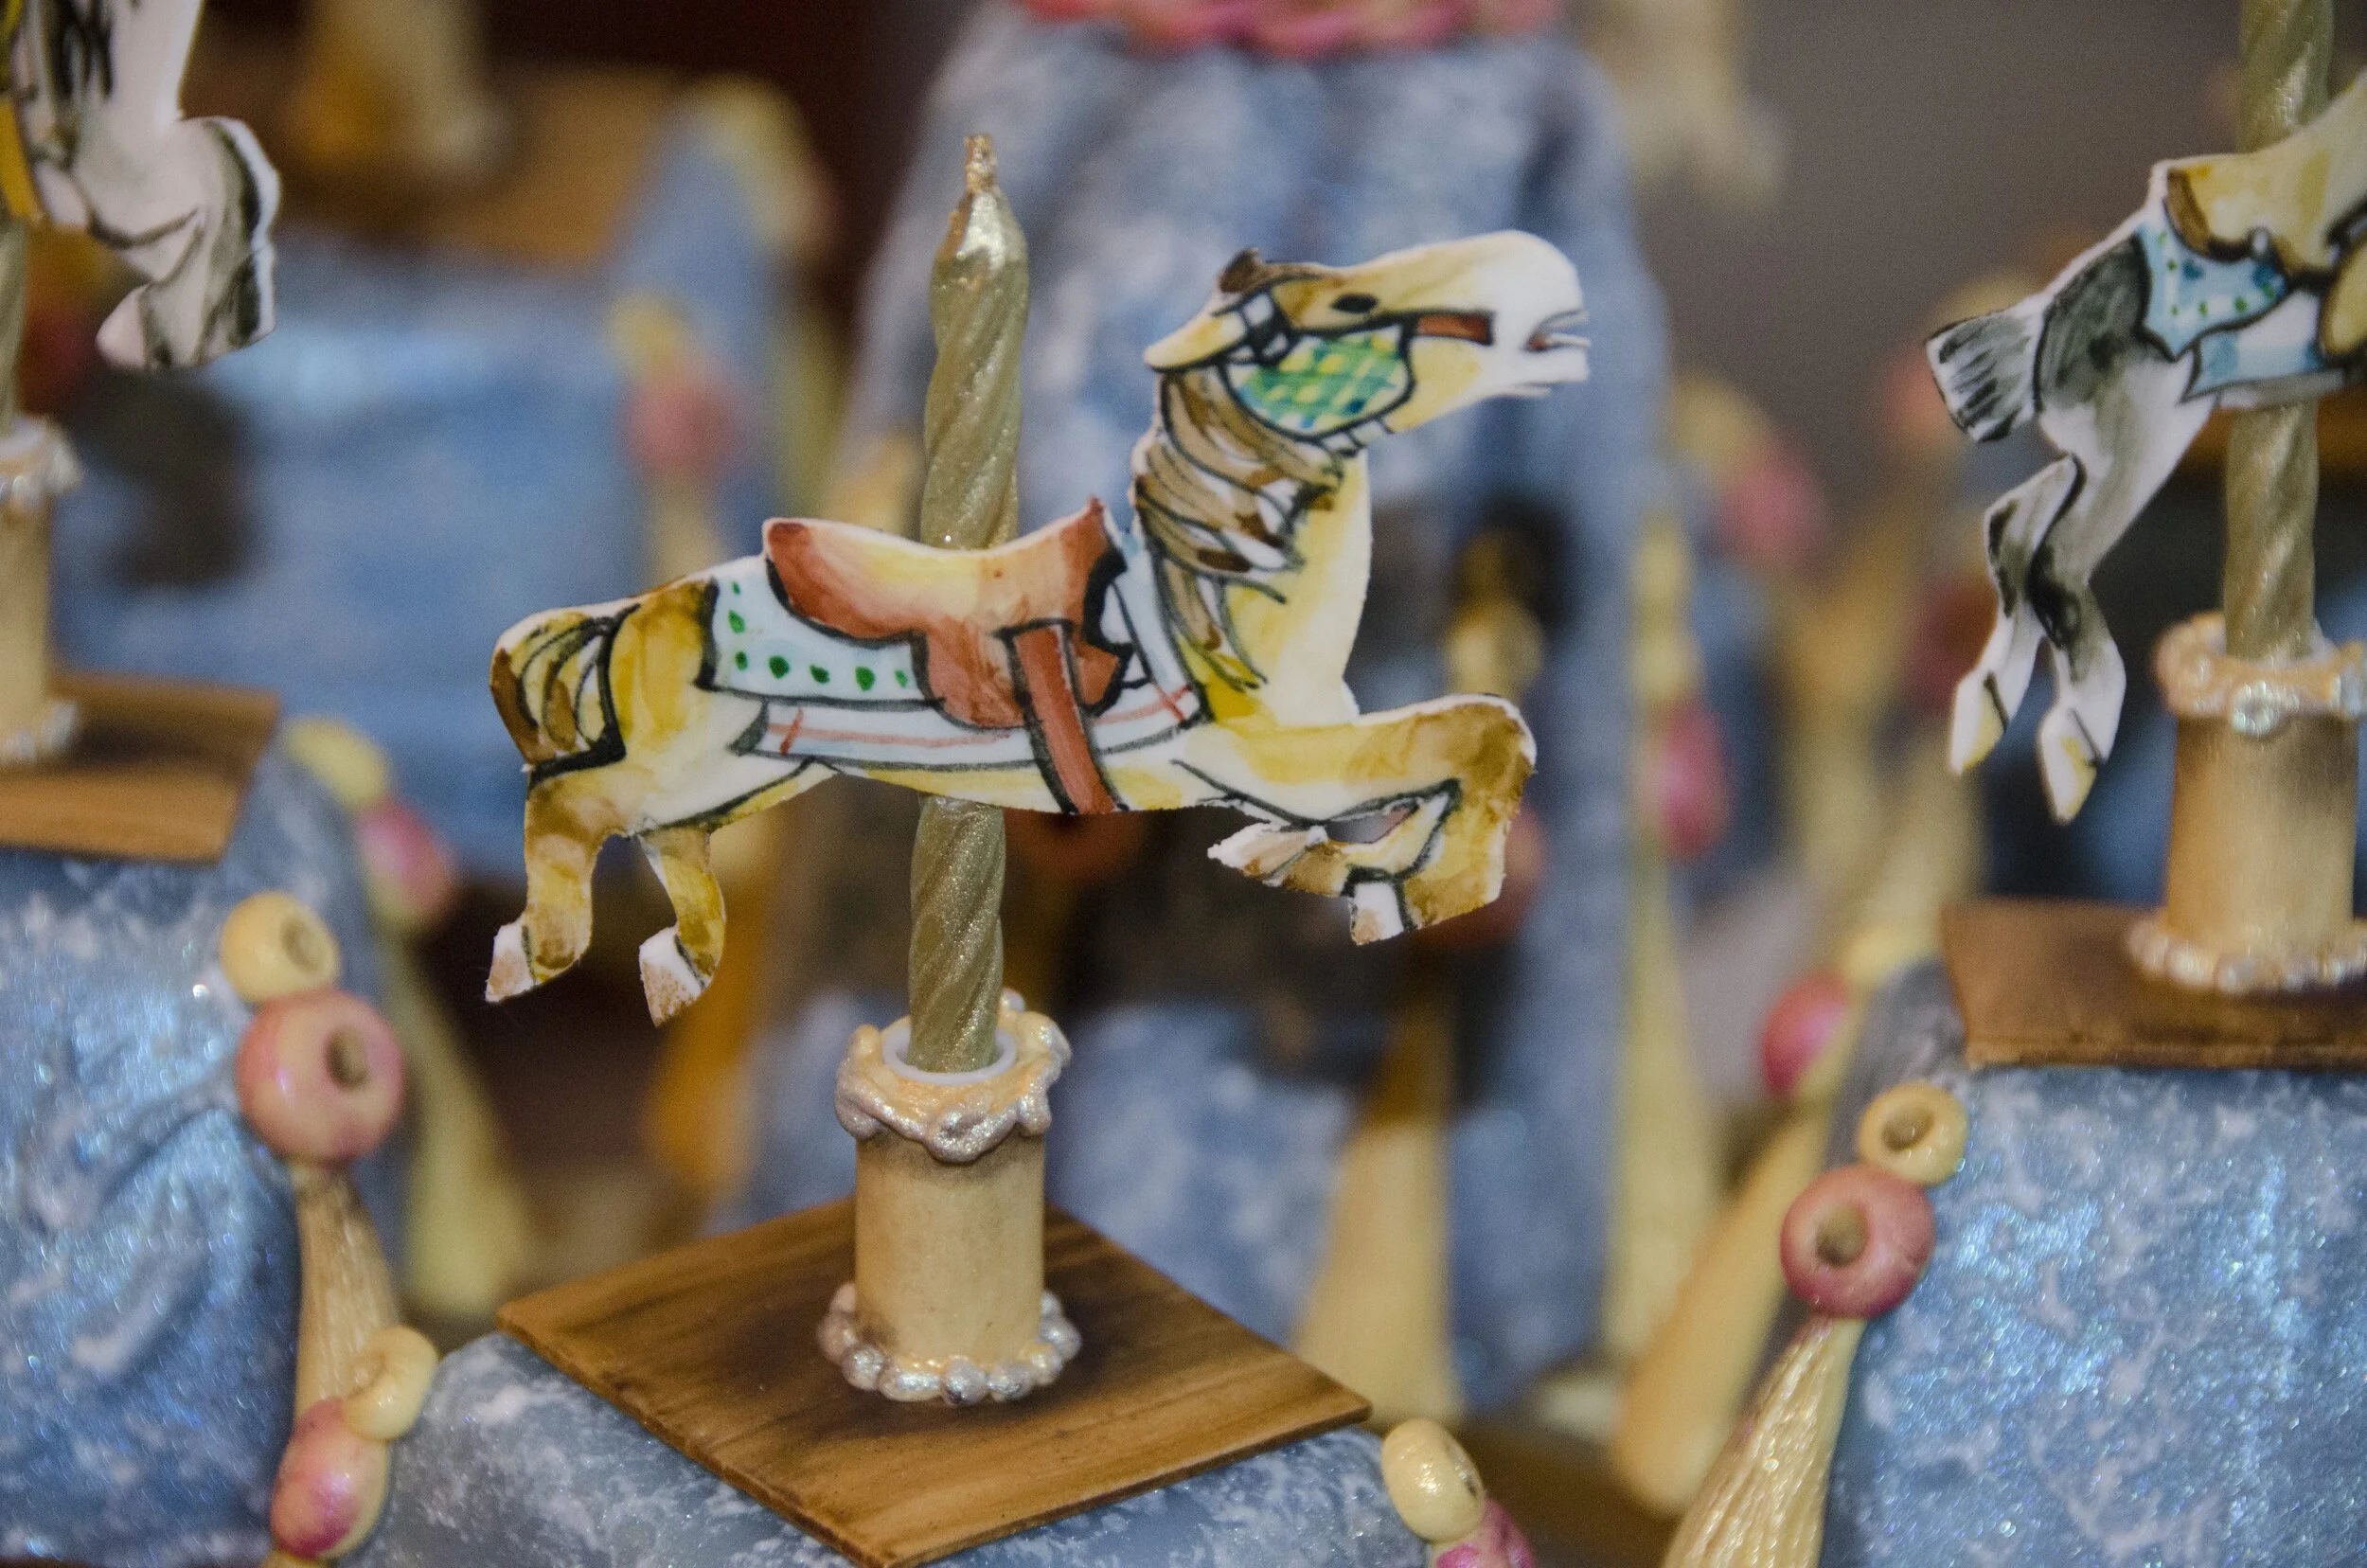
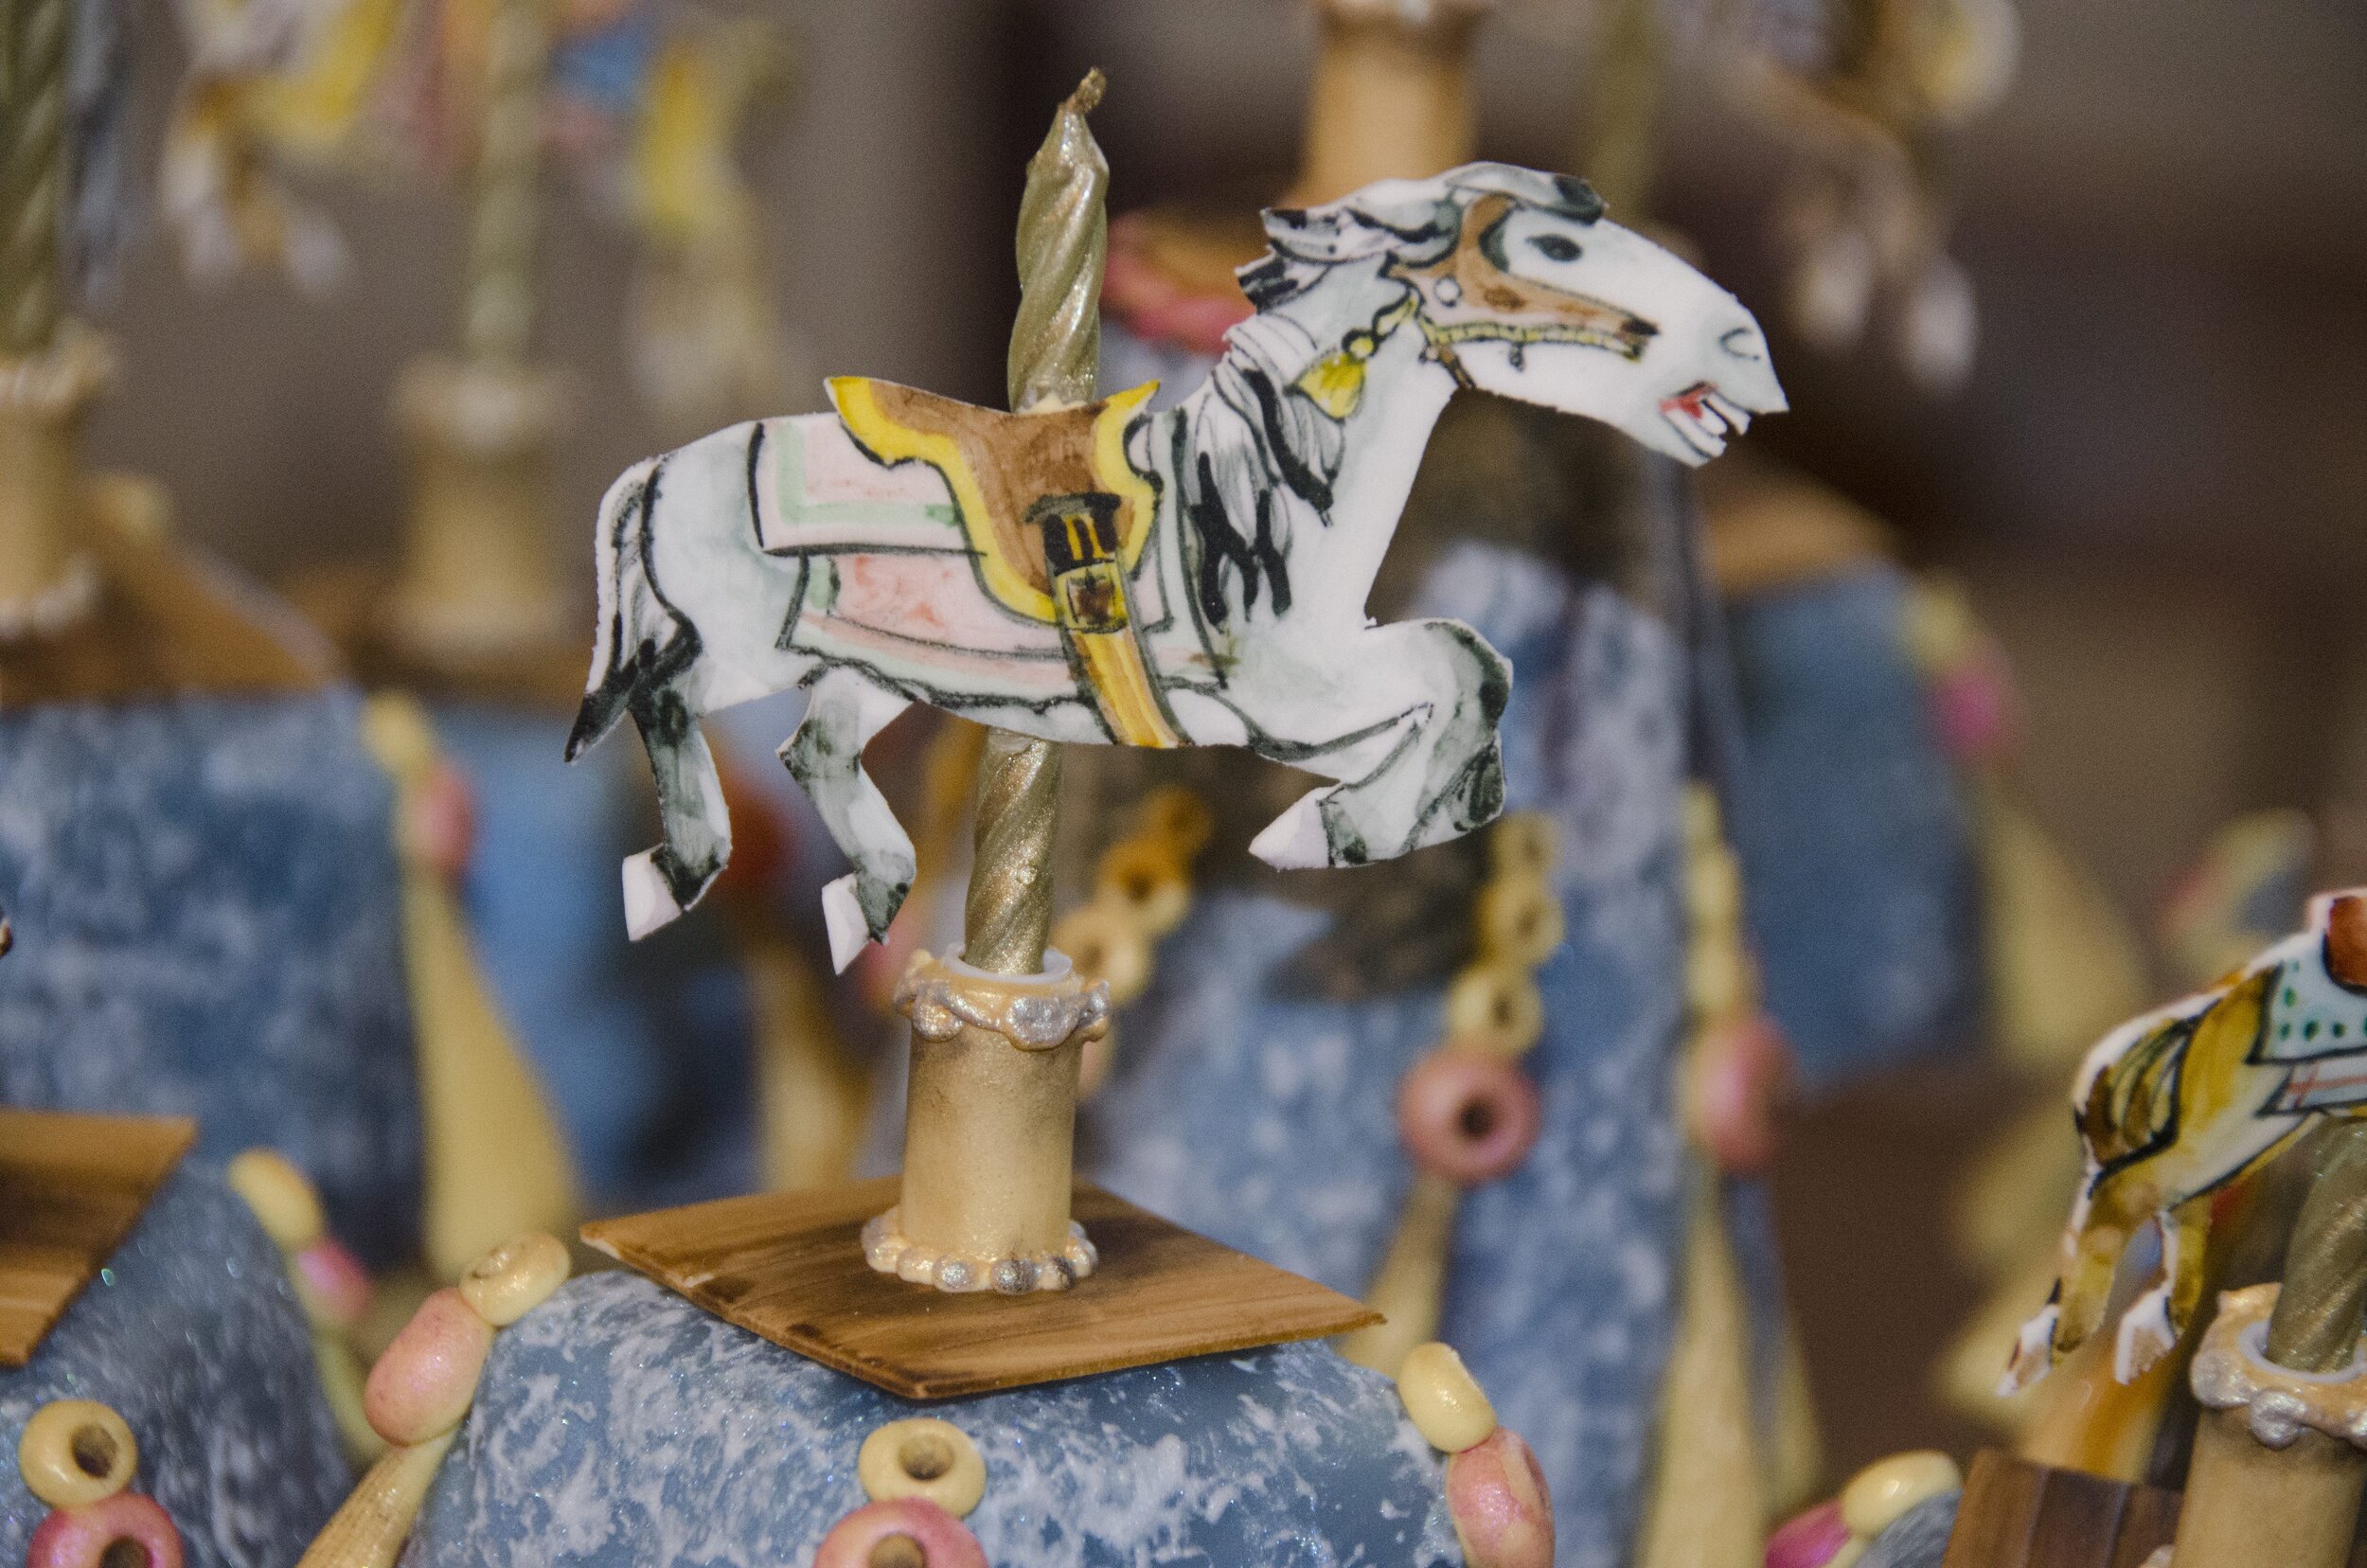
Obviously, it rotated and lit up. The little gum paste horses on the candles are modeled after horses on the real carousel.

Flying Saucer Cake
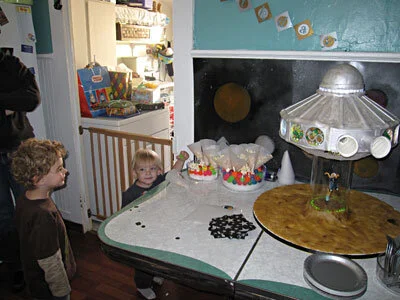
The occasion for the cake was my friend Isaac’s third birthday party. My goal in this design was to evoke the classic B-movie spaceships from the 50’s and 60’s (the title of the party’s evite was “Plan 3 from Outer Space”.)

I began this cake flush with the success of my recent Tardis cake. I received a bit of a comeuppance.
The occasion for the cake was my friend Isaac's third birthday party. (You may remember Isaac from his second birthday cake and his first birthday cake.)
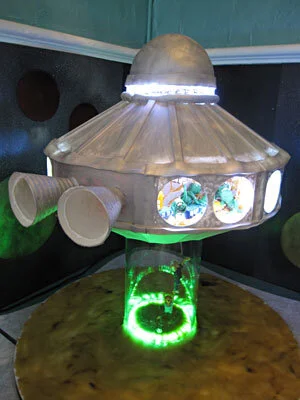
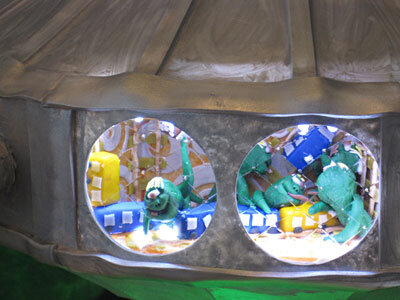
My goal in this design was to evoke the classic B-movie spaceships from the 50's and 60's (the title of the party's evite was "Plan 3 from Outer Space".) As I had so recently completed the Tardis cake, I was still interested in cakes with mirrors, LEDs, and visible interiors. I also wanted to personalize the cake, by including Isaac (in alien form), abducting his parents (in human form). So I designed a classic silver flying saucer with round portholes around the sides that would look into the lighted interior rooms of the ship, where alien Isaacs would be doing things that human Isaac loves to do - eating pretzels, climbing on unsafe things, splashing in a pool, and playing with trains. The entire ship would be mounted on a turntable, so it could slowly rotate. The turntable in turn would sit on a clear acrylic tube, representing the ship's tractor beam, within which I would enclose gum paste figures of Isaac's parents, in the process of being sucked up into the ship.

To make the rooms inside the ship, I started with two pieces of foam core - a 14" diameter circle for the bottom and a 14" diameter 2" ring for the top, so that I would later be able to put the cake inside. I split the space into eight equal slices with gum paste dividers, each with a row of white LEDs on top and bottom. I backed every other space with mirror, so that when their corresponding portholes were backed with mirrored window film and the LEDs were lit, they'd be mirrored ad infinitum within the ship, creating a spacey infinite corridor. For one of these spaces I used red LEDs instead of white, as that was where the conical thrusters would connect to the ship, thereby evoking a combustible power source.
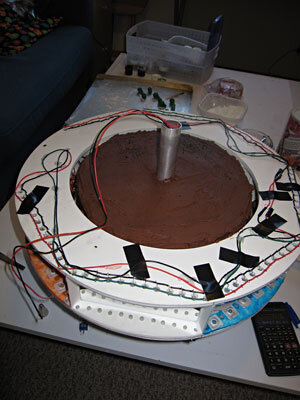
The remaining four spaces became the rooms for the alien-Isaacs. Because I was going for a little-boy's-birthday vibe combined with my 60's B-movie vibe I painted one room aqua, one lime green, one orange, and one yellow. These are all also colors that Isaac's mother has used to decorate their house. Then I appliqued each room with various gum paste squares and circles, painted silver.

I made the aliens out of gum paste, serpentine with green skin and one big eye. To make them reminiscent of Isaac, I gave them puffy cheeks and little shocks of blond hair.

For the portholes, I used a template to cut out gum paste rectangles with windows in them, and draped them over custom forms to dry. The thrusters were also gum paste, wrapped around cones to dry, and then coated with royal icing for a sort of corrugated steel texture. Once the portholes dried, I used royal icing to stick sheet gelatin window panes to the back and, in the case of the portholes in front of the mirrored room, a layer of mirrored window film.
My sister kindly baked the cakes for me. There was space inside the perimeter defined by the rooms to put a 3" tall 10" diameter cake.

To make the tapered upper section of the ship, I started with a 10" diameter cake on top of a 14" diameter cake. I carved these into a truncated cone, 3" high, tapering from 14" diameter at the bottom to 6" diameter at the top. To get the appropriate architectural feel, I covered the cake with a layer of fondant and then the fondant with 16 pre-made gum paste trapezoids. Then I dropped this whole section on top of the cylinder with the rooms.

For the very top of the ship, I carved some 6" round cakes into a hemisphere and covered that with fondant. I mounted this cake onto a foam core circle in which I had embedded a ring of LEDs and mounted it on top of the other cakes.
With the main body of the cake assembled, I needed to get the base together. I embedded a ring of green LEDs into the plywood base to illuminate the tractor beam and then set about creating the people being abducted. I started with a wire armature and built up the figures in gum paste around that.
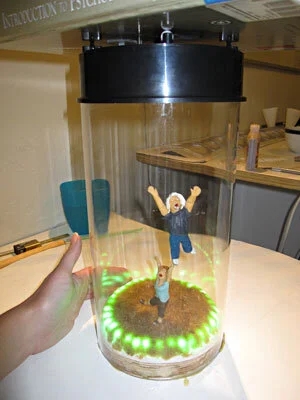
Once the figures were complete I installed the acrylic tube around them and then glued a turntable to the top of the tube. I had considered mounting the turntable at an angle, but I decided that might make it too hard for the turntable to rotate, so I kept the turntable level. As it turned out, I needn't have worried because the moment that I transferred my cake to the turntable it became clear that the turntable was nowhere near powerful enough to turn such a heavy cake. And thus my cake became stationary. Actually the turntable wasn't a total waste, as it still allowed me to turn the cake manually. This was convenient, since the cake was designed to be viewed from all angles, but it certainly lacked pizzazz.
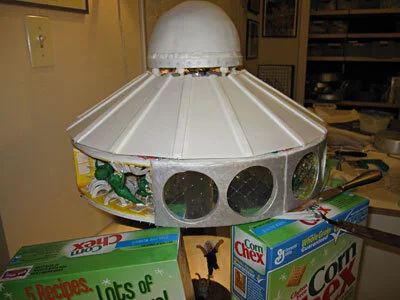
With the cake mounted on the base my flying saucer still needed to taper at the bottom. Unfortunately, it proved to be far too difficult to attach the gum paste pieces that I had created for the bottom of the flying saucer and by this time it was so late that the royal icing would never have had time to dry. So I was forced to hot glue my Bristol board mockup to the bottom of the turntable. I don't like using non-edible materials any more than necessary, but in this case I felt that it was just too late to do anything else.

In fact, by this time it was about 5:00 am the morning of the party and it was too late for a lot of things. I had planned to finish all the edges very cleanly and wind up with a very polished final product that would live up to the standard that I set for myself with the Tardis Cake. Sadly, at 5:00 am, this was not meant to be. The best I could do was to whip up a few fondant ropes to cover the most egregious seams, slap a coat of silver luster dust on everything and go to bed. I was not thrilled with the results. I'd like to claim that it was some sort of homage to the shoddy special effects that we all love so much in our B-movies, but the sad truth is that it was just poor time management.
The next morning I just had time to cover the plywood base with a layer of pressed sugar and make it to the party in time to help hang up the decorations. The cake did make the car trip with no untoward effects, but there evidently was a lot of moisture trapped in the acrylic tube because the figures' gum paste limbs softened and wilted, so where their arms had meant to be pulled upwards by the inexorable force of the tractor beam, instead their arms curved despondently towards the earth.
I actually don't mind an occasional failure. When you're pushing the boundaries of a medium you have to expect a few unsuccessful trials. This failure irked me however, because in this instance my failure was not due to excessive ambition but to deficient planning. I view the first type of failure as an inevitable result of man's eternal striving to better himself, but the second is merely the inevitable result of opting to watch America's Next Top Model instead of working on the project at hand.
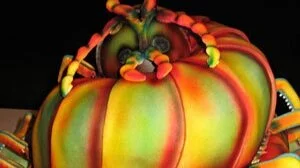
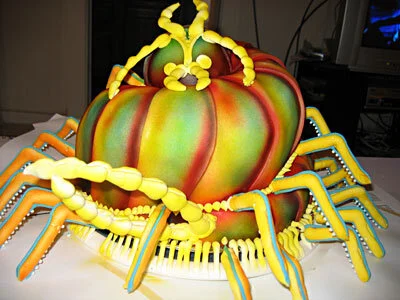
Centipede Cake
When I was in MBA school I had to take a class called Venture Creation, for which the final project was to write a business plan. Mine was for a cake business. We also had to do a presentation for people pretending to be potential investors, so, as part of that presentation, I naturally needed to make a cake. The Centipede Cake is what I came up with.
When I was in MBA school I had to take a class called Venture Creation, for which the final project was to write a business plan. Mine was for a cake business. We also had to do a presentation for people pretending to be potential investors, so, as part of that presentation, I naturally needed to make a cake. The Centipede Cake is what I came up with.
Since the name of my imaginary cake business was Kinetic Cakes, it was obvious that my cake had to do something. Since I didn't have all that much time blocked out in my schedule to make the cake, it was obvious that it wouldn't do anything too complicated. Since there would only be a few people at the presentation, it was obvious that it shouldn't be very big. Since moderation in cakes is not one of my strong suits, it was obvious that I was going to make way too much cake.
I had some trouble coming up with a concept because I had a bit too much creative freedom - it can be hard to design anything when there are so few parameters. I have no idea why I ultimately settled on the centipede, unless perhaps it was because the apartment I was living in at the time was occasionally invaded by house centipedes, which are completely harmless but quite large and shocking to meet in the bathroom in the middle of the night. And I like arthropods. I once had to walk five blocks in my pajamas to my friend's apartment because she had a house centipede in her sink and couldn't get rid of it herself.
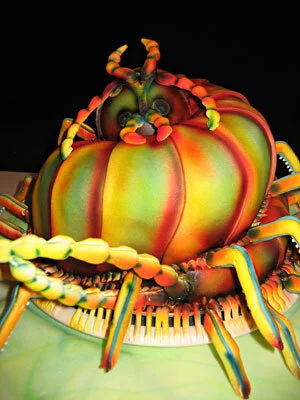
The legs are, of course, the most pivotal part of the centipede, plus it is their disturbingly inhuman rippling motion that makes the centipede seem so alien to us. It was this motion that I was trying to convey through my cake.
My plan was to mount the cake on a turntable that was, in turn, sitting on a bumpy base so that, when the turntable was spun, the legs, which would hang off the sides of the turntable, would ripple up and down as they passed over the bumps.
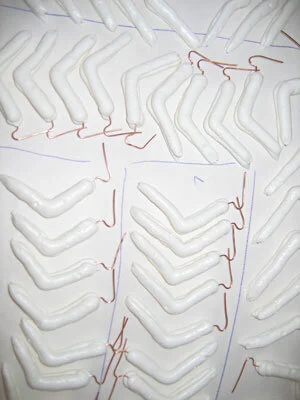
First I needed a turntable. I was fortunate enough to find one with a wire around the perimeter so that I could easily attach my legs to it. In order to do that, I built the legs around lengths of copper wire by piping royal icing onto each side of the wire with a large round tip. I airbrushed one side of each leg yellow and the other side orange because I though that having a variance in color between the two sides would help to emphasize the rotational motion of the turntable. To hide the seams running up each side of the legs, I piped on a thin line of turquoise royal icing. (If this sounds like an unusually colorful centipede, you're right. I don't really recall why I chose this color scheme, but it was quite festive.) Then I positioned the legs all the way around the perimeter of the turntable, wrapping the copper wire in the legs around the wire at the circumference of the turntable.
For the base that the turntable would rest on I used a big piece of foamcore, with smaller segments of foamcore arranged around it to create the bumps. Then I covered the whole thing with a layer of green marbled fondant, to suggest grass and because I like marbled fondant.
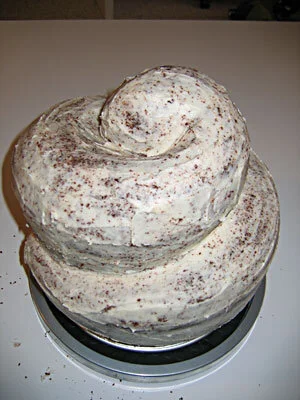
To make the cake, I started with two tiers of chocolate cake, one 10" in diameter, the other 8" in diameter, torted and filled with buttercream frosting. Then I carved that into a spiral, as if the centipede was curled into a loop, and coated it with buttercream.

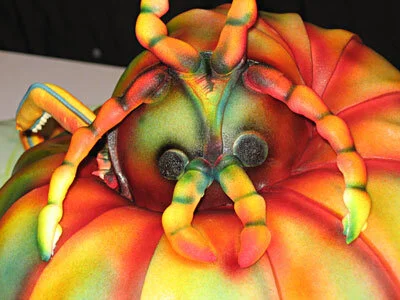
Because centipedes have segmented bodies, it was easy to cover the cake with small fondant sections, each overlapping the one before. With the fondant in place, I built up the airbrush color in layers. First a yellow base, then orange and red shadows around the perimeter of each segment, then blue shading in the center of the segments. Once the color was on, I moved the whole cake onto the base, which already had the legs attached. I stuck some additional legs directly into the cake, following the curve of the centipede's body. In an attempt to conceal the edge of the turntable that wasn't already obscured by the legs, I piped on some sort of mini-legs between the big legs. I also piped some details onto the face. I had made some royal icing antennae and mandibles in advance, as well as some wicked-looking pincers for the back, and I stuck those on at this point as well. Then I airbrushed my new royal icing details with the same yellow, orange, red, and blue and a bit of black for good measure.
The cake went over well at the presentation, though I think if I were talking to real potential investors for a real project it would behoove me to make a cake that did something more impressive, though the rippling of the legs was nice in a restrained kind of way. And of course I had about five times as much cake as I needed, so I gave the rest to my friends in the Entrepreneurship Center. And I got an A in the class (which no one but my parents cares about because it's grad school.)
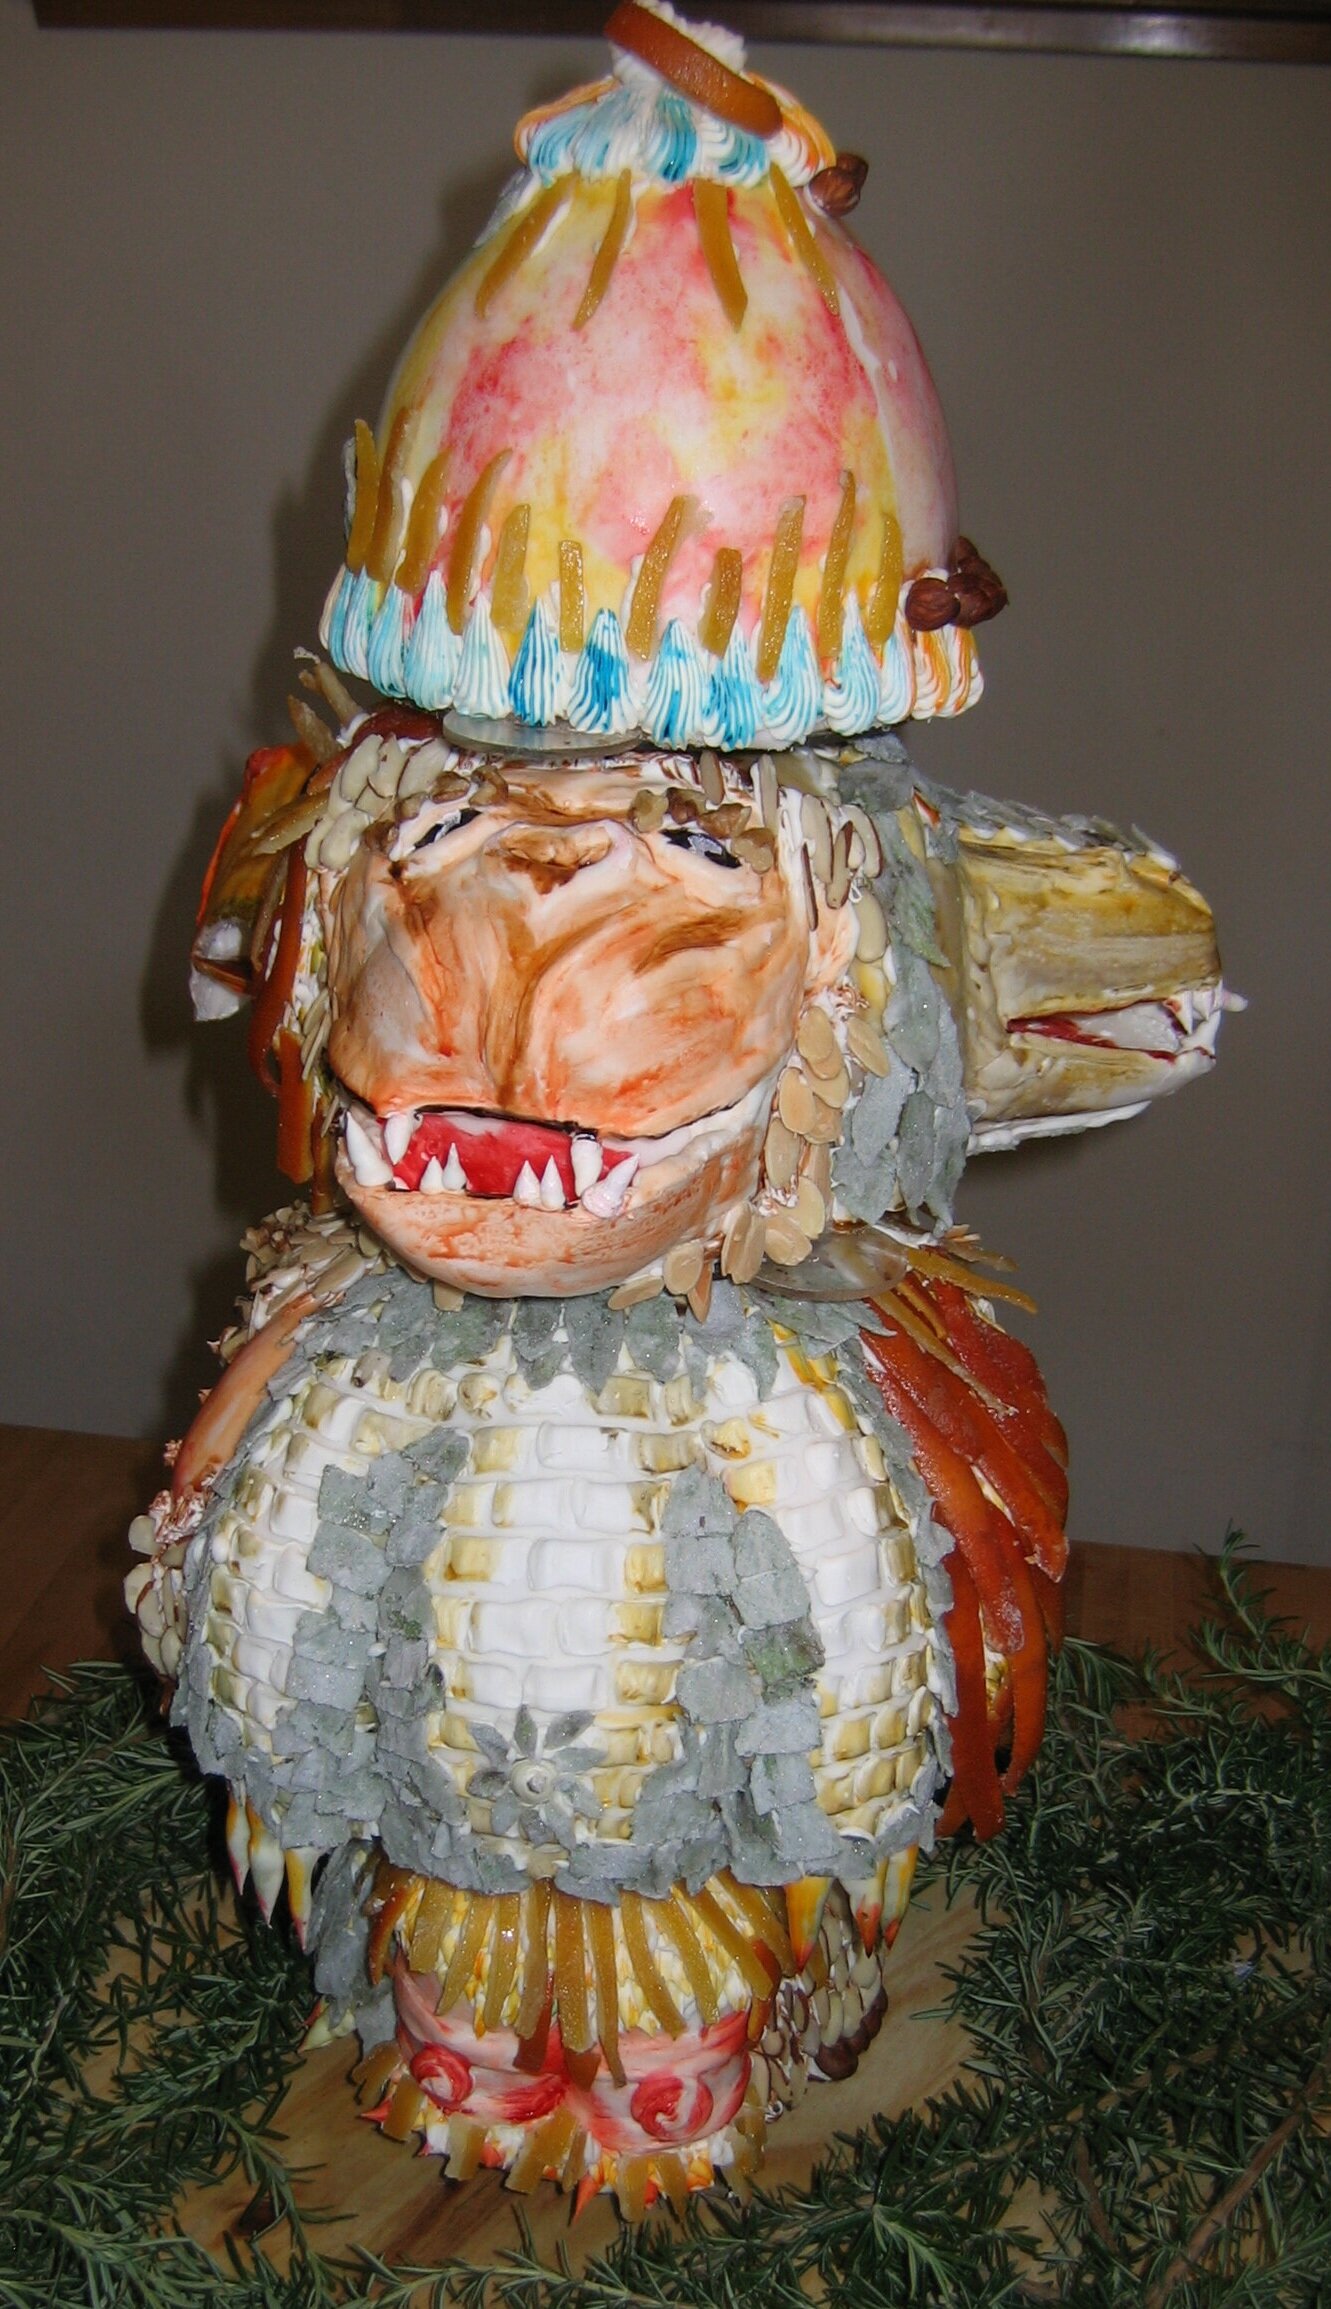
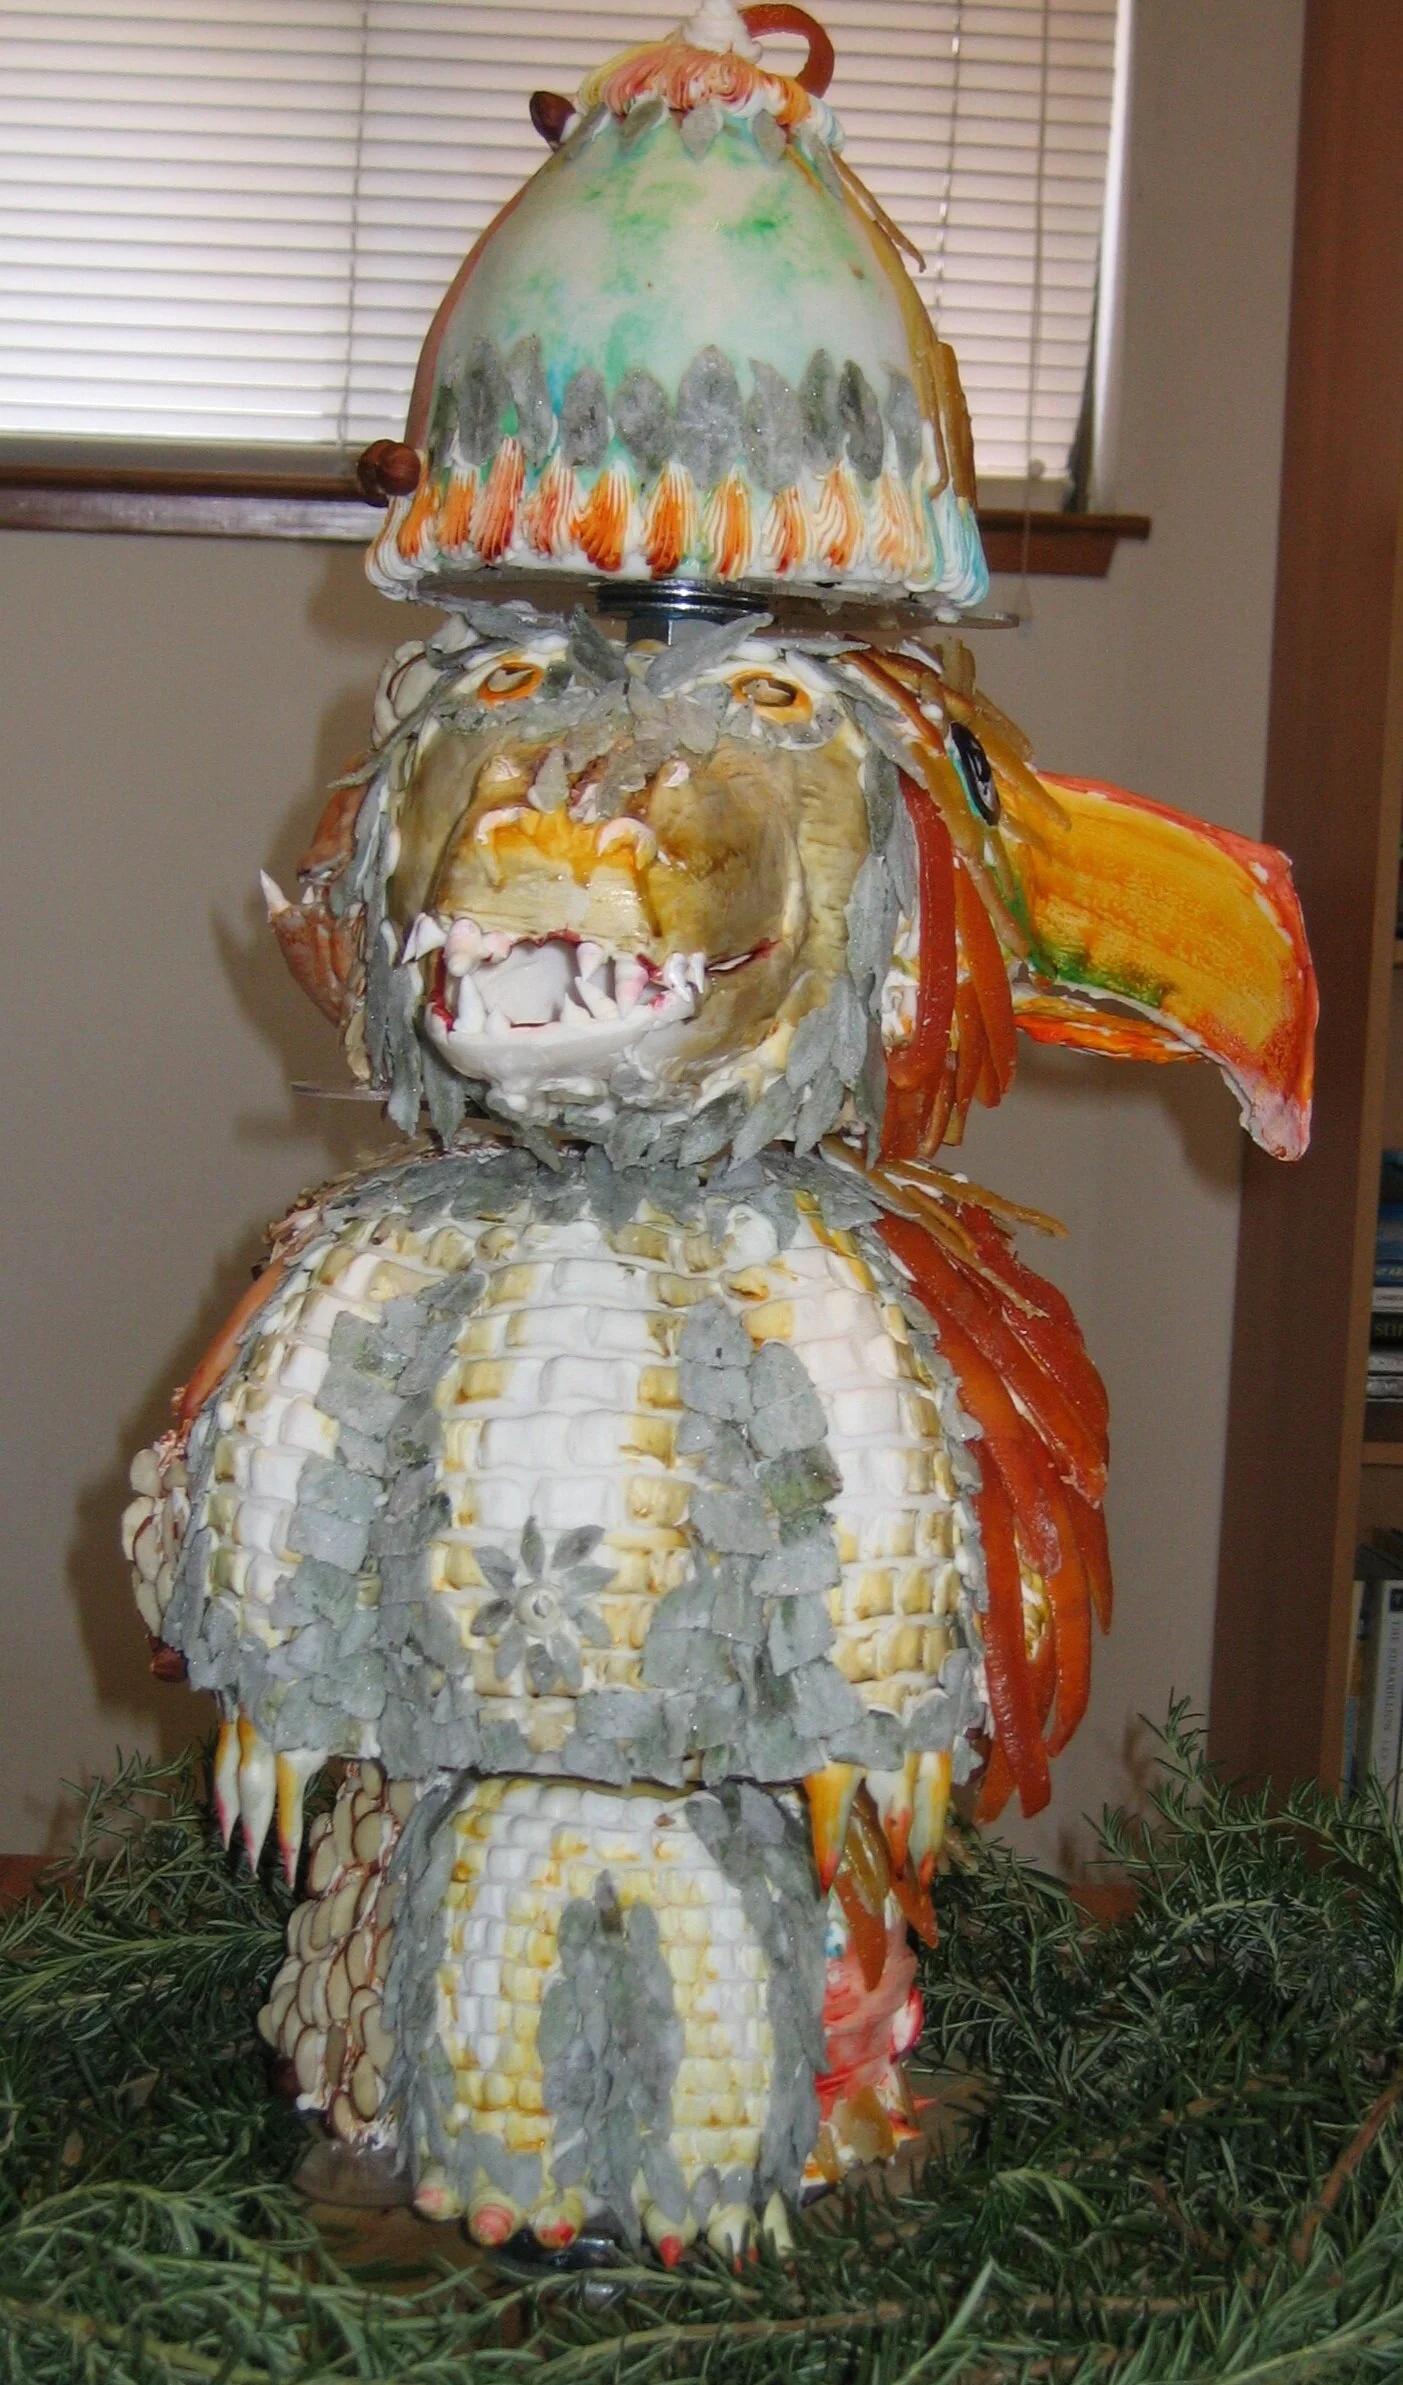
Triple Animal Cake
This cake was made for my niece's first birthday. I was trying to make a 3-dimensional version of those children's picture books where each page is split into three parts so that you can mix and match the heads, bodies, and feet of the animals.
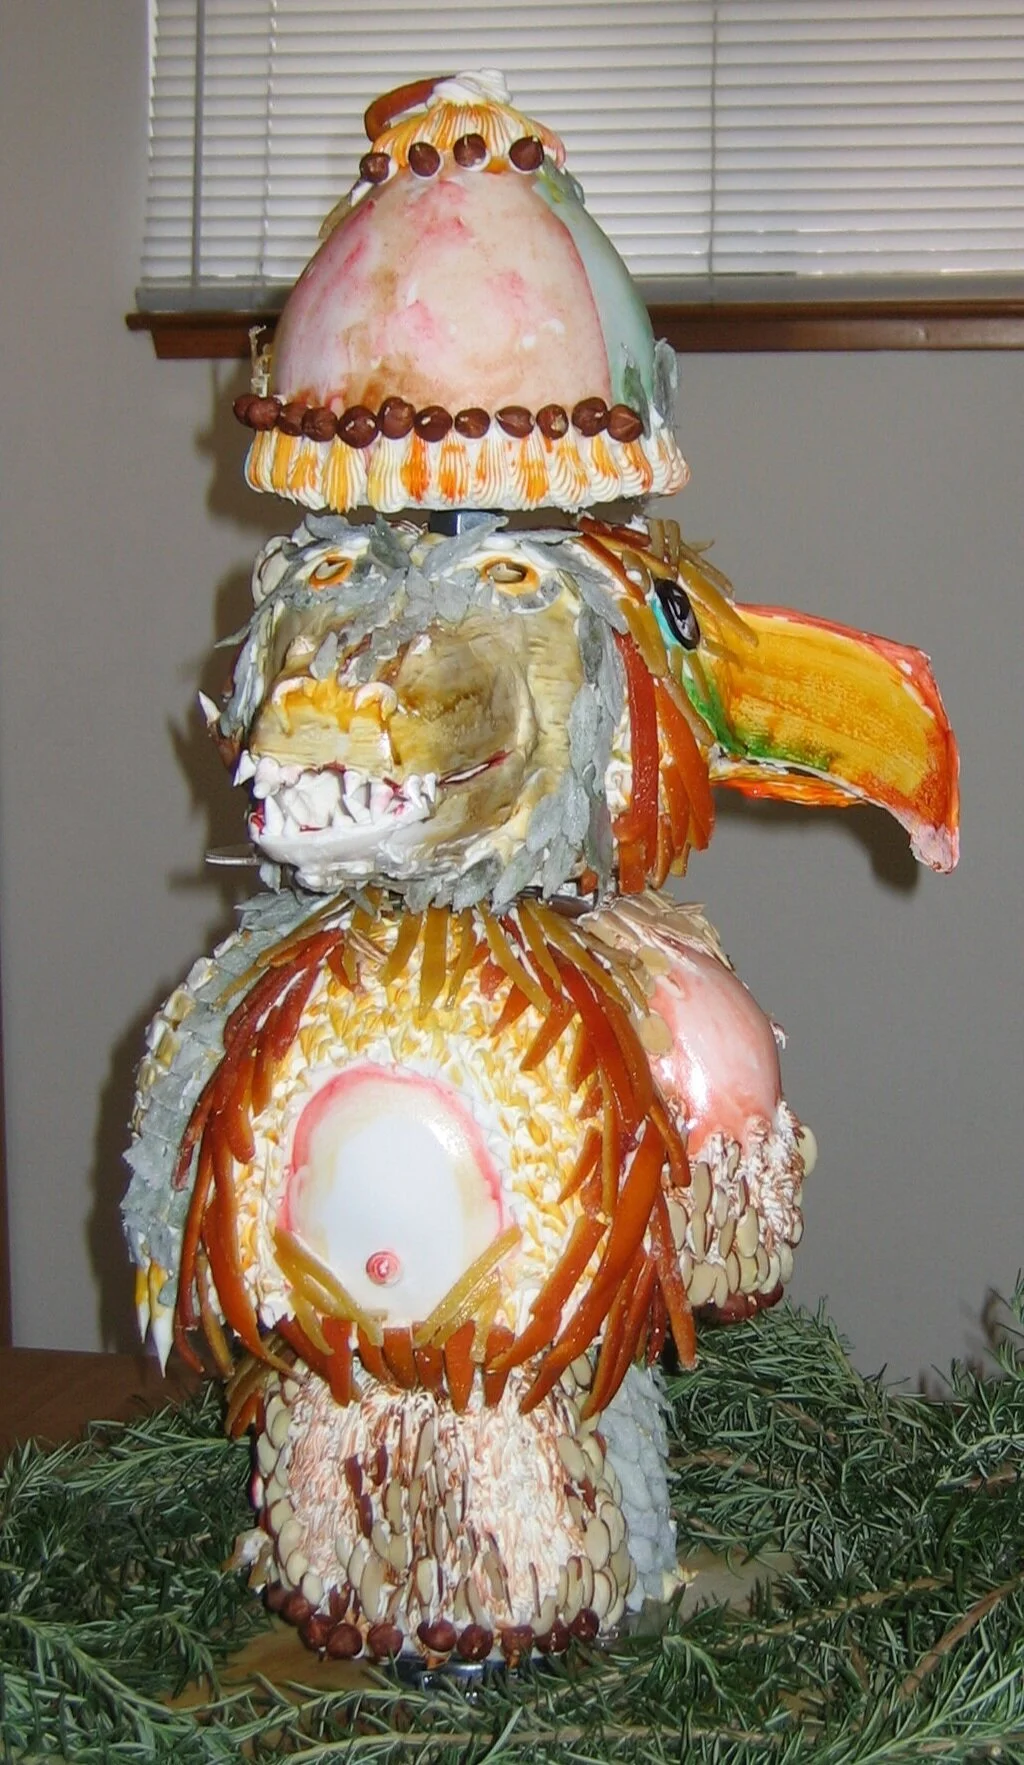
This cake was made for my niece's first birthday. I was trying to make a 3-dimensional version of those children's picture books where each page is split into three parts so that you can mix and match the heads, bodies, and feet of the animals.
My plan to adapt the concept of the mix-and-match animal parts book into a 3-dimensional cake was to build the cake around a central pole, so that each tier would be able to rotate independently of the others. The first tier was the feet, the second tier the body, and the third tier the head. Because I was planning to put all kinds of decorative schmutz onto and into these cakes and because I wanted to have just a basic chocolate cake section for the one-year-old birthday girl to smush, I also made a hat for the fourth tier, which frankly didn't really add a whole lot, visually or conceptually speaking.
Each tier was divided into three sections, each decorated like a different animal. That way, you could line all the sides up so that the three animals appeared in their entirety on the three sides of the cake, or you could rotate the sections relative to one another so that, for, instance, each side of the cake would show the feet of one animal, the body of another, and the head of the third. I also wanted to experiment with different decorating and texturing techniques, so rather than decorating in the usual way with only fondant and frosting and food coloring, I decided to enhance the primary texture of each animal with a different food product and then also coordinate the flavor of the cake within to the decor on the facade of the cake. My animal / decoration / flavor combinations were:
Side #1: Monkey / Nuts / Hazelnut Chocolate Cake
The monkey side of the cake was made of chocolate cake with hazelnut paste added to the batter, with nuts of various types and textures applied to the outside to create the appearance of matted monkey fur.
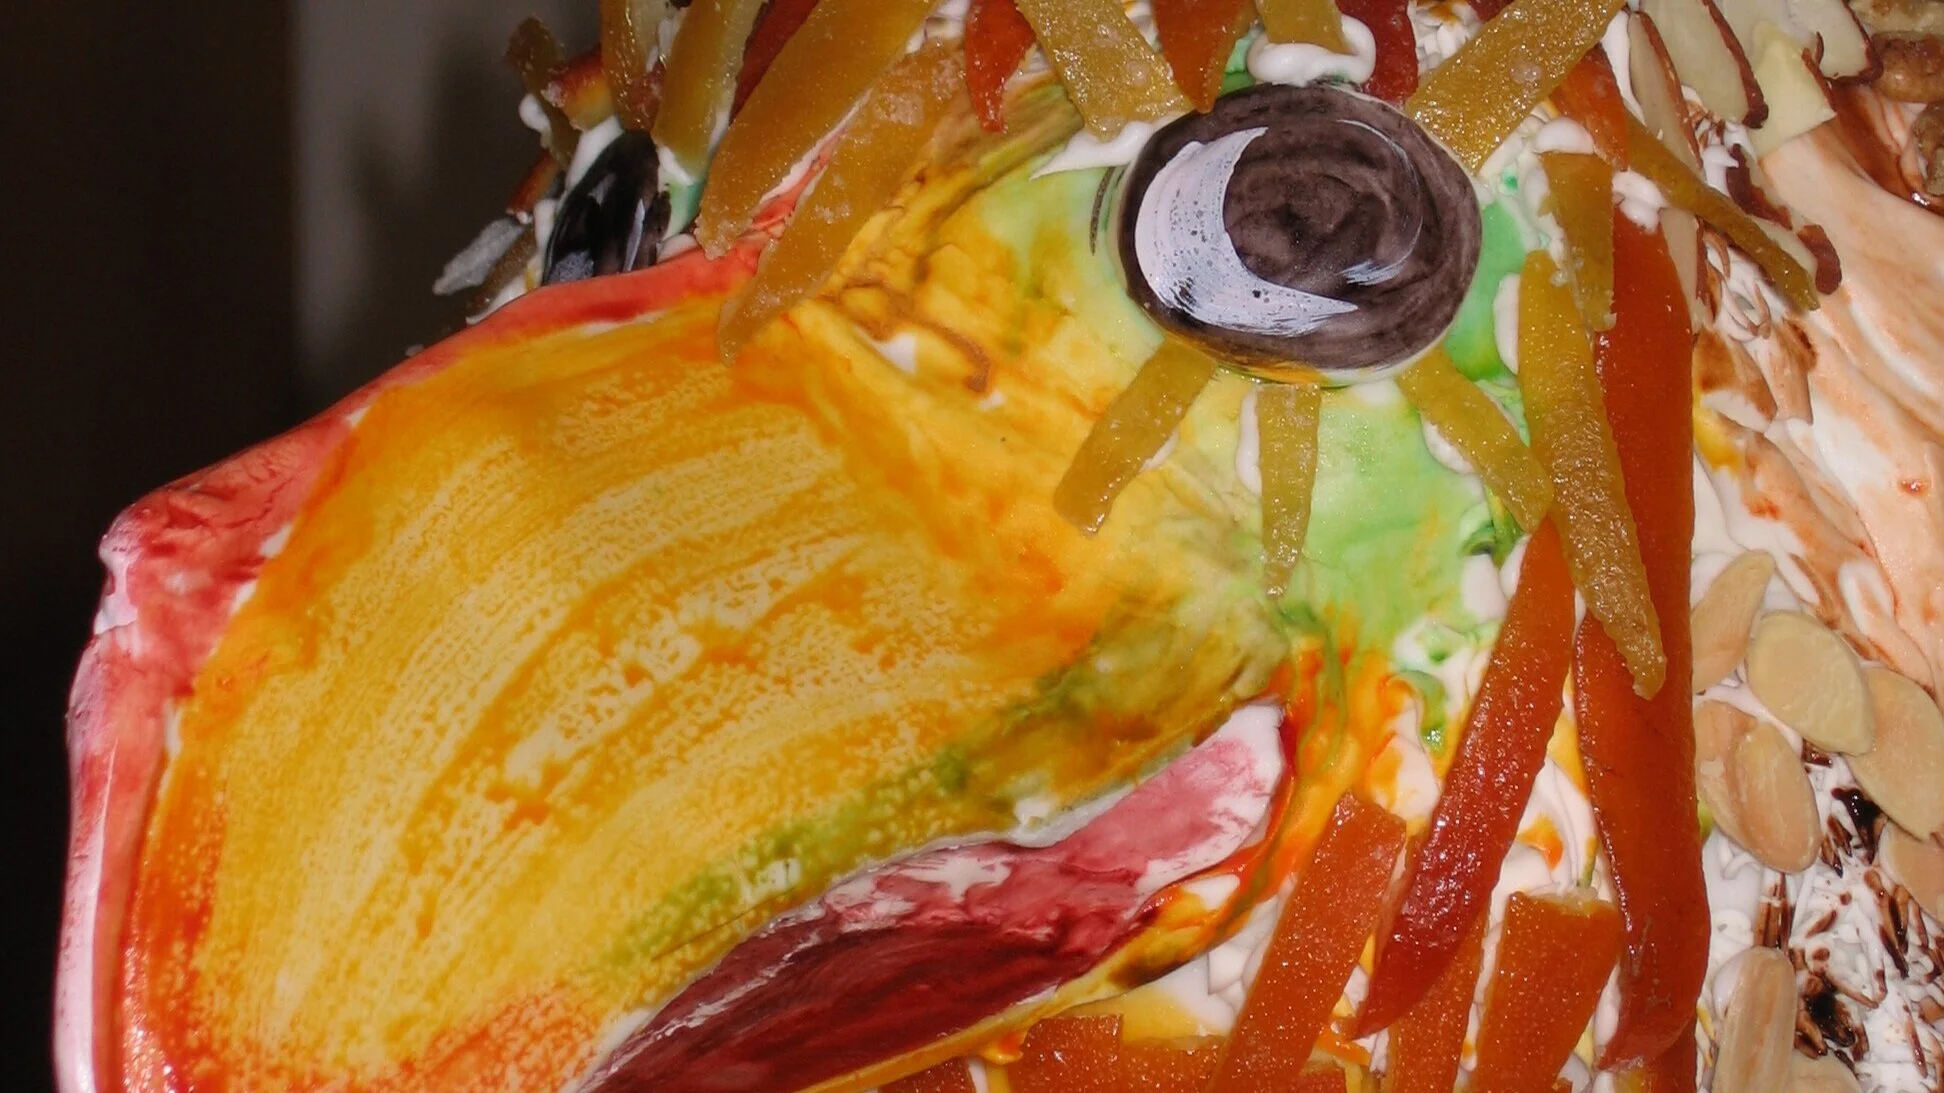
Side #2: Bird / Candied Citrus Peel / Chocolate Orange Zest Cake
The bird was chocolate cake with orange zest added to the batter, with candied lemon, orange, and grapefruit peel feathers.
Side #3: Alligator / Sugared Mint Leaves / Mint Chocolate Chip Cake
The alligator was chocolate cake with mint chocolate chips mixed in, with sugar-coated mint leaves for the textured skin.
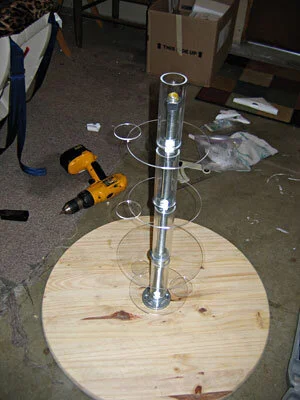
The first thing I needed was a central pole for my cakes to rotate around. I started with a heavy circular wooden base with a 3/4" threaded rod screwed into a phalange in the center. To support the cakes, I got four plexiglass circles with holes drilled in the middle with acrylic tubes the height of the tiers glued around the holes. So that we would be able to turn the tiers without touching the cakes, I glued little plexiglass circles onto the edges of the bigger circles to use as handles. To support these plexi cake bases, I used big nuts and fender washers, screwed onto the central threaded rod. Each tier required three nuts and a fender washer. The nuts were just the right size to fit inside the acrylic tube while the fender washers were big enough for the plexi bases to rest on. To assemble, I started with one nut, then a fender washer, then another nut pinching the fender washer in between. Then one more nut, positioned so that the distance from the top of the fender washer to the top of the nut was the same as the height of the tier. That way, when I slipped the plexi plate and acrylic tube over the nuts, the plate rested on the fender washer and the nuts at the top and bottom kept the whole piece stable. Then repeat the whole operation for each successive tier. I did a dry run putting this whole assembly together without cake to make sure it would work the way it did in my head before I started working on any of the edible cake components. When I reassembled it later with the cakes in place, I also sprayed the washers with cooking spray as lubricant to counteract the weight of the cakes, which I was afraid would hinder the rotation.
Before I started on the cakes themselves, there was lot of advance work to do:
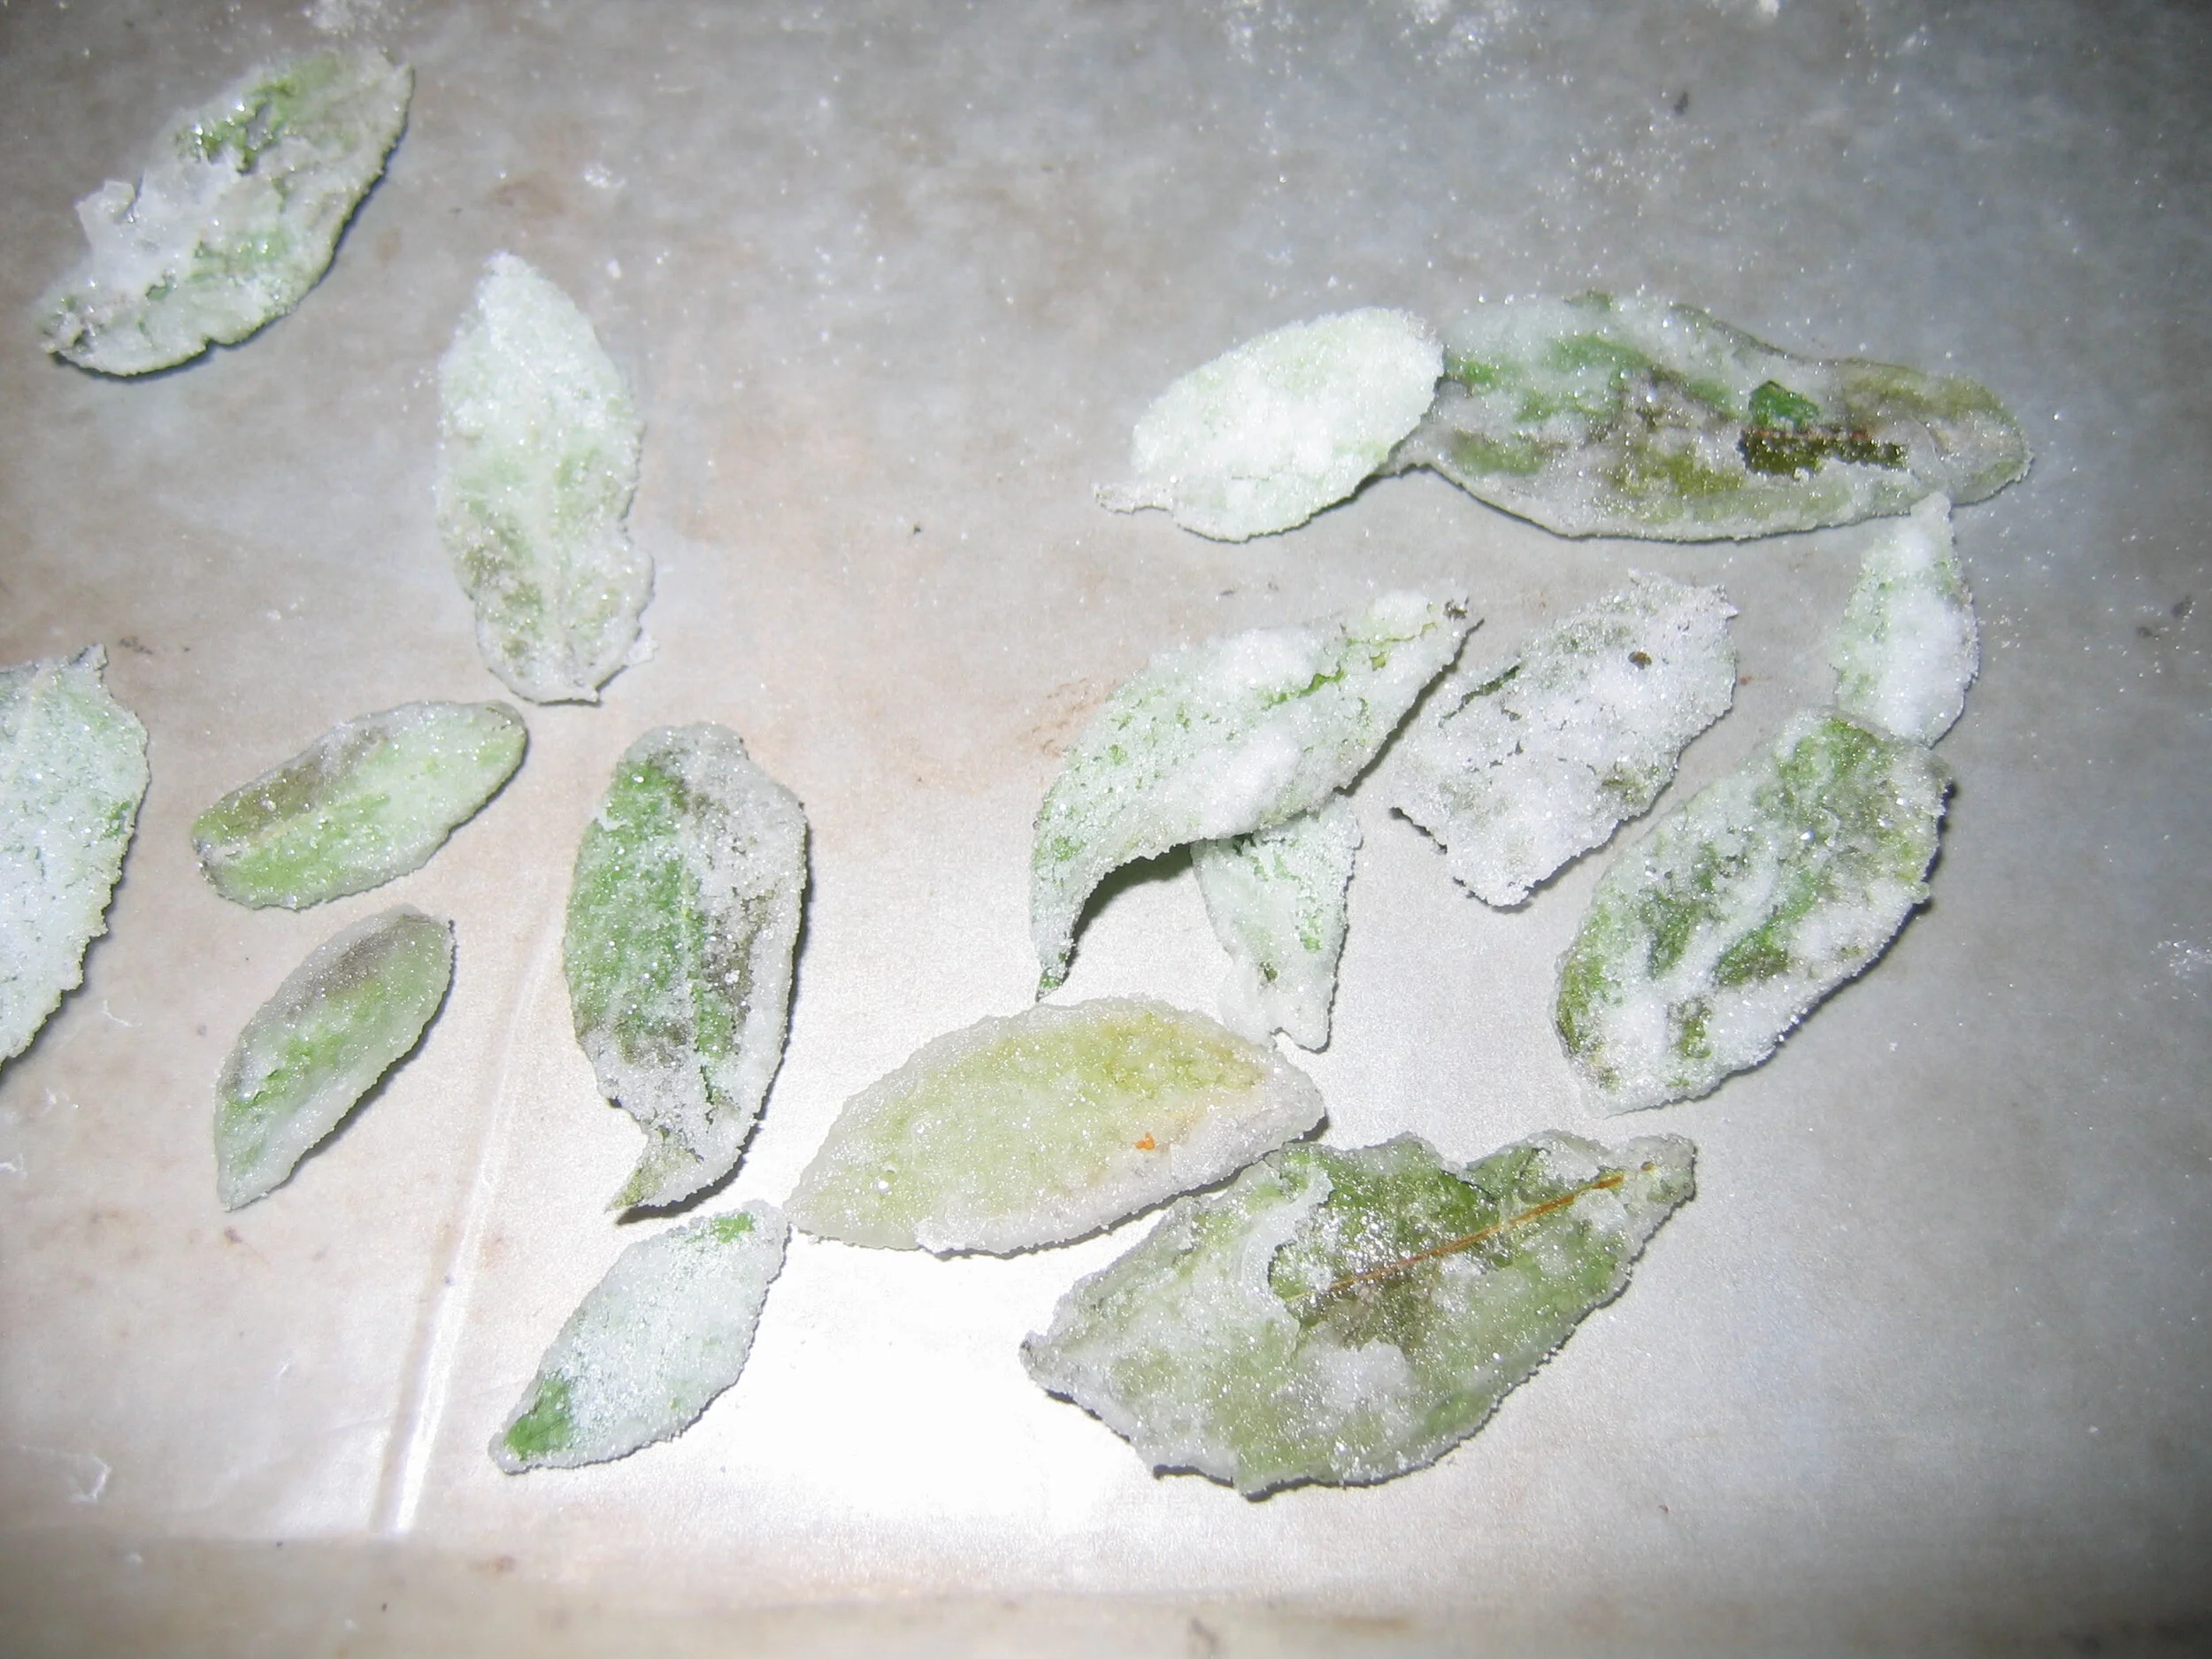
Sugared mint leaves:
These were easy to make, if a bit gooey and tedious. Fortunately, my sister had a big mint plant in her back yard, so I had ready access to a virtually infinite supply of mint leaves. To sugar them, I dipped each leaf one at a time in egg white, then in granulated sugar and put them on wax paper to dry. I have since realized that I could probably have gotten a nicer result had I rubbed on the egg white with my fingers in a thinner layer and then sifted the sugar overtop. As it was, some of my leaves got too much egg white or too much sugar on them and wound up being unusable or just a little lumpy and weird.
Candied citrus peels:
I started with lemon peels, orange peels, and grapefruit peels, so that I would have a variety of sizes and colors to use for my feathers, using a recipe from Jacques Torres. First I cut the fruit into fourths and removed the peels. My mom was in town (she and Dad were both a big help on this cake) so she took the leftover fruit and carefully separated the fruit from the inner membranes to feed to my niece. I tried to eat some of the grapefruit but Mom shooed me away. Apparently I don't rate as highly as she does. The pieces of peel went into a pot of boiling water three times to blanch some of the bitterness out of them. Then they went into a pot of sugary water to simmer for a couple of hours. Then I pulled them out of the syrup and left them on a wire rack to drain and dry. I had been lead to believe, by Jacques Torres' recipe, that they would dry out in a few hours. As usual, Jacques' recipe didn't work out the way I expected. None of Jacques' recipes that I have ever tried have worked out the way I expected. I left the peels out on the rack overnight, and they were still nowhere near dry. At that point, I became pressed for time, so I had to put them into a warm oven to dry before I could put them on the cake.

Gum paste faces:
To make the snouts of the alligator and the monkey and the beak of the bird protrude appropriately from the cake surface, I made them in advance out of gum paste. As it turned out, I didn't make them quite enough in advance, as the beak wasn't quite fully hard when I went to attach it, but I'll get to that in a little bit. In order to get the shapes I needed, I draped rolled-out sheets of gum paste over forms. In the case of the monkey nose and the alligator snout I was able to find cups lying around the kitchen that were basically the right size and shape. To get the more distinctive shape of the bird's beak, I made my own form out of cardboard. All the forms had to be liberally coated with corn starch before applying the gum paste to insure that the finished pieces would release easily.

When it came time to make the cakes and the frostings, Mom and Dad were invaluable, with Mom doing most of the baking work and Dad doing most of the cleanup. For each tier, we made three two-inch tall cakes - one of each of the three flavors described above. I torted each of the cakes and filled them with chocolate buttercream frosting. Then I cut each of the cakes into thirds and stacked the thirds on top of each other, so that I wound up with three pie wedges per tier, one in each flavor, each about six inches tall. I had to cut a little divot out of the corner of each pie wedge so I could fit them around the central tubes, assembling the pie wedges back into circles. As it turns out, cakes are much flimsier when they're built this way and until I finished carving them and covering them with fondant I was very worried that the three sections of the cakes would flop outwards like the petals of a flower. As I said before, I had conceived of the hat as the smash cake for the birthday girl, so for that one I simply made a basic chocolate cake and didn't have to worry about cutting it into thirds.

Carving was pretty easy, actually, since I was going for sort of puffy cartoony animal shapes. Once I had them covered with fondant, I was able to stick my gum paste beaks and snouts on with royal icing, holding them in place with skewers until the icing dried. Unfortunately the beak wasn't quite dry enough and it sort of sunk over the skewer, so I had to leave the skewer embedded in it and pipe royal icing on top to hide the end of the skewer sticking out.
I added a base layer of royal icing details - feathers and fur and scales - because I didn't trust my textural appliques to provide the level of detail that I was looking for. I also added facial features to the heads, and nipples and belly buttons to the torsos. I wasn't quite sure what to do with the hat, so I just gave it a poorly executed inverted shell border.

Because I was visiting my sister when I made this cake, I didn't have my airbrush with me, so I had to paint the colors on the old fashioned way - with a soft brush and some paste food coloring. I didn't do a very good job - so I wound up with a lot of drips and messy brush marks. I also think I either went too muted with the alligator colors or too bright with the bird colors because they sort of didn't belong in the same world.
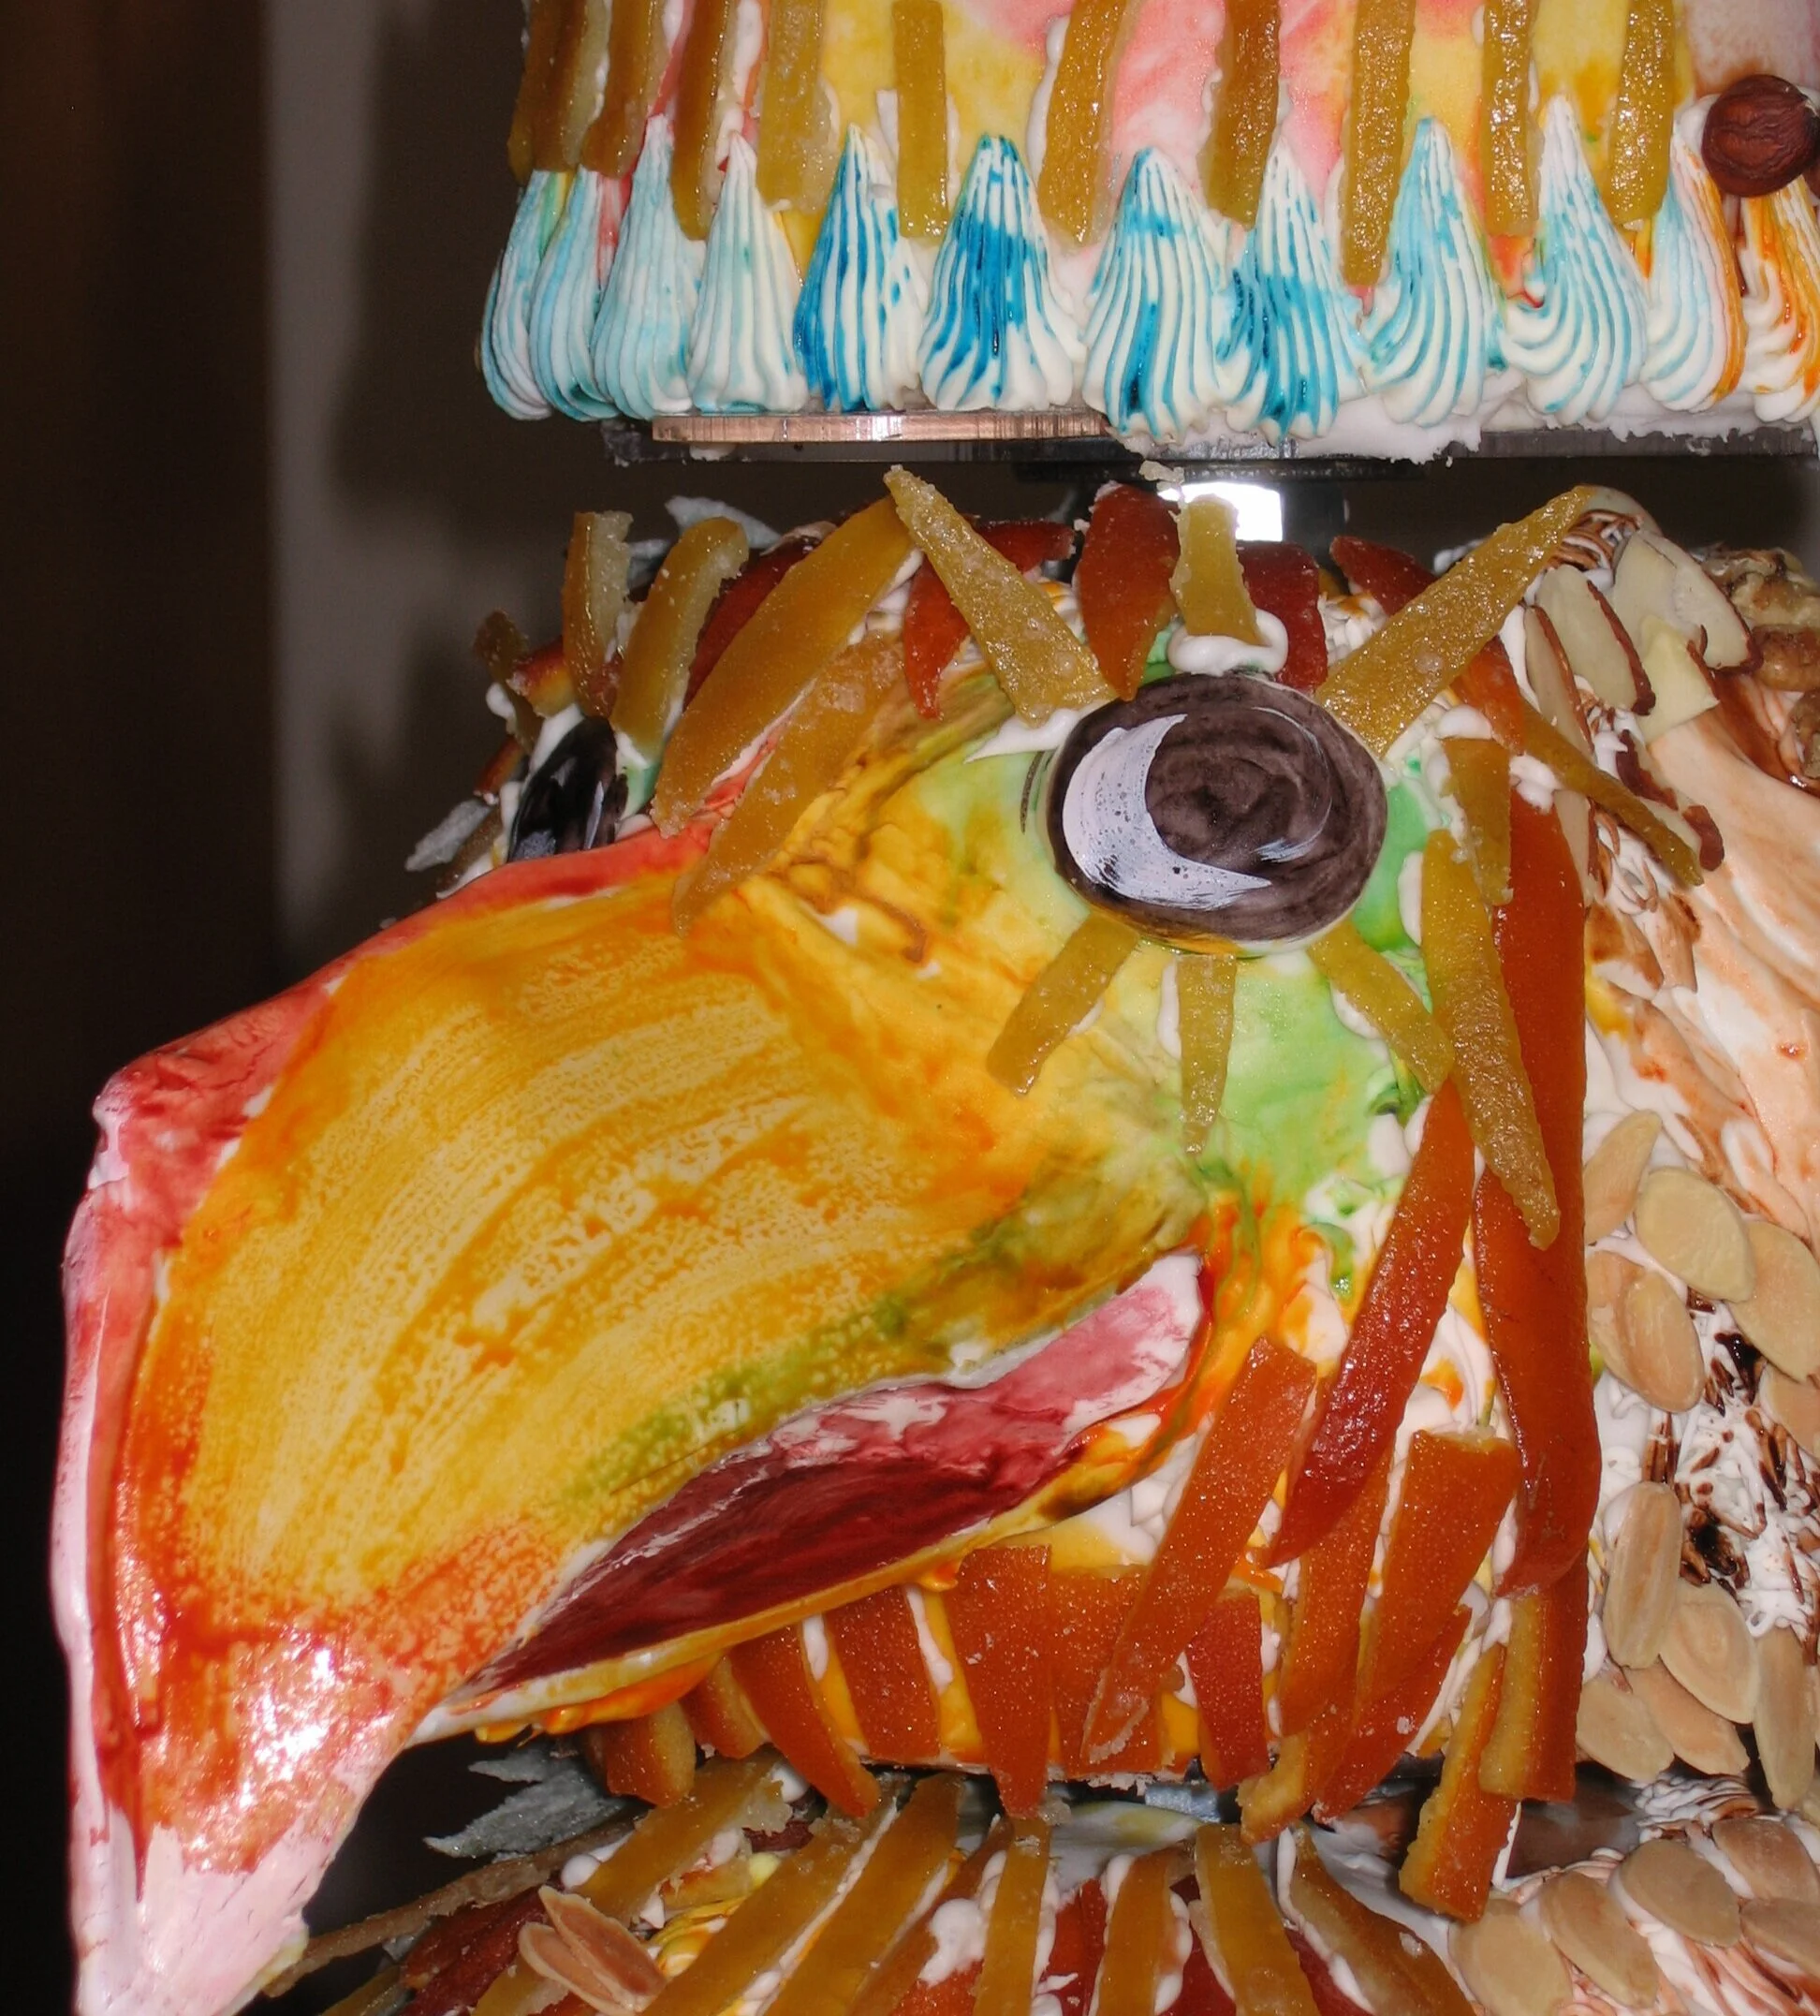
I was pleased with the effect of my appliques, though. I did get a little carried away with the alligator. I'm not sure why I put a little flower of mint petals around its belly button (which reptile don't even have, by the way!) My bird wound up looking a bit like it was on drugs, because I gave it big blank staring eyes surrounded by dramatic lemon peel lashes. The monkey was apparently a bit diseased, since its shoulders were bald and red and splotchy. You didn't really expect me to successfully make cute little children's book animals, did you?

The board had to be pretty big relative to the cake in order to make sure that it was stable, but I hadn't given any thought whatsoever to decorating it, so it looked very bare. Mom suggested that we get some rosemary sprigs from the garden to gussy it up a little. I think it helped.
Whatever aesthetic faults the cake may have had, my rotation mechanism worked flawlessly. With that aspect, I really couldn't have been happier. Each tier spun easily and smoothly and yet the cake as a whole still felt rock solid.