Bluebird Cake
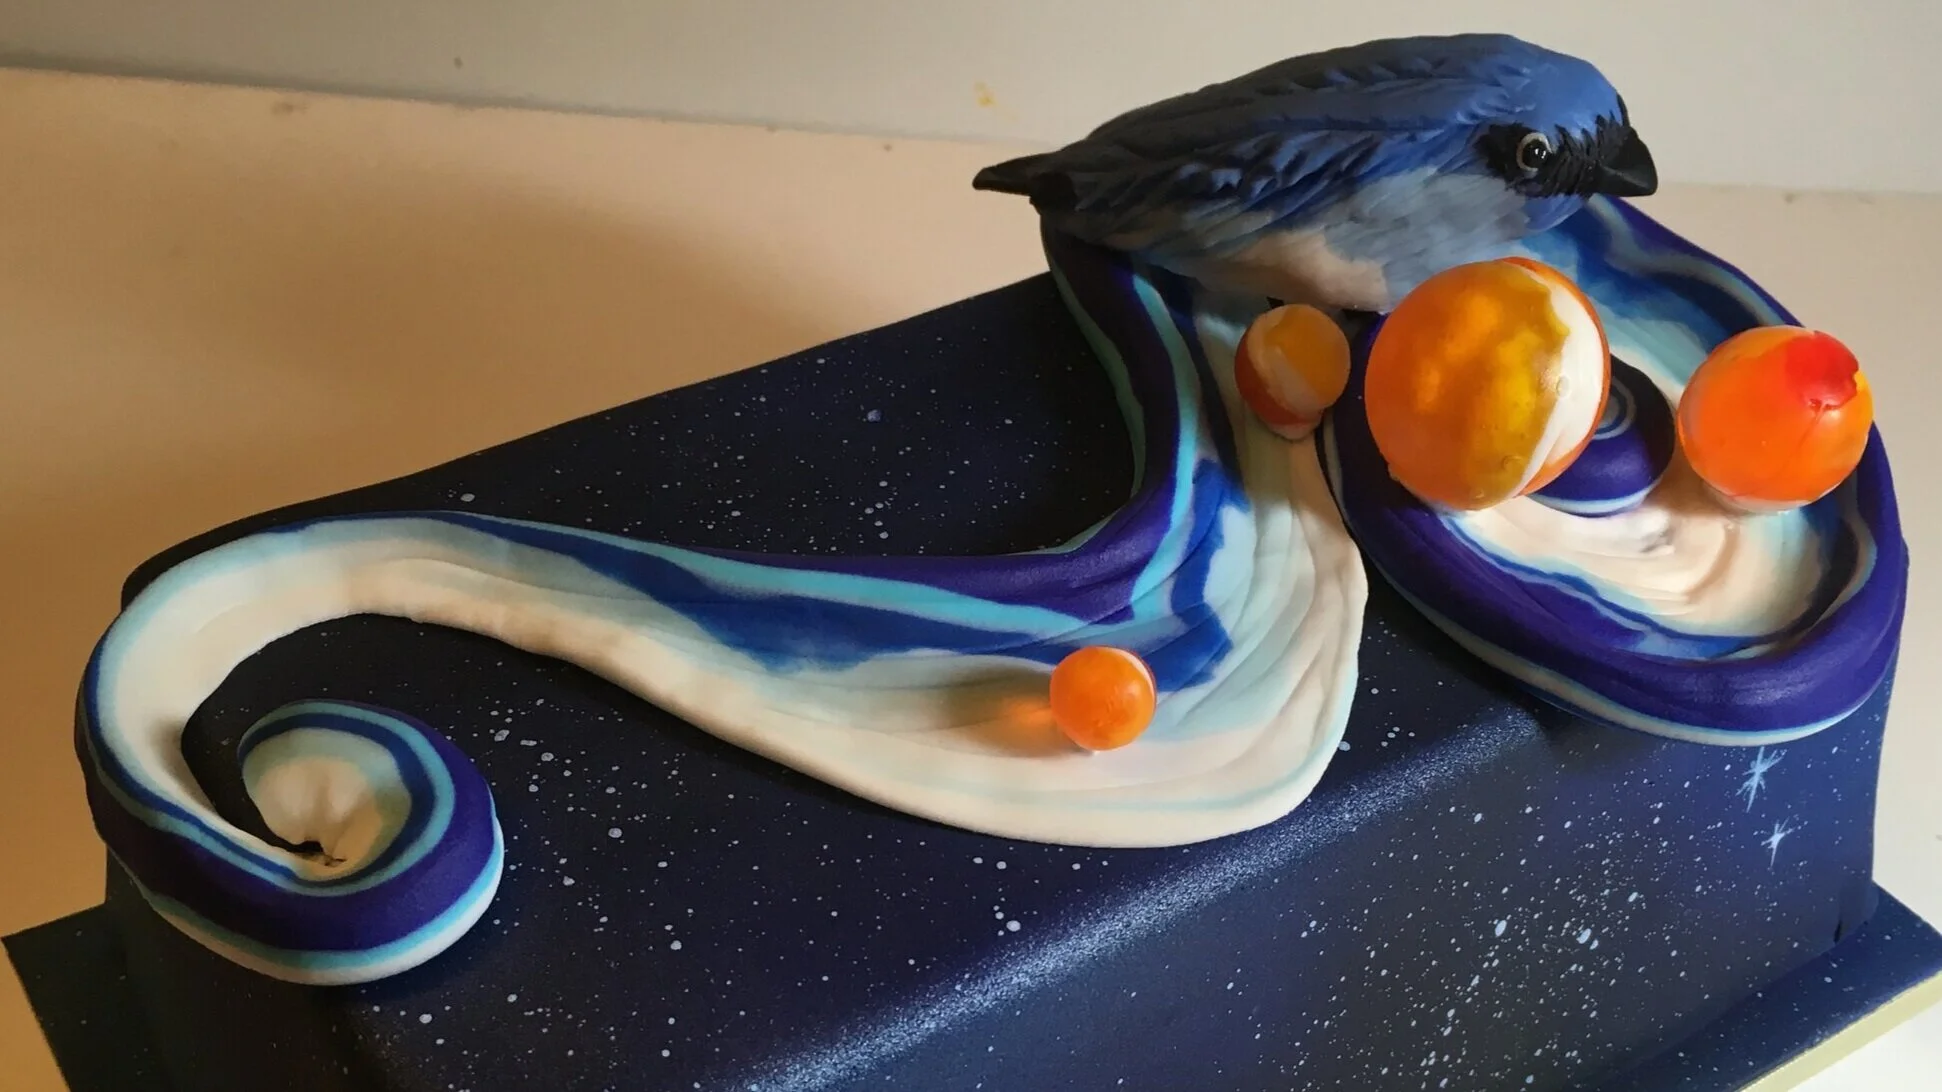
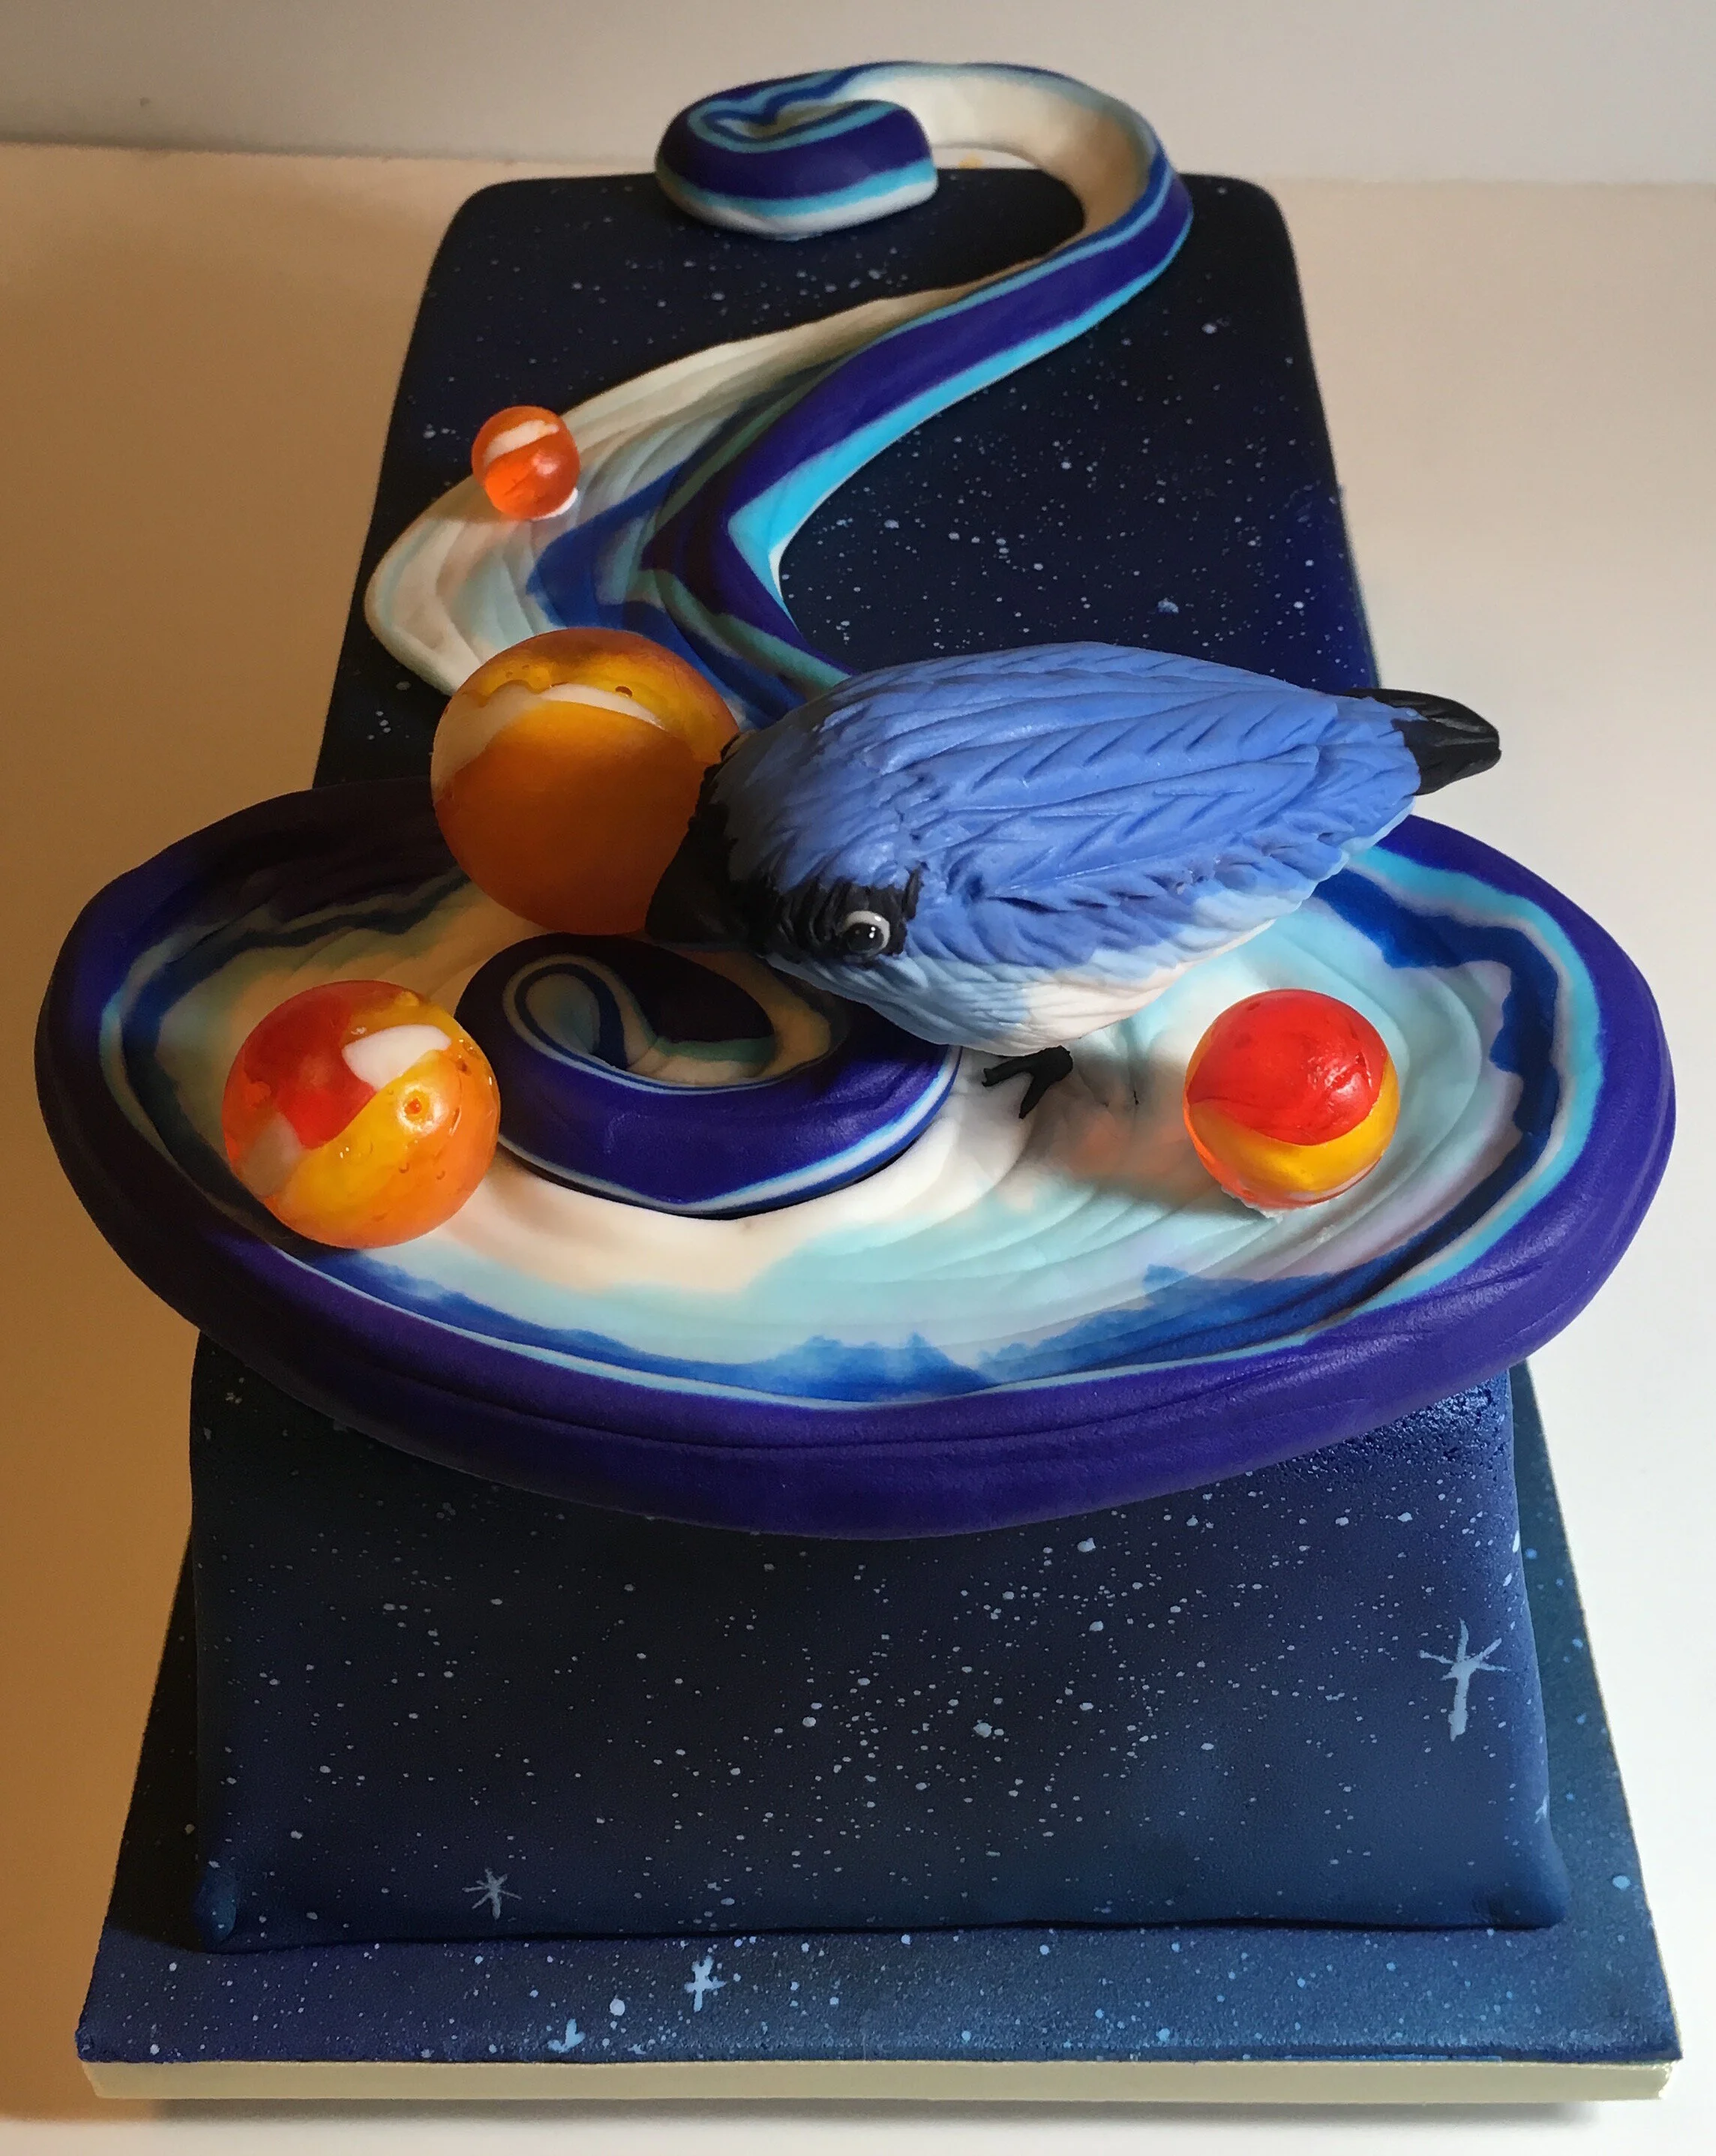
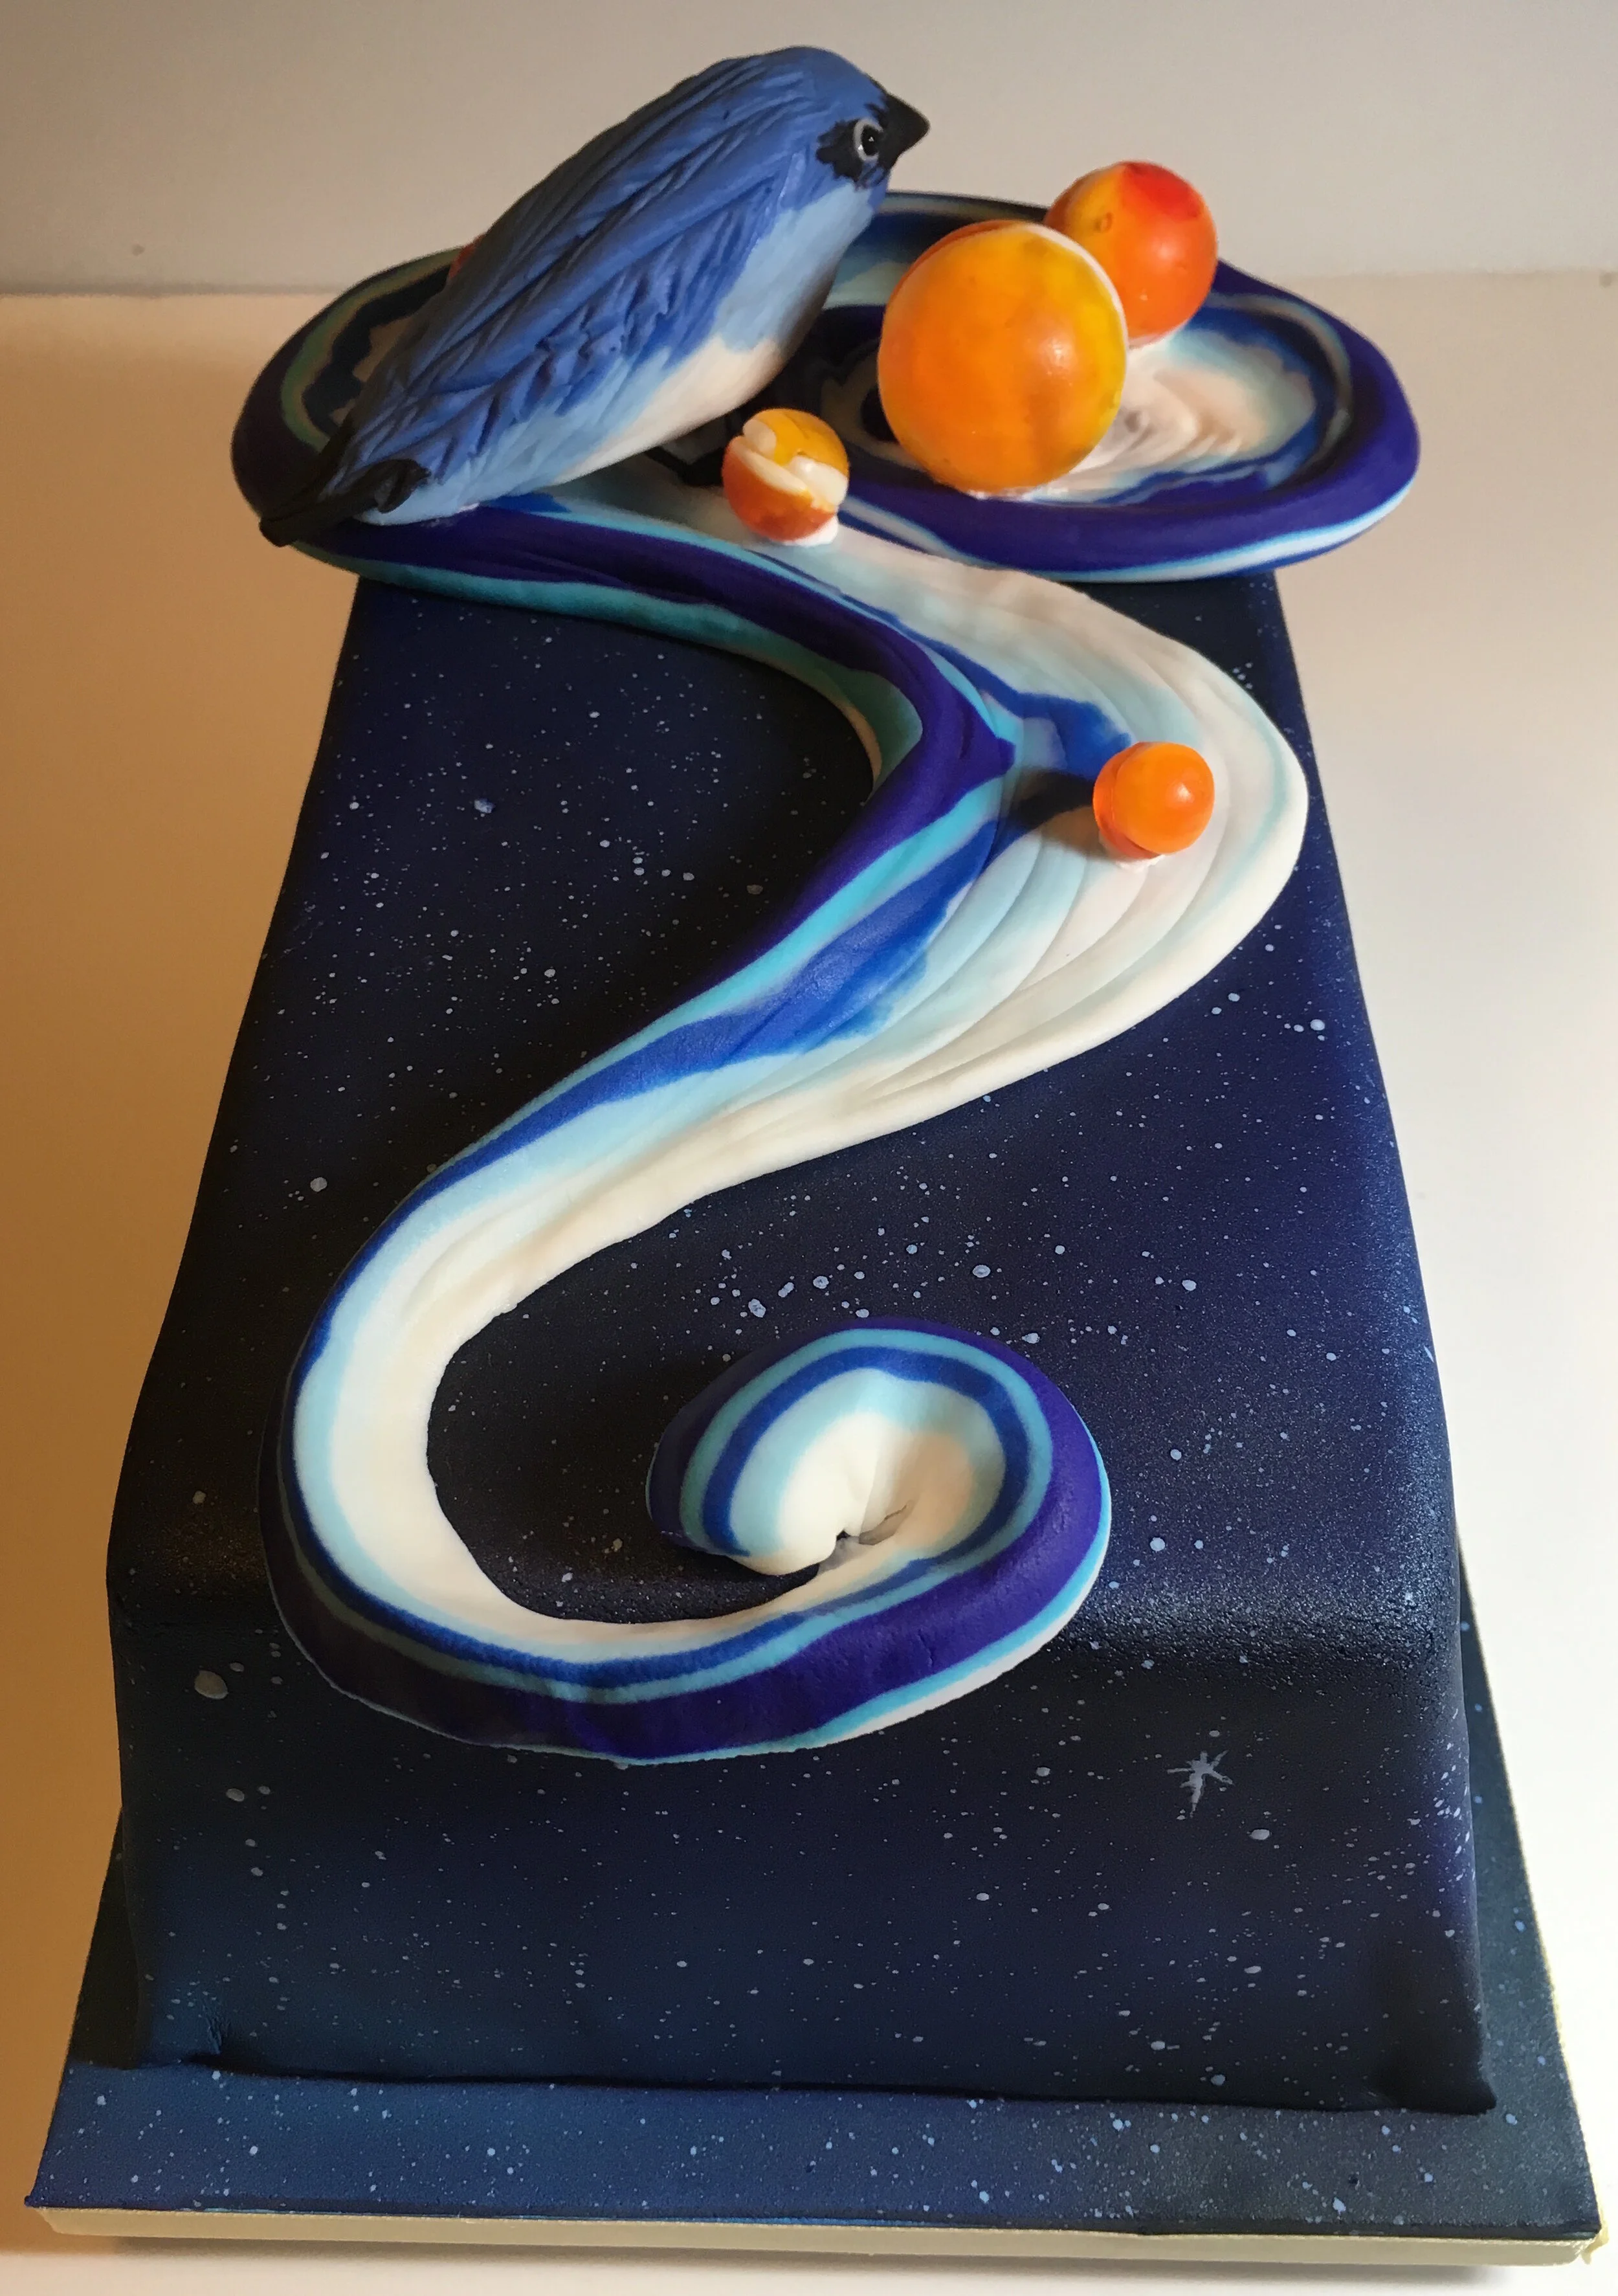
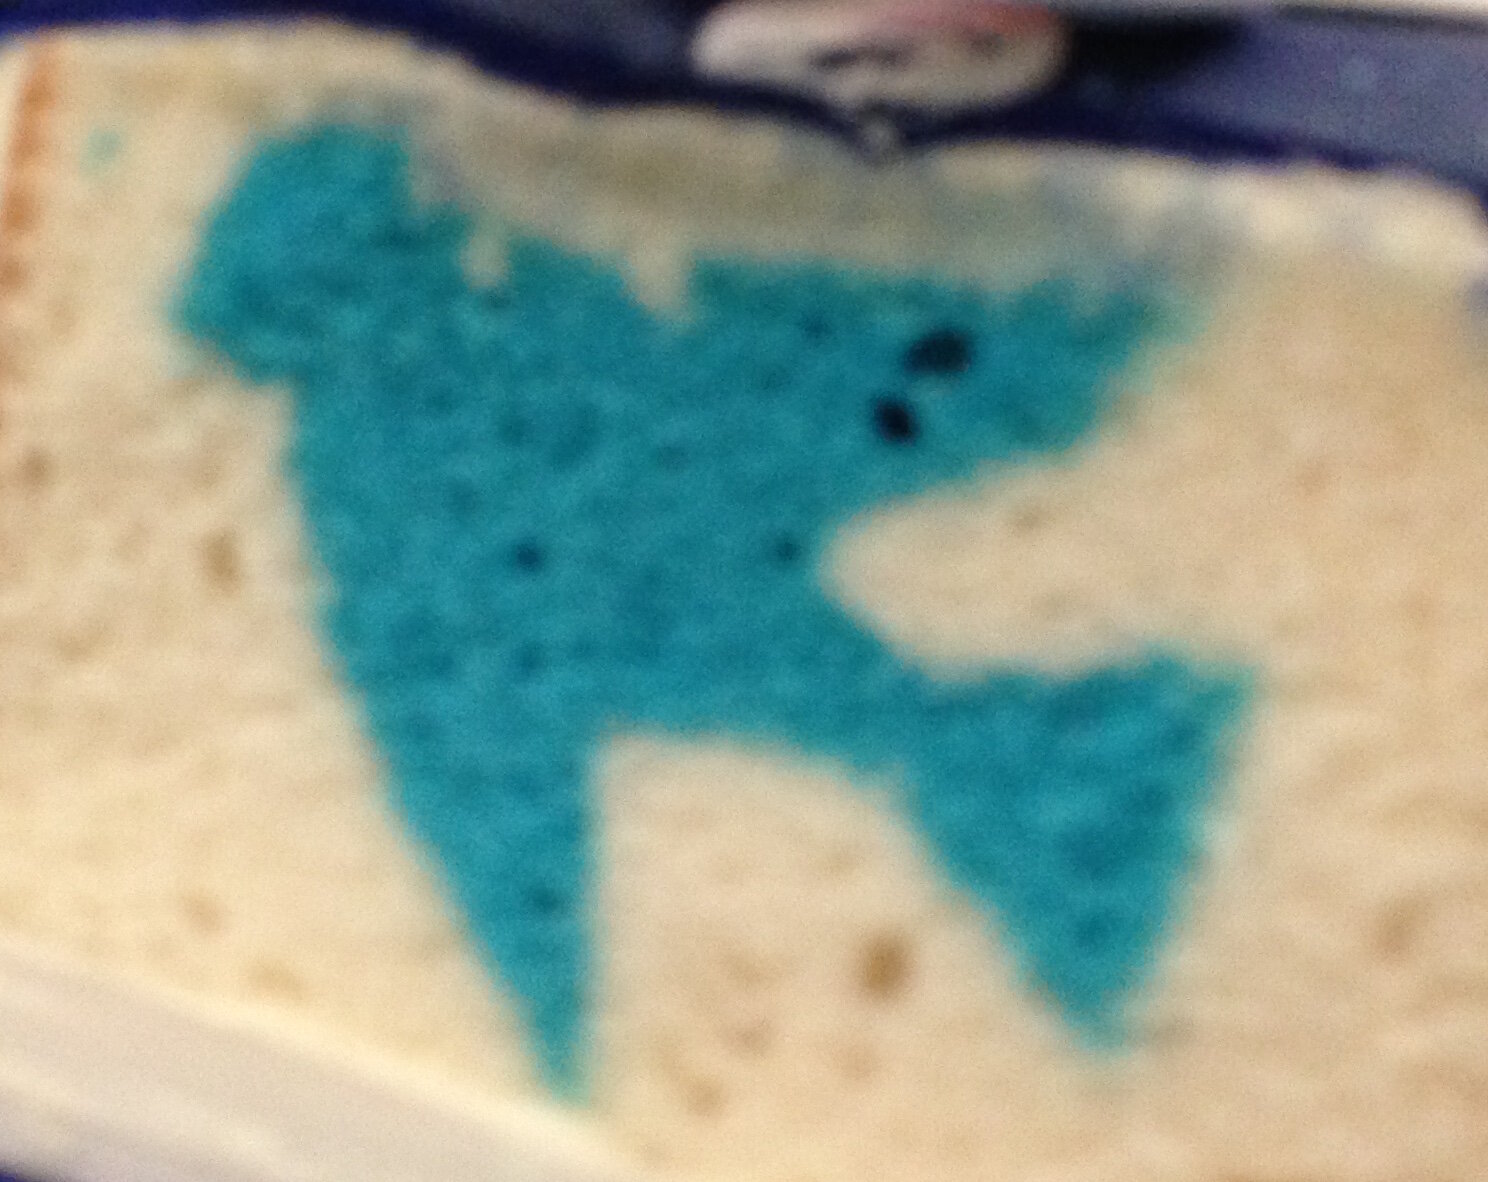
For her granddaughter’s birthday, my friend asked for a cake that somehow combined the themes of bluebirds and the universe. I came up with this cake that’s sort of a cosmic bluebird in a space nest with planetary eggs in it.
For her granddaughter’s birthday, my friend asked for a cake that somehow combined the themes of bluebirds and the universe.
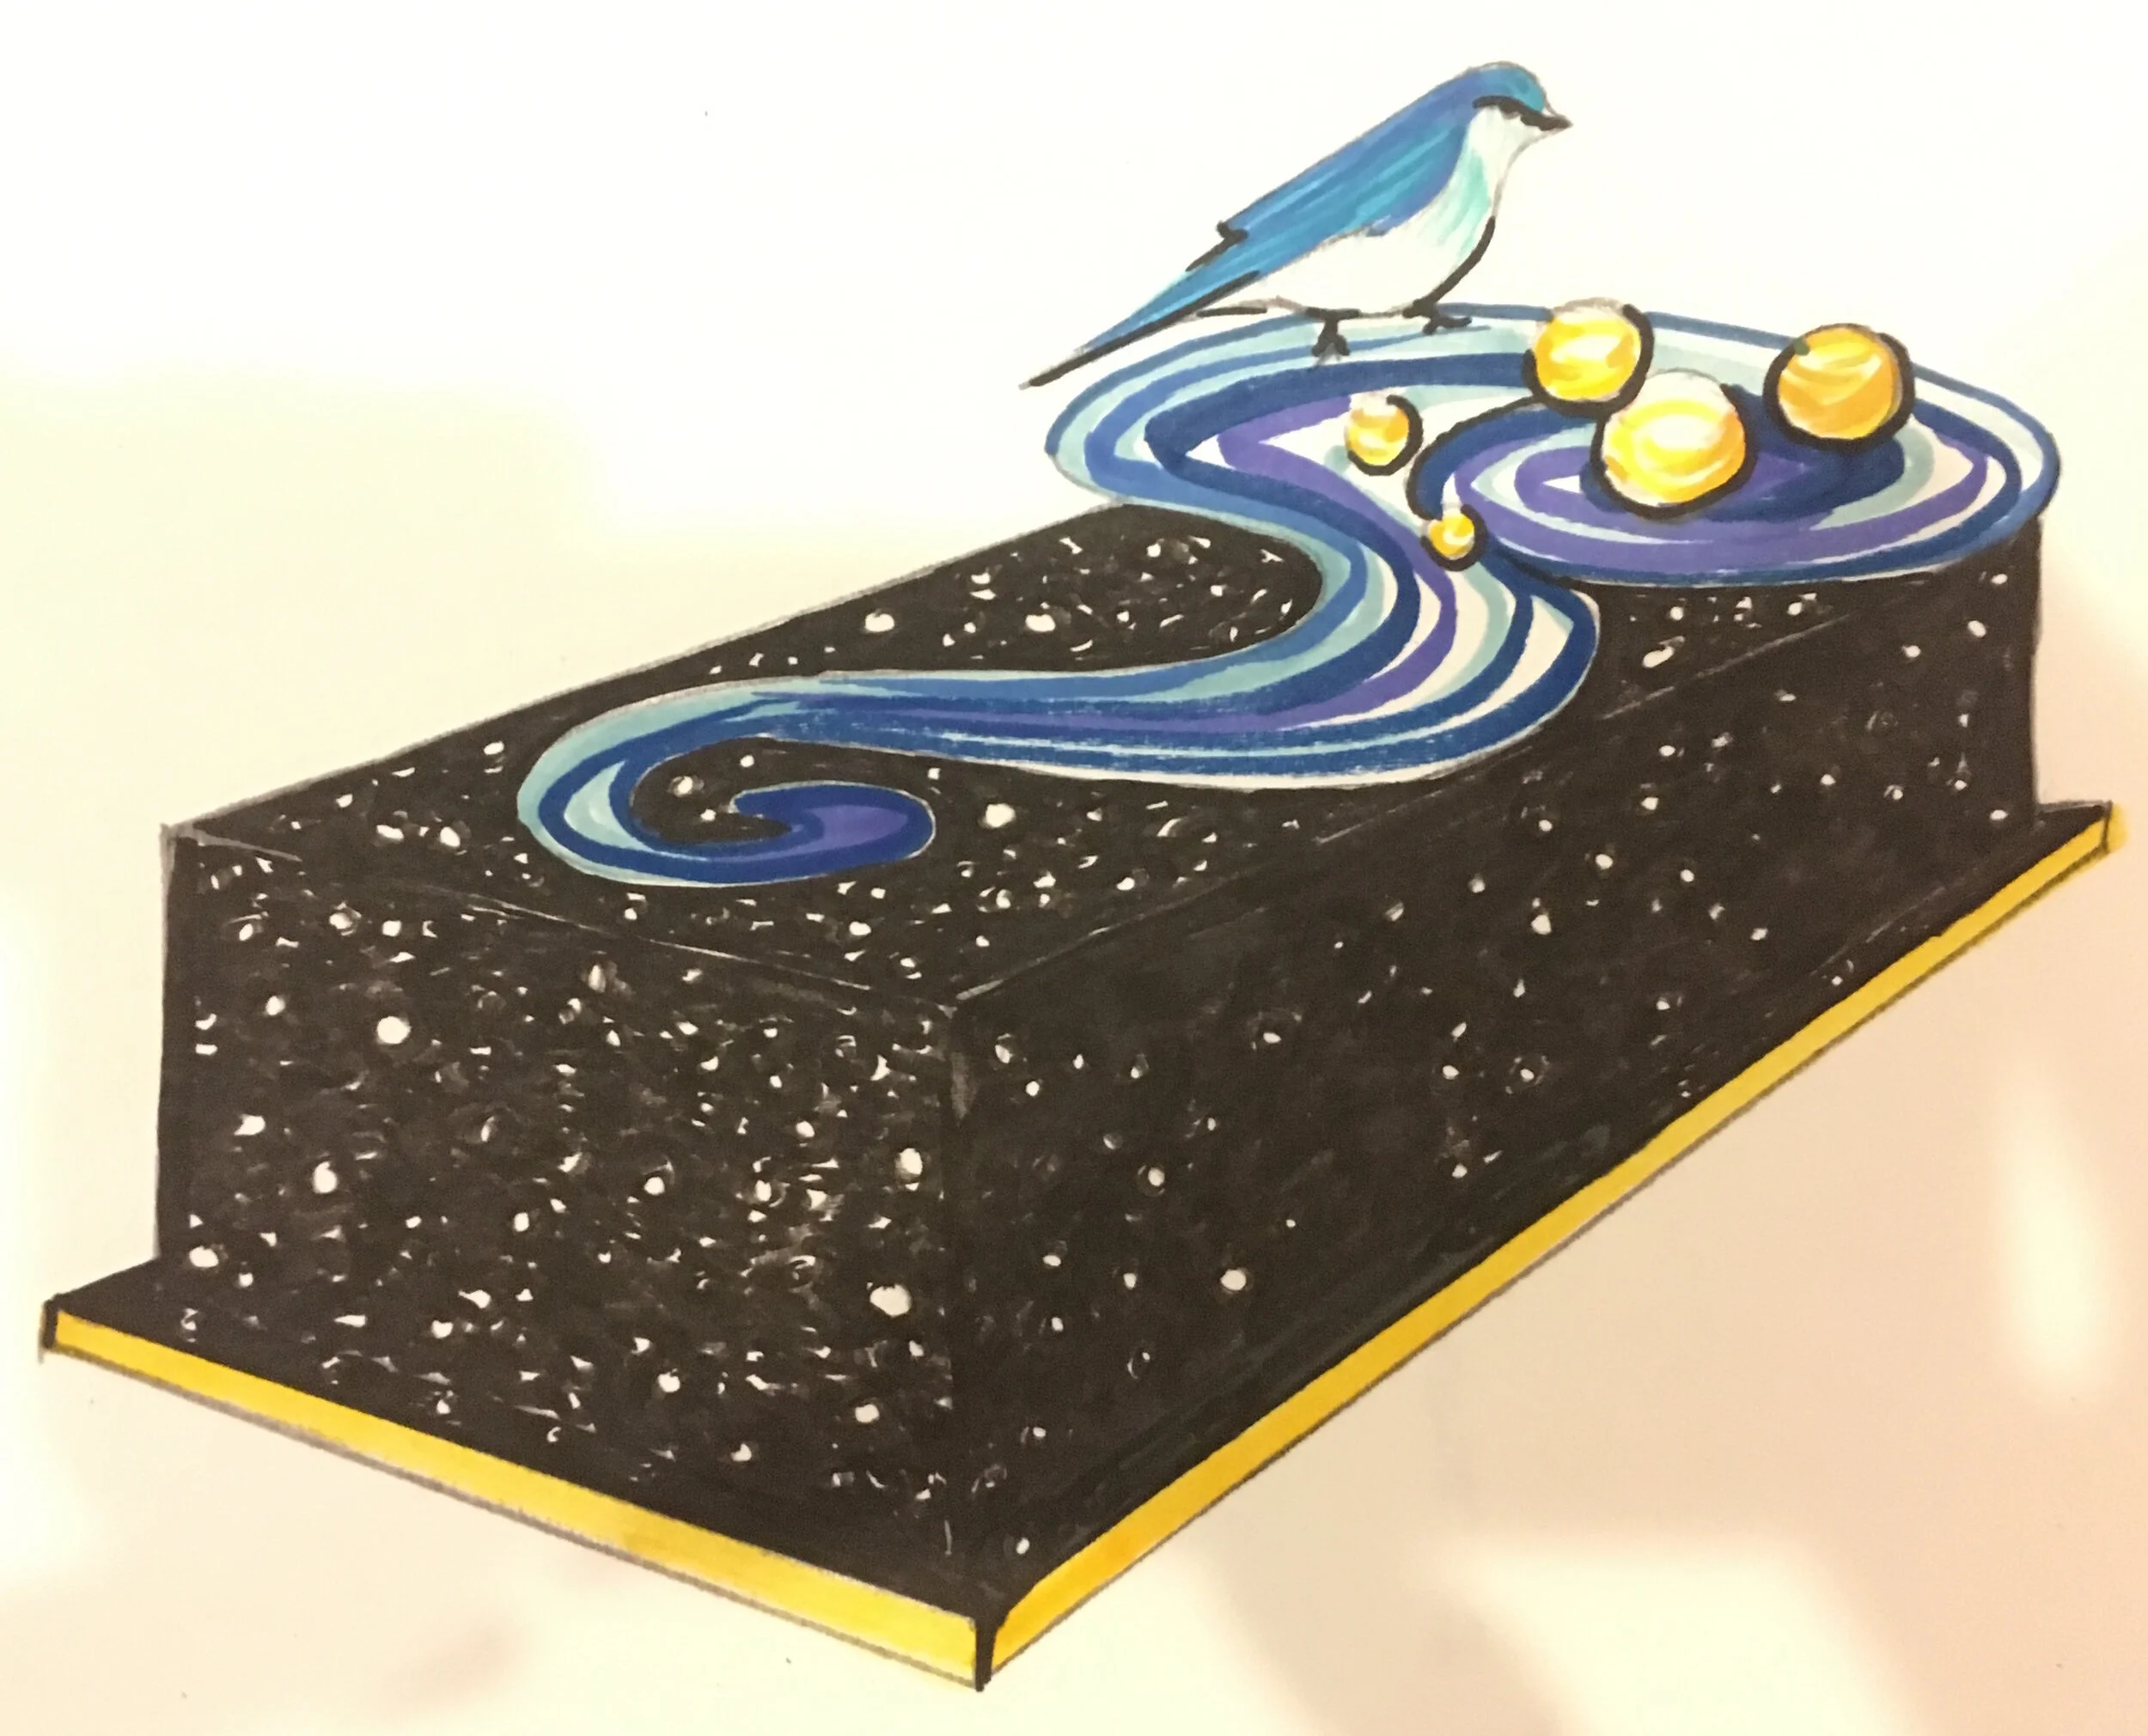
I came up with this cake that’s sort of a cosmic bluebird in a space nest with planetary eggs in it.
It turned out to be surprisingly elegant, especially when compared to my usual cakes.

The swirl is a gum paste / fondant mix. The planets are isomalt. The bird is gum paste over rice krispie treats. I also put a little blue silhouette of a bird inside the cake.

Emperor Palpatine Whoopie Cushion Cake
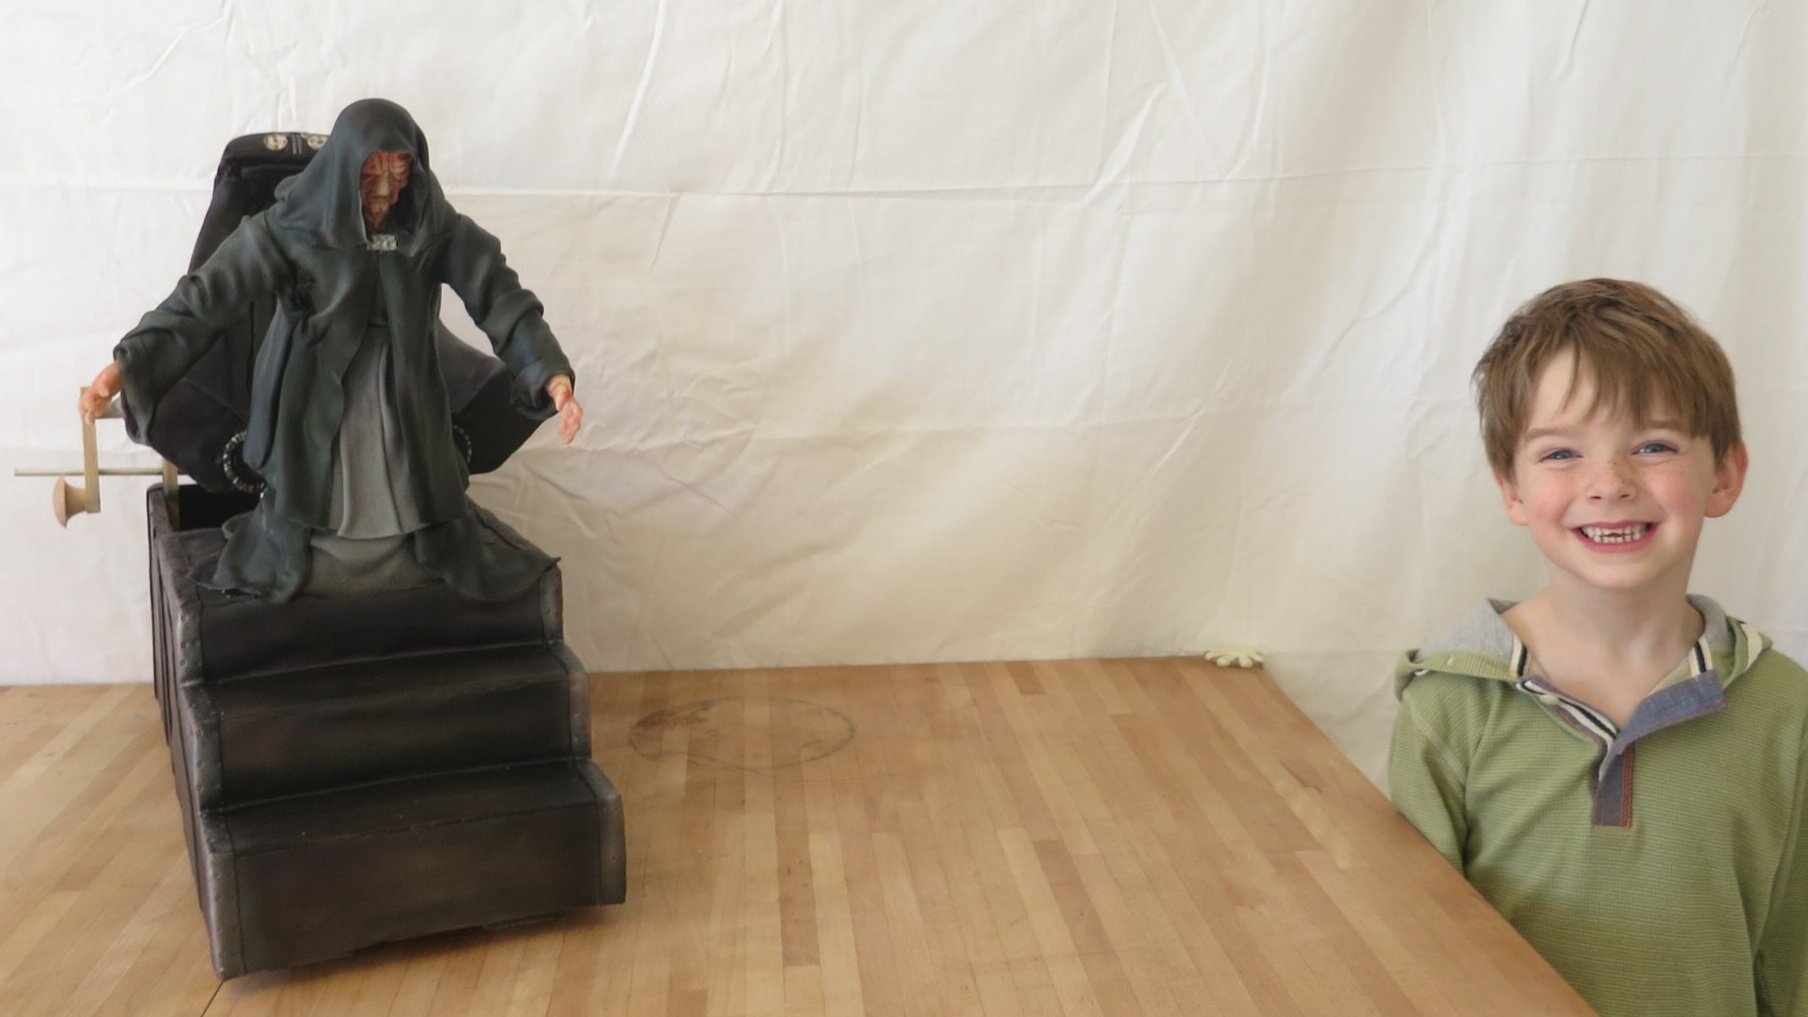
My niece and nephew and I play a game called “Emperor Palpatine Whoopie Cushion.” Essentially, the kids put imaginary whoopee cushions on a chair and then I, as Emperor Palpatine, sit on the chair, make a farting noise, and chase them around the room shouting about how I’m going to destroy them. So, for his fifth birthday, Sam requested an Emperor Palpatine whoopie cushion cake. Here is what I came up with.

My niece and nephew and I play a game called “Emperor Palpatine Whoopie Cushion.” I don’t remember the genesis of the game. Essentially, the kids put imaginary whoopee cushions on a chair and then I, as Emperor Palpatine, sit on the chair, make a farting noise, and chase them around the room shouting about how I’m going to destroy them.

So, for his fifth birthday, Sam requested an Emperor Palpatine whoopie cushion cake. Here is what I came up with. The steps, the chair, and the lower portion of Palpatine’s body are cake. The upper half of Palpatine is rice krispie treats. I used a little recording module from Radio Shack to record the sound, triggered by a button under the seat that was depressed when Palpatine sat down.
This may be the silliest cake I’ve ever made (which is a pretty high bar), but it was also perhaps the most entertaining.
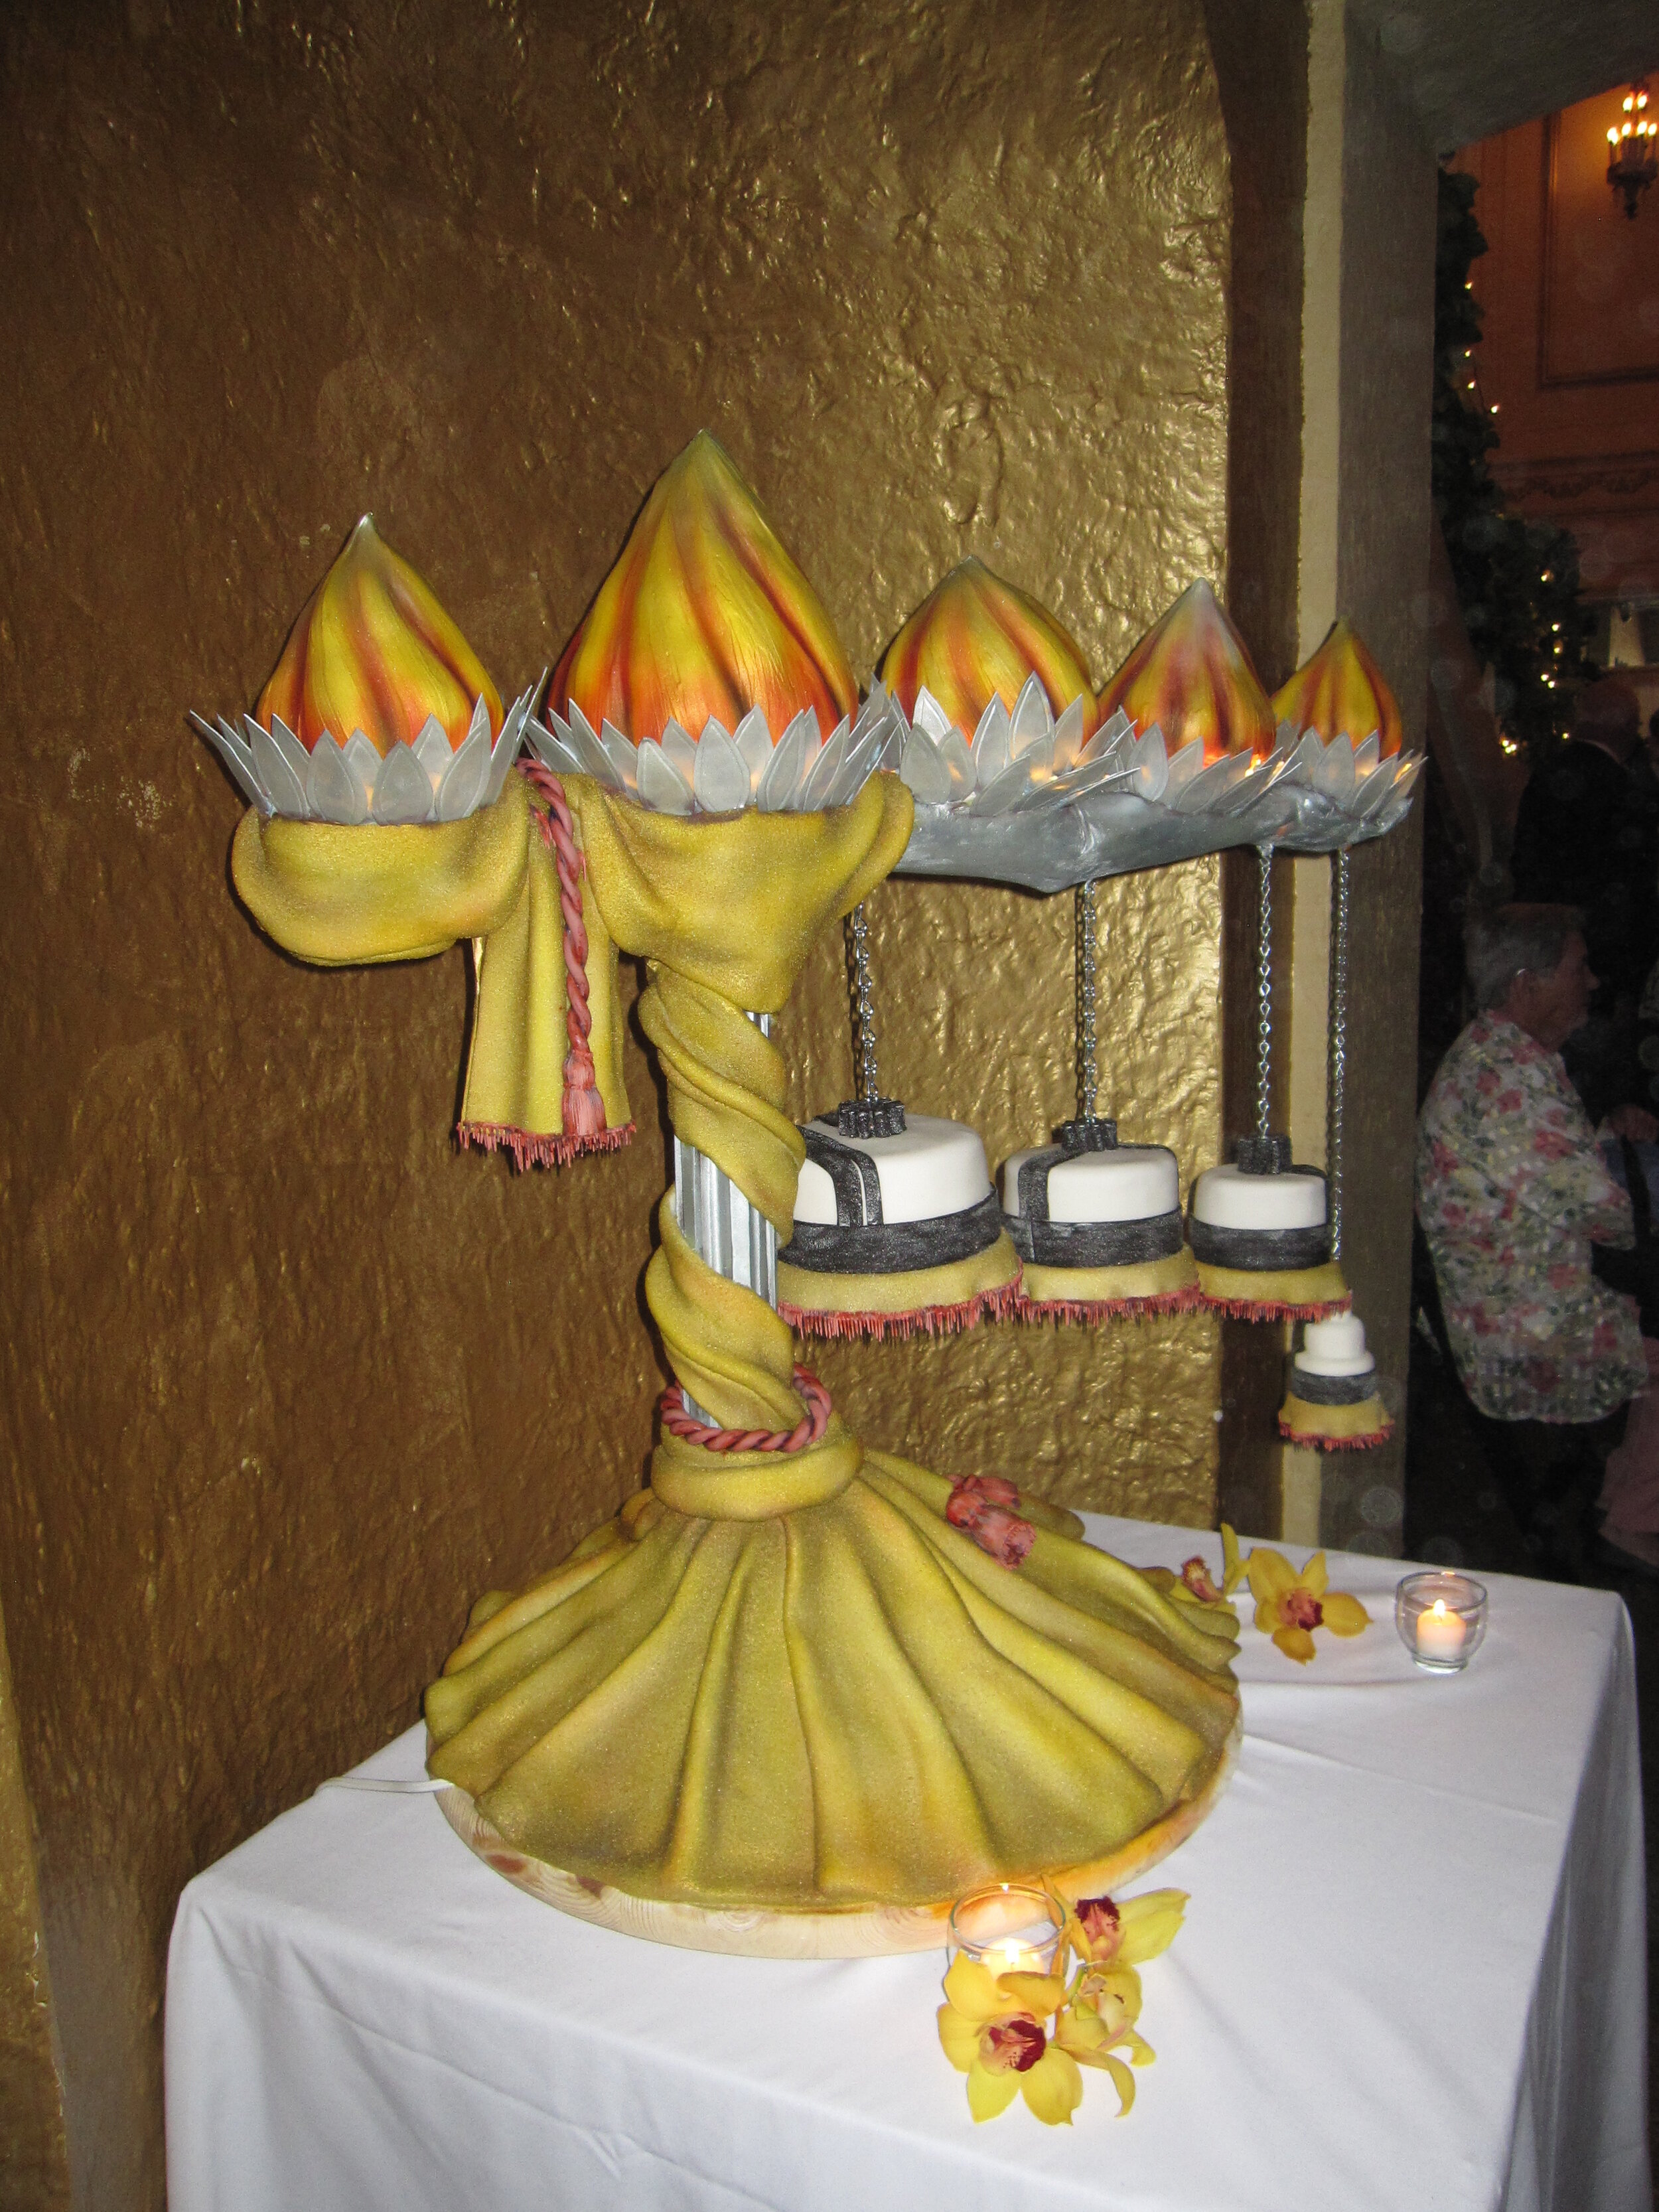
Torchiere Wedding Cake
My friends were getting married at the Orpheum, which is a beautiful old movie theater from the 20s, so I was thinking art deco; I was thinking stage lighting; I was thinking theater curtains; I was thinking dusty elegance and timeless romance.


So far, two couples have had the courage and/or the lunacy to trust me to design and make their wedding cakes. The first was the Seasons of Love Cake, which my sister and I made back in 2004. This is my second wedding cake.
My friends were getting married at the Orpheum, which is a beautiful old movie theater from the 20s, so I was thinking art deco; I was thinking stage lighting; I was thinking theater curtains; I was thinking dusty elegance and timeless romance.
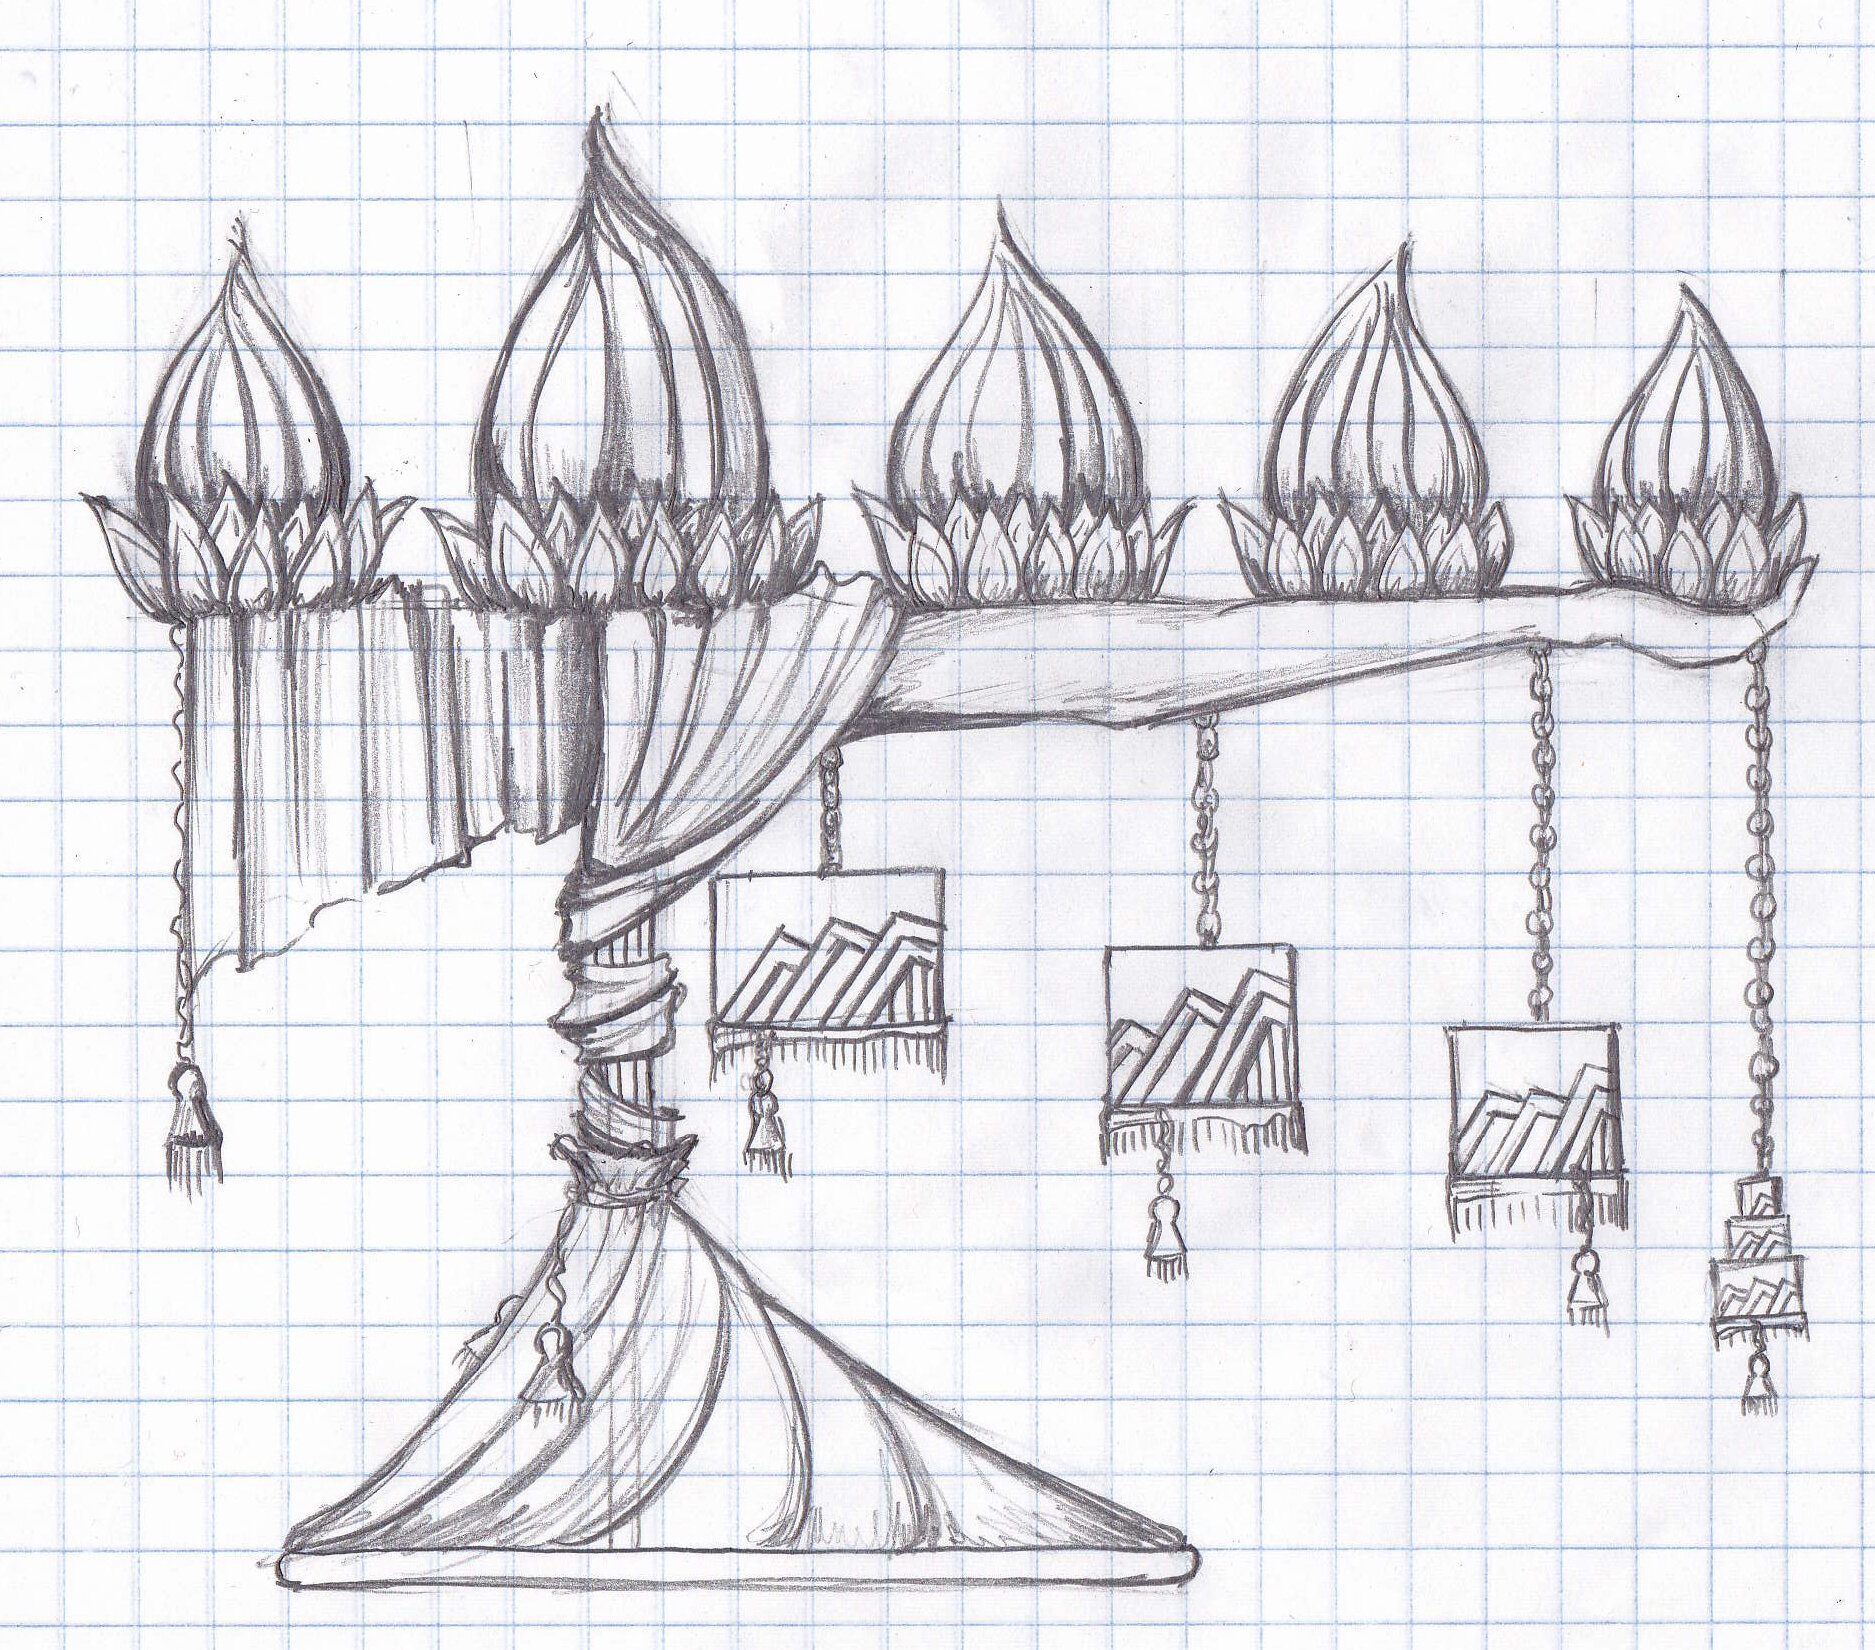
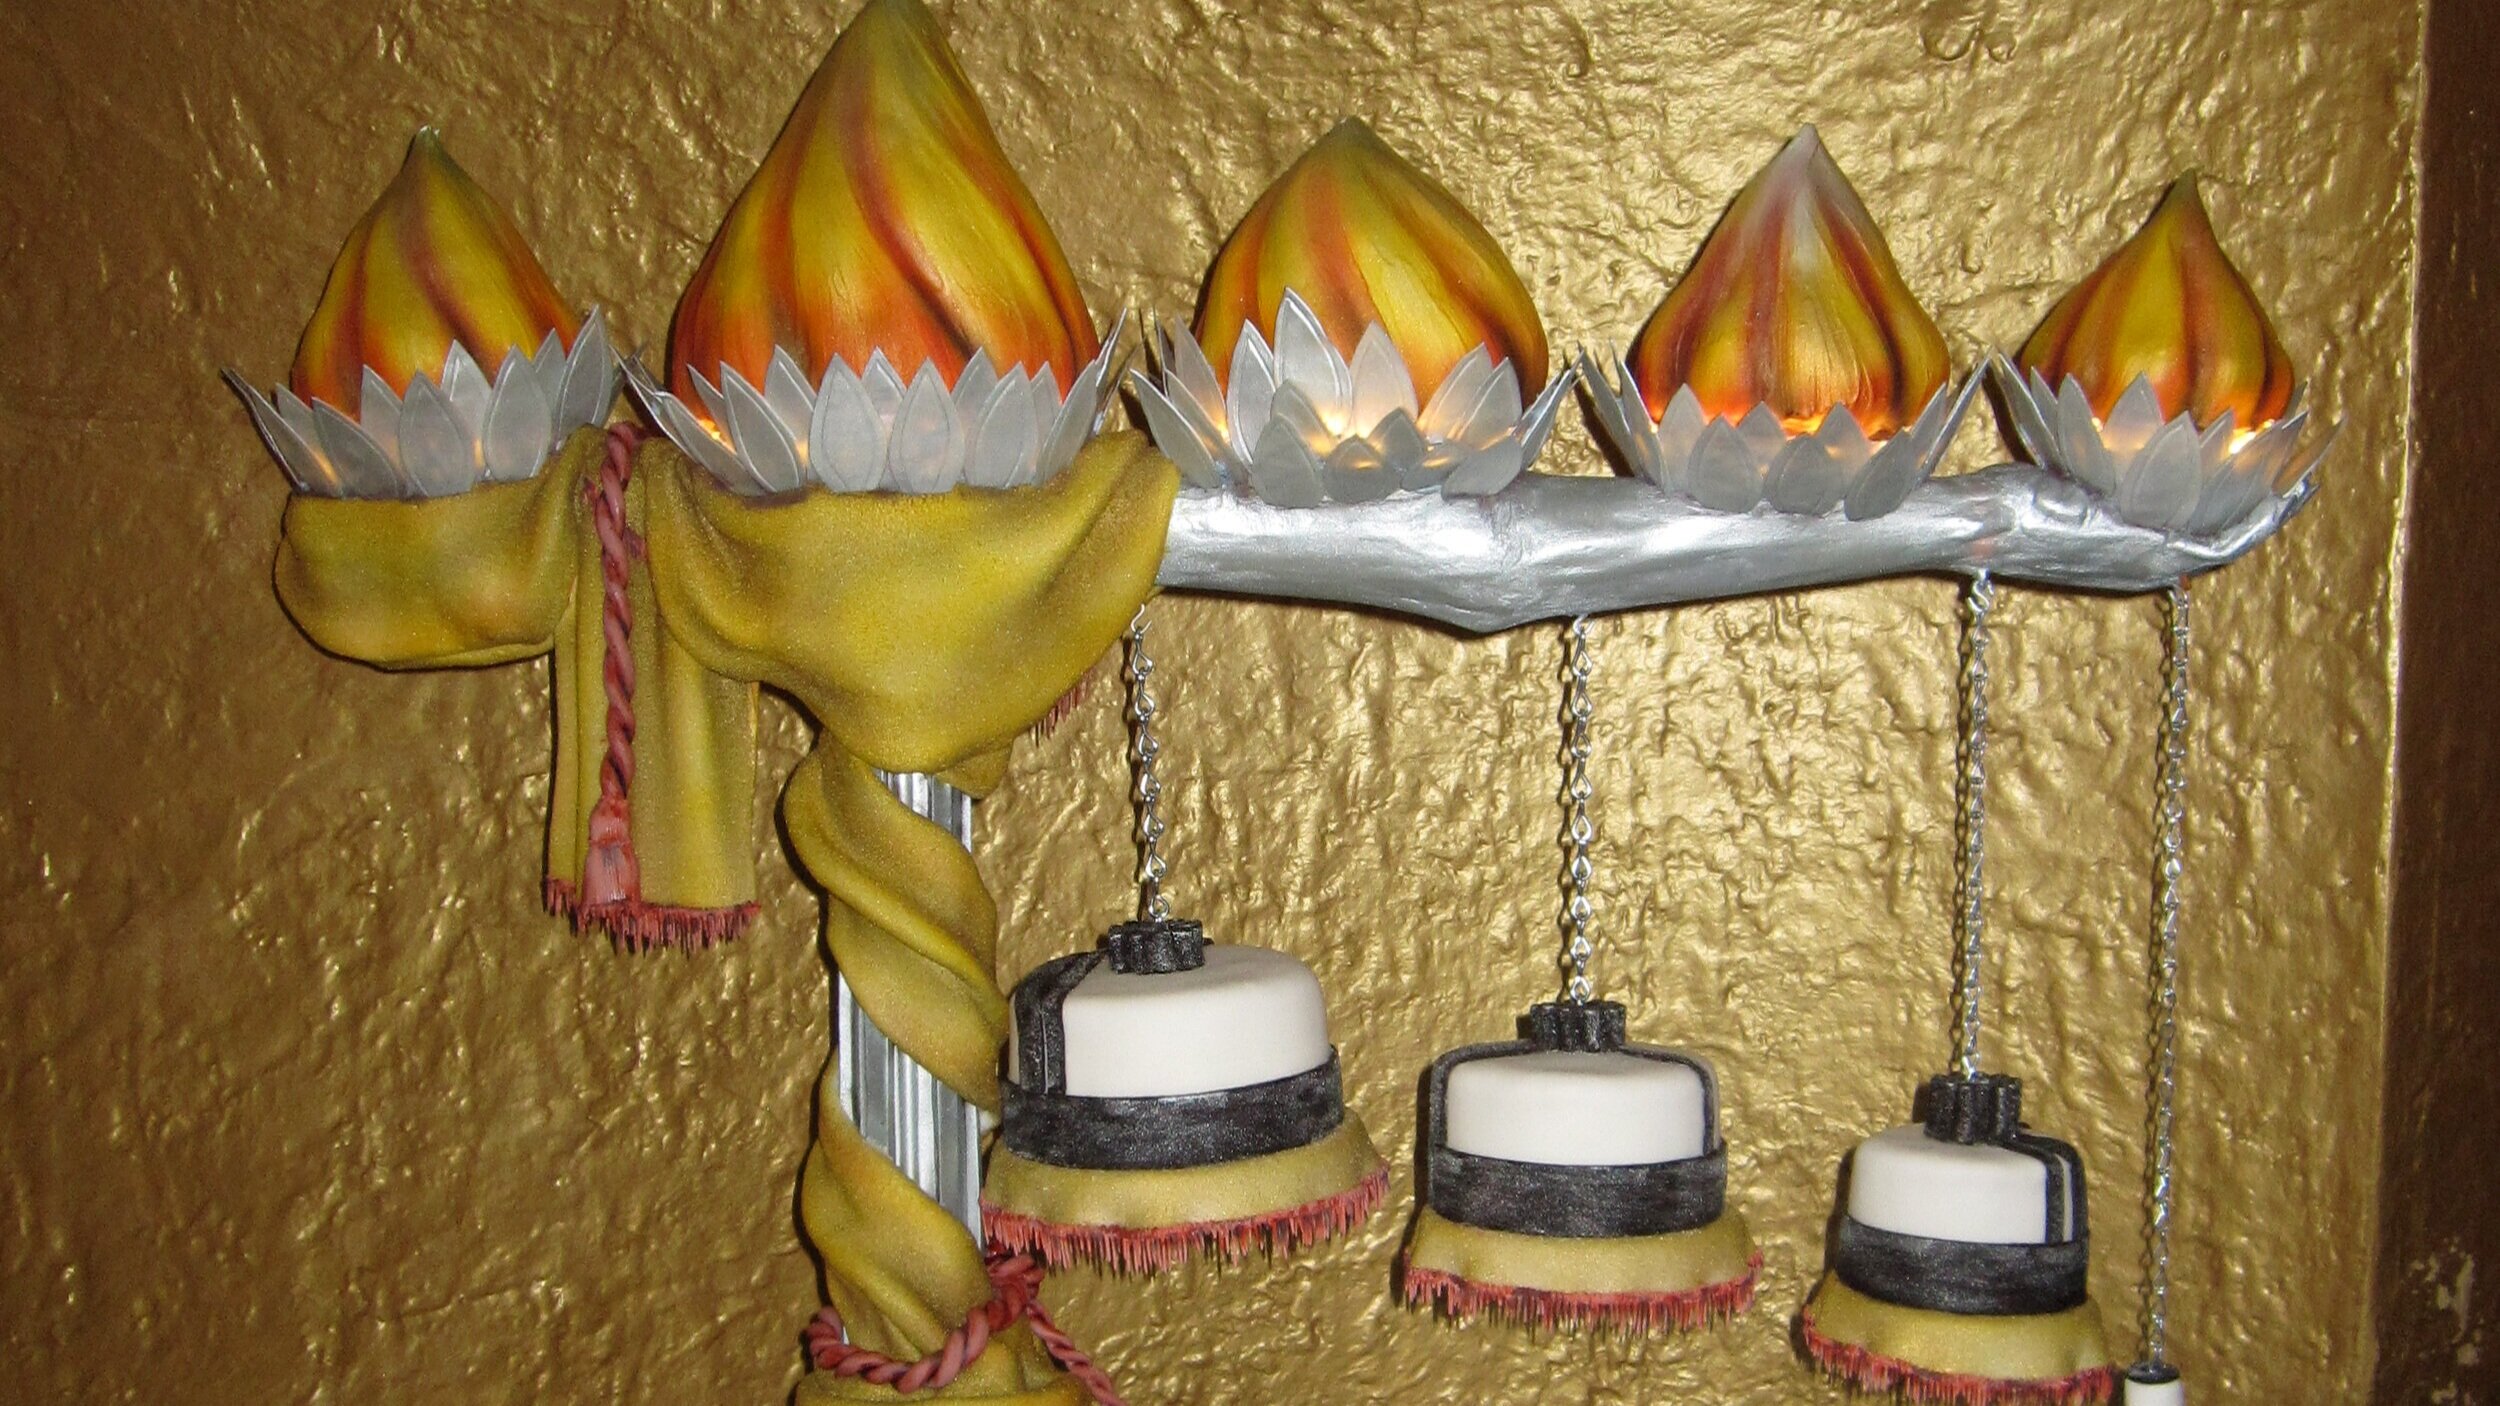
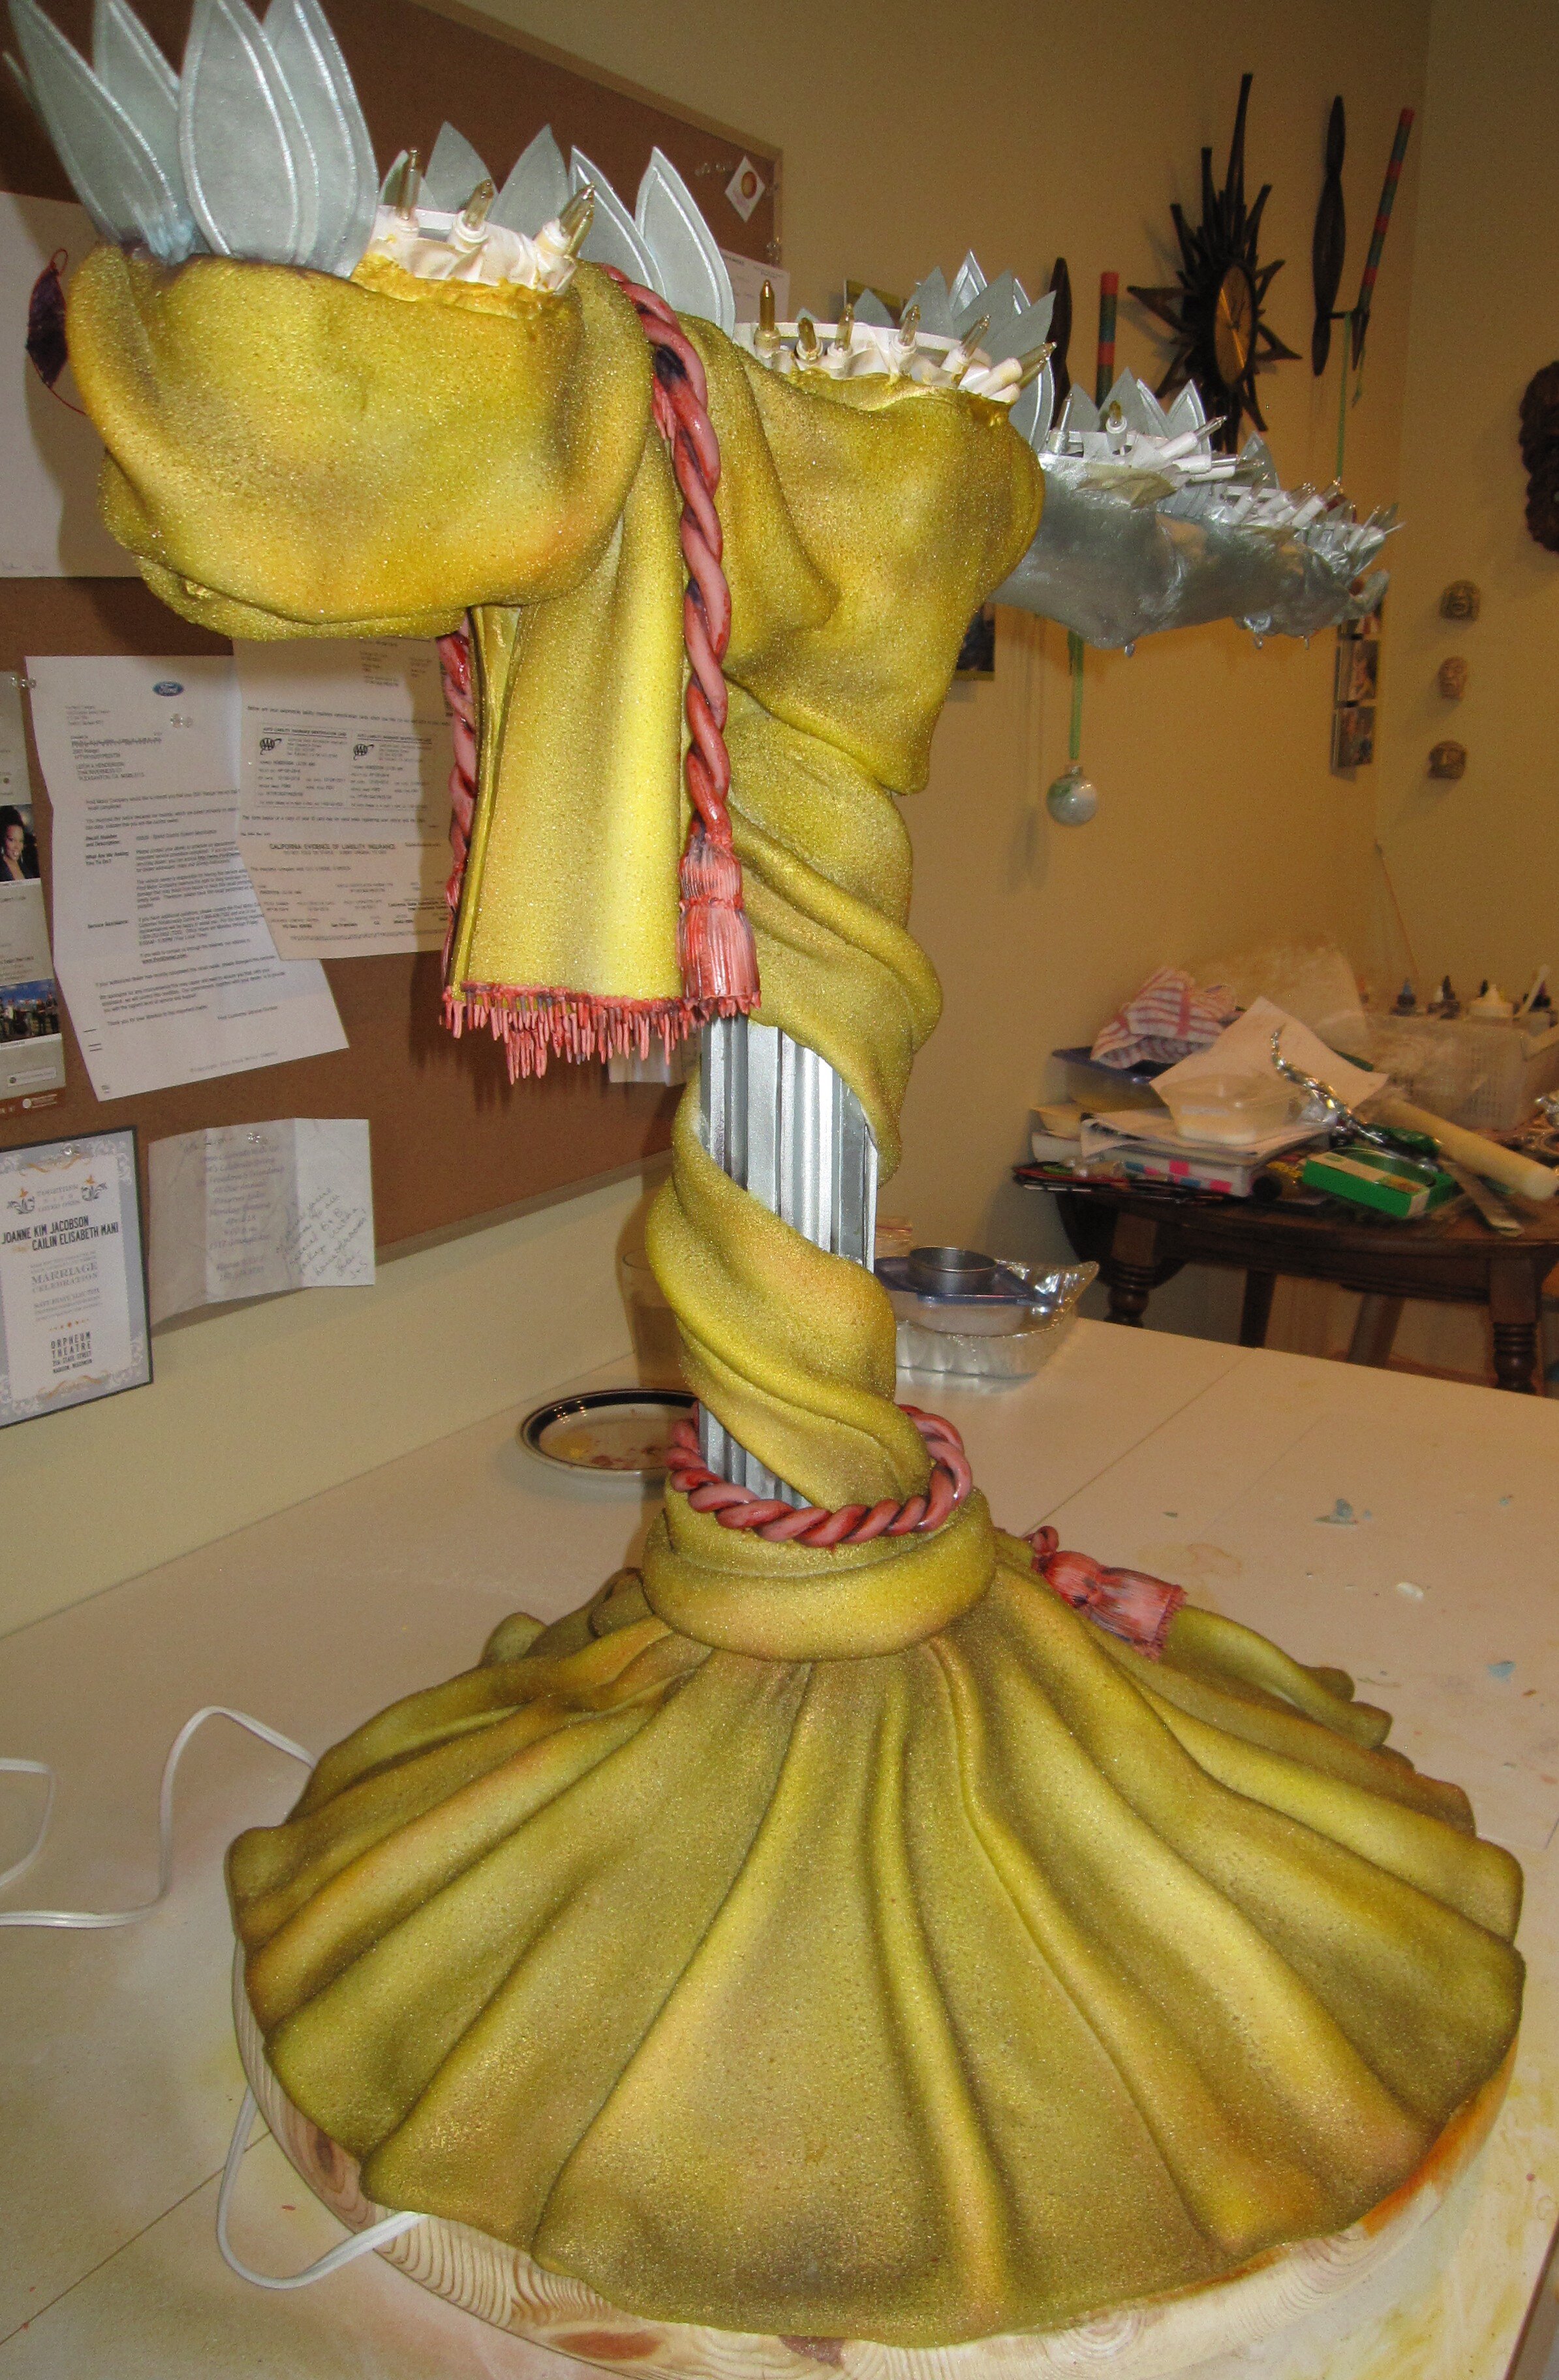
What I came up with was this bizarre art deco torchiere cake. Both this and the Seasons of Love Cake had aspects of balance and defying gravity about them. I didn’t really do this on purpose, but maybe it tells you something about how I see marriage – delicate? precarious? buoyant? at risk of collapse? I’m not sure. I’m also not sure why it’s in the shape of a human arm, except that it let me hang the little tiny wedding cake from the wedding ring finger. Apparently I just like making cakes in human form, whether appropriate to the occasion or not.
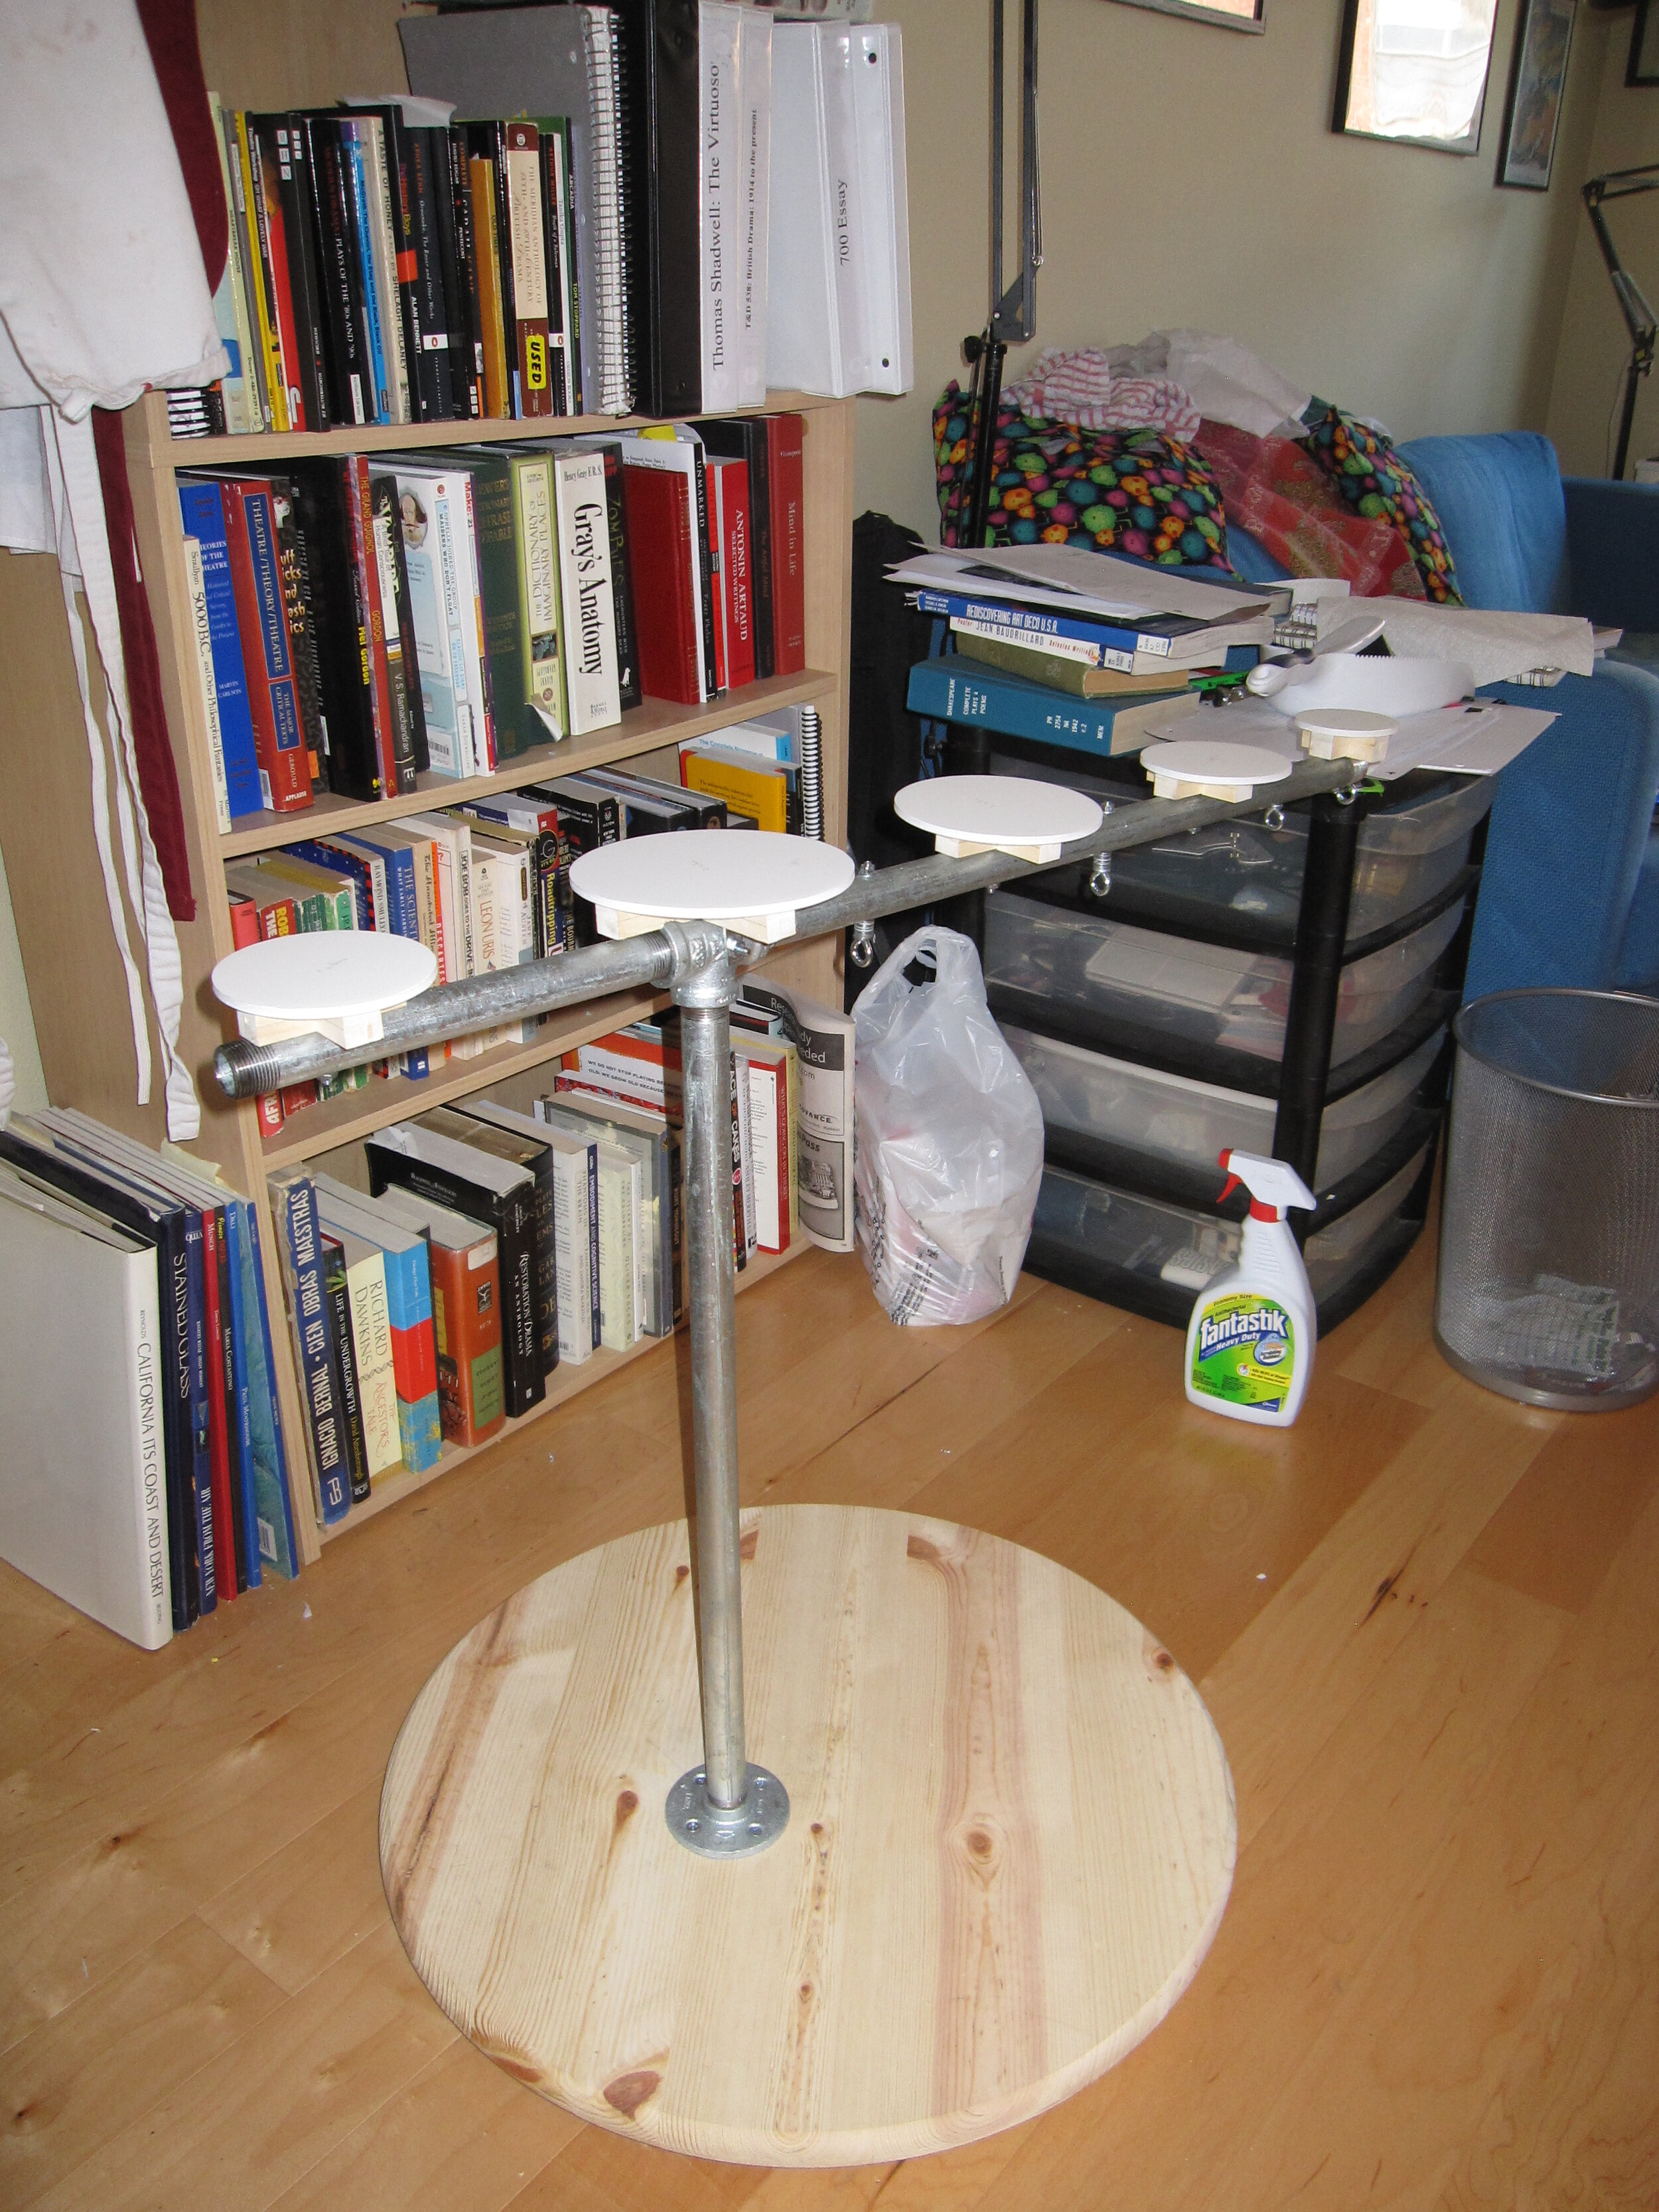
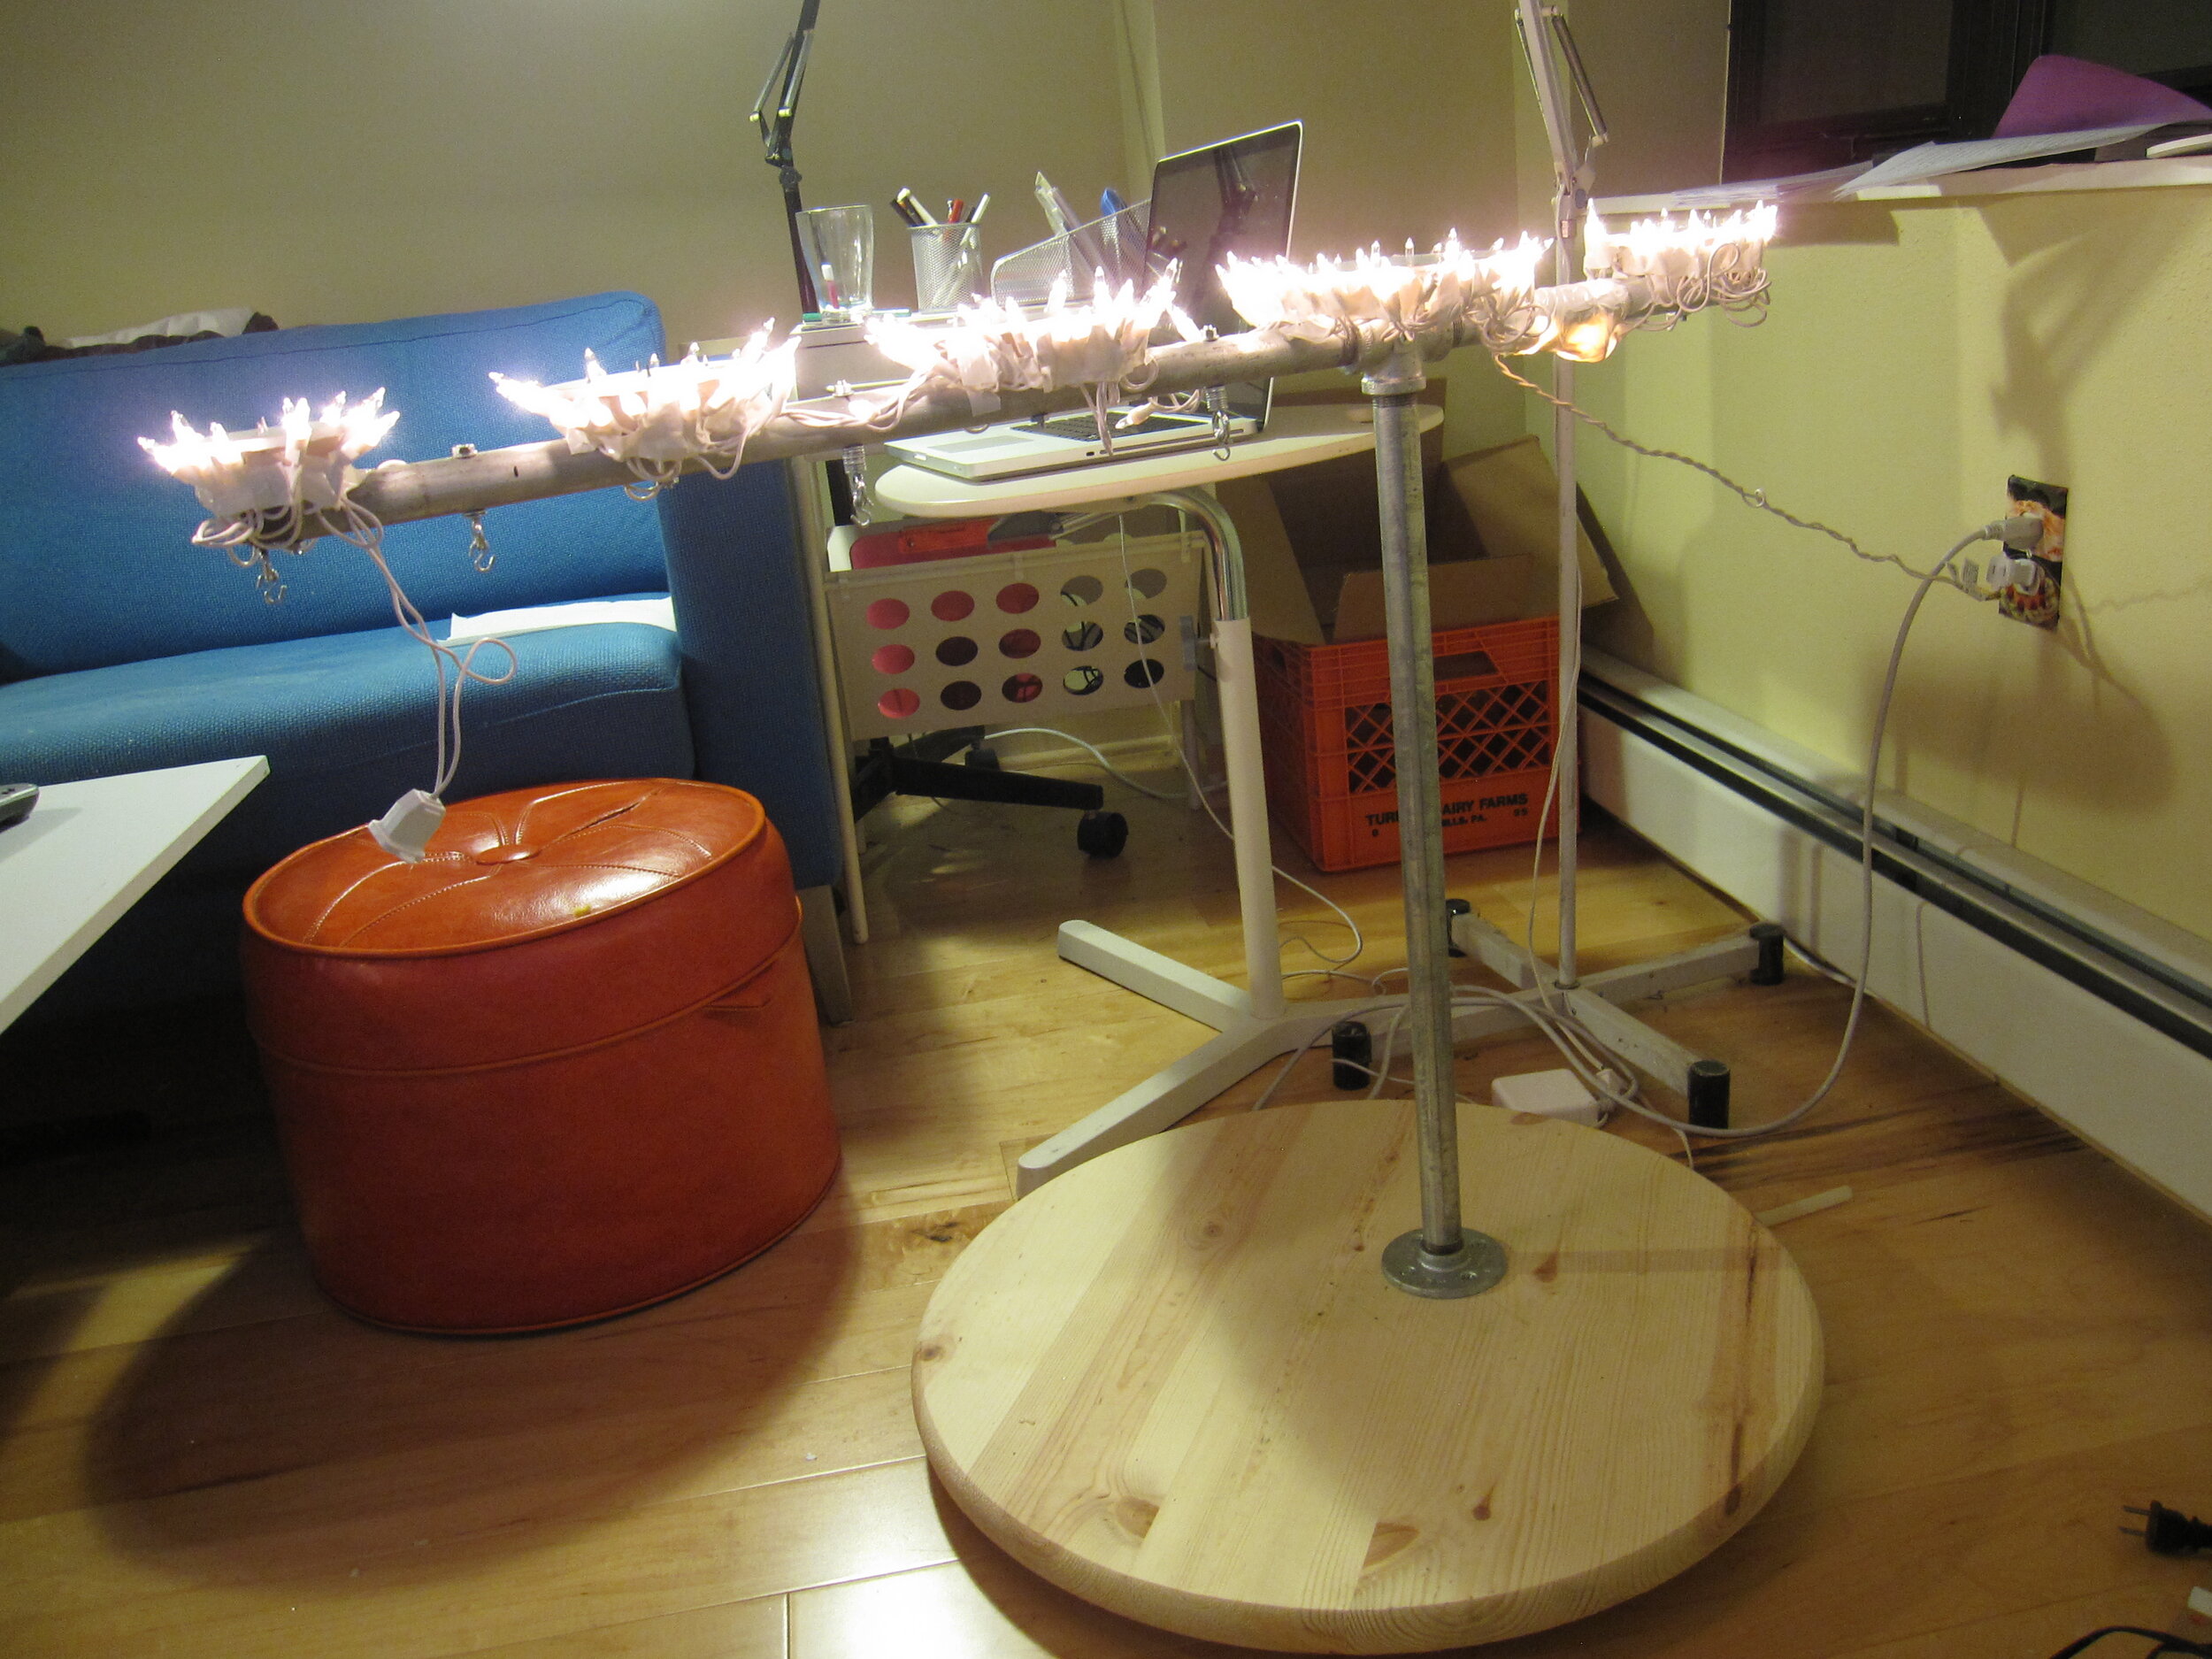
To make the arm strong enough to hold the cake, I started with ¾” steel pipes bolted to a 24” diameter solid wood base. I bolted little wood and foam core bases to the steel pipe to support the flame cakes and installed eyebolts to support the hanging cakes. To make the torchiere light up, I ran a strand of Christmas lights around all the little bases. In retrospect, it would have been better if I had used smaller lights, as I did have some difficulty later on masking the lights with the gum paste leaves.
I thought about making the arm out of white modeling chocolate, because I thought that would be the easiest to sculpt, but I was afraid that the silver airbrush color wouldn’t show up as well on that as it would on some other materials. Then I thought about making it out of fondant, but I thought that would be too heavy to stay up on the pipe. So I decided to form the shape of the arm out of rice cereal treats and then cover it and put in the details with royal icing.
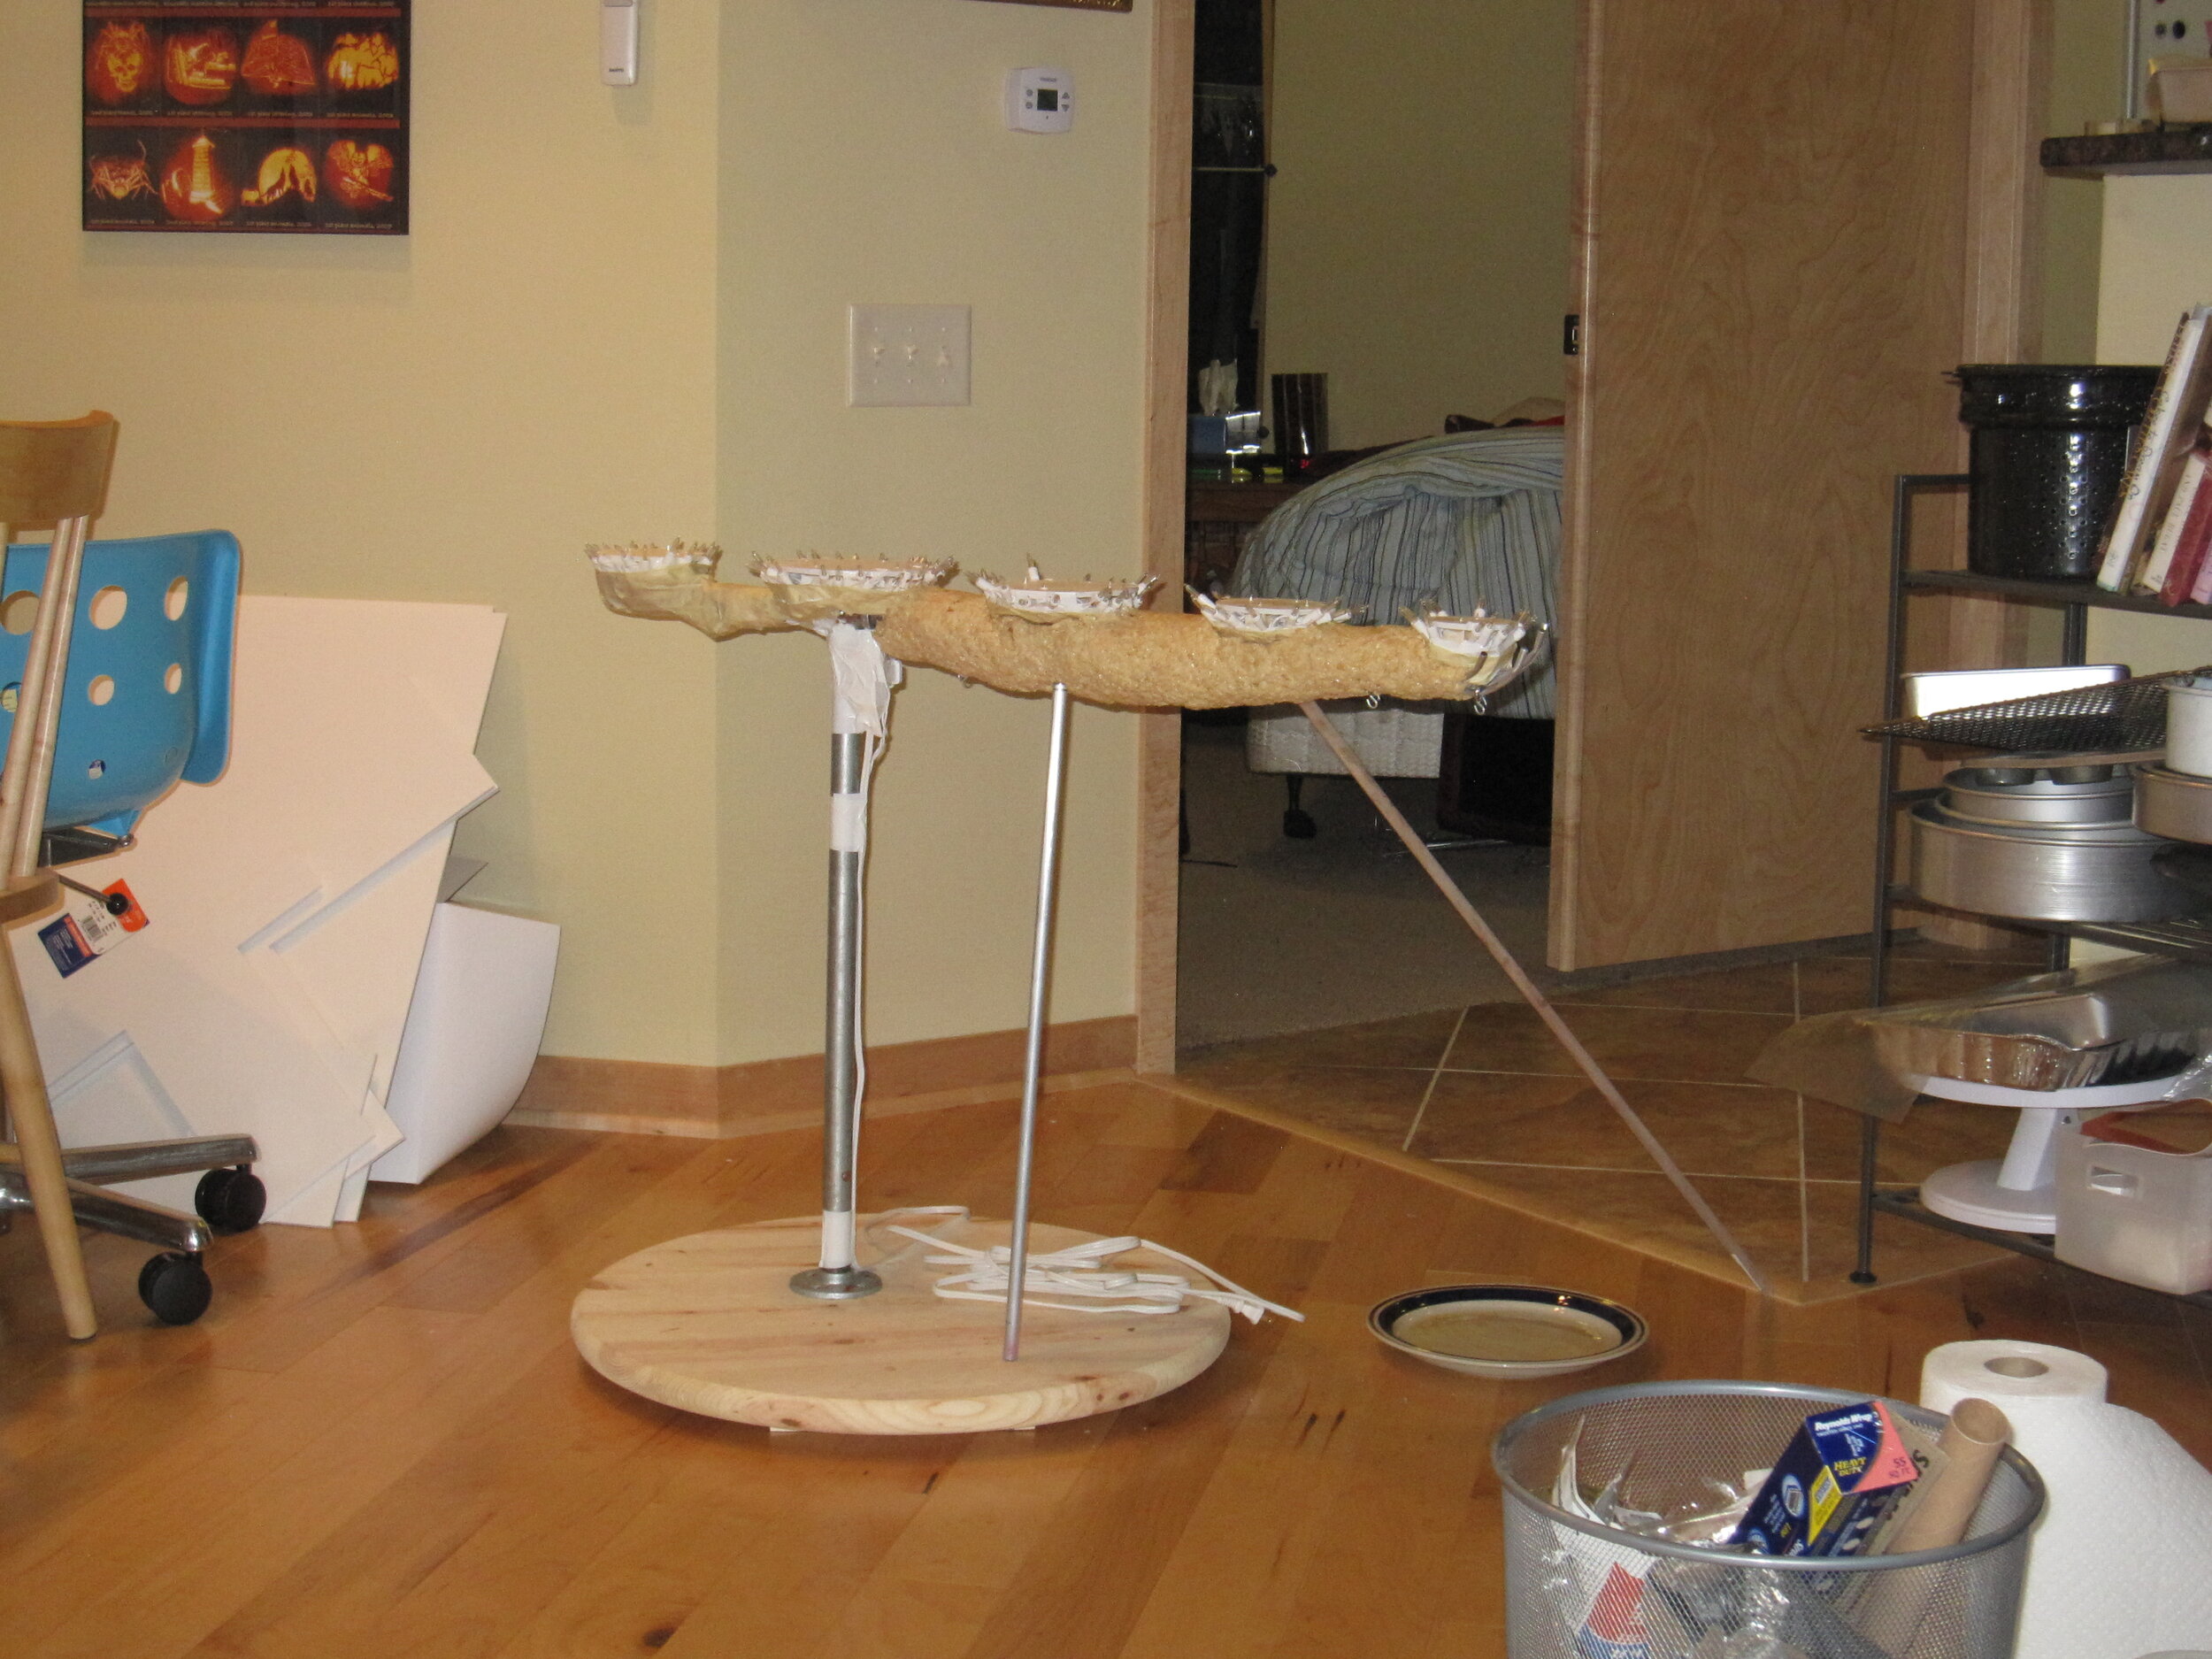
Rice cereal treats always wind up being more difficult to work with than I expect them to be. I had a lot of trouble getting them to stay in place, to the point where I briefly feared that I might have to resort to a non-edible material instead. Eventually, though, I figured out how to hold them in place with aluminum foil until they firmed up. Then I carved them down to shape and slapped on a coat of royal icing. In retrospect, I would have been better served by a more carefully applied coat of royal icing.
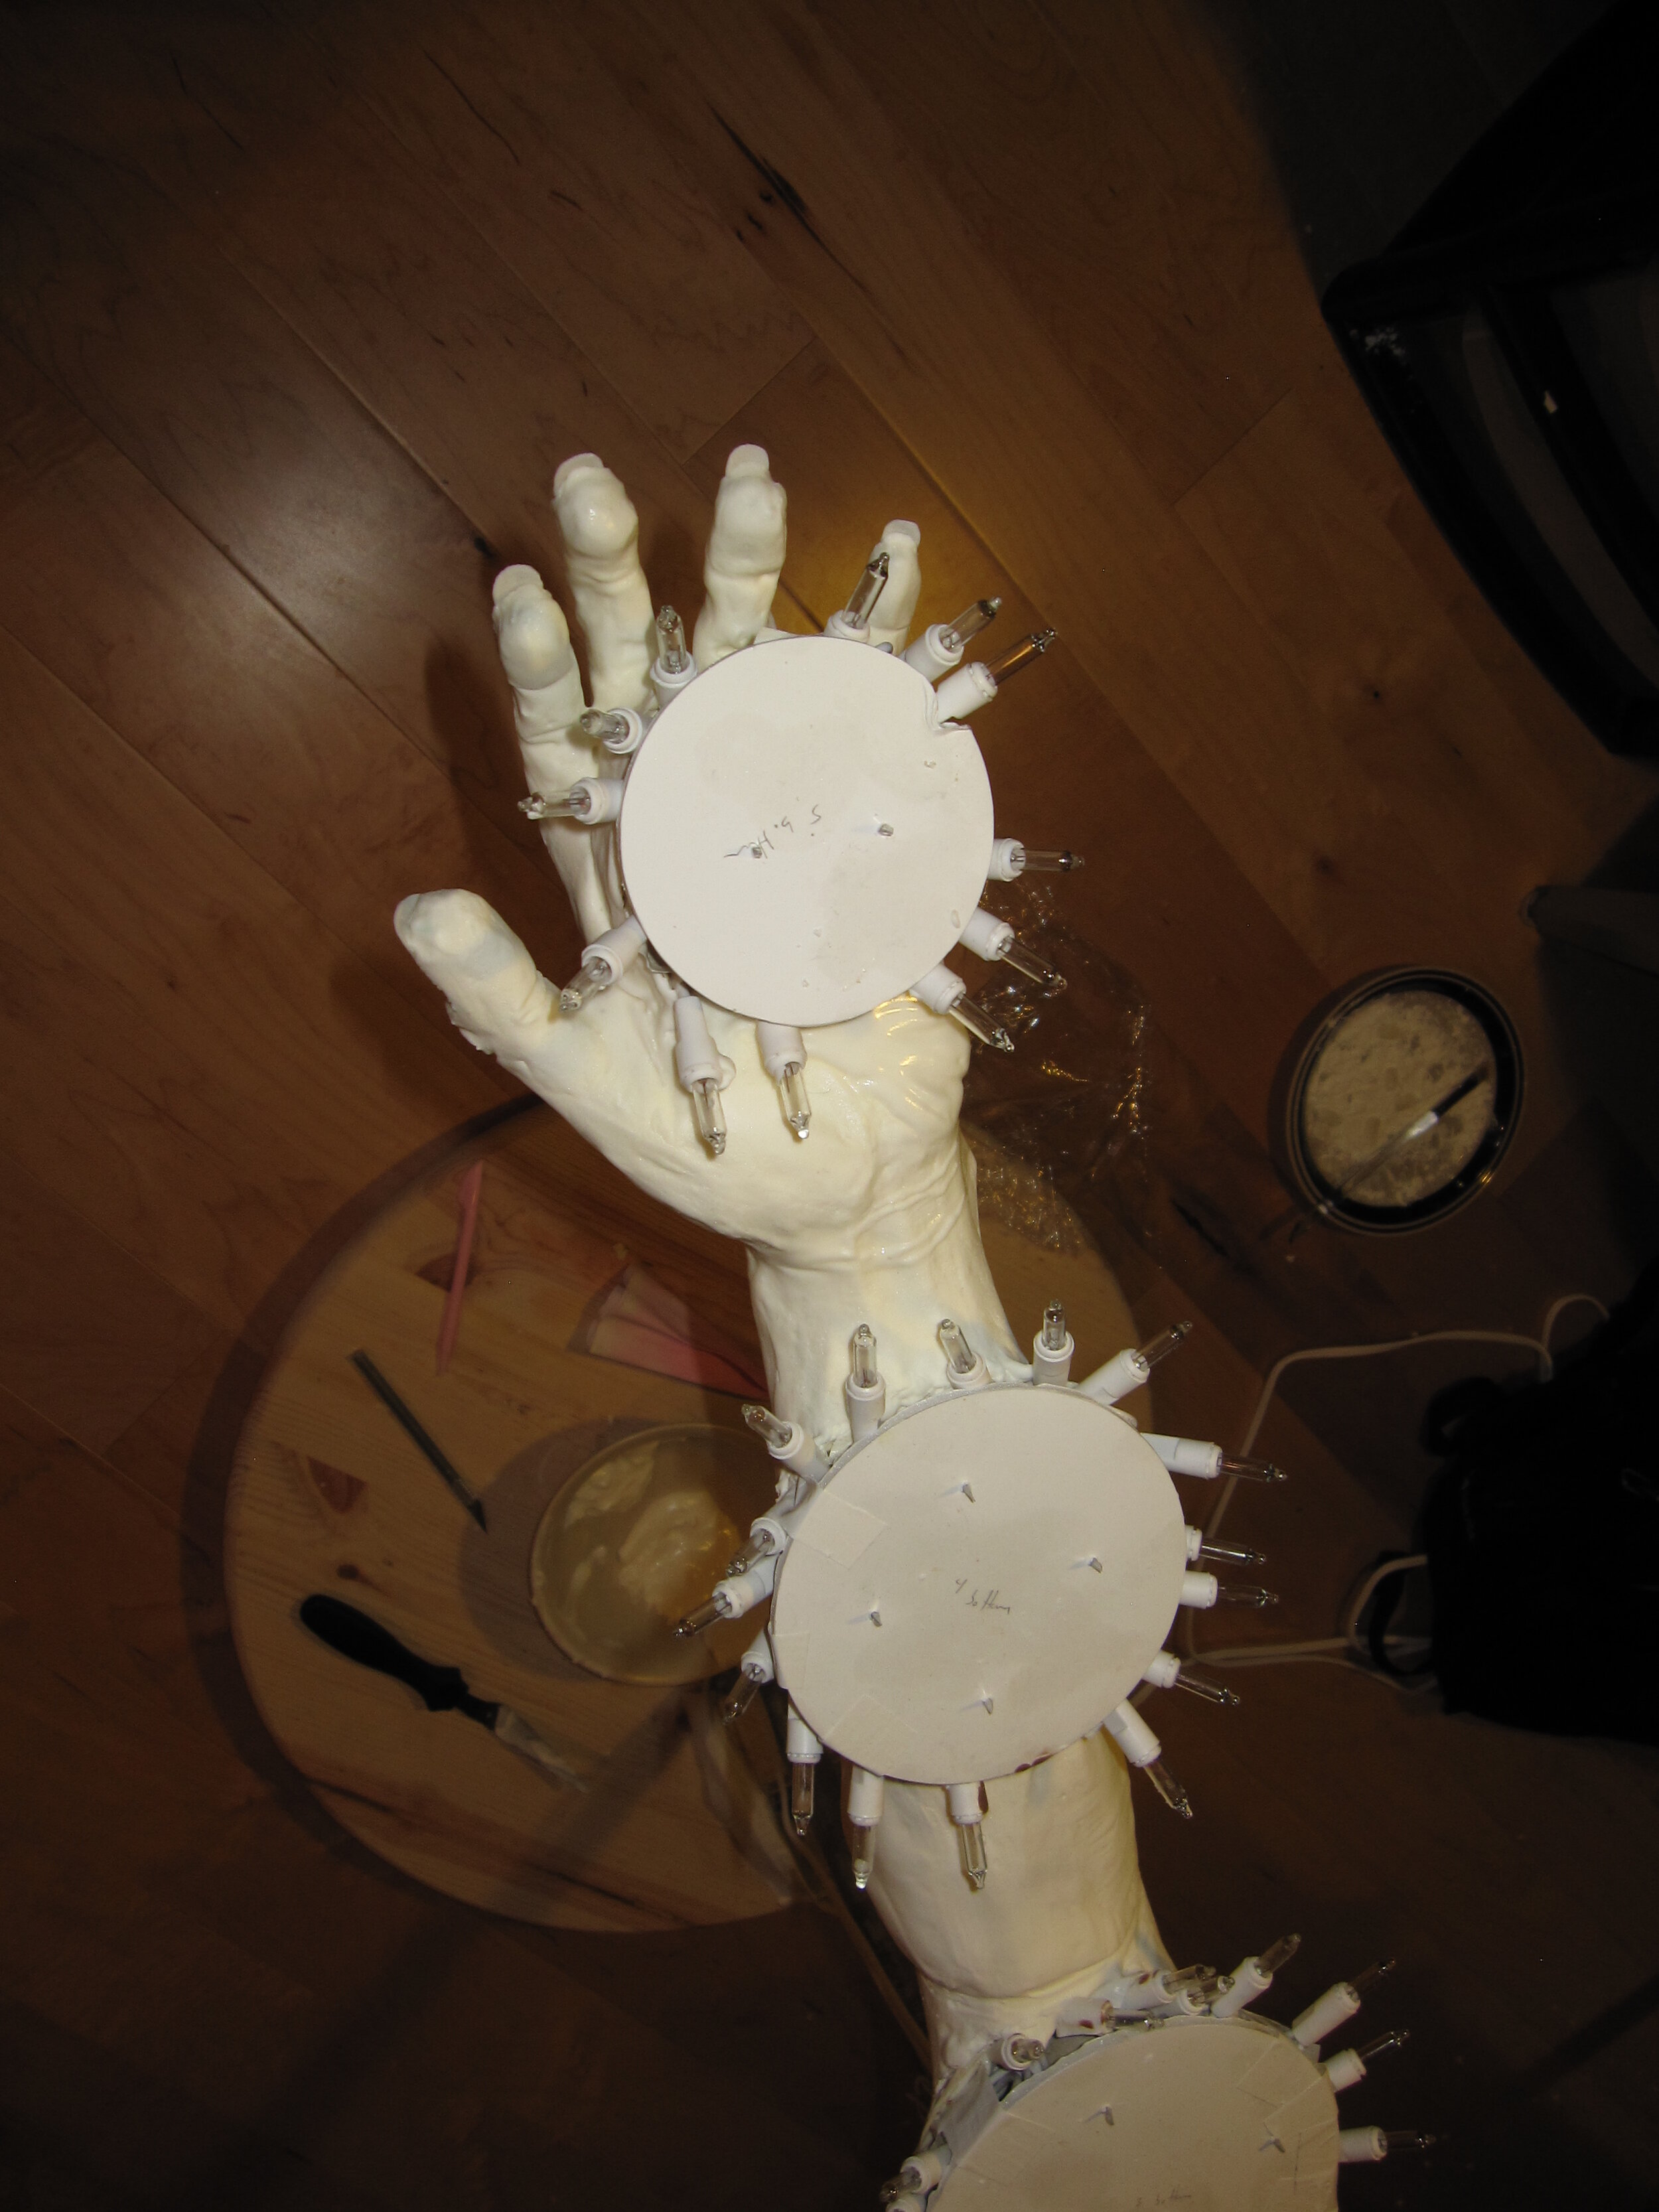
Once that coat of royal icing dried, I sanded the rough edges, a process that would have been much easier if I had given more attention to the first coat. Then I applied a second coat, this time carefully smoothing it with a damp paintbrush. I found that I needed to install some small aluminum tubing to get the fingers to hold their shapes. I also sanded this coat of royal icing with a fine grit sand paper after it dried. I then went in one more time to create the details of the bone structure and skin folds. I made the fingernails out of gum paste, a technique that worked well for me on the Killer Rats Cake. This time I had a little trouble because the royal icing had dried too much to let me really sink the nails into the nail beds, so I had to add some more icing over the top of the nails to marry them to the fingers. As a result, the fingertips wound up perhaps a bit bulkier than ideal. Apparently the arm was wearing acrylic nails.
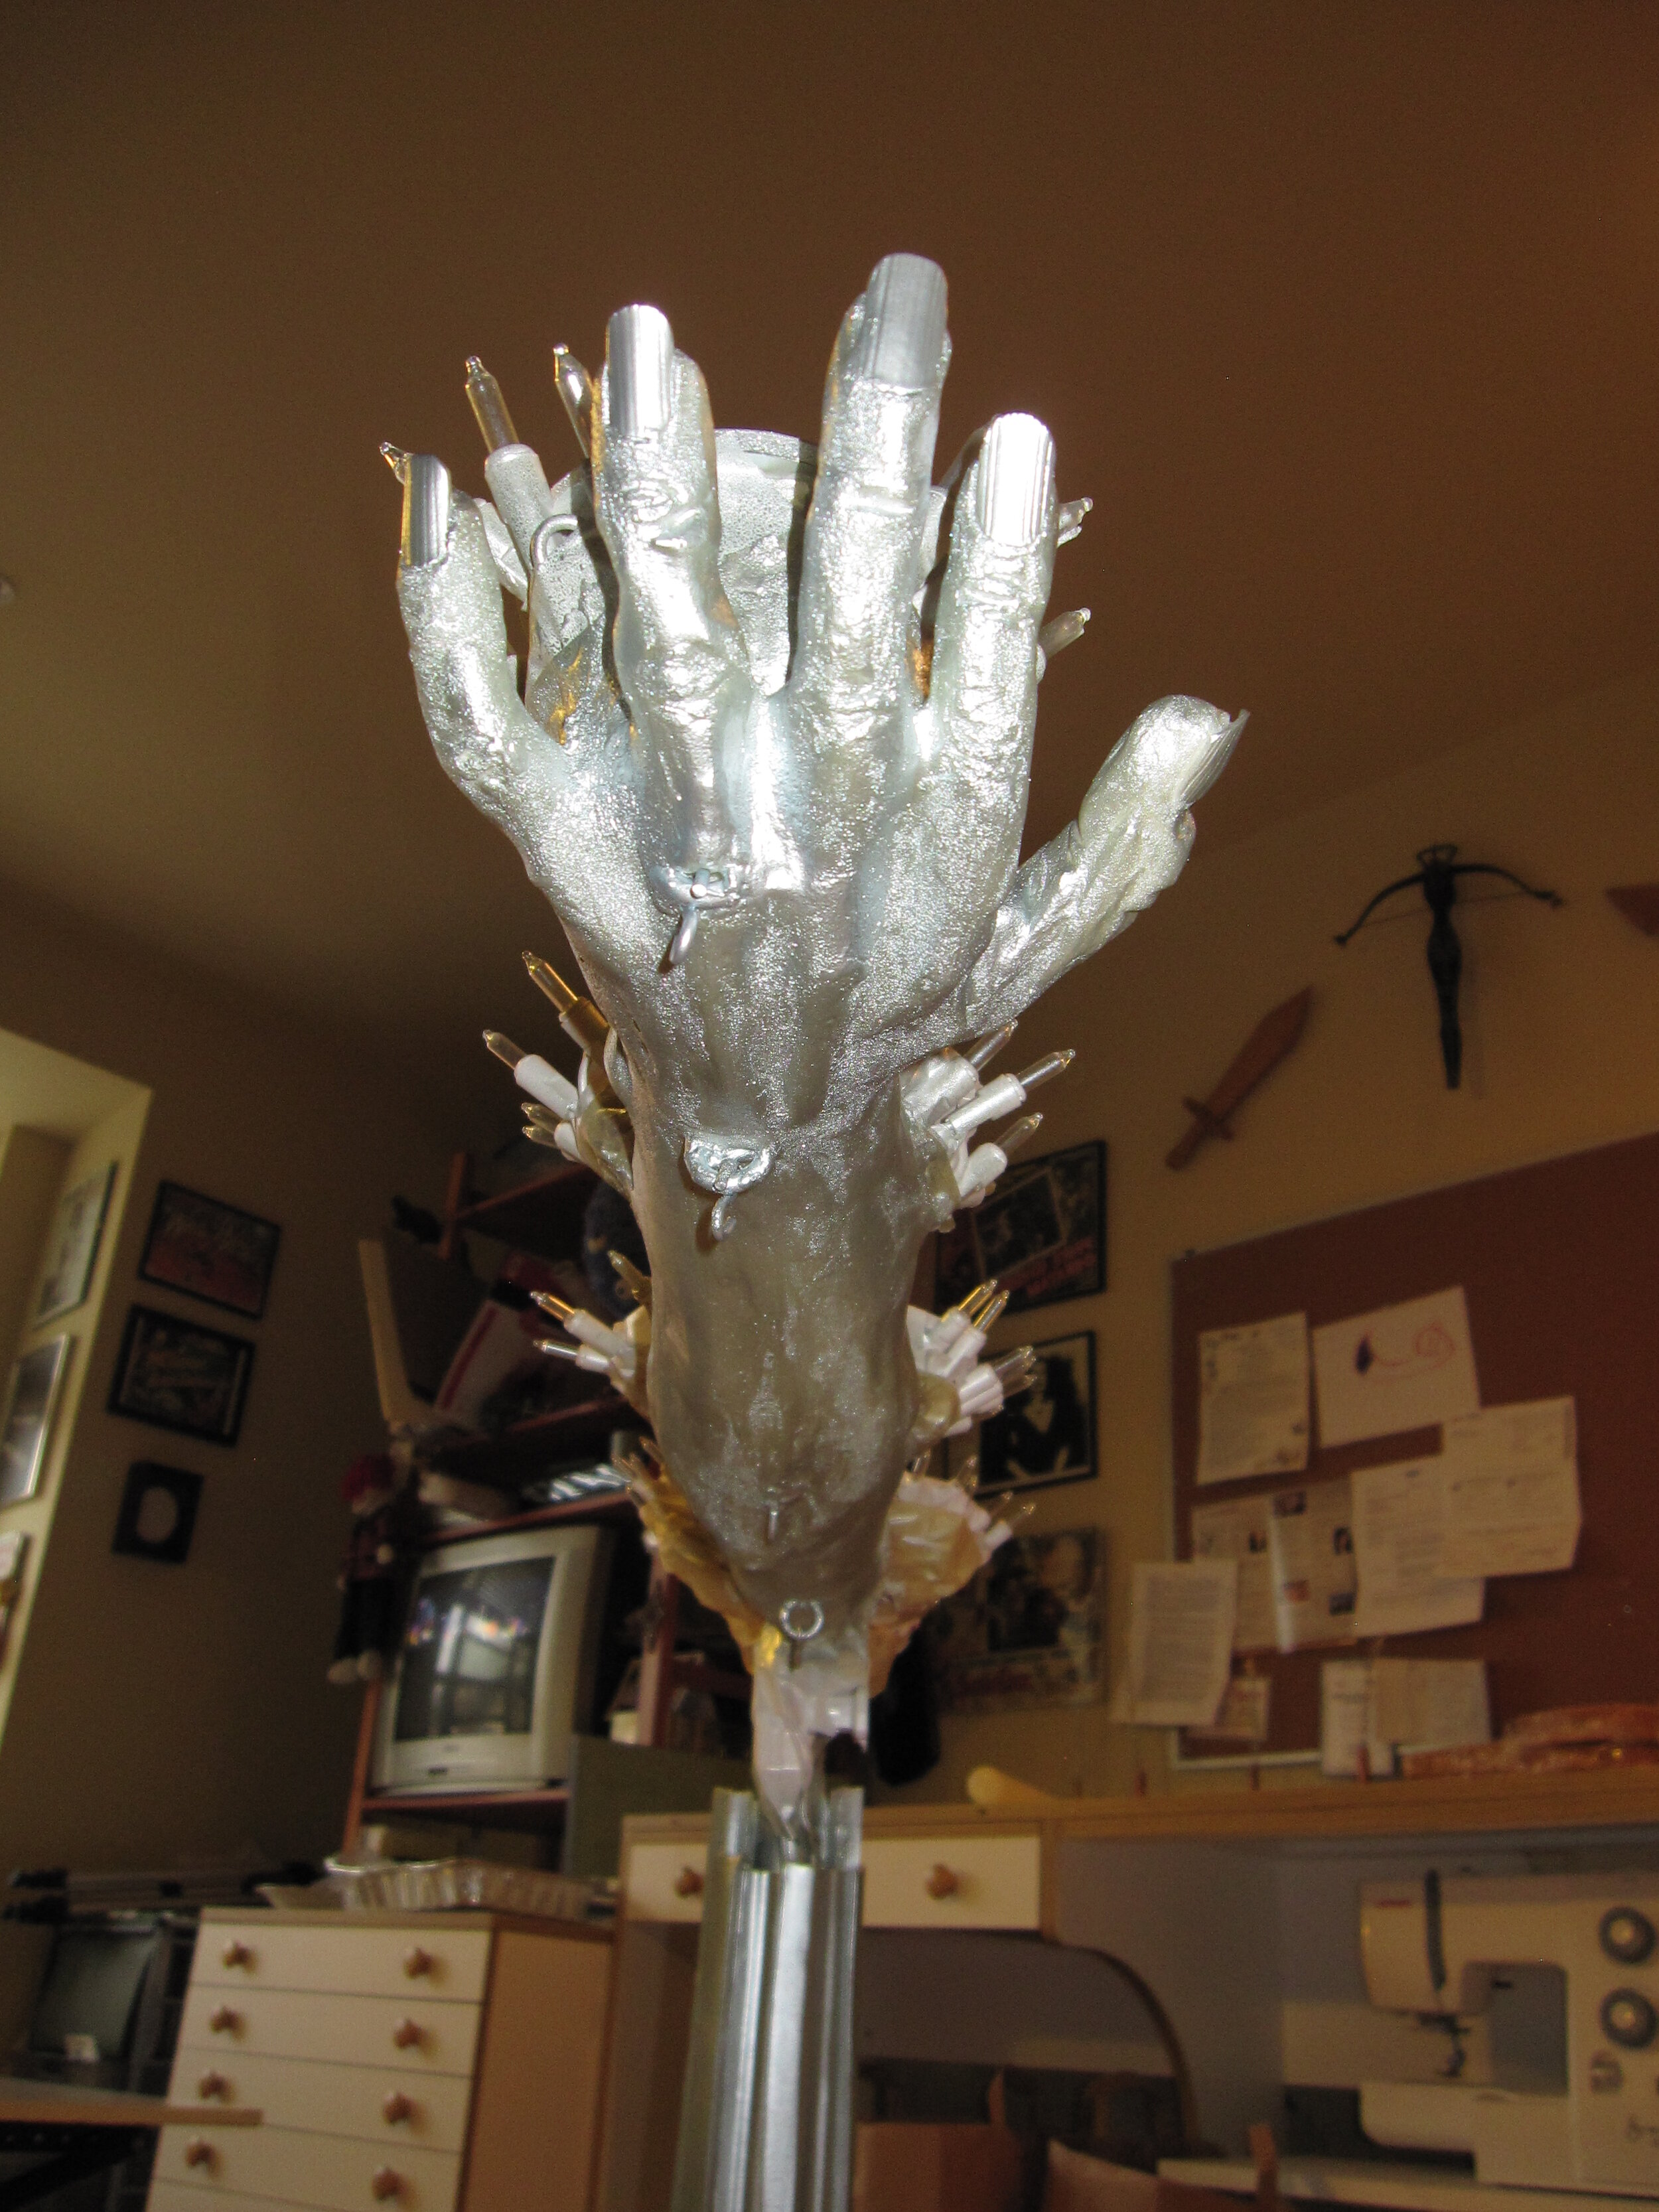
To mask the central support pipe, I used some pieces of foam core covered with fondant to create a fluted hexagonal column. I also made some stylized art deco leaves out of gum paste to cover the lights at the bases of the flame cakes. Then I got busy with the airbrush spraying the arm, the column, and the leaves silver. I also added a little gum paste wedding ring to the ring finger that would support the hanging mini wedding cake.

The next step was to make the fondant curtains. I had expected this to be a challenge, and I was right. Unsupported fondant drapery is difficult under any circumstances because it’s hard to drape the heavy fondant realistically without the weight of it ripping itself apart. This fondant drapery was especially tricky because I wanted it to have the worn velour texture of old theater curtains. To accomplish this, after I rolled out the fondant, I moistened the surface and then coated it with an even layer of granulated sugar. So not only was I worried about getting a natural drape, I also had to be careful not to damage the sugar texture. Because I was applying the drapery to the arm and the column that had already been airbrushed, there was also the risk that I would mar the paint job if I moved the fondant drapery around too much. In the end, it worked out pretty well, though, and I was able to wrap some tin foil around to hold the fondant in place until it set in place. I also draped some fondant over the foam core bases that I had made for the four hanging cakes.
Another problem with my sugar fabric texture technique is that it has a tendency to get sugar everywhere. So from this point forward, my apartment was covered with a fine layer of stickiness. My good friend Angie came to stay with me for a few days for the wedding and she made a valiant effort to keep the mess under control, but I still had to loan my slippers to my other friend Jenn when she came over to visit so that her stockings wouldn’t get covered with sugar.

With the torchiere structure in place, it was time to bake the cake. It needed to serve about 150 people, so this was the biggest cake I have made thus far. I actually rather dramatically overbought on ingredients because I thought that the cake recipe I was using made only six cups of batter when, in fact, it made ten cups of batter, so I didn’t have to make nearly as many batches I thought I would have to make. I believe that in the end I made 11 batches instead of the 16 I had initially anticipated. It’s perhaps just as well that I underestimated the yield of the recipe, as I also underestimated the number of eggs that it takes to make up a cup of egg whites. I bought eggs thinking that it would take 6 eggs per cup, when it actually took 8 eggs per cup, so in this case my miscalculations almost cancelled each other out and I had about the right number of eggs.
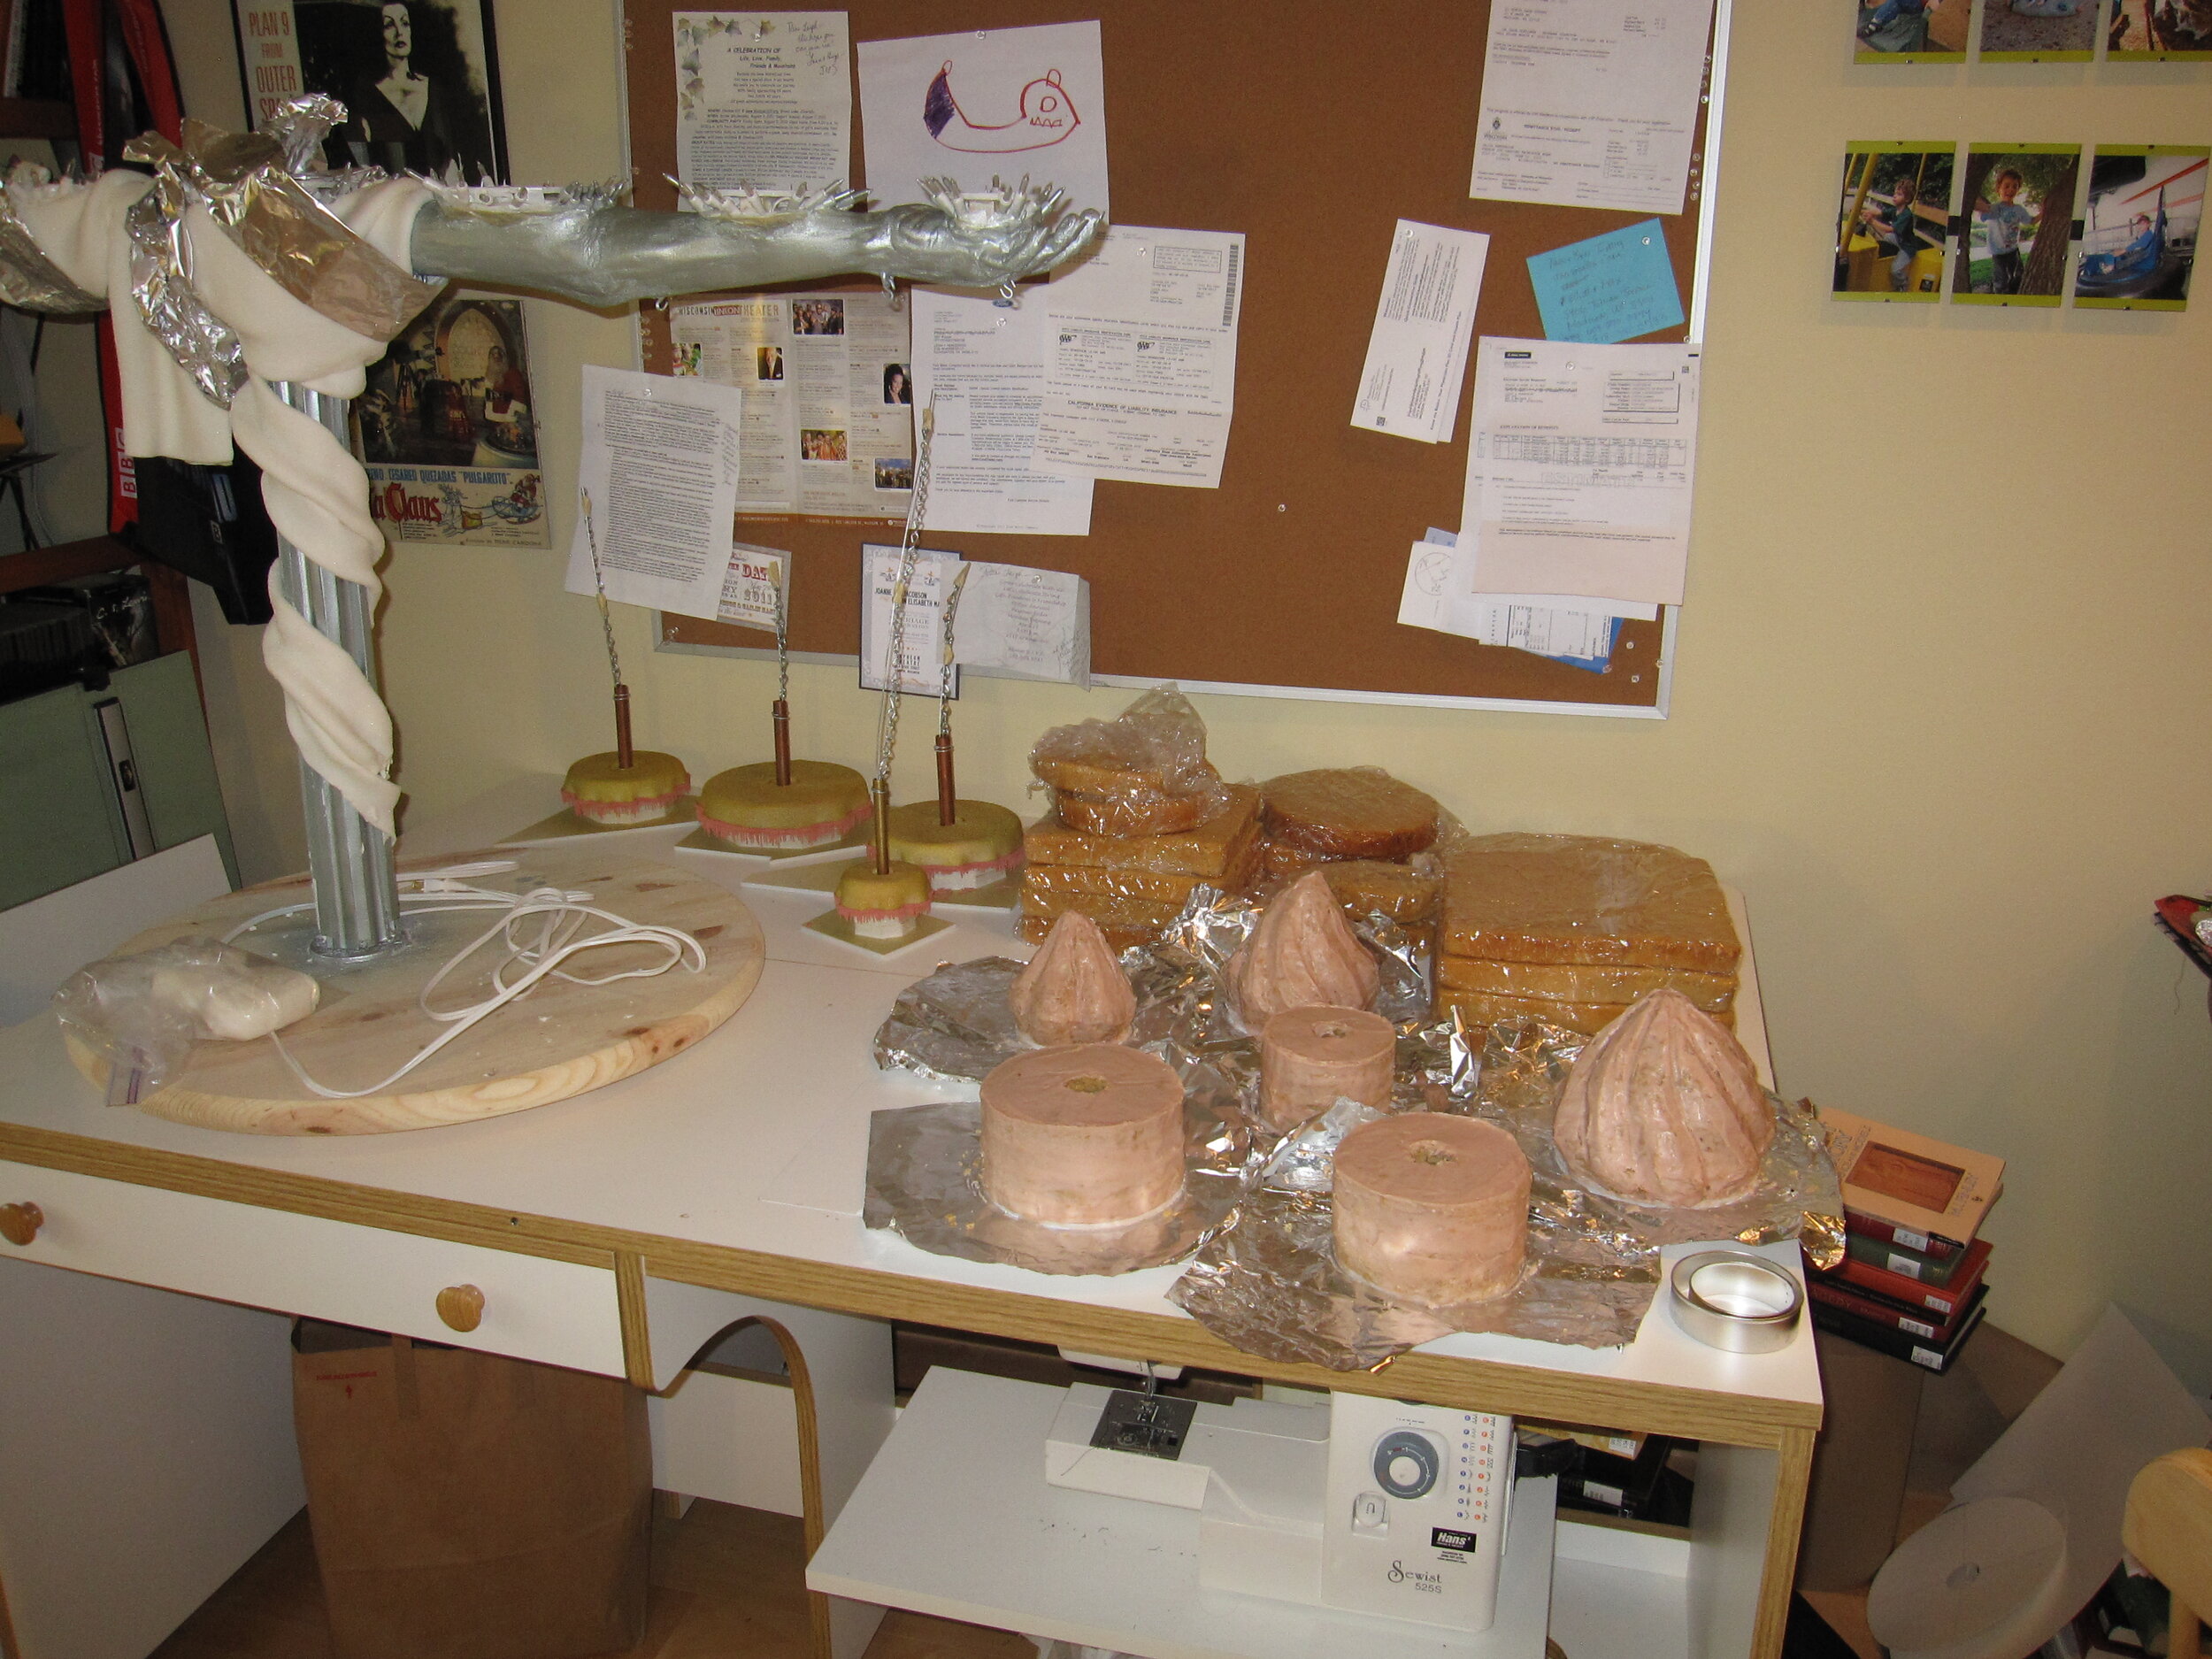
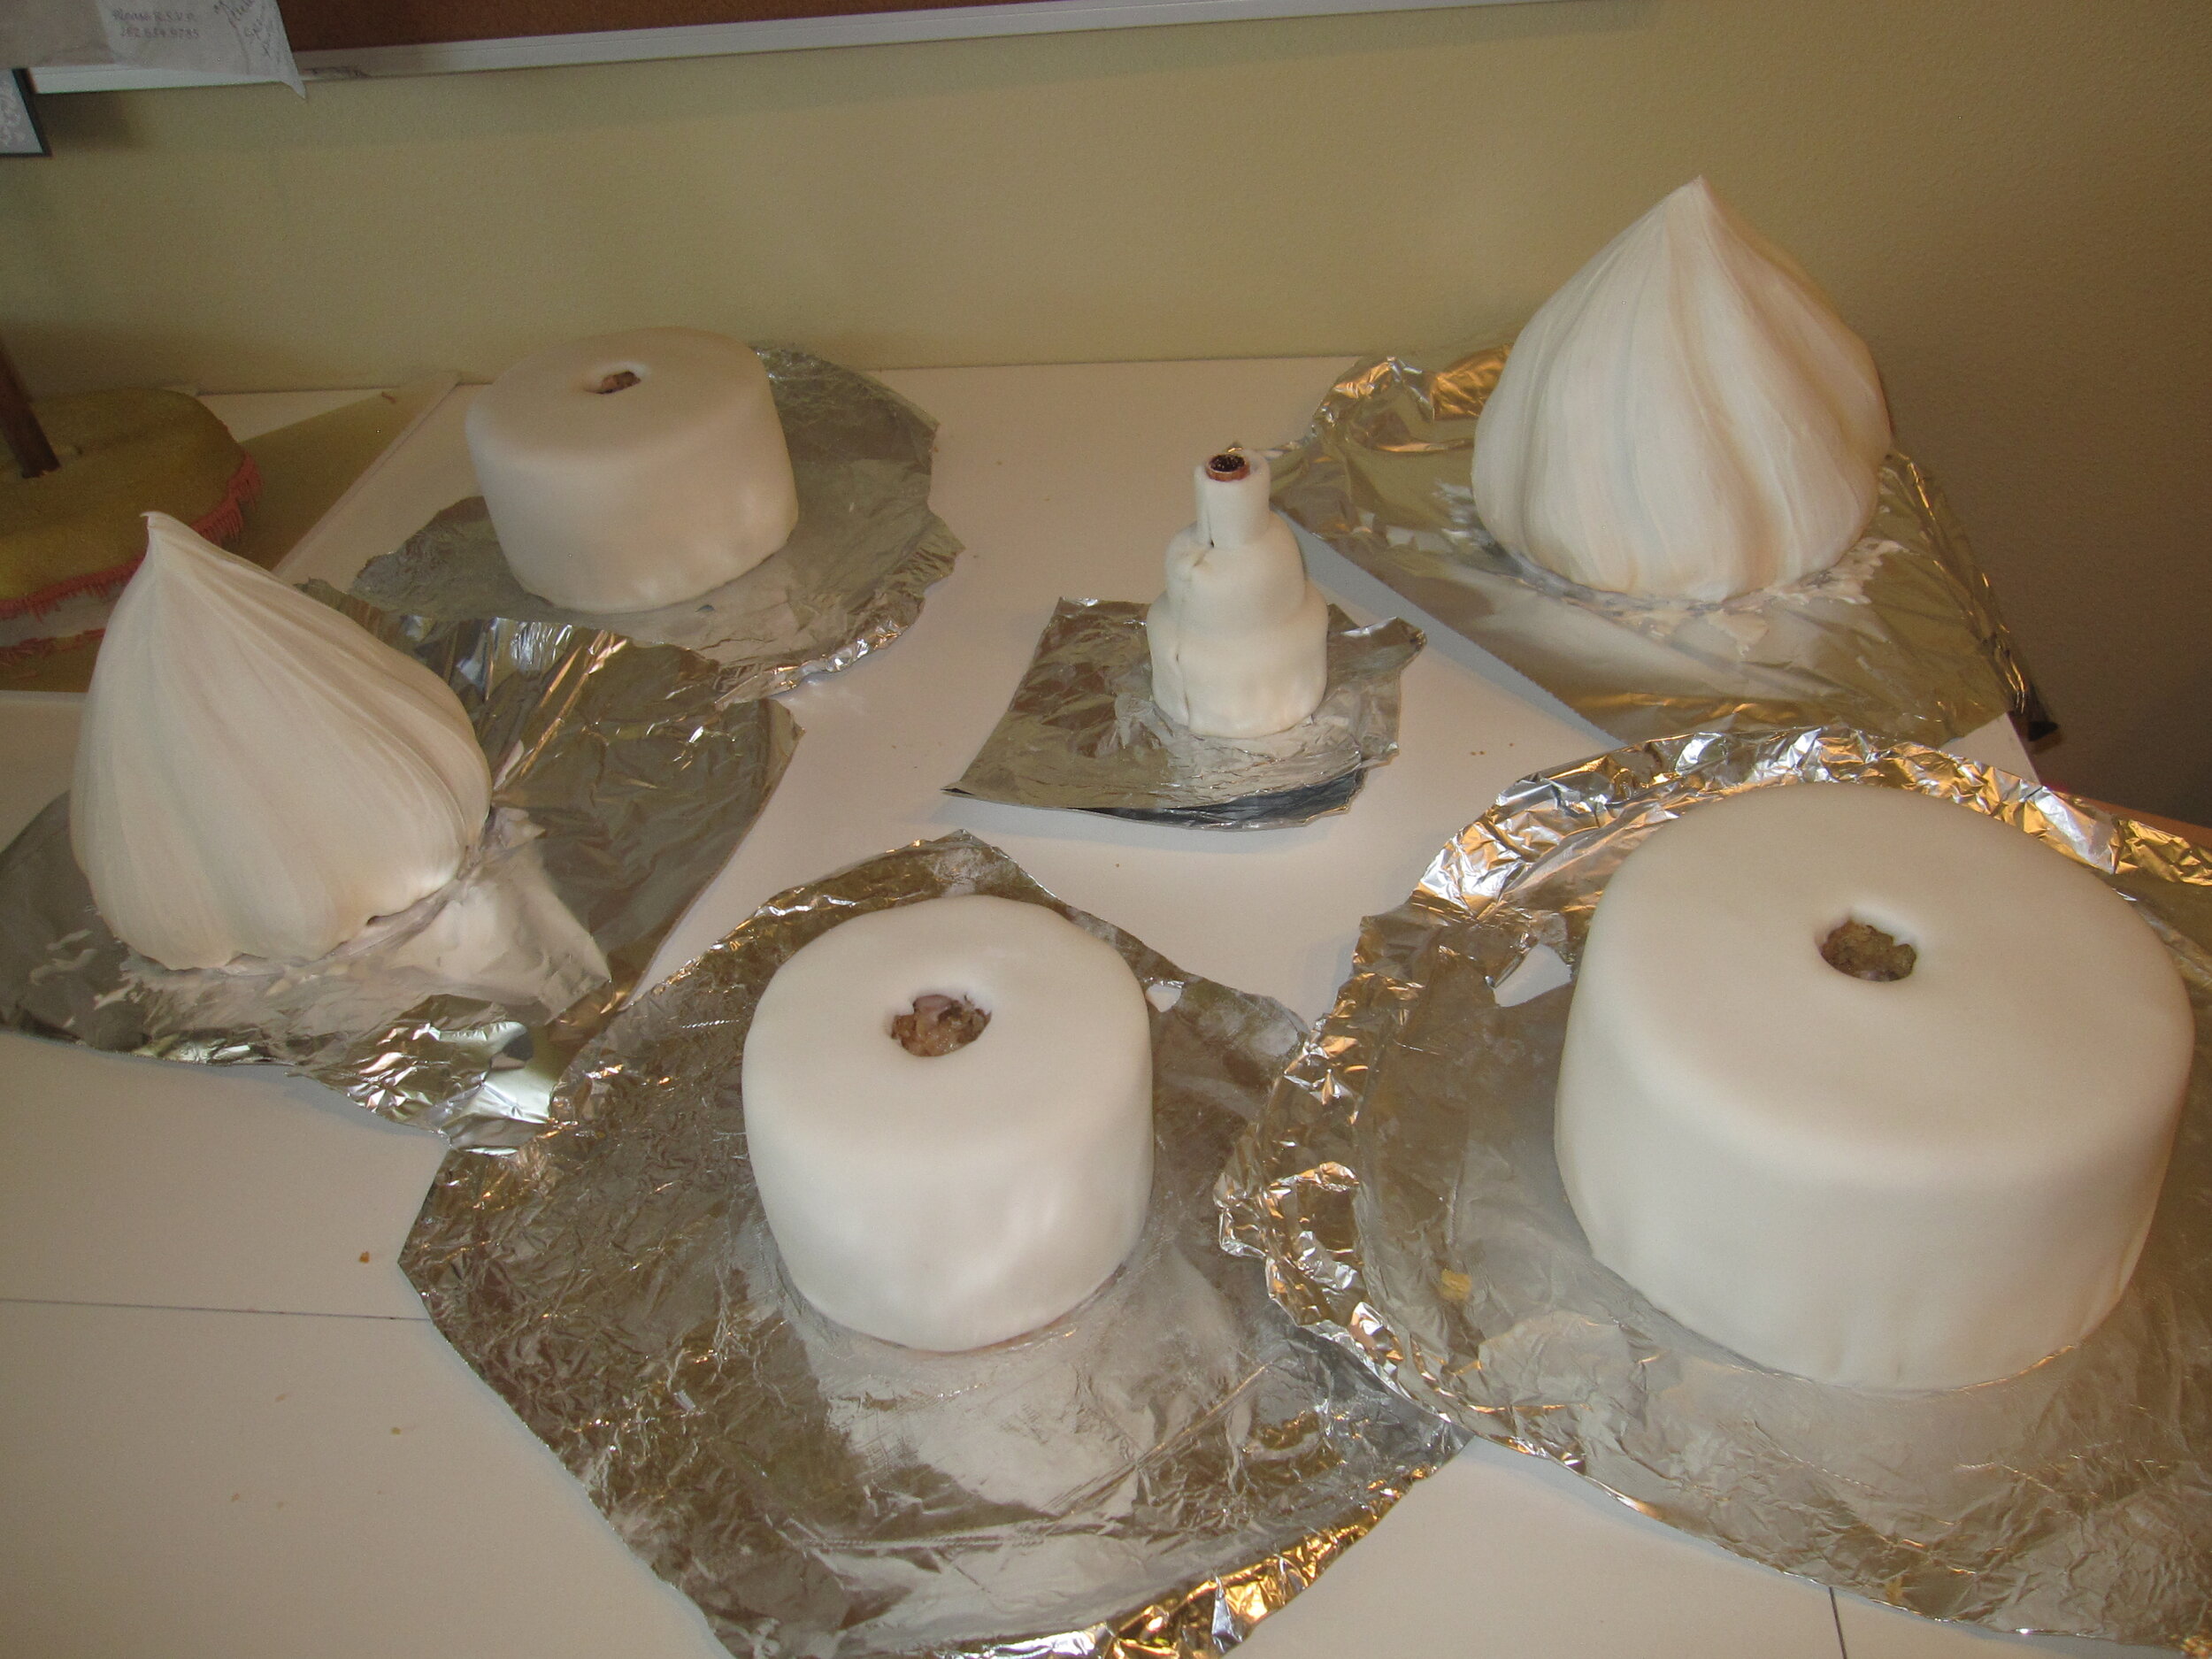
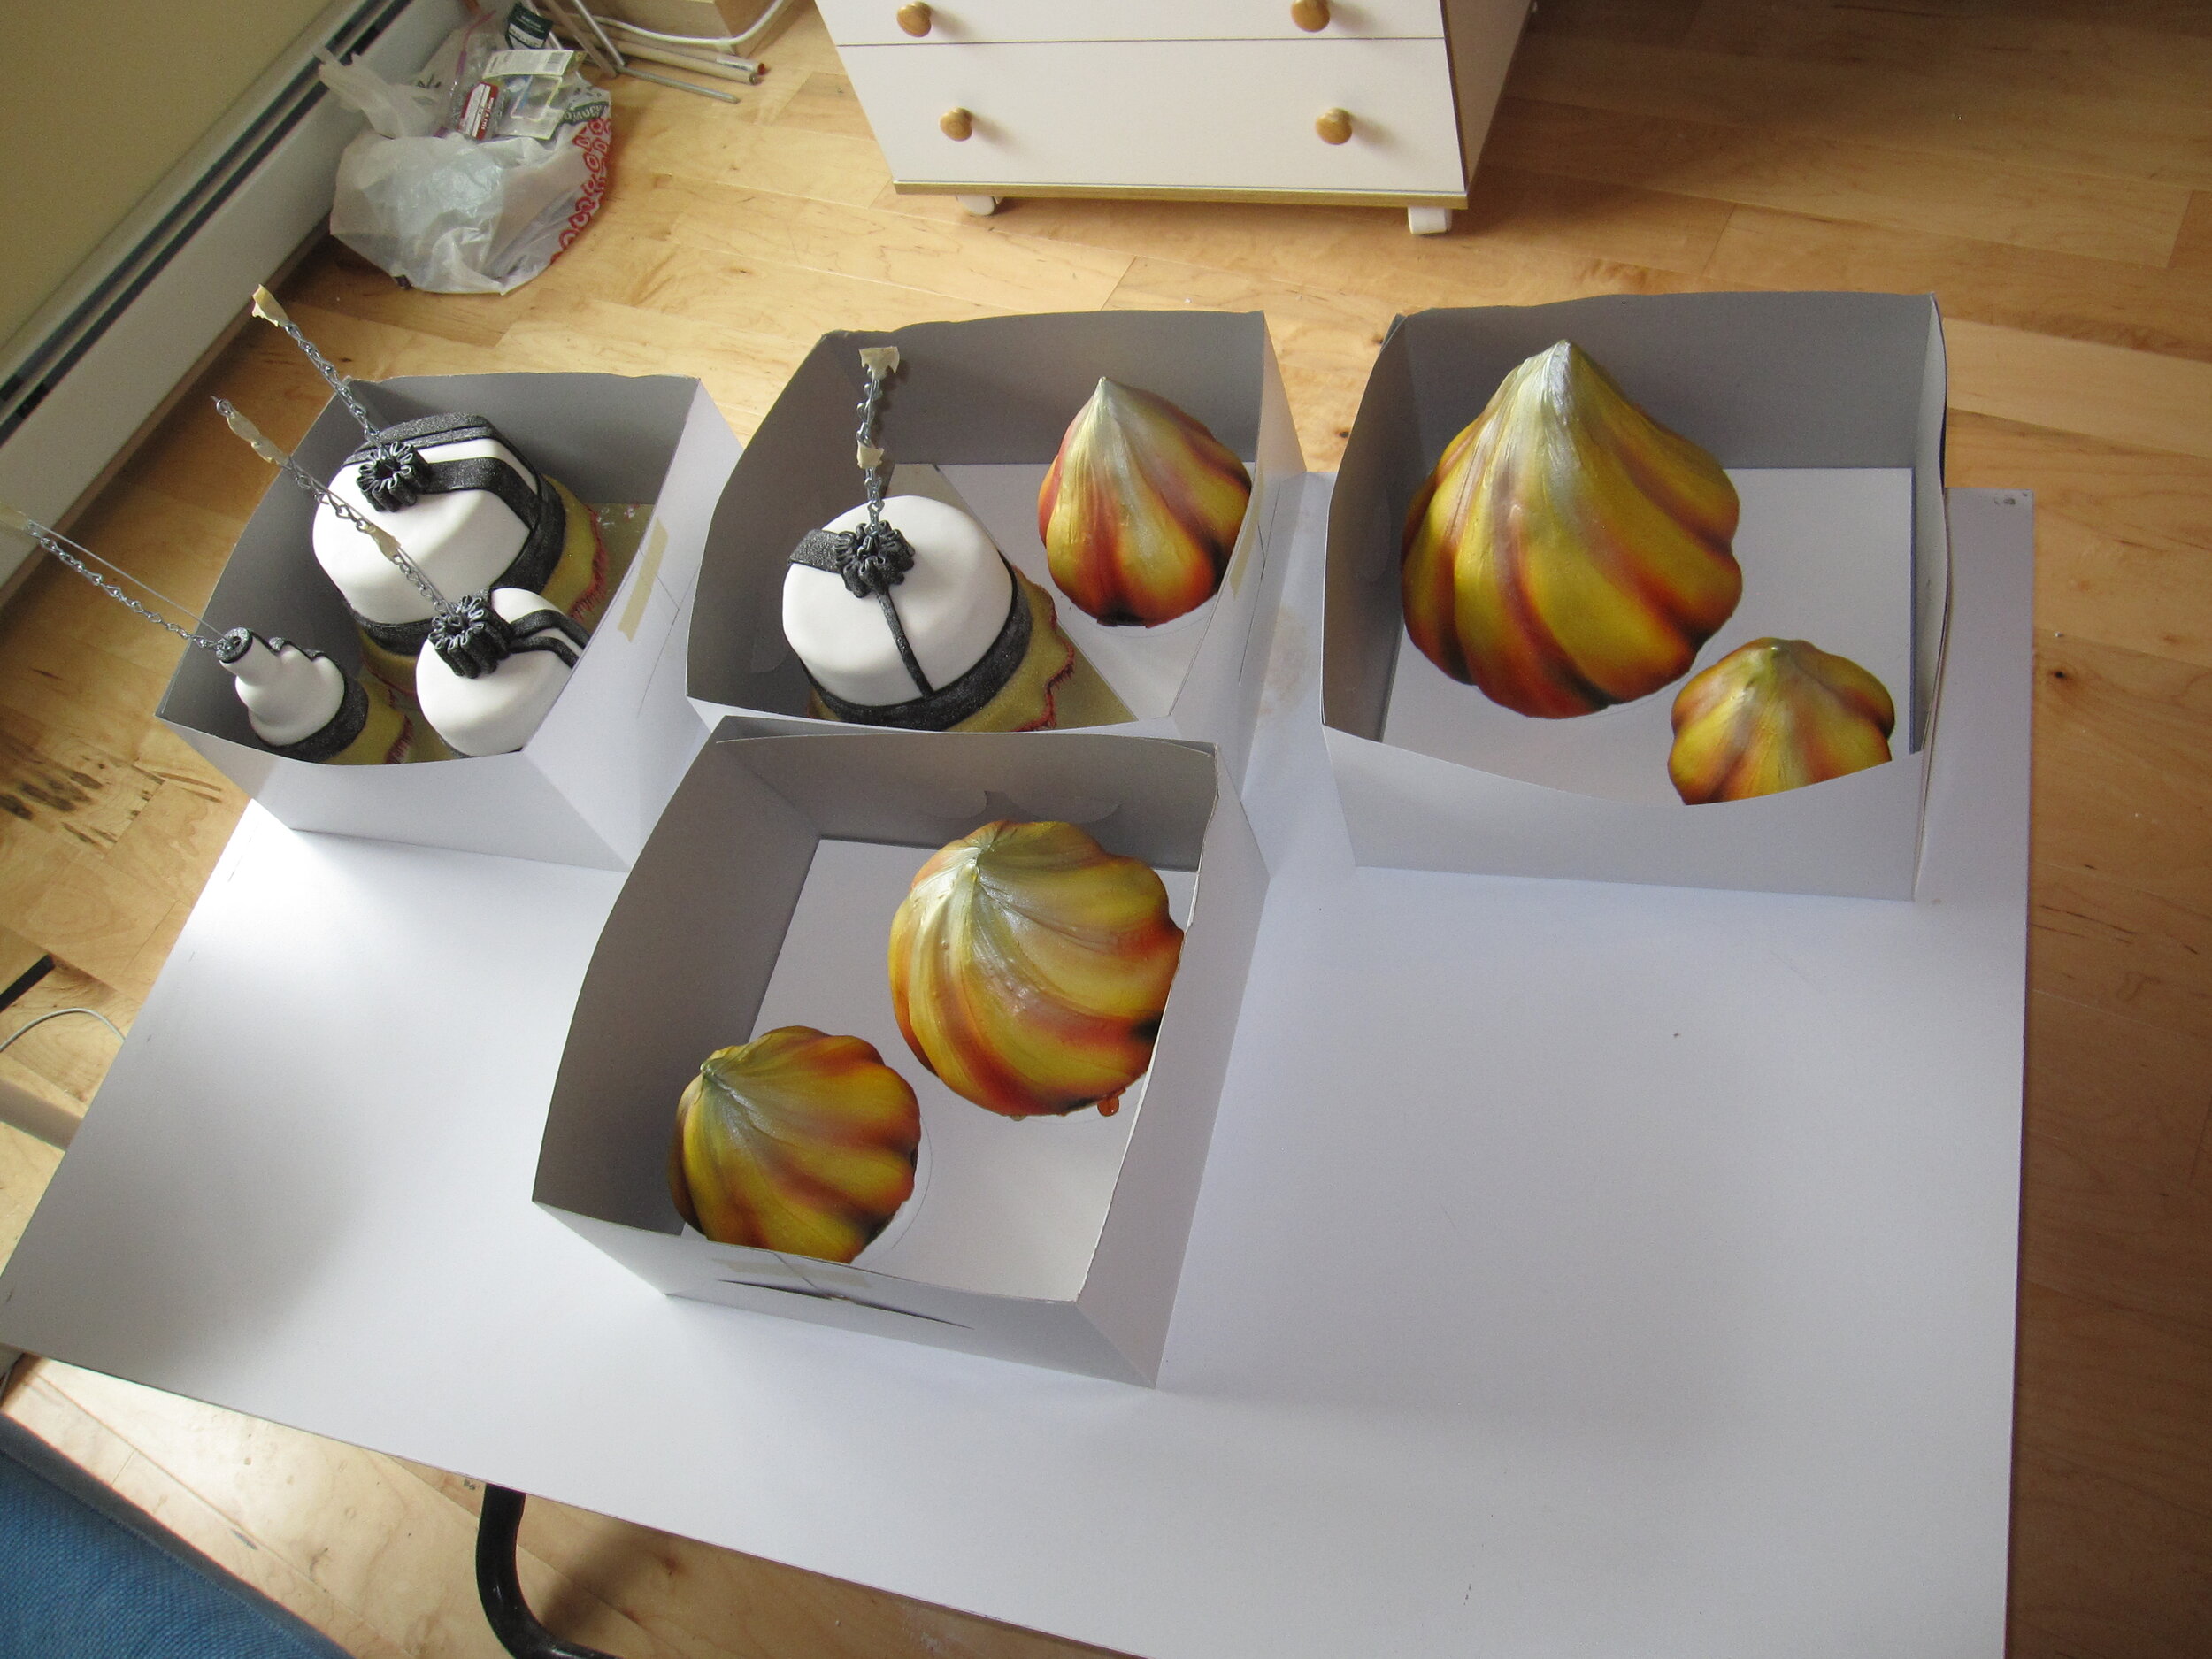
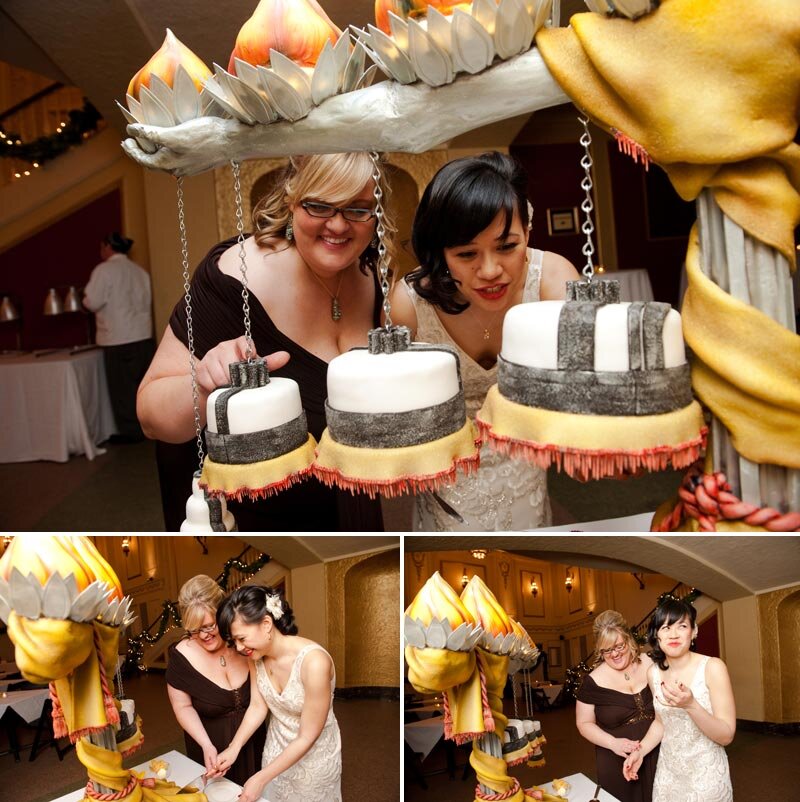
With a truly massive pile of cake baked, I was ready to begin assembly. First I put together the nine smaller cakes – 5 for the flames, and 4 for the hanging cakes. Three of the hanging cakes were pretty easy because they were round. The fourth was a little tiny three-tiered cake. The only request that the brides had made of me was that there be a mini wedding cake, because one of them loves miniature things. This cake was so small that there actually was only cake in the lower two tiers. The top was just fondant wrapped around the central tube that all the hanging cakes needed in order to attached the chain to the base. The flame cakes took a little longer to assemble and carve because they were tall enough to require internal supports and their shape was a bit complicated. Once all the cakes were carved, I covered them with fondant. Not to brag, but I was pretty pleased with how well I did covering such small cakes.
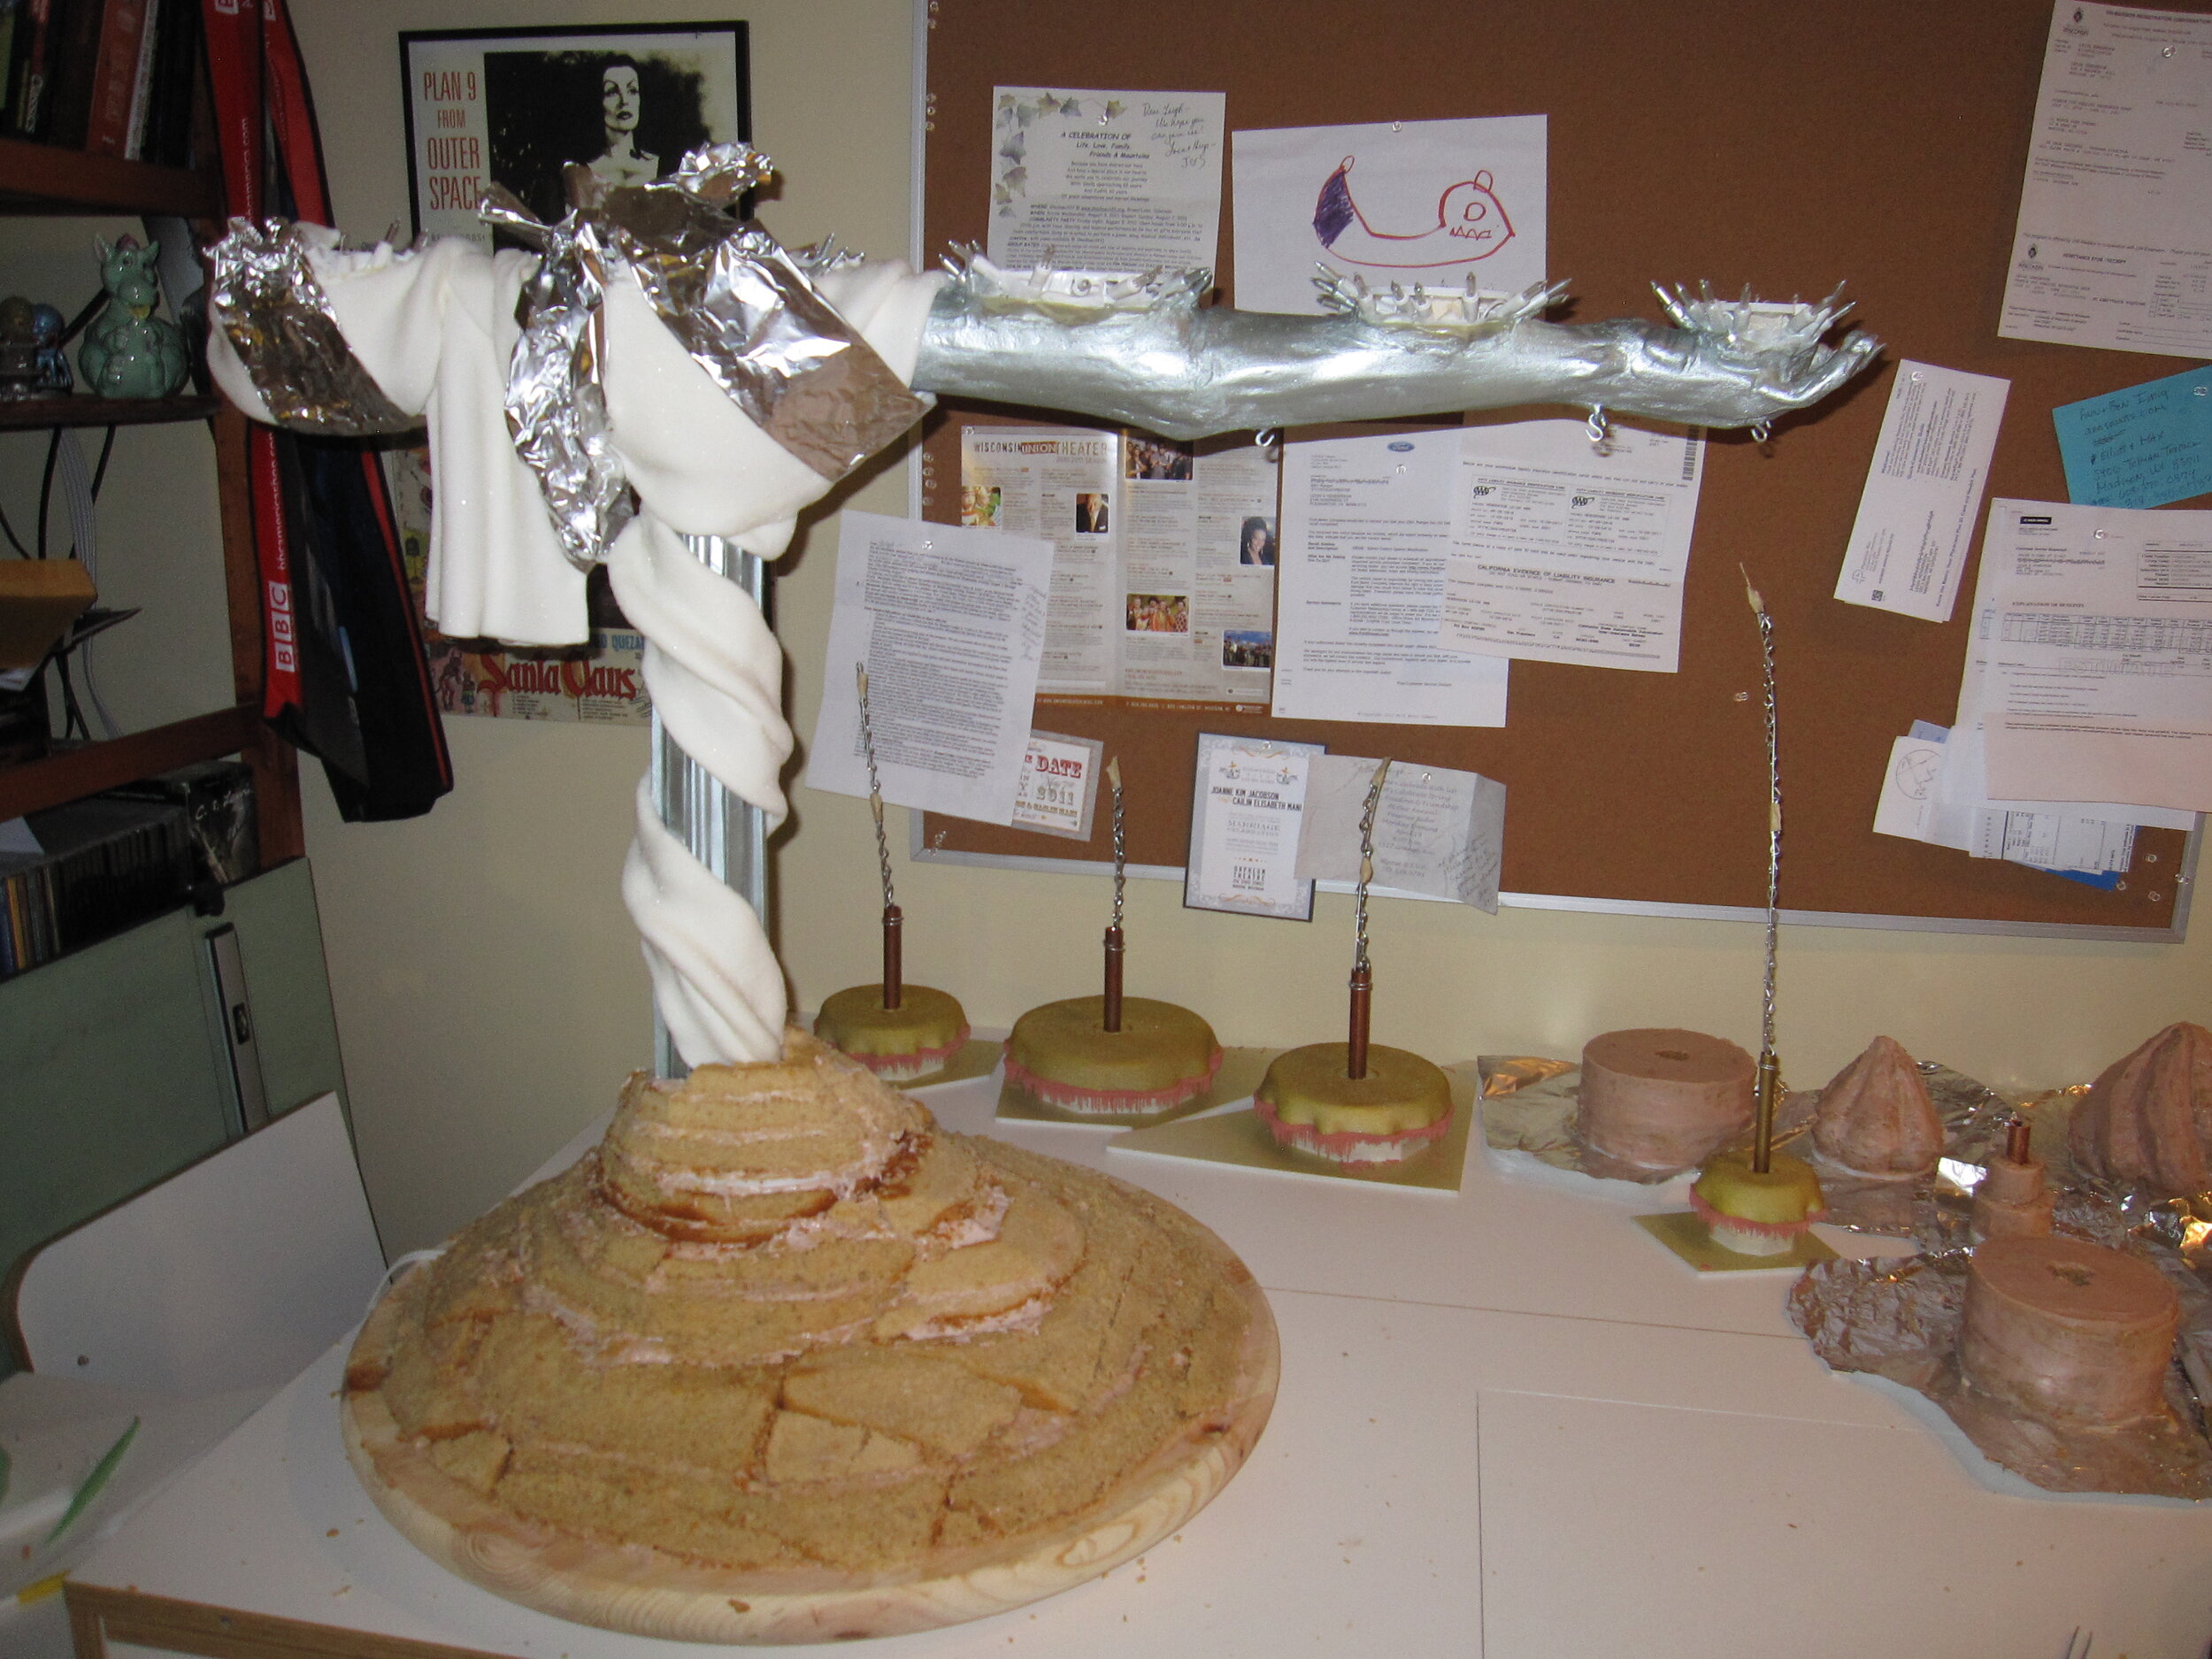
The majority of the cake went directly onto the base around the central column. Basically, I just made a big pile of cake and carved it into an organic pyramid shape. To cover it, I used the same sugared fondant technique that I had used for the rest of the drapery. Rather than trying to cover such a big cake with one enormous piece of fondant, I did it with a number of smaller trapezoidal pieces, which worked out quite well.
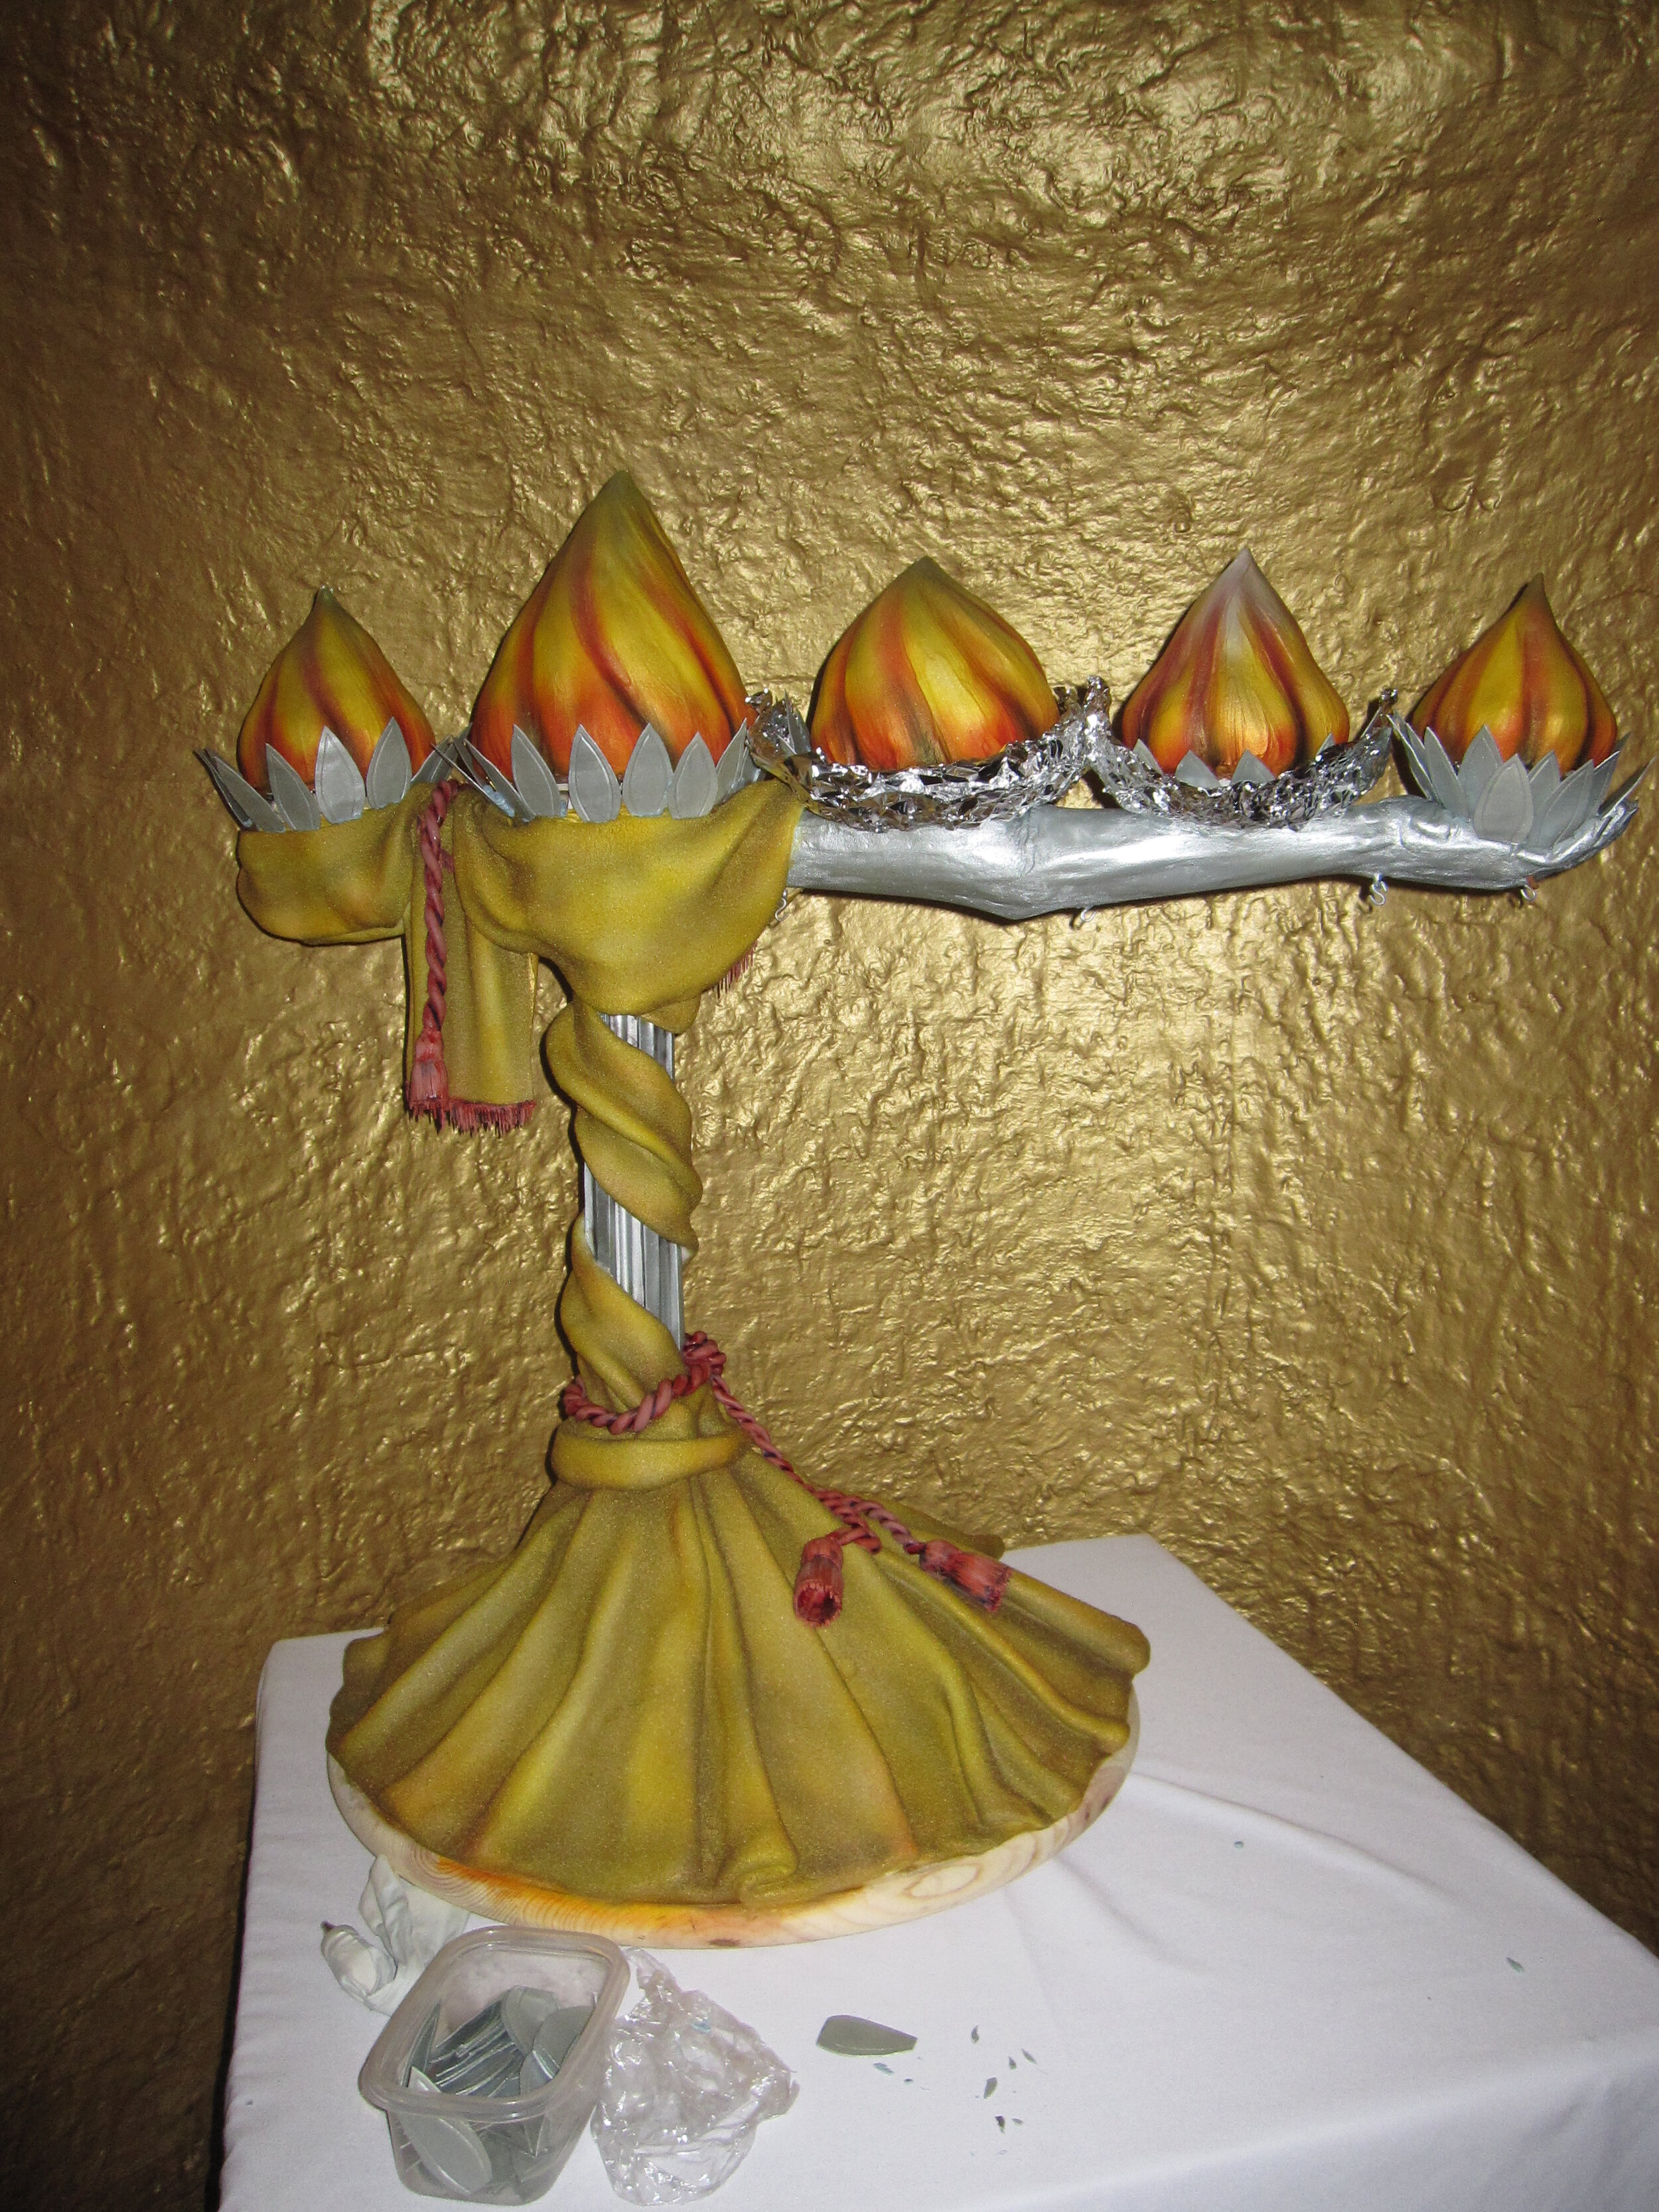
At this point I wasn’t happy with the way that the flame cakes looked. For one thing, a few of them did have imperfections in their fondant, but more importantly, they didn’t have the sense of movement and life that I had been hoping for. After a bit of experimentation I found that I could kill both birds with one stone by adding a layer of royal icing, striated and textured with a damp paintbrush, which gave them more flow.
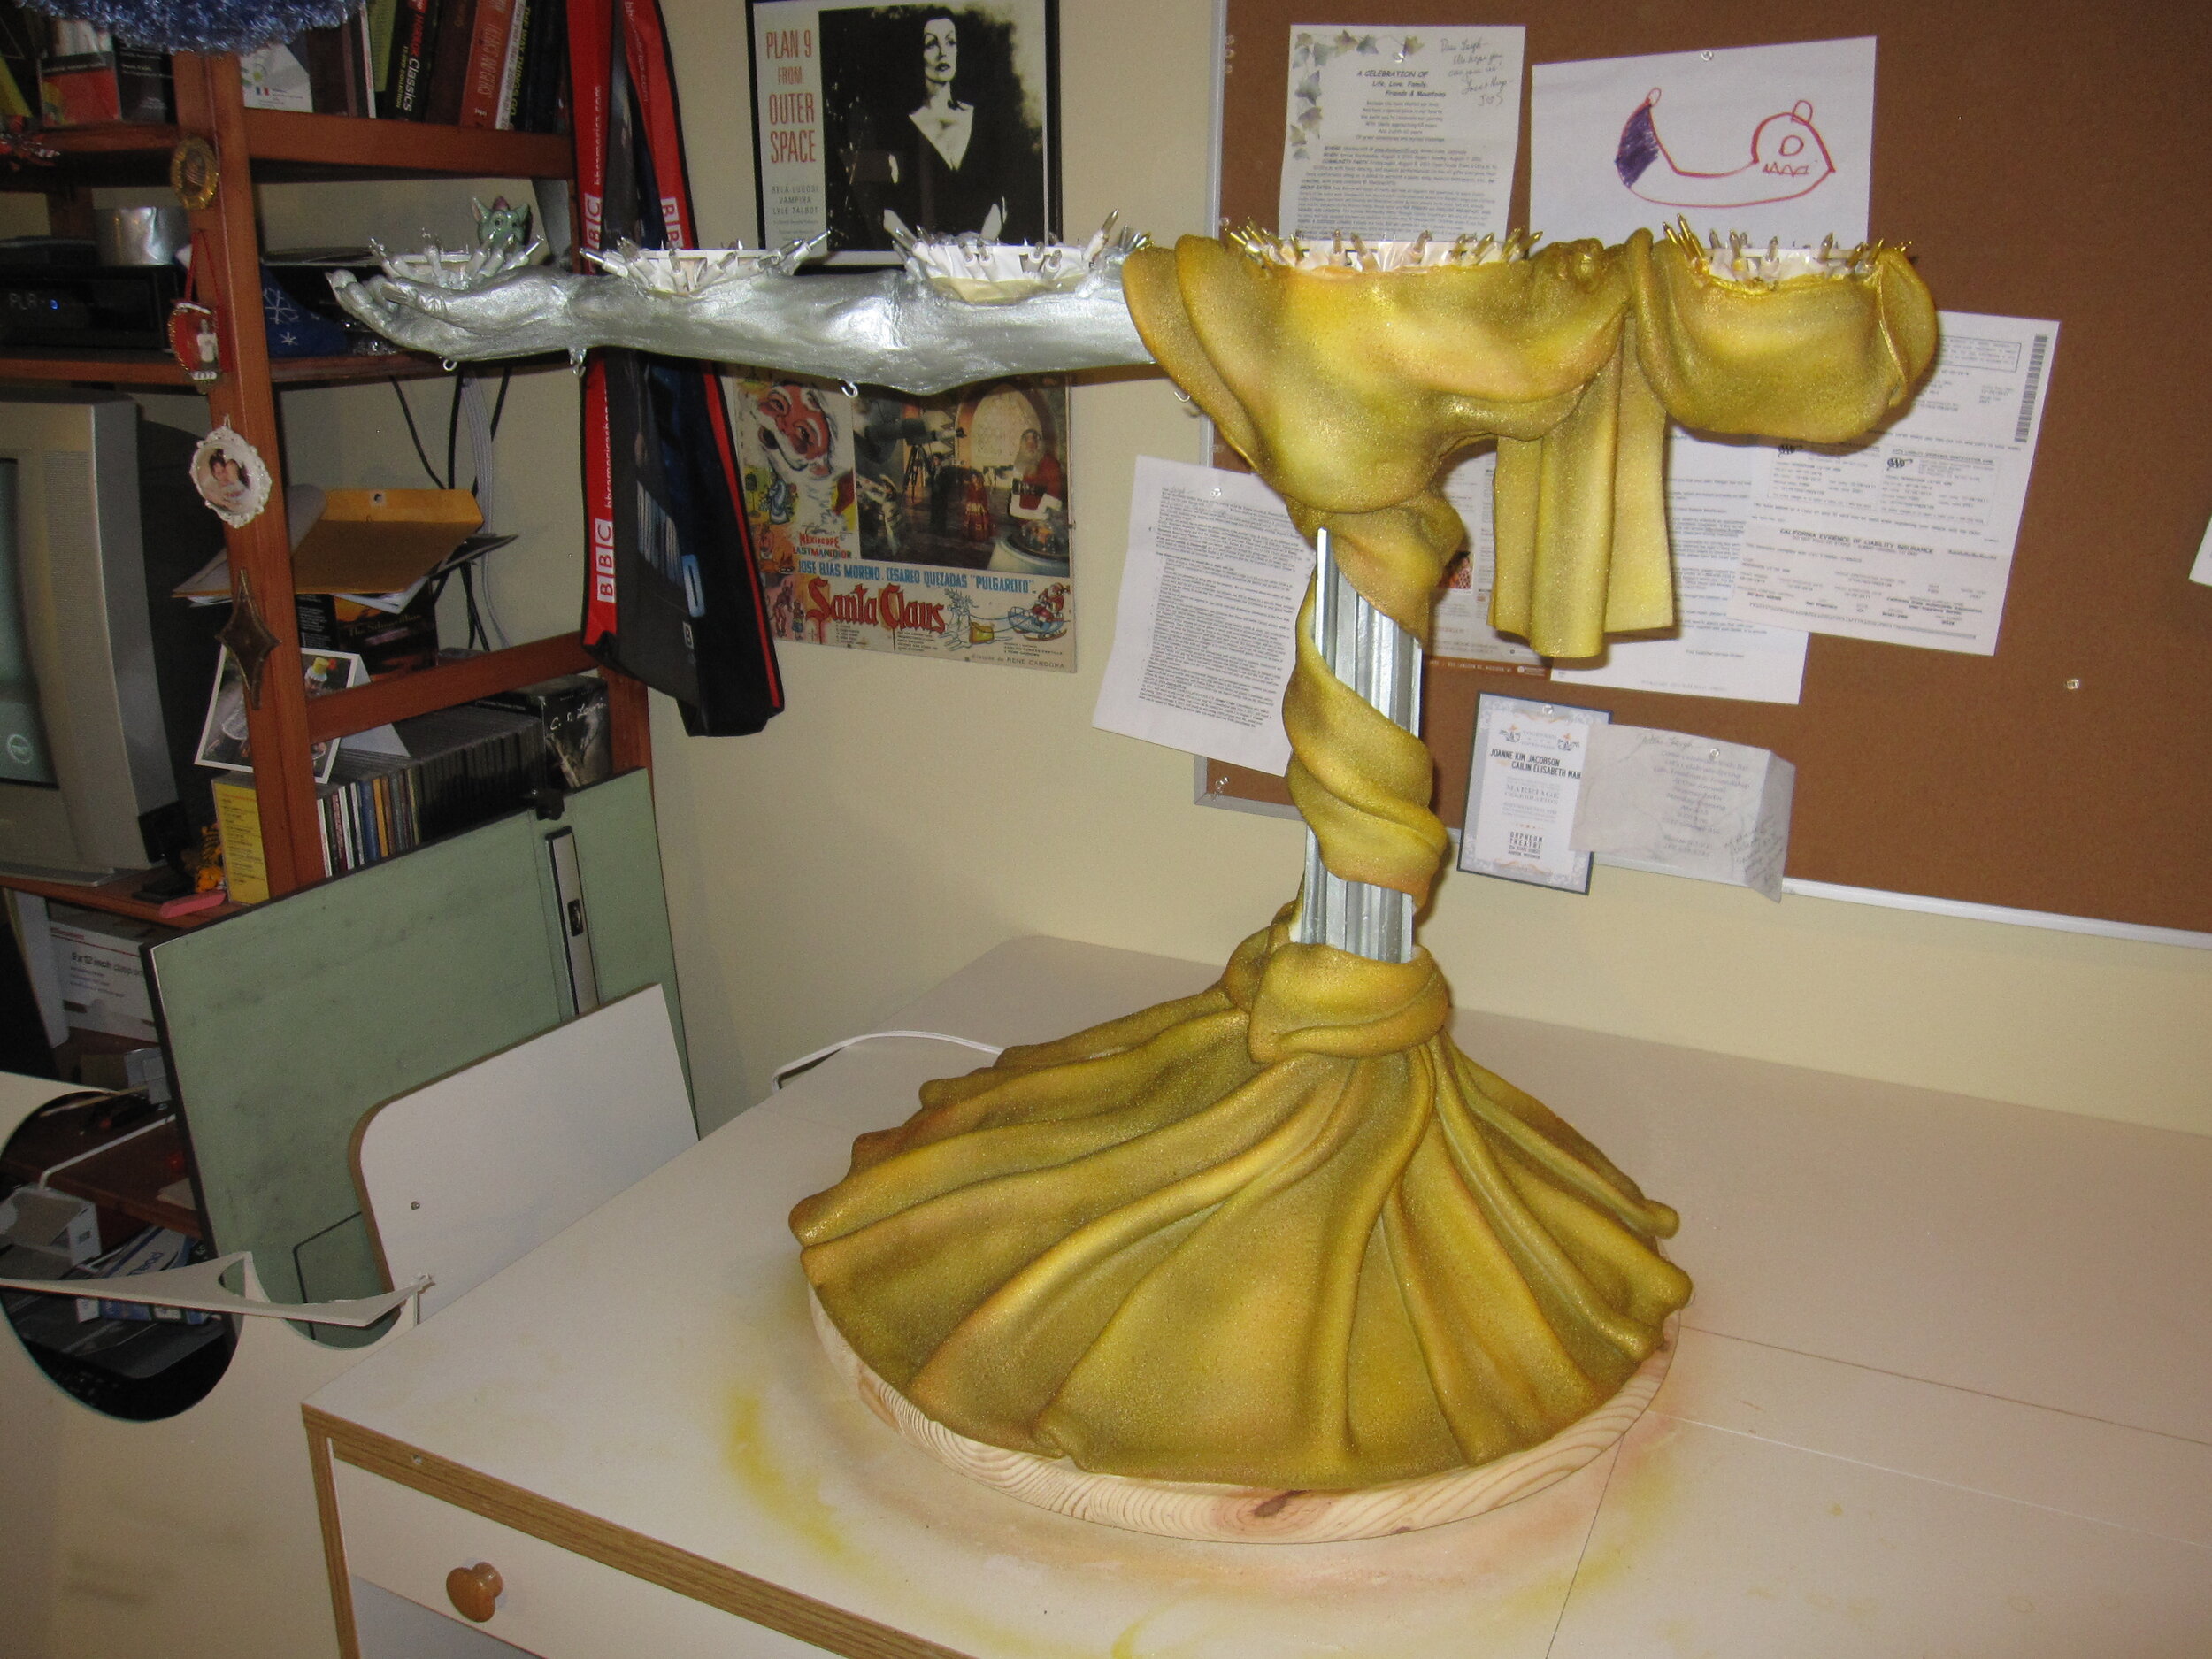
Then it was time to paint. The colors for the wedding, to the extent that there were any, were grey and a sort of muted yellow. So I tried to tie in with this by making the structure silver and the curtains a dusty yellow-gold. After masking off the arm, column, and base with tin foil, I sprayed a layer of yellow, then just a smidge of red, some gold for shine, and finally some bronze to add a sense of age.
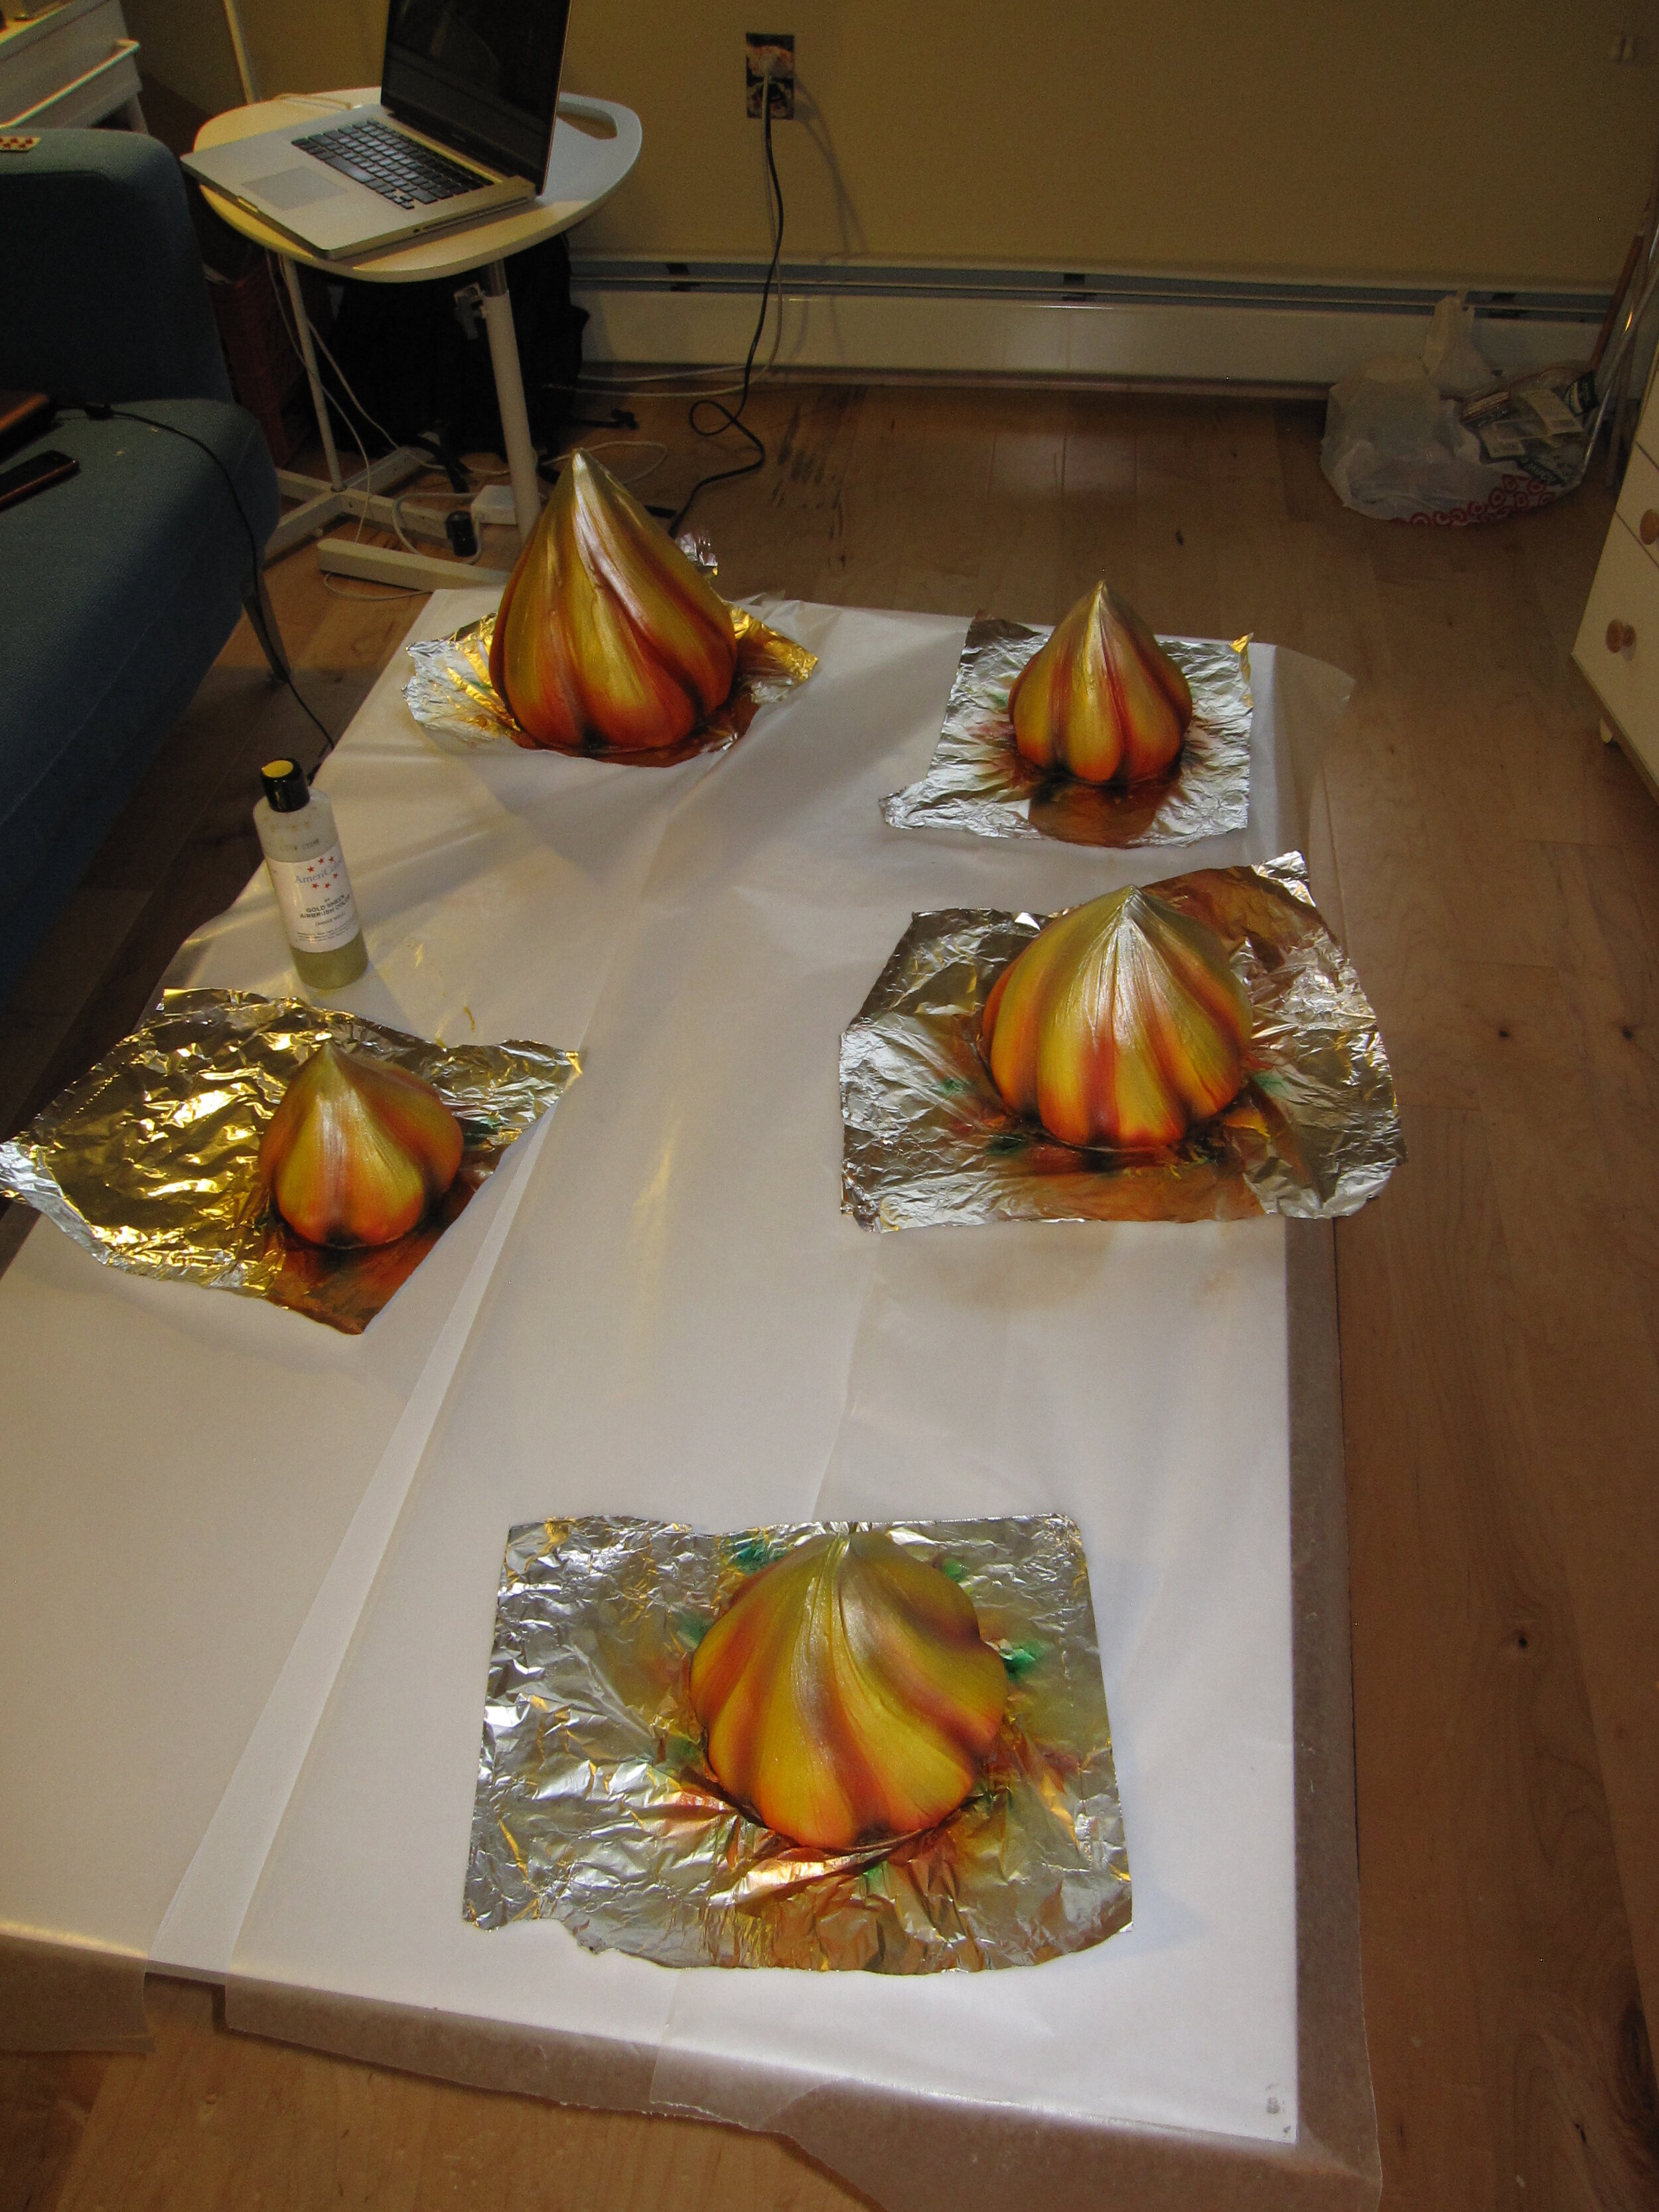
The flames took quite a few layers of color. I’m still not sure that I didn’t overdo it a bit. I think I did yellow first, then orange, then red, then blue, then bronze, then gold, then finally silver.
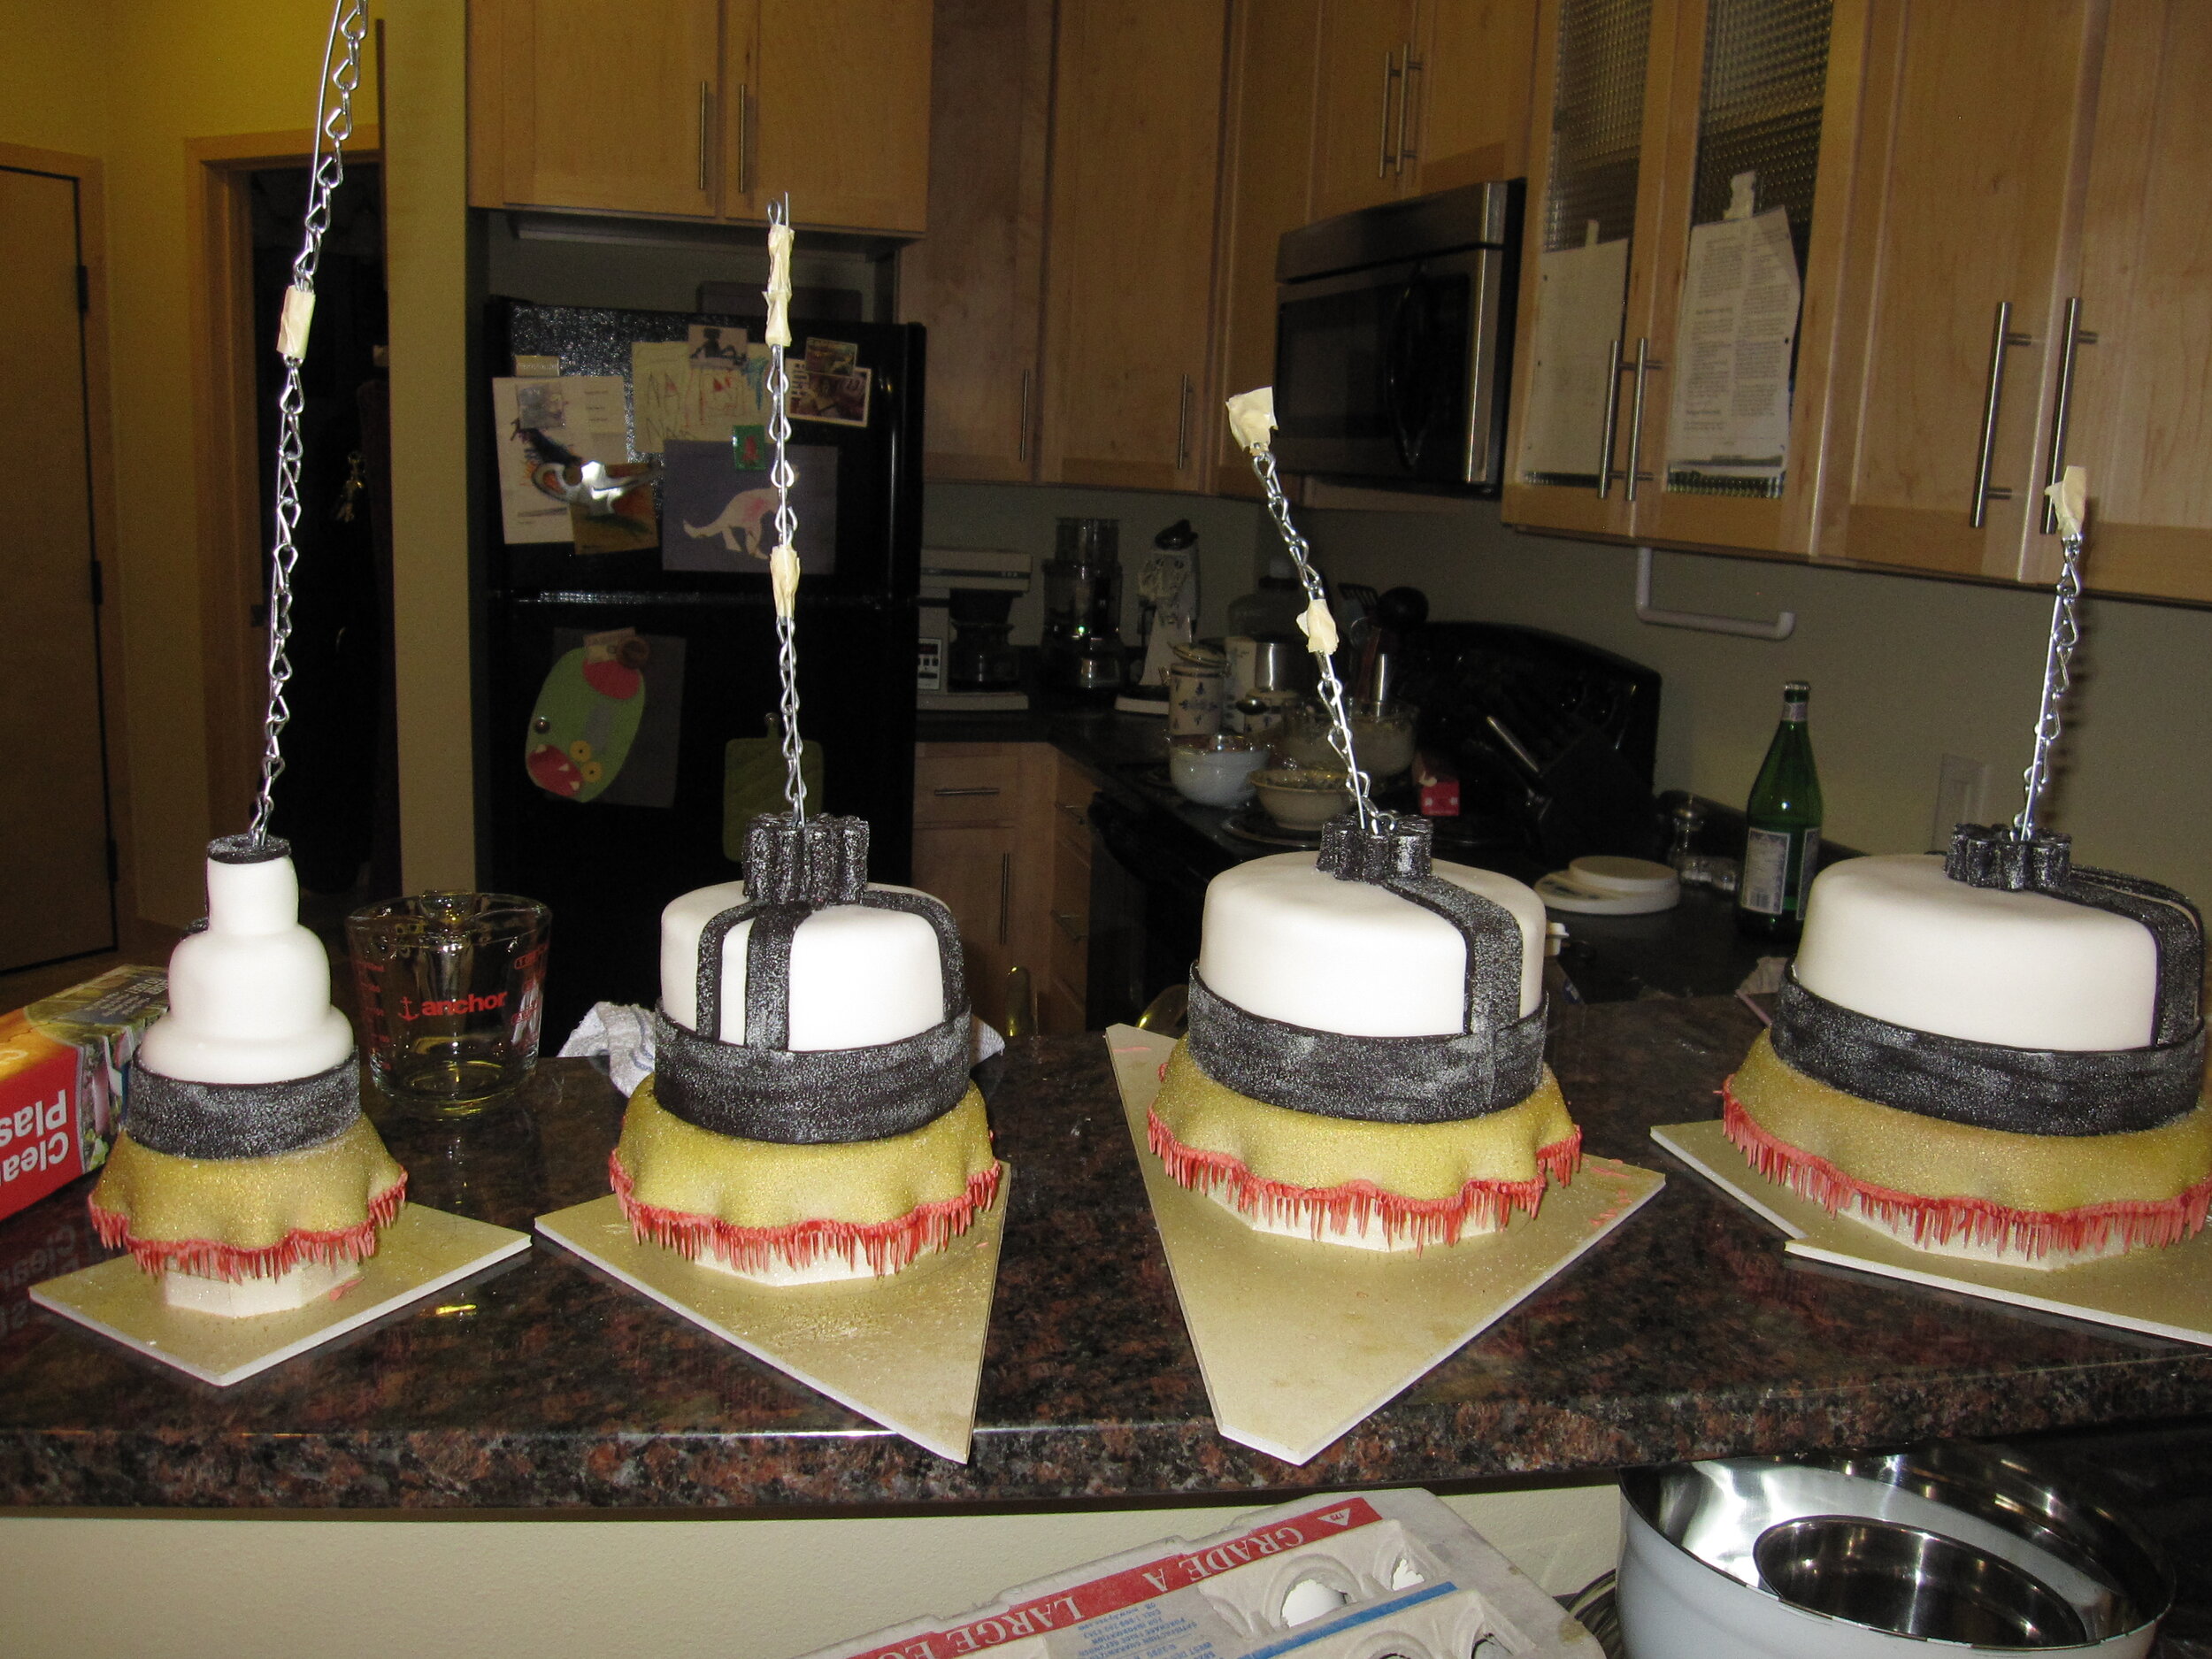
Instead of painting the hanging cakes, I just adorned them / concealed their imperfections with some black fondant details. To tie them in with the rest of the cake, I textured the black fondant with the same granulated sugar technique, and then highlighted the texture by brushing on a bit of silver luster dust.
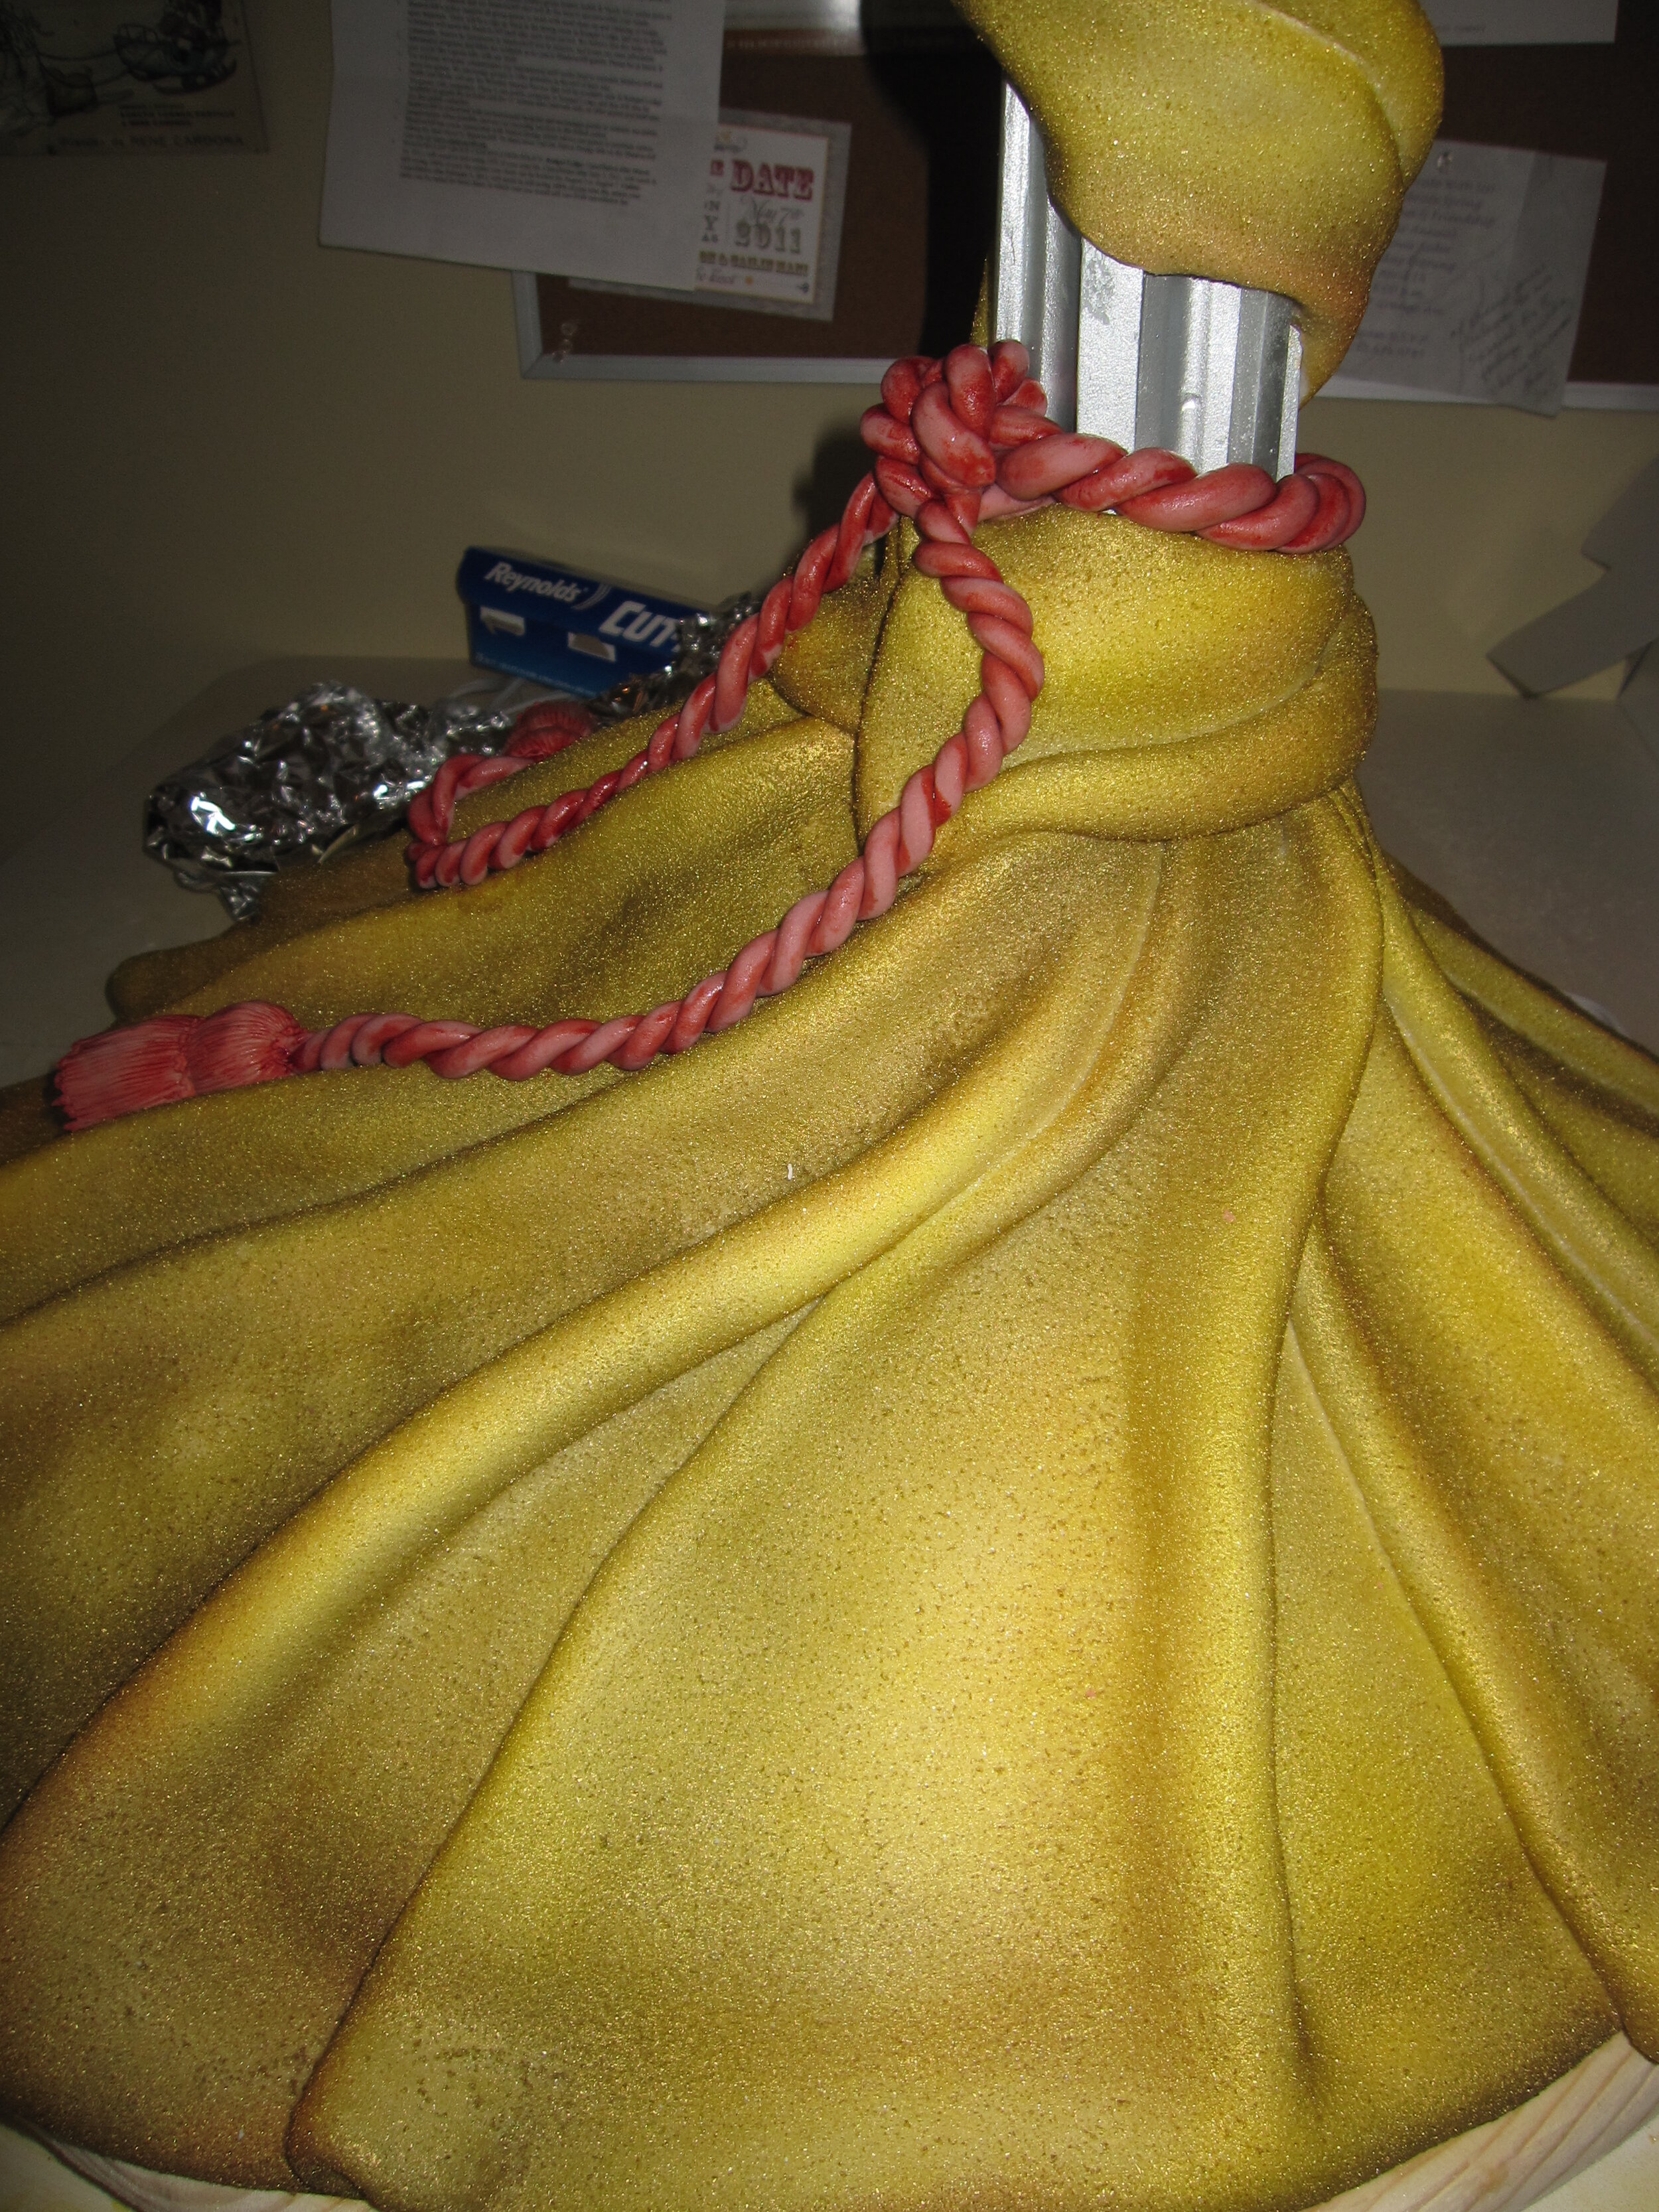
I put just a little more color into the cake by adding dusty rose royal icing fringe to the hanging cake bases and to the drapery, as well as some fondant ropes and tassels. Once these dried, I painted a little bright red and a touch of blue onto them.
I wasn’t planning to actually install the flames and the hanging cakes until the cake was at the venue, but I did attach some of the gum paste leaves around the Christmas lights that would be under the flames. I could only attach about half of them, because I needed one side to be open in order to place the flames. This made me rather nervous because I had some trouble getting them to stick and had to create elaborate tin foil supports to hold them in place until the royal icing dried. I also had trouble with the royal icing sticking because I had made it a little too thick. So I was scared that, if I had that much trouble at the venue, I wouldn’t be able to get it all together in time.
Even though the venue was less than two miles from my apartment, transport was hair-raising. At first I had for some inexplicable reason imagined that I could transport the cake in the front seat of my pickup. Since the cake was two feet wide, three feet long, and about two and half feet tall, apparently I was temporarily insane when I was picturing sticking this thing in my passenger seat. My friend Alejandro very kindly volunteered to come pick up the cake in his SUV, though I don’t think he really knew what he was getting into.
The cake literally came within inches of not fitting in the back of his SUV along all three dimensions. On the top, there was not even a quarter of an inch of clearance. All I can do is thank my lucky stars that it made it in. The only reason that I didn’t make the cake six inches longer is because that was the size that the steel pipe came in.
I actually didn’t ride in the car with the cake on the way to the venue, because I wanted to have my truck there as well, but fortunately Angie was able to go with Alejandro, so he didn’t have to face the nerve-wracking ride alone. I can now admit that I was terrified that something would go wrong on the way over, though of course I didn’t say this to Alejandro until the cake was safely at the venue. All sorts of horrific scenarios were running through my head. The royal icing arm might crack. The fondant curtains could rip. All the leaves might break off. The entire cantilevered arm might collapse somehow. I packed two huge bags full of repair equipment and supplies to cope with any eventuality.
Of course, none of these dire events happened, or even had any real likelihood of happening. The cake got to the Orpheum with no problem whatsoever. A passing stranger even helped out by holding the door as Alejandro and I carried it into the venue.
This is the first time that I’ve ever completed a cake in the midst of professionals setting up a wedding venue. I was feeling very insecure about having that many people around while I was working, but Angie kindly hung around and kept me company and distracted me with stories about her love life. The assembly actually went quite smoothly and fairly quickly. Really it was just a matter of dropping the flames onto their bases, sticking on a few more leaves, and aging the silver leaves with just a touch of black powdered food coloring.
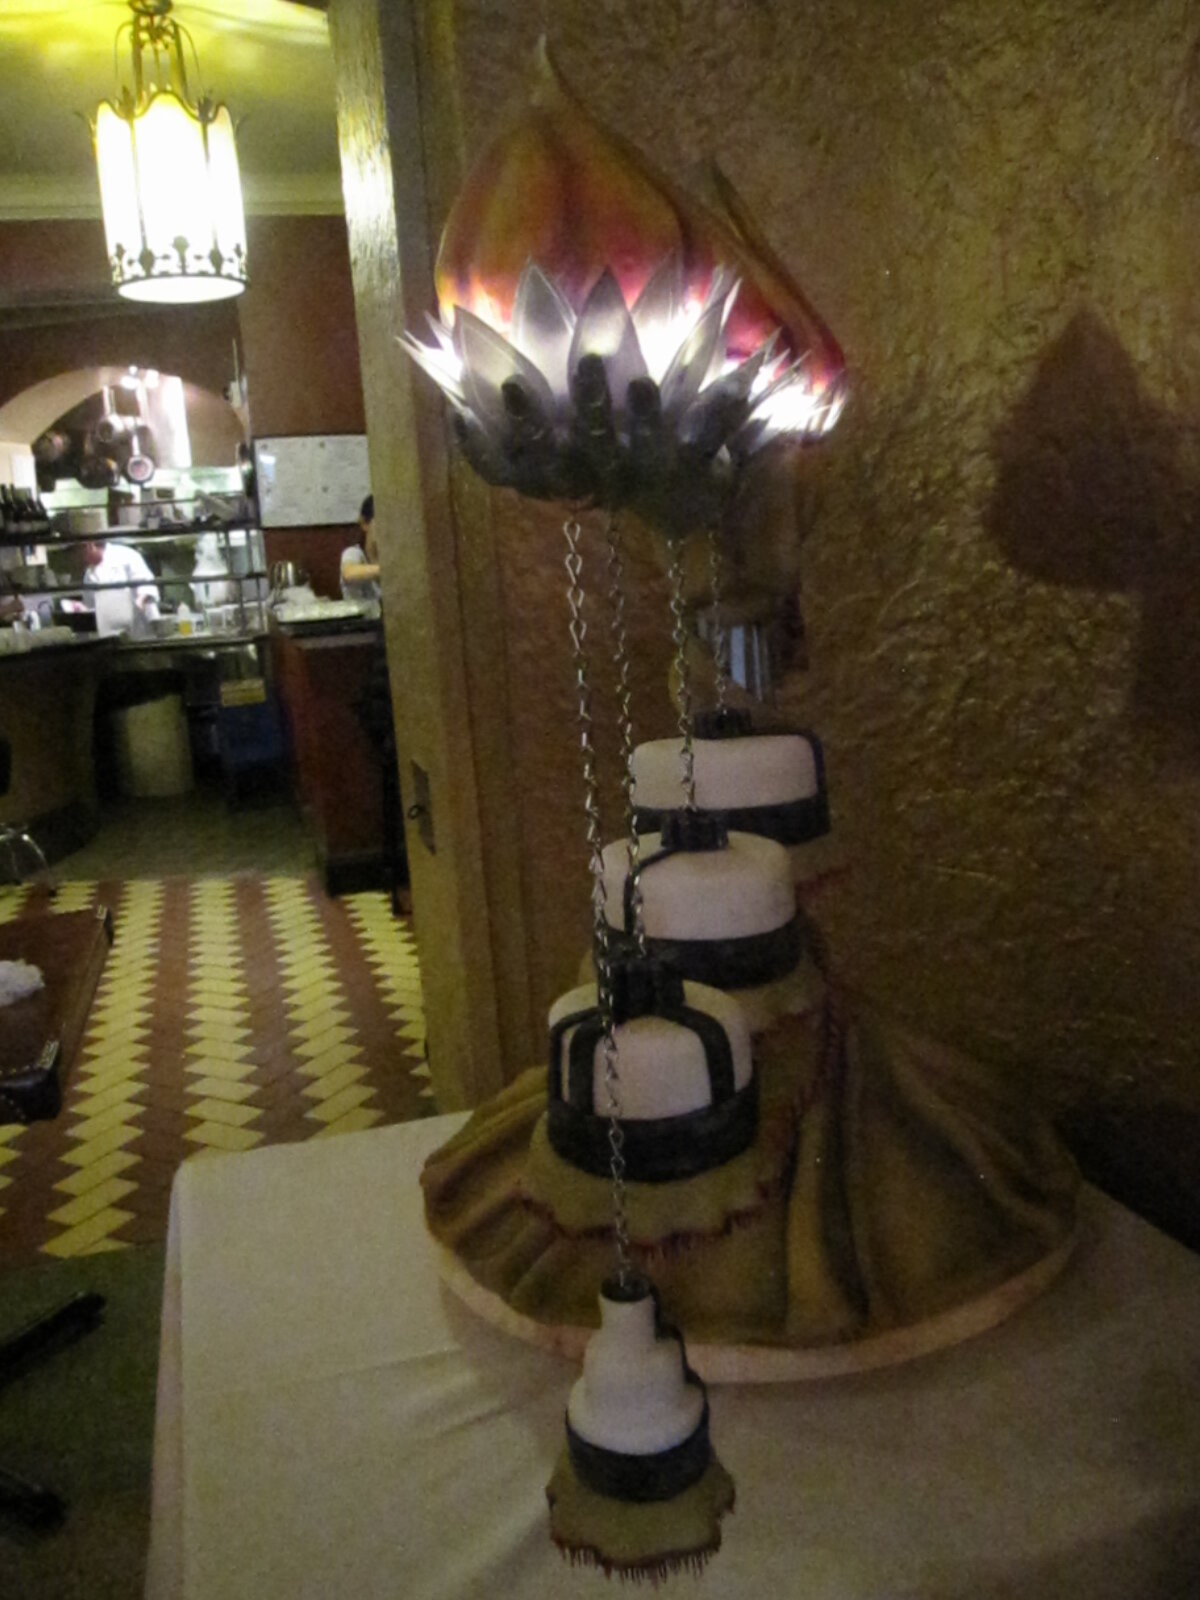
Because I wasn’t sure how long it would take to finish the assembly at the venue, we had tried to come up with some sort of complicated plan of vehicle switching that would allow me to stay at the venue if necessary while Angie went back to my apartment to change. I was so distracted that I never understood the plan in the first place, so it’s a good thing that we didn’t actually attempt to put it into action. In the end, we had plenty of time to drive home and change and then take a bus back to the venue in time for a pre-ceremony cocktail. While we were gone, they even accessorized the cake table with votive candles and flowers that matched the colors of the cake flawlessly.
The wedding was absolutely beautiful. I was so nervous about the cake that I hadn’t eaten all day and there was an open bar, so I may have had a few more glasses of wine than was really good for me. The wedding coordinator for the venue told me that the cake was a challenge to cut, which I don’t doubt is true. Apparently he put a note to that effect in the file. Not that there’s any real likelihood that I’ll ever serve a cake there again.
I have absolutely no idea whether there was any leftover cake or what happened to the cake base, since by the end of the night I was too drunk and exhausted to do anything but let Angie roll me into a cab home I like to picture a severed, silver, sugar arm sticking out of a dumpster being devoured by ants.
As promised, I’d like to give Executive Producer credit on this cake to Angie for cleaning my apartment, to Jenn for running to the store for emergency powdered sugar, and to Alejandro for driving the cake to the venue. Thanks guys!
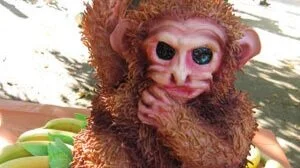
Poo-Flinging Monkey Cake
I made this creepy poo-flinging monkey cake for our little friend Isaac's first birthday party. This was a special request by Isaac's mother, who was also the recipient of the dancing yeti wedding cake.

I made this creepy poo-flinging monkey cake for our little friend Isaac's first birthday party. This was a special request by Isaac's mother, who was also the recipient of the dancing yeti wedding cake.
What does every little boy want for his first birthday? That's right - a cake shaped like a creepy-looking monkey! And what's even better than a creepy-looking monkey cake? That's right - a creepy-looking monkey cake that flings poo, just like a real monkey.
OK, maybe that's not exactly what my little friend Isaac would have requested for his first birthday cake, but he can't talk, and that is exactly what his mom requested.

The first step, of course, was to figure out exactly how the poo mechanism should work. My first thought was to make it a sort of catapult, but thenI realized that it would be more fun if it could fling poo repeatedly without a complicated reset of the mechanism. So I decided to go with a spring-loaded hinge. I made an armature for the arm and hand out of wood and brass tubing - I felt that it was necessary to have a metal structure within each individual finger so they wouldn't break off when I pulled the arm back to release the poo. The arm was connected via the spring hinge to a post, which was in turn secured to the heavy wooden base of the cake.

Before I made the cake, I sculpted the arm out of gum paste and fondant around the wooden armature, which meant that I had a sort of ghostly white monkey arm on a stick. I did load it up with some raisinettes (aka cake monkey poo), which it flung quite effectively, so I was ready to move onto the cake.
My sister was kind enough to actually bake the cakes for me. Fortunately she baked more than I asked her to, because the amount that I asked her to make would not have been enough. I had to cut notches in each tier and slide them into place around the arm support post. When I was done, I had what appeared to be a squat, one-armed robot, at least until I carved it into a more monkey-like shape.

This cake marked my first experiment with using rice krispie treats to sculpt additively onto my cakes. It's a technique that I learned, like so many others, from reading Colette Peters' books. My plan was to sculpt the tail, haunches, and second arm out of rice krispie treats. Not having ever made rice krispie treats myself, for some reason I thought they solidified really quickly. "I'll have to work fast," I thought, "but once I get them into shape they'll hold really well." Yeah, it didn't work out that way atall.

I'm not sure whether it was because it was really wet out or just because that's the way rice krispie treats are, but they didn't behave at all the way I expected them to. As I started sculpting them, they were just gooey and collapsing everywhere. I hollered for my sister to bring me skewers! Hurry! Hurry! Yikes! I stuck in skewers, here, there, everywhere! Anything to hold those rice krispie treats together and to hold them in place. Pretty soon I had a proto-monkey which appeared to be undergoing a truly ghastly acupuncture session. But at least it had arms and legs. I added some detail to the hand and feet with fondant.
I made the facial features by piping buttercream and sculpting it with a paintbrush. It was kind of hard to make it look like a monkey rather than like a sort of withered old man, but I think I did OK. I was using one of my baby niece’s animal picture books as a reference. It was very nice of her to share it with me.
The ears I had made a few days in advance out of gum paste with skewers embedded in them so I could just stab them into place in the cake.
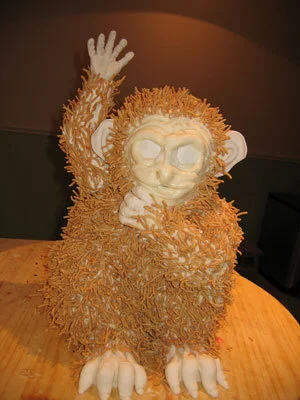
What's the point of a poo-flinging monkey without gross, matted fur? It would have been easy to make the fur out of frosting, but that tends to be too cartoonish for my taste. So I came up with a different plan - those little crunchy chow mein noodles. I know, I know it sounds a little weird. But potato chips and chocolate can be good. Those little shoestring potato snacks and chocolate can be good. I though it was workable. And they looked GREAT! It took me quite a while to cover the entire monkey and I seriously underestimated the amount of noodles it would take. Fortunately, there was some confusion as to who was buying how many packages of noodles, and we wound up buying approximately twice as many as I thought I would need. Which turned out to be just barely enough.

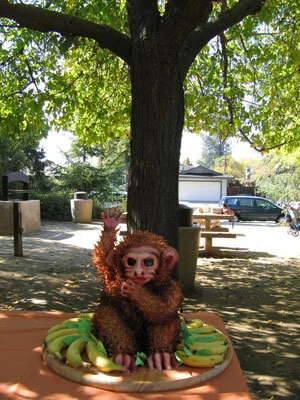
The noodles were already a pretty good base monkey color, so I just airbrushed in some mottling and some shadows. I painted the eyes with black food coloring and then went over that with clear piping gel to get the necessary depth and sheen. With that, the monkey itself was done. Left to my own devices I probably would have left it at that, but fortunately my sister gave me the kick in the ass that I needed to make it a better presentation. She came up with the idea of surrounding the monkey with bananas. So we bought about sixteen bananas and I made some gum paste leaves to fill in the gaps. It looked quite regal really, like he was a monkey king sitting on his banana throne.
The party was in an outdoor park, which was a great setting. We arranged the monkey on a picnic table underneath a big tree, with a convenient bowl of raisinettes to use as poo. The green leaves of the tree complimented the green leaves on the cake perfectly and I got to bask in the compliments of the guests at the party in the next picnic area as well as those of the guests at our party. I actually went to the party thinking that the cake was entirely innocuous and mainstream, at least compared to all my other cakes. But the unanimous verdict was that it was actually quite creepy, primarily due to the huge, hypnotic, glassy eyes.

The weight of all the gum paste and frosting and chow mein noodles on the arm made the poo flinging a little more sluggish than it was in my initial tests, so the monkey only threw his poo about two feet in front of him. Oh well, next time maybe I can get a better angle of release.
Cutting the cake was very funny because I had to cut it away around the arm mechanism. We ended up with a monkey arm hovering above a field of cake and banana carnage. The verdict on the chow mein noodles with the cake was mixed. Some people thought it worked quite well - a bit of crunch, a bit of salt - while others just found it weird and incongruous and ate around it. The birthday boy himself didn't weigh in on that particular issue, as he doesn't have enough teeth to get any of the chow mein noodles, but he certainly seemed to enjoy the cake. No one's quite sure how he got some on the back of his head, though.
