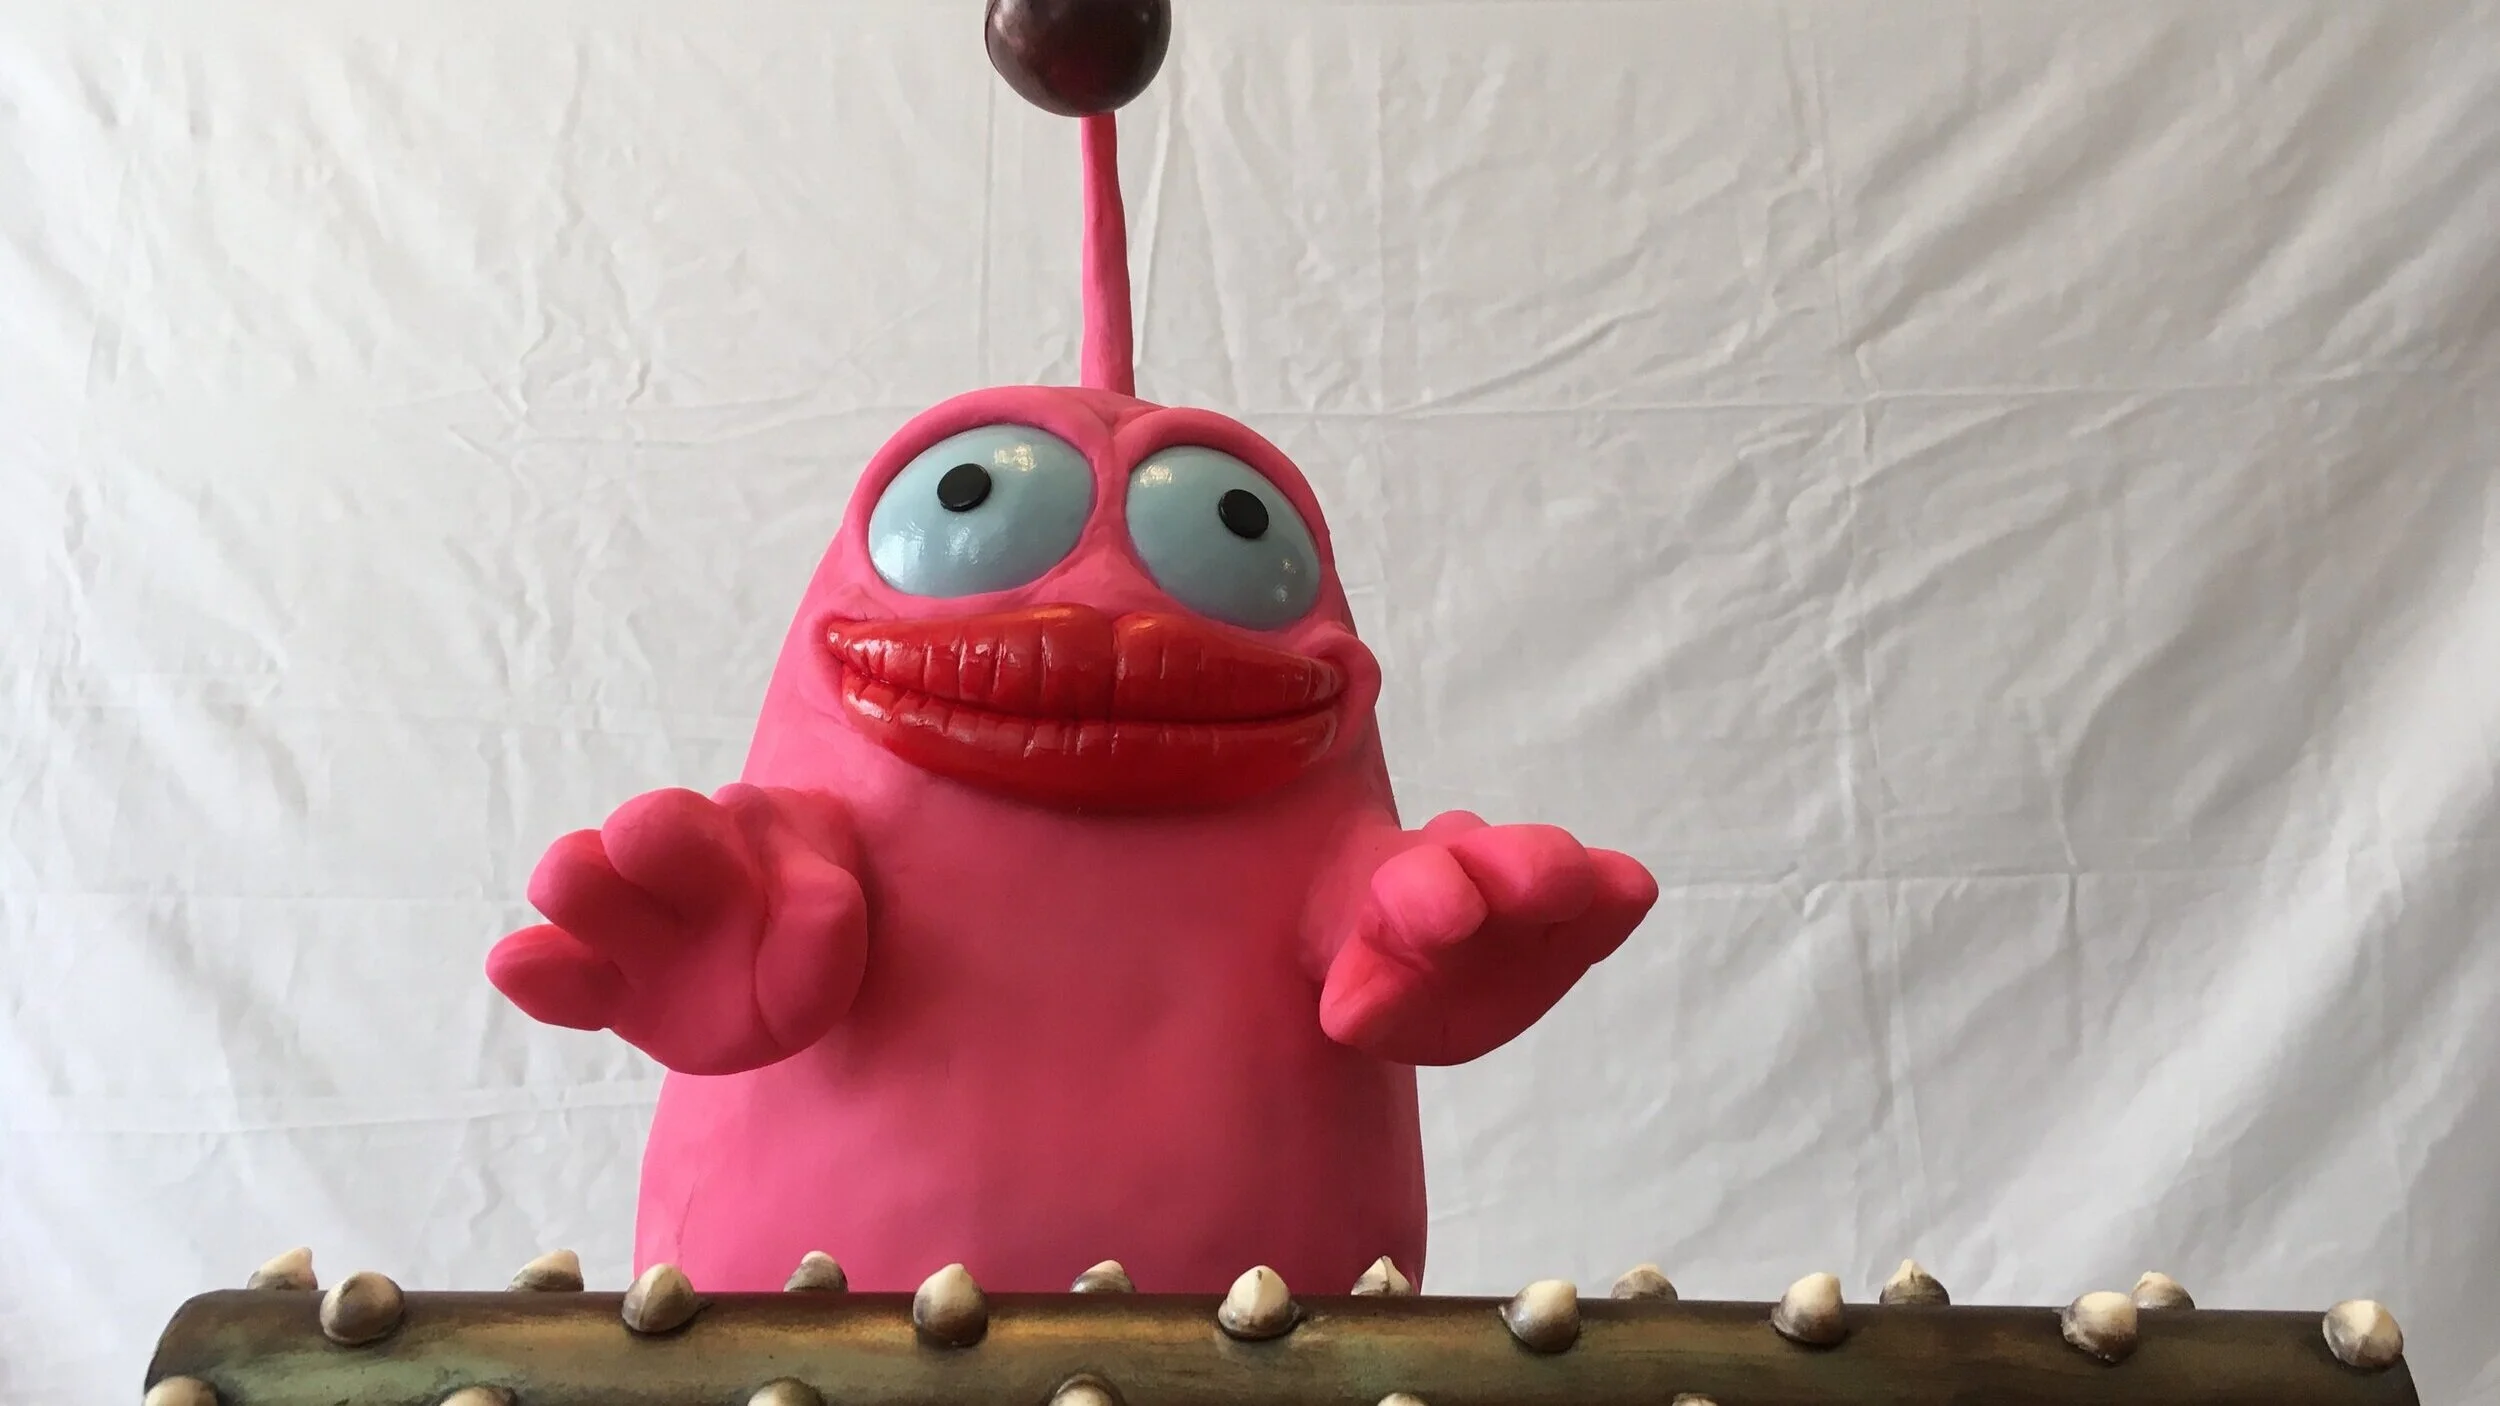
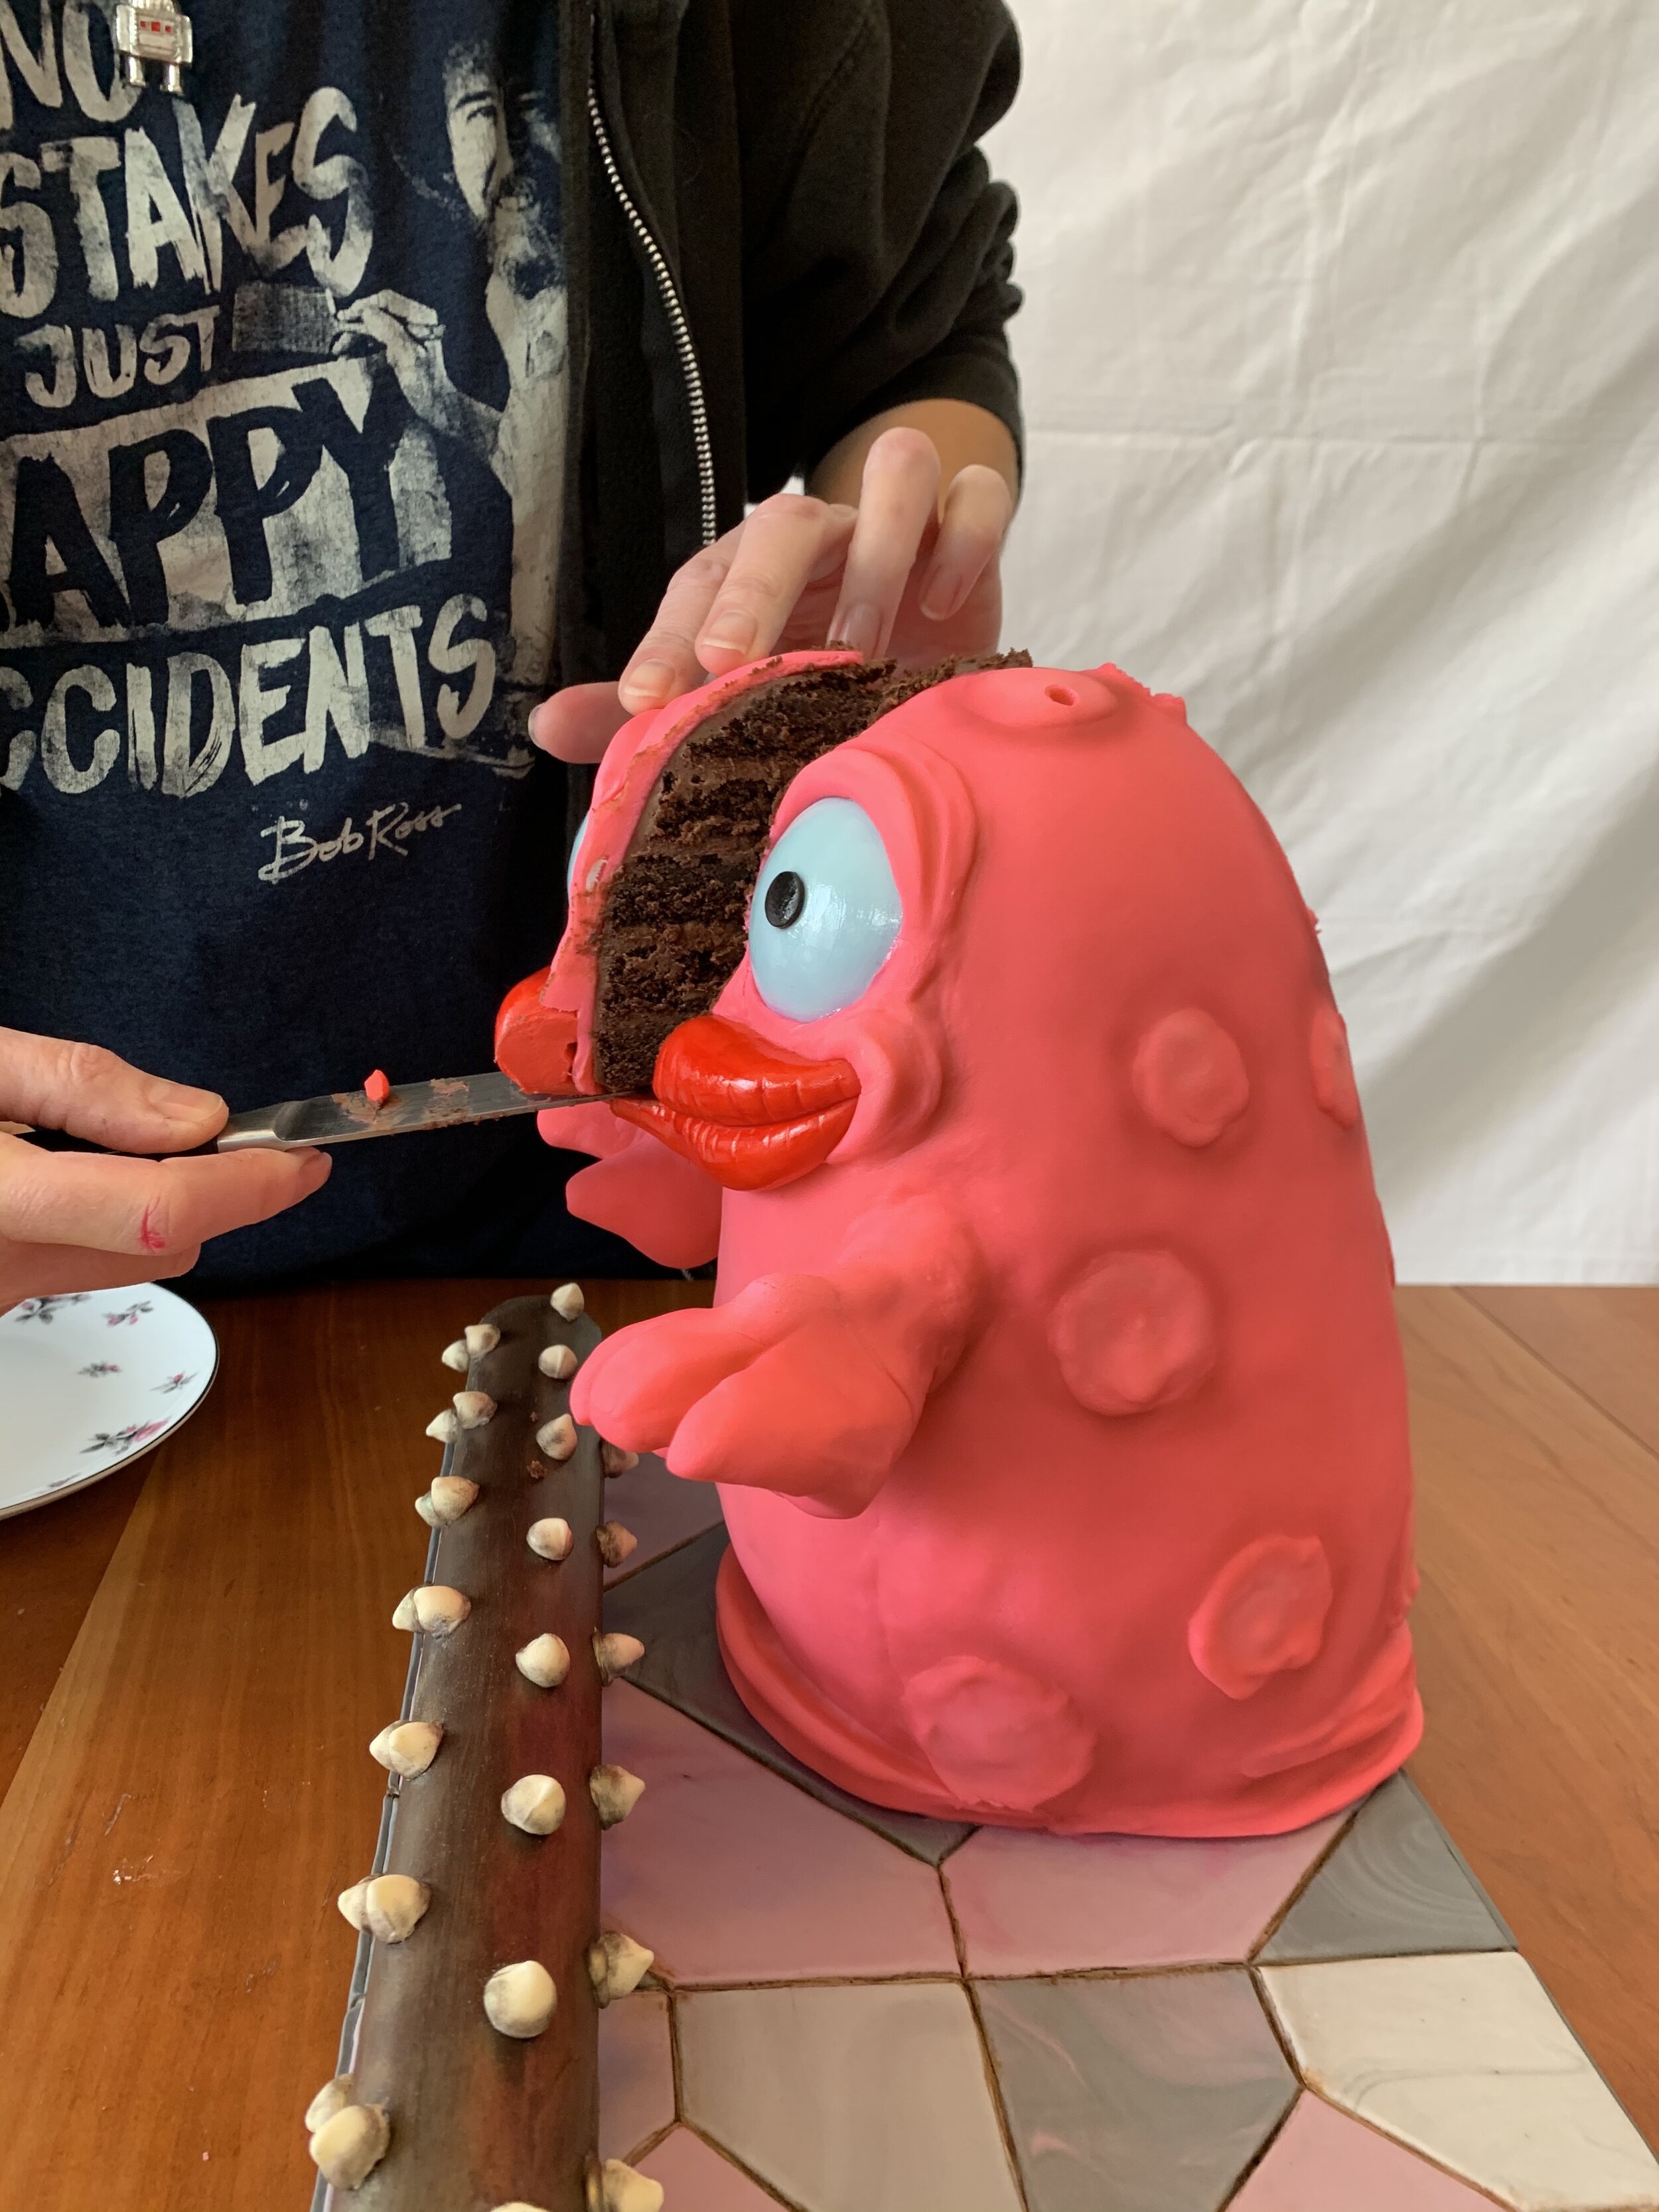
Spike Roller Cake
This very pink monster is a mini-boss from Legend of Zelda: Link’s Awakening. It’s chocolate cake with milk chocolate ganache icing. The spike roller itself is a tube of dark chocolate with white chocolate chip spikes and milk chocolate mousse inside.
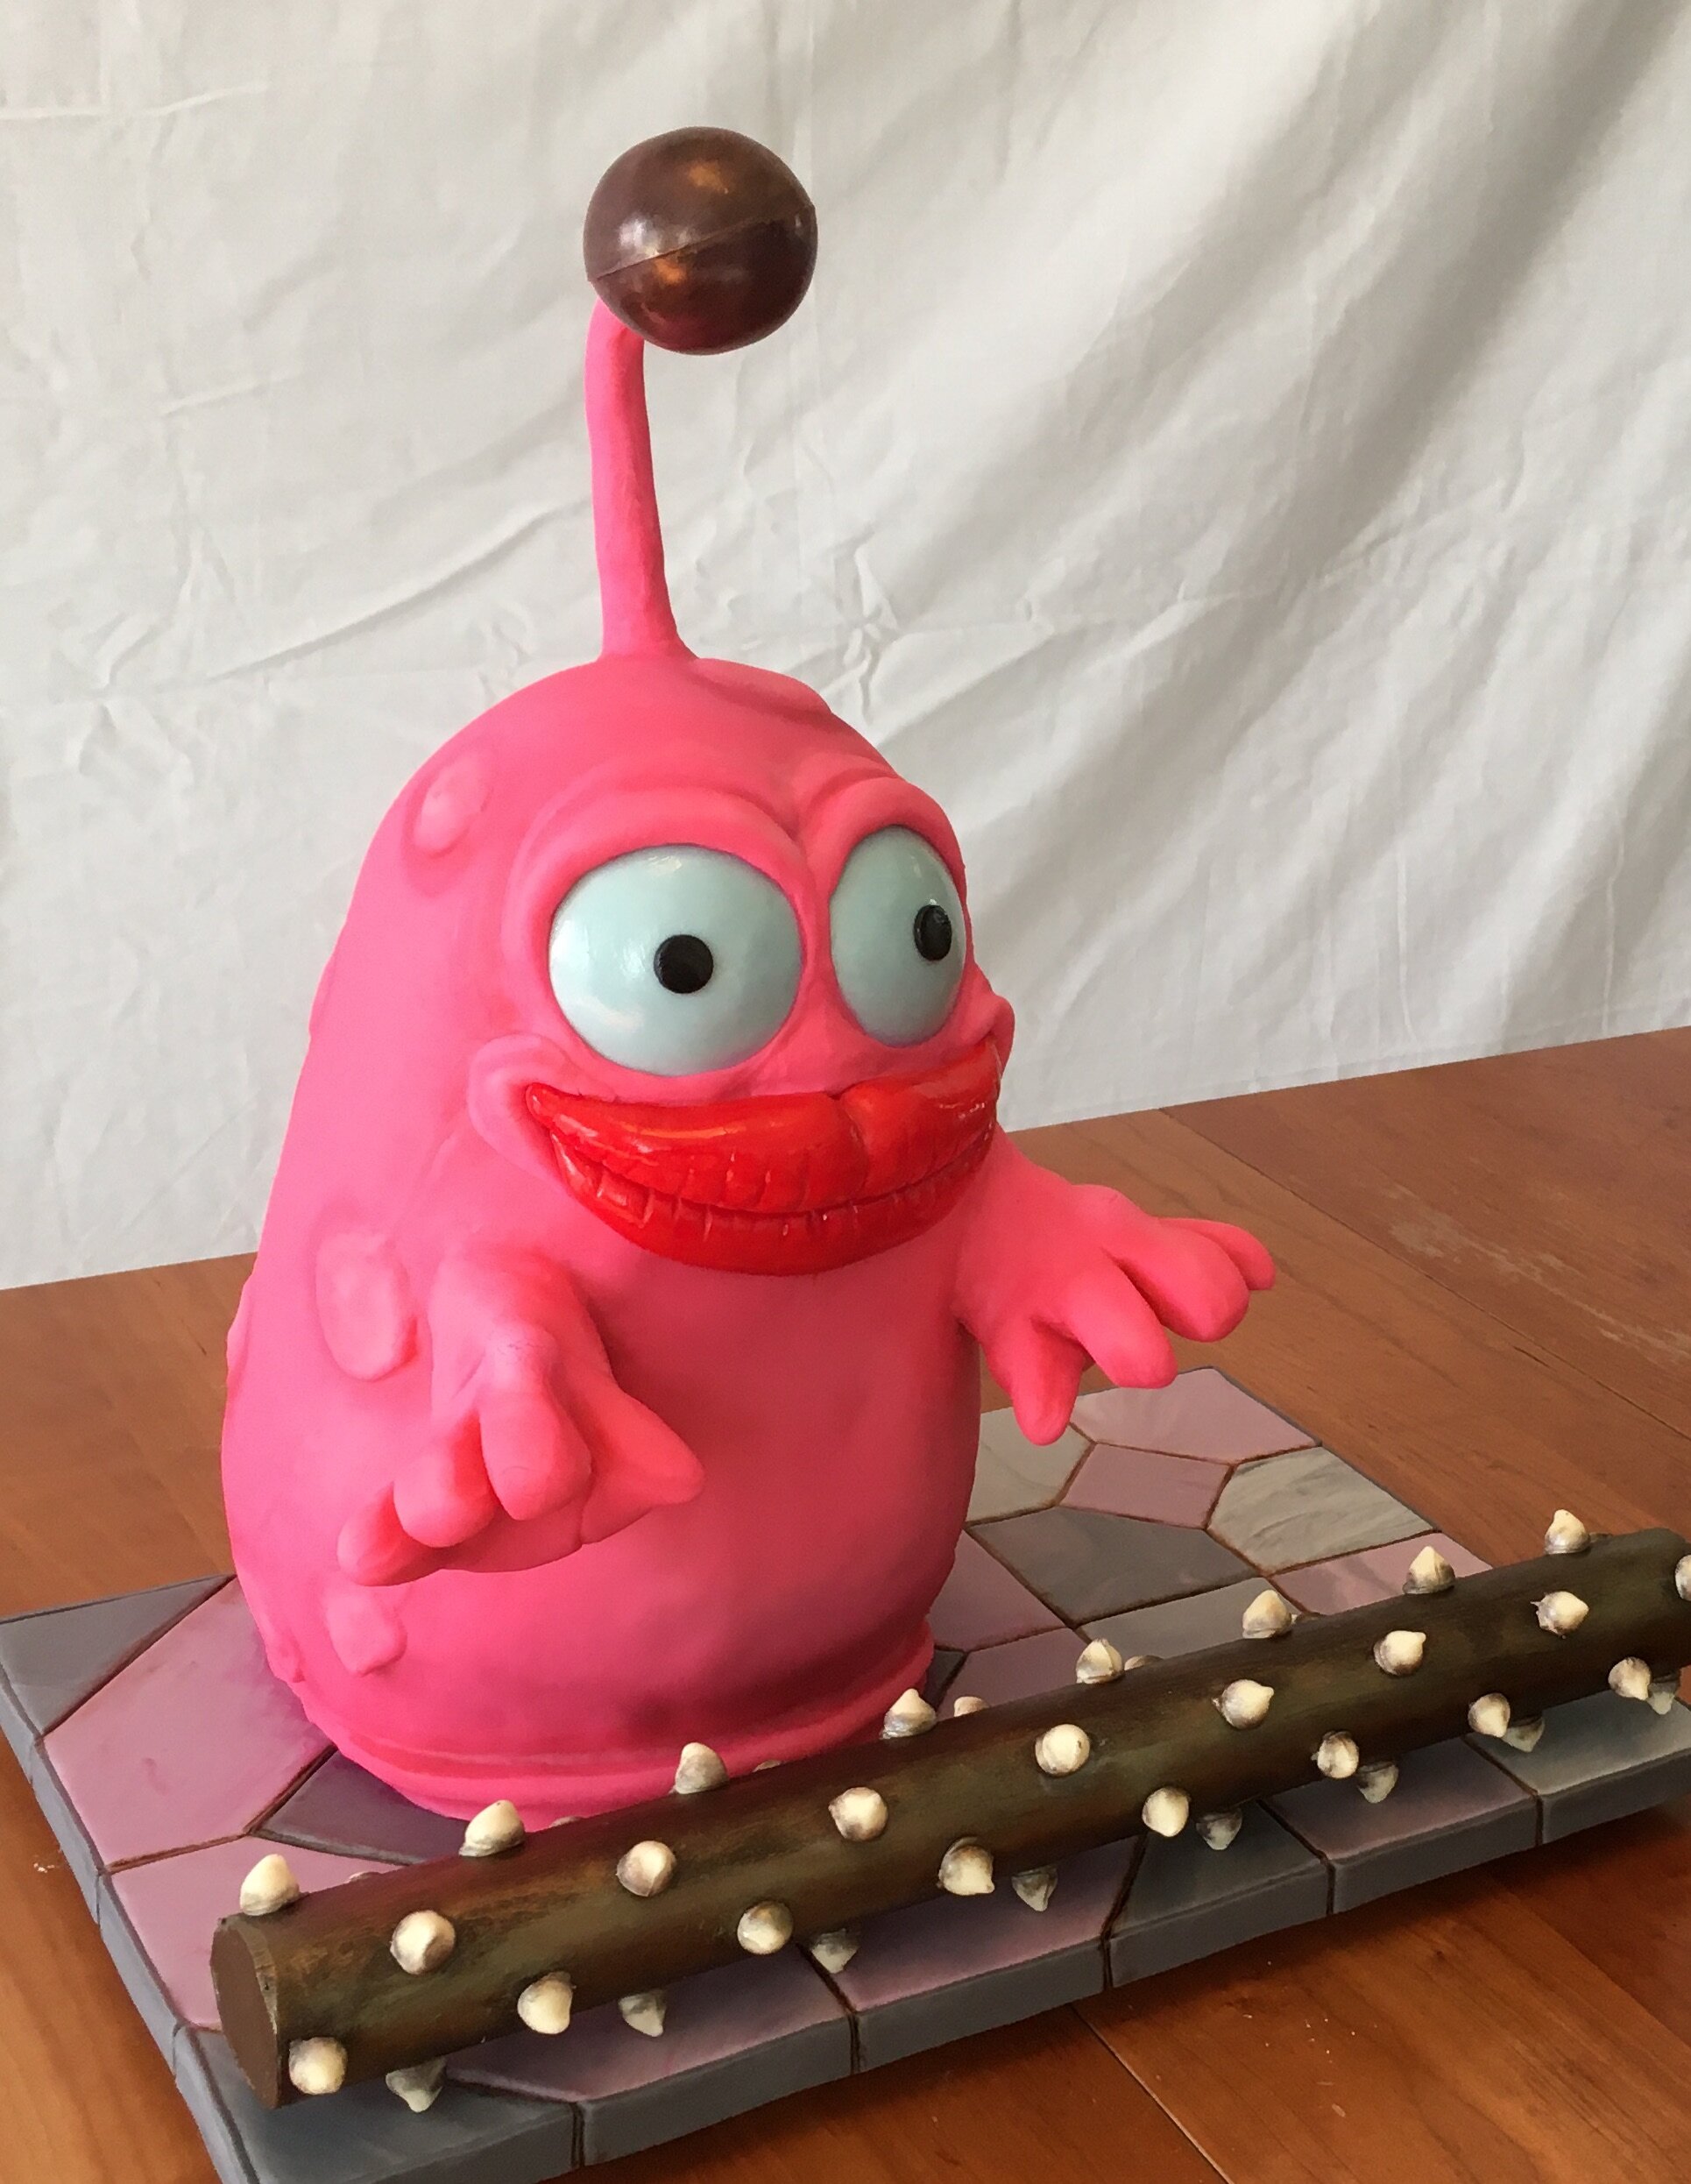
This very pink monster is a mini-boss from Legend of Zelda: Link's Awakening. It's chocolate cake with milk chocolate ganache icing. The spike roller itself is a tube of dark chocolate with white chocolate chip spikes and milk chocolate mousse inside.

Miss Fritter Cake
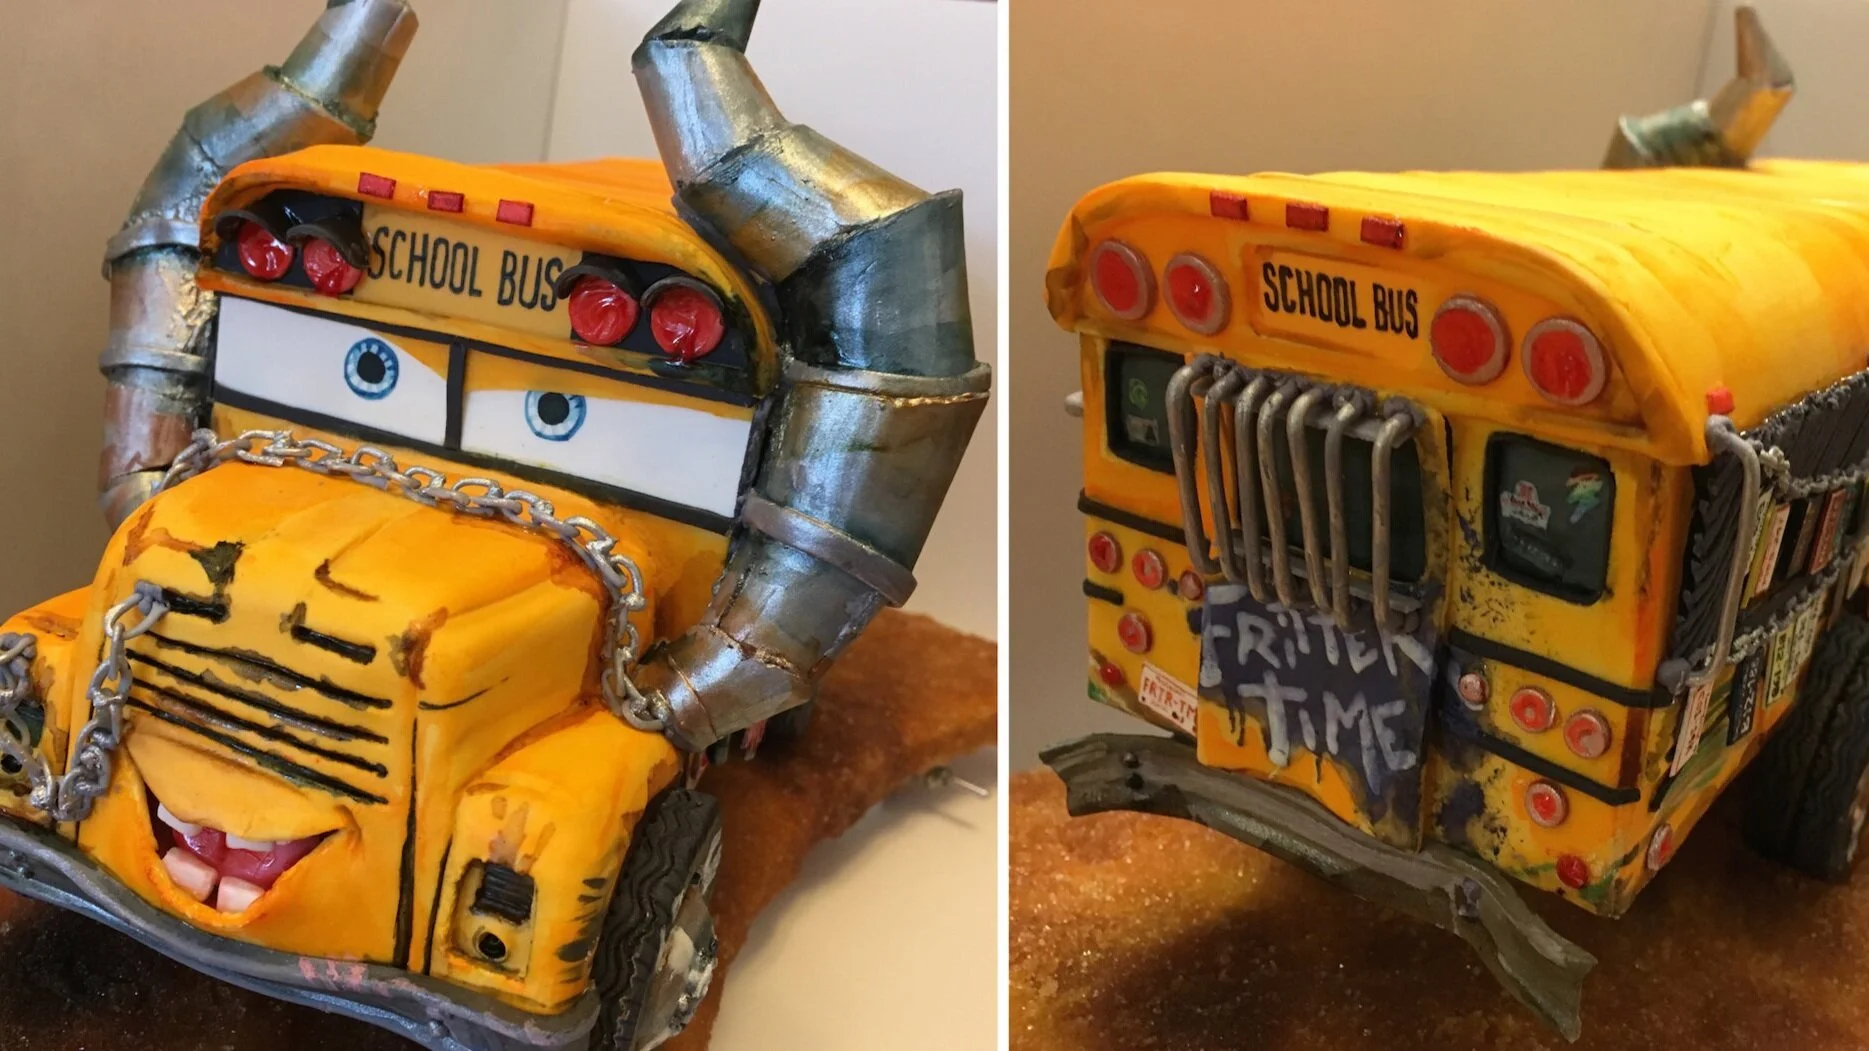
Look – it’s another Cars-based cake! And one of my best, if I do say so myself.

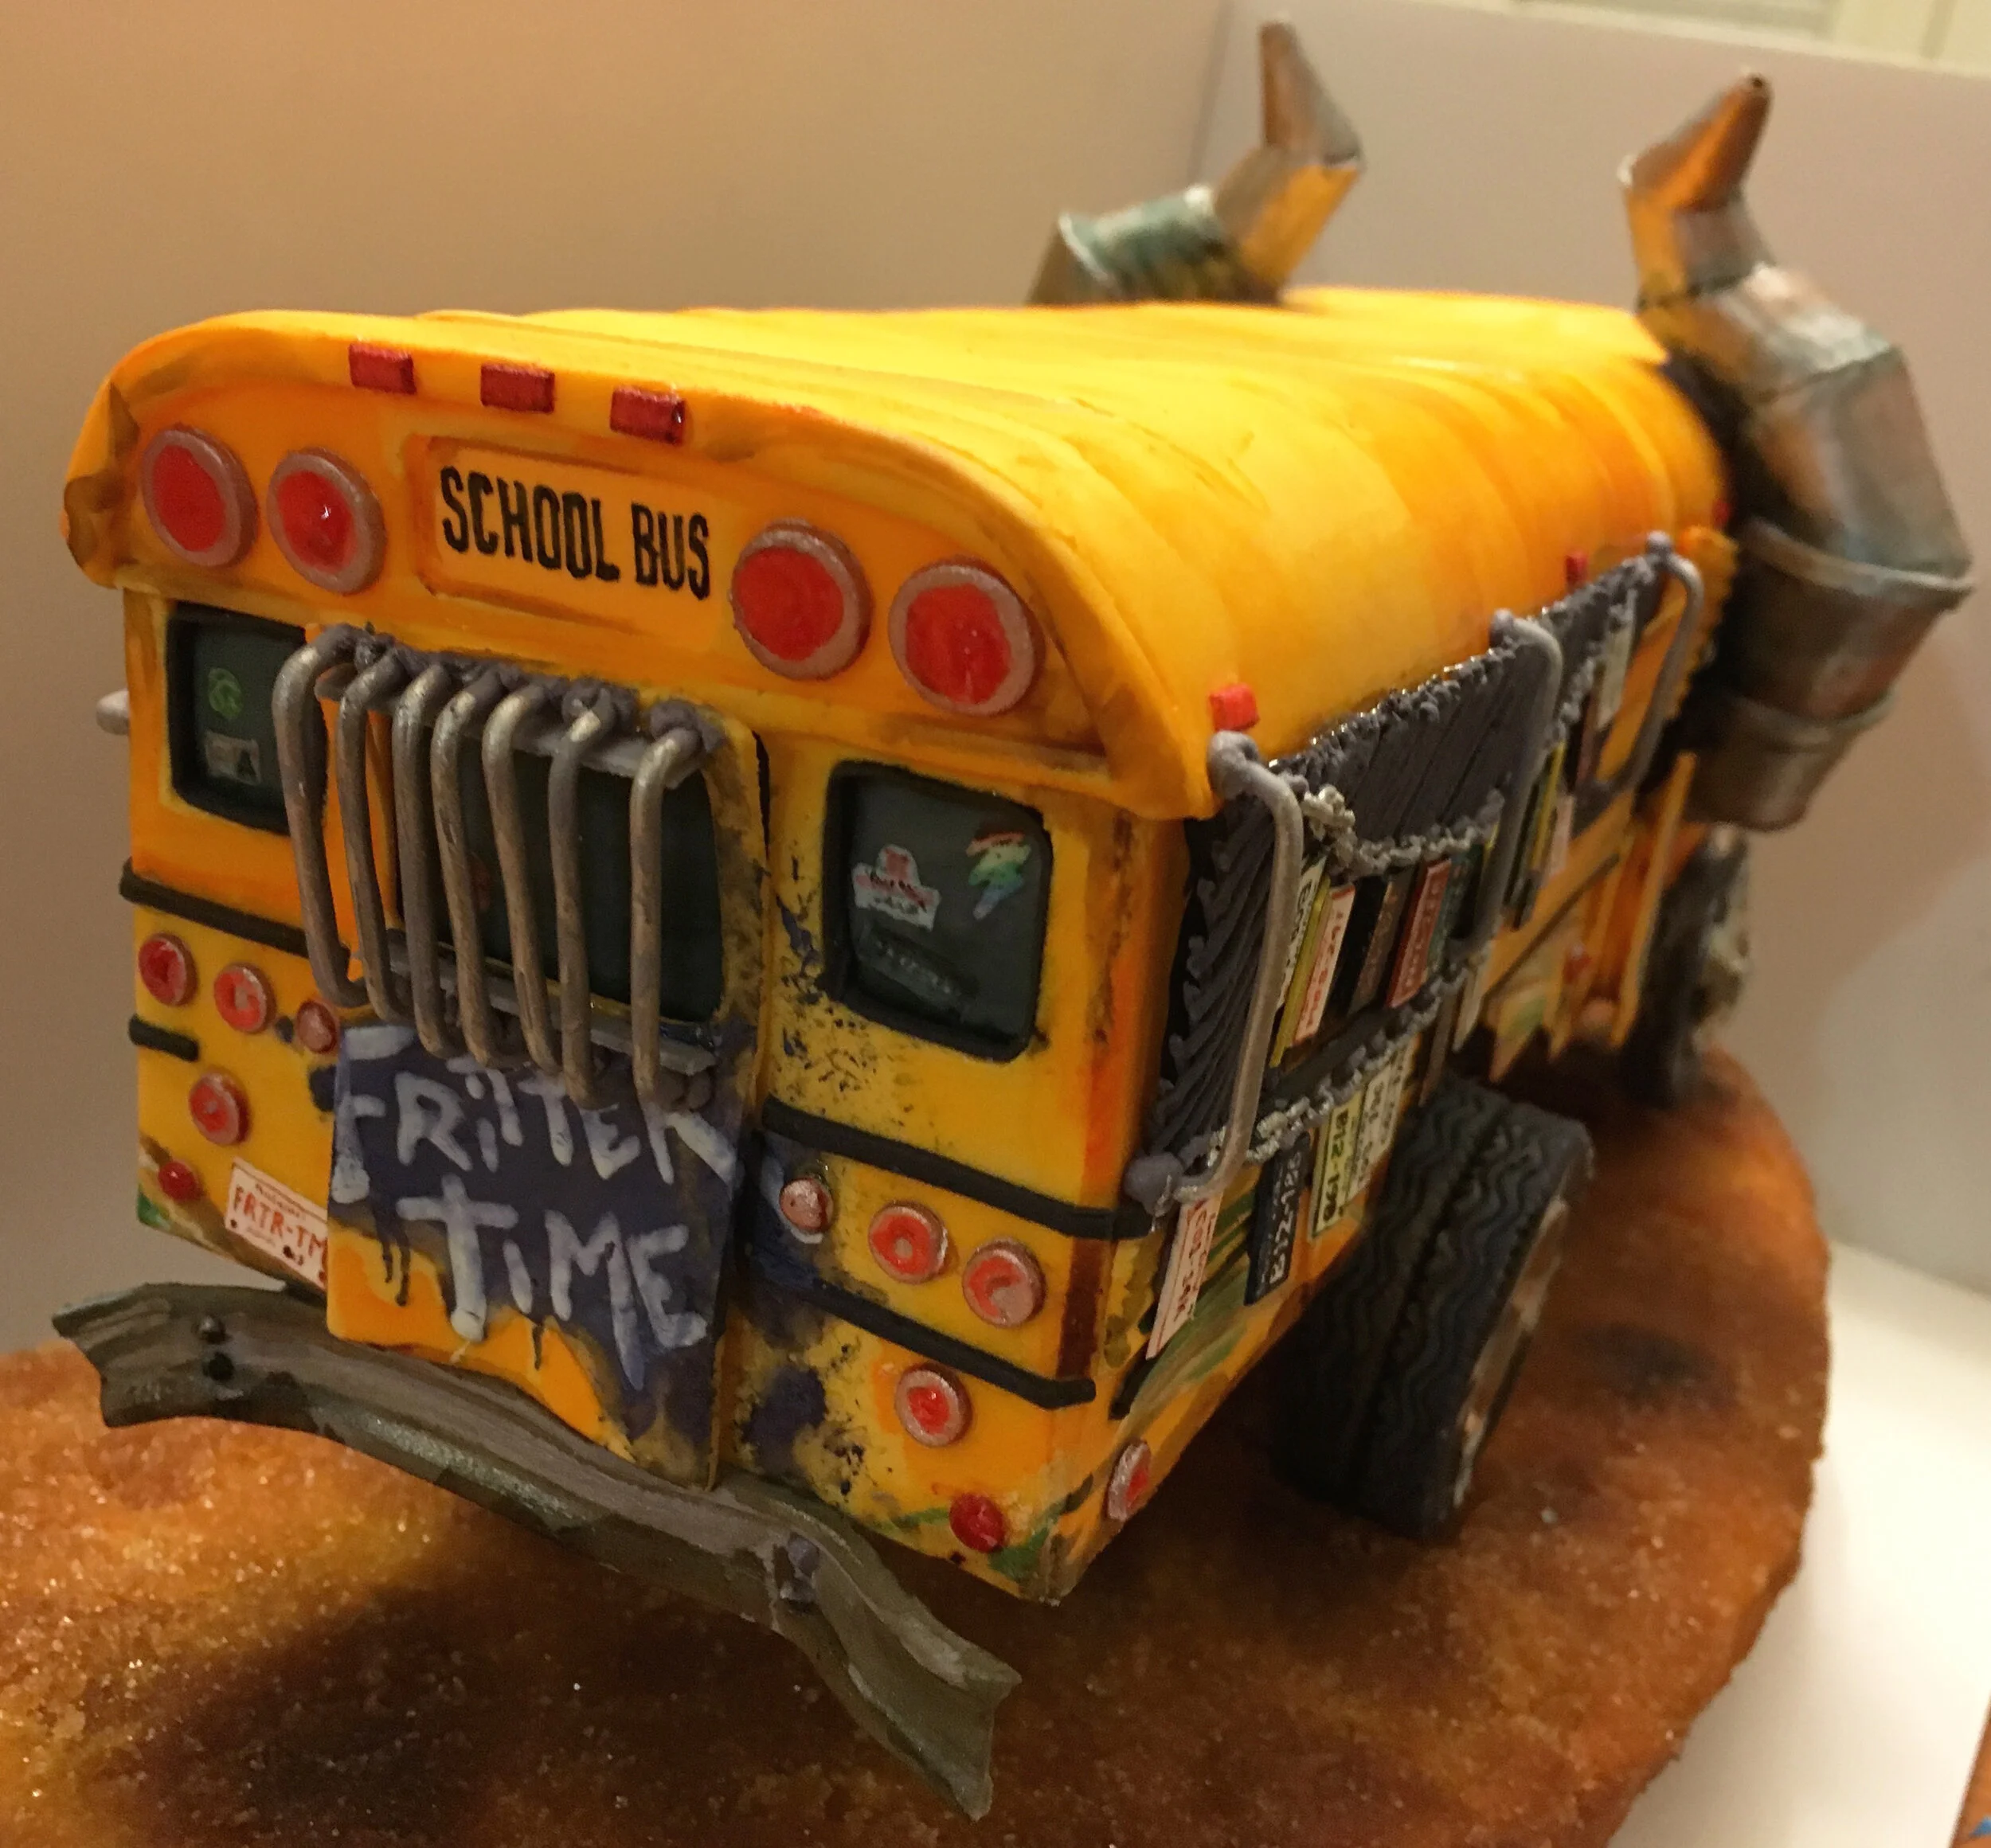
Look – it’s another Cars-based cake! And one of my best, if I do say so myself. If you’re not an avid follower of the Cars franchise, you might not be familiar with Miss Fritter, so if you need to get up to speed, here’s a video clip.

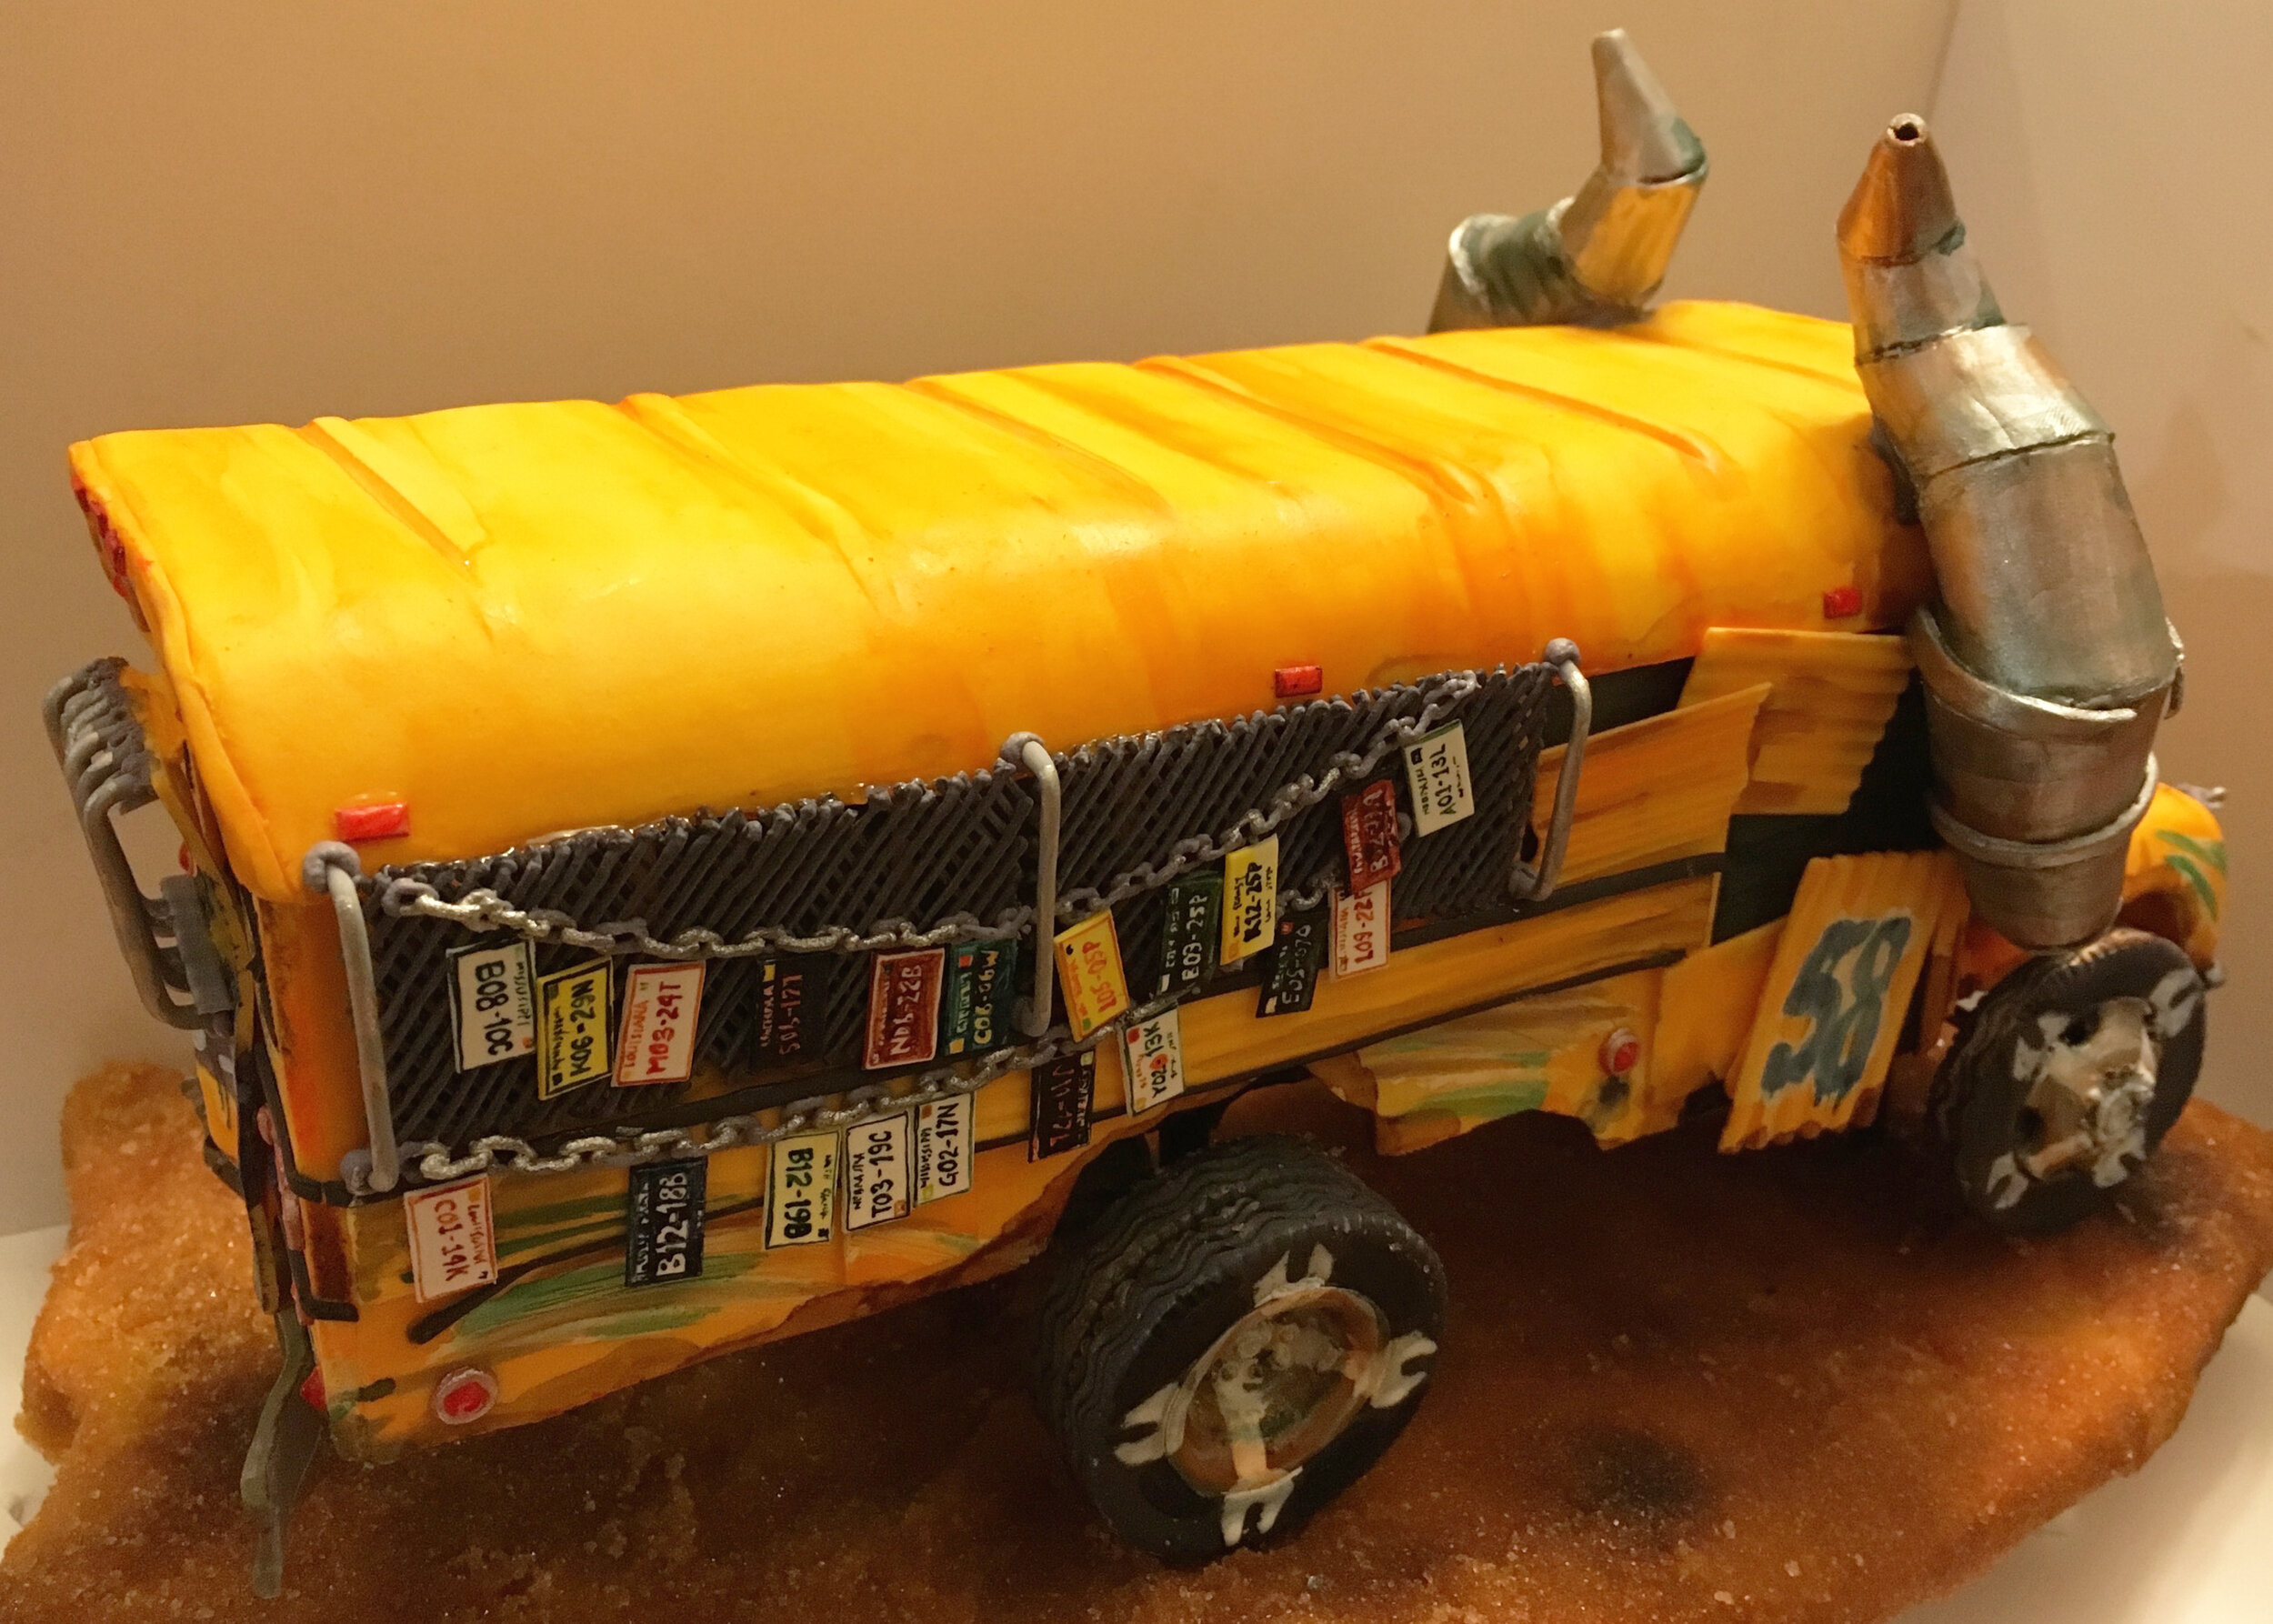
I’m really happy with how well this one turned out. All the detail is gum paste and royal icing. The hand painting was particularly fun to do.
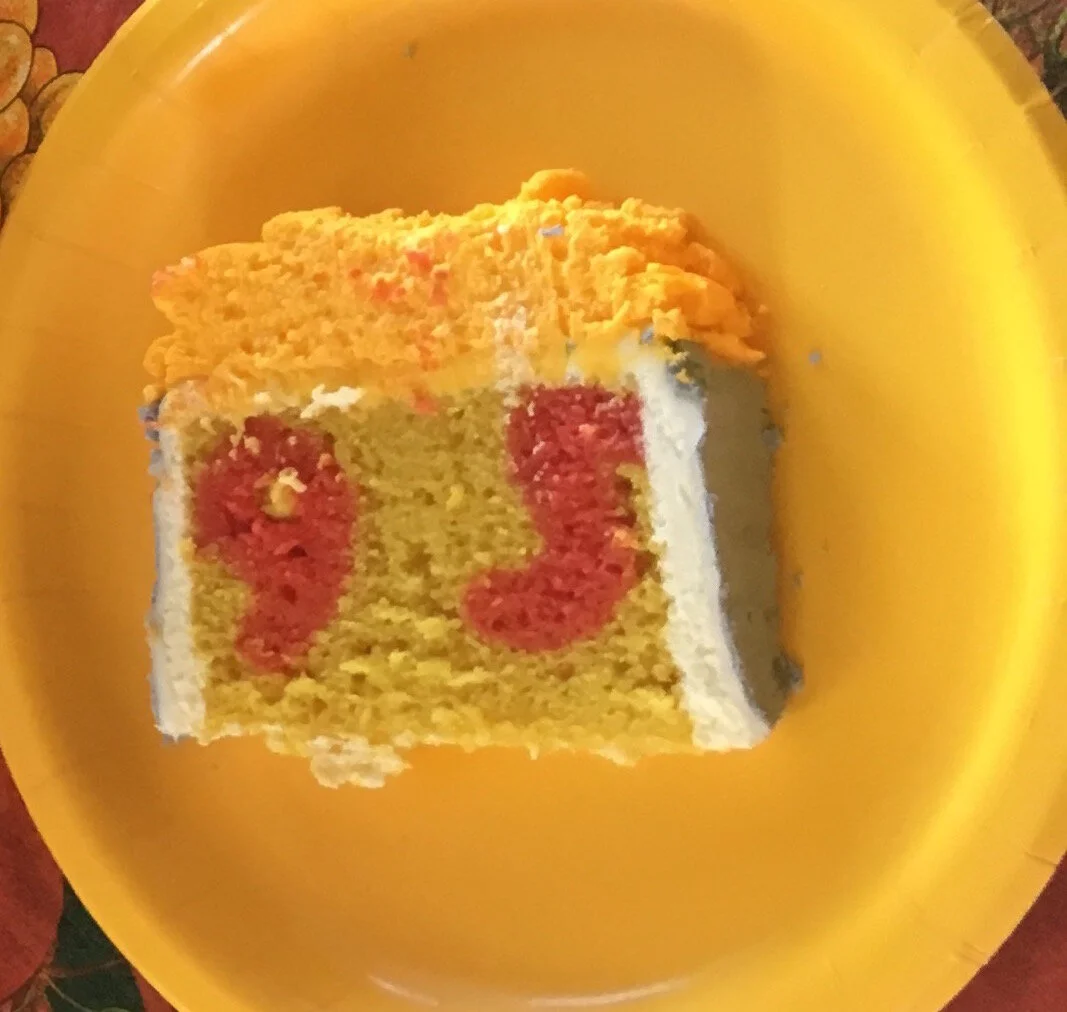
I also put Lighting McQueen’s number 95 in the middle of the cake because the birthday boy loves numbers.
The nice thing about this cake was that I could just buy the die-cast toy version of Miss Fritter and measure and scale it up. Then I gave the toy to the birthday boy for his present, so it all worked out perfectly.
Here is the cake Miss Fritter next to the toy version I modeled it after and the slightly smaller toy version that the birthday boy already had.

Norbert(a) Cake
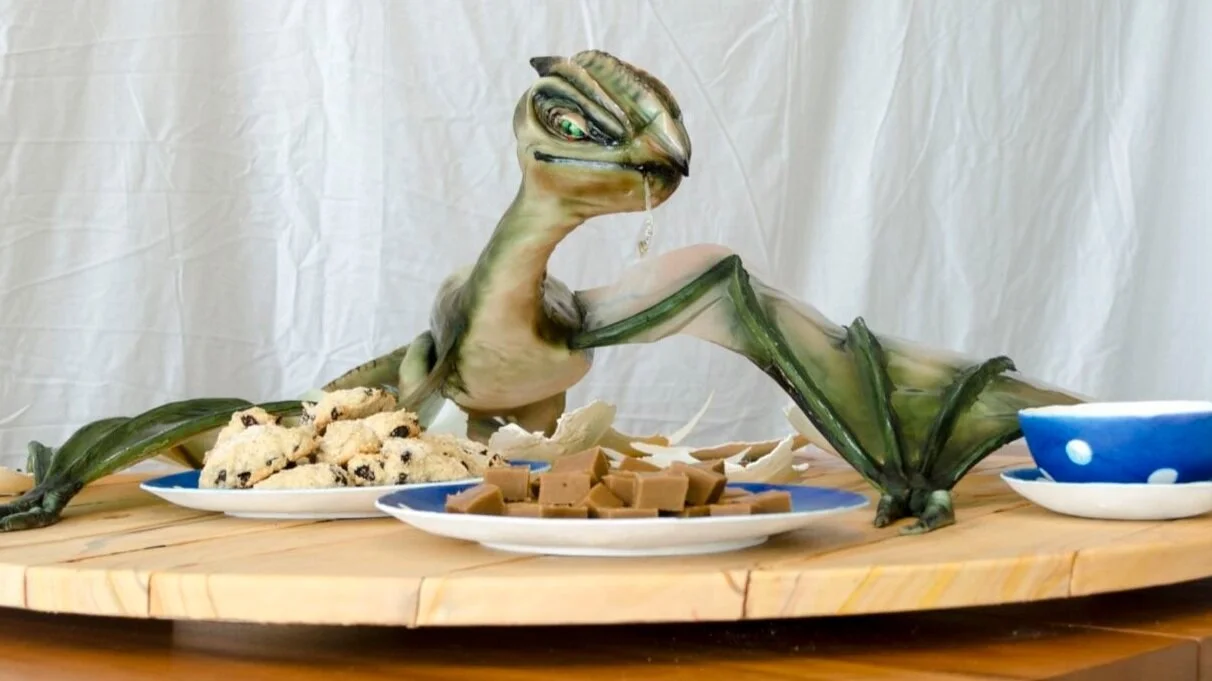
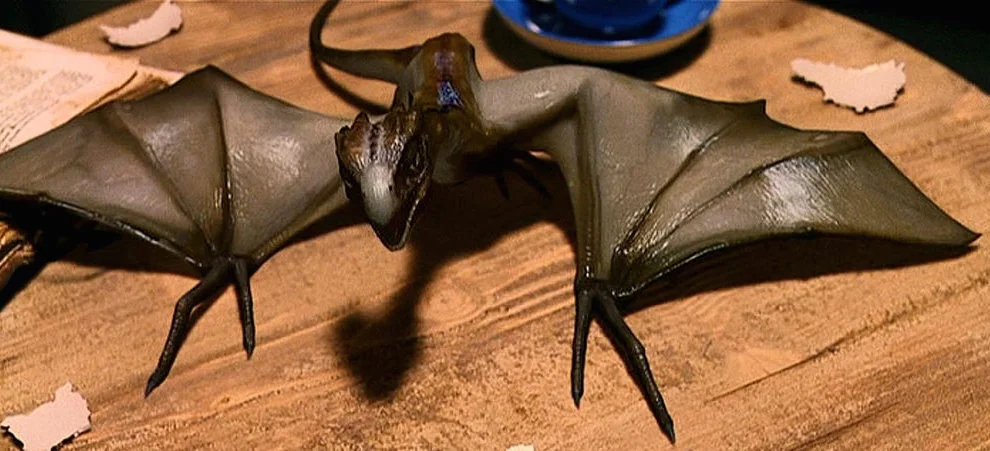
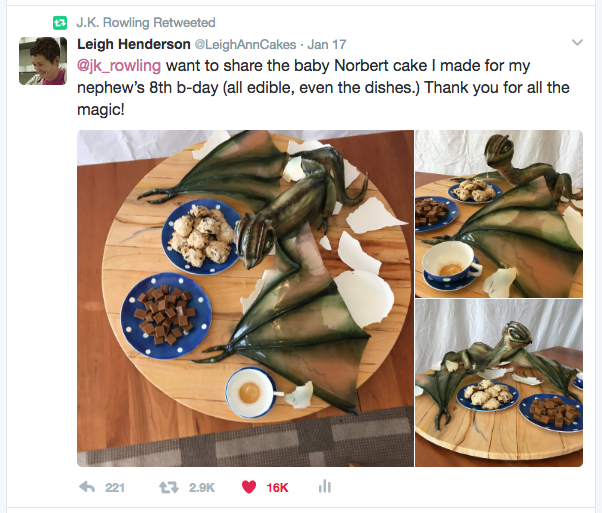
We’re all Harry Potter all the time at our house these days. So for his 8th birthday Sam wanted a cake of Norbert hatching out of an egg on Hagrid’s table.

We’re all Harry Potter all the time at our house these days. So for his 8th birthday Sam wanted a cake of Norbert hatching out of an egg on Hagrid’s table. Here is what the scene looked like in the movie.
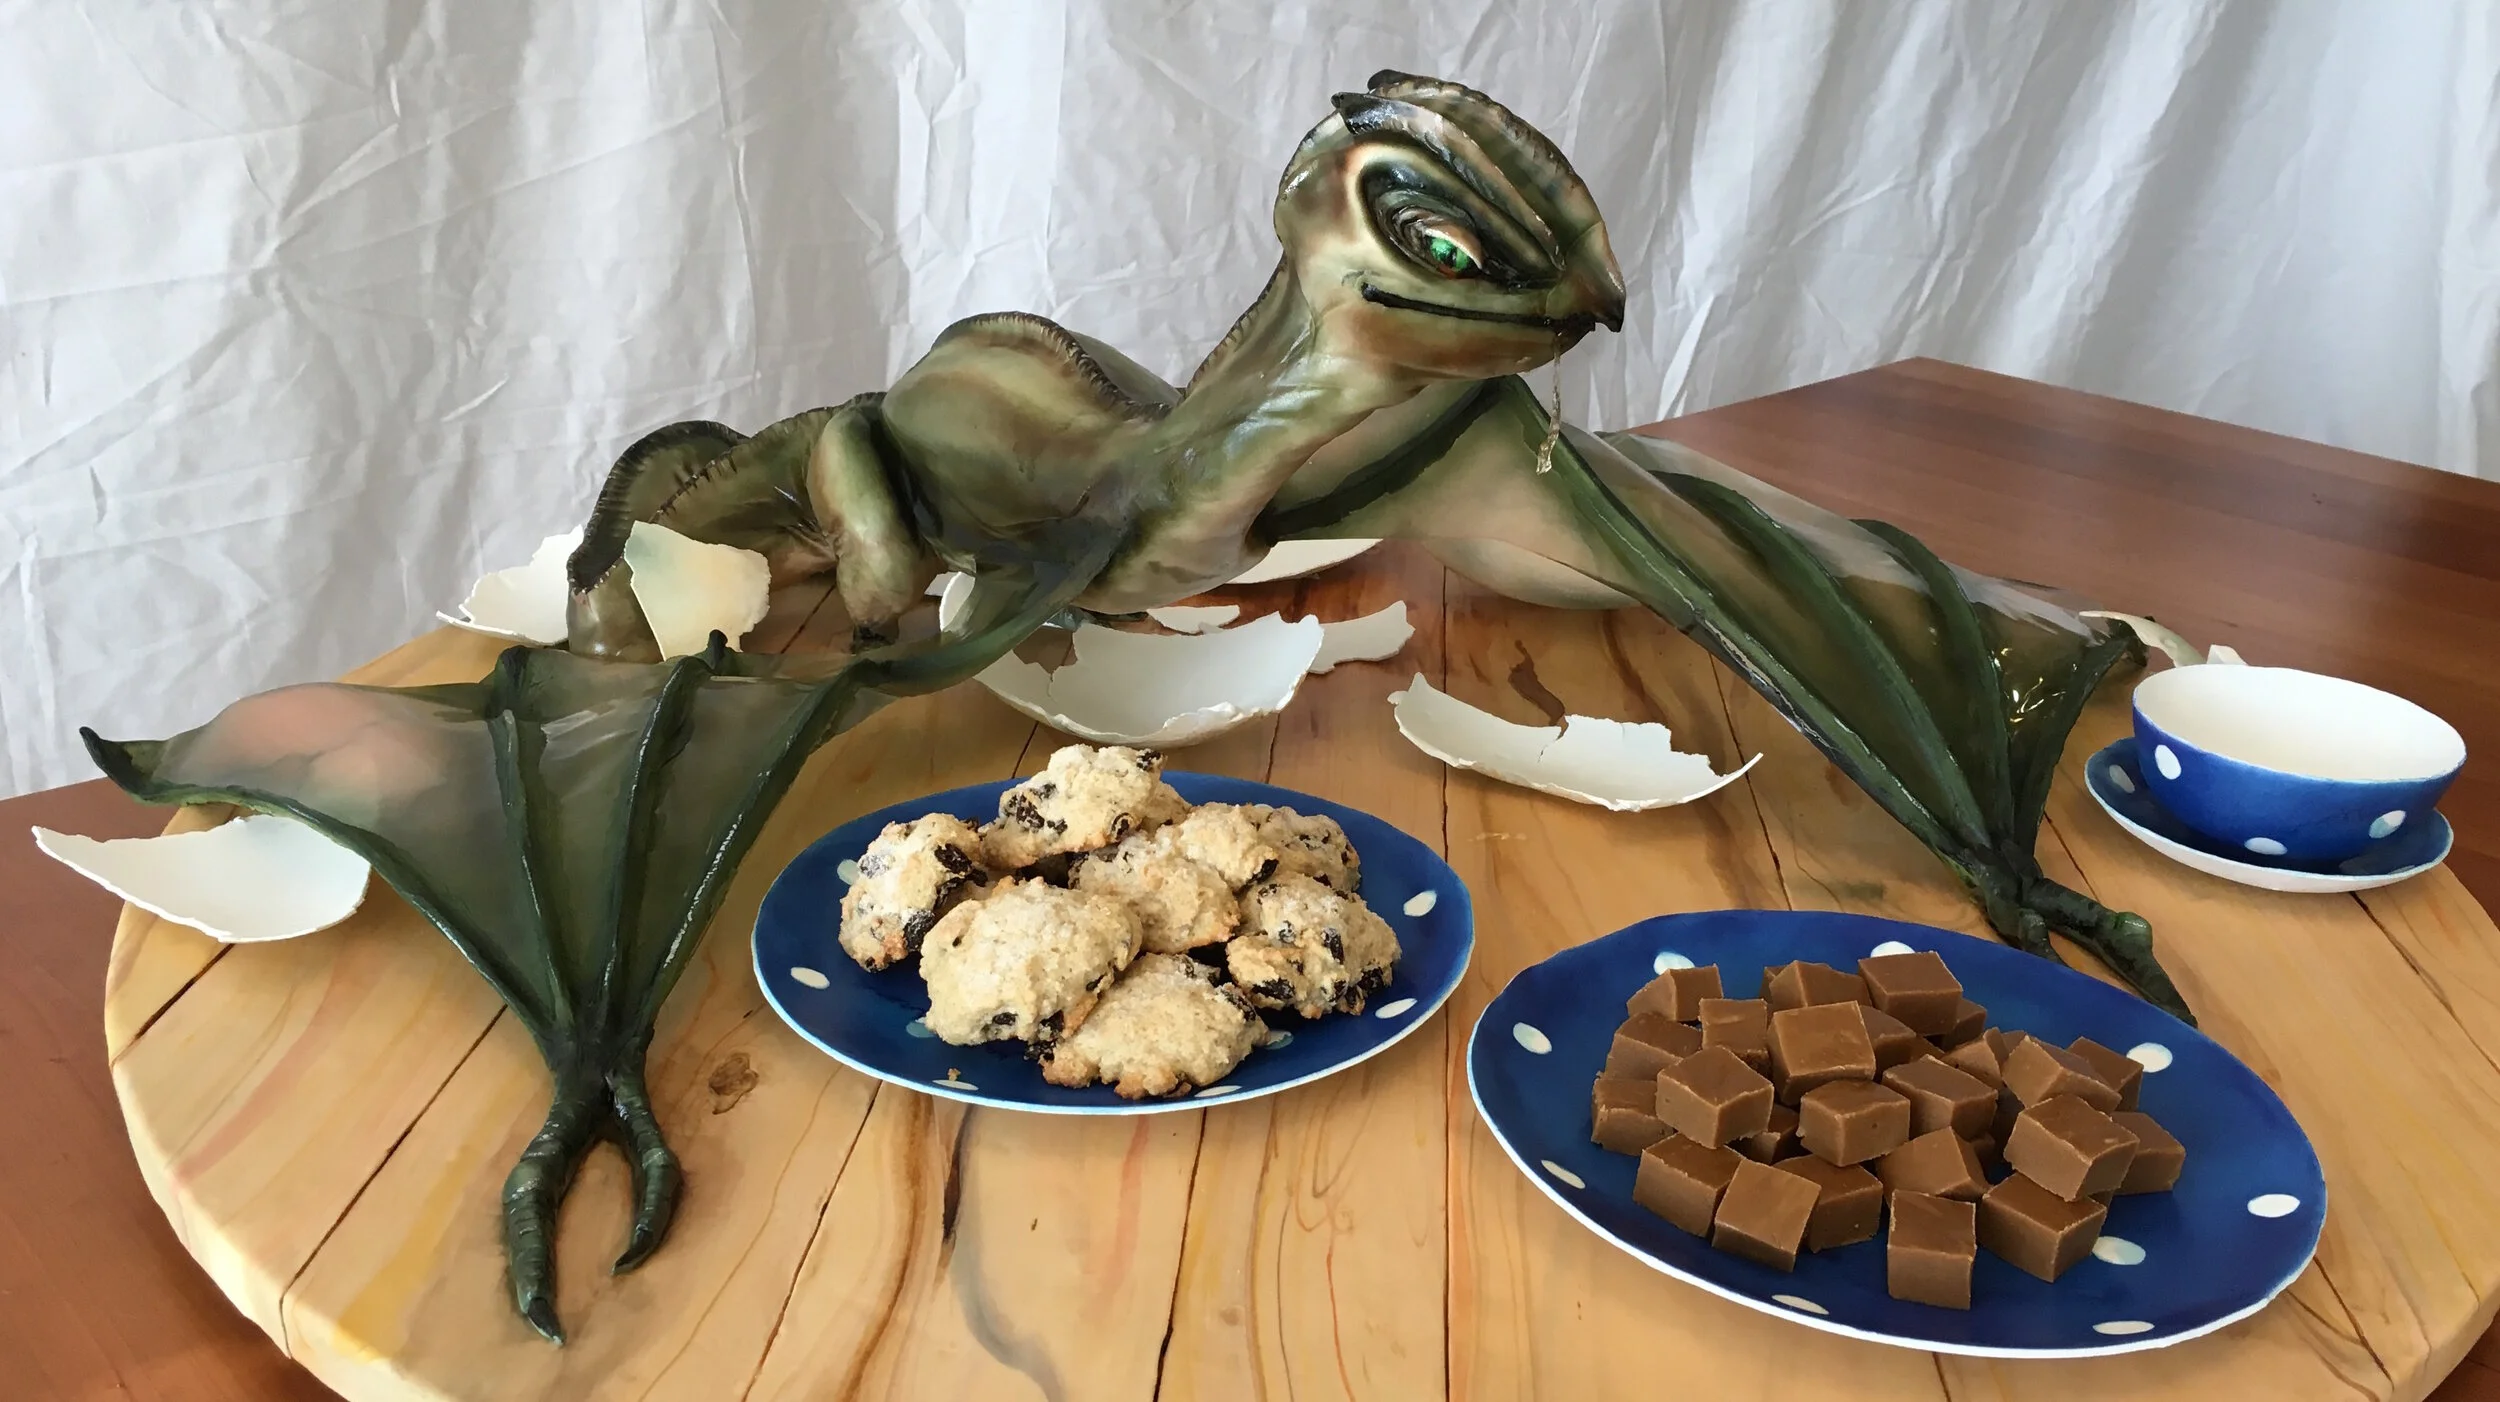
The thing about baby dragons is that they’re mostly wings. So in order to have enough actual cake in the body to serve the guests, I had to make the cake pretty huge. That base is a 3-foot diameter plywood circle, covered with wood-grained fondant.
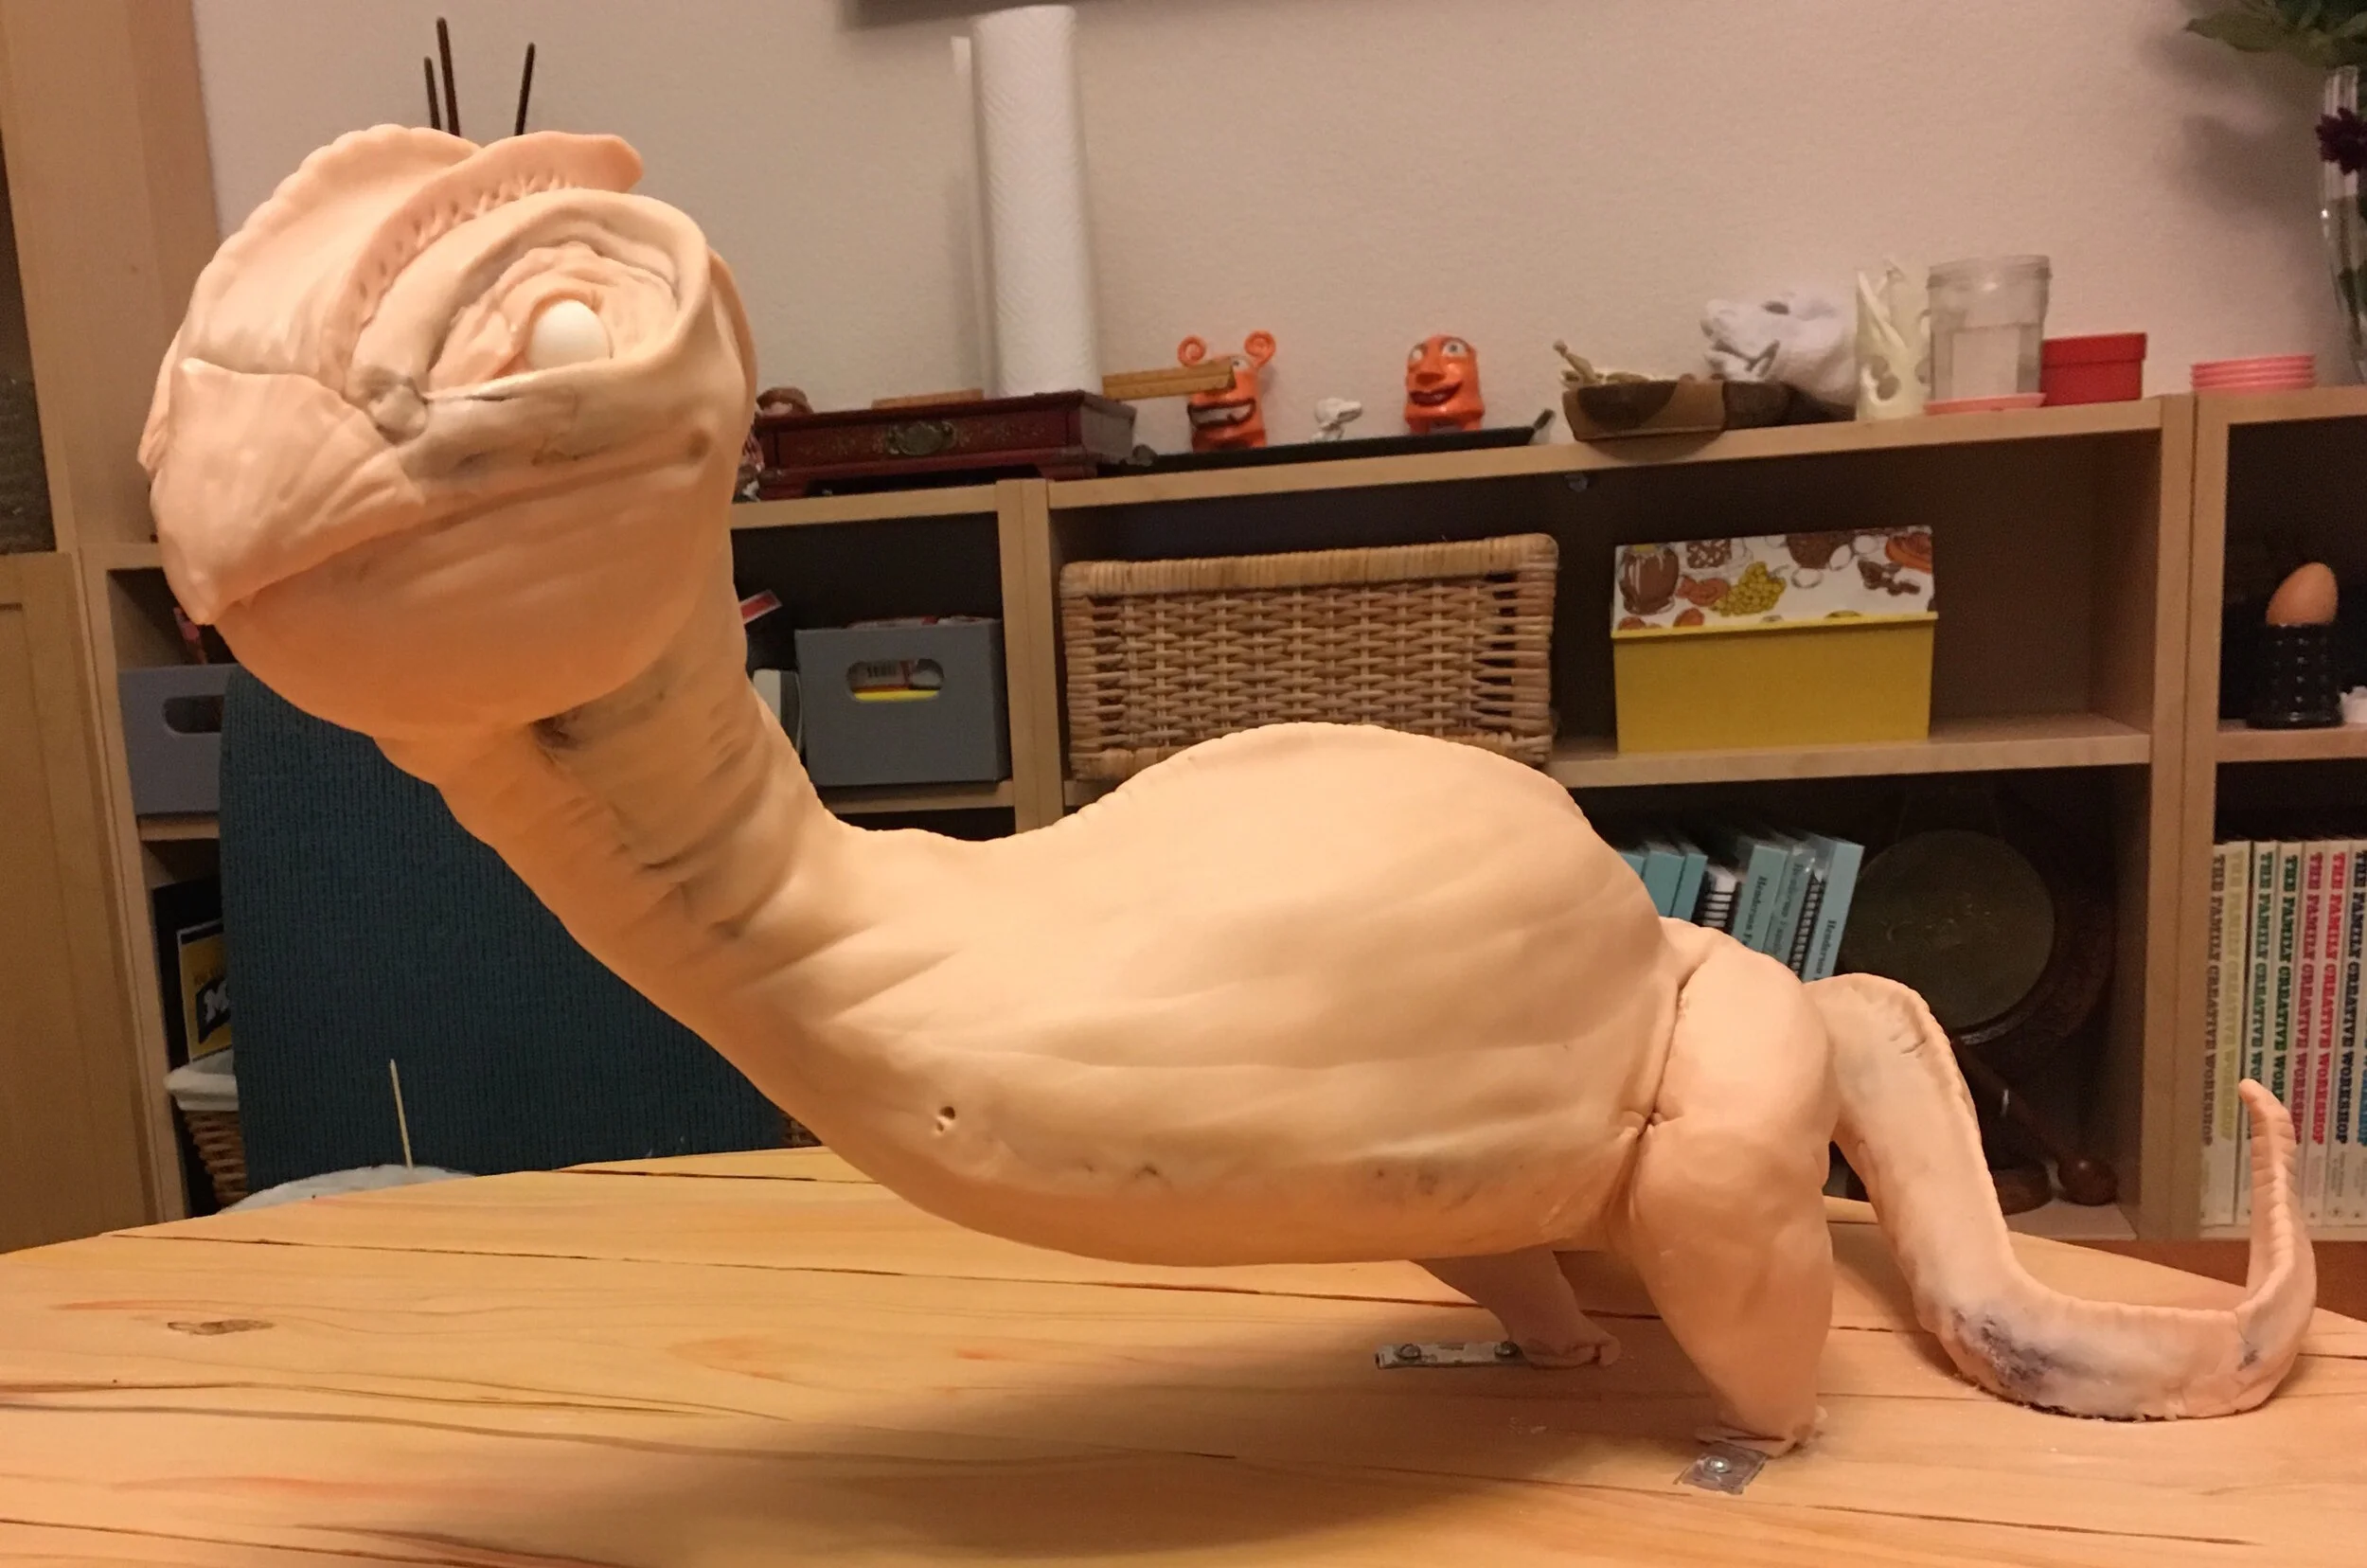
The cake is stacked and sculpted onto a foam core base, supported underneath with aluminum straps, then covered with a mix of fondant and modeling chocolate. I started with a light skin-toned base and airbrushed the colors on top. Sam even helped me sculpt some of the details.

The wings began with a wire armature, covered with gum paste. The membrane is made of gelatin. I’m particularly pleased with the airbrushed veins.
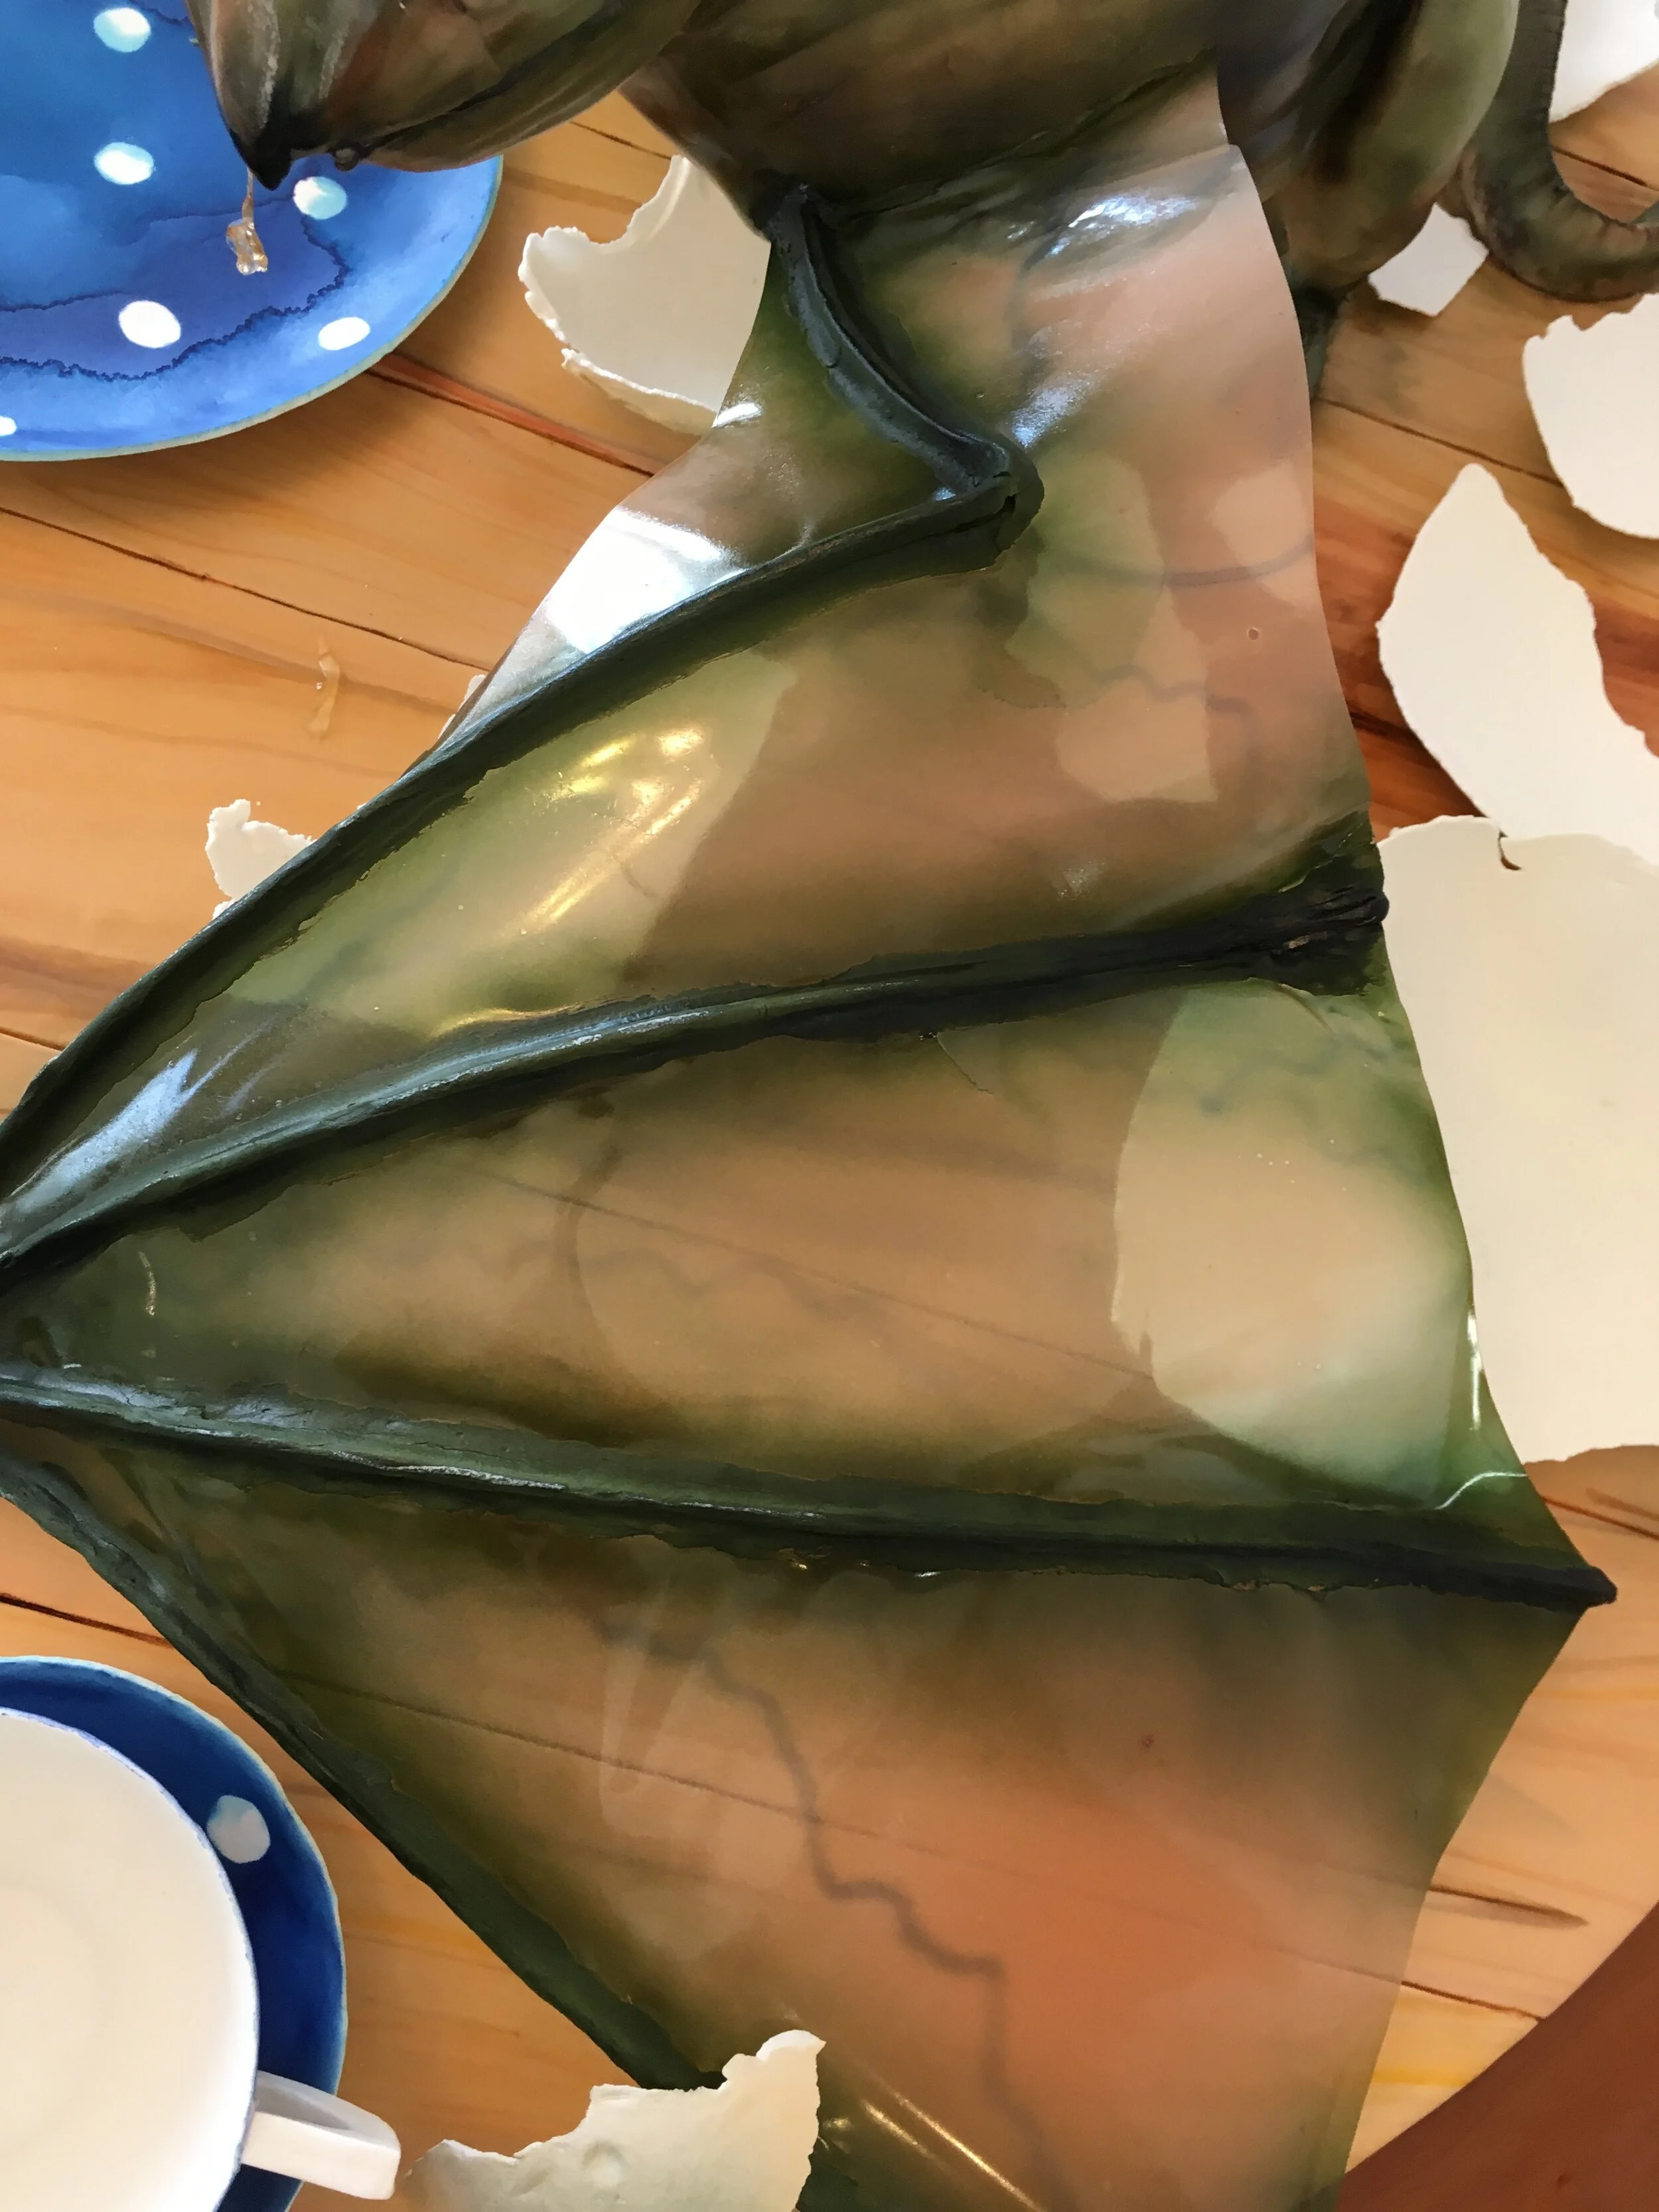
My absolute favorite part about the whole cake, though, is the string of drool hanging from her mouth. It’s piping gel with a strand of sheet gelatin in the middle for structure.
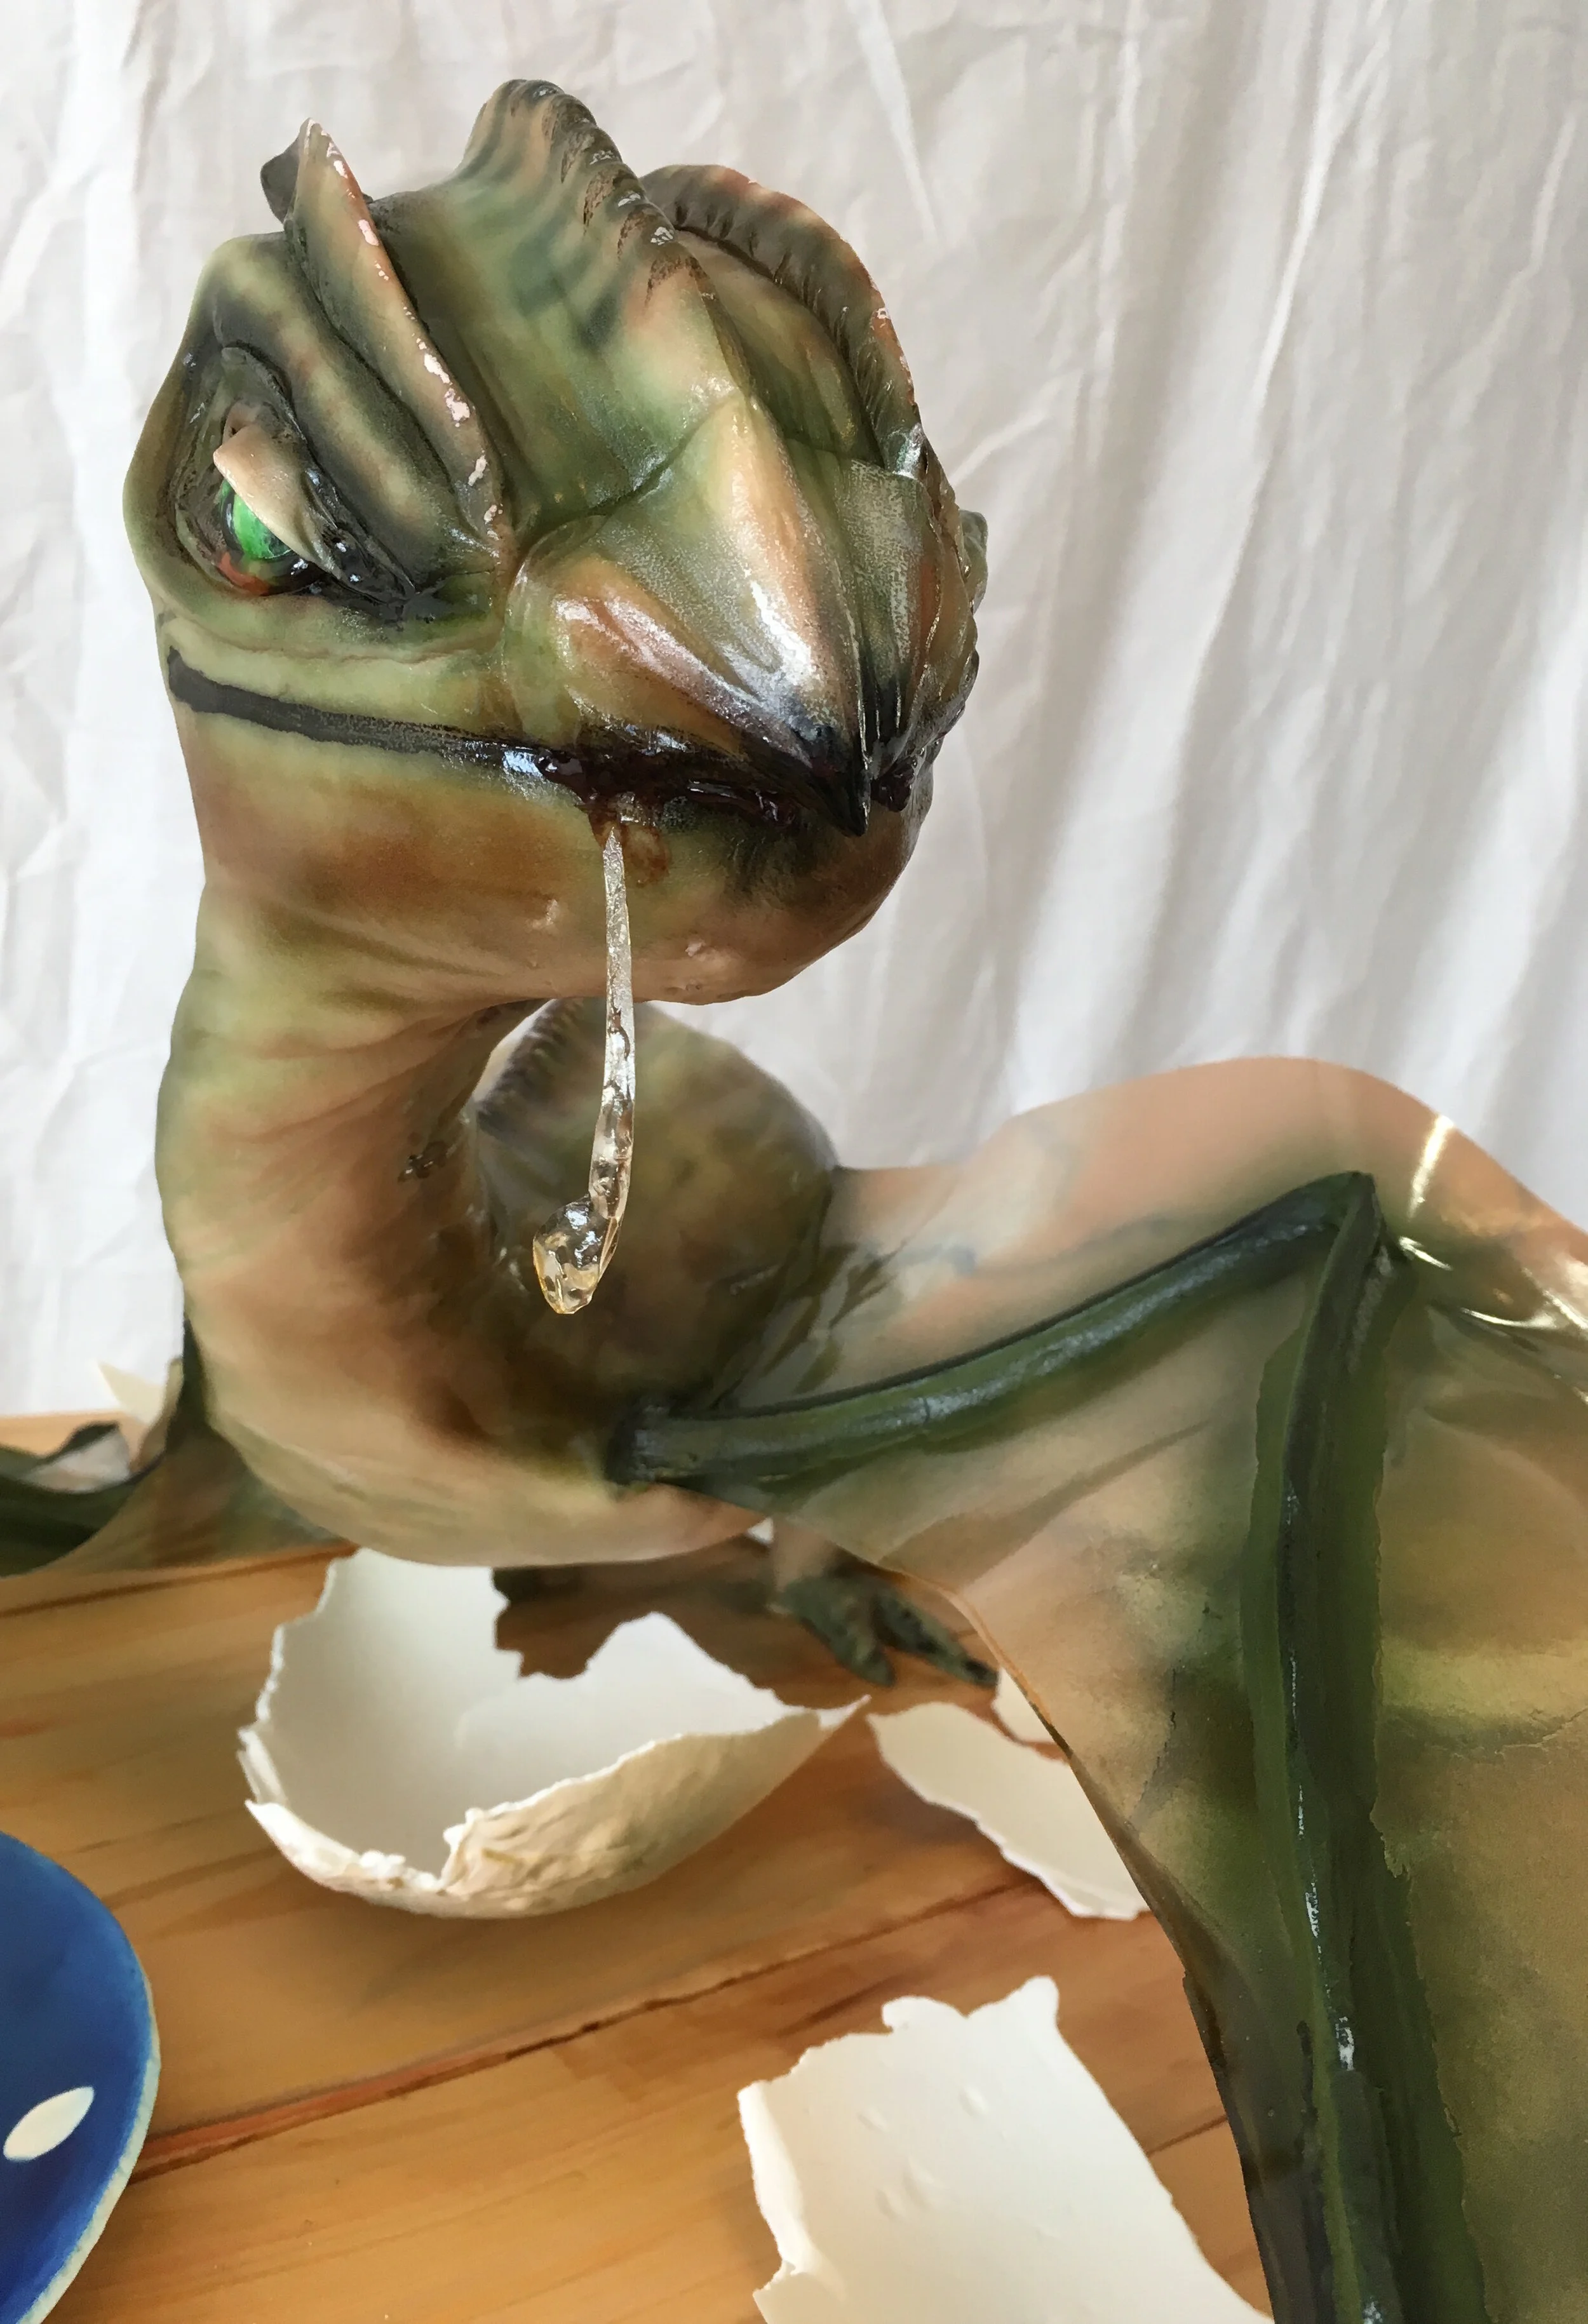
To make the egg shell, I draped gum paste over an oversized plastic Easter egg, then Sam helped me to break into pieces and place it around Norbert like he had just hatched out of it.

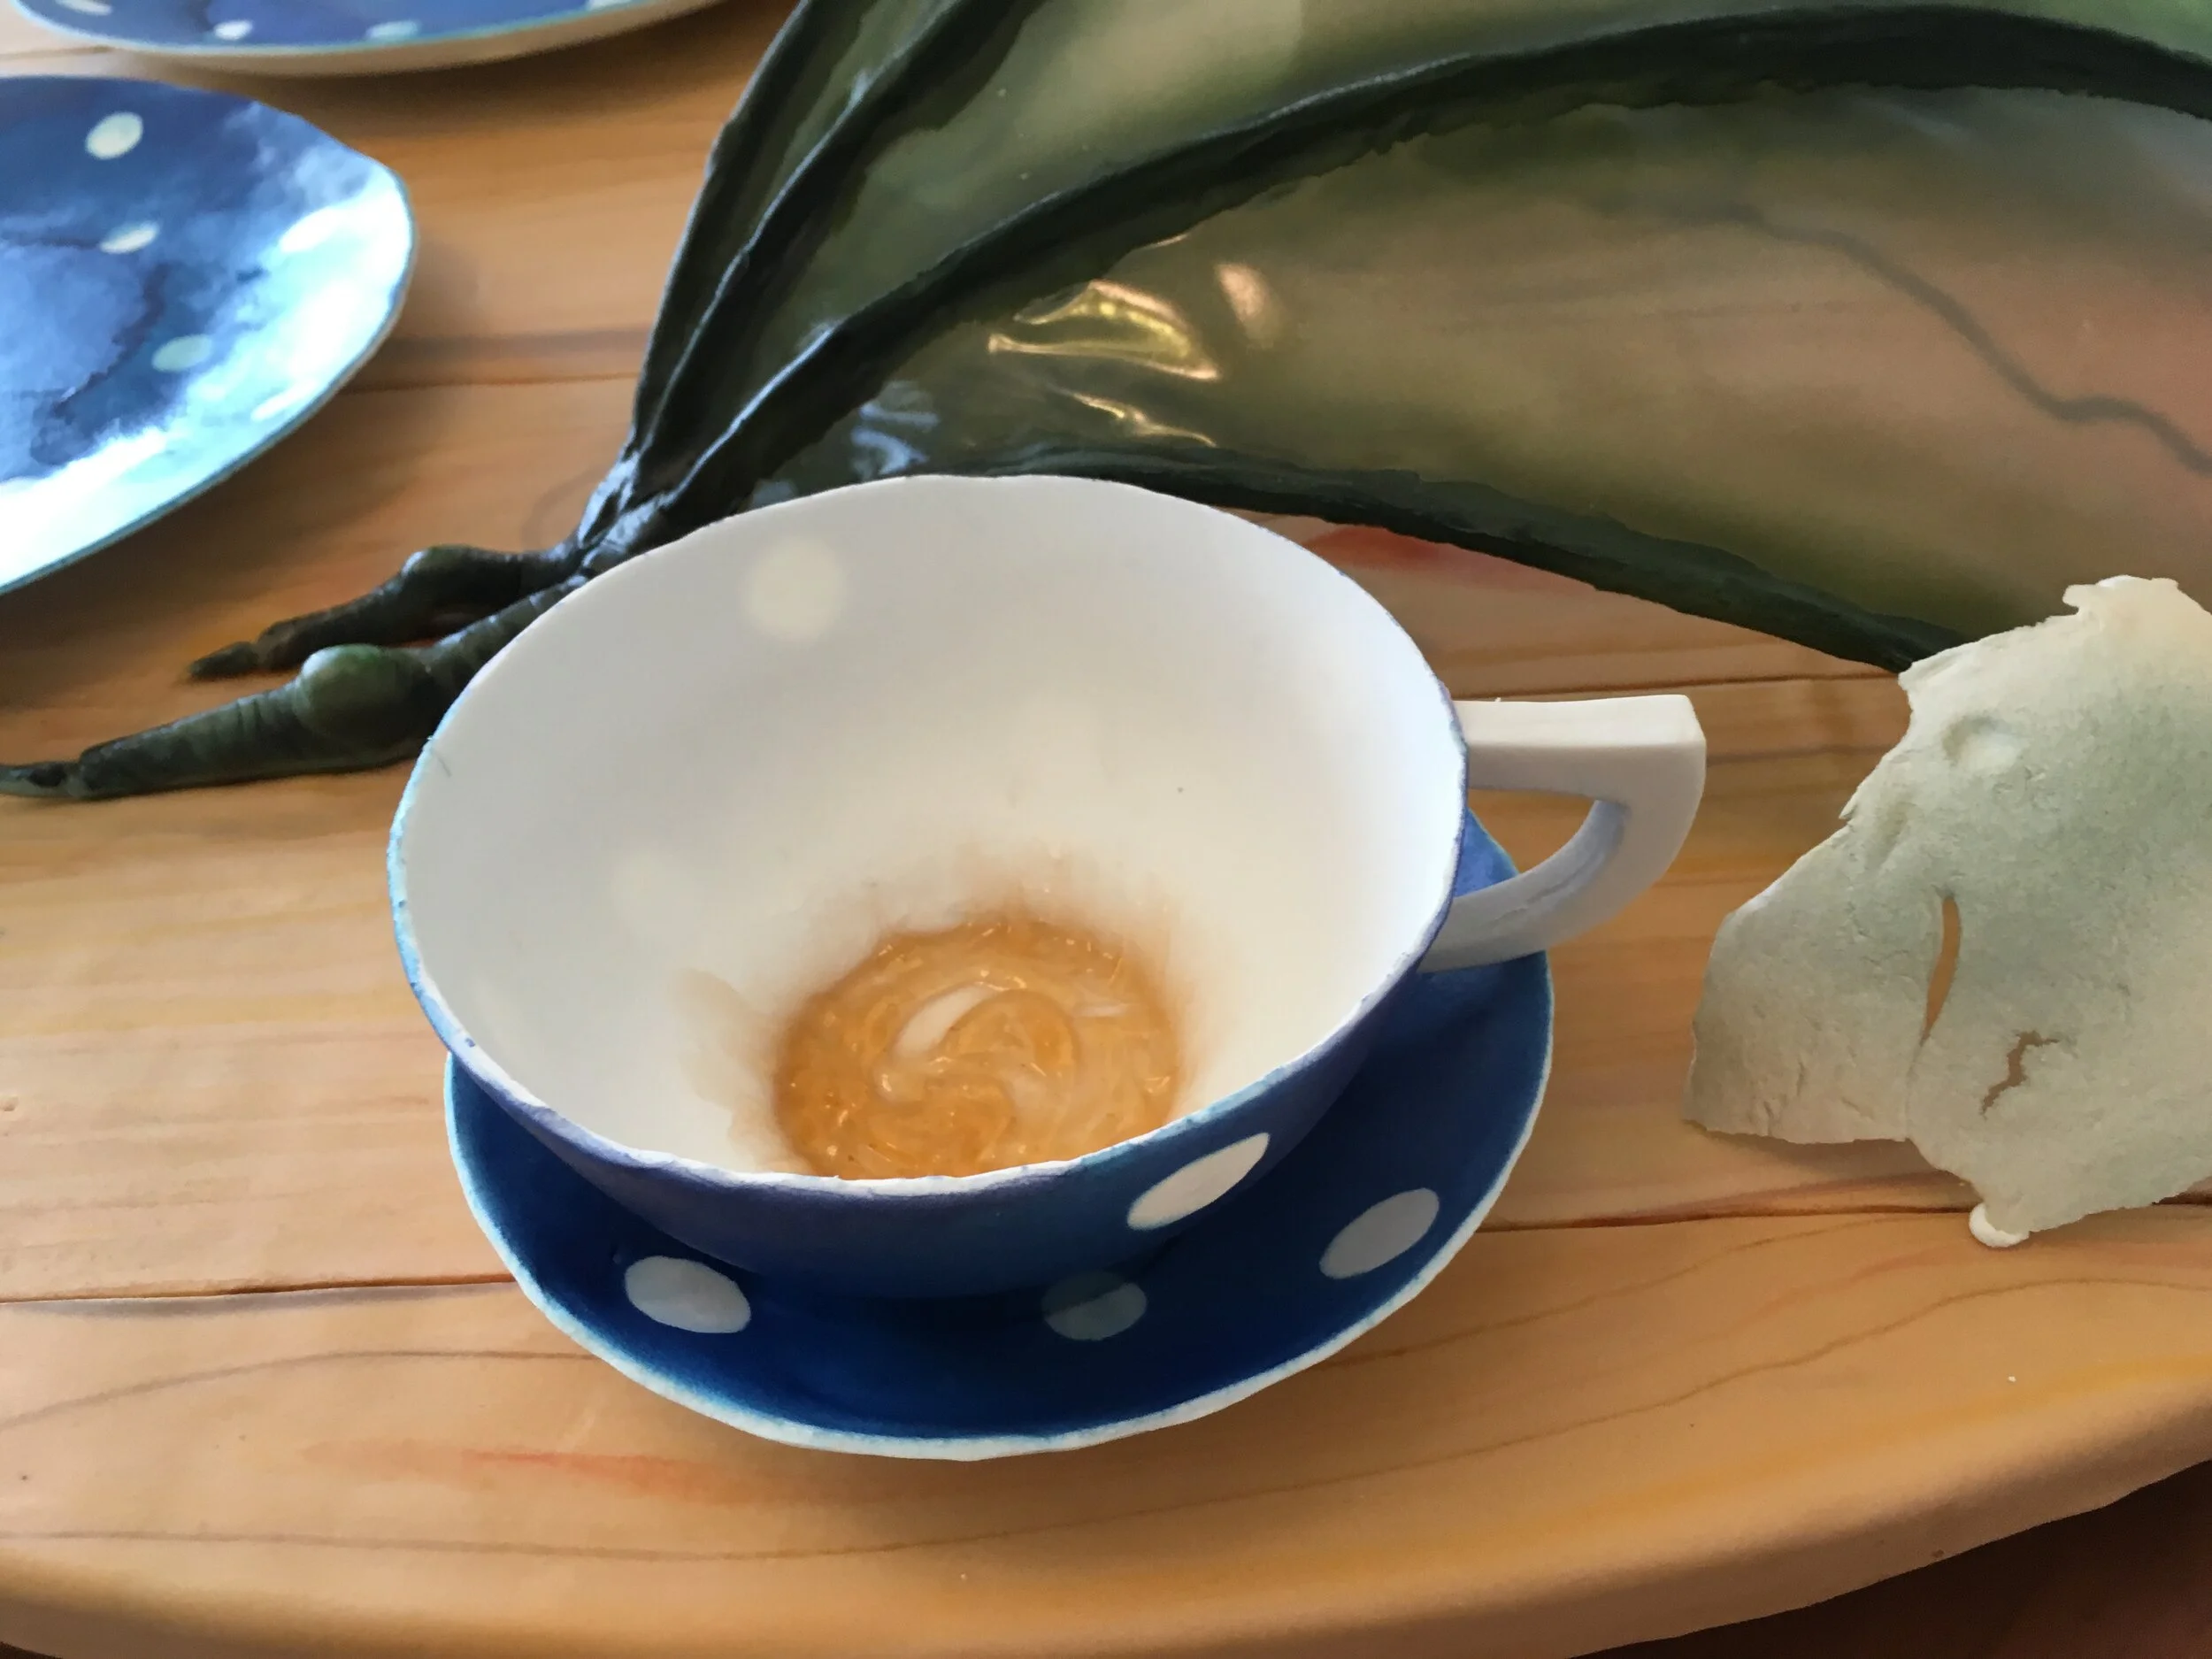
The dishes are also made of gum paste. I formed them over a lovely set of china that my sister’s mother-in-law gave her. Obviously, it needed the finishing touch of a little piping gel tea residue in the teacup.
The treats on the dishes are rock cakes and treacle fudge that Sam and his mom made from recipes in The Unofficial Harry Potter Cookbook. We have also made the pumpkin pasties recipe from this book and all the recipes have turned out great. Highly recommended.
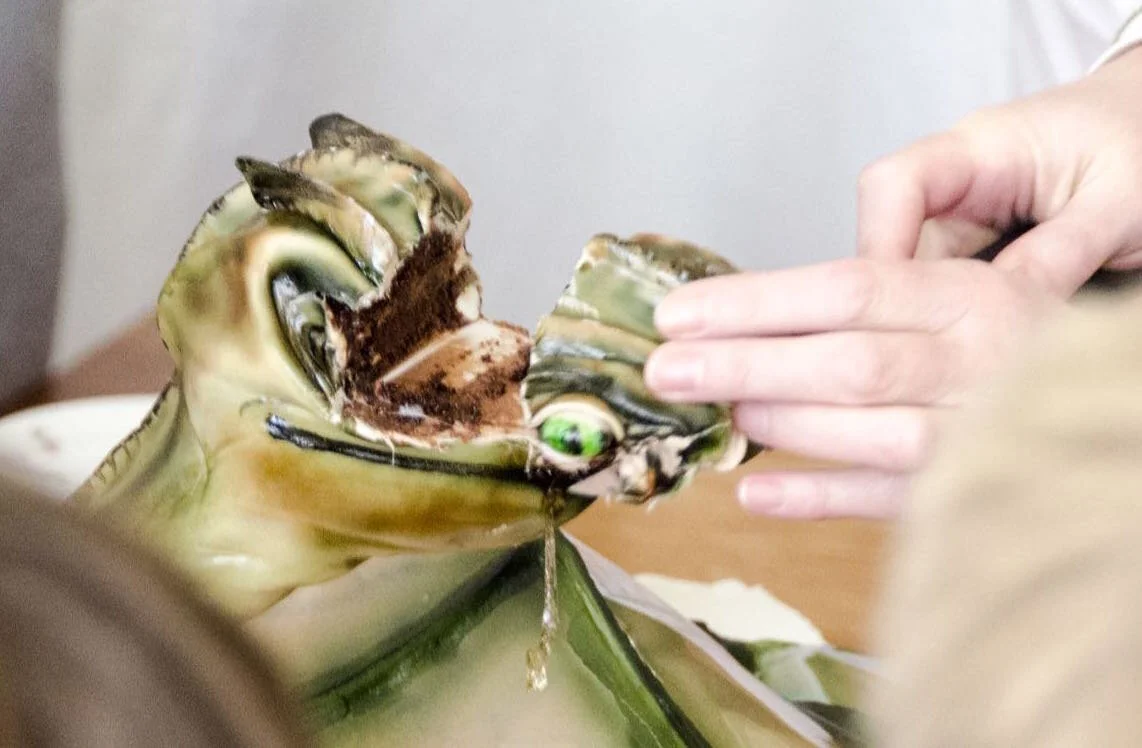
Inside, the cake is chocolate with chocolate buttercream icing. Sam helped me make that, too. For once, the amount of cake that I made was appropriate to the size of the party.
After the party, I tweeted photos of the cake to J.K. Rowling and she not only liked it, she retweeted it! As a result, my tweet is currently at over 965,000 impressions and 15,500 likes. Based on the replies, Harry Potter fans are some of the nicest people in the world.
Update: It's now at over 1,000,000 impressions!

Note:
Unfortunately, J.K. Rowling has disappointed me and many other people. By publicly opposing trans rights and misrepresenting trans people, she has fallen far short of the standard of loving acceptance set by the heroic characters in her books. To learn more, I recommend this open letter to J.K. Rowling from Mermaids, a group in the UK that advocates for trans and gender-diverse children. If you want to help, you can donate to Mermaids, Gender Spectrum, and many other groups working to support trans and gender-diverse people.

Inside Out Cake
This Inside Out cake was for my friend Isaac’s ninth birthday, which is why it’s in the shape of the number 9.
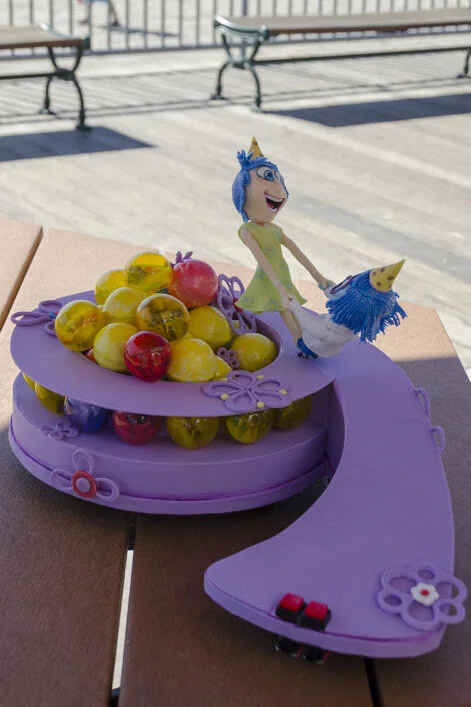

This Inside Out cake was for my friend Isaac’s ninth birthday, which is why it’s in the shape of the number 9.

The number 9 itself is mostly foam core covered with gum paste, because I needed room to embed LEDs and I didn’t need very much cake because they party was pretty small.

The memories around the edge of the 9 are gelatin bubbles, which are made by dipping partially inflated balloons, coated with shortening, into melted gelatin. They’re surprisingly sturdy once dry and technically edible, though it’s a little like eating plastic.
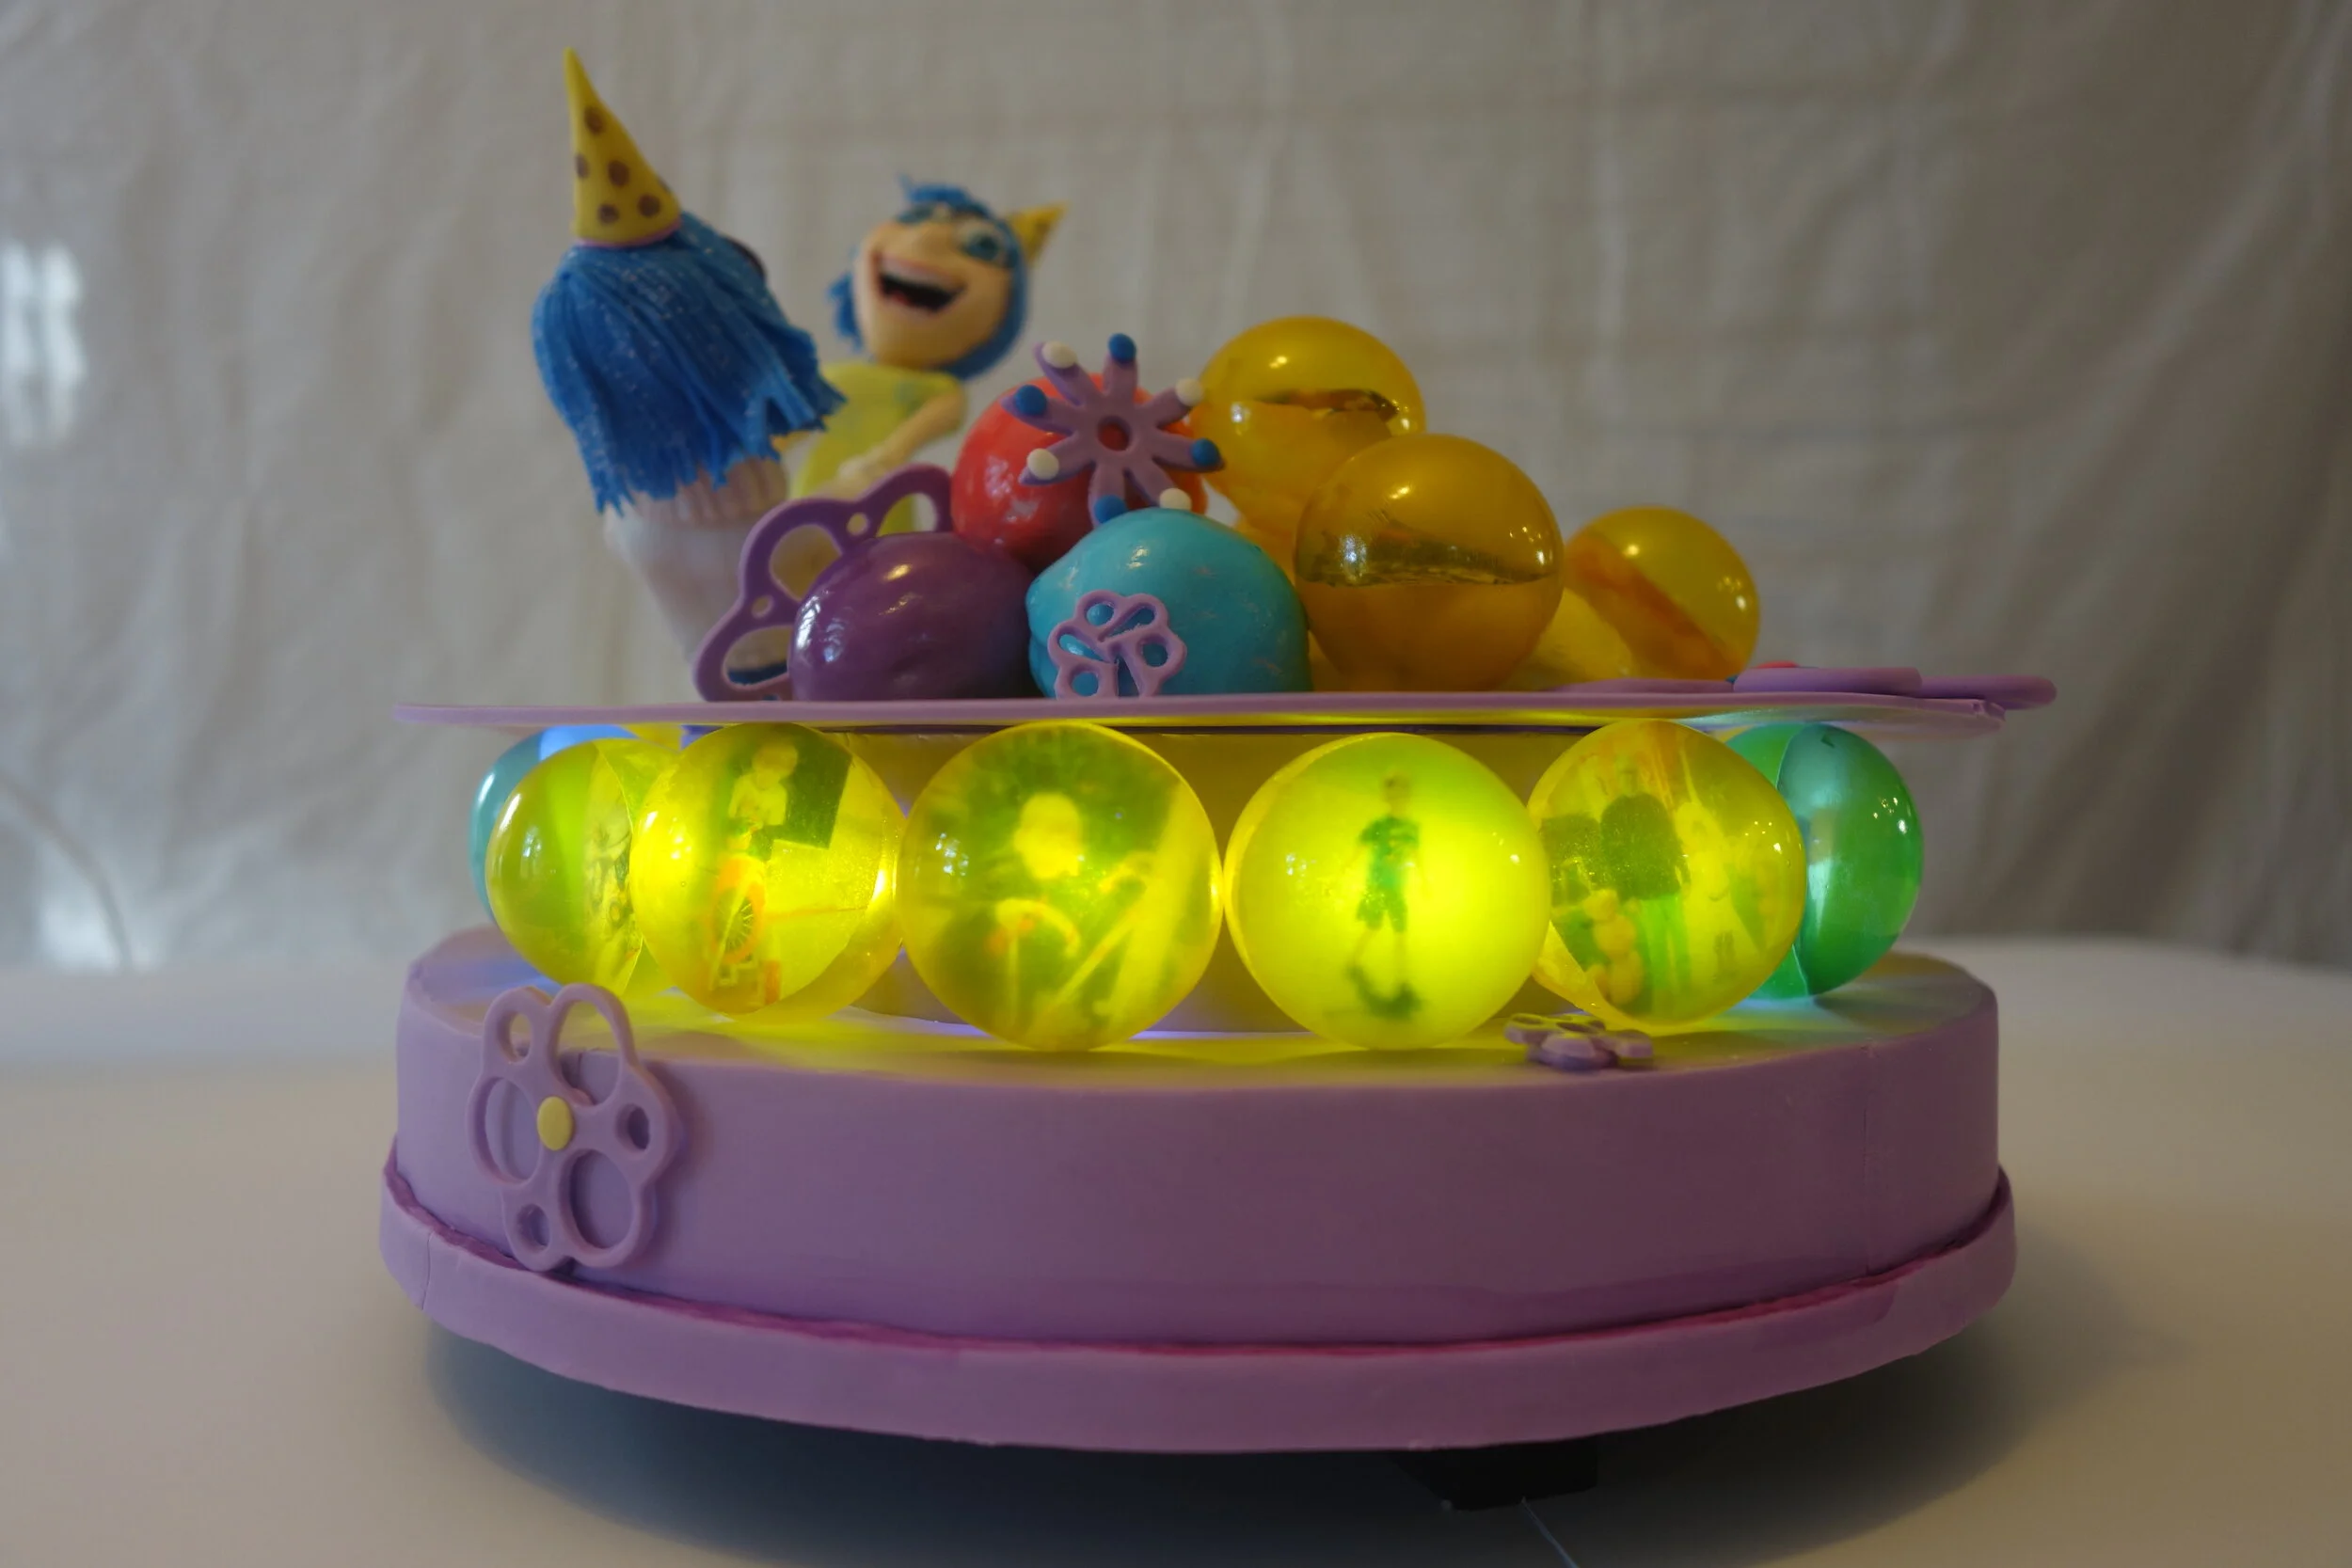
Each memory bubble contains a picture of the birthday boy, at ages from infancy to now, printed on edible wafer paper and each one has an LED behind it.
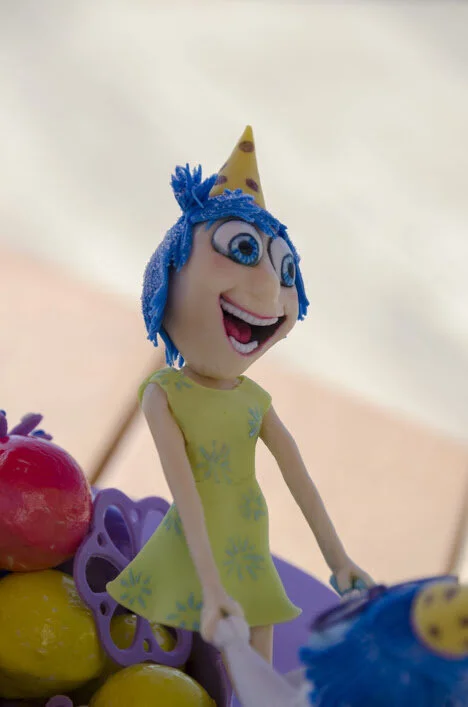

The figures are made of modeling chocolate with gum paste hair and clothes. They are made over a wire armature attached to a motor, so that they can spin joyously around.
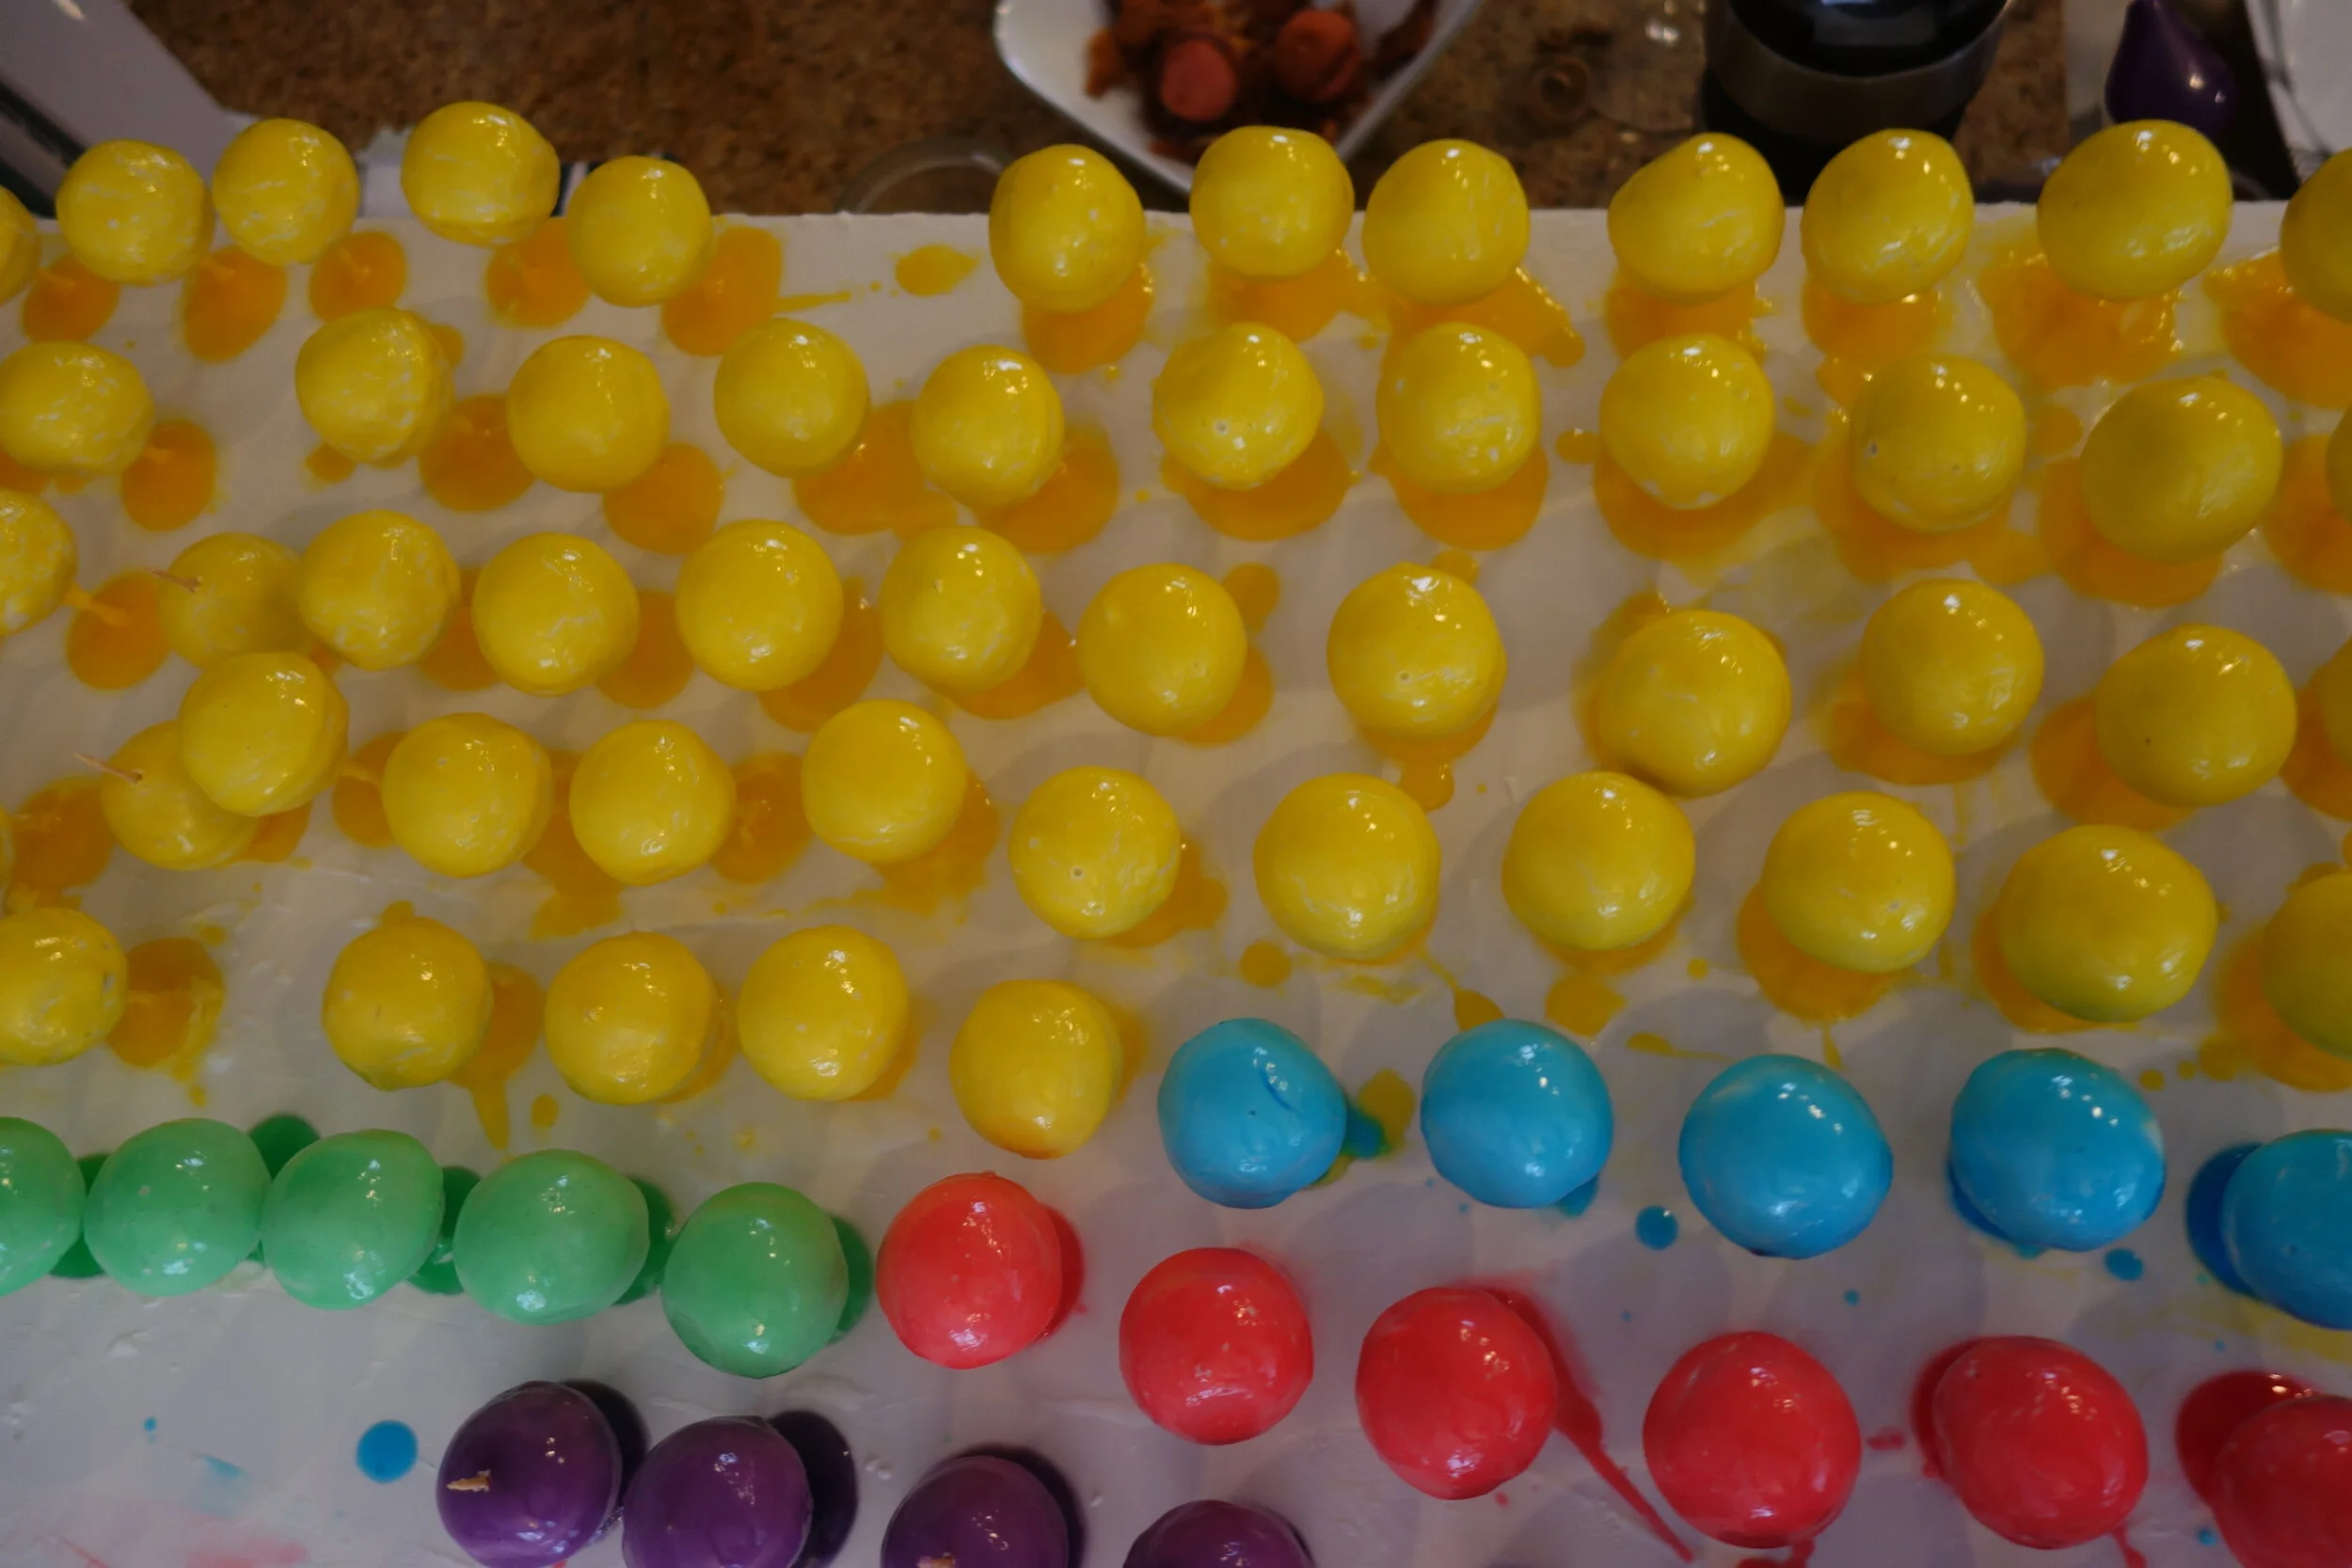
The actual cake is the memory balls in the middle of the 9, which are cake balls dipped in royal icing and then in colored piping gel. I was trying to make cake that was easy to pick up and eat with no utensils, because the party was outside. But I didn’t leave enough time for the piping gel to dry, so they wound up extremely sticky and messy to eat. Still tasty, though.

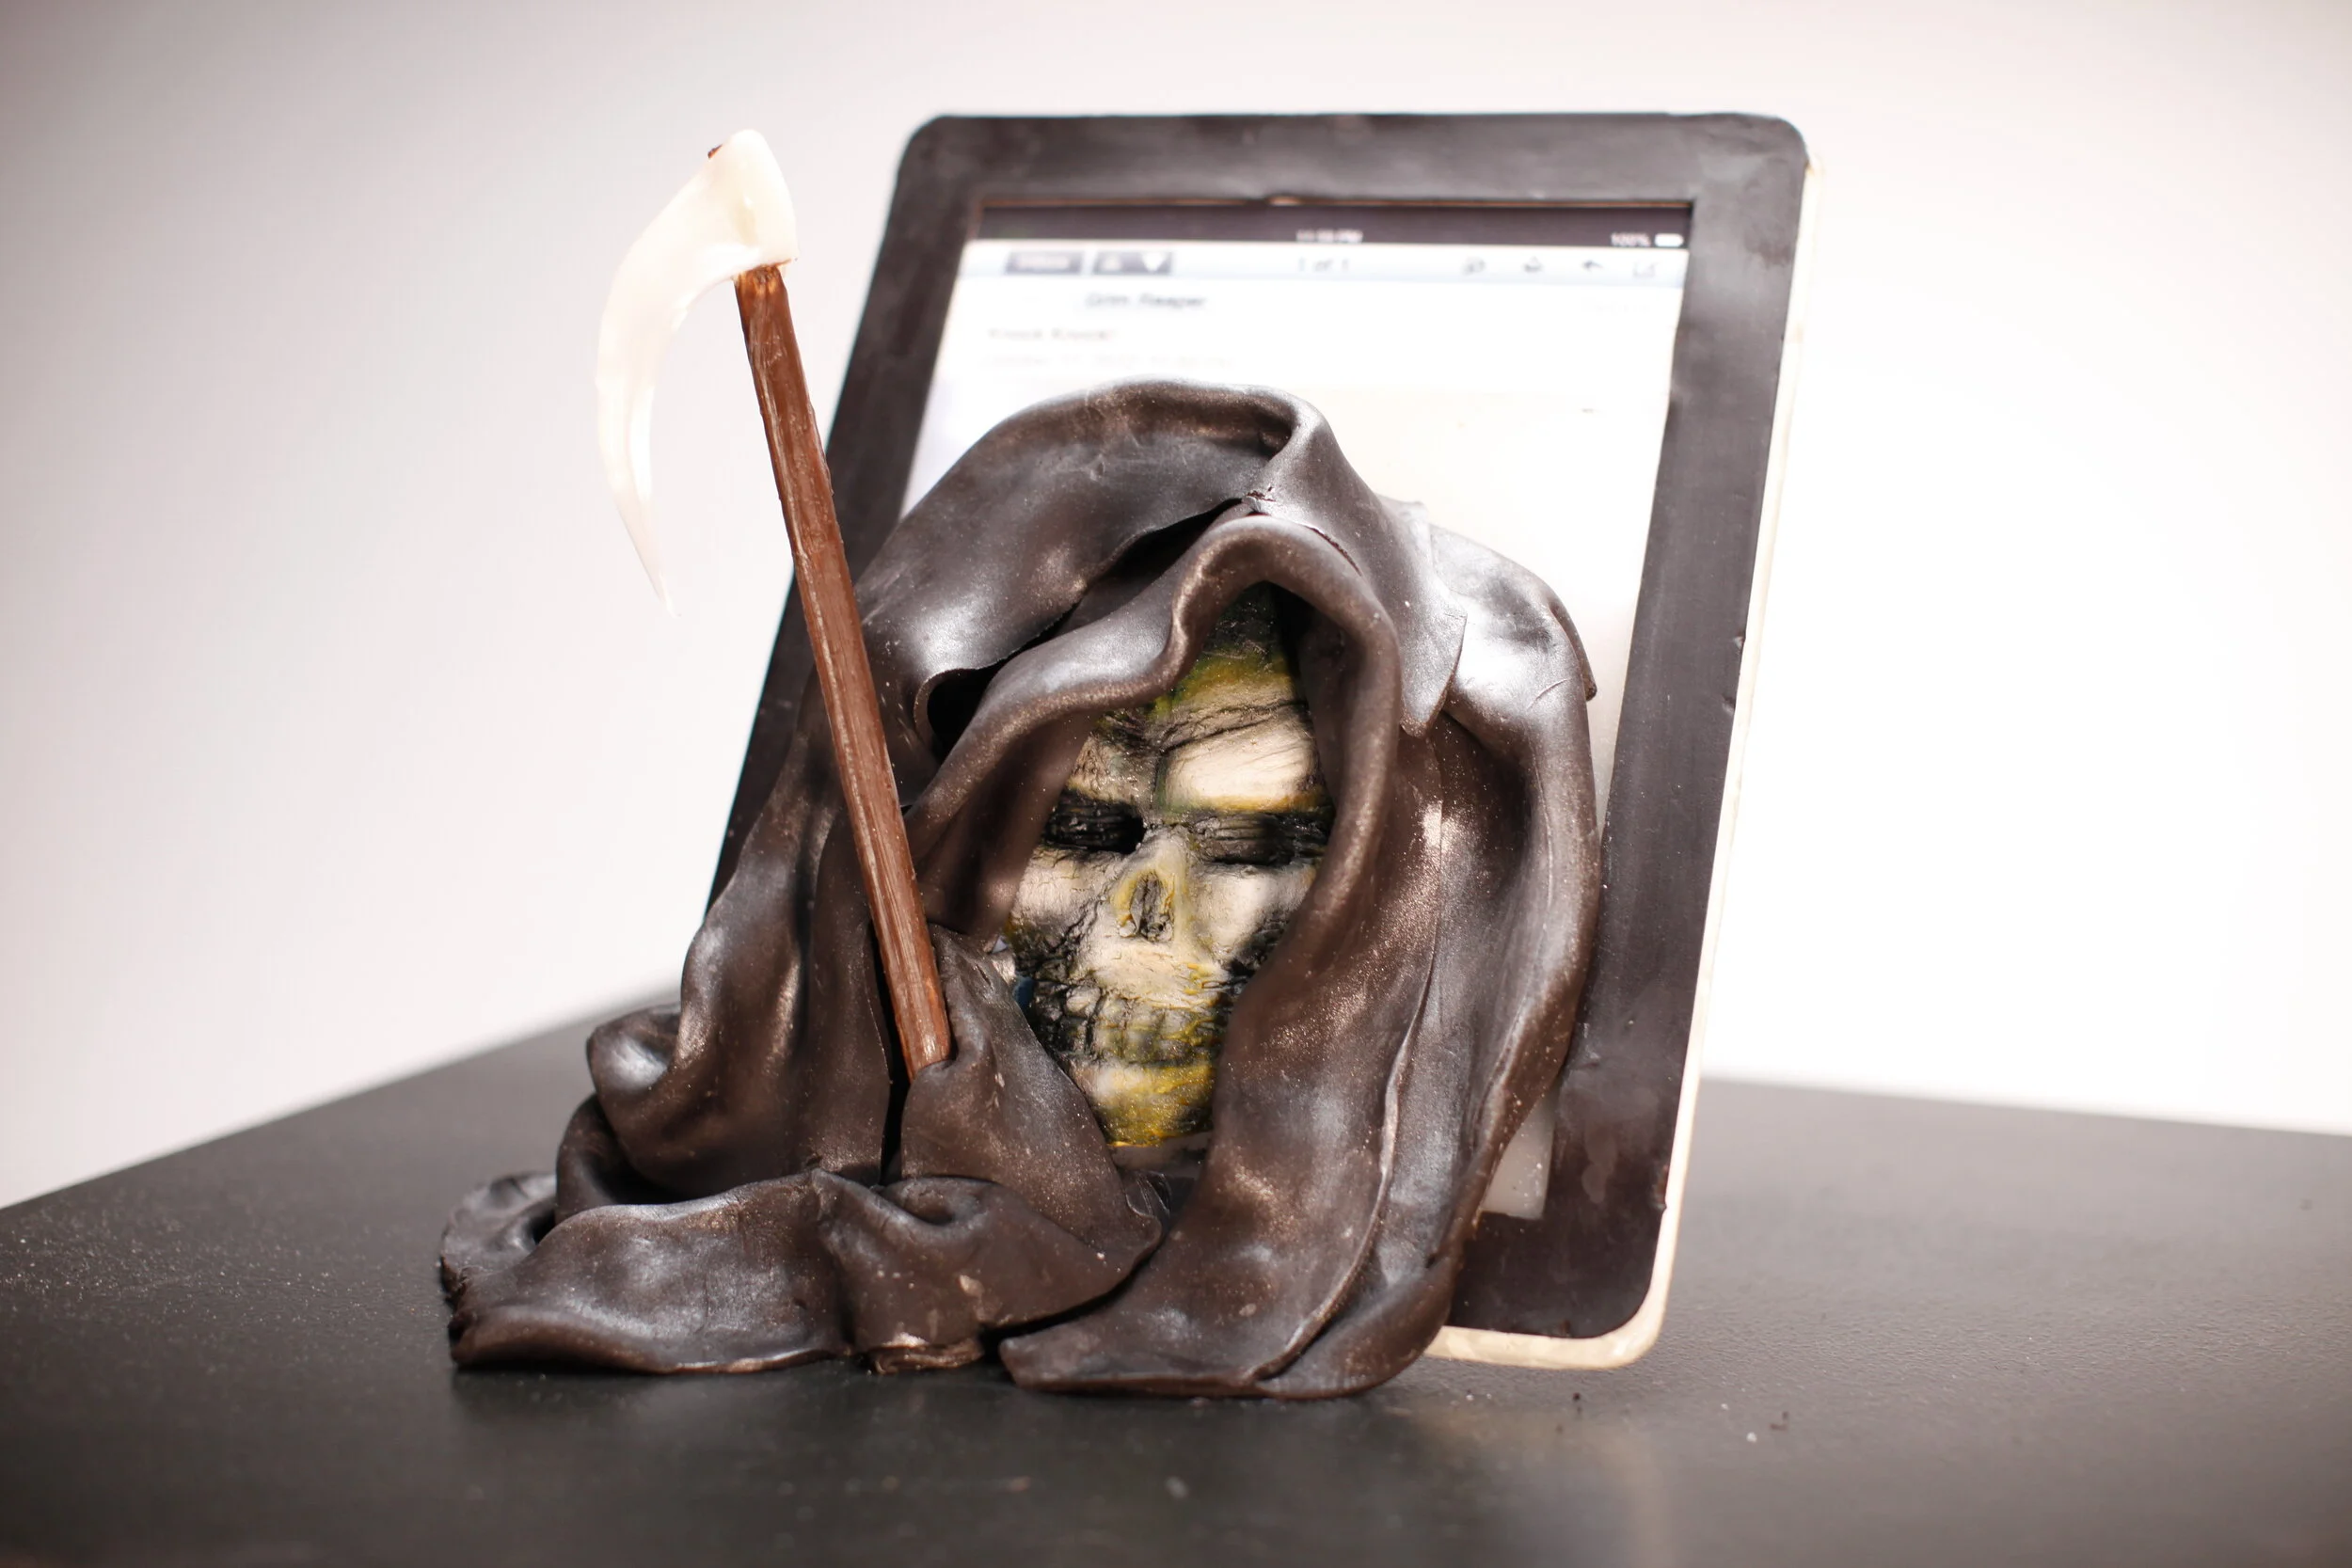
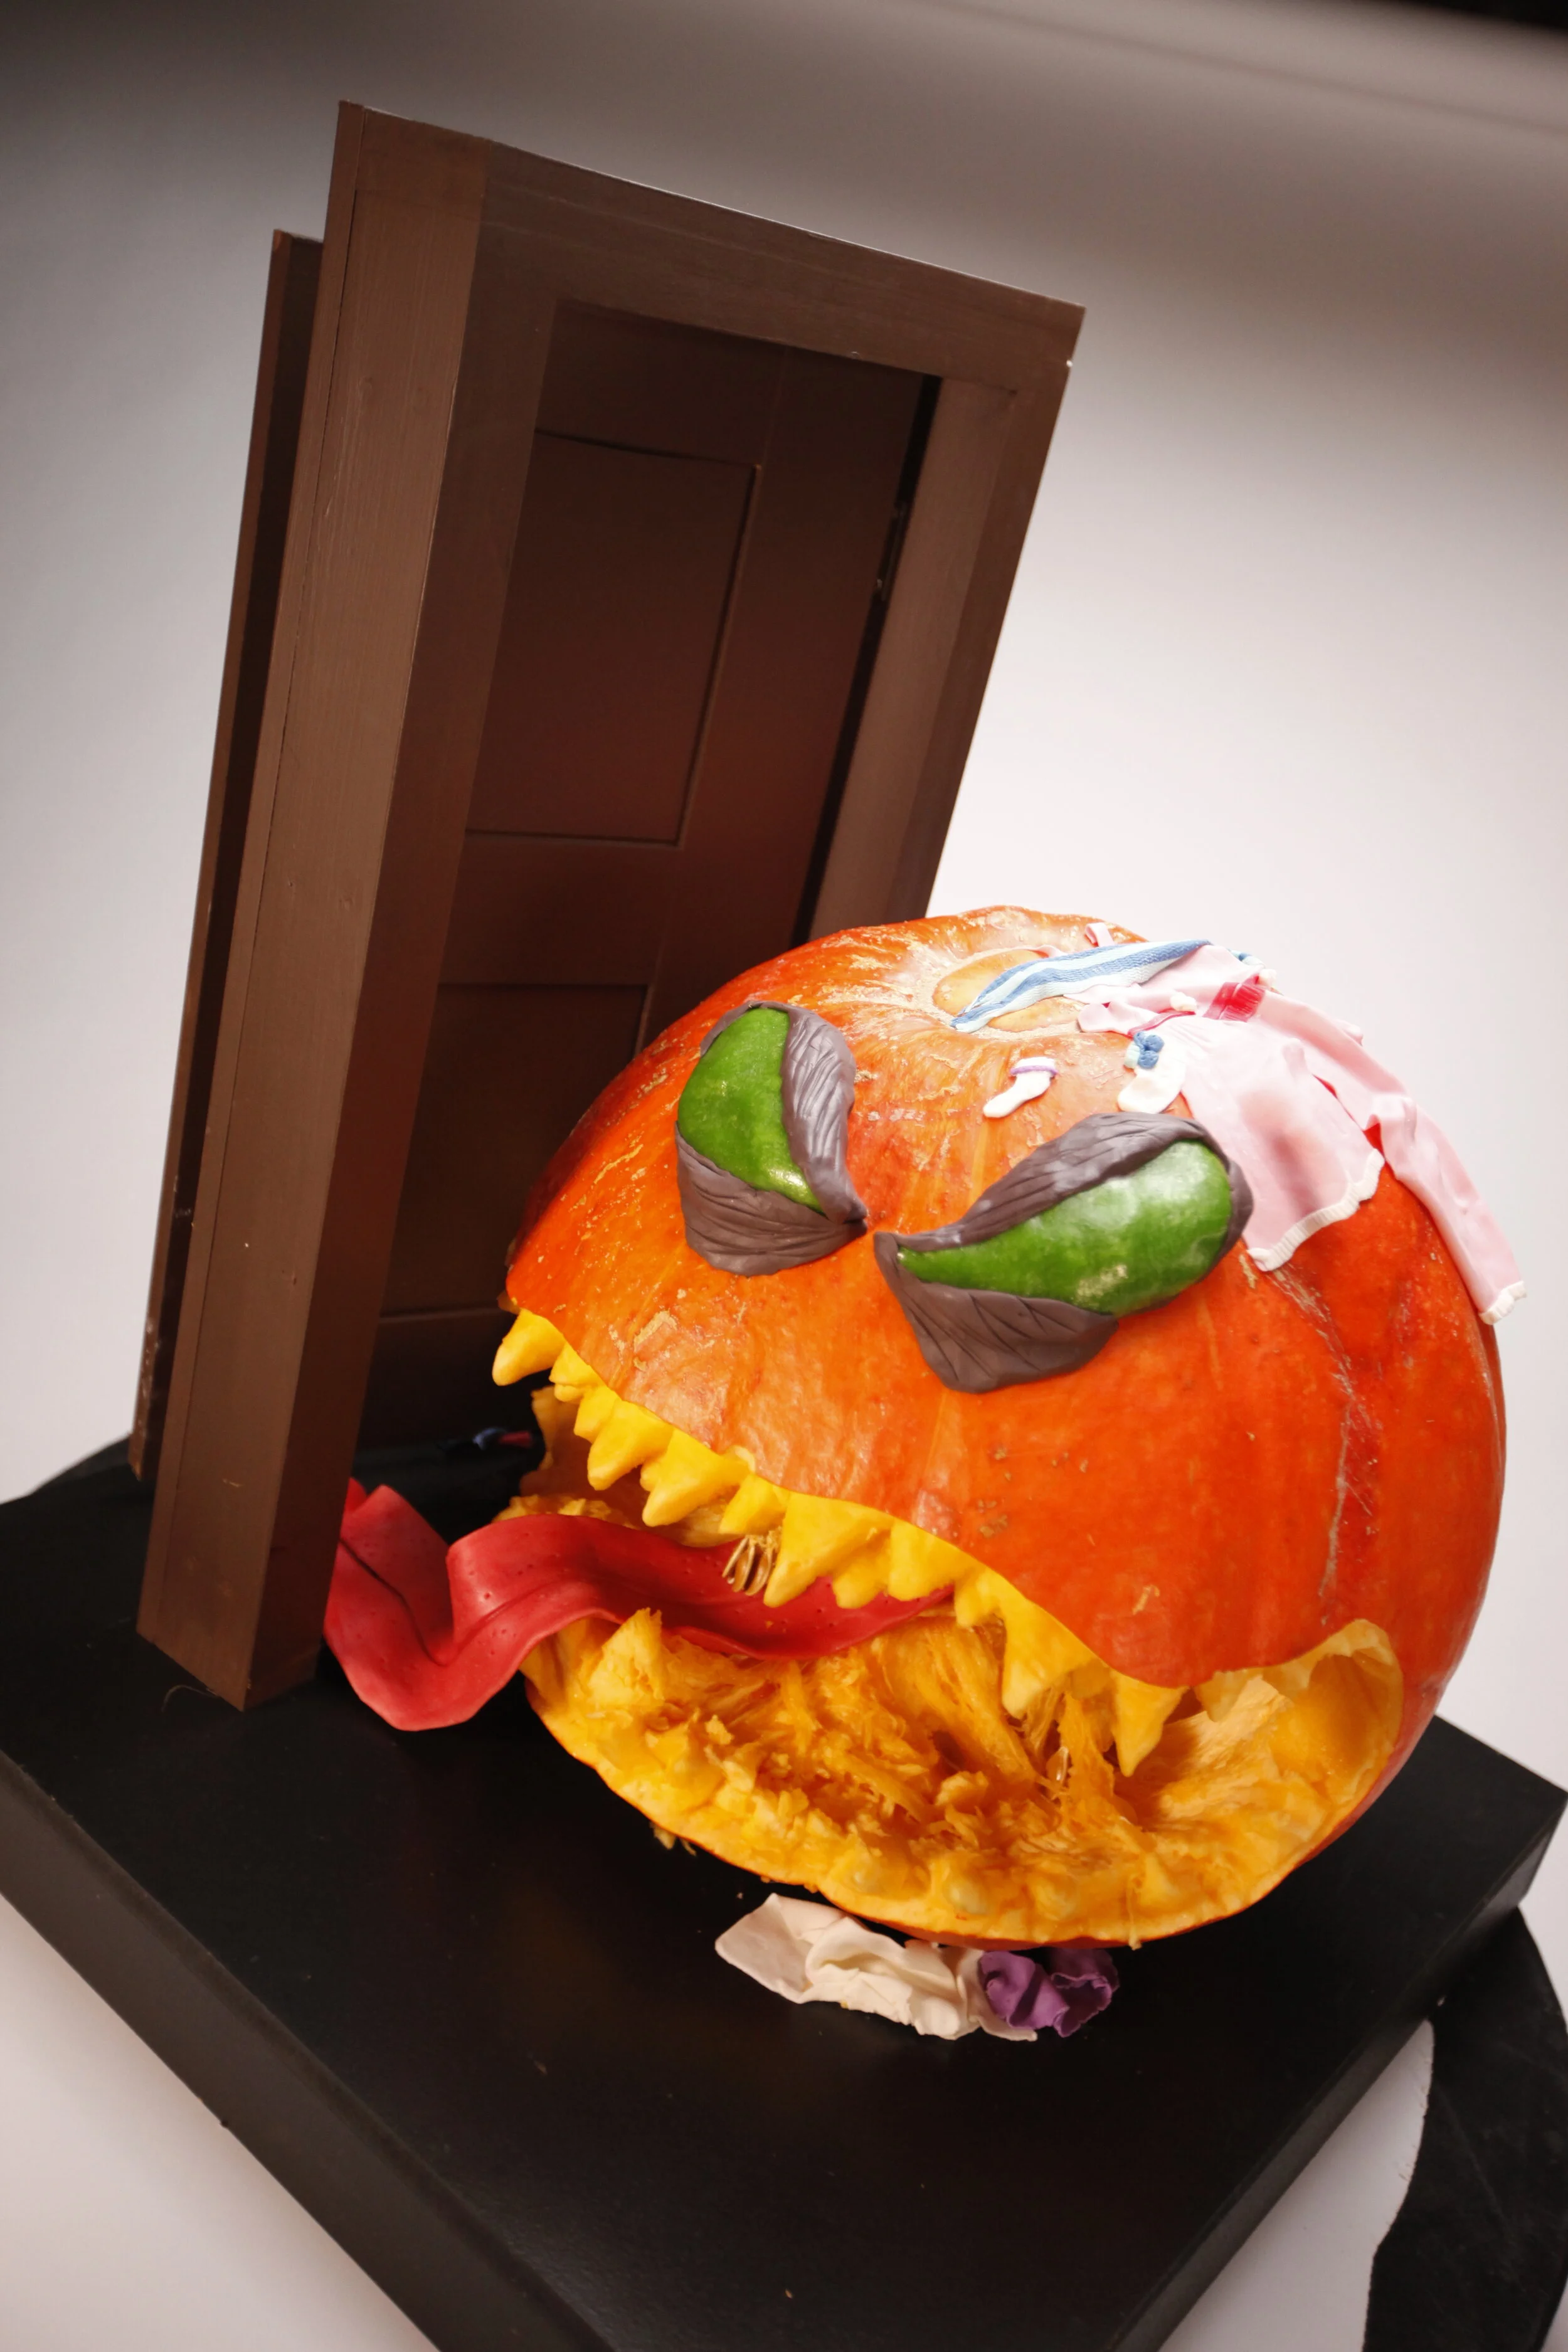
Halloween Wars!
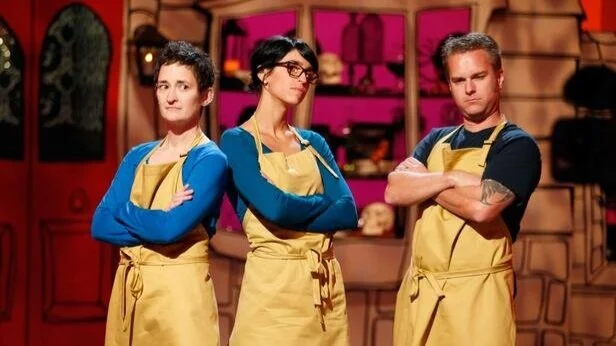
Check it out – I’m a warrior of Halloween Wars! You can watch my TV debut on Food Network, October 7th at 9:00 Eastern and Pacific.

Check it out - I'm a warrior of Halloween Wars! You can watch my TV debut on Food Network, October 7th at 9:00 Eastern and Pacific.
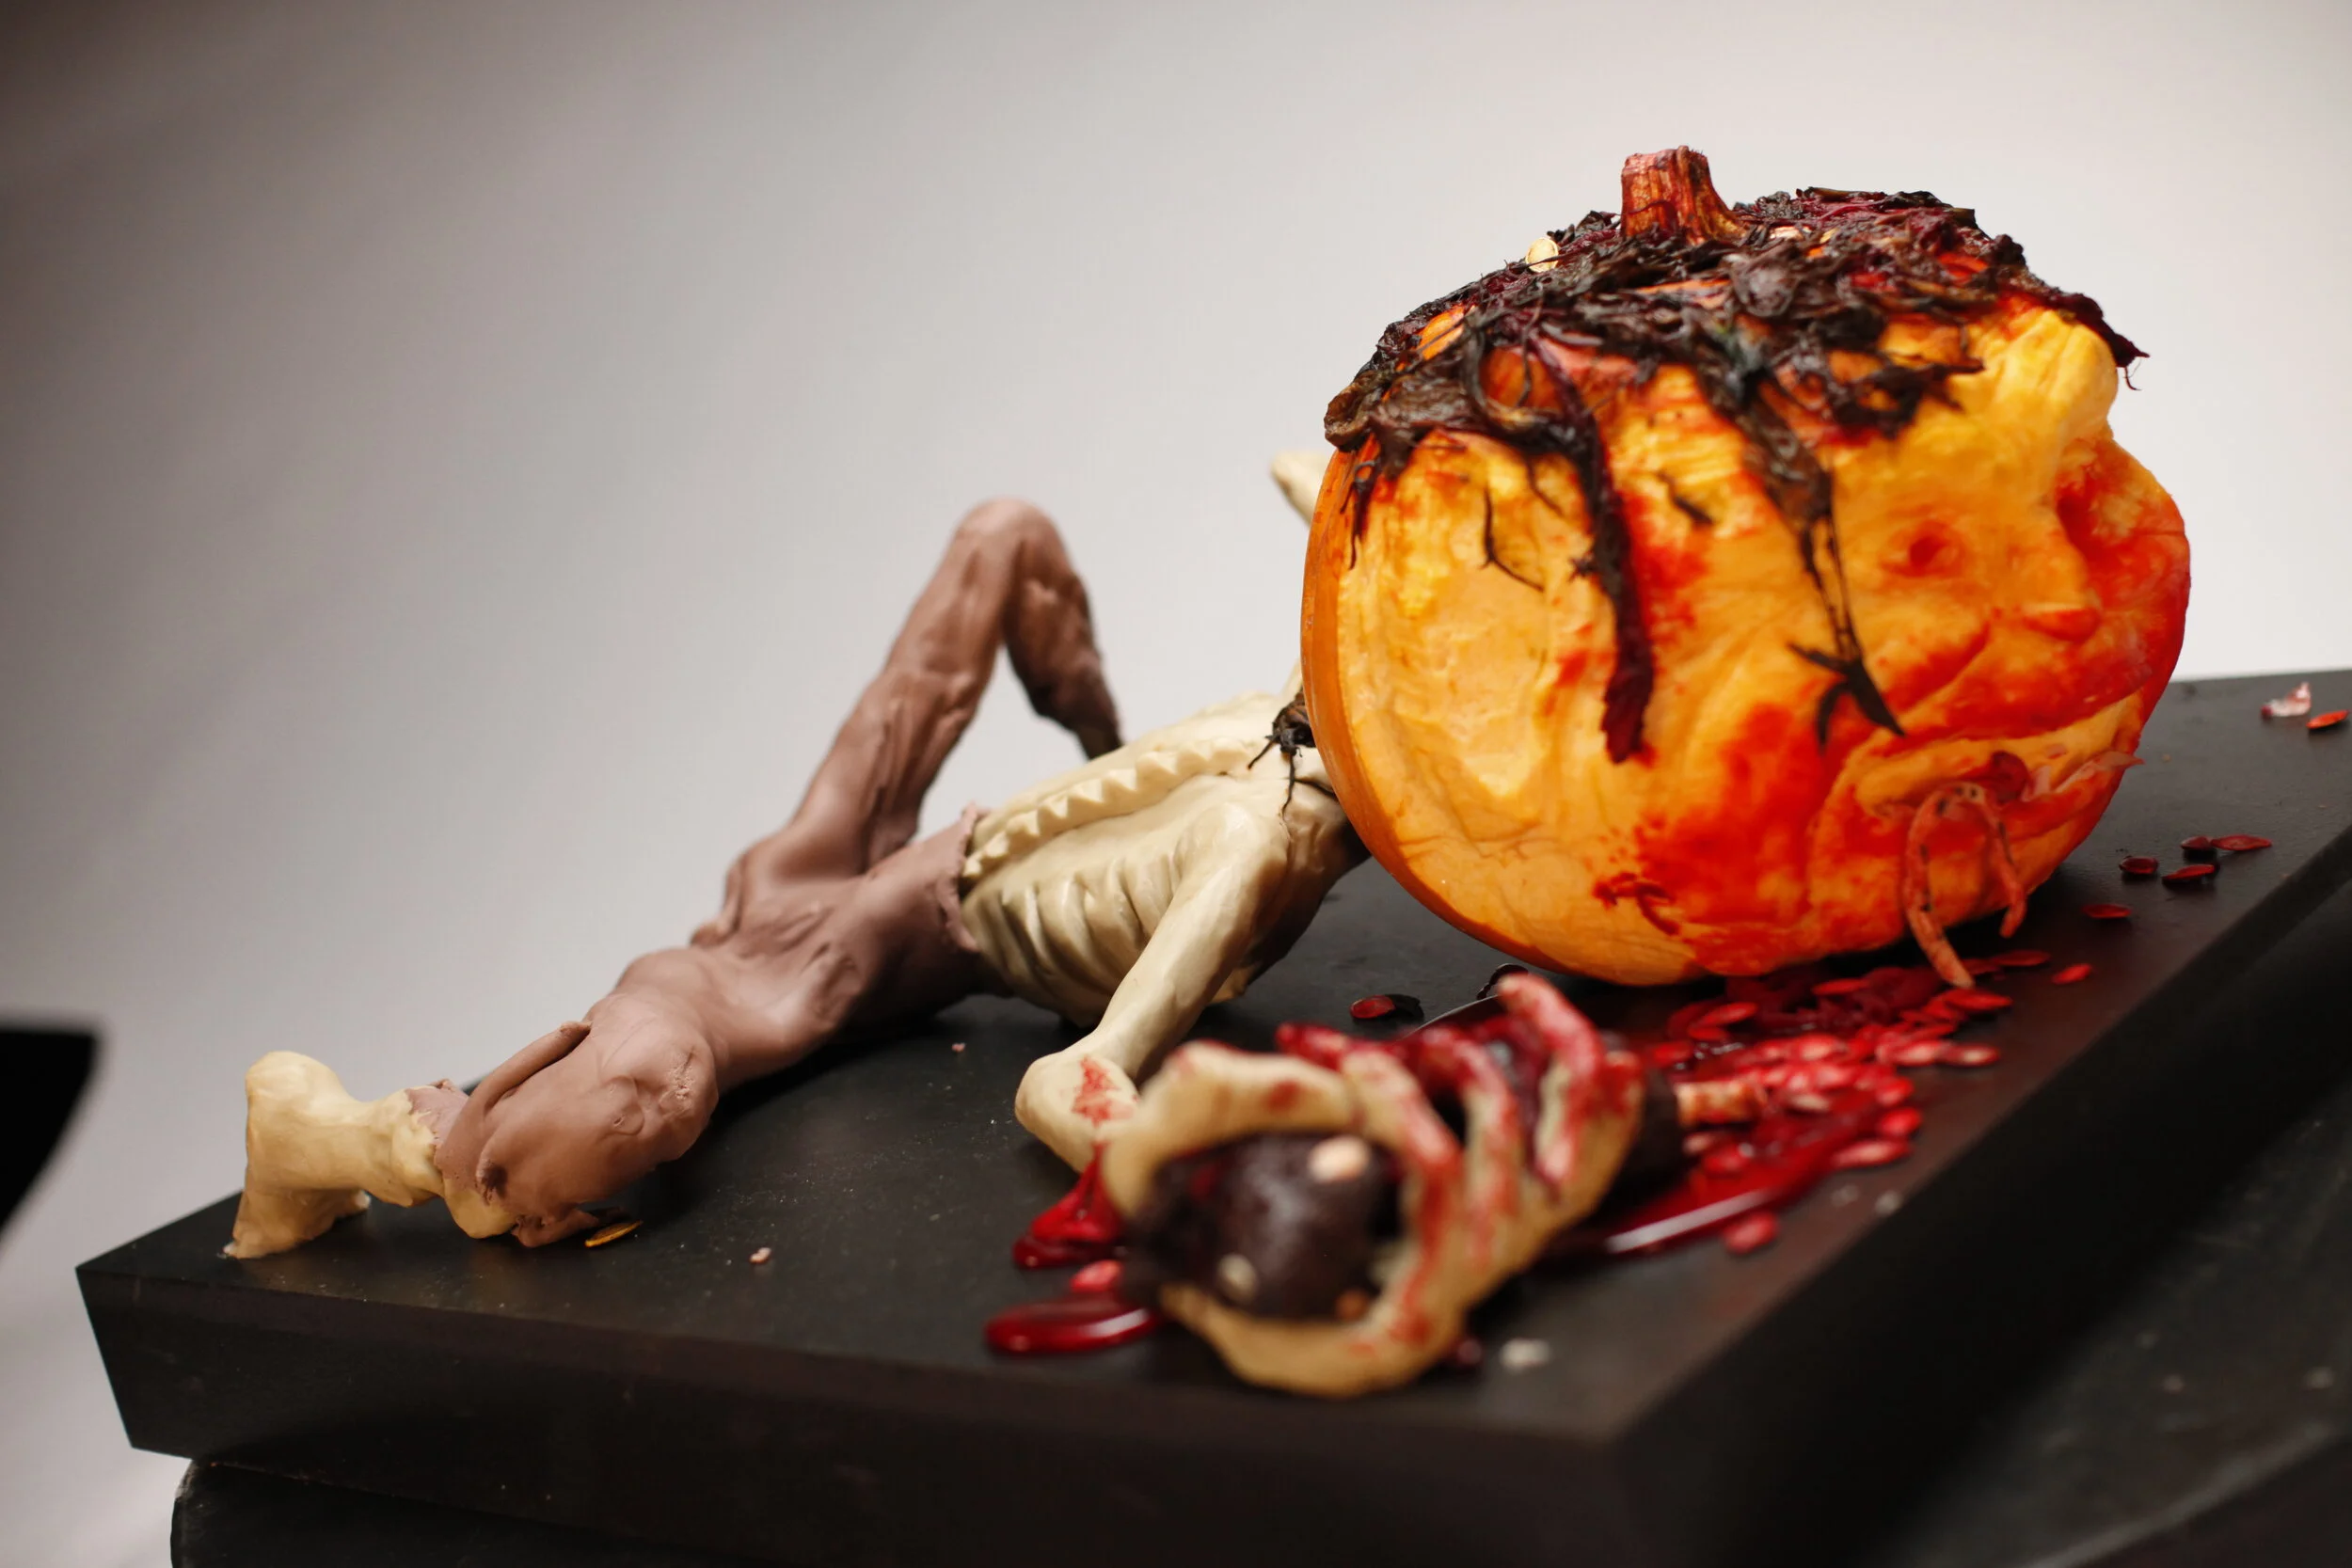
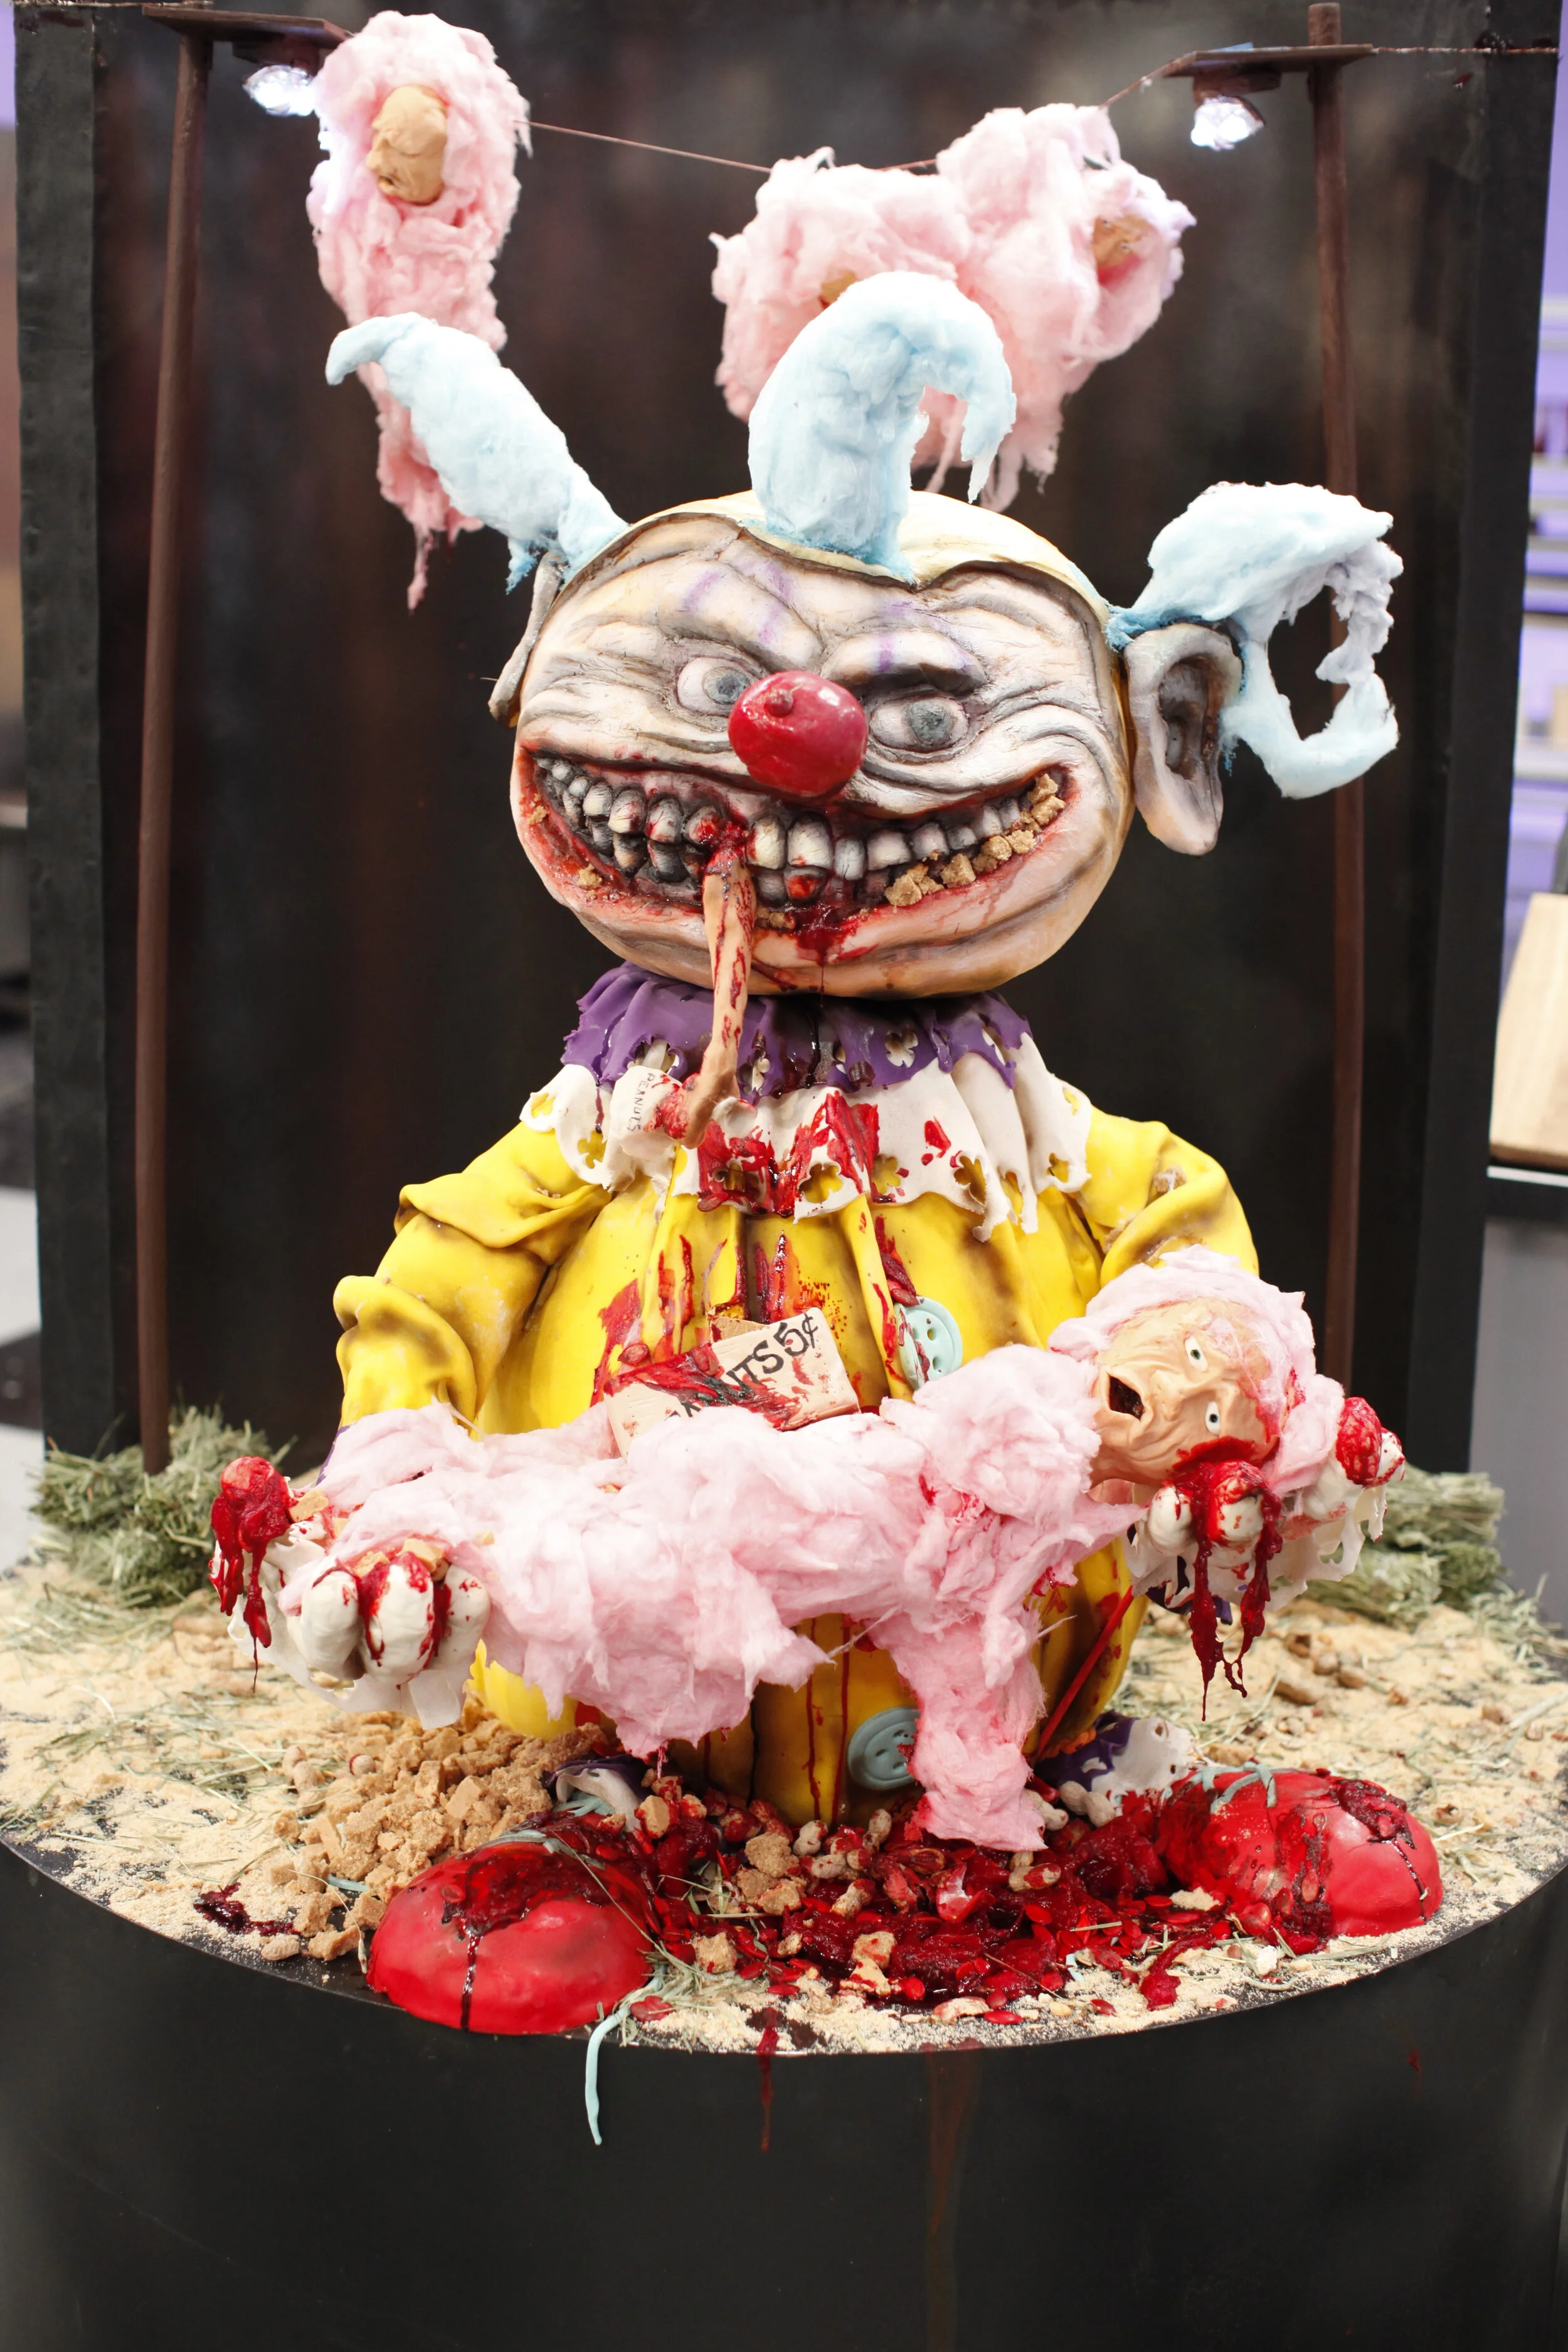
UPDATE: Here are the pieces we made.


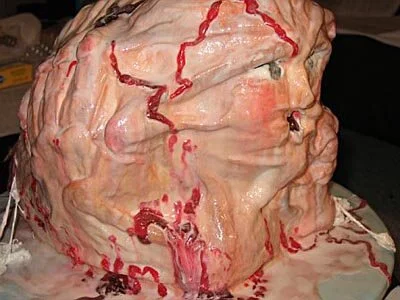
Gelatinous Man Cake
The Gelatinous Man was created for a small art show that some friends and I were hosting at my business school.
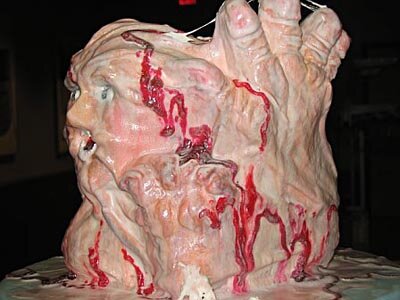
The Gelatinous Man was created for a small art show that some friends and I were hosting at my business school. Very few people at the show actually believed that he was cake until I cut into him, but then everyone agreed that he was delicious. One boy even expressed delight at the way the eyeball squished when he bit into it.
The concept for the Gelatinous Man developed out of a cake that I made when I was taking a Master Class from Colette Peters at the Wilton School for Cake Decorating and Confectionary Art. I referred to it as a Sea God cake. It was essentially a standard 3-tiered cake with a raised face on top spitting out a fountain of gum paste water. This got Colette and I talking about making a cake that had an entire man trapped inside, trying to get out. Naturally, when I finally got around to making the cake, it came out all oozy and bloody and moist. And so the Gelatinous Man was born. Or at least he's on the verge of being born. Or possibly he's just been absorbed into his odd, oozing sack. I can't say for sure. You'd have to ask him.
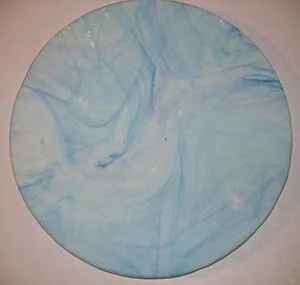
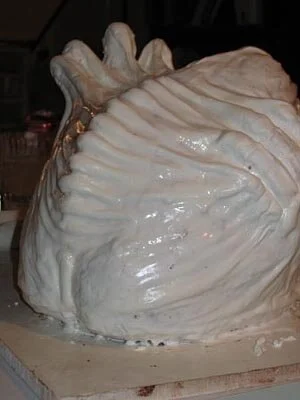
The first step was to make the base, which is simply two circles of 3/8" foam core glued together, one larger than the other. The smaller circle is only there to make it easier to pick up the cake by leaving a space under the upper plate to get your fingers into. It's a little trick I learned from watching cake competitions on the Food Network. The larger circle is covered with fondant, marbled with some royal blue food coloring. Just knead some of the color into the fondant until you come up with a cool marble texture, and then roll it out to about 1/8" thickness. It's very easy to stick the fondant to the foam core by brushing it with water.
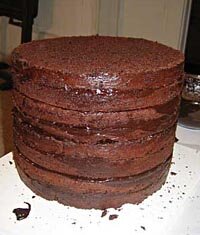
I started in on the cake itself by baking four 10" round cakes, using a really great chocolate cake recipe I got from one of Colette's books. I then torted and filled these with a plain chocolate ganache. Because the cake was so tall I had to put a layer of 3/16" foam core, supported by 1/4" dowels, in the middle. I also put a 3/16" foam core circle on the bottom of the cake to make it moveable before it was mounted on the final base. Both pieces of foam core were only 9" in diameter, instead of the 10" diameter of the cake so I would be free to carve into the cake without worrying about running into the foamcore.

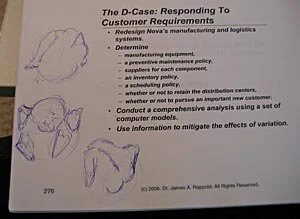
Now for the fun part - carving the cake into the shape of a man trapped in some sort of membranous sack. I had a little sketch, which I had made in the margins of my Operations notebook during class. So I was sculpting a cake while consulting my Operations notes. I found this juxtaposition perhaps unduly amusing, because, as anyone else out there who has gone to business school doubtless already knows, Operations is about the most tedious class in existence (Sorry, Professor Rappold.) and I'm not just saying that because, as I write this, my final Operations project is due in eight hours. Using a paring knife, I started by cutting away the area around the face, the hands, one foot, and one knee. I carved the back into a slope with a ridge of spine running down the middle, then added a little butt crack at the bottom. I had to add some extra pieces to the top of the cake to get the requisite height on the fingers of Gelatinous Man's right hand.

Once I had the basic shape, I sealed the entire cake with a crumb coat of royal icing. Royal icing isn't the greatest tasting icing, of course, but I needed the stability of it to hold up to all the brushing and sculpting that would be required in subsequent steps. I had to wait for that crumb coat to dry before I could proceed to the next step.
My plan was to sculpt the details of the features by piping them on in essentially the right place, then smoothing and making fine detail with a damp paint brush. My first attempt at this failed because the water on the brush diluted the icing so much that it couldn't maintain its shape. So I scraped it off and started over again with much thicker icing, to the point where I could barely squeeze it out of the bag, and a slightly drier brush. This worked much better.
It took me two passes through using this technique to get the finished shape. The first pass created all the major shapes - toes and palms and cheeks, even details like the creases in the finger joints. The second pass added more fine details and built up heavily frosted areas like the heel, but mostly focused on stretching out the icing between elevated area - between the finger and the spine, for instance, and between the toes and the chin - to make it seem like Gelatinous Man was writhing inside and struggling against a contiguous membranous sack.
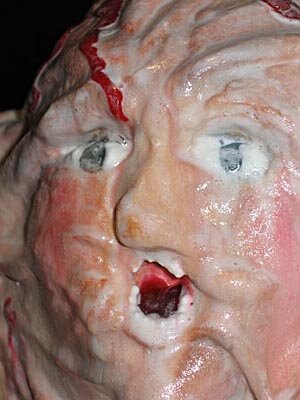
I ran into some difficulty with the nose. I couldn't make it as prominent as I wanted to because the icing wasn't sturdy enough and kept slumping into his open mouth. Clearly I needed something structural to stick into the cake to build the nose around. It needed to be edible, so I ran around my apartment for a while like a chicken with my head cut off, looking for a pretzel, which I already knew I didn't have. Then I stumbled across a packet of Lik-M-Aid that a friend gave me for Valentines Day. The little candy stick, which was already broken in half, was perfect. I stuck the broken end into the cake and built up a frosting nose around the protruding rounded end.

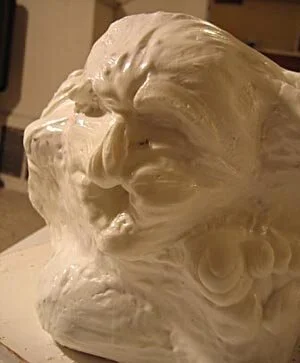
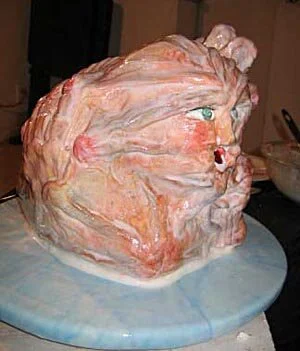
Now for color. My plan was to just add color to the regions that protruded, as if the sack was white but thin, so the flesh color underneath only showed through where Gelatinous Man was exerting pressure on his membranous prison. That plan didn't really pan out because I got carried away with the airbrush, and the whole thing ended up fleshier than I had anticipated. So I made the protrusive parts even darker and redder. Then I sprayed some dark blue and purple vein-ish lines along the stretched membrane areas. I believe that while, obviously, red is important for blood, in order to really evoke gore, you need blues as well. I also added some blue in the as-yet-empty eye sockets and red inside the mouth.
To complete the eyes, I piped in big blobs of clear piping gel for the irises then added royal icing whites over top of the piping gel. A bright red piping gel tongue enhanced the mouth.

With that I was ready to transfer Gelatinous Man onto his blue fondant-covered base. Considering that I was by myself, this went remarkably smoothly and I even got him relatively centered. To clean things up I piped a bead of royal icing around the seam between the cake and the base, and then smoothed it with a damp paintbrush. While I had the icing out, I put some little teeth in Gelatinous Man's mouth.
Now I had a good shape and some decent colors, but the cake still didn't sing. For one thing, it was too neat - no damp oozing, no blood - and for another thing, Gelatinous Man wasn't integrated with his base to create a unified piece.
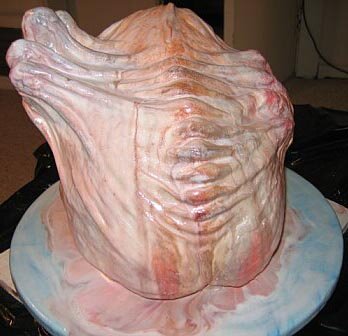
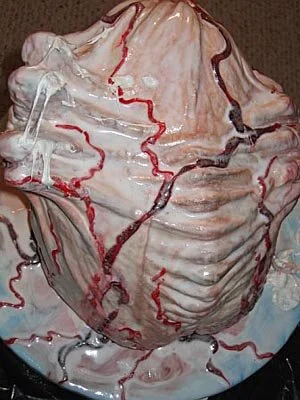
To create the oozing, damp look I was going for, I made some very, very thin royal icing and used a paintbrush to apply it to the cake. Naturally, such watery icing pooled in the crevices and around the bottom of the cake, giving more of an illusion of depth and an indication of moist membrane. A somewhat unforeseen but beneficial effect of the dripping icing was that it made the airbrushed colors run and bleed. I think it made it look much more natural and frankly, I should have known that was going to happen, since I know that airbrush colors don't really set. It took three coats of this watery icing to really get the depth I was looking for, and by that time a whole bunch of icing had pooled on the base, so that Gelatinous Man appeared to be sitting in a puddle of his own melting flesh. It was a nice look, and effectively joined Gelatinous Man visually with his base.

I almost called it quits at this point, but I still thought it needed a little more, and I had a bunch of piping gel lying around. So I whipped up two different colors of red piping gel - a deep burgundy and a bright red. I painted a stripe of blue food coloring on the inside of a piping bag (I told you I'm a big fan of judicious use of blue in my gore effects.) fitted with a #8 round tip and filled it with the darker red piping gel. It was a little hard to control the piping gel on the vertical surfaces, but I ended up pretty happy with my big veins, so I then used the bright red piping gel in a bag with a #6 tip to make the smaller veins.
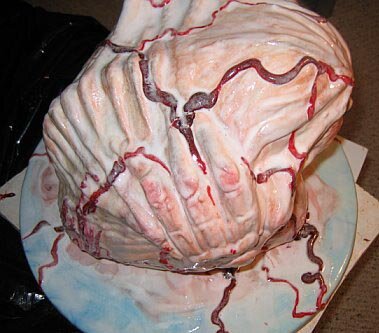
Now I had blood, but was once again faced with a piece that seemed unfinished. One more coat of watery icing did the trick, blending the veins into the cake, melting them just enough to make them seem integrated into the membrane rather than disconnected and sitting on top.

Once again I almost called it done. Then I remembered that I had bought a bag of marshmallows in the hopes of melting them into some sort of fibrous tendrils. This worked really well when I tried it on a practice bowl, but less well when I tried it on the cake because it was still a little wet so the marshmallow wouldn't stick easily. So I only used a little bit, but I still think it added a nice touch and it'll probably be a good technique to have in my arsenal in the future. Easy, too - I just popped the marshmallow in the microwave for fifteen seconds, and then stuck it wherever I wanted it with the tip of a knife. I only used three of the marshmallows, but I have since eaten the entire rest of the bag.
I could probably have gone on poking and prodding at this cake forever until it was just an indistinguishable blob of yuckiness, but fortunately, I ran out of time at this point and had to decide that I was done. I think it has firmly established me as the weirdest member of my MBA class.

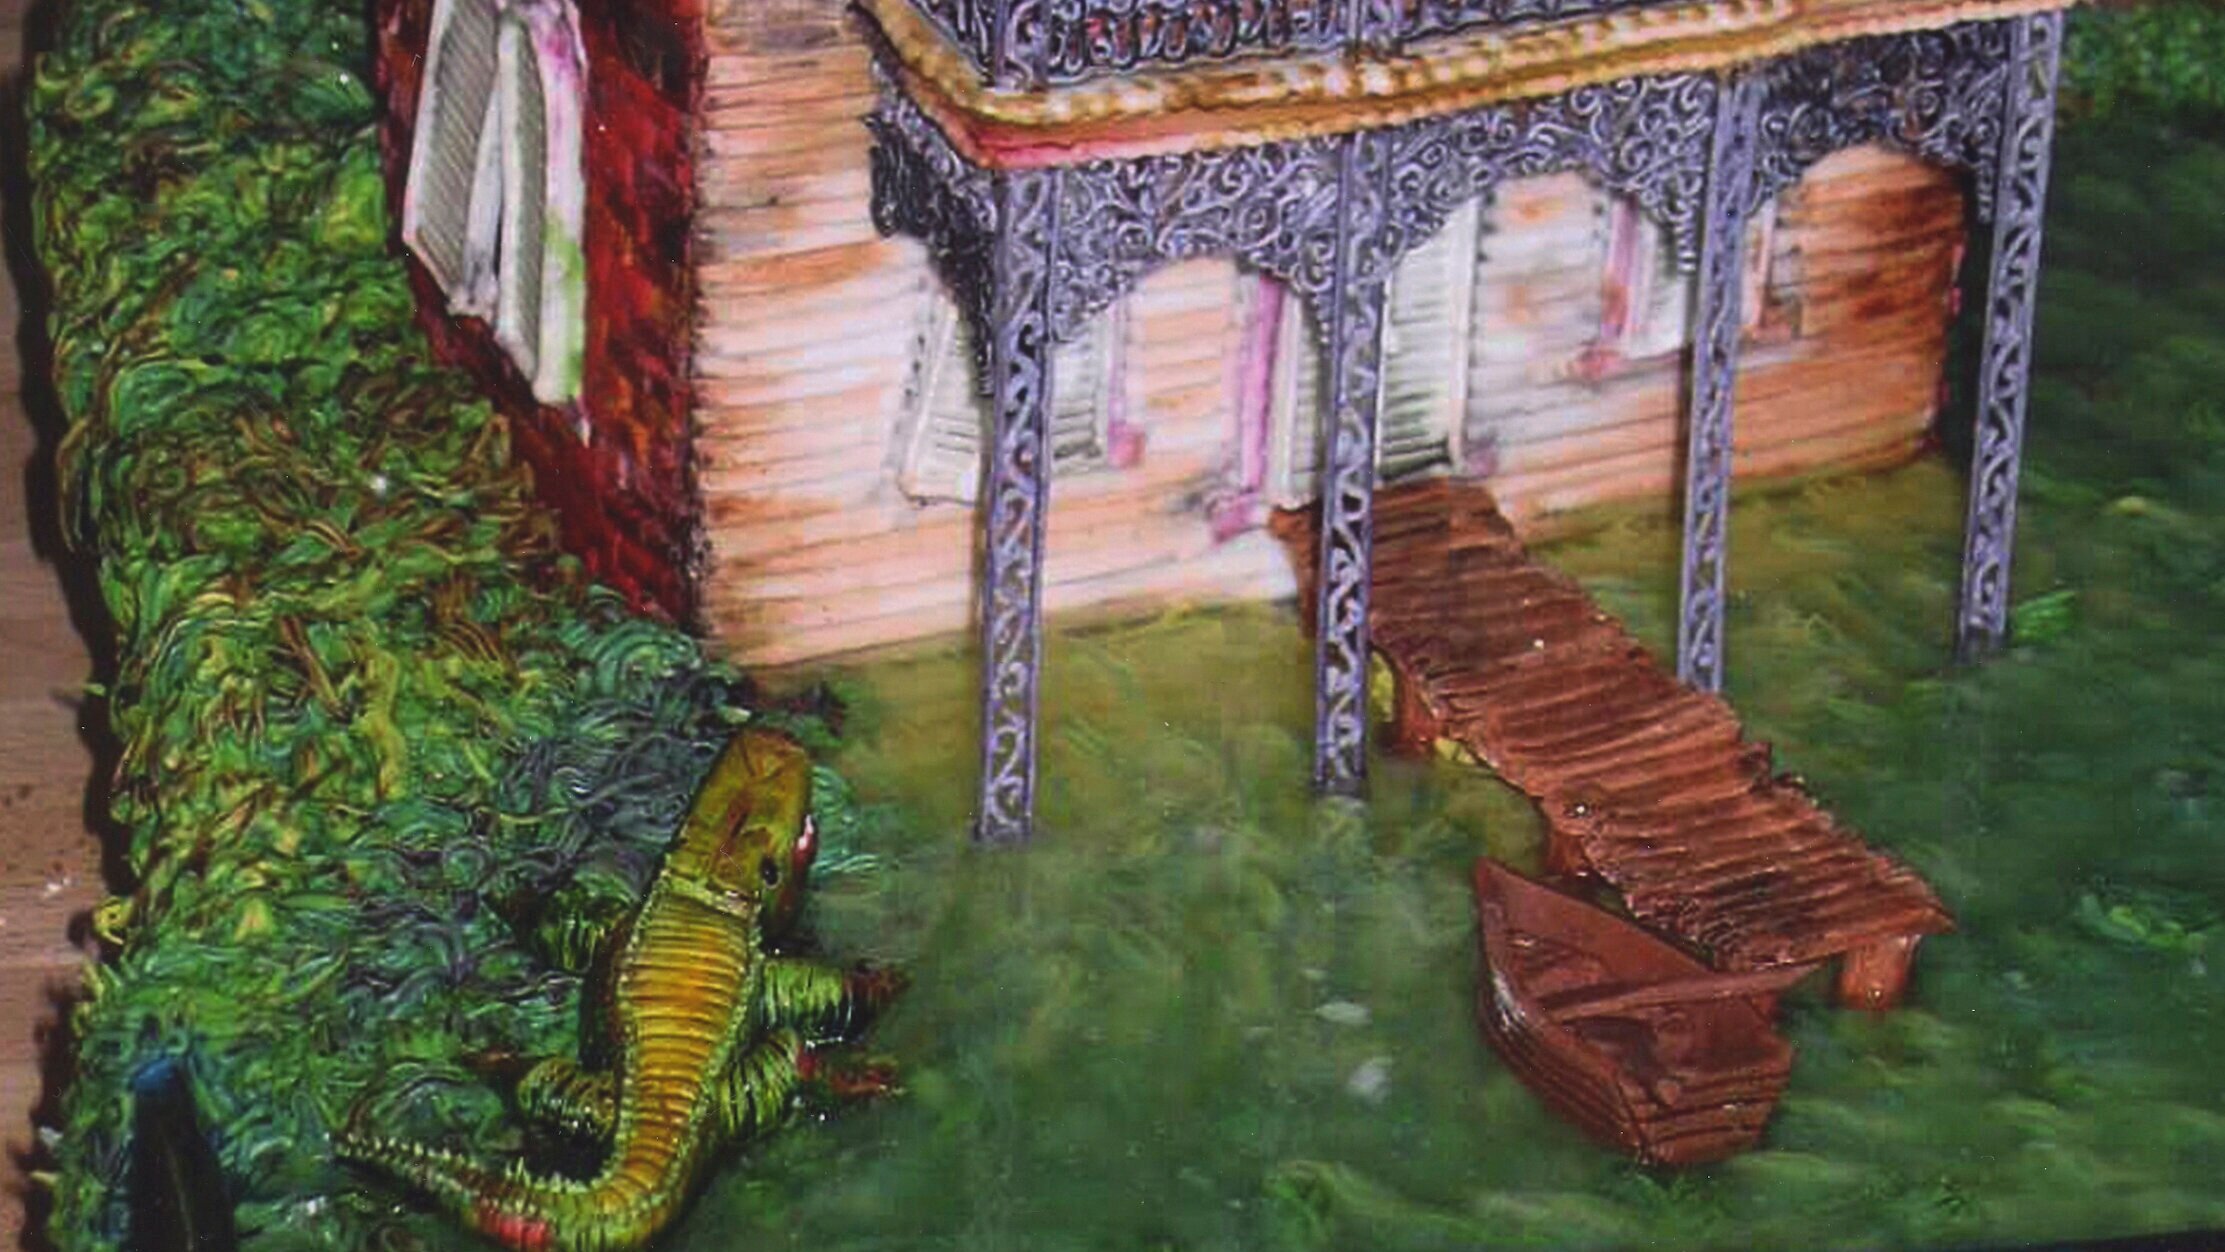
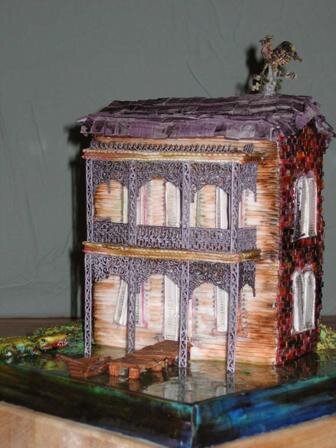
Gingerbread Swamp House
This gingerbread house was inspired by my recent trip to New Orleans. I took a walking tour of the Garden District.

This gingerbread house was inspired by my recent trip to New Orleans. I took a walking tour of the Garden District, which, by the way, I recommend to any of you should you happen to find yourselves with a free day in New Orleans. The stunning ironwork was what first caught my attention. Fortunately, my parents had just given me a digital camera for my birthday, so I spent the rest of the afternoon happily snapping close-up of delicate architectural details.
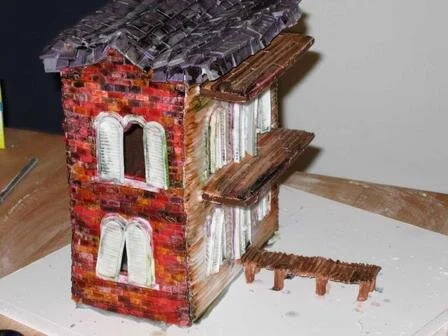
I'm not very good at making nice, normal, friendly gingerbread houses, so, naturally, I decided that this should be a dilapidated bayou house, complete with alligator, rowboat, and swamp water.
The basic pattern of the house was remarkably easy (Though not so easy that I didn't manage to cut the roof pieces too short, but that's a story for later on in my gingerbread saga.), consisting simply of four sides, two rectangular balconies, and four long roof pieces. It took me almost no time to draft the patterns for those, which was good because it took me hours to draft the patterns for the intricate railing and decorative grillwork I had planned for the balconies.

That was all the prep work I could do until the week before Christmas, as I was planning to spend Christmas in California with my sister and royal icing balcony rails can hardly be expected to survive a trip across a room, let alone a trip across the country.
Finally, my big travel day arrived and, gingerbread plans carefully packing in my carry-on bag (so I wouldn't have to do without them for even a day in the event that there was a problem with my checked luggage) I hied myself to LaGuardia and boarded my plane.
Within but a few hours of my arrival in San Francisco (where I rendezvoused with our parents, who had flown in from Michigan for the occasion) I was hard at work rolling and cutting gingerbread pieces. You see, I had to have them baked and ready, as Gingerbreadfest was the next day! Gingerbreadfest is the biggest of our annual craft parties. We have to provide all of our friends with pre-made gingerbread house pieces, all manner of candy decorations, and approximately twenty gallons of royal icing with which to stick everything together.

Actually, it turned out that it really didn't matter that I had the gingerbread pieces baked in time for Gingerbreadfest, as it took me all day just to pipe the tiny royal icing grillwork, using a #1 tip. Frankly, Gingerbreadfest isn't a great time for either my sister or I to get much work done on our own gingerbread houses, as we have to spend most of the time replenishing candy bowls, mixing batches of icing, and assembling everyone's houses. It's all worth it though, just to see what everyone comes up with. The undisputed triumph of Gingerbreadfest this year was the gingerbread rebel stronghold, complete with guard tower and bomb shelter entrance, which our youngest guest (age five) made out of the little leftover pieces (doors, chimneys, etc.) of other houses. I helped.
Even the day after Gingerbreadfest, the only thing I had a chance to do to the gingerbread pieces themselves was to glue the balconies to the front of the house with some thick royal icing. I then spent most of the day running Christmas related errands, so all I had time to do that evening was cut fifty sticks of peppermint chewing gum into tiny bricks, then paint them various shades of brown and red.
Once I finally started decorating the actual house, things went quite smoothly. The balconies were the first pieces I tackled. I frosted both sides of these with slightly thin, brown royal icing, and then scored the icing with a toothpick to create planking. For maximum verisimilitude, I tinted some of the boards with various shades of red and yellow food coloring.
I glued the chewing gum bricks to the side and back pieces with a thin layer of grey royal icing and covered the front of the house with slats made of thinly rolled fondant. I also made shutters for all the windows out of rolled fondant, scored with a toothpick. I then piped royal icing frames around all the windows, doors, and shutters using a wide, flat decorating tip while watching the thematically appropriate, yet woefully incomprehensible movie Eaten Alive.
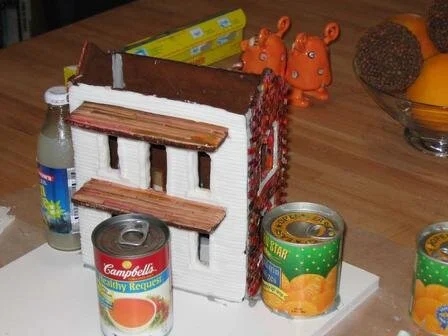
Finally, the exciting moment of assembly arrived! I had cut a one-foot square base out of 3/8" foamcore, to which I glued first the back, then the sides and front of the house. It went together pretty well. I always get a certain amount of warping and curvature in the gingerbread pieces as they bake, which results in some gaps in the assembled structure. I understand that some people recut each piece after baking before the pieces is cooled for greater accuracy. I should try that next year. In this case, however, the gaps were minimal and easily covered with the careful application of a few more chewing gum bricks.
Now we come to my greatest error in judgment - the roof pieces. I'm not quite sure whether the house was more out of whack than it looked or whether I just cut the roof pieces too small, but when I went to attach the roof pieces, they were too short to sit on top of the sides of the house as they were intended to. If I had been clever I could have built up the sides with some royal icing and allowed that to dry prior to attaching the roof pieces. I'm not that clever, so I just glooped on a whole mess of royal icing to fill the gaps and held my breath until it dried, hoping that the entire roof wouldn't just sink into the body of the house. In the end, the problems with the roof turned out to be rather fortuitous, as one end of the roof sagged threateningly and greatly enhanced the dilapidated look of the house, which was, of course, what I was going for in the first place.

With roof pieces safely in place, I set about tiling the roof using little squares of fondant, about 1/2" on each side. I made two colors of tile, one a deep purple marbled with some black, the other a deep green, also marbled with black. Then I applied the two colors at random, to nice effect. I also attached the shutters at this point, some open, some closed, some on the verge of falling off entirely.
With the structure of the house in place, it was time to paint! I distressed everything, using mostly green, red, black, yellow, and brown food coloring. Prior to this point, the siding on the front of the house, the window trim, and the shutters were pristine white. By the time I was done, they looked like they had been sitting in the swamp for a century. I also ran a coat of water across the roof to give a damp sheen to the fondant tiles.
Now it was time to make the finishing touches - a little rowboat and oars, the pier for it to dock at, and the giant alligator to menace anyone who might be foolish enough to venture forth into the ominous swamp around the house. All these I sculpted from fondant, white for the alligator, marbleized brown for the rowboat and pier.
The pier was easily made by rolling out a strip of fondant and scoring it with a toothpick to make individual boards. I also distressed the ends of the boards for that all-important aged look. The legs of the pier are simply little rolled cylinders of fondant. The boat was also quite simple to make, but took a little longer, mostly because the first one I made was ridiculously out of scale so I had to make another one.
The alligator was, of course, my biggest sculptural challenge of this project, but fortunately I made gum paste frogs a few months ago for a friend's wedding cake, and the skills are quite similar. I pulled a good research picture off the internet and set to work. Once I had the basic shape of the body and head, I added textural detail to the hide with a toothpick and with a star decorating tip. I made eyeballs by gently pressing in a #8 decorating tip and nostrils with, I believe, a #3. I then propped the mouth open with a folded bit of was paper and left it to dry.
The first step in landscaping around the house was to build up a hill in back of it with a wad of fondant, so it appeared to be fronting on the swamp, while the land rose behind the house. Then I attached the pier leading to the front door. In retrospect, it might have been easier to pipe the grass under the pier before I attached the pier, but it's too late for that now.

I used a grass tip to cover the entire area around the house with two shades of slightly unhealthy green icing and one of sickly yellow icing. While I was doing this, I also attached the delicate grilles to the front of the house. To say that it was nerve wracking working with those tiny, fragile pieces would be a tremendous understatement, particularly as I had neglected to make any extras of one section of the grille. To be more accurate, I made two sets of everything, thinking I would then have extras in case anything broke, forgetting that I needed two sets of some pieces anyway. Astonishingly, nothing broke except one tiny edge, which was easily repaired. Once I was breathing normally again, I finished piping all of the grass, then added and painted a little royal icing trim around the tops of the decorative grilles.

My plan for the swamp was to use Jell-O. In order to prevent the hot, liquid Jell-O from simply pouring over the side of the house's base and onto my sister's new table I had to made a dam around the edge of the base. I first tried to do this with royal icing, but I didn't like the results, so I scraped it off and made a new dam out of thick fondant, cut into strips and painted deep blues, greens, and blacks.
I decided to experiment with the Jell-O before pouring it onto the front of the actual house. I'm extremely glad I did, because it turns out that Jell-O is totally incompatible both with royal icing and with fondant. My experimental bowls wound up looking like hideous biological specimens in Petri dishes. The Jell-O dissolved both the royal icing and the fondant, then failed to set up properly, resulting in a gooey, bubbling mess, made all the grosser by the fact that I had added altogether too much blue food coloring to the Jell-O.

Scrapping the Jell-O, I turned to Plan B - piping gel. I had no idea that piping gel could be made at home, having always purchased it ready made from a cake decorating store, but Mom suggested that I look for a recipe online. She was right. I found a recipe in no time, which is a very good thing, because by this time it was Christmas, so it wasn't as if I could just run out and buy piping gel. My first batch of piping gel turned out too thin. I wanted it to be thin enough to flow under the pier and around the grillwork posts, but not thin enough that it would never set up. I tried again and the second batch seemed more promising.
After the Jell-O fiasco, I was careful to experiment with the piping gel before applying it to the house. This time, all went well. The royal icing and fondant samples seemed to suffer no ill effects from the piping gel, so I called it a go. This time I only added a smidgen of blue coloring to the gel.
I wanted to place the alligator before piping the gel onto the actual house. That way it could appear to be partially submerged, as if it were in the process of emerging from the swamp. In the end, I think I chickened out a little because I was afraid the detail of the alligator would be obscured by the piping gel, so it only ended up with one foot in the swamp.

Before I could place the alligator I had to paint it. I used shades of yellow, red, brown, and green food coloring, then added tiny royal icing ridges to his back and royal icing teeth to his mouth with a #1 decorator tip. He was then ready to effectively menace the inhabitants of the swamp house! I set him in place on the edge of the swamp.
The big swamp water moment had arrived! I dumped the whole sticky mess of piping gel into a piping bag with a #8 tip, and started slowly piping the gel in front of the house. Everything was going well until I hit one of the grillwork columns with my decorating tip and smashed it! There ensued an extremely tense period in which I performed some emergency surgery to replace the broken piece with a spare column, a process which involved very carefully trimming the new piece down to size with a pair of tweezers. I'm proud to report that the operation was a complete success!
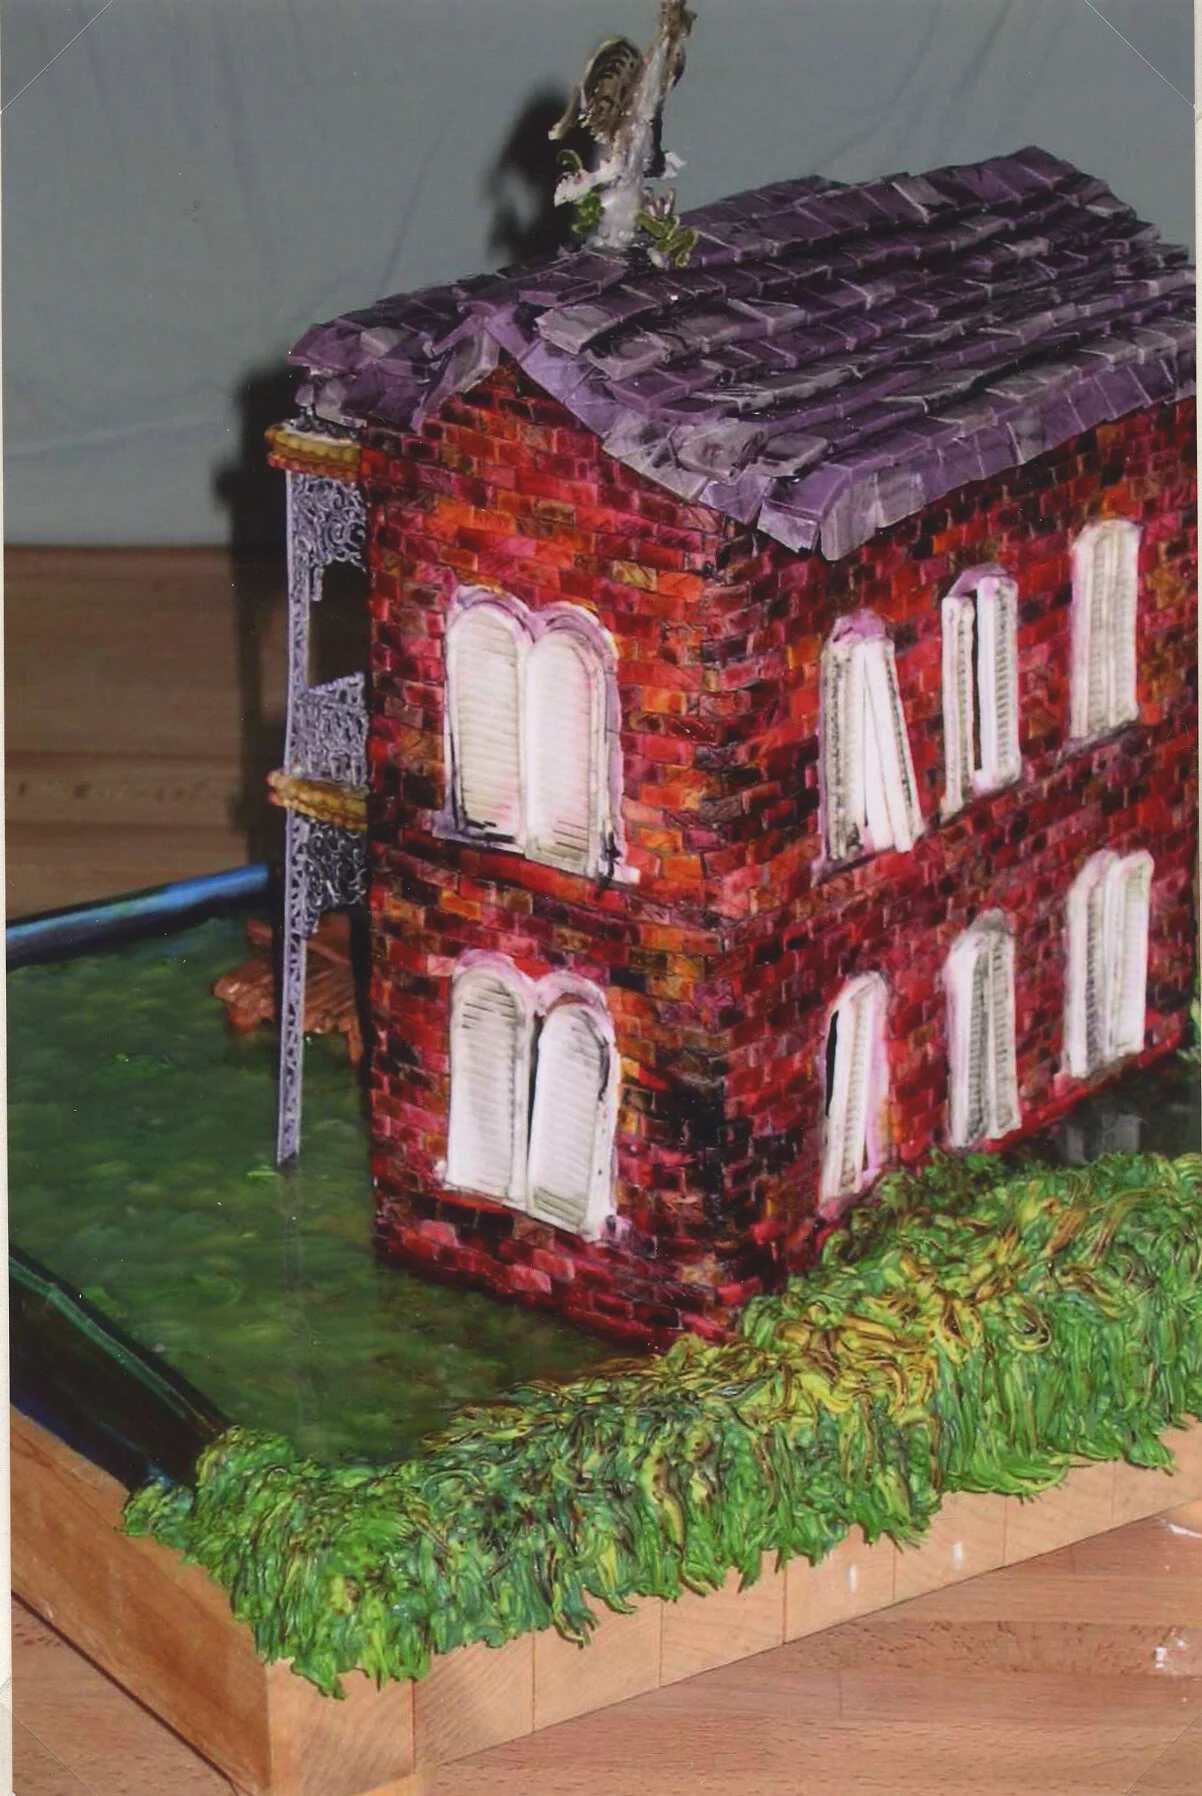
With infinitely more care, I continued piping in the gel until the entire swamp in front of the house was full, as well as little sinkhole in the back of the house. It looked great, if I do say so myself. The royal icing grass was visible beneath the surface, and I could even see reflections of the house in the surface of the piping gel! Now, two weeks later, the gel still has yet to set up completely, but I don't think that's really a big deal.
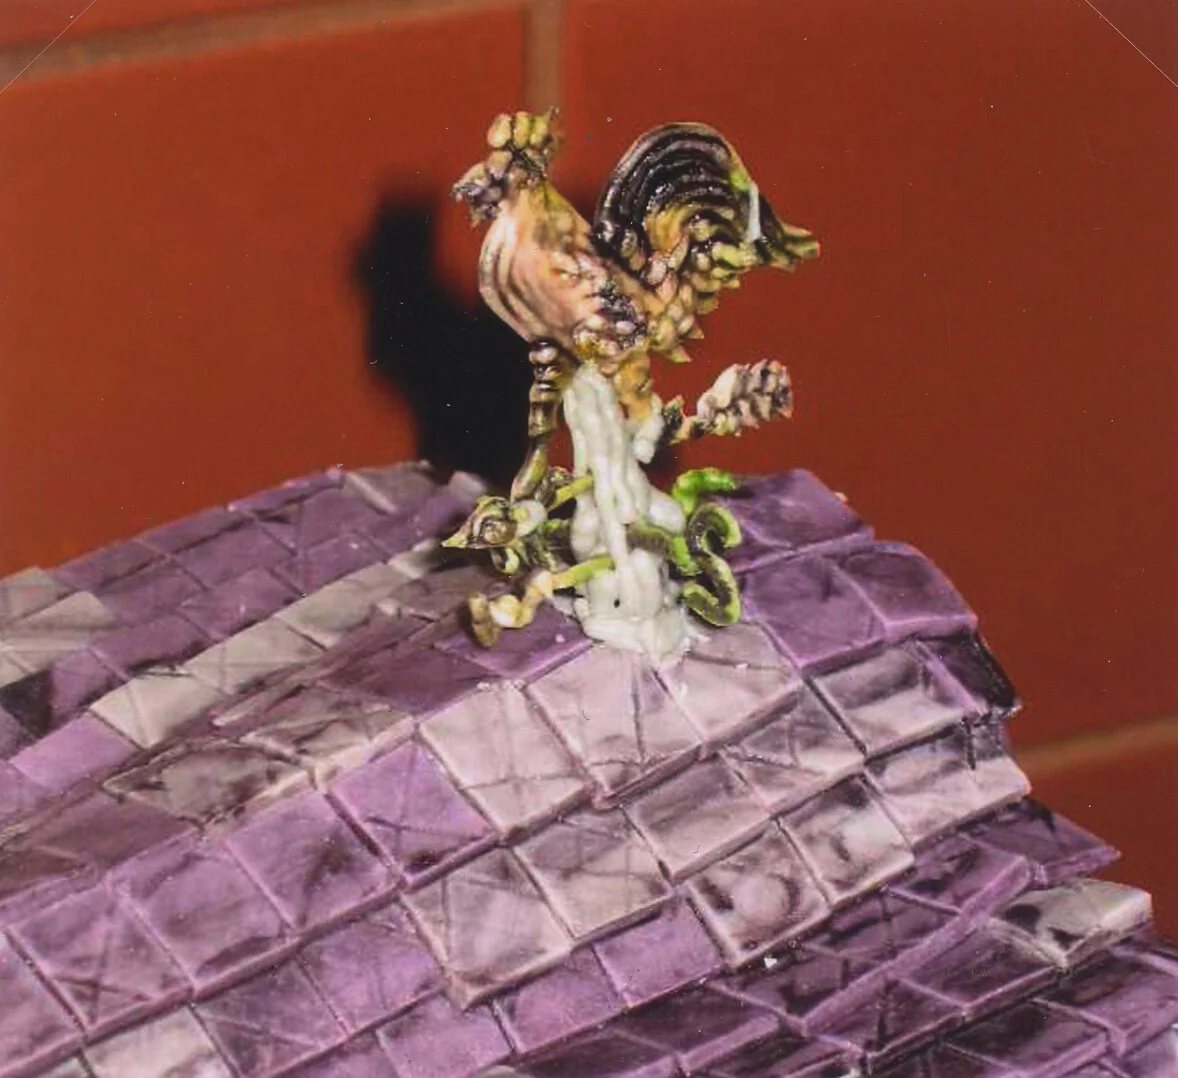
The house was almost done, but something was still missing. I thought about putting some sort of decoration along the ridge of the roof, but then my sister and I hit on the answer - a weather vane! After settling on the traditional rooster design, I piped a weather vane in royal icing onto some wax paper. Once dry, and painted green and black, the weathervane proved exceedingly fragile and difficult to attach to the roof, but, six or seven repairs later, I finally had it in place.
I was finished at last! And it was still Christmas day! Between the success of my gingerbread house, the awesome quilt my sister made for me, and my parents' gift of another trip to the fabulous Wilton School ofCake Decorating, I think it was my best Christmas yet!