Relatively Successful Entremet
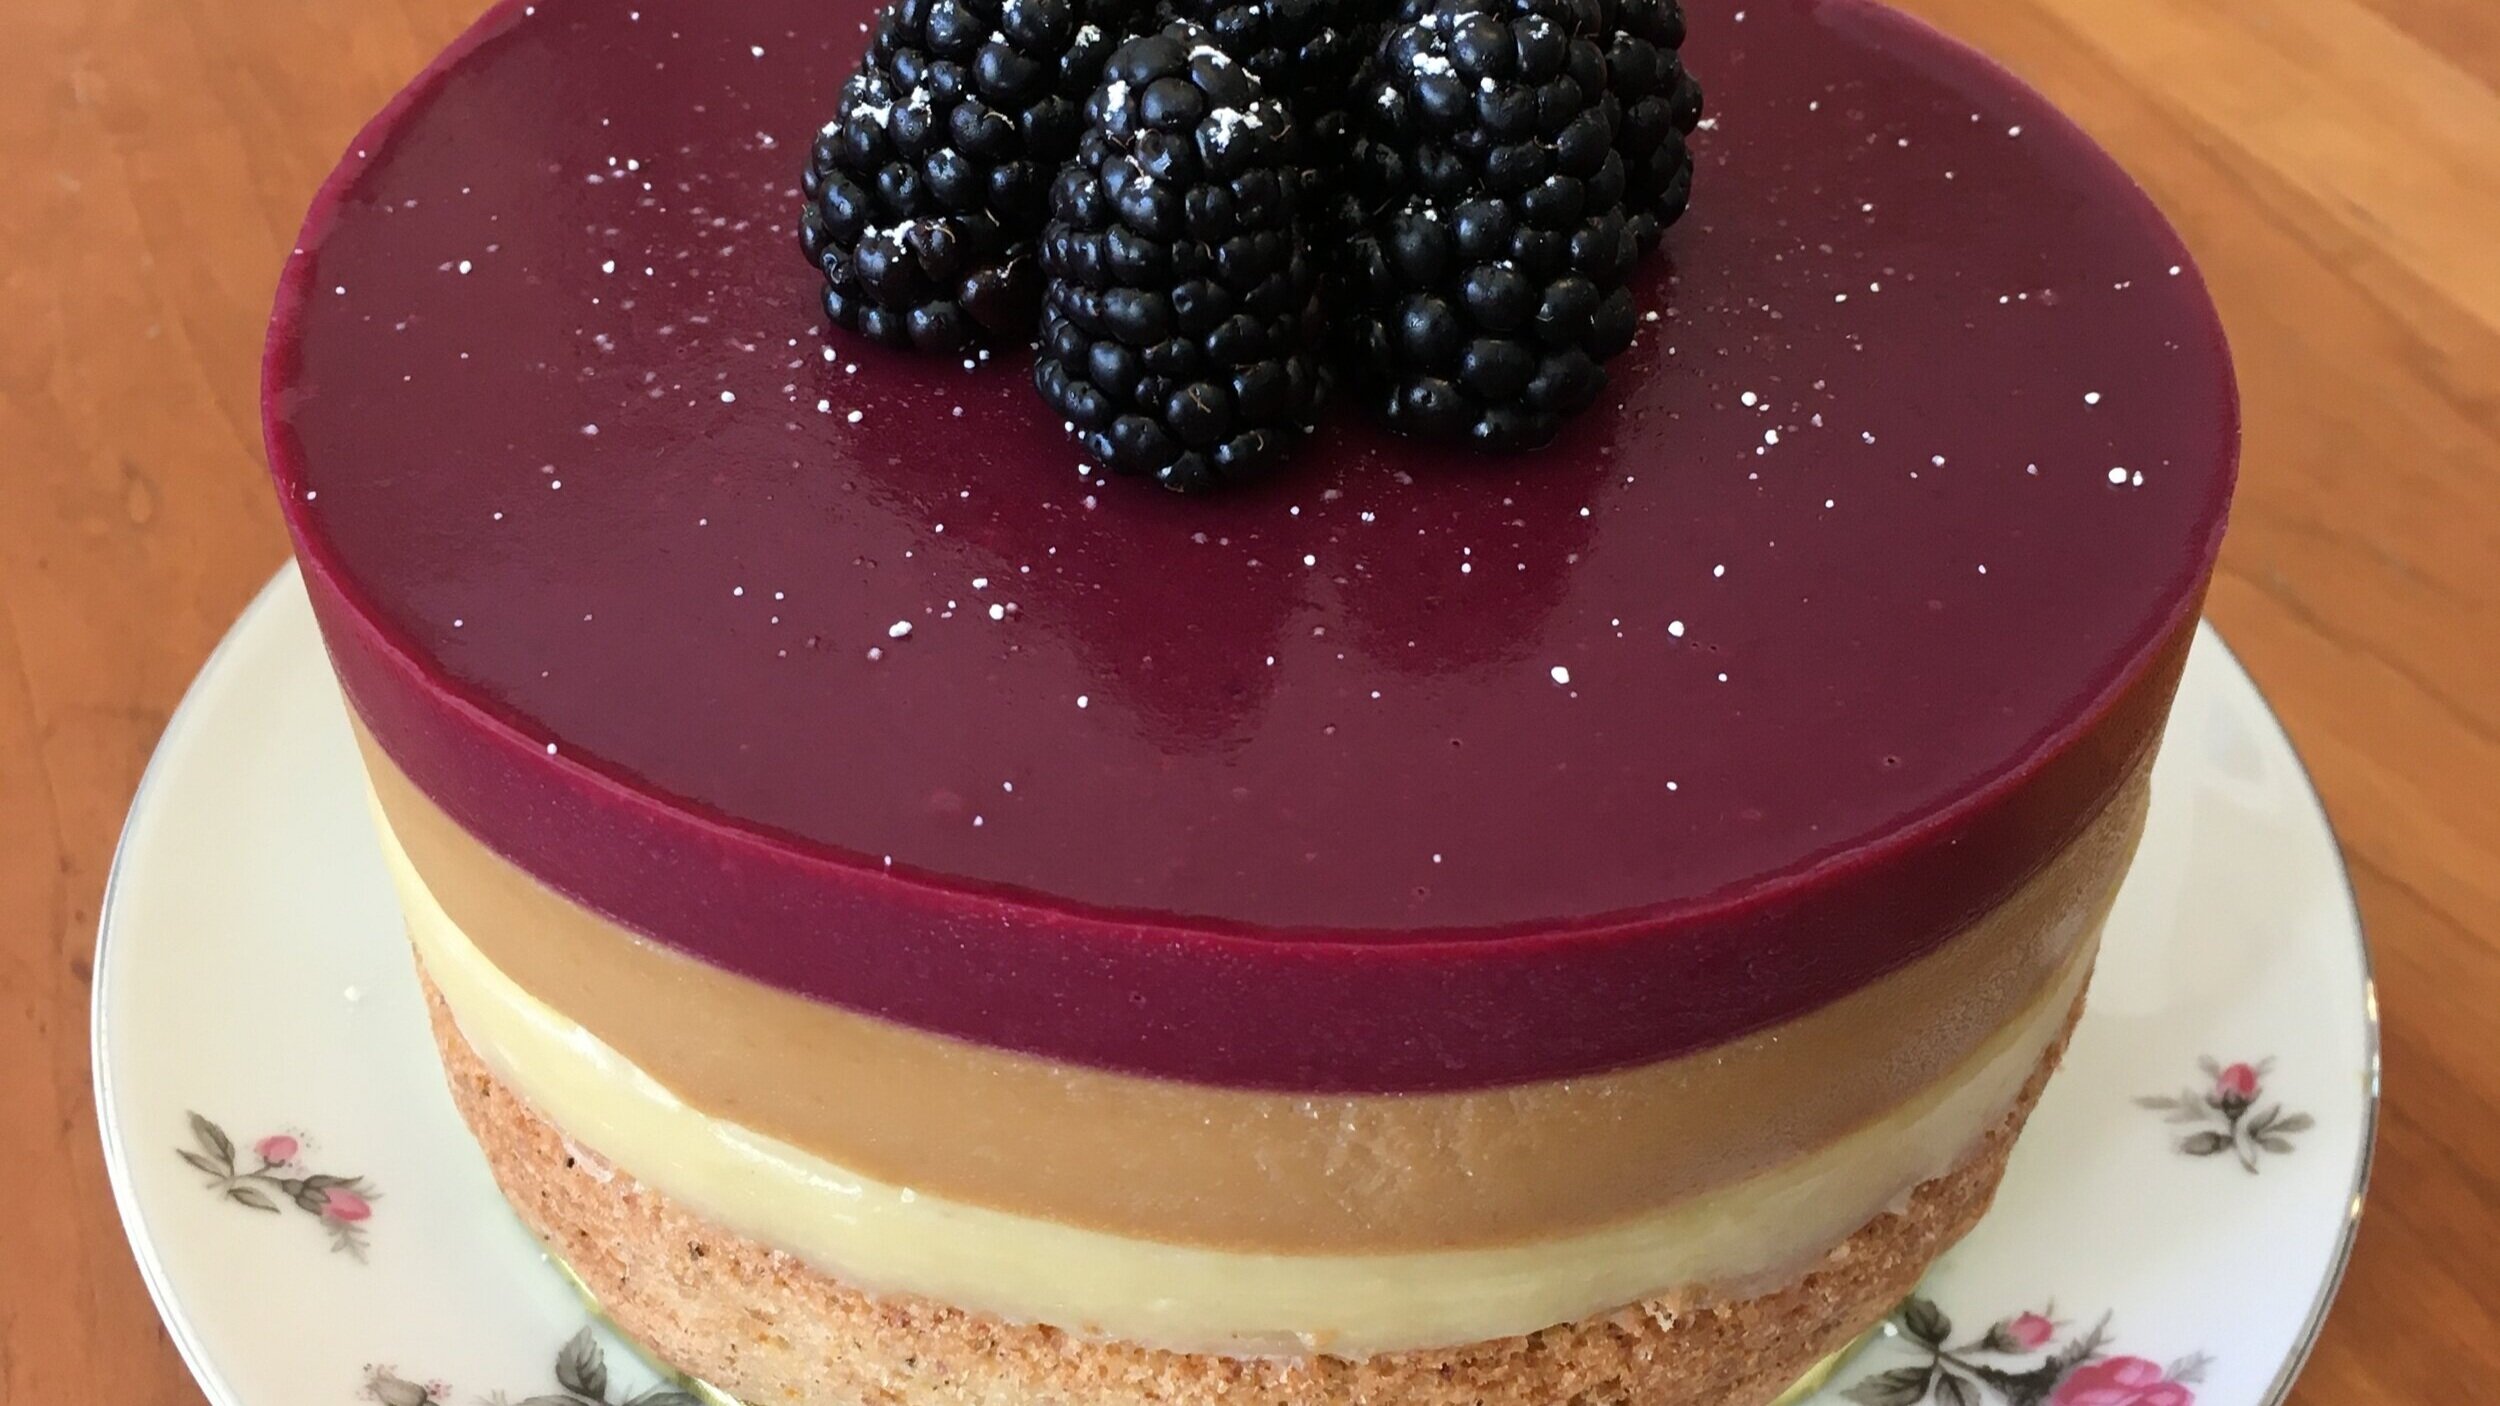
I made this cake for my dad’s birthday, from a recipe in one of my cookbooks from The Great British Bake Off.
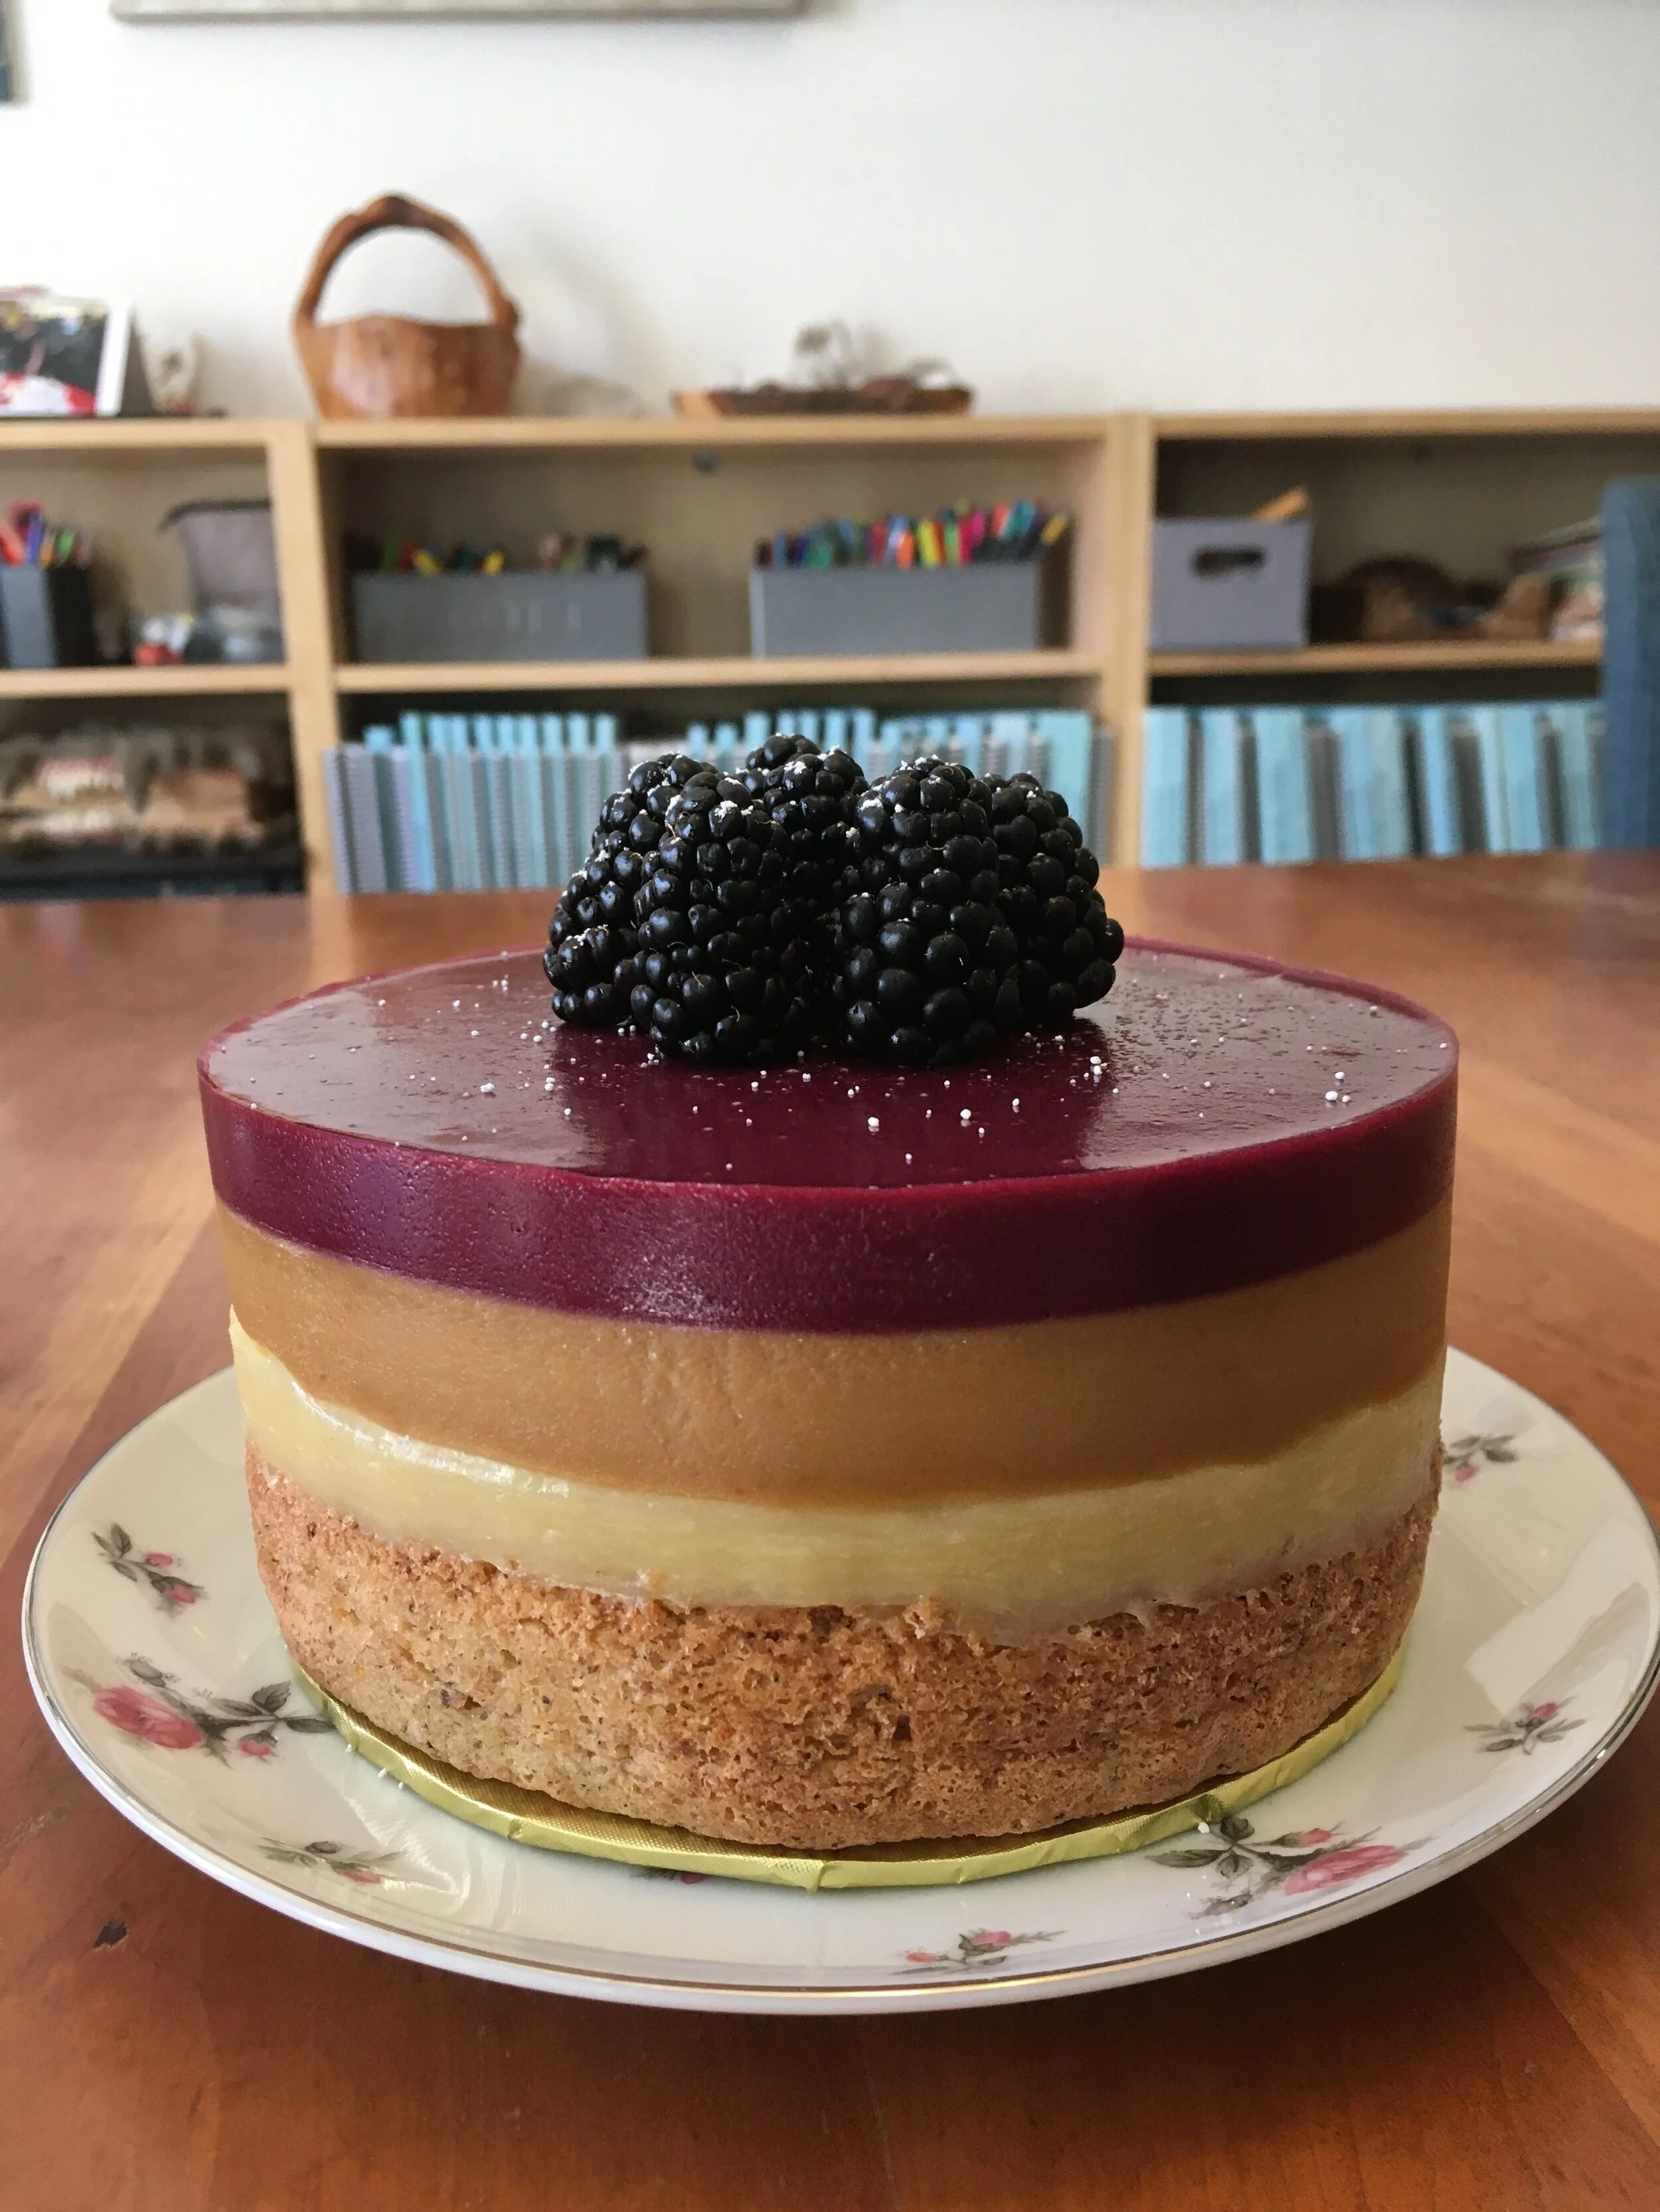
I made this cake for my dad’s birthday, from a recipe in one of my cookbooks from The Great British Bake Off . The layers, from bottom to top, are almond sponge, lemon curd, honey custard, and blackberry gelée. It all tasted good, but I think I put too much gelatin in the custard and the gelée because they were a little rubbery. The recipe was in leaf gelatin and I only have powdered gelatin. Also, the lemon curd wasn’t set enough, so it squooshed out a bit when the cake was cut and later in the refrigerator the top half slide off of the bottom half.
Hollow Knight Cake
In keeping with our Hollow Knight Halloween costumes, Sam wanted a Hollow Knight cake for his birthday this year.
In keeping with our Hollow Knight Halloween costumes, Sam wanted a Hollow Knight cake for his birthday this year.
For reference, this is the image, from Hollow Knight: Voidheart Edition, on which the cake is based

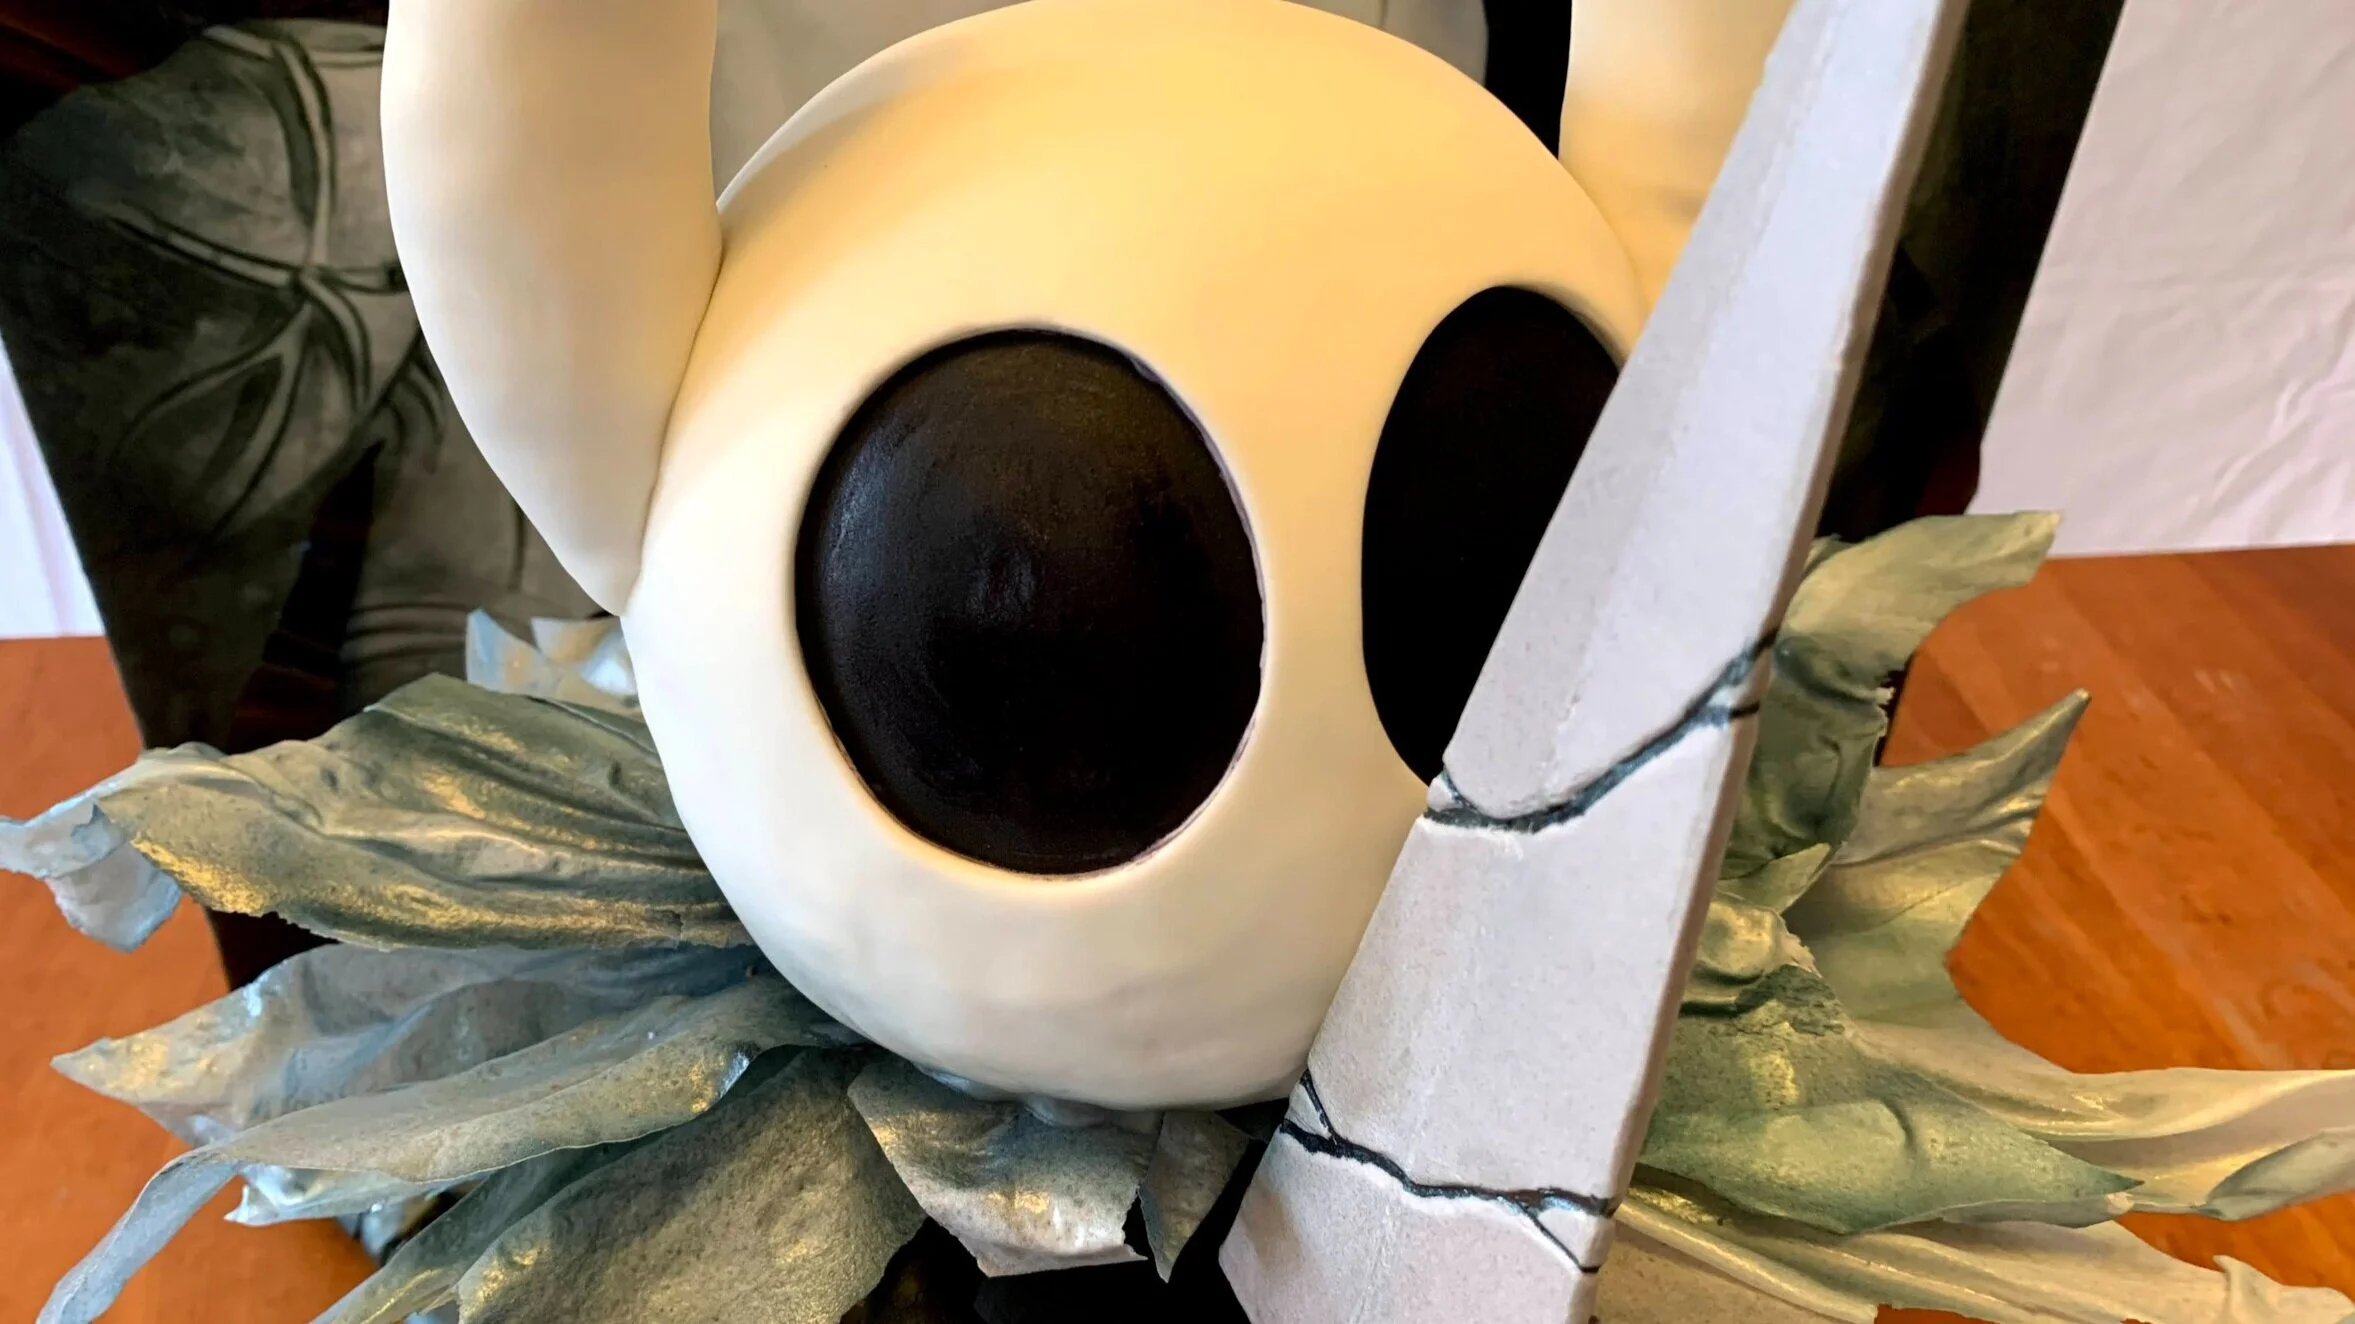
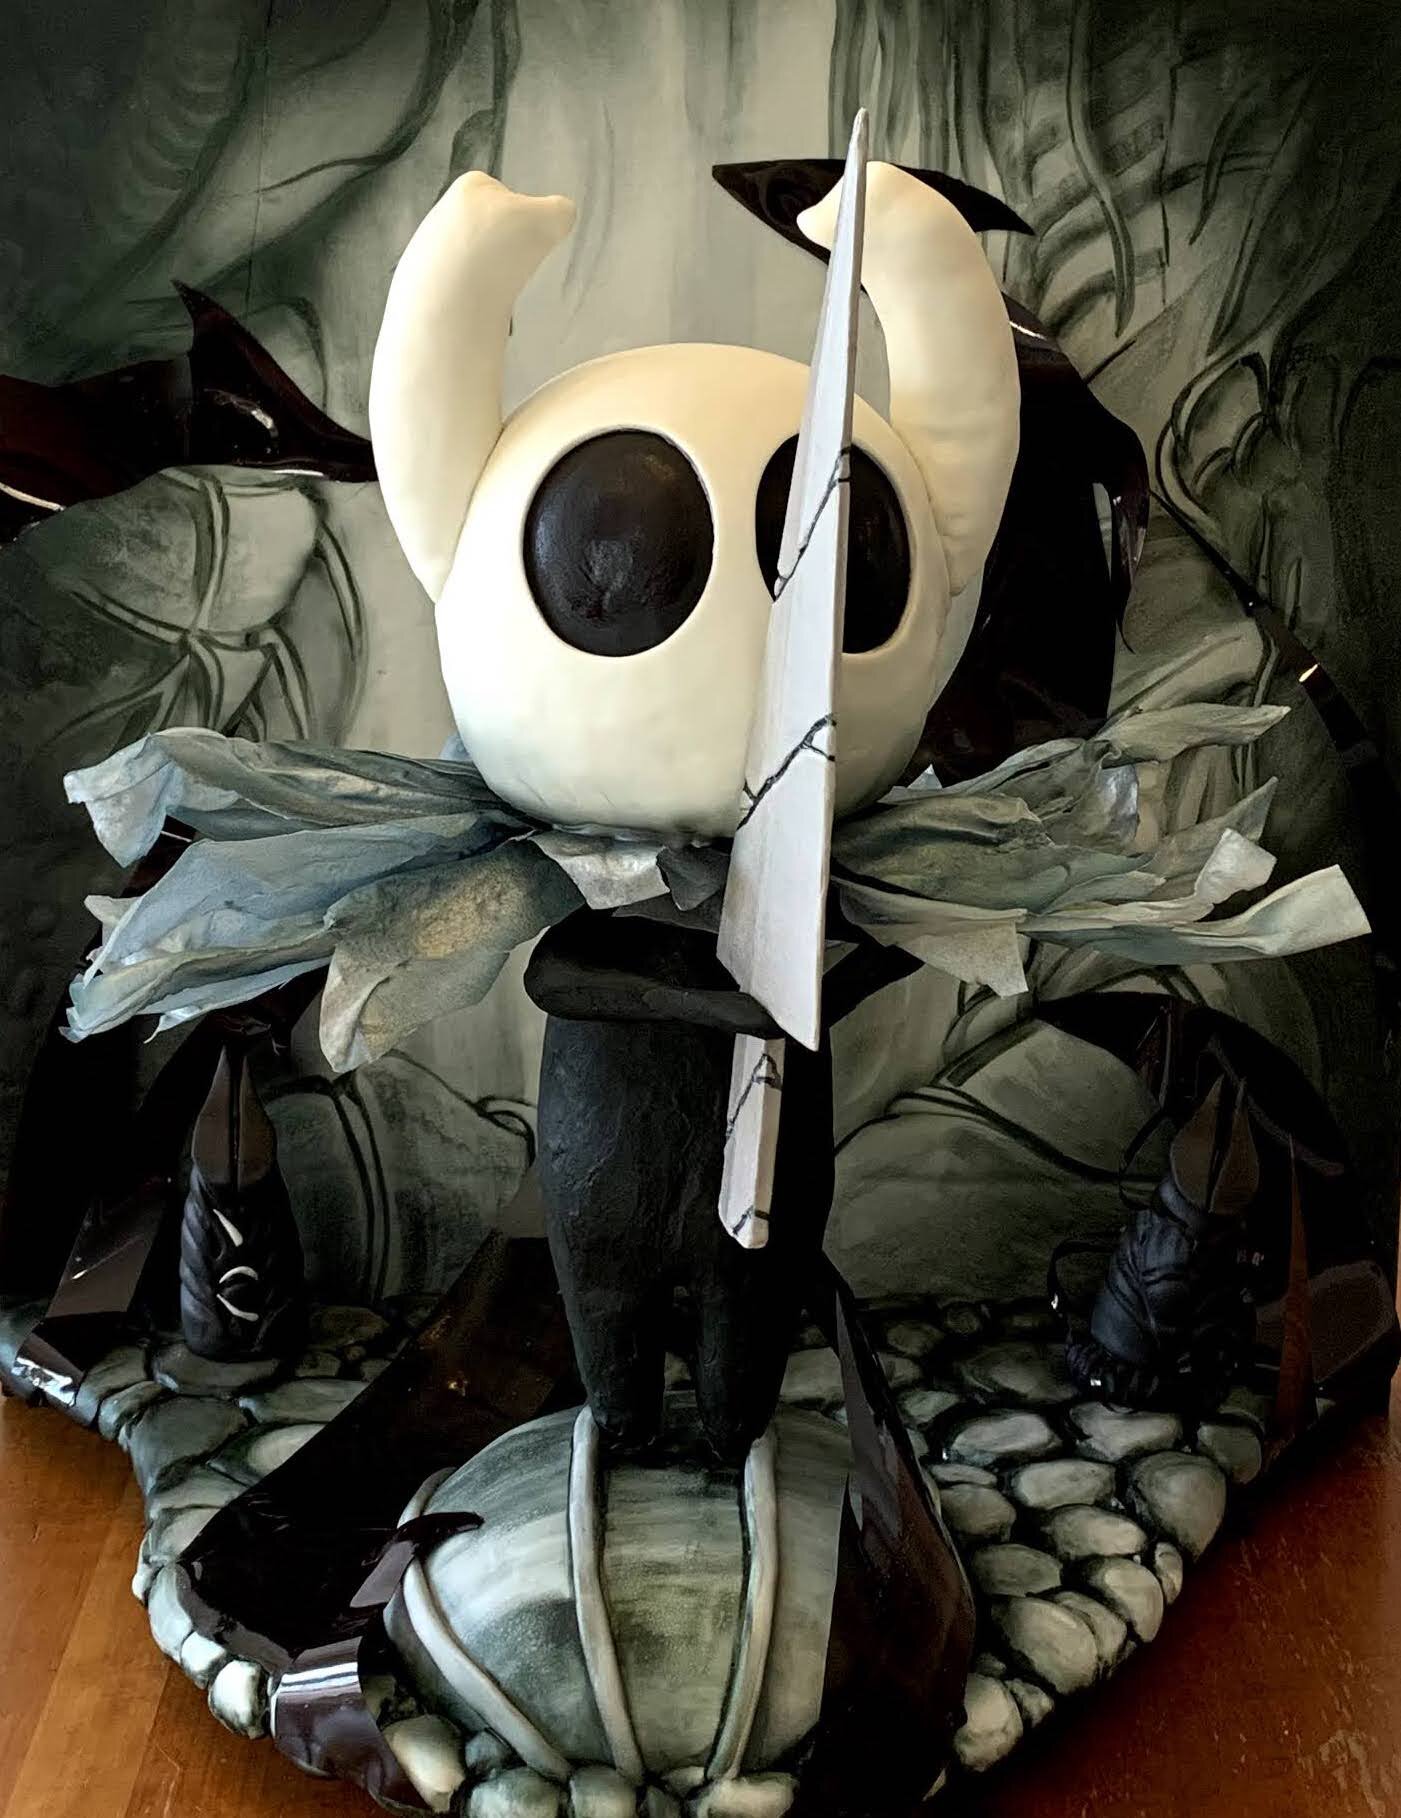
The back is fondant over foam core, painted with food coloring. The rocks on the base are fondant as well, which is good because Sam loves eating fondant and enjoyed eating the rocks as much he enjoyed the actual cake. The cape is wafer paper, coated with gelatin, and the sword is gum paste.

The body, the horns, and the soul totems in the background are made of rice cereal treats covered in fondant.
The soul totems were not in the image the cake is based on, but Sam seemed to think they were important. The one on the left is full of soul energy, hence the little white bits.

The one on the right has been corrupted, hence the Void tendrils. All the Void tendrils are made of gelatin.

The Knight’s head and the thing he’s standing on are made of cake, which is much more cake than we needed for the five people living in this house.

We did Zoom the grandparents in to the party, but unfortunately, they couldn’t help us eat the cake.

Ana Northstar Cake
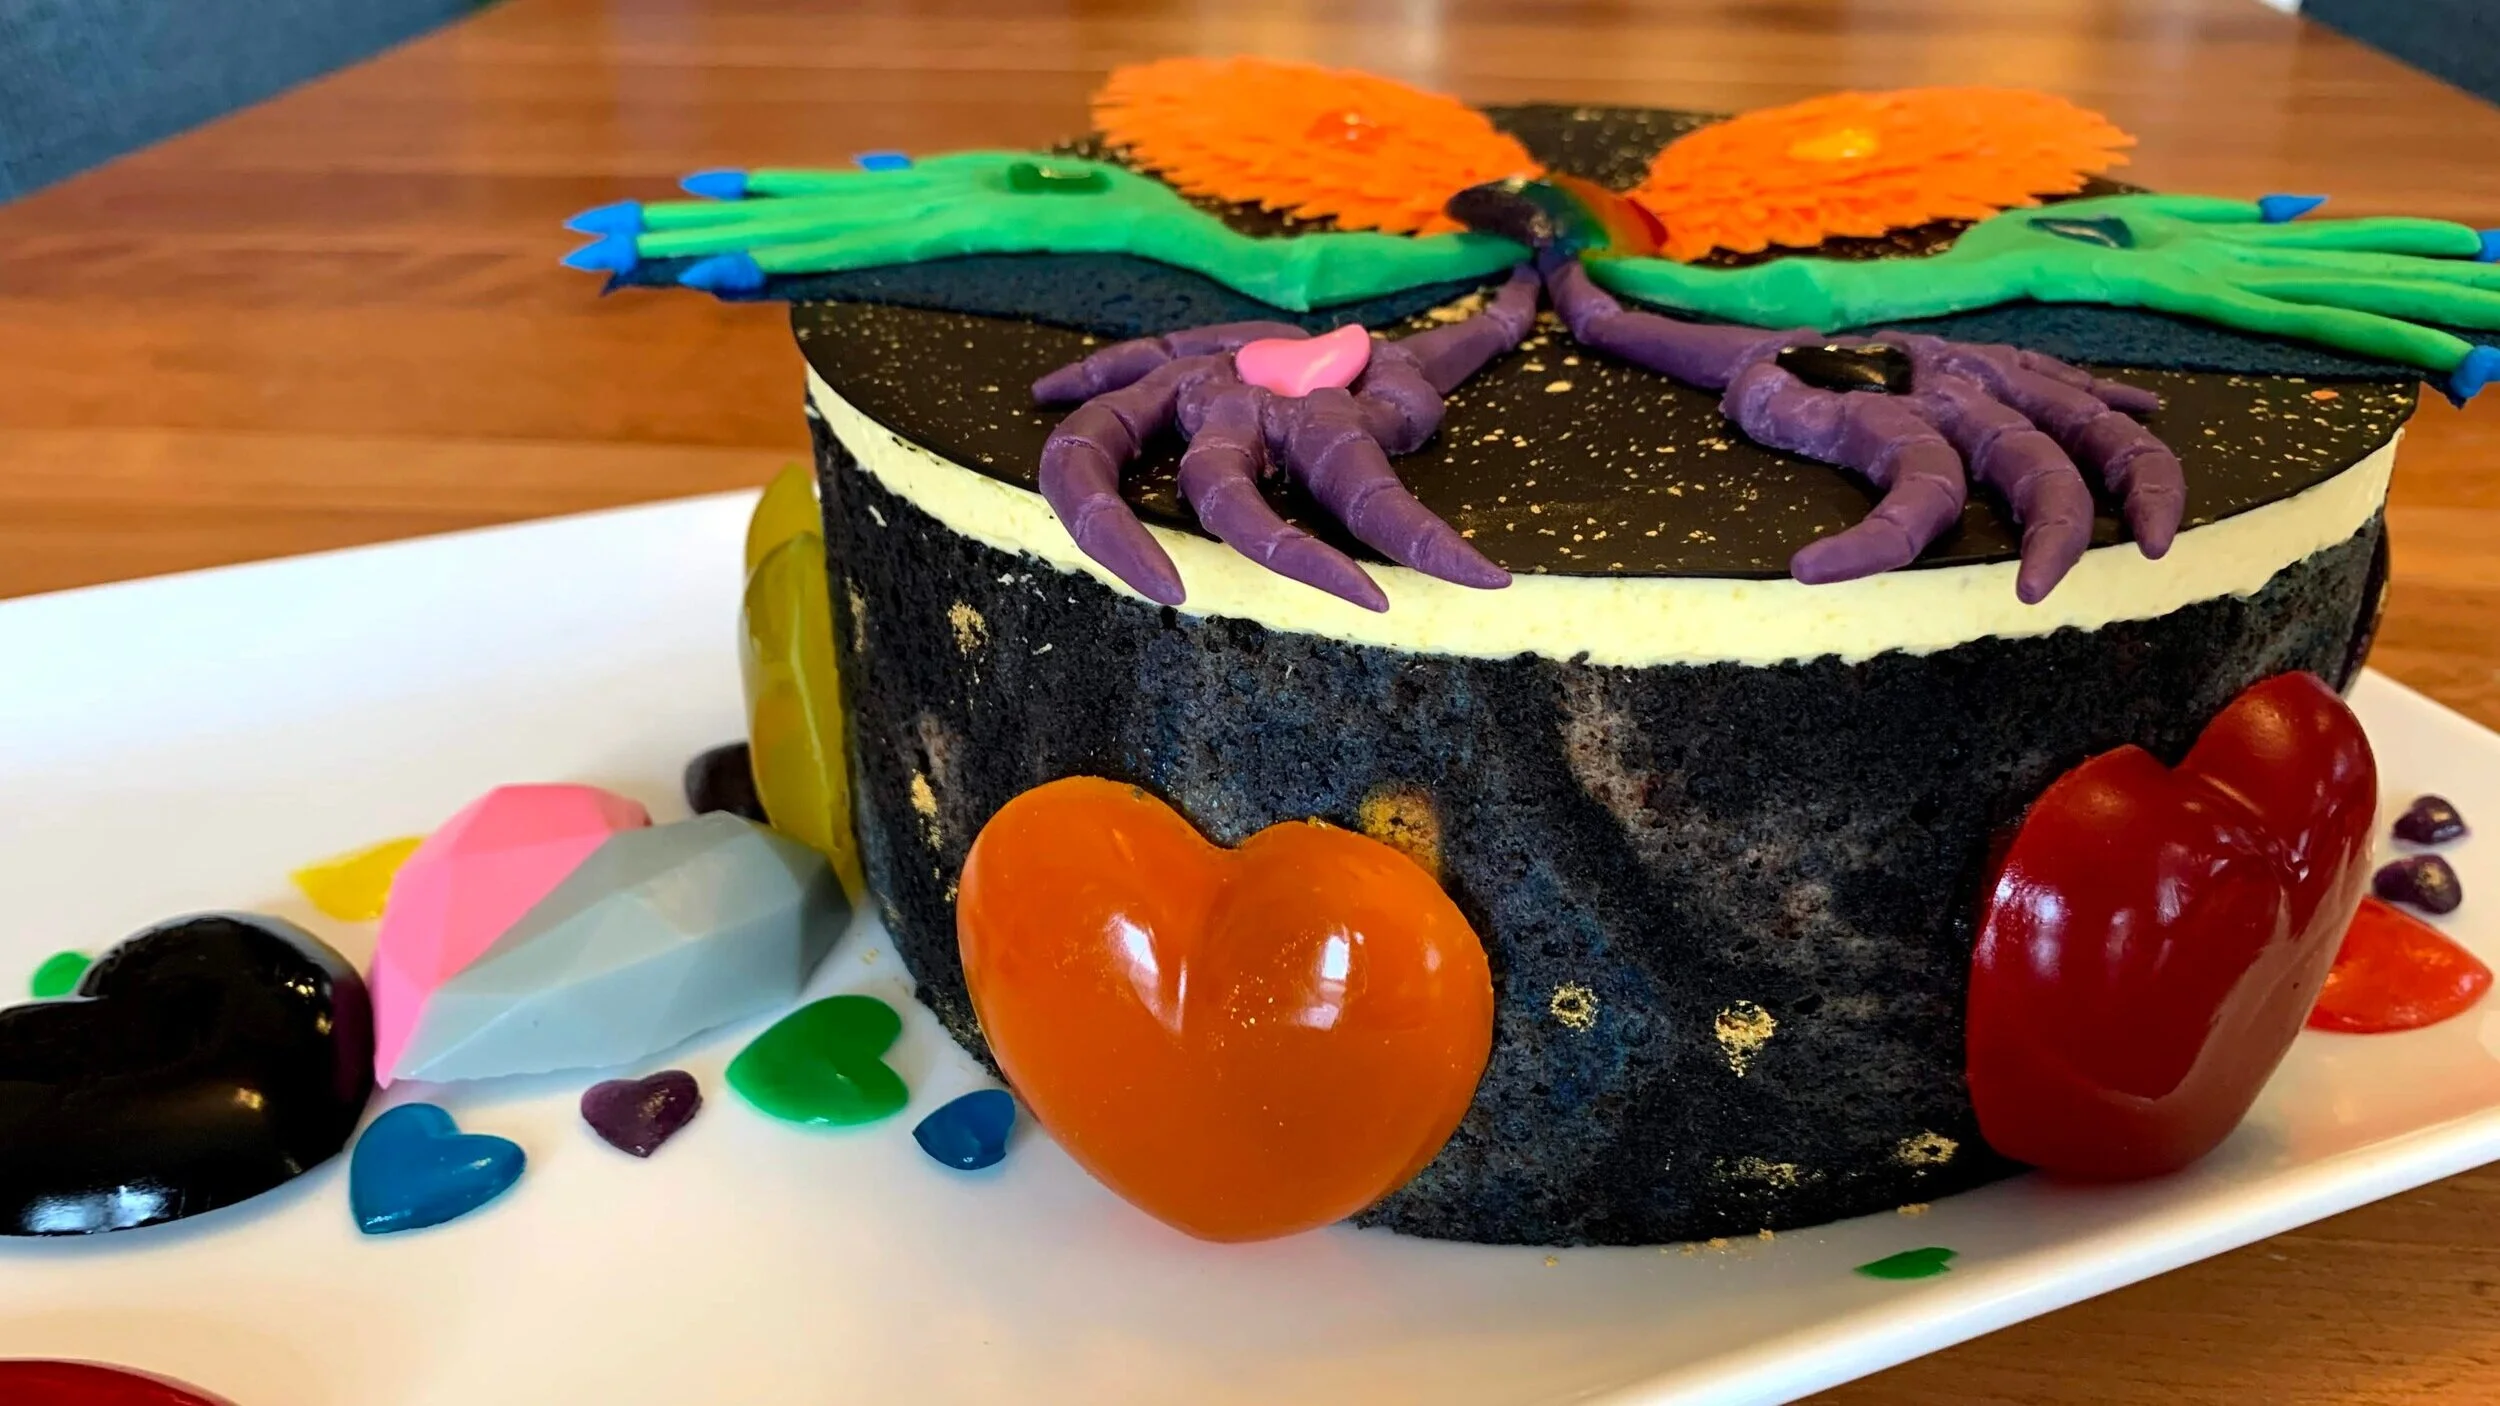
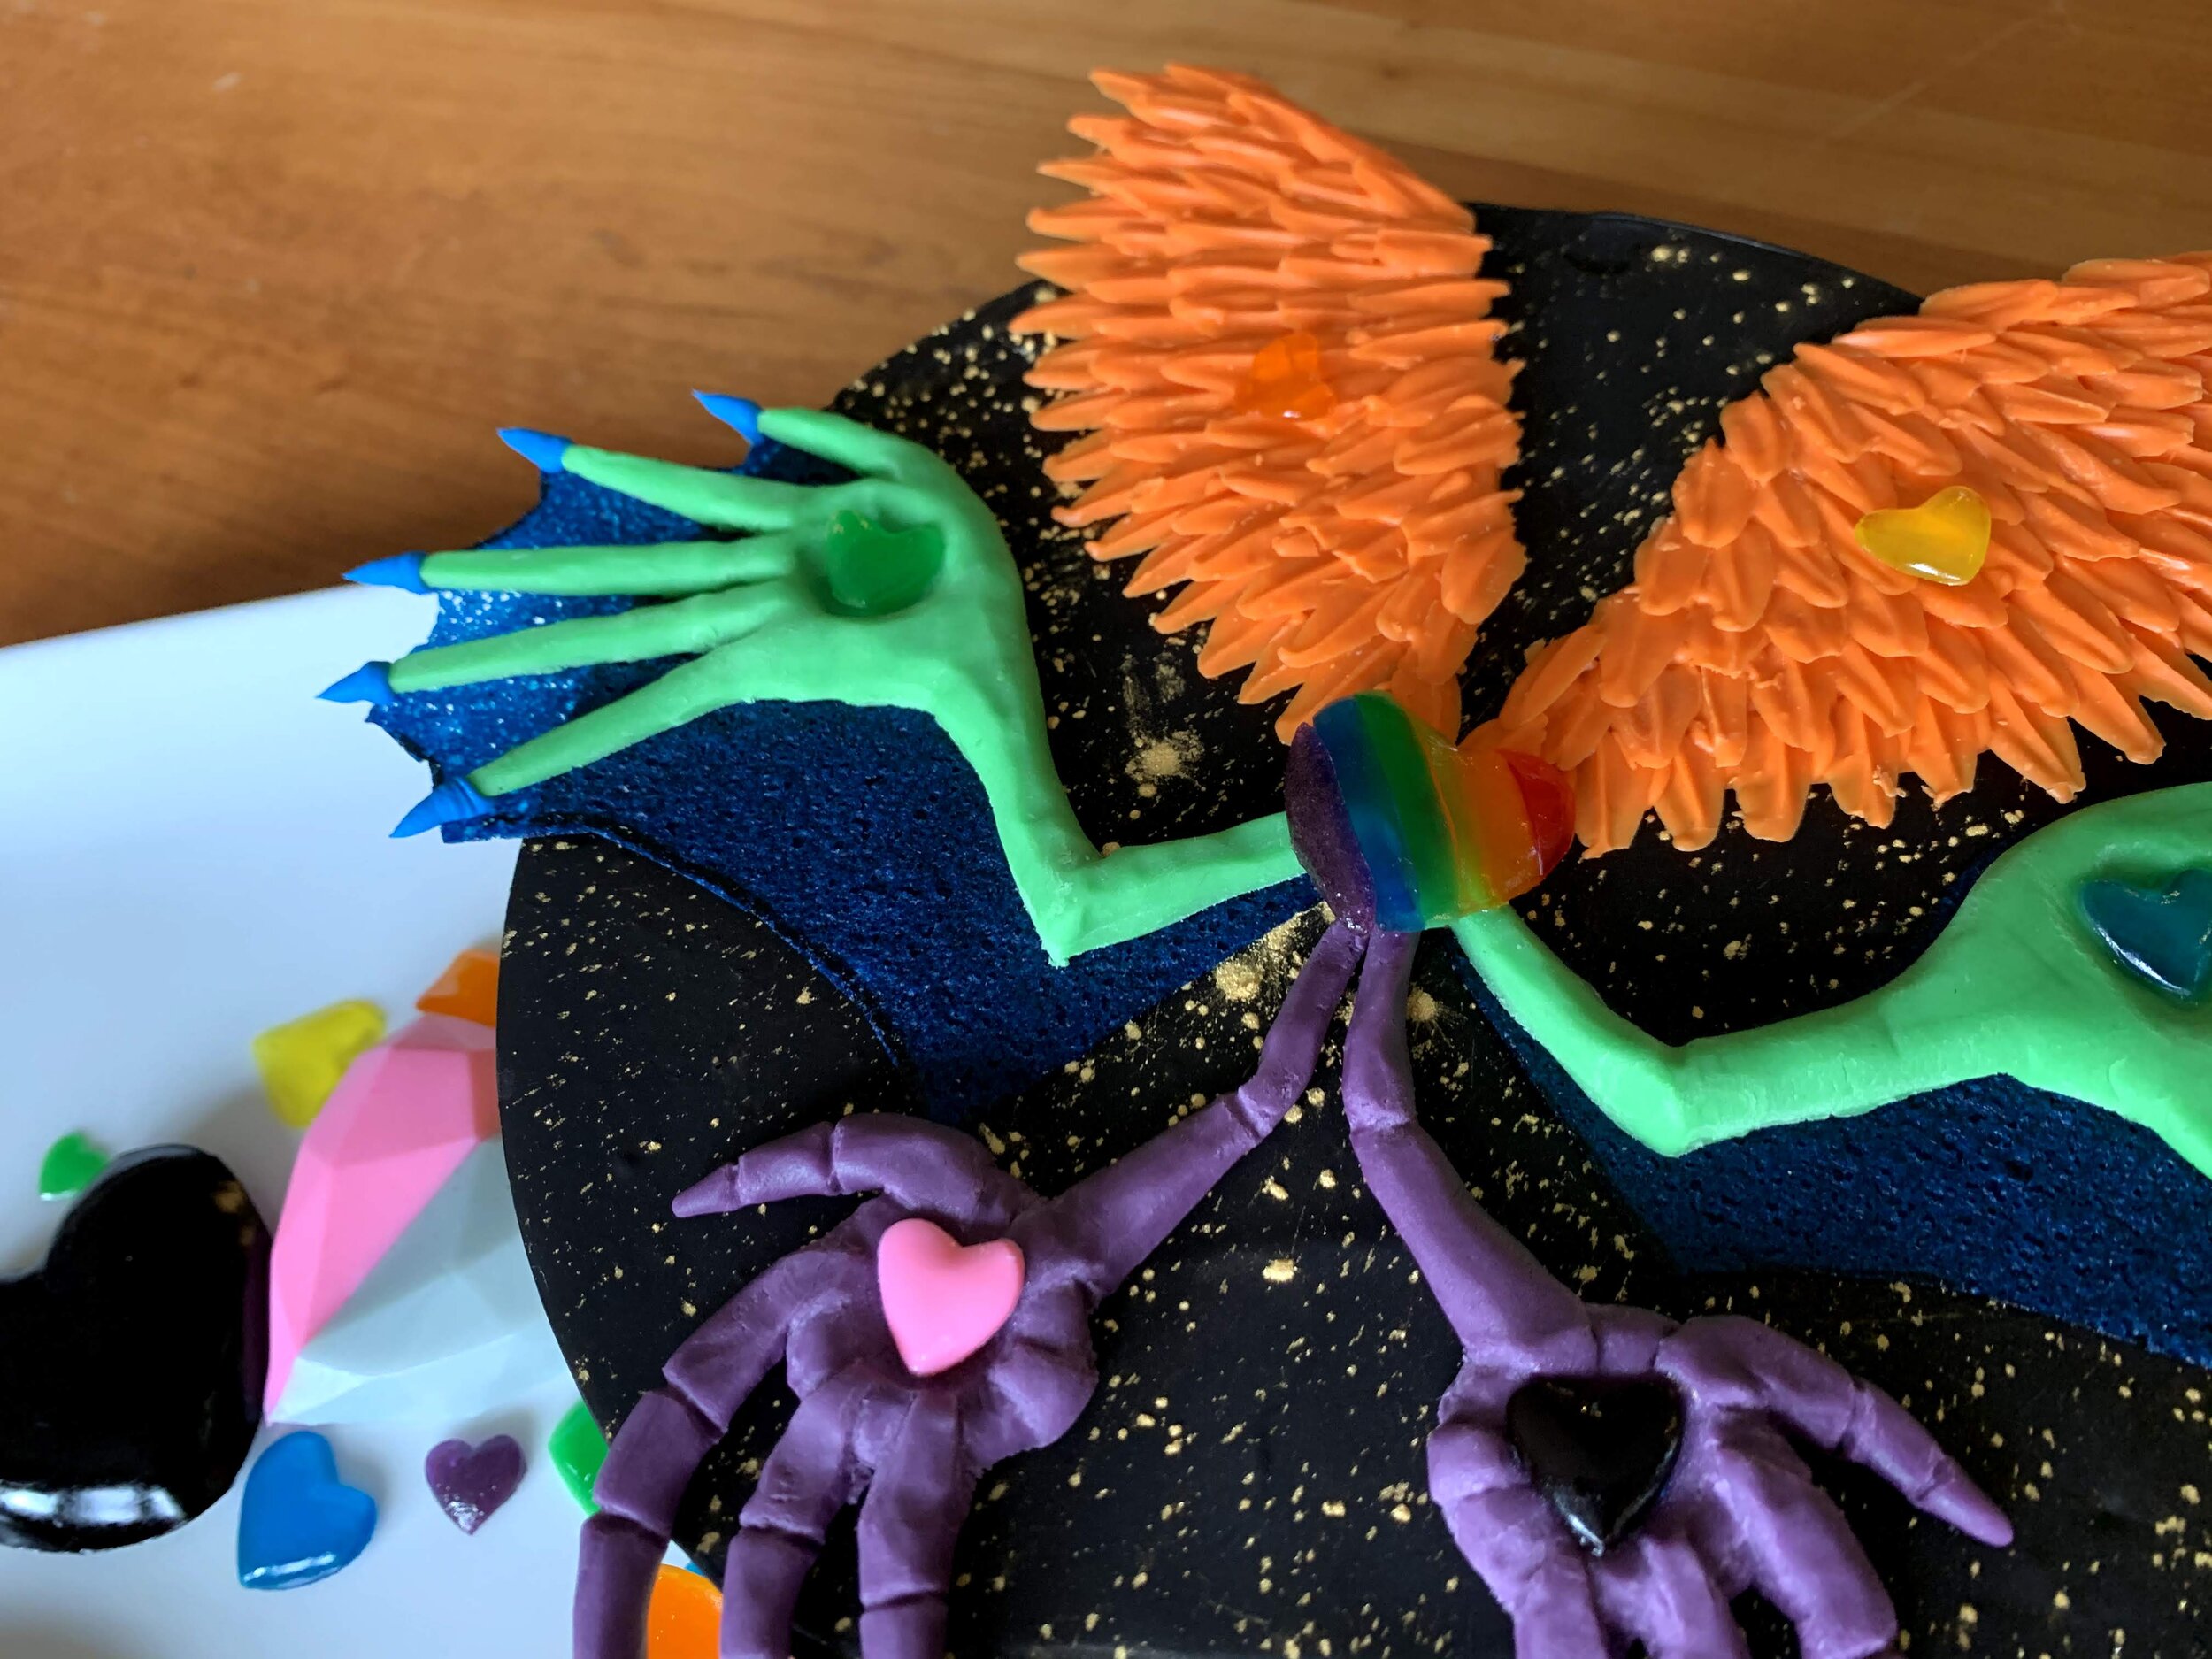
My niece has made up a marvelous imagined universe that centers around the mythical heroine Ana Northstar. For her birthday, she asked for a cake featuring Ana Northstar’s wings.

My niece has made up a marvelous imagined universe that centers around the mythical heroine Ana Northstar. For her birthday, she asked for a cake featuring Ana Northstar's wings. Here's the cake I came up with, along with the inspiration drawing of Ana Northstar.

The outside of the cake is chocolate jaconde. Inside is mango mousse with a jaconde rainbow heart inside, which represents Ana Northstar's soul.

The hearts are fresh lime gummies. The orange wings are white chocolate. The green and purple wings are modeling chocolate. The blue webbing on the green wings is homemade pineapple fruit leather.

Guardian Skywatcher Cake
For his 9th birthday, my nephew asked for Guardian Skywatcher from Legend of Zelda: Breath of the Wild. It was almost, but not quite, a total disaster.

For his 9th birthday, my nephew asked for Guardian Skywatcher from Legend of Zelda: Breath of the Wild. If you aren’t familiar with it, it look something like this:
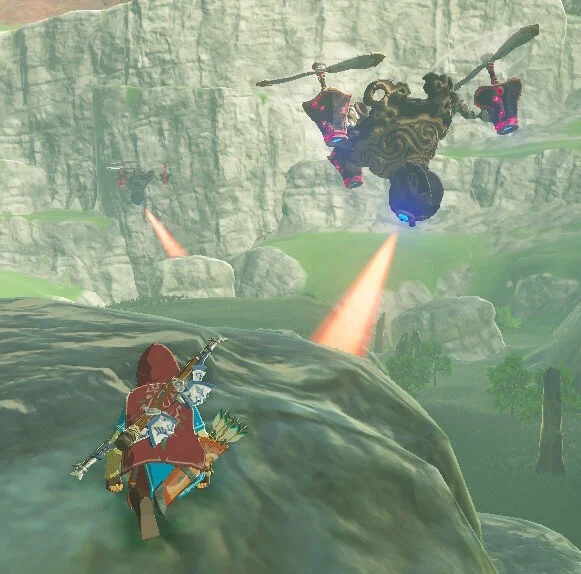
This was one of those cakes of which I just underestimated the difficulty. In retrospect, the difficulties should have been obvious. The shape of the Guardian Skywatcher is very undercut. It has pieces suspended off the sides by thin supports. The propellers are wide at the tips but narrow in the center. And the entire thing is flying. None of these things are easy to achieve in cake.

Yet I blundered into the project with big ambitions but minimal preparation. Long story short, it was almost, but not quite, a total disaster. Attaching the pieces on the sides was a nightmare. The propellers all broke before the party. Even the pink piping gel I used for the glowing sections faded before the party started. On the bright side, at least the entire structure didn’t collapse, which was a real possibility. Overall, clearly not my strongest work, but my nephew, who is among the sweetest people in the world, loved it anyway.

Mega Rayquaza Cake
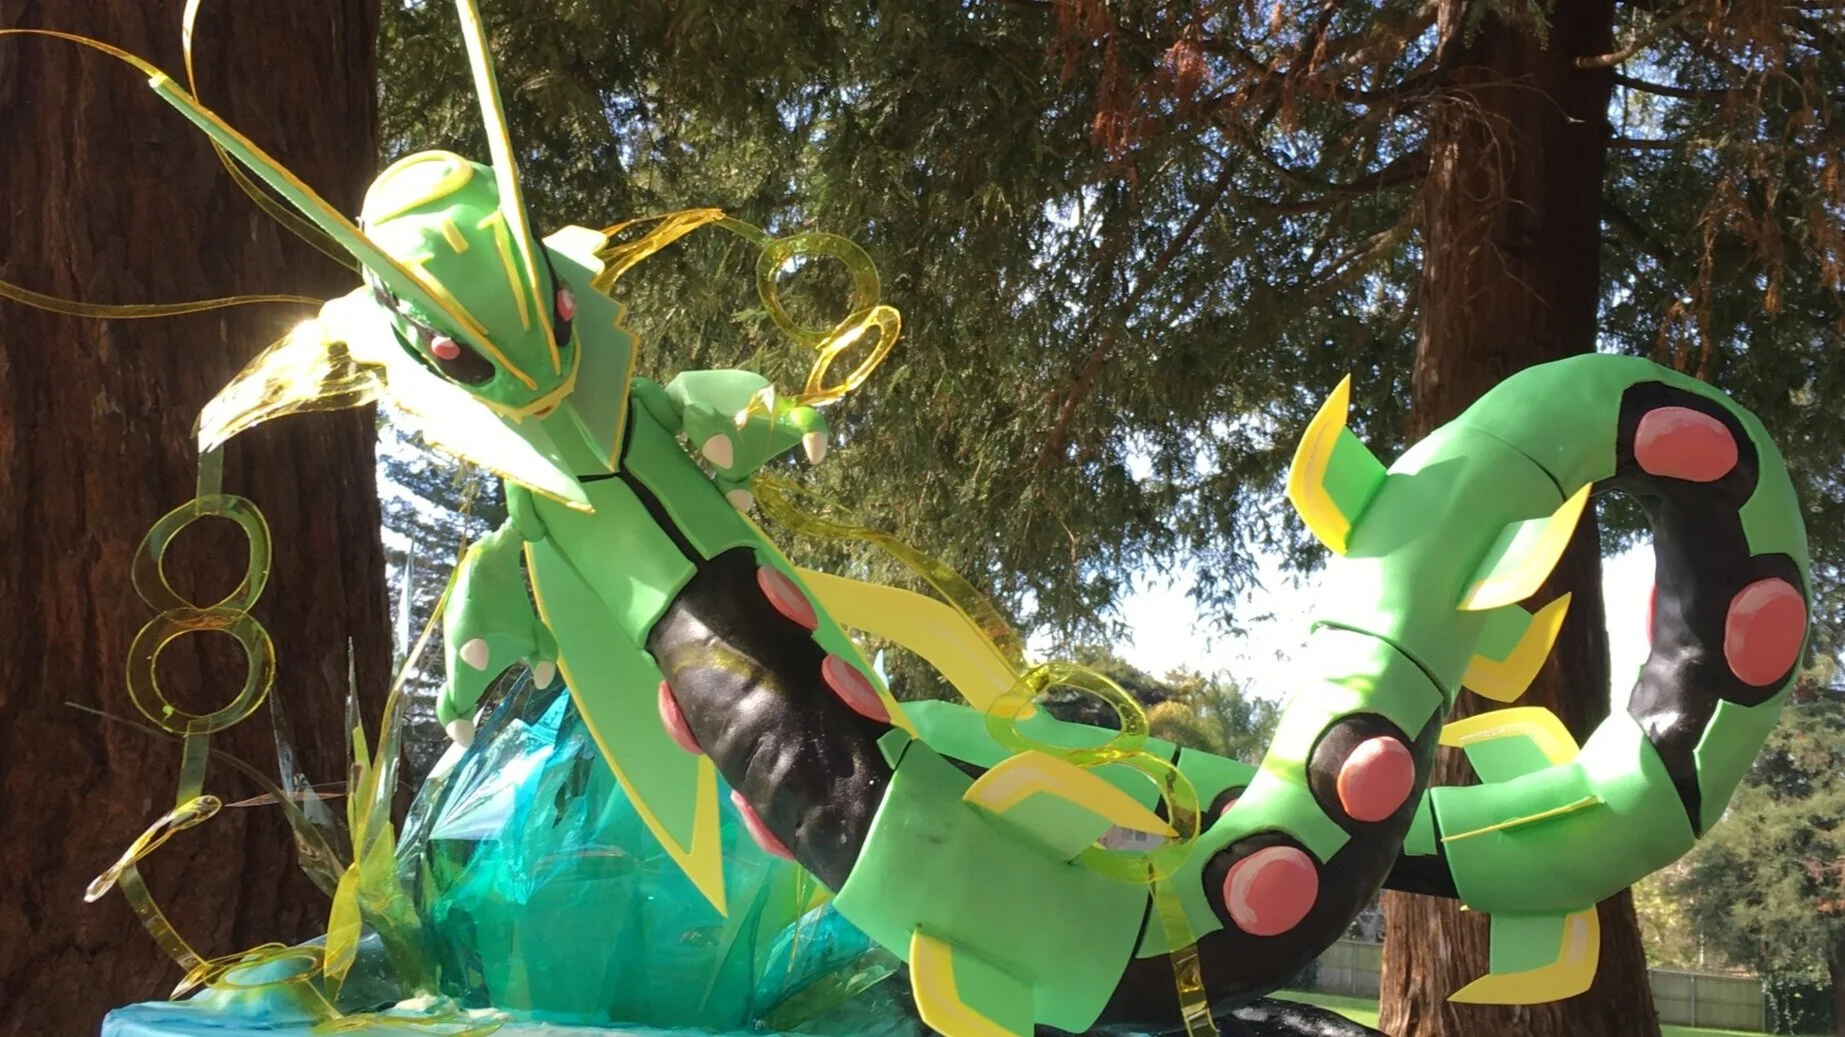
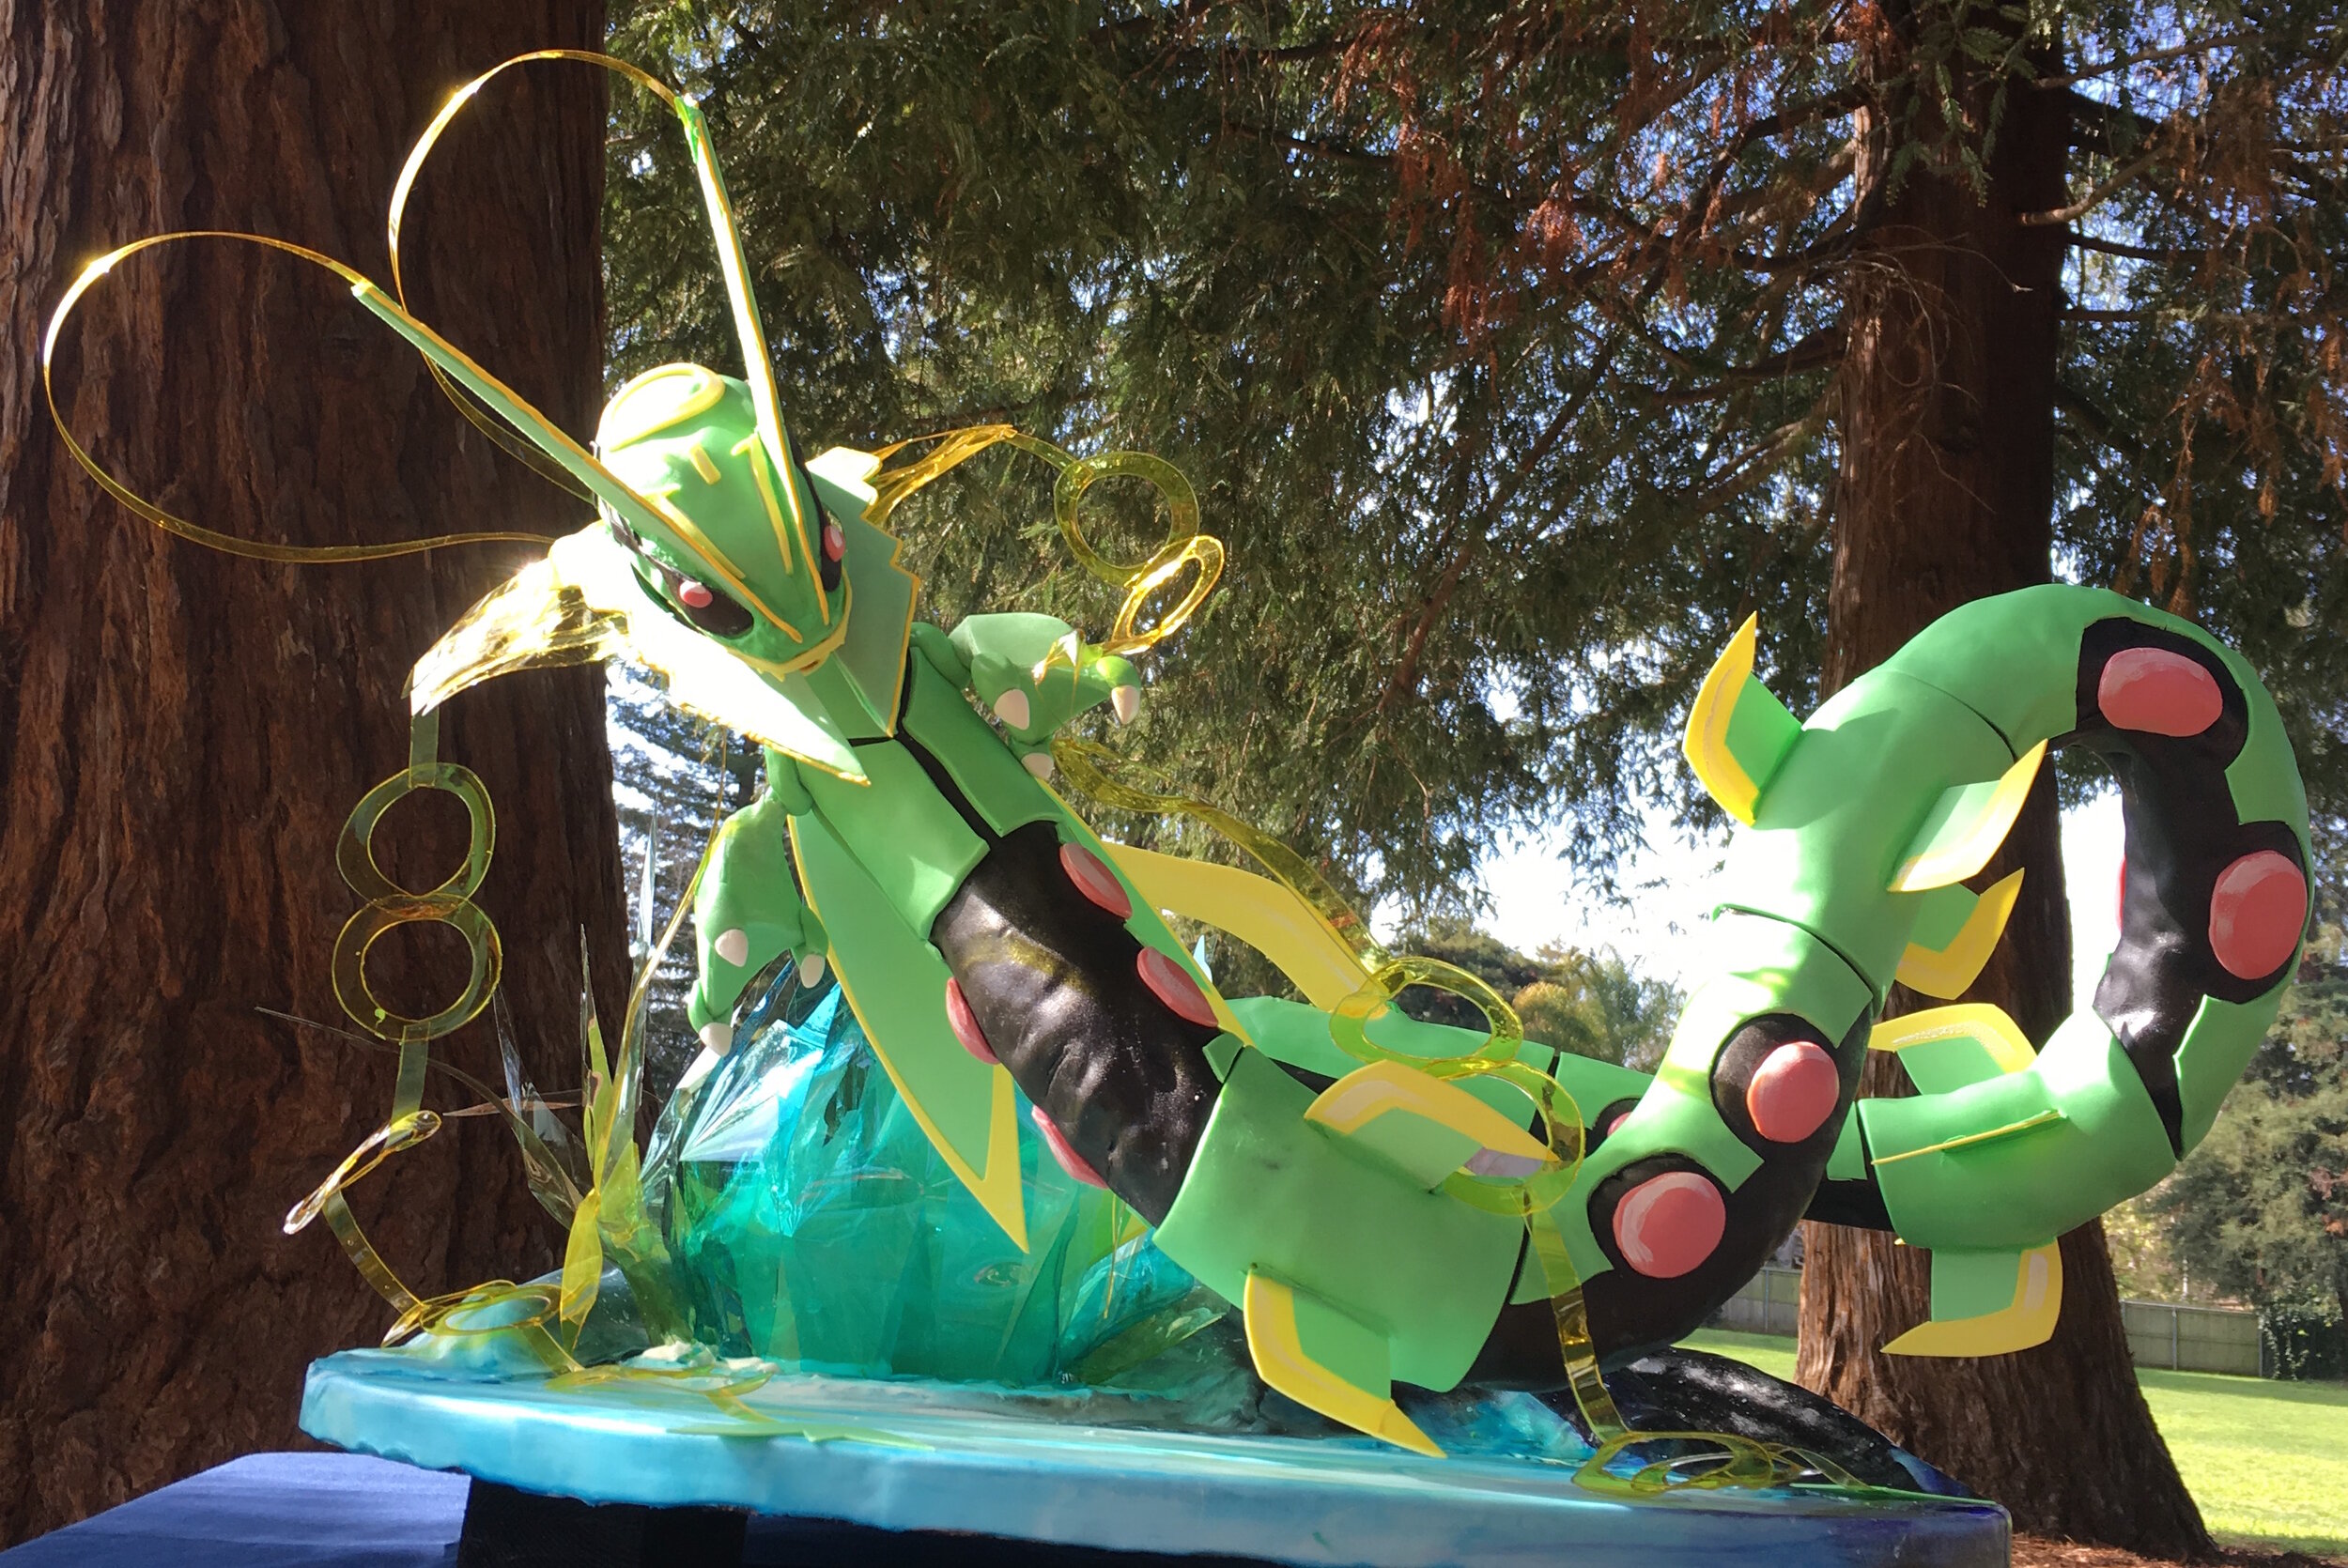
My niece wanted a Mega Rayquaza cake. It’s not really the most conducive shape for a cake, but I like a challenge.
My niece wanted a Mega Rayquaza cake. If you’re not familiar with Mega Rayquaza, it looks something like this:
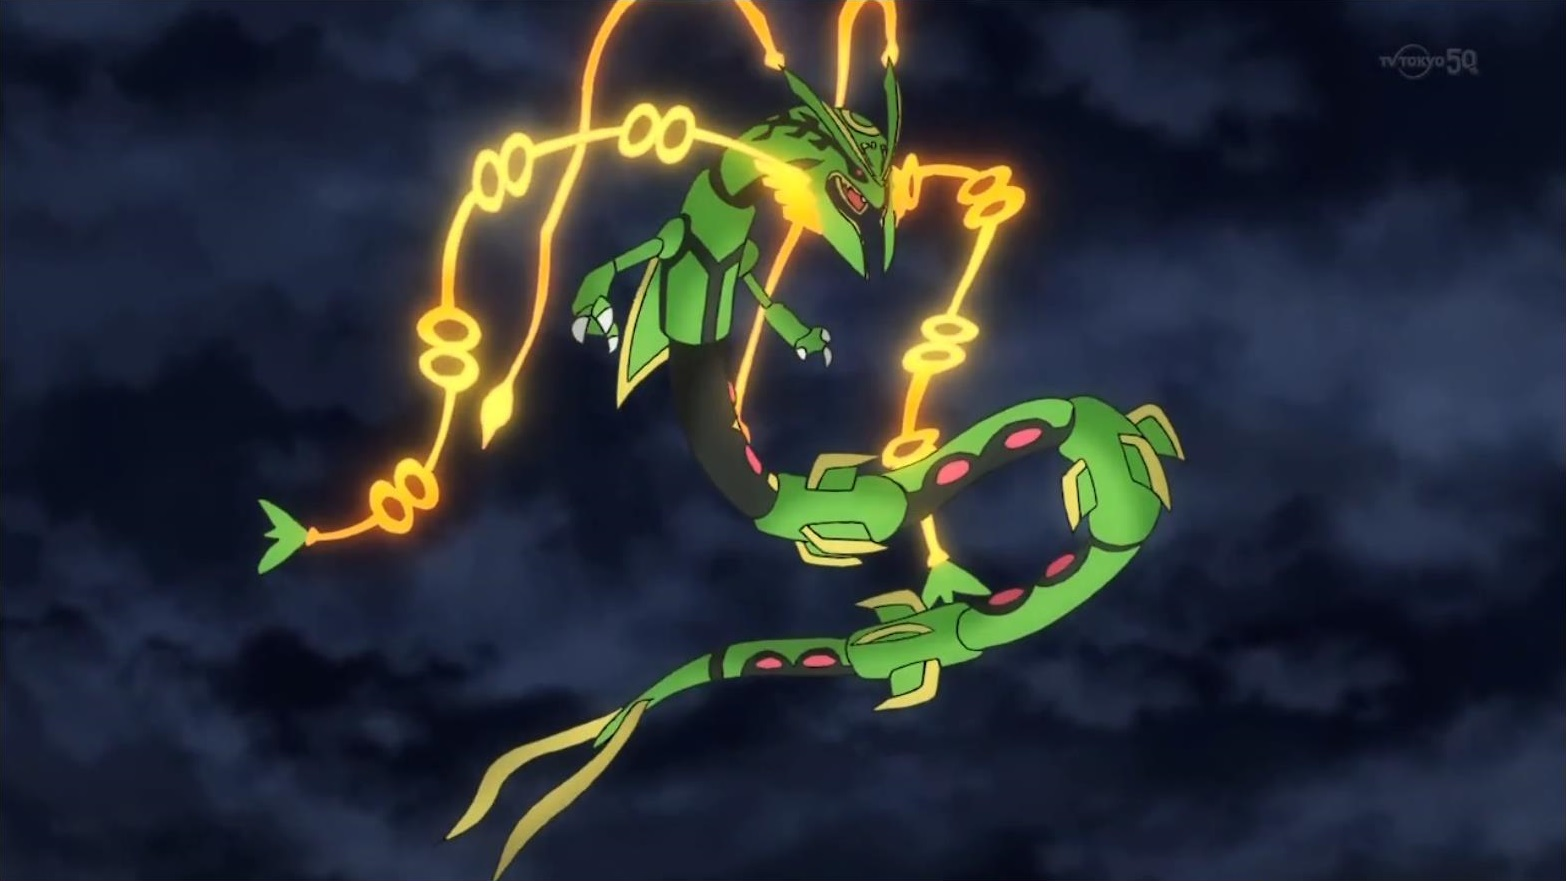
It’s not really the most conducive shape for a cake, but I like a challenge. It’s made by threading little cylinders of cake, reinforced with discs of chocolate, over a bent steel rod.

The details are all fondant and gum paste, except for the weird trailing tendril things, which are gelatin.

It wound up being extremely bouncy, which made the drive from our house to the park where the party was kind of stressful and it did suffer some slight damage along the way. All in all, not my cleanest work ever, but a pretty cool shape to build out of cake nonetheless.
Norbert(a) Cake
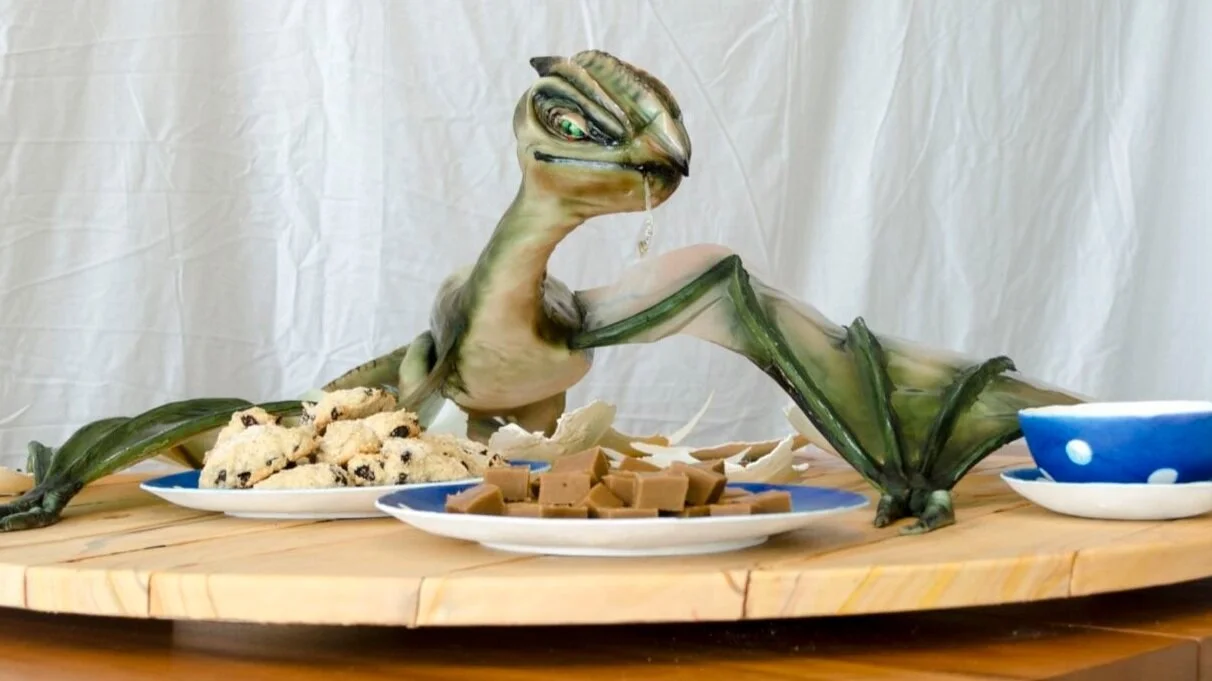
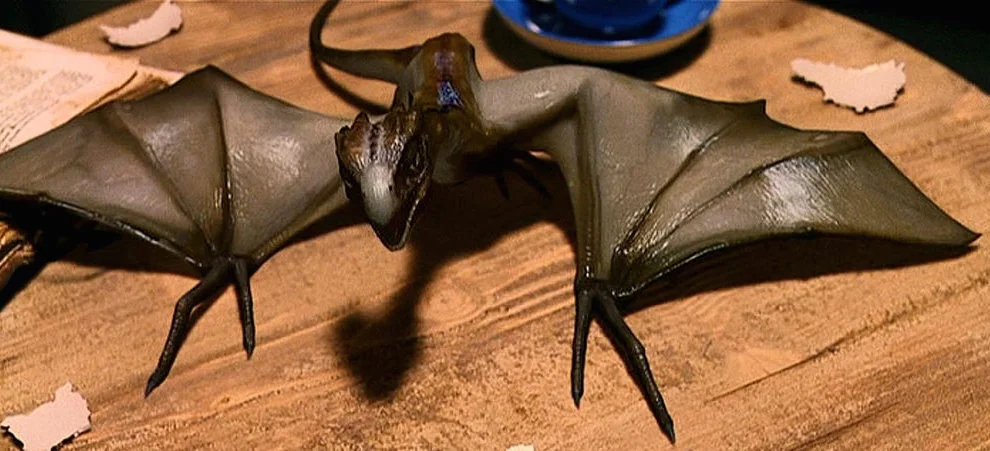
We’re all Harry Potter all the time at our house these days. So for his 8th birthday Sam wanted a cake of Norbert hatching out of an egg on Hagrid’s table.

We’re all Harry Potter all the time at our house these days. So for his 8th birthday Sam wanted a cake of Norbert hatching out of an egg on Hagrid’s table. Here is what the scene looked like in the movie.
The thing about baby dragons is that they’re mostly wings. So in order to have enough actual cake in the body to serve the guests, I had to make the cake pretty huge. That base is a 3-foot diameter plywood circle, covered with wood-grained fondant.
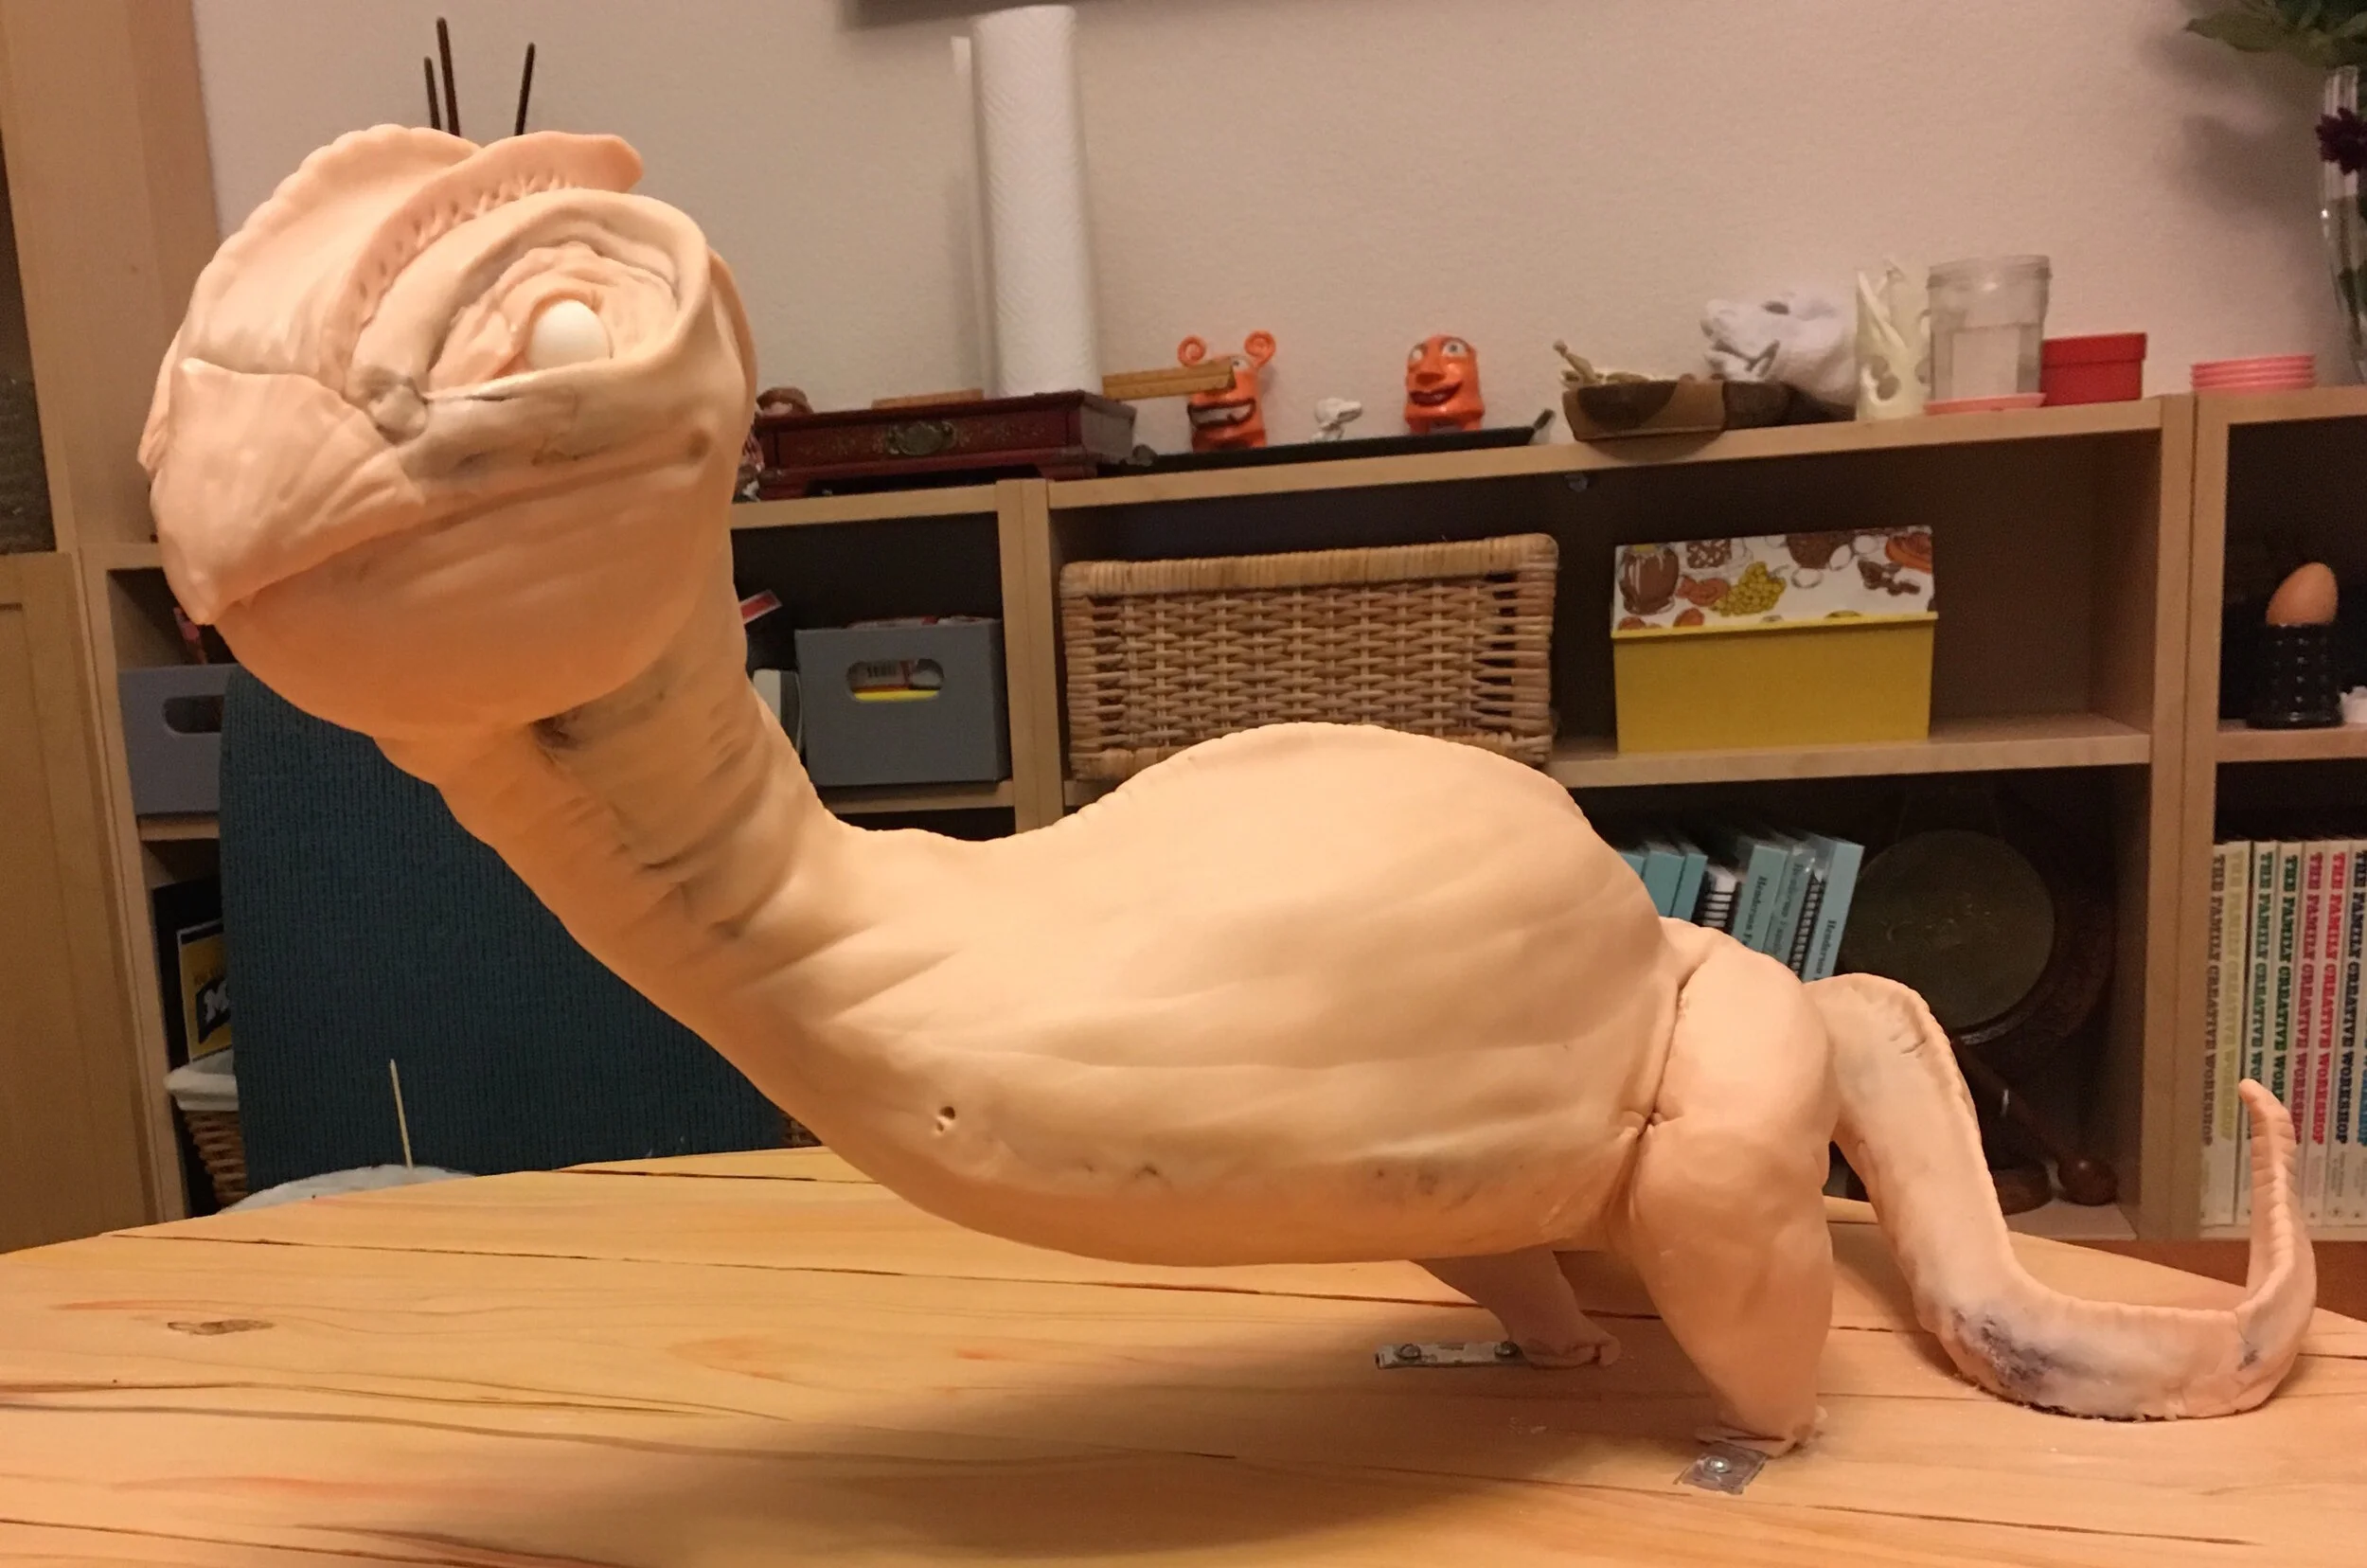
The cake is stacked and sculpted onto a foam core base, supported underneath with aluminum straps, then covered with a mix of fondant and modeling chocolate. I started with a light skin-toned base and airbrushed the colors on top. Sam even helped me sculpt some of the details.

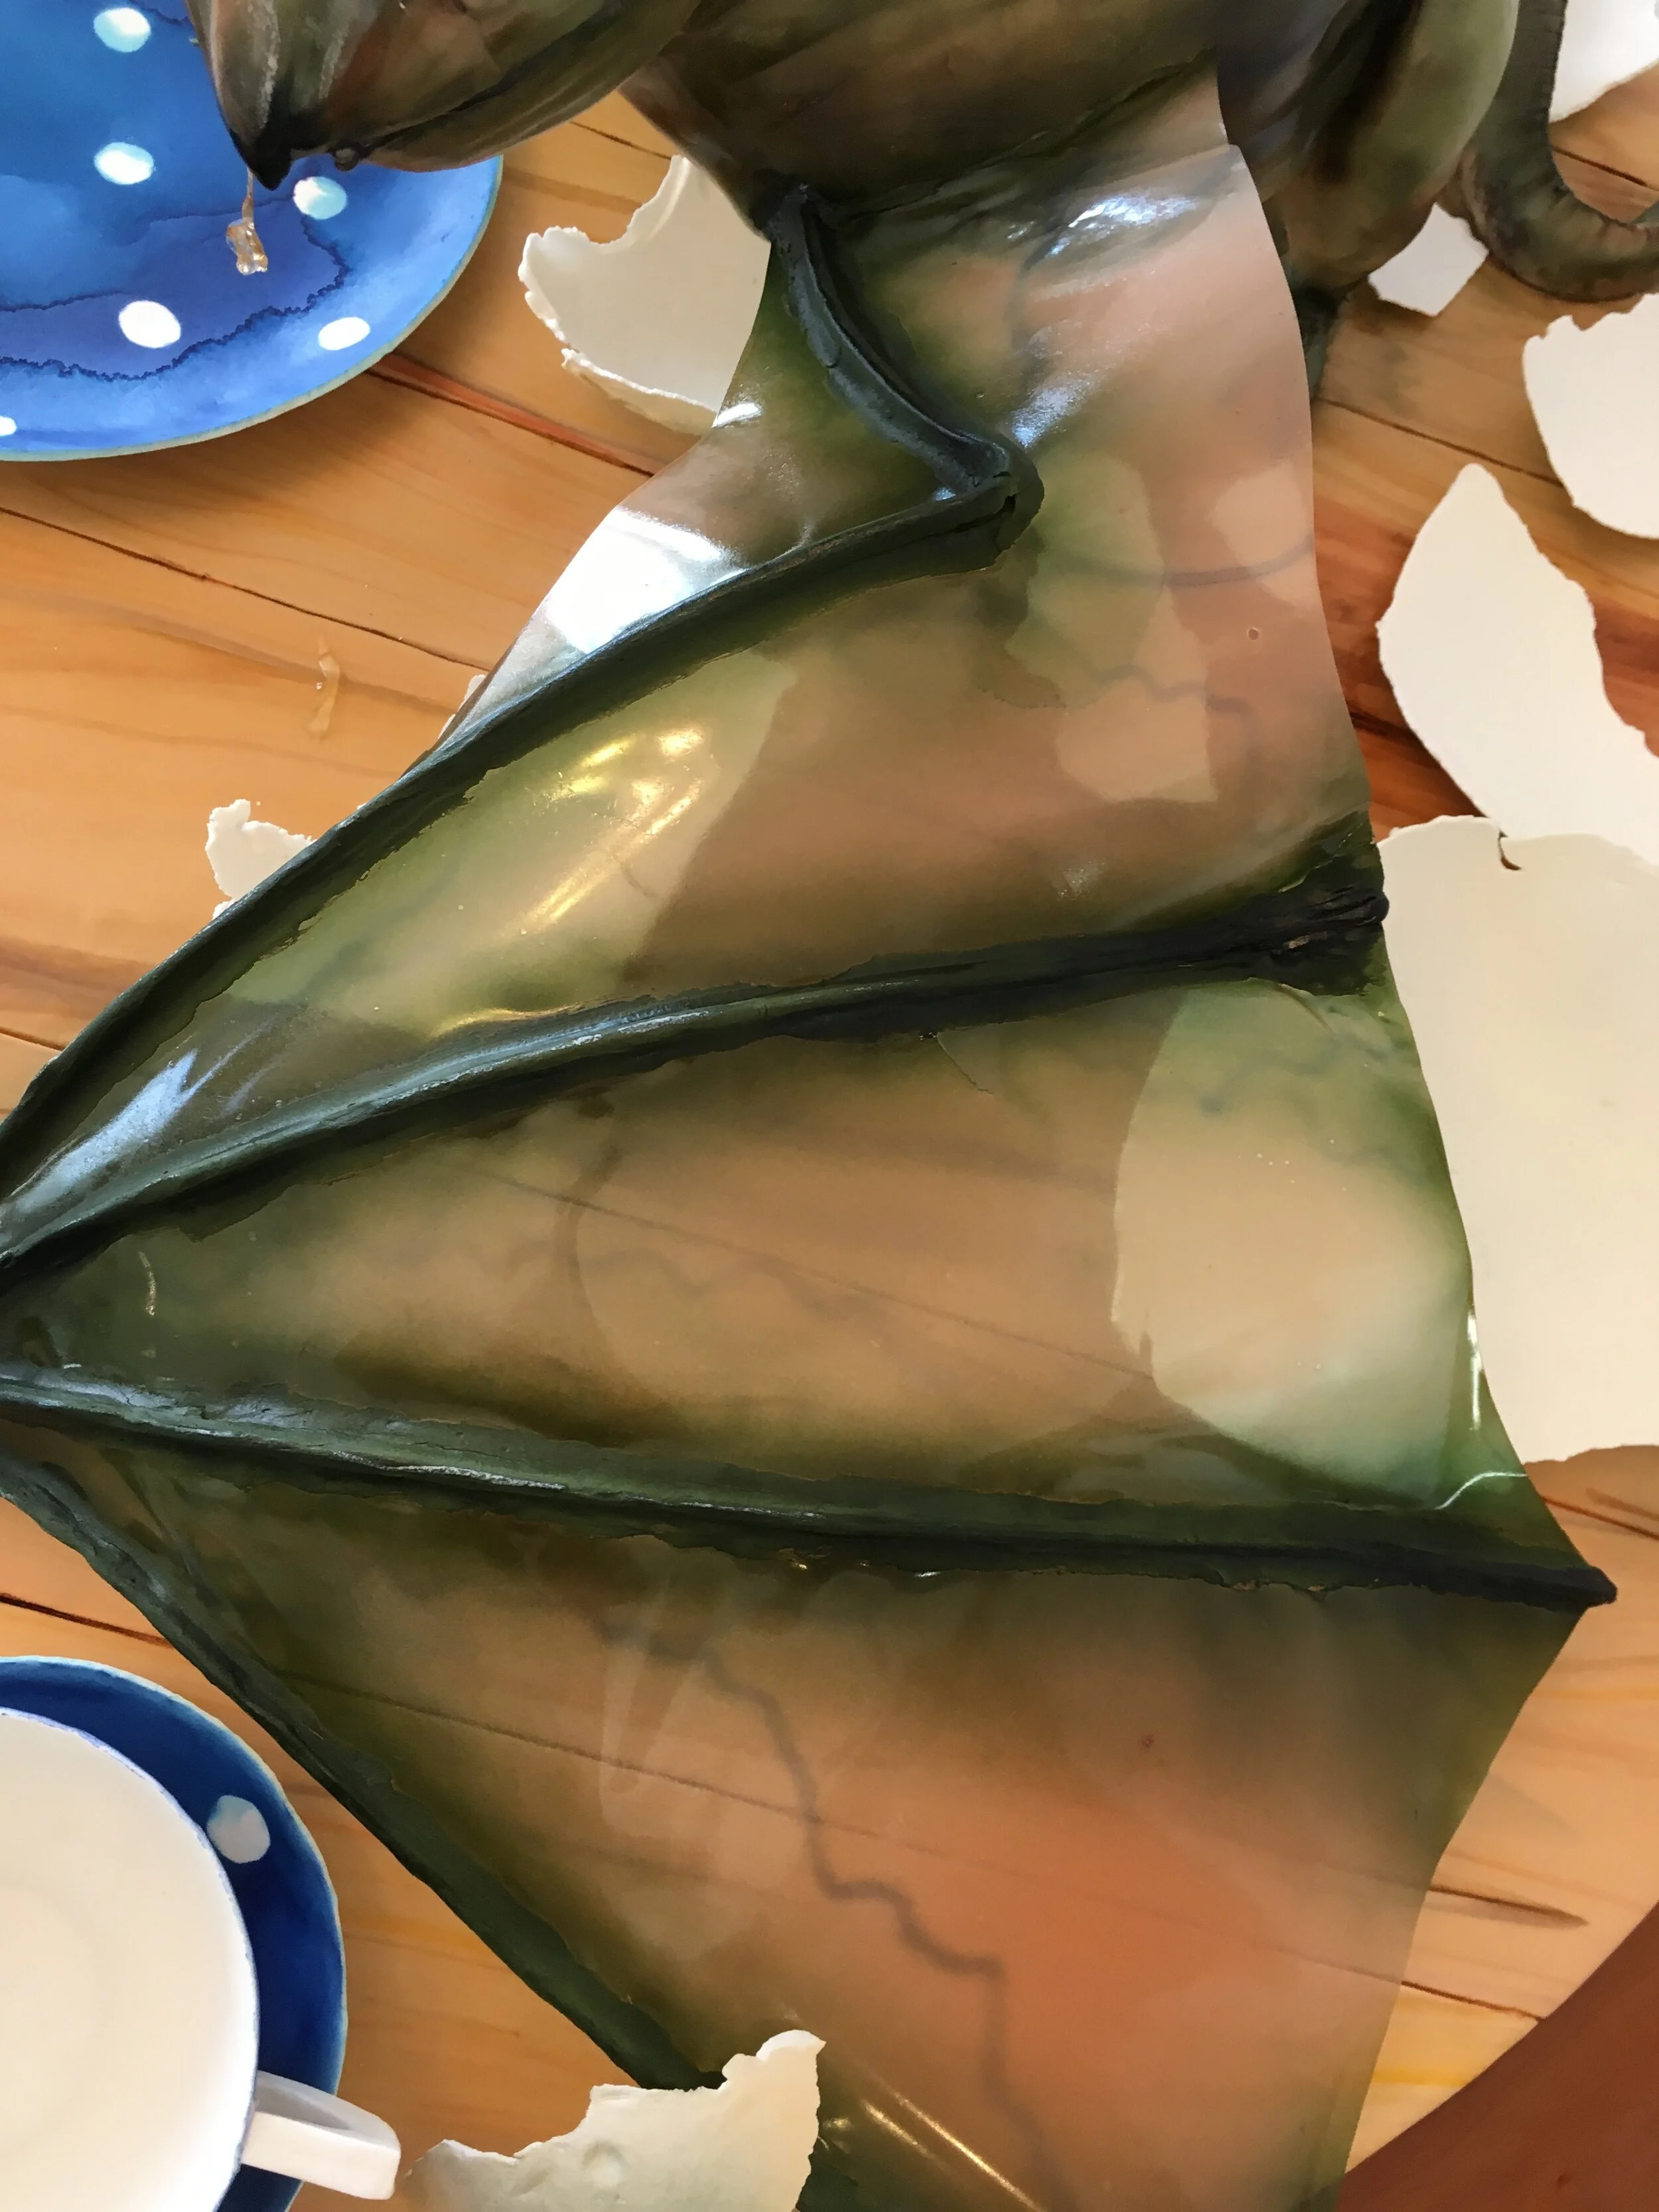
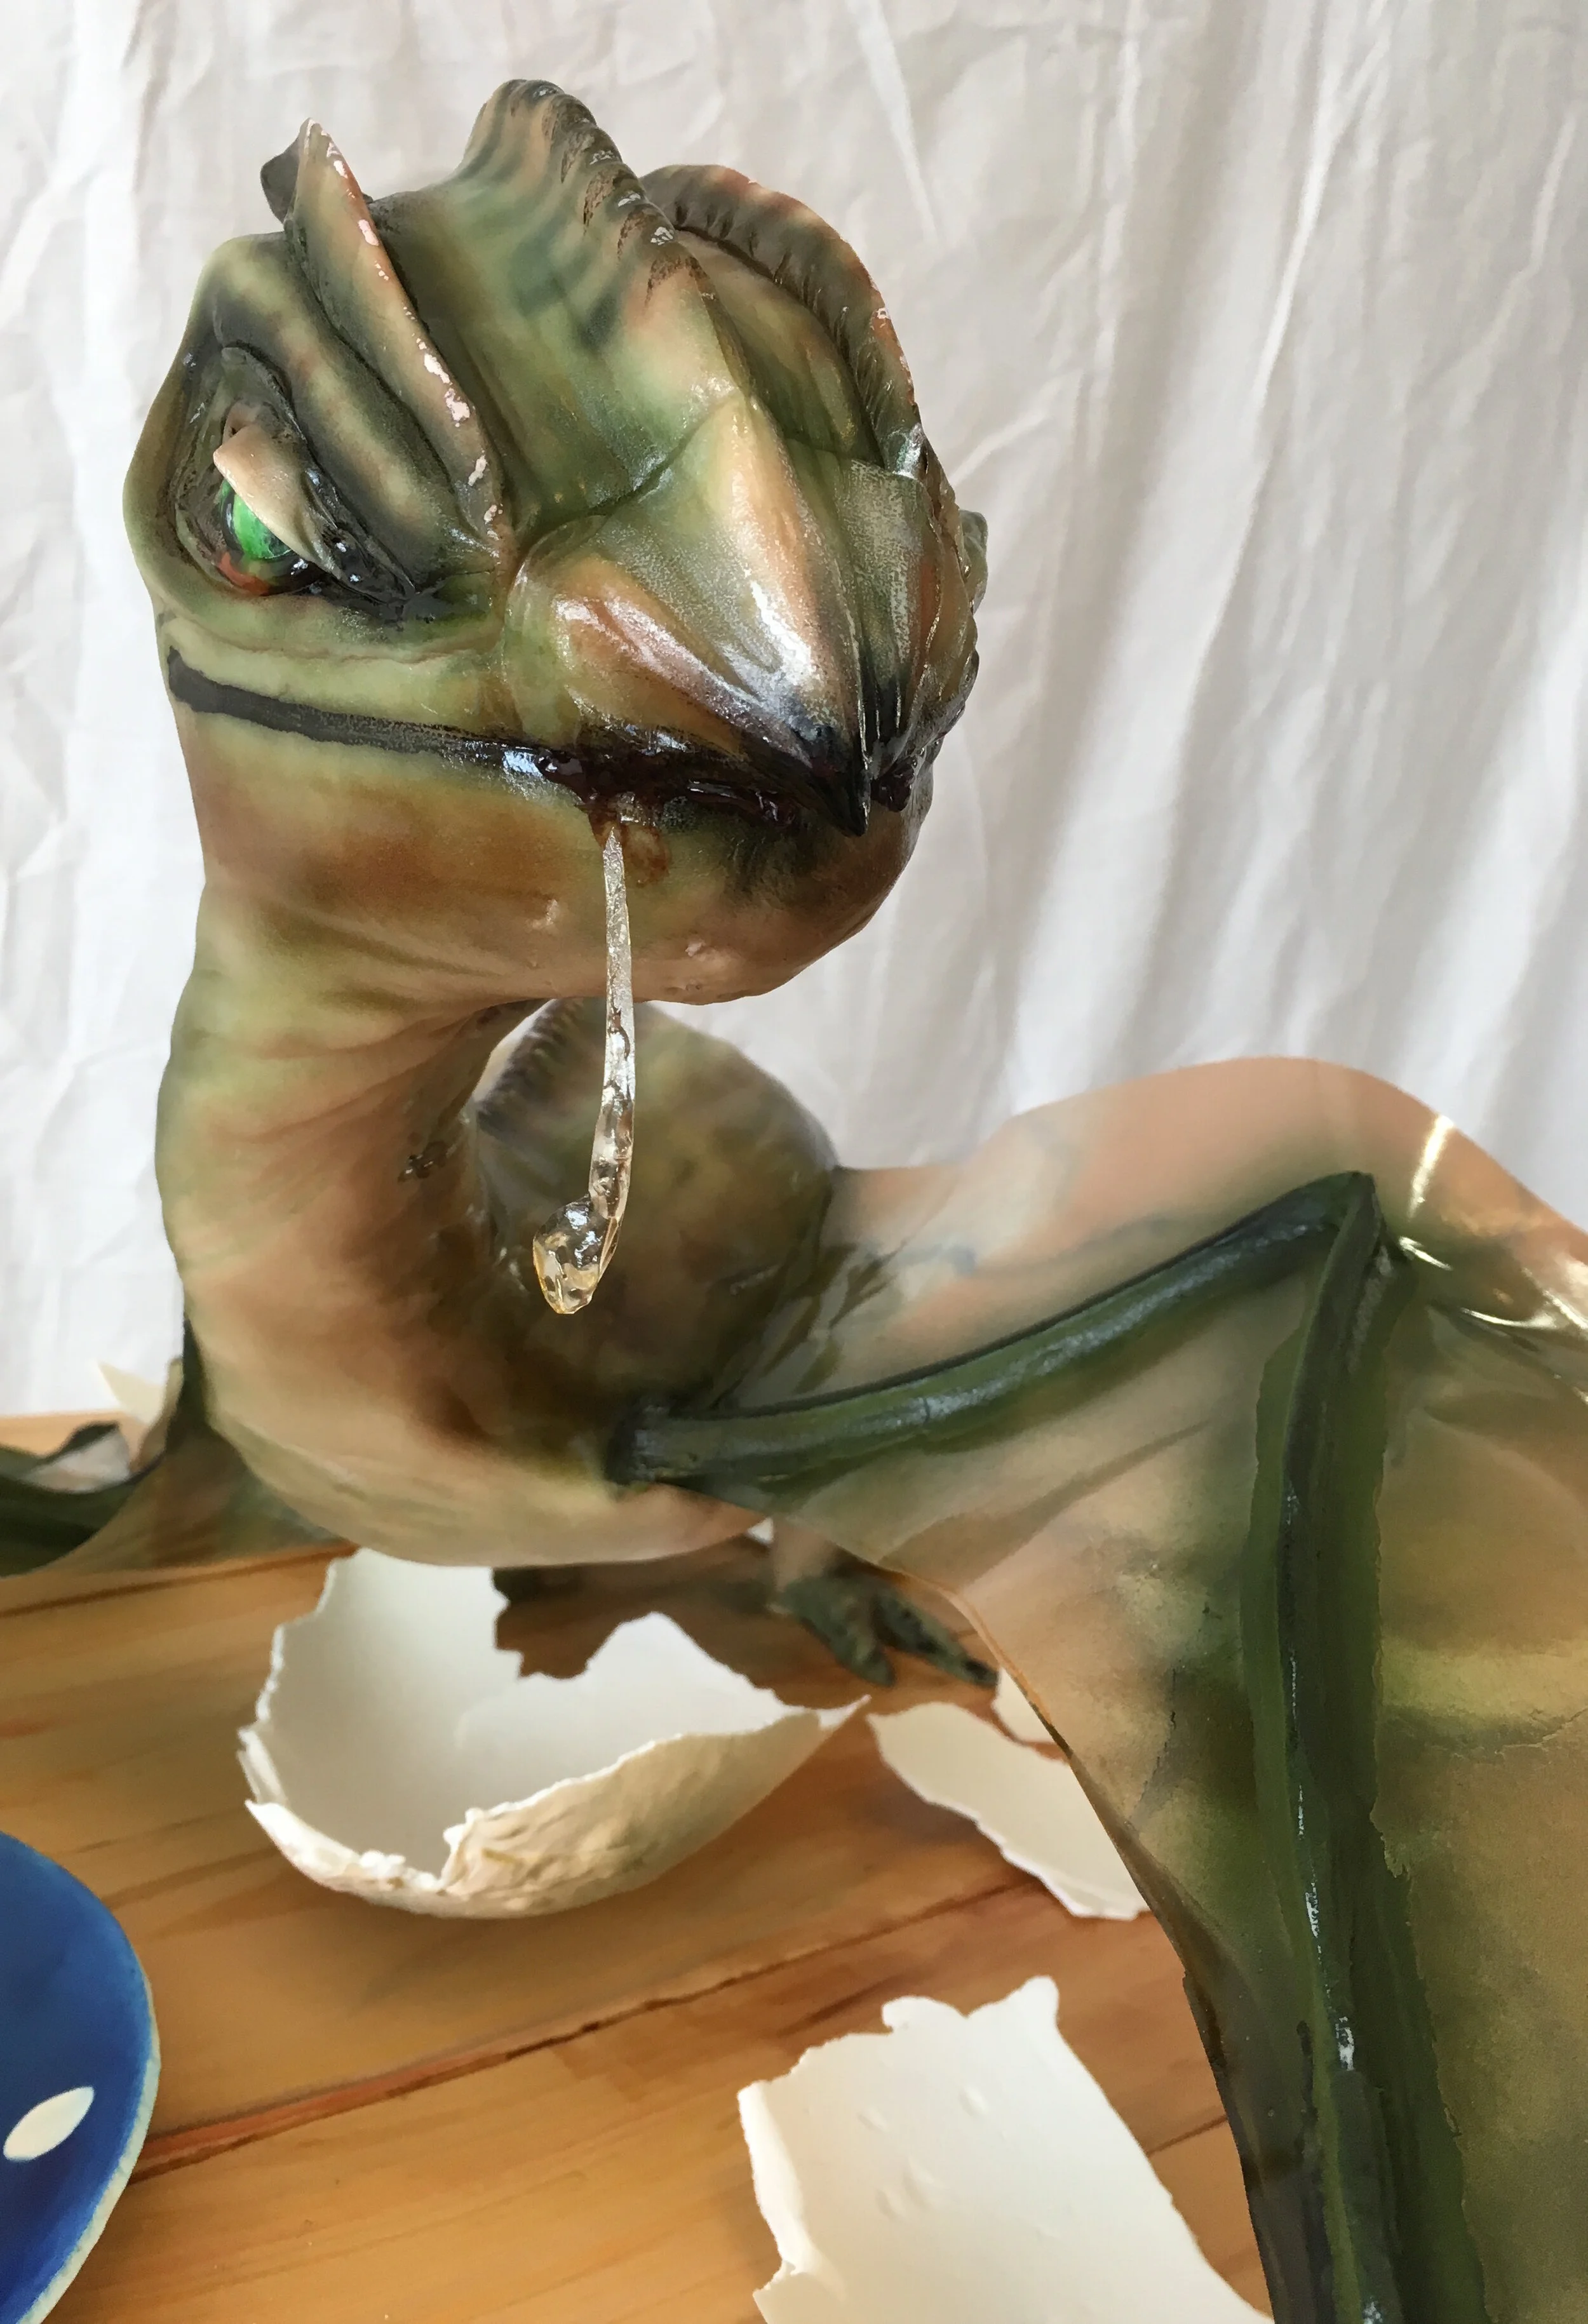
The wings began with a wire armature, covered with gum paste. The membrane is made of gelatin. I’m particularly pleased with the airbrushed veins.
My absolute favorite part about the whole cake, though, is the string of drool hanging from her mouth. It’s piping gel with a strand of sheet gelatin in the middle for structure.
To make the egg shell, I draped gum paste over an oversized plastic Easter egg, then Sam helped me to break into pieces and place it around Norbert like he had just hatched out of it.

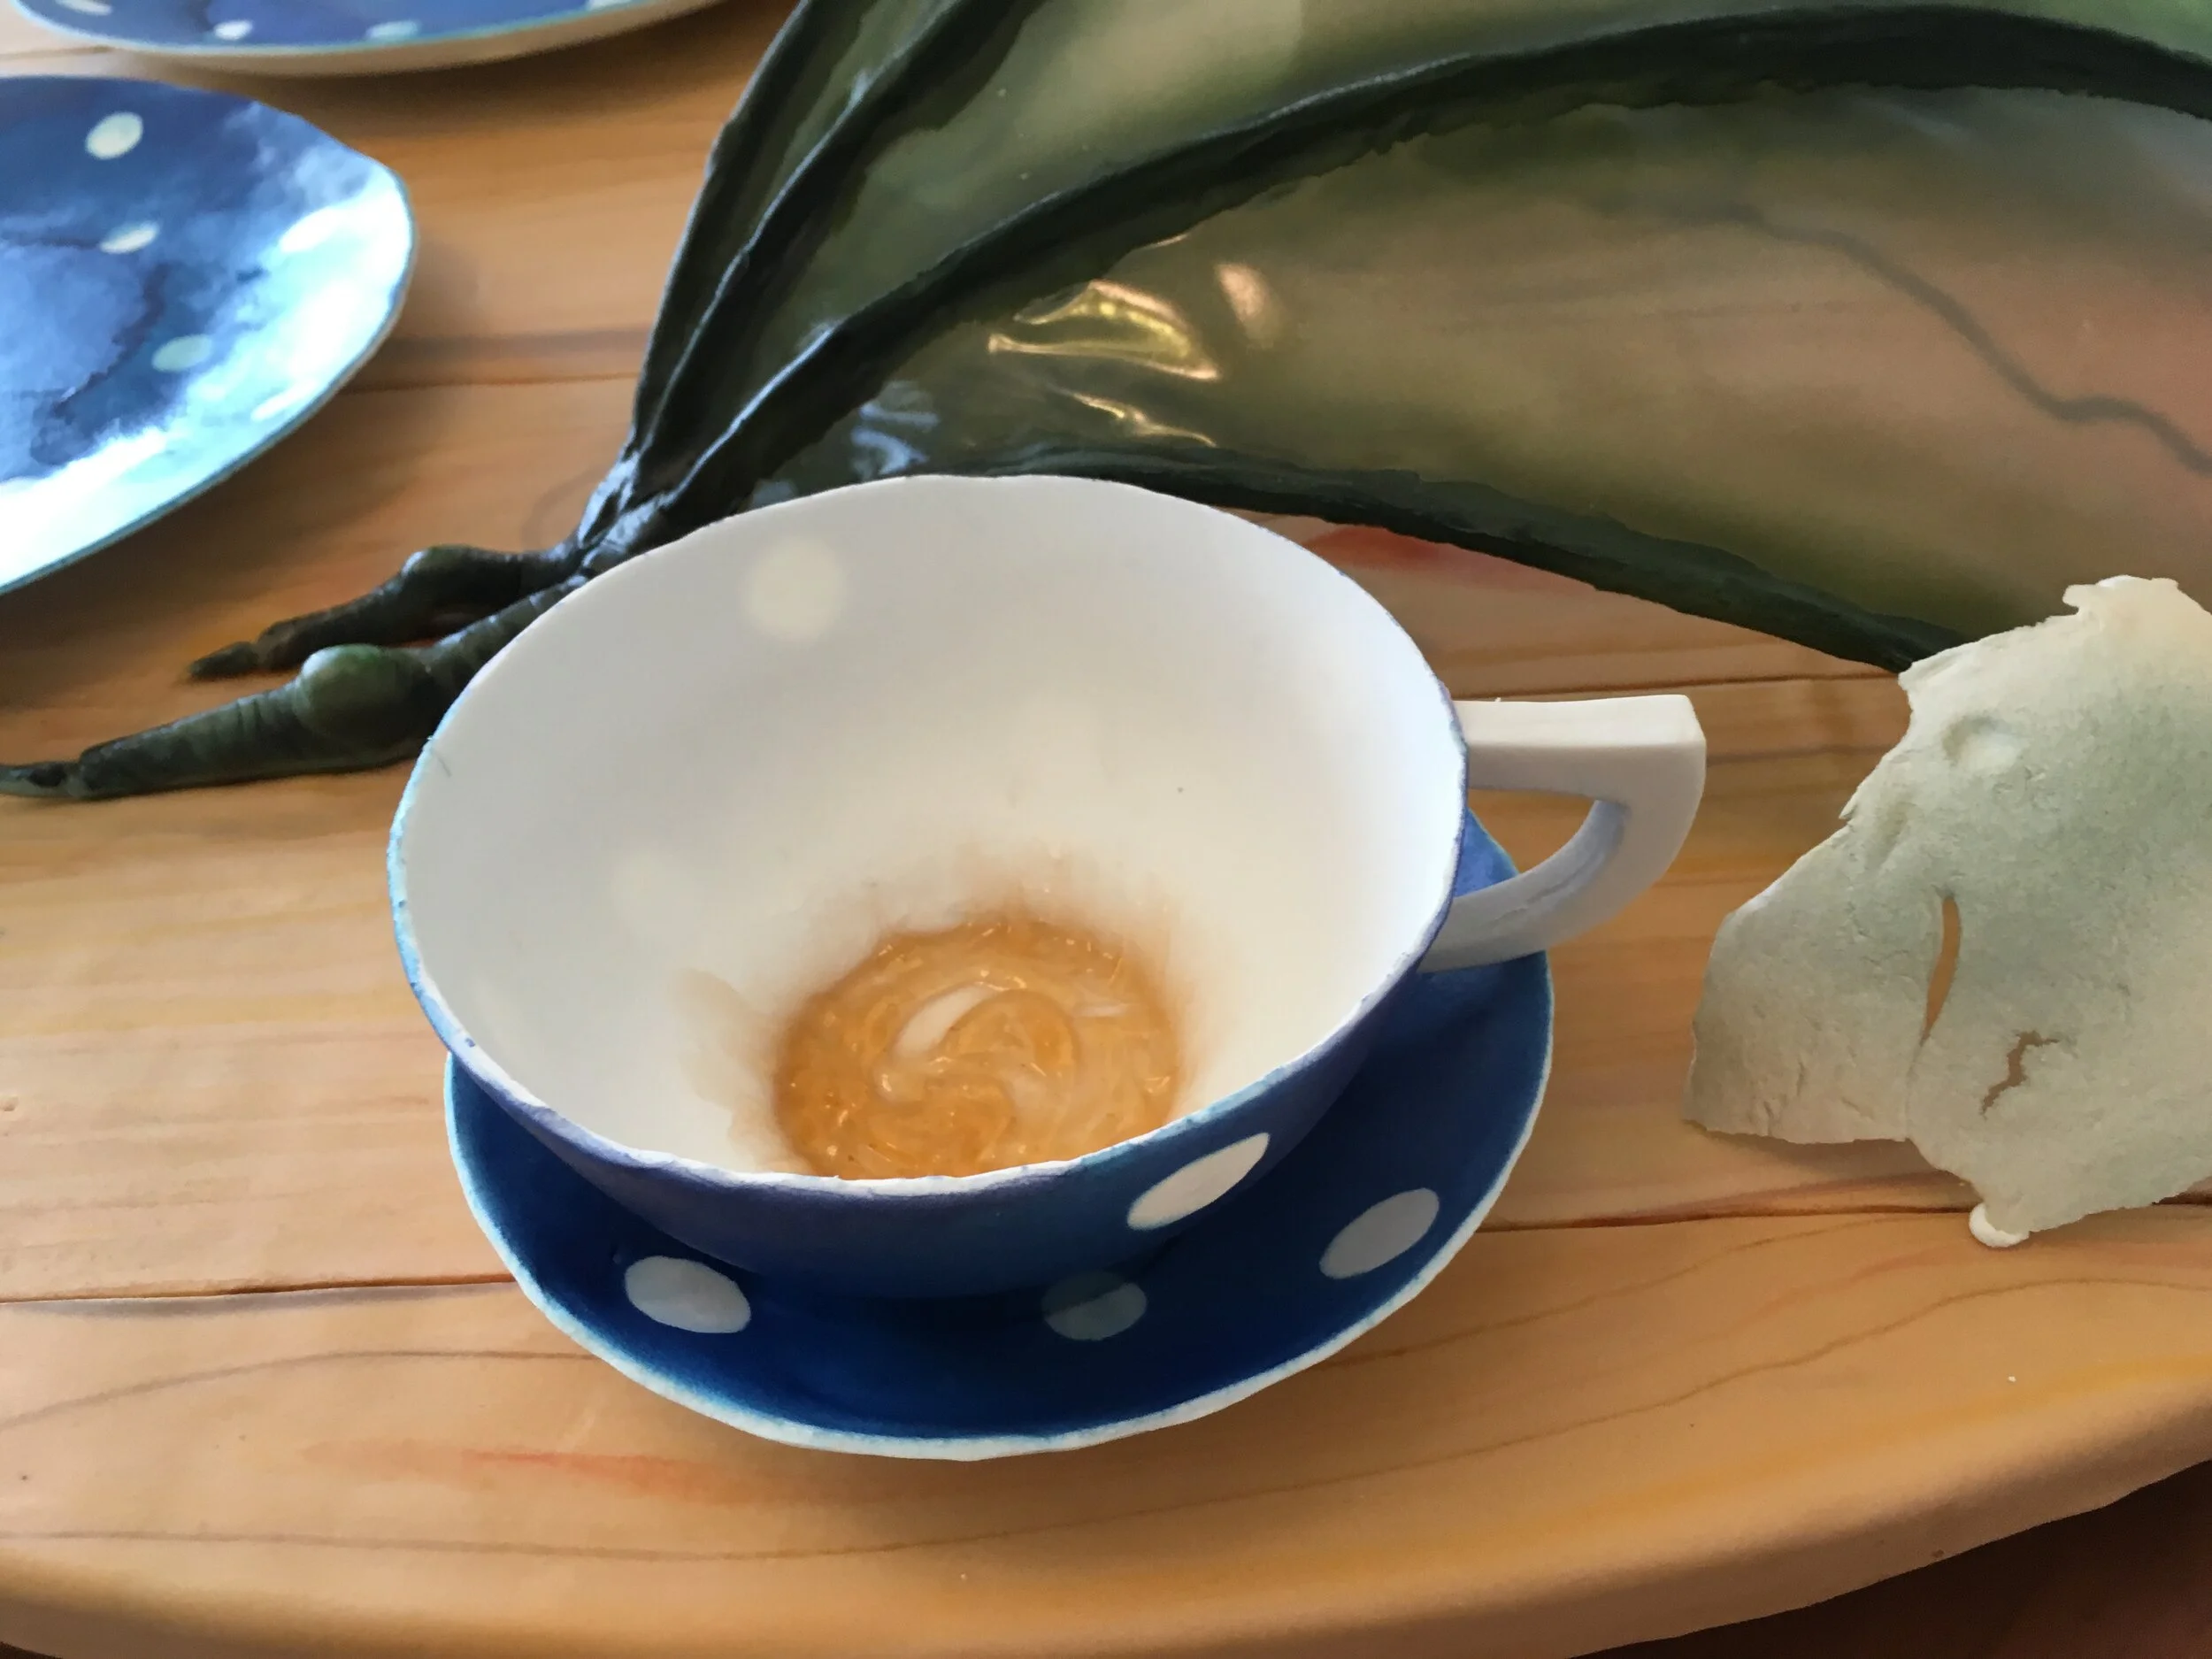
The dishes are also made of gum paste. I formed them over a lovely set of china that my sister’s mother-in-law gave her. Obviously, it needed the finishing touch of a little piping gel tea residue in the teacup.
The treats on the dishes are rock cakes and treacle fudge that Sam and his mom made from recipes in The Unofficial Harry Potter Cookbook. We have also made the pumpkin pasties recipe from this book and all the recipes have turned out great. Highly recommended.
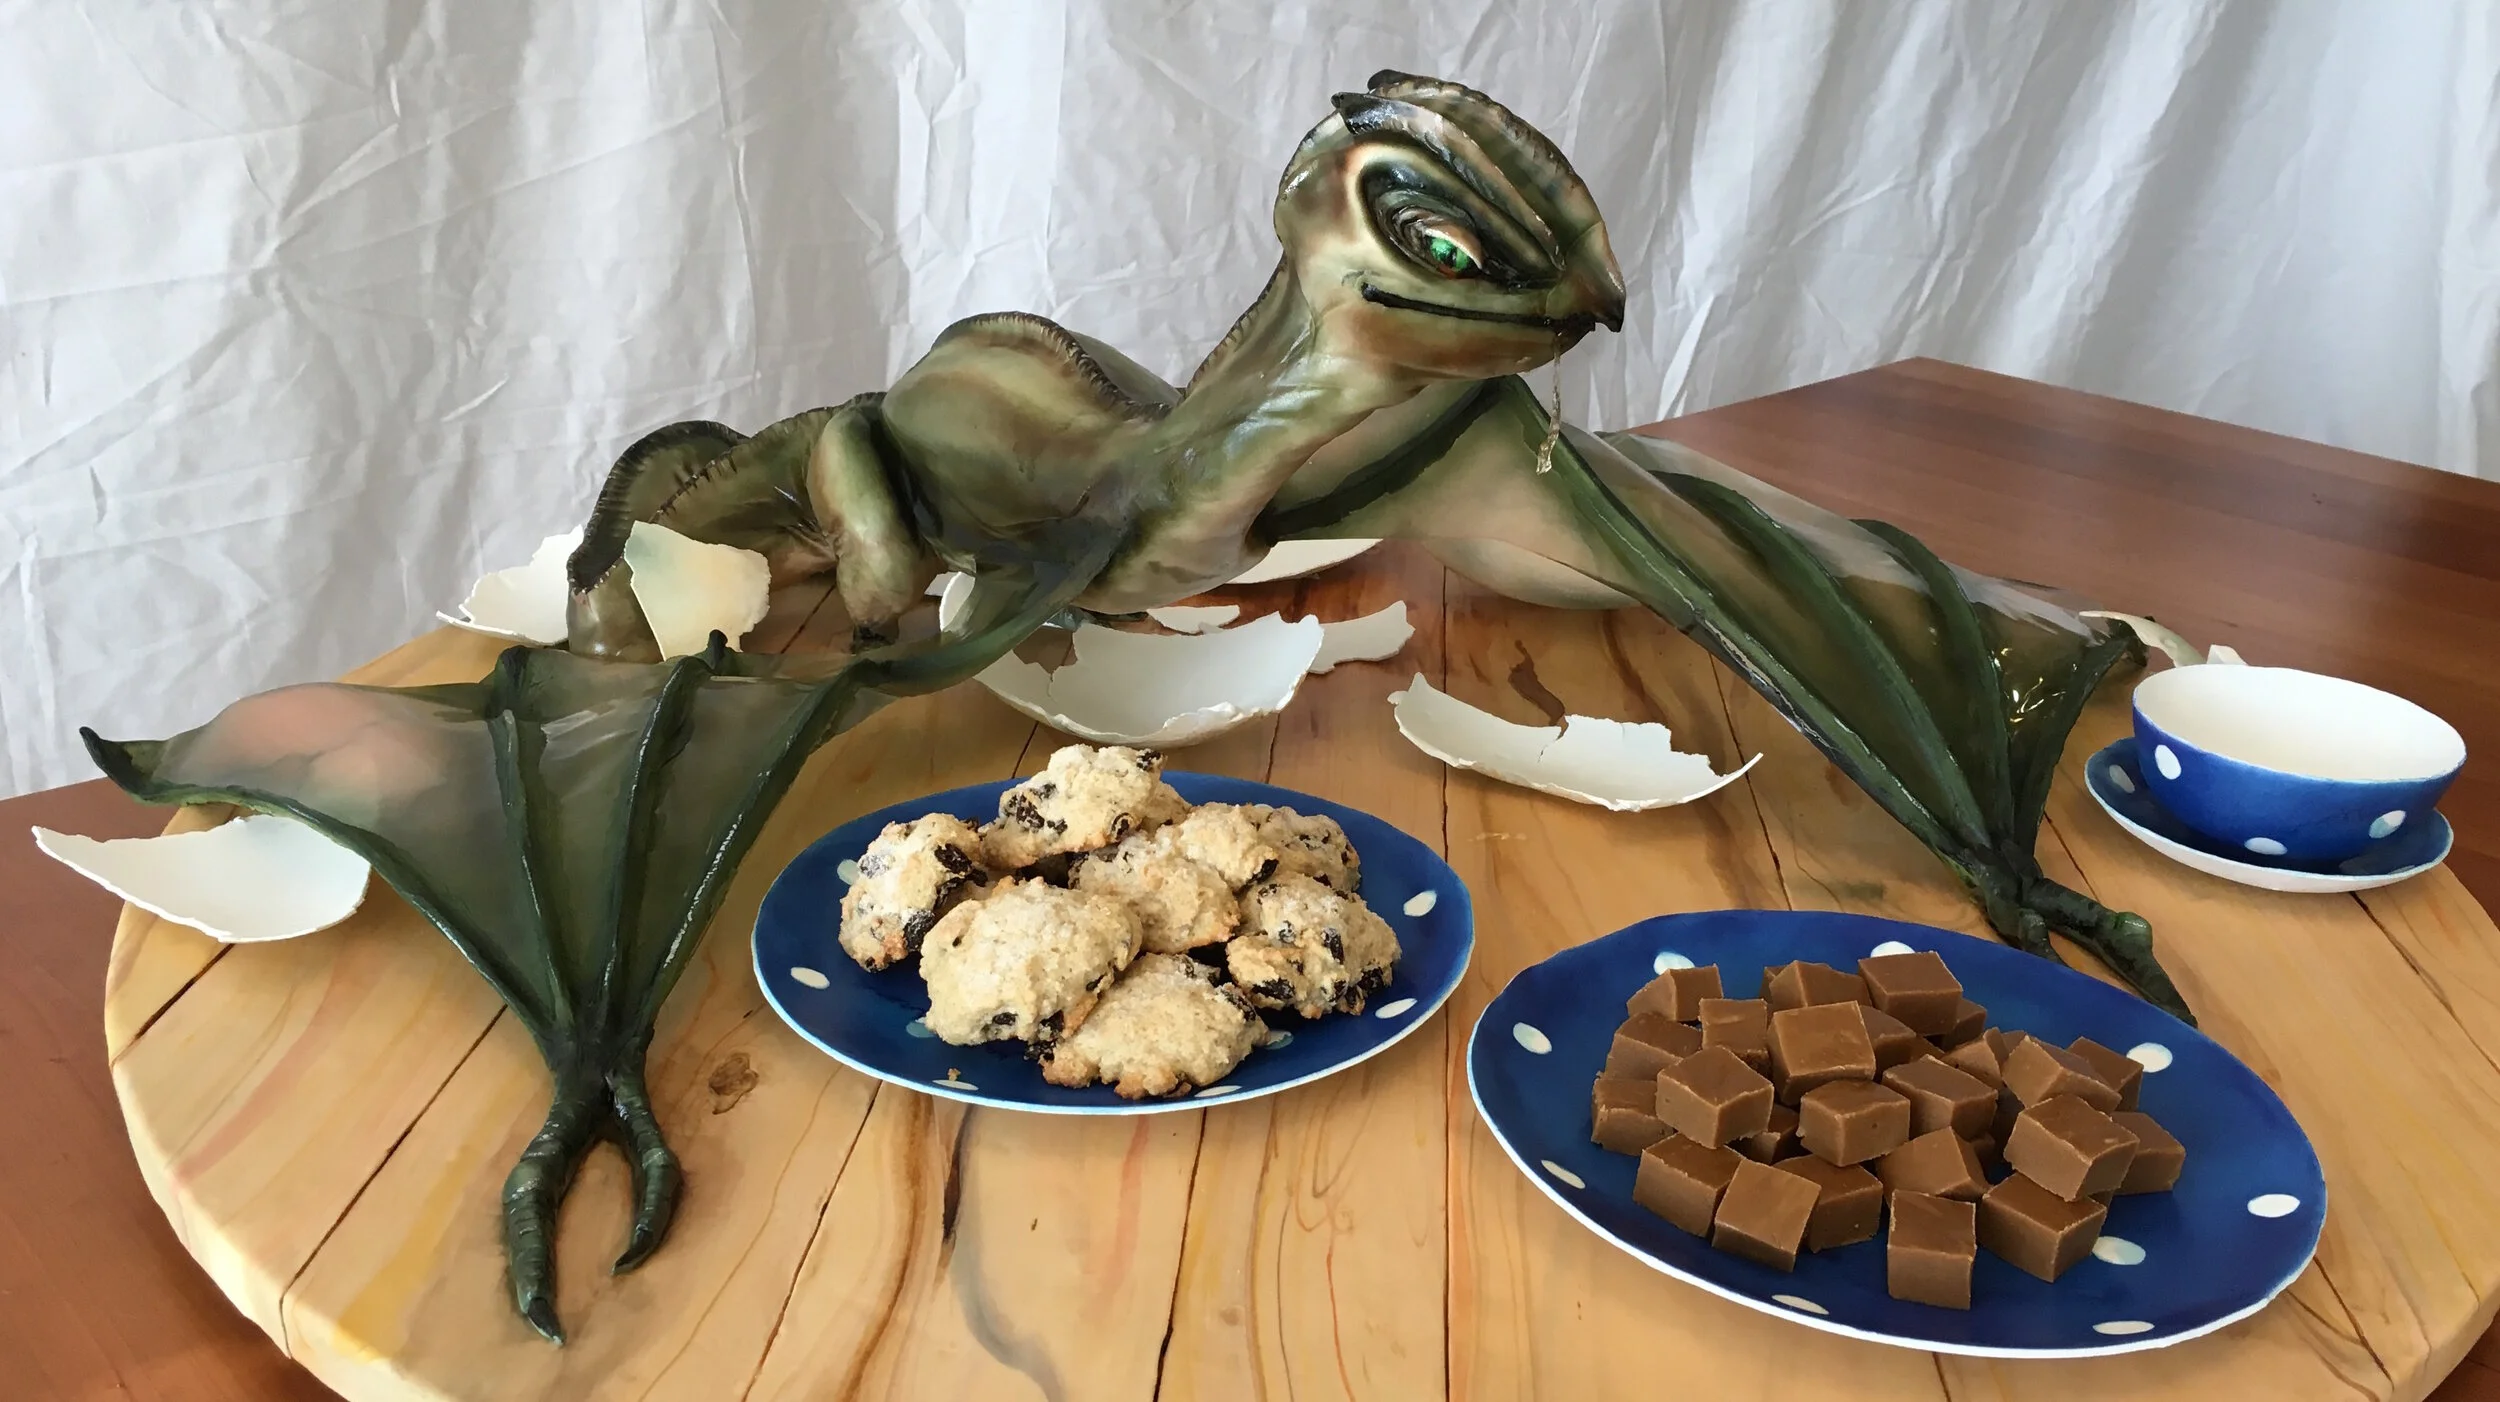
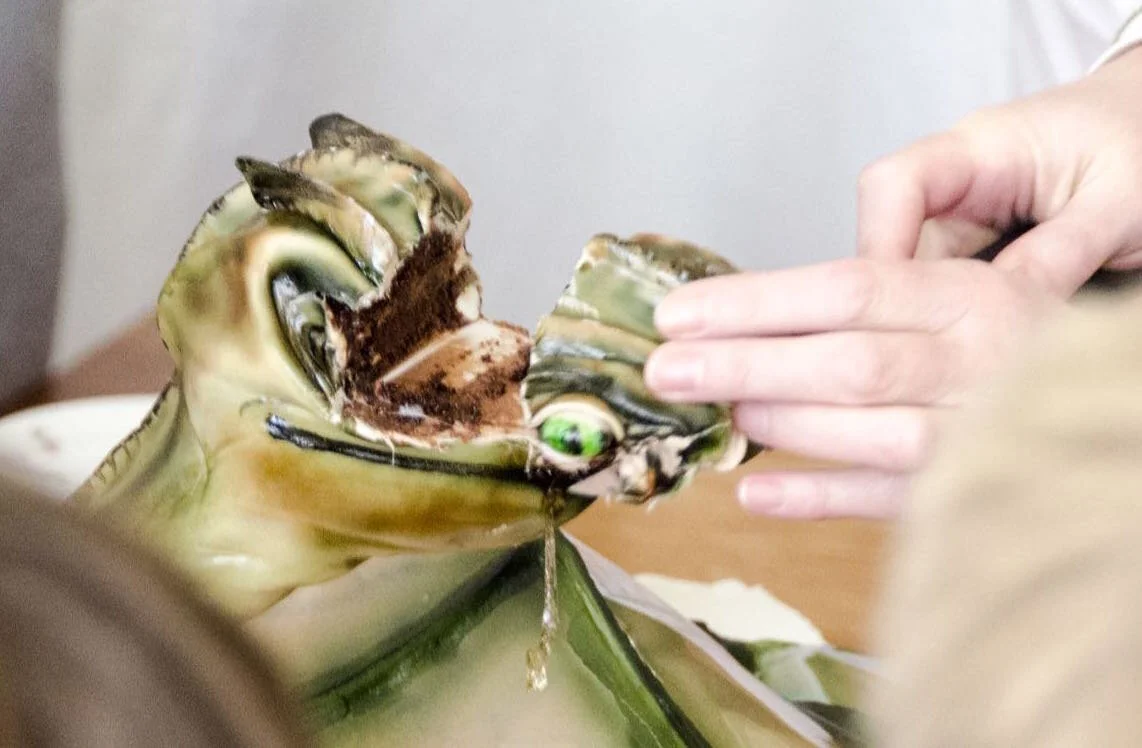
Inside, the cake is chocolate with chocolate buttercream icing. Sam helped me make that, too. For once, the amount of cake that I made was appropriate to the size of the party.
After the party, I tweeted photos of the cake to J.K. Rowling and she not only liked it, she retweeted it! As a result, my tweet is currently at over 965,000 impressions and 15,500 likes. Based on the replies, Harry Potter fans are some of the nicest people in the world.
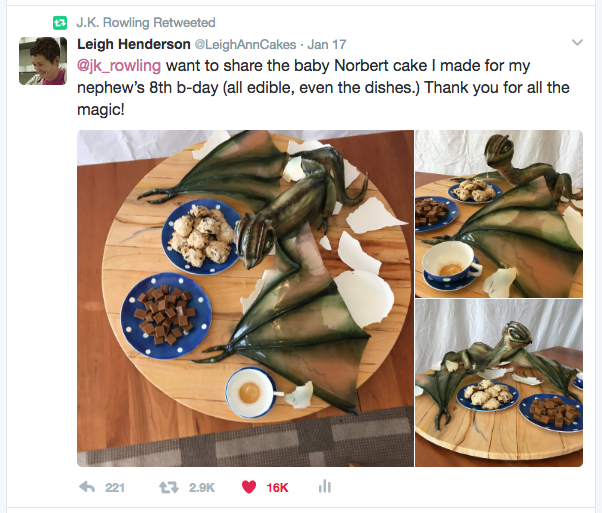
Update: It's now at over 1,000,000 impressions!

Note:
Unfortunately, J.K. Rowling has disappointed me and many other people. By publicly opposing trans rights and misrepresenting trans people, she has fallen far short of the standard of loving acceptance set by the heroic characters in her books. To learn more, I recommend this open letter to J.K. Rowling from Mermaids, a group in the UK that advocates for trans and gender-diverse children. If you want to help, you can donate to Mermaids, Gender Spectrum, and many other groups working to support trans and gender-diverse people.

Inside Out Cake
This Inside Out cake was for my friend Isaac’s ninth birthday, which is why it’s in the shape of the number 9.
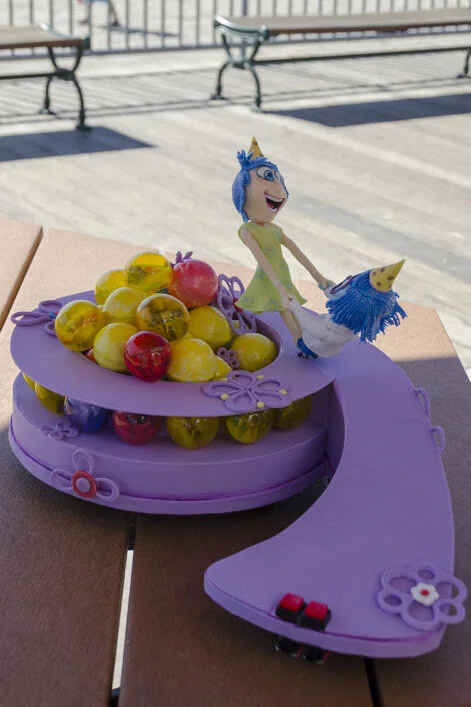

This Inside Out cake was for my friend Isaac’s ninth birthday, which is why it’s in the shape of the number 9.

The number 9 itself is mostly foam core covered with gum paste, because I needed room to embed LEDs and I didn’t need very much cake because they party was pretty small.

The memories around the edge of the 9 are gelatin bubbles, which are made by dipping partially inflated balloons, coated with shortening, into melted gelatin. They’re surprisingly sturdy once dry and technically edible, though it’s a little like eating plastic.
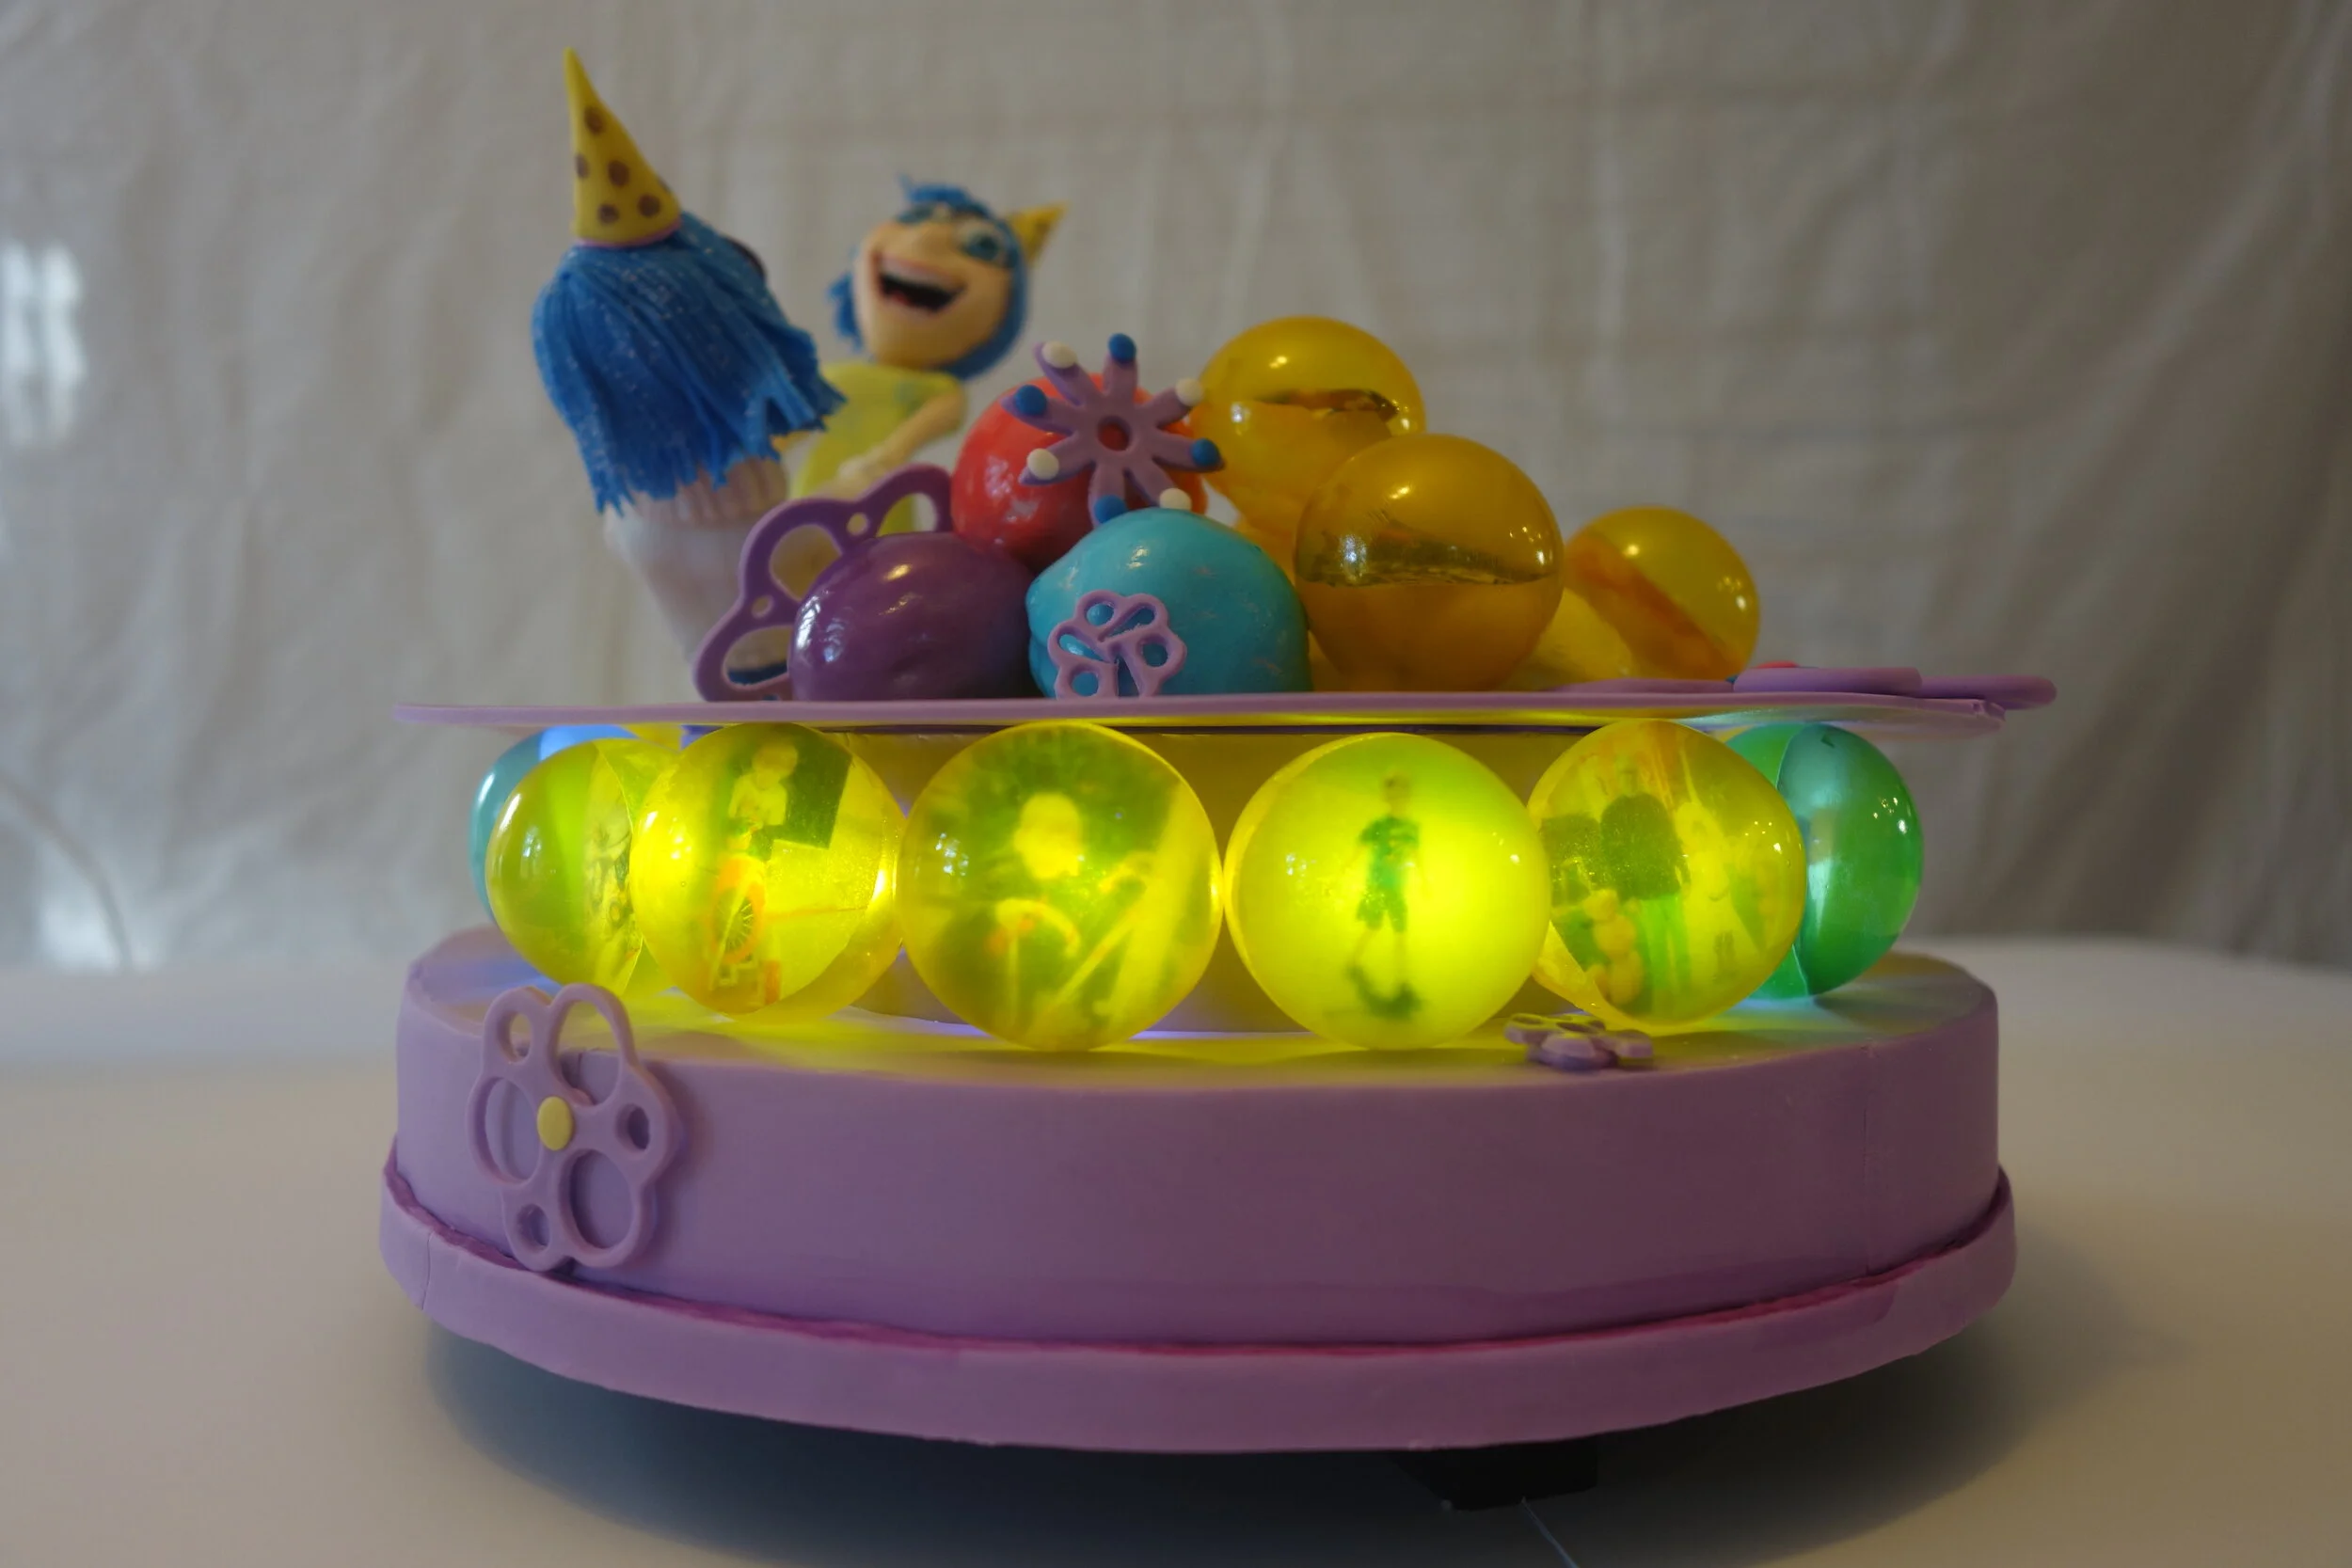
Each memory bubble contains a picture of the birthday boy, at ages from infancy to now, printed on edible wafer paper and each one has an LED behind it.
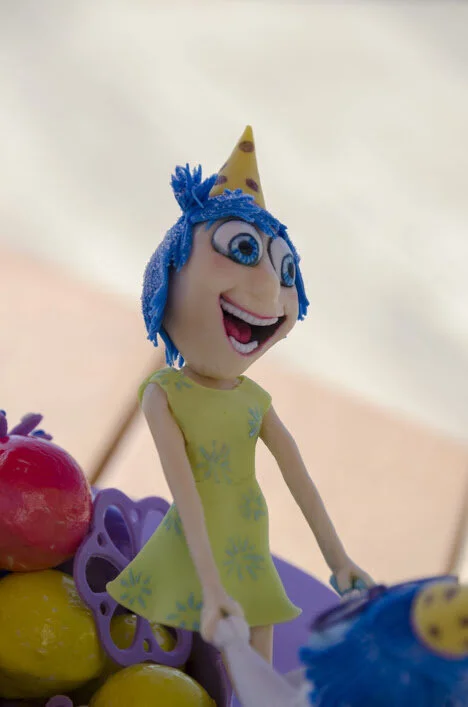

The figures are made of modeling chocolate with gum paste hair and clothes. They are made over a wire armature attached to a motor, so that they can spin joyously around.
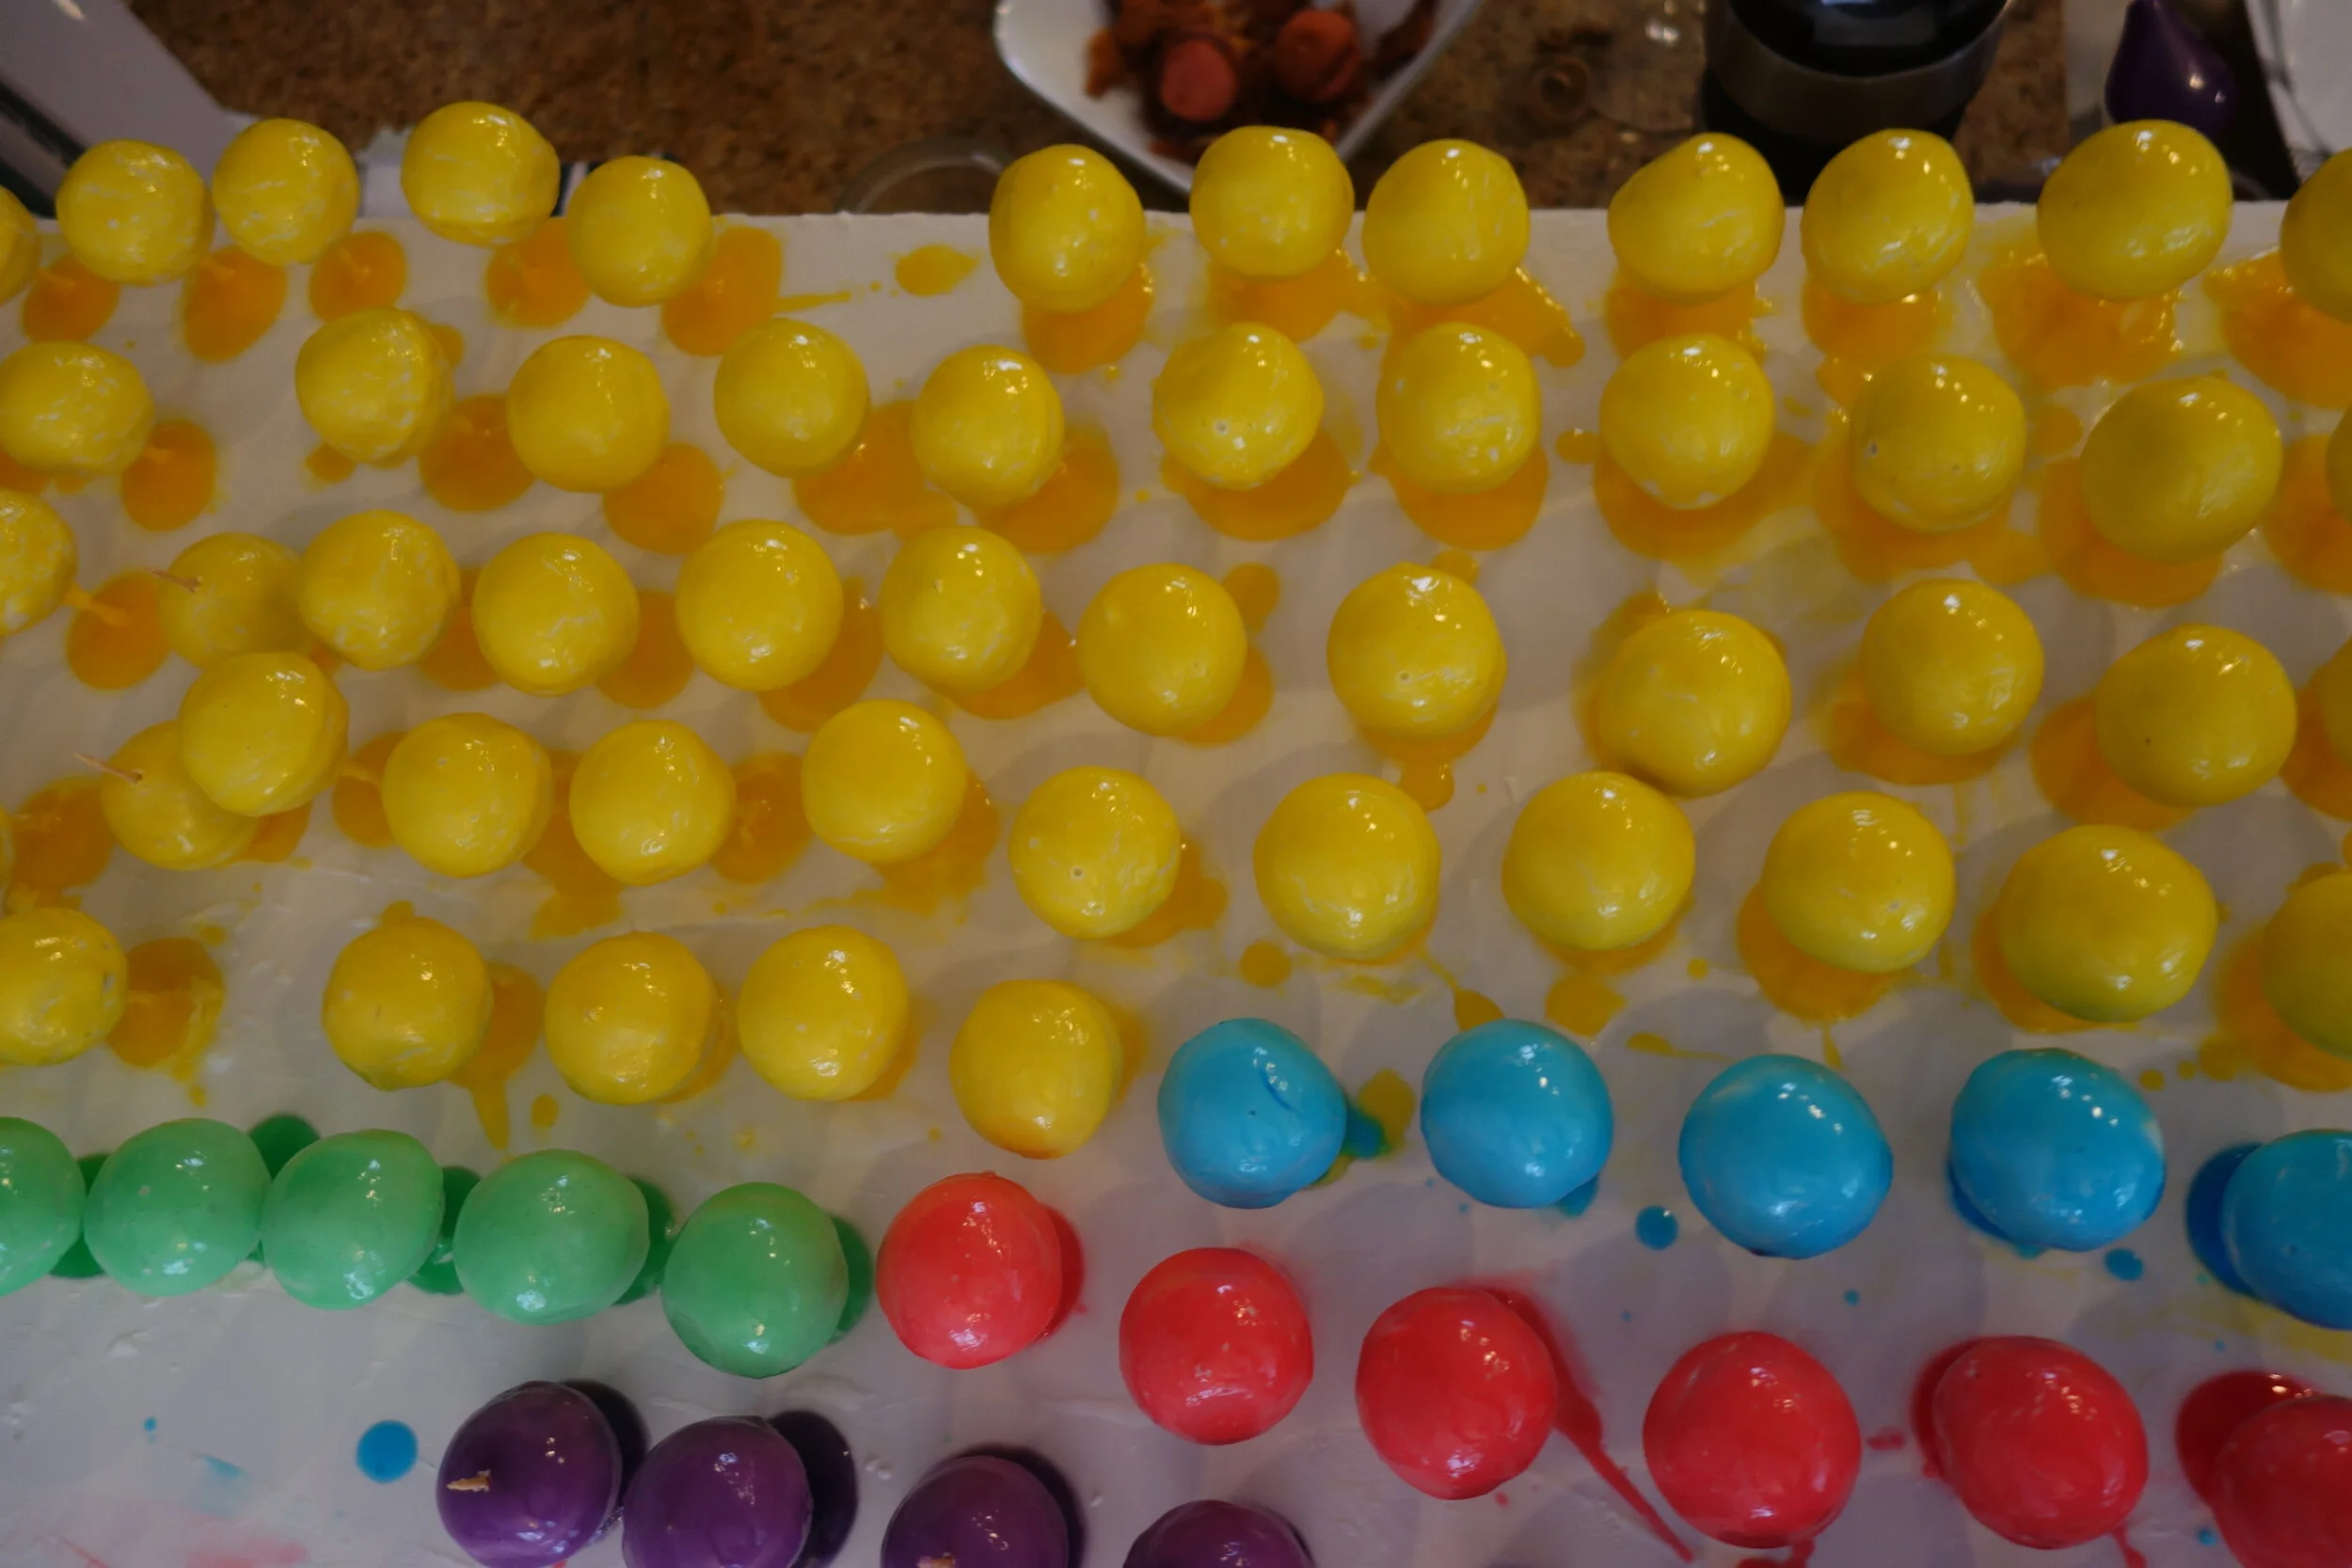
The actual cake is the memory balls in the middle of the 9, which are cake balls dipped in royal icing and then in colored piping gel. I was trying to make cake that was easy to pick up and eat with no utensils, because the party was outside. But I didn’t leave enough time for the piping gel to dry, so they wound up extremely sticky and messy to eat. Still tasty, though.


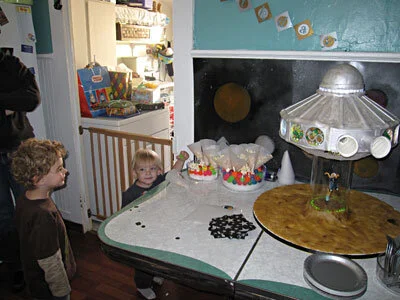
Flying Saucer Cake
The occasion for the cake was my friend Isaac’s third birthday party. My goal in this design was to evoke the classic B-movie spaceships from the 50’s and 60’s (the title of the party’s evite was “Plan 3 from Outer Space”.)

I began this cake flush with the success of my recent Tardis cake. I received a bit of a comeuppance.
The occasion for the cake was my friend Isaac's third birthday party. (You may remember Isaac from his second birthday cake and his first birthday cake.)
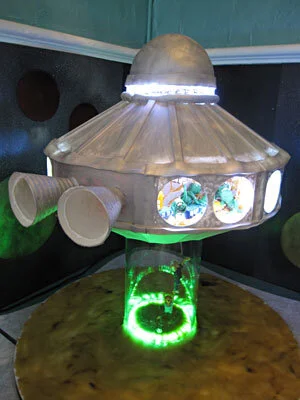
My goal in this design was to evoke the classic B-movie spaceships from the 50's and 60's (the title of the party's evite was "Plan 3 from Outer Space".) As I had so recently completed the Tardis cake, I was still interested in cakes with mirrors, LEDs, and visible interiors. I also wanted to personalize the cake, by including Isaac (in alien form), abducting his parents (in human form). So I designed a classic silver flying saucer with round portholes around the sides that would look into the lighted interior rooms of the ship, where alien Isaacs would be doing things that human Isaac loves to do - eating pretzels, climbing on unsafe things, splashing in a pool, and playing with trains. The entire ship would be mounted on a turntable, so it could slowly rotate. The turntable in turn would sit on a clear acrylic tube, representing the ship's tractor beam, within which I would enclose gum paste figures of Isaac's parents, in the process of being sucked up into the ship.

To make the rooms inside the ship, I started with two pieces of foam core - a 14" diameter circle for the bottom and a 14" diameter 2" ring for the top, so that I would later be able to put the cake inside. I split the space into eight equal slices with gum paste dividers, each with a row of white LEDs on top and bottom. I backed every other space with mirror, so that when their corresponding portholes were backed with mirrored window film and the LEDs were lit, they'd be mirrored ad infinitum within the ship, creating a spacey infinite corridor. For one of these spaces I used red LEDs instead of white, as that was where the conical thrusters would connect to the ship, thereby evoking a combustible power source.
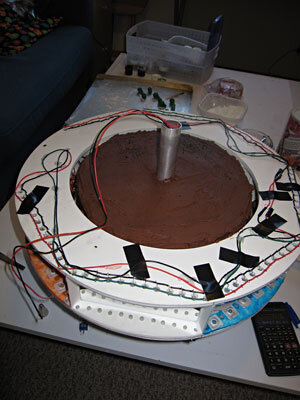
The remaining four spaces became the rooms for the alien-Isaacs. Because I was going for a little-boy's-birthday vibe combined with my 60's B-movie vibe I painted one room aqua, one lime green, one orange, and one yellow. These are all also colors that Isaac's mother has used to decorate their house. Then I appliqued each room with various gum paste squares and circles, painted silver.

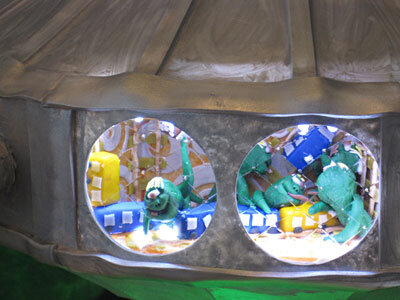
I made the aliens out of gum paste, serpentine with green skin and one big eye. To make them reminiscent of Isaac, I gave them puffy cheeks and little shocks of blond hair.

For the portholes, I used a template to cut out gum paste rectangles with windows in them, and draped them over custom forms to dry. The thrusters were also gum paste, wrapped around cones to dry, and then coated with royal icing for a sort of corrugated steel texture. Once the portholes dried, I used royal icing to stick sheet gelatin window panes to the back and, in the case of the portholes in front of the mirrored room, a layer of mirrored window film.
My sister kindly baked the cakes for me. There was space inside the perimeter defined by the rooms to put a 3" tall 10" diameter cake.

To make the tapered upper section of the ship, I started with a 10" diameter cake on top of a 14" diameter cake. I carved these into a truncated cone, 3" high, tapering from 14" diameter at the bottom to 6" diameter at the top. To get the appropriate architectural feel, I covered the cake with a layer of fondant and then the fondant with 16 pre-made gum paste trapezoids. Then I dropped this whole section on top of the cylinder with the rooms.

For the very top of the ship, I carved some 6" round cakes into a hemisphere and covered that with fondant. I mounted this cake onto a foam core circle in which I had embedded a ring of LEDs and mounted it on top of the other cakes.
With the main body of the cake assembled, I needed to get the base together. I embedded a ring of green LEDs into the plywood base to illuminate the tractor beam and then set about creating the people being abducted. I started with a wire armature and built up the figures in gum paste around that.
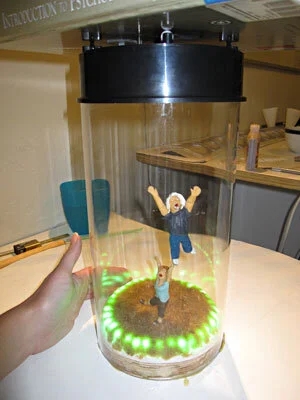
Once the figures were complete I installed the acrylic tube around them and then glued a turntable to the top of the tube. I had considered mounting the turntable at an angle, but I decided that might make it too hard for the turntable to rotate, so I kept the turntable level. As it turned out, I needn't have worried because the moment that I transferred my cake to the turntable it became clear that the turntable was nowhere near powerful enough to turn such a heavy cake. And thus my cake became stationary. Actually the turntable wasn't a total waste, as it still allowed me to turn the cake manually. This was convenient, since the cake was designed to be viewed from all angles, but it certainly lacked pizzazz.
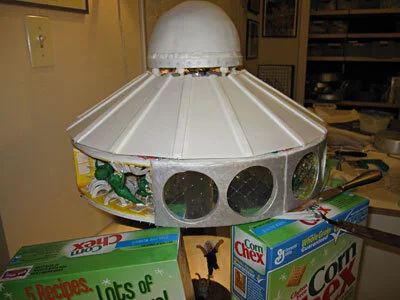
With the cake mounted on the base my flying saucer still needed to taper at the bottom. Unfortunately, it proved to be far too difficult to attach the gum paste pieces that I had created for the bottom of the flying saucer and by this time it was so late that the royal icing would never have had time to dry. So I was forced to hot glue my Bristol board mockup to the bottom of the turntable. I don't like using non-edible materials any more than necessary, but in this case I felt that it was just too late to do anything else.

In fact, by this time it was about 5:00 am the morning of the party and it was too late for a lot of things. I had planned to finish all the edges very cleanly and wind up with a very polished final product that would live up to the standard that I set for myself with the Tardis Cake. Sadly, at 5:00 am, this was not meant to be. The best I could do was to whip up a few fondant ropes to cover the most egregious seams, slap a coat of silver luster dust on everything and go to bed. I was not thrilled with the results. I'd like to claim that it was some sort of homage to the shoddy special effects that we all love so much in our B-movies, but the sad truth is that it was just poor time management.
The next morning I just had time to cover the plywood base with a layer of pressed sugar and make it to the party in time to help hang up the decorations. The cake did make the car trip with no untoward effects, but there evidently was a lot of moisture trapped in the acrylic tube because the figures' gum paste limbs softened and wilted, so where their arms had meant to be pulled upwards by the inexorable force of the tractor beam, instead their arms curved despondently towards the earth.
I actually don't mind an occasional failure. When you're pushing the boundaries of a medium you have to expect a few unsuccessful trials. This failure irked me however, because in this instance my failure was not due to excessive ambition but to deficient planning. I view the first type of failure as an inevitable result of man's eternal striving to better himself, but the second is merely the inevitable result of opting to watch America's Next Top Model instead of working on the project at hand.
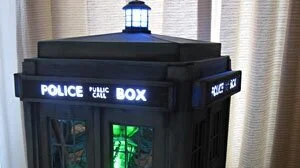
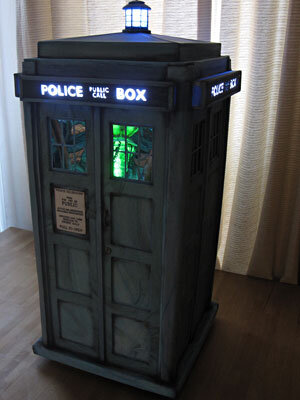
TARDIS Cake
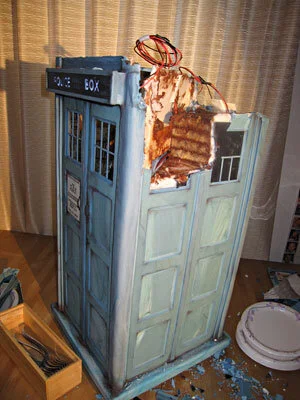
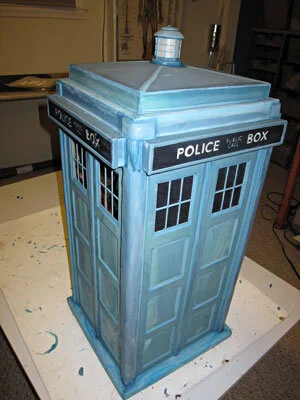
It's a TARDIS! It's bigger on the inside! It's two feet tall (quarter scale)! And aside from the lights, everything you see is edible.
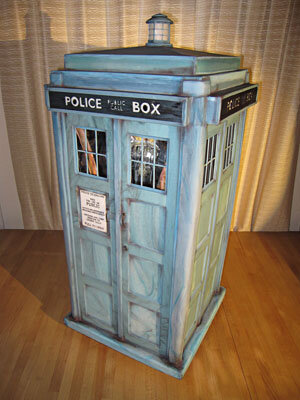
It's a TARDIS! It's bigger on the inside! It's two feet tall (quarter scale)! And aside from the lights, everything you see is edible.
I love Dr. Who. Just a few weeks ago my sister-in-law and I waited in line for five hours to get good seats at the Dr. Who panel at Comic-Con. Totally worth it!
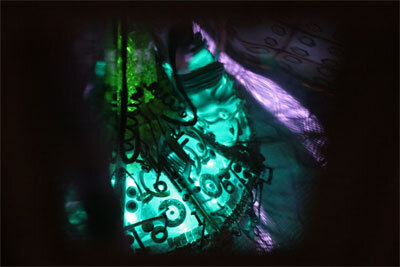
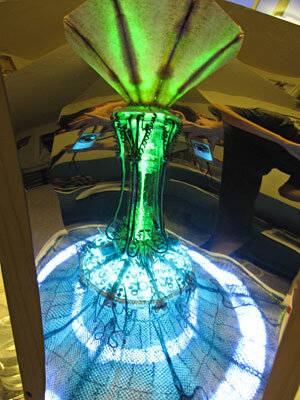
Since I would have to be a Time Lord to make a Tardis cake that could actually go anywhere in time and space, I decided to do the next best thing - make a Tardis cake that's bigger on the inside. Or at least appears to be. Like I said, I'm not a Time Lord. I chose to go with the new Tardis interior because, as it is both more organic and more interestingly illuminated than any previous Tardis interior, I thought it would be the most visually effective.
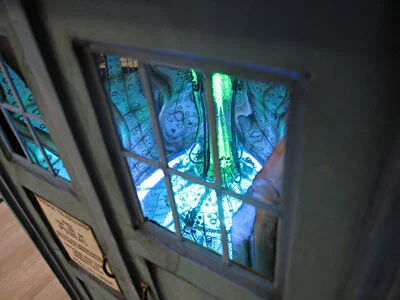
First I had to figure out the best way to create the illusion of a more spacious interior. I tried to consult the internet about optical illusions, but didn't find anything helpful, so I went with old fashioned trial and error. I played around with a lot of different configurations, eventually settling on two convex mirrors arranged at about a 45 degree angle. To get the curve I wanted, I used flexible carnival mirror, glued onto my custom made wood and mat board form.

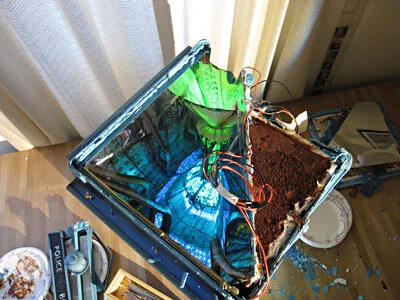
Next, in order to illuminate the inside of the Tardis and the "Police Box" signs on the outside, I needed to learn at least a little bit about electronics. So I ordered a DIY Electronics Kit from the MakerShed that was really sort of geared for pre-teens, but it was also very helpful. Armed with new-found knowledge of resistors and LEDs, I trolled the internet for the best deals and ordered a total of 385 LEDs in blue, aqua, green, yellow, white, and flashing white. They didn't all make it into the cake, but I did wind up using enough of them that I used seven nine-volt batteries to power them. I embedded these batteries into a plywood base and mounted the mirrors.
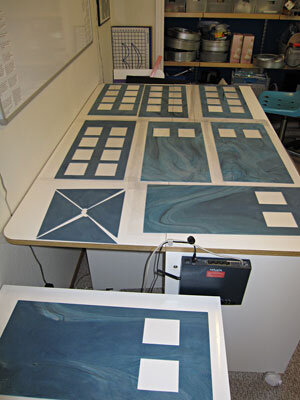
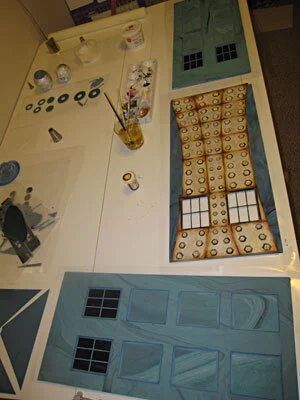
With my structure in place, it was time to start making gum paste pieces. The exterior required fifty-two separate pieces of gum paste - two for the panels on each of the four sides plus one inward-facing panel for the side that looked into the interior and three to back the windows on the other three sides, six for each of the four "Police Box" signs (some of which were quite tedious, as I had to painstakingly cut out the words to let the light through), and sixteen for the roof. Later I needed an additional seventy-two pieces of gum paste for the window frames and mullions. I went with a grey-blue marbled effect because I thought it would look more convincing and more interesting than a uniform color field.
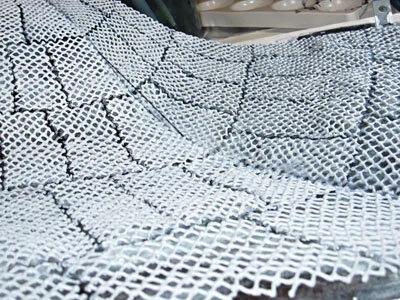
To make the interior I started with a gum paste floor with cutouts to let the light through from all the white LEDs embedded in the base. In order to enhance the illusion of interior space and elevate the bottom of the central console sufficiently to make it easily visible through the windows, I gave the floor a serpentine curve, supported by gum paste struts. Then I stuck a layer of rice paper to the top of the gum paste floor and painted it dark grey with food coloring. On top of this I piped grey royal icing expanded steel. It went pretty quickly, because I got a lot of practice making royal icing expanded steel when I was making the Demolition Cake. To give it a nice sheen, I went over it with some silver luster dust.
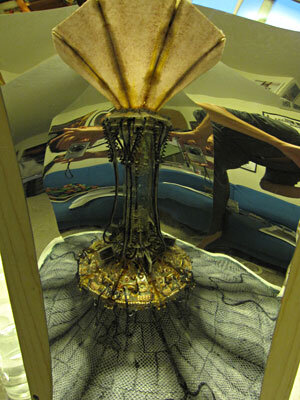
Now it was time to make the control console. Fortunately, thanks to the mirrors, I only needed to make one eighth of it. The console structure is gum paste and sheet gelatin, assembled around blue, green, and aqua LEDs and attached to the mirrors with clear piping gel. Then I had a good time sticking on a myriad of gum paste and royal icing levers, dials, cables, monitors, etc. At times the mirrors made things a little difficult because it was sometimes hard to remember which was the real console and which was the reflection. Liberal use of silver, bronze, and gold luster dust made everything nice and shiny.
With the interior finished, I assembled the exterior gum paste pieces, adding the royal icing molding around the perimeter of each recessed panel, and installing the window mullions and backing.
It was at this point in the process that we decided that we really should schedule a party so that we would have something to do with this cake when it was finished. Fortunately, we have a lot of nerd friends, so we soon had about forty positive rsvps to our evite. It was also at this point in the process that I took some time off to go to Comic-Con and then on a family trip to Colorado, so my gum paste pieces had a long time to thoroughly dry. This was definitely an advantage, because it would have been very hard to assemble the cake with anything less than 100% dry gum paste and because the pieces were so large that they did require some significant drying time.

A week before the party I began assembling the exterior, beginning by putting together the "Police Box" signs around my strings of white LEDs. I backed the cutout letters with rice paper, both to diffuse the light and so that I could stick the free-floating interior pieces of the O's, P's, A's, and B's to the rice paper.
Because of the mirrors and the interior space only a little less than half of the interior was actually going to be made of cake. This meant that I could install two of the four sides prior to baking any cake and even attach and solder their respective "Police Box" signs.

Three days before the party I baked the cake. We decided to go with a banana cake with chocolate buttercream icing because, to quote the Doctor, "You should always bring a banana to a party. Bananas are good." I needed a total of eight two inch tall, ten inch square cakes. Of the eight cakes, seven of them were cut in half on the diagonal and stacked in the body of the Tardis. The last cake was reserved for the square top section.
With the cakes in place, I covered them with a layer of fondant, to prevent the gum paste exterior pieces from coming into contact with the buttercream, which would moisten, soften, and weaken the gum paste. Then I was able to install the last two side pieces and their respective "Police Box" signs.

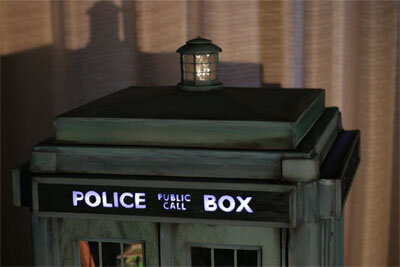
I put the top section together separately, carving the slanted roof, covering it with fondant, and then assembling the gum paste pieces around it with royal icing. I left a hole through the middle, so that I could run blinking LEDs through it for the light on top. Once the top section was in place, my Tardis really started to look like a complete piece, but it still needed a lot a detail work.
I used fondant rather than gum paste to cover the base and for the trim on the corners and in the center of each side panel because some of them needed to be relatively thick, which is easier to accomplish with fondant. I did use gum paste, however, for the thin strips of molding around the perimeter of each "Police Box" sign.
To make the little light on top, I wrapped rice paper around gum paste circles, then put panels of sheet gelatin on top of that, followed by gum paste trim and royal icing mullions. The curved top is gum paste dried over Styrofoam balls.
With all the major features in place, I went over the entire structure with royal icing smoothed with a damp paintbrush, to hide unwanted seams and fill in a few gaps. Then, to give it that distressed look of a vehicle that's been to the end of the universe and back again, I went into all the corners with some black powdered food coloring on a soft paintbrush.
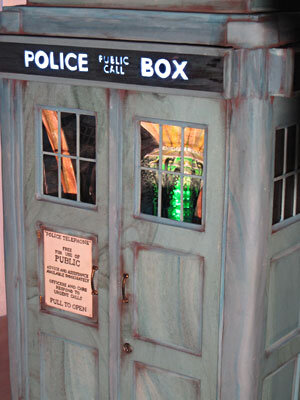
To make the sign for the front of the Tardis, I blew up an image of it to the correct size and then essentially made some edible transfer paper by coating the back with black powdered food coloring. I put this on top of a dry white piece of gum paste and traced all the letters with a stylus to transfer the text onto the gum paste below. Then I painted over the letters with black paste color.
The finishing touches were the royal icing handles, hinges, and tacks to hold on the sign, and the gum paste lock.

Carrying the cake to the table for the party was a bit stressful and difficult, as it probably weighed fifty pounds and all of the weight was in one half of the cake. Part of me was convinced that, after literally months of planning and building, I was going to drop it at the penultimate moment. But actually the move went perfectly smoothly. I got my brother-in-law to help me and he even bravely volunteered to carry the heavy end.

I'm really pleased with the way this one came out, maybe more so than any cake I've ever made before. Please note that, with the exception of the mirrors, the electronics, and the wooden base and dowels and foam core separators that would needed in any cake this size, it is entirely edible. (And if anyone knows how to make an edible mirror, please let me know.) It's hard to capture the "bigger-on-the-inside" effect in a photo, but I do think it was pretty darned successful. By an odd coincidence, Cake Wrecks (one of my favorite websites) did a Dr. Who post on the very same day that we had our party, so I immediately sent them photos of the cake, mere hours after it had been consumed, and they very kindly posted it right away!
For hours after we attended the Dr. Who panel at Comic-Con, my sister-in-law and I were all a-twitter about how awesome it was; now I still kind of feel that way about this cake.