
Circulating Heart Cake
Some variation on a bleeding heart cake is a relatively standard feature of our annual Pumpkinfest. This year, I was trying to make a cake through which "blood" (cranberry juice) would continuously and visibly circulate.
Some variation on a bleeding heart cake is a relatively standard feature of our annual Pumpkinfest. This year, I was trying to make a cake through which "blood" (cranberry juice) would continuously and visibly circulate.
Concept: A cake, shaped like a heart and covered with fondant, sitting on top of a platform elevated above a reservoir full of cranberry juice. In the reservoir, a pump attached to a tube leading up the side of the cake to pump the cranberry juice up and over the cake. To contain the juice and insure that it spread nicely over the surface of the cake, an isomalt (sugar substitute) shell, also in the shape of a heart, placed over the cake, leaving about an eighth inch of space for the juice to flow between the cake and the outer shell. In the opposite side of the elevated platform from the tube, a series of holes to drain the juice back into the reservoir and begin the whole cycle all over again.

Step 1: Make an isomalt shell shaped like a heart. At first, I had hoped to find something that was already in the shape of a heart, cover it with tin foil, and pour isomalt over the top. I wanted to use isomalt rather than sugar because it's more transparent. Unfortunately, in spite of having access to numerous seasonal Halloween stores, I was unable to locate anything that was a) accurately heart-shaped, b) big enough that I would be able to get sufficient cake for our guests inside, and c) able to resist the heat of liquid isomalt. I therefore had to make my tin foil heart mold from scratch. I started with a cereal bowl, upside down, and built up the rest of the heart shape around the bowl with wadded up tin foil. To get as smooth a surface as possible to pour over, once I had a shape I was happy with, I spread one final layer of tin foil on top and smoothed it as much as I possibly could. As you may recall from my description of the jellyfish cake, the problem that I often have with pouring sugar or isomalt over tin foil is that the little ridges of the tin foil get stuck in the solidified sugar and are very tedious and nerve-wracking to remove with tweezers and a damp paintbrush.
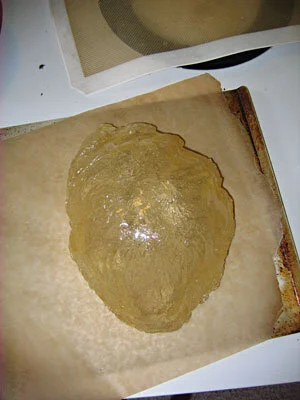
I put this tin foil heart onto a silpat mat and melted down my isomalt. In my earlier discussion of the jellyfish cake I described some of the problems that I have with making sugar domes. All of these problems apply equally to making isomalt hearts. I was also a little disappointed that the isomalt hardened somewhat cloudy, I think because I was working air into it as I pulled it back up the sides of my tin foil heart to prevent it from all pooling at the bottom. I was hoping for a transparent heart, but I had to settle for cloudy. I also think that there's something wrong with the bucket of isomalt that I have, because it always come out sort of yellow, when isomalt is supposed to be perfectly clear. At least the heart released from the tin foil better than any of my prior tin foil sugar projects.
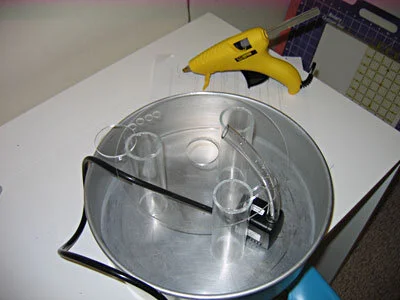
Step 2: Make an elevated platform, pump, and reservoir assembly. Rather than purchasing any new equipment for this project, with just a little glue and a few additional holes drilled, I was able to repurpose some of the acrylic circles and tubes from the Triple Animal Cake and the pump and tubing from the Fish Fountain Cake. I used a cake tin for the reservoir. Not the most aesthetically inspired choice, perhaps, but highly functional and readily available.
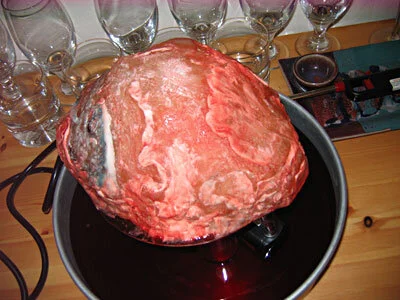
Step 3: Make a heart-shaped cake. Internal-organ-shaped cakes being something of a specialty of mine, the carving went pretty quickly. I covered it with white fondant - a much thicker layer than usual, as I wanted it to be able to stand up to the juice running over it without dissolving away and exposing the cake - then sculpted in some of the major features, like the divisions between the chambers. Then I moved it onto the acrylic platform, and positioned the tube tight up against it. To get some additional detail (though I wasn't overly concerned with extreme detail, since the whole thing was going to be under my isomalt shell) I piped on royal icing and shaped it with a slightly damp, soft paintbrush. I also covered the tube with royal icing, both to hold it in place and to camouflage it. I painted the cake with brighter colors than I might have ordinarily, because I wanted them to read through the translucent shell.
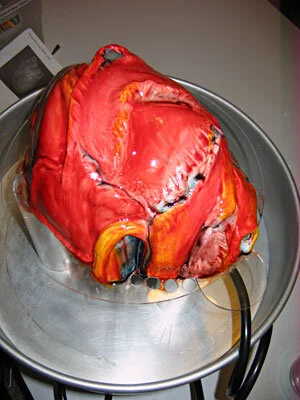
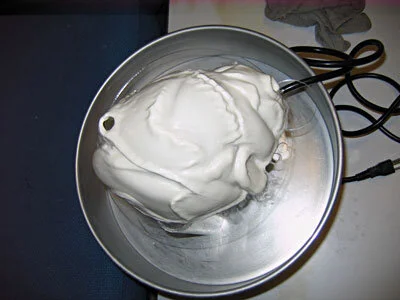
Step 4: Attach the isomalt shell. Unfortunately, once I plopped the shell over top of the cake, it looked more like an amoeba than a heart. I hadn't planned to decorate the top surface of the shell, because I wanted it to be as see-through as possible, but I felt that I had to do something to make it more identifiable. So I went over the top surface of the isomalt with royal icing details and texture, and then painted the surface with some reds and blues. This did make it look marginally more like a heart, but it also made it much more opaque, which proved to be unfortunate when I got around to plugging the pump in.

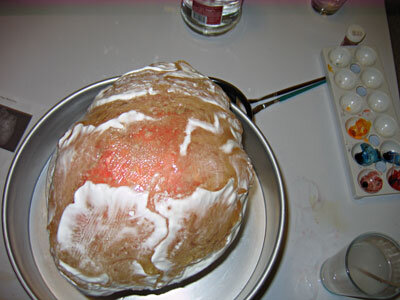
Step 5: Fill the reservoir with cranberry juice, cross your fingers, and plug in the pump. Because my isomalt was cloudy from the get-go and because I had further opaqued the surface with royal icing and food coloring, the pumping action, while technically successful was exceedingly subtle. I'm pretty sure that if I hadn't explained it to everyone, no one would have had any idea what the cake was or what it was doing. I tried to capture it on video, but all you can really see is the juice venting down the side and back into the reservoir. (Which, by the way, I really should have directed out the aorta.) The video is further compromised by the fact that my camera was in the process of kicking the bucket resulting in a distinct horizontal line across the frame and the fact that there was a toddler screaming in the background.
Conclusion: I still believe that there is potential in the concept of a cake with fluids circulating inside, but I think it requires either a) a different form factor, b) a more competent isomalt handler, or c) both.
Heart Cupcakes
In the past, my heart-shaped cakes have tended to get bigger and bigger, resulting in things like a heart the size of a small dog and the infamous Thoracic Cavity Cake. This year I decided to buck the curve and make very small, individual-portion-sized heart-shaped cakes.

In the past, my heart-shaped cakes have tended to get bigger and bigger, resulting in things like a heart the size of a small dog and the infamous Thoracic Cavity Cake. This year I decided to buck the curve and make very small, individual-portion-sized heart-shaped cakes.
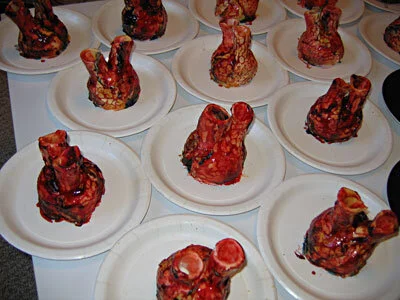
There were 18 people coming to Pumpkinfest, so I needed to make 18 little, cupcake-sized hearts. I also wanted them to bleed because what would be the point of making heart-shaped cupcakes that didn't bleed? I thought it would be a nice touch to have both red blood (arterial) and blue blood (venous), so I made a batch of fresh raspberry sauce and a batch of fresh blueberry sauce. Both of these sauces are very delicious and very easy to make. The only ingredients are berries, sugar, and lemon juice, mixed up in a blender and strained through a sieve to remove the seeds. The blueberry sauce was perhaps less blue than it might optimally have been, but I think we all know how hard it is to find appetizing blue food.
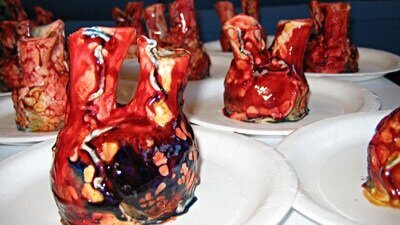
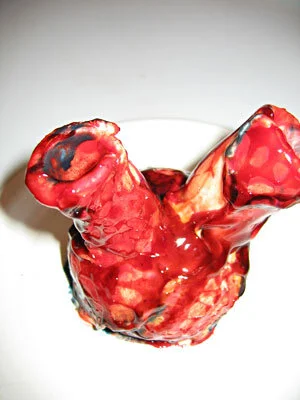
To contain the sauces, I made two gum paste cylinders per cupcake, for a total of 36. The idea was that one of them would be the aorta (full of red blood) and the other the superior vena cava (full of blue blood). Mounted vertically on the top of each cupcake, they would hold the fruit sauces until the cupcakes were cut into, at which point they would spill their gory contents over the plate.
For the cake itself, I started with cupcakes, which are relatively heart-shaped to begin with. I removed the paper from each one and set them in the middle of white paper plates, the better to emphasize the soon-to-be-spilt fruit sauces, and covered them with a thick later of chocolate buttercream frosting.
I didn't want to use fondant to cover and sculpt these hearts because I thought that the proportion of fondant to cake would be overpowering at cupcake scale (not that it probably makes that much difference anyway since most people peel the fondant off before they eat the cake.) For some reason, I also decided not to use buttercream frosting. I don't recall why I made that decision because in retrospect, buttercream would clearly have been the way to go. Instead, I decided to use white modeling chocolate. I didn't do a very good job of making the modeling chocolate, so it came out very hard and a little grainy. I used it anyway. I rolled out circles of the modeling chocolate to drape over the whole cupcake and then shaped it a bit with some gum paste sculpting tools. Then I used royal icing to pipe on detail veins and attach the cylinders sticking off the top.
Because I had used modeling chocolate I needed to color the hearts with powdered food coloring mixed into cocoa butter. Water-based colors don't stick to chocolate. To get the hearts nice and shiny, I then painted on a layer of red- or blue-tinted piping gel. Because the piping gel is water-based, it didn't spread smoothly, but rather beaded in rills and pockets, which I thought was actually kind of a nice effect.

Right before serving, I filled the tubes with my two fruit sauces.
Reactions were mixed. Adults more or less agreed that the cake was tasty, but that the modeling chocolate was too thick, hard, and grainy to eat. I really should have used buttercream. One little boy, who had been promised a cupcake adamantly refused to accept that these were, in fact, cupcakes in a slightly different configuration and had to be supplied with a normal-looking cupcake that we fortunately had in reserve. His little brother, on the other hand, took to the little hearts immediately, breaking off the aorta and jugular vein and gleefully drinking the contents like a proper little cannibal.


Thorax Cake
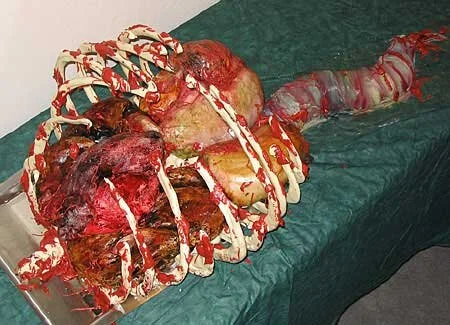
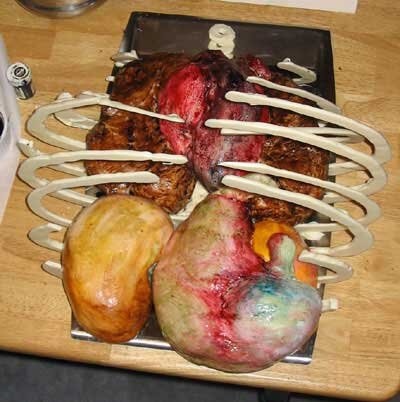
I generally make a bleeding heart cake for our annual pumpkin carving party (Pumpkinfest). Sometimes the heart beats, sometimes it's anatomically correct, and so on and so forth. This year I decided to go the whole hog and make an entire thoracic cavity cake.
The Thorax Cake - grossing out the internets since 2003.
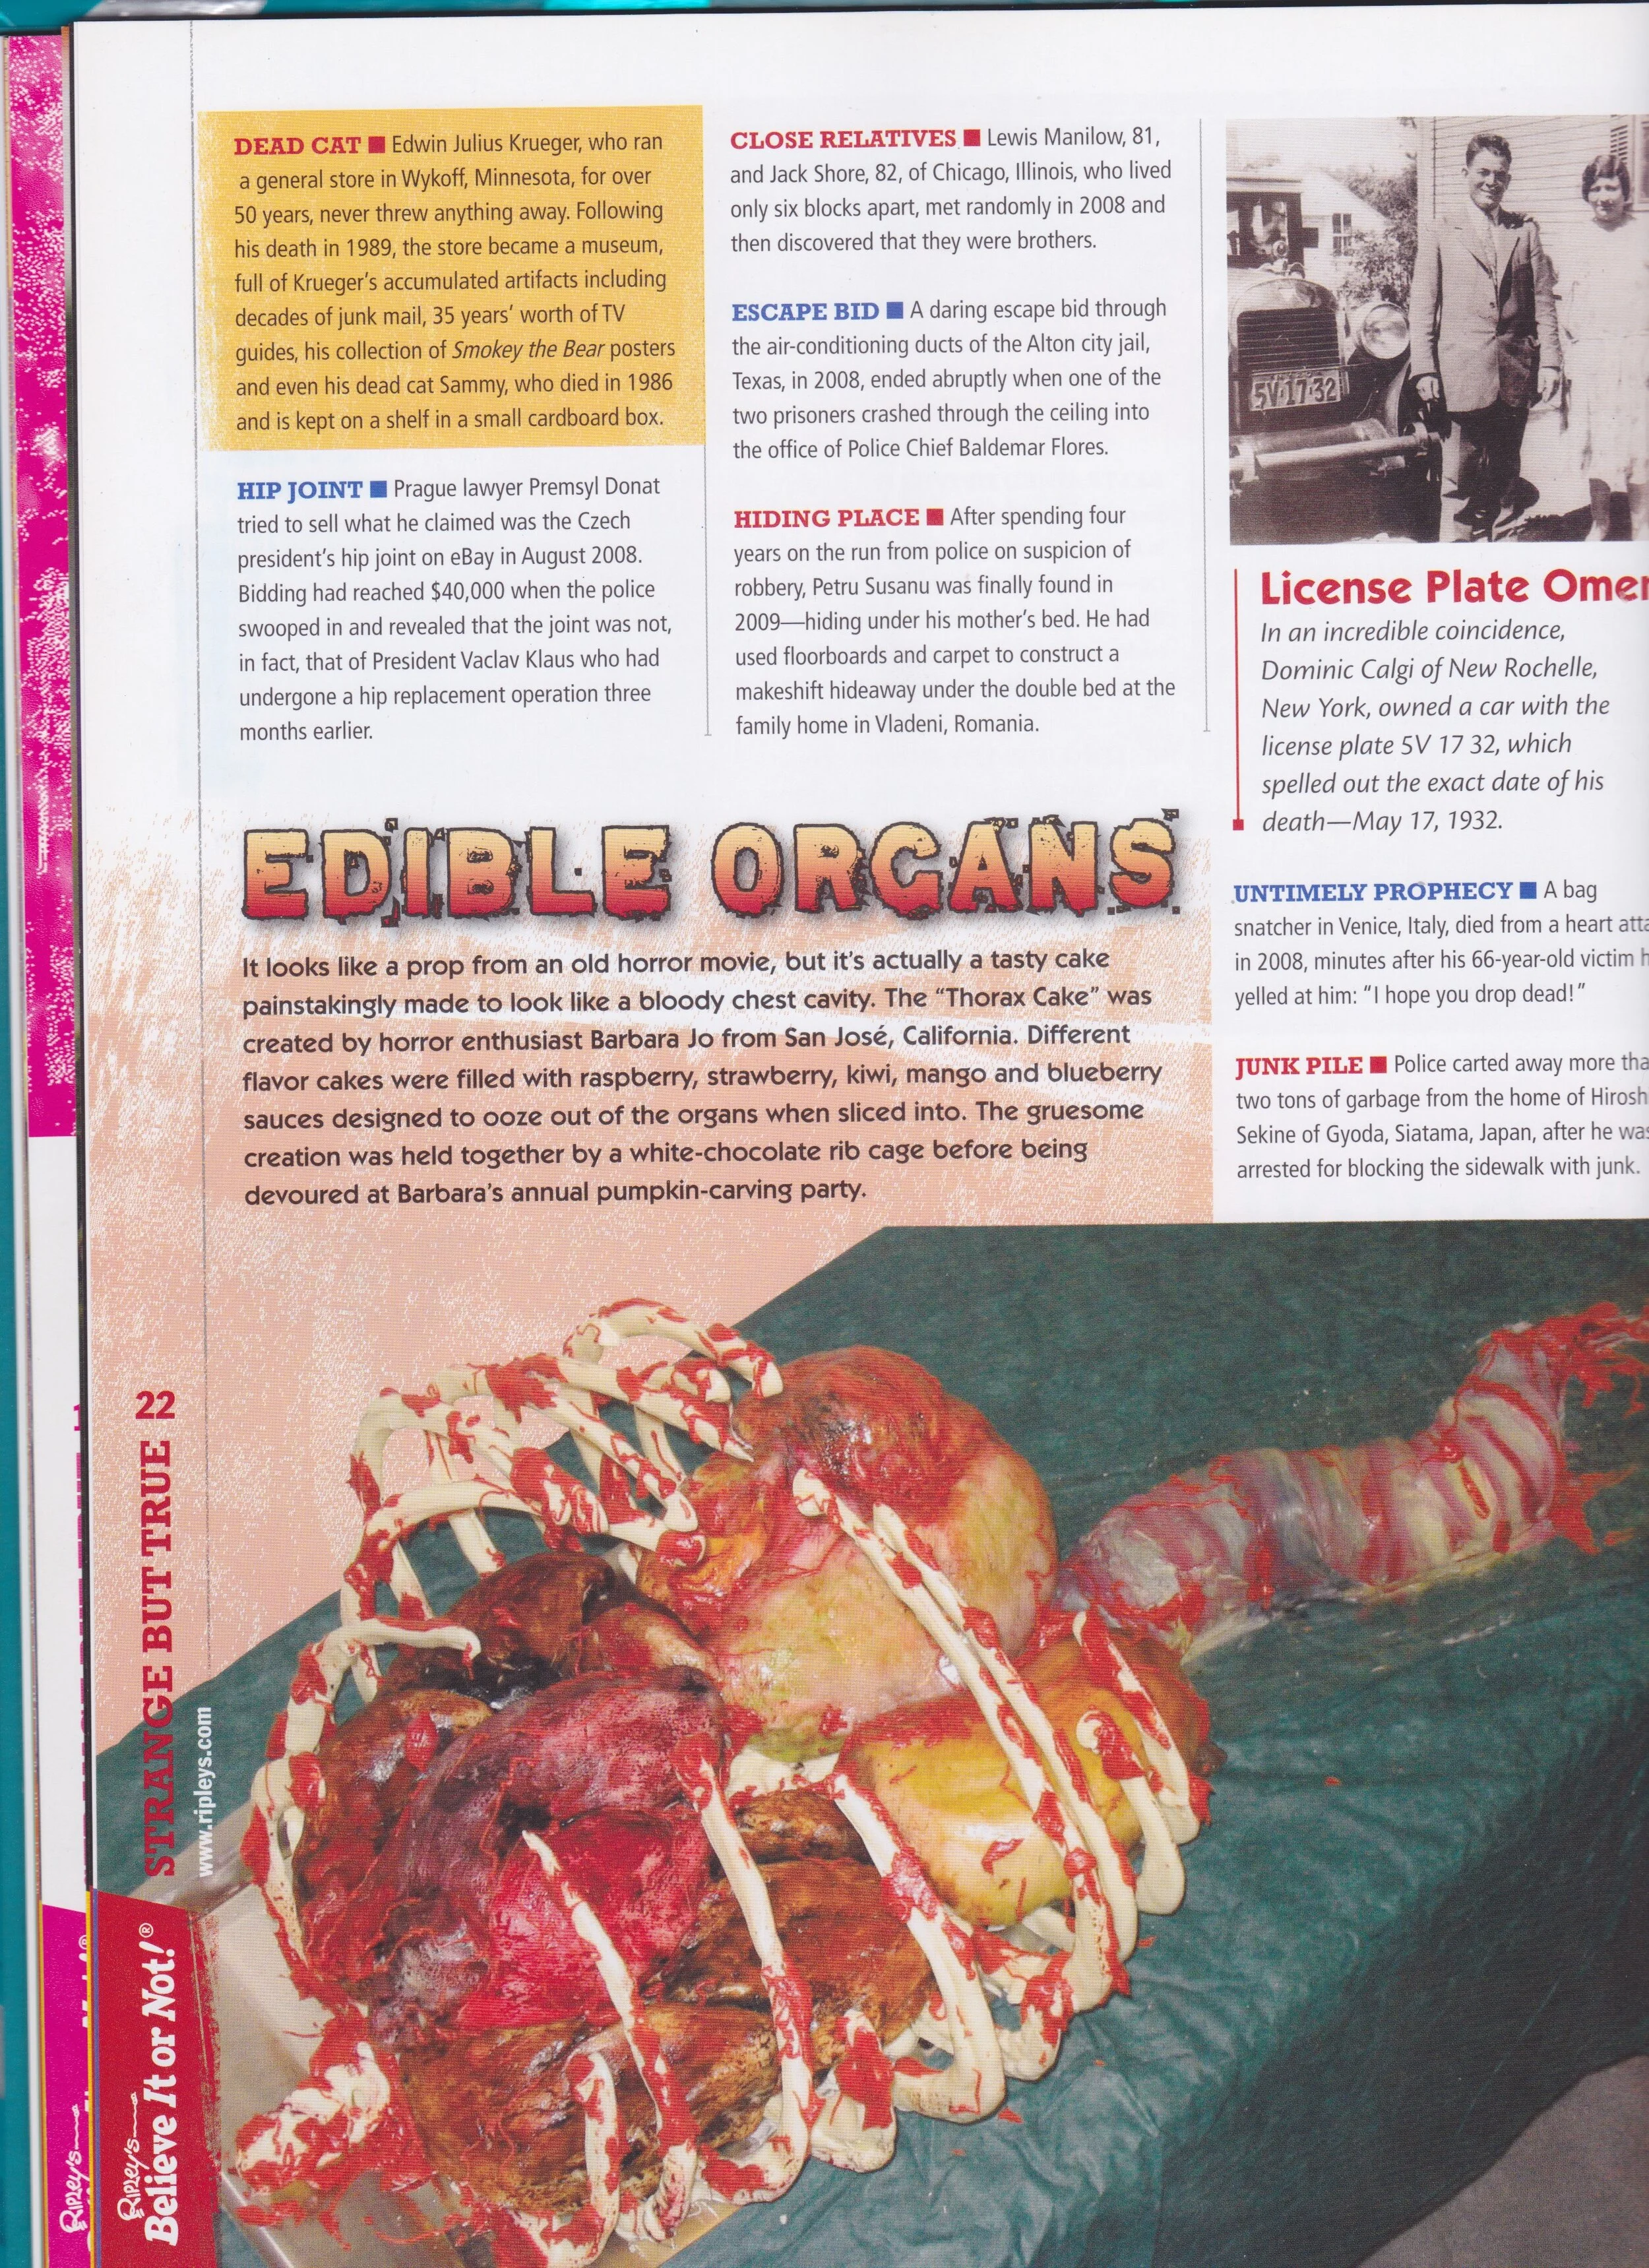
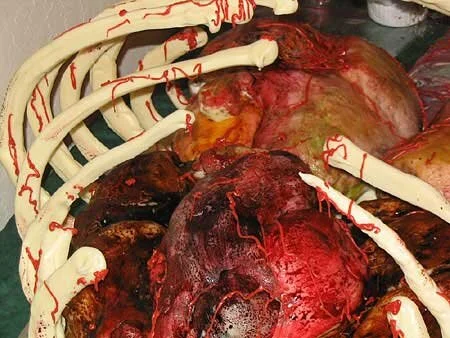
I generally make a bleeding heart cake for our annual pumpkin carving party (Pumpkinfest). Sometimes the heart beats, sometimes it's anatomically correct, and so on and so forth. This year I decided to go the whole hog and make an entire thoracic cavity cake. The plan was for each organ to be made out of a different kind of cake and to secrete a different color of fluid when it was cut into. Previous heart cakes have bled fresh, homemade raspberry sauce. This year I made raspberry, strawberry, kiwi, mango, and blueberry sauces. Sadly, the organs didn't bleed as well as I had hoped when I cut the cake, as each organ was relatively small and couldn't hold much sauce. Also all the moving around after filling the organs made it hard to keep the sauce contained in the little cavities I hollowed out. The heart bled pretty well, but the other organ fluids weren't very dramatic. On the bright side, there were lots of leftover sauces, which were all quite delicious. But I'm getting ahead of myself. My intended organ-cake-sauce combinations were as follows.
Heart - orange cake with raspberry sauce
Lungs - apple spice cake with strawberry sauce
Kidneys - orange cake with blueberry sauce
Stomach - ginger cake with mango sauce
Liver - chocolate cake with kiwi sauce
Small Intestine - jelly roll with red currant jelly
Unfortunately the liver suffered a complete structural failure when I tried to transfer into place within the rib cage, so it had to be eliminated from the presentation. I like to think that the liver was the tastiest bit and so whoever ripped this unfortunate man apart (My sister thinks it was Klingon because it was slightly larger than life size, but I'm not sure Klingons have the same internal organ structure.) ate the liver first before it ever got to our pumpkin party.

After baking all the different types of cakes, I carved them into the shapes of the appropriate organs, using my handy Gray's Anatomy as a reference.
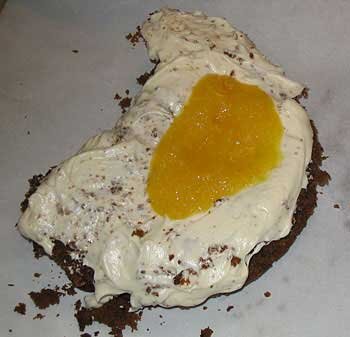
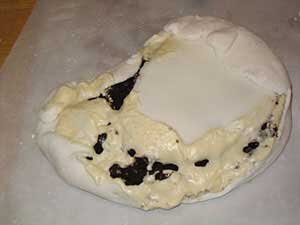
I then flipped each organ over, hollowed out a cavity in the center and frosted the inside of the cavity and the underside of the cake with buttercream frosting. After spooning in the fruit sauces, I sealed the cavities with a layer of fondant icing and flipped the organs back over. The heart and the lungs I covered with white modeling chocolate and the kidneys and stomach I covered with fondant icing. Both had their advantages and their disadvantages. White modeling chocolate tastes better than fondant and it sticks to itself better than fondant, but it's more difficult to work with on cakes like these which were relatively unstable due to the hollows in the middle. Also, modeling chocolate is difficult to paint with paste food coloring, which is what I usually use. It can be painted easily with powdered food coloring, but I didn't have any cocoa butter to dissolve the powder in. The fondant is easy to roll out and wrap around the cake and very easy to paint but it doesn't hold sculptural detail as well as modeling chocolate.
At this point, I took a break from the cakes in order to assemble the white chocolate rib cage in which all the organs were to be placed.
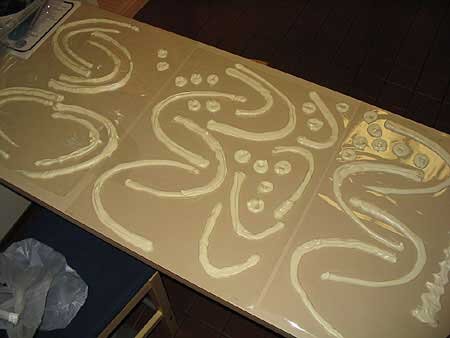
I tempered white chocolate chips in the microwave and piped ribs and vertebrae onto acetate with a plastic piping bag. I drew ribs onto paper which I placed underneath the acetate to insure that the ribs would be the same shape and the right size.
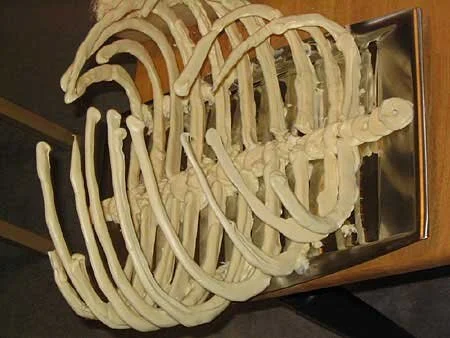
Dipping each piece into a bowl of melted white chocolate, it was relatively easy to assemble the rib cage on a silver tray. (The tray's last use was for passing out cookies at my sister's wedding.) Of course, with all the organs on top of it, virtually no one ever actually saw the fact that there was a complete spinal column underneath all the cake so some might say there was a bit of wasted effort there, but I say if you're going to make an edible, anatomically correct chest cavity dessert tray, you might as well do it right!

Once the rib cage was dry, I placed all the organs except the liver in the appropriate places inside it (again using Gray's Anatomy as a guide. This is, by the way, the only use that Gray's Anatomy ever sees in our household.)
It was at this point that I realized the liver was beyond salvaging. (I had problems with the liver from the moment I tried to take it out of the cake tin.)
I'm not really sure what colors kidneys and stomachs and such are supposed to be, but, drawing on my vast experience watching people in movies being disemboweled, I gave it my best shot.
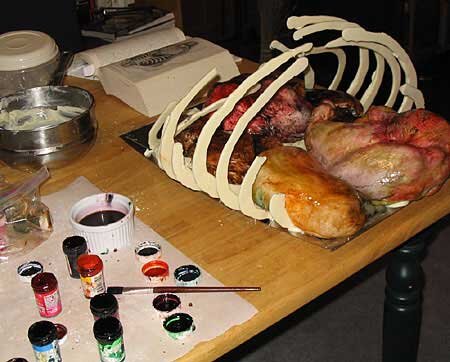
I'm not sure how accurate the results were, but they were definitely gross.
At this point my sister came home from a party and helped me move the cake to its final location so I could attach the intestine, which was to be trailing out of the rib cage so as to suggest that the person to whom the thorax had belonged had been ripped apart, rather than carefully dissected.
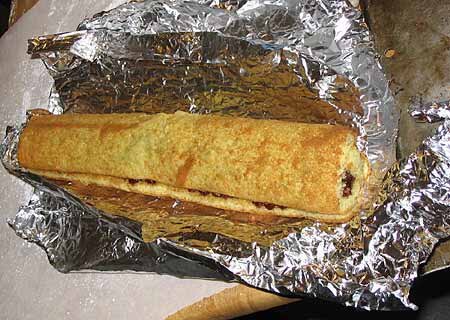
I bent the jelly roll (which I was quite proud of; I'd never made that kind of cake before and I sometimes have problems with whipping eggs. Fortunately, I was visiting my mom recently and she told me that it's very important the mixer and bowl be very clean and perfectly dry or the egg whipping won't work, so I didn't have any problems at all this time. Thanks, Mom!) into appropriate curves and covered it with white chocolate. I was, by this point, out of both kinds of frosting, lacked the ingredients to make more, and it was four o'clock in the morning so I couldn't get any more. That's why I just used plain white chocolate to cover the intestine. It looked fine, but was pretty difficult to paint, again because I lacked cocoa butter and so couldn't use the powdered food colors.
All that was left was to add the buttercream frosting blood, so it wouldn't look so pristine.
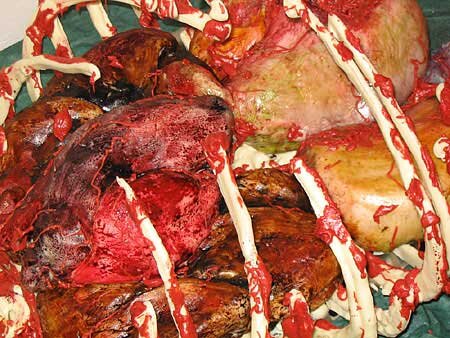
I did little veins on the organs first with a piping bag, then put big globs of gore on the ribs with a knife. A little spritz of corn syrup to give it that all-important oozing, wet look and I was done!
Tragically, the next day was very hot and, as white chocolate melts at about 95 degrees Farenheit, this caused major structural failure of the rib cage. By the time our guests arrived for Pumpkinfest, the rib cage had collapsed almost completely. It was nice and stable in the middle of the night when it was cool, though, I swear! So we put a photo of it in its original state up on the computer monitor. Actually, even with the rib cage broken, it looked pretty gruesome and neat, but it was better before. As I mentioned before, the cutting of the cake was not as dramatic as I had hoped, but, considering that I make all this up as I go along, I think the whole project didn't go too badly at all. And everyone said the cakes and sauces were all delicious, despite the excessive amounts of frosting required for this sort of project.

Zombie Cake
I made this cake version of our logo for a gala party we threw to celebrate our 100th review on theyrecoming.com.
I made this cake version of our logo for a gala party we threw to celebrate our 100th review on theyrecoming.com.
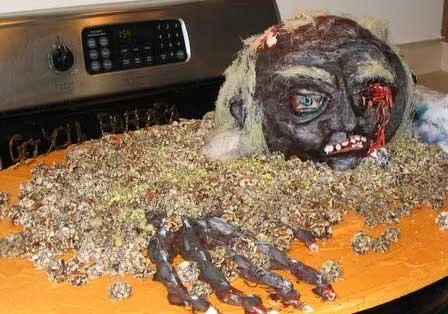
The highlight of the party, if I do say so myself, was my zombie cake, which we named Orville, after the dead guy in Children Shouldn't Play with Dead Things, though it looked nothing like him. In effect, it was a three-dimensional version of our logo, a zombie rising up out of the grave, or, in this case, rising up out of a field of my homemade French cream candies. The head was made of sour cream chocolate chip cake, dyed red to resemble brain matter, covered with modeling chocolate and various other frosting and hard candy details. The hand was made of mint-flavored hard candy bones covered with chocolate. Green hard candy letters around the perimeter reminded everyone that "They're coming to get you, Barbara." At the height of the party we gathered everyone around it to witness the thrilling moment when raspberry flavored blood spurted from his eyes and poured from his mouth. In fact, it sprayed a bit further than I expected it to. Fortunately only my sister and I were hit.
I calculated that, between the cake, the French creams, and the bloody eyeball cordial cherries, I went through 15 pounds of granulated sugar, 2 bags of powdered sugar, 8 large bags of chocolate chips, 2 bottle of corn syrup, 8 pounds of dark chocolate, and 4 pounds of white chocolate. I have a slight tendency to go overboard with these things. We have a lot of eyeballs left over.
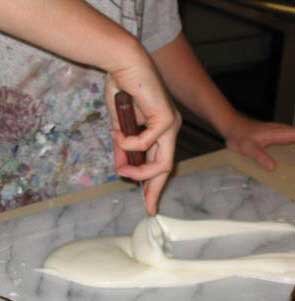
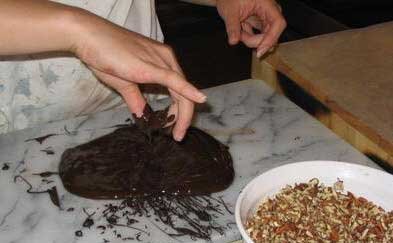
The first step is to make the French creams that will be used for the dirt in the zombie presentation. The creams have a flavored fondant center, dipped in chocolate, and then rolled in chopped nuts. Here, I am preparing the fondant by working it on a marble slab.

These are the completed fondant centers. The colors are all flavored differently -- I believe these are chocolate, pistachio, cherry, and orange. At this point, we're five days before the party.
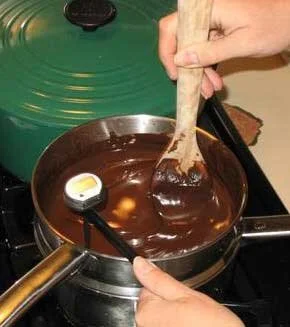
Here, I am tempering the chocolate to prepare it for dipping the creams. I’m using a double boiler and candy thermometer.
After the chocolate was tempered, I poured out a portion onto the marble slab. I dipped each fondant center into the chocolate, and then rolled it in the chopped nuts. The candies were completed four days before the party.
As a side dish to the zombie cake, I decided I also wanted to make cordial cherry eyeballs. Before dipping the maraschino cherries, they were soaked in rum or brandy for several days. They were then dipped in the center filling and left to dry. After this, I dipped them in white chocolate. Dark chocolate is better, but it wouldn't really work for the eyeball concept.
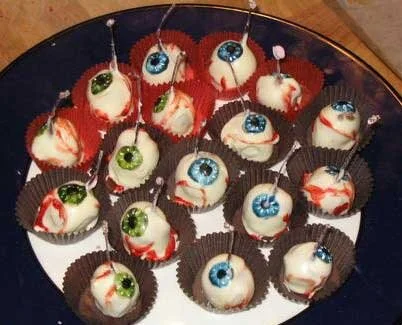
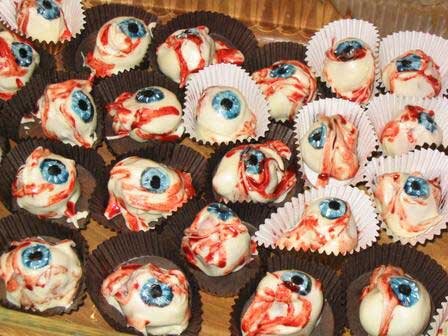
Yes, we had lots of eyeballs. They were painted using powdered food coloring dissolved in melted cocoa butter.
And we finally start the cake! Yes, it really did require that much cake. We used a recipe from The Joy of Cooking for a very yummy sour cream chocolate chip cake. Red food coloring swirled in the batter gave it a delicious-looking bloody brain color. Any light-colored cake would work as well.

This is me straining the fresh raspberry sauce which will be used for blood. This is great over cake or ice cream, even if your dessert doesn't bleed. Puree 1 pint of raspberries, 3 tablespoons of sugar, and 2 teaspoons of lemon juice in a food processor. Then strain the mixture through a fine sieve to remove the seeds.
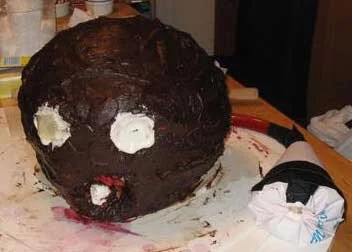
Ok, we've skipped a few steps here (clearly). This is the completed base of the cake. There are 5 layers of cake here, frosted with a chocolate ganache, which is made by melting semisweet chocolate with cream, and if you like (and why wouldn't you?) flavored with liqueur. Because it's so tall, we had to use interior supports, or the whole thing would have just toppled over. I cut a circle of foam core and stacked it between the middle layers. It's supported below with wooden dowels pushed into the cake, trimmed to just below the level of the layer. Of course, it was a little more complicated than that, since the plumbing system also had to be installed. You can see the large pastry bag to the right of the head, which is filled with whole lot of raspberry syrup. The bag is attached to a plastic tube, which curves behind the cake and enters in the back. Inside the cake, there's plumbing to send the syrup to outlets behind both eyes and the mouth. The outlets are blocked with frosting to prevent premature ejaculation, so to speak.
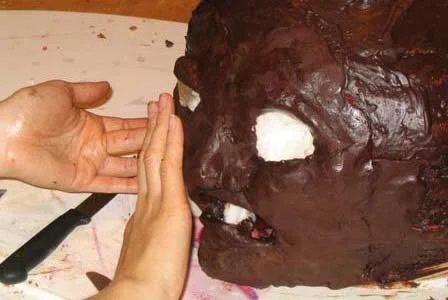
Once the base of the cake was completed, I started sculpting the facial features out of modeling chocolate, which is semisweet chocolate melted with corn syrup. Once chilled, it's very easy to work with and pretty tasty.
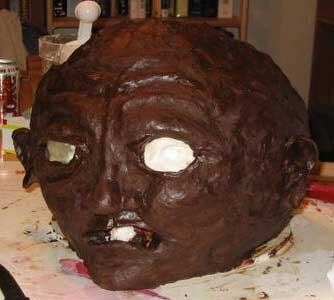
This is the completed face, with all the modeling chocolate details.

These are hard candy eyeballs, which were made by pouring out hot candy (sugar, water, corn syrup, and coloring) and pushing it into icky globs as it cools. Orville's right eye is already covered with a candy eye, so when the blood is pushed through, it'll fill up behind the eye before spilling out.
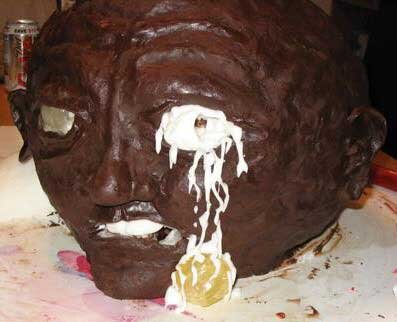
Orville's left eye has fallen out, so the other candy eyeball is just placed on the base. The blood details are done with royal icing.
The next step is to paint the face details and the blood. The paint is powdered food coloring mixed with melted cocoa butter. It has a consistency kind of like oil paints, and the cocoa butter can be melted in the microwave.
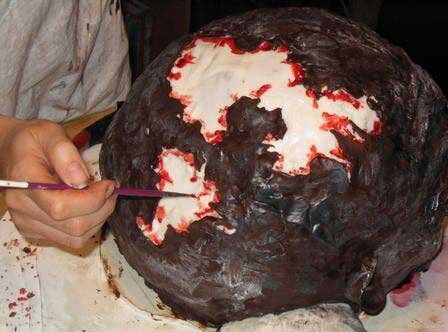
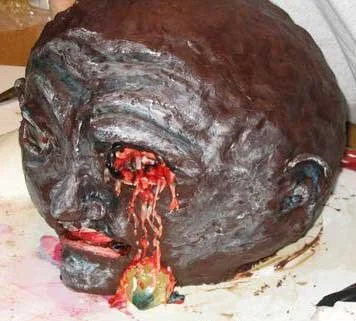
Here's me painting blood on the bits of exposed skull. The skull is done with royal icing, with modeling chocolate layered over it to make the ragged edges.

Here's Orville's hand, rising up out of the orange ground. Prior to placing the hand, the base was frosted with royal icing colored to match our site. The bones of the hand are mint-flavored hard candy, dipped in dark chocolate. The finger nails are royal icing.
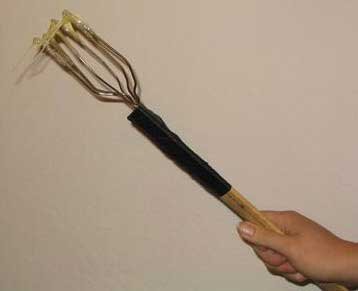
I display my zombie hair-making tool. I made it by cutting up some old coat hangers taped to a ruler, creating sort of a deformed whisk. To make the hair, I dipped the ends of the deformed whisk in hot candy, and then whipped it back and forth over two wooden spoons attached to the edge of the counter. As the candy cooled, it hardened into wispy somewhat hair-like strands.

Here's the skull with the hair attached. The strands are thin enough that they just kind of melt onto the head.

Note the lovely hairy eyebrows. Orville's left shoulder is the raspberry blood-filled bag, covered with a t-shirt. His right shoulder is made of fondant (cake fondant, not the kind used as the centers of the chocolate creams).

You can see the layers on the platform here, created to give Orville uneven ground to climb out of. The platform is made out of foam core, glued together in layers and covered with royal icing.
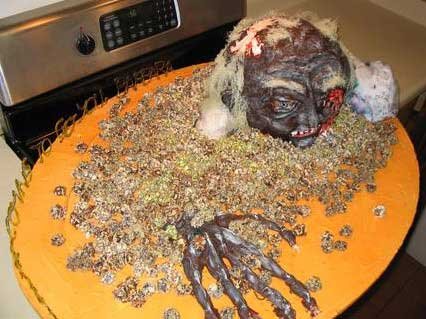
And here we have the full dirt presentation. The French creams are arranged around Orville, creating a lovely field of dirt. The different types of nuts create a nicely varied texture.

This is the hard candy lettering that followed the curve of the base, reminding us, "They're Coming To Get You, Barbara!". Usually I just pour the hot candy directly onto the marble slab in the shape I want. The letters require more detail than that method allows. The candy is hot enough to melt a paper or plastic pastry tube, so I used a 70's-era metal pastry tube, and filled that with the hot candy. I wasn't able to find a similar one online, and I'm not sure they're even made any more.

Orville looks pretty happy in the French cream dirt. Too bad about his eye.
Wow, Orville has big hands. You can see that the shirt covering the raspberry blood bag has now been distressed (as you'd expect a zombie's shirt to be).

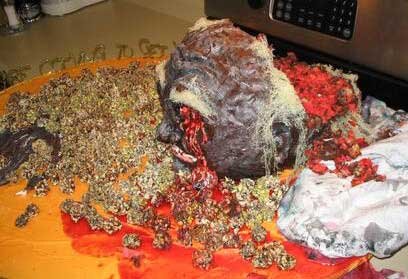
And here we are post-explosion! When I squished Orville's left shoulder, the blood shot out his left eye, slightly splattering both of us (but fortunately none of our guests).

I put our cleaver to good use serving the cake.
We did a fair job on the back of Orville's head, but of course we had at least three quarters of the cake left. My sister brought it in to work the next Monday, but her co-workers were oddly hesitant to cut into the face. She eventually dissected him and removed the face and all the plumbing, and that seemed to be more appetizing.

Lovely parting shot, eh? During the first spurt of blood, the frosting cap over the mouth didn't come off. Once I removed it, the blood just kind of oozed out the mouth, it was very nice. I really like the little drops of blood on the right cheek.

Easy Heart Cake
Instructions on how to make a simple heart cake that bleeds raspberry sauce when you cut it. It's easy, delicious, and sure to be a hit at your next Valentine's Day party!

Instructions on how to make a simple heart cake that bleeds raspberry sauce when you cut it. It's easy, delicious, and sure to be a hit at your next Valentine's Day party!
We thought you all might enjoy the instructions for this simple bleeding heart cake because it's quick and easy to make and delivers a dramatic effect for very little effort. It also requires almost no baking skills or cake decorating experience.
To start with, you'll need to bake a cake in a heart-shaped pan. Any kind of cake will work, including any simple, boxed cake mix, though I like to make mine from scratch. Ideally, make two cakes, to stack one on top of the other. A deeper cake will give you much more space on the inside to fill with blood. You want it to really pour out, don't you?
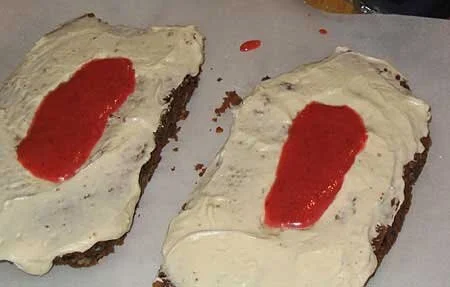
Once both cakes are baked and cool, level off the tops with a bread knife or cake leveler so your cake will be nice and flat. Then, frost the top of one tier with icing (or any other filling, jam, etc. that you want to use) and stack the other tier on top of it. It works best if you put the two cut sides of the cakes together, leaving the two perfectly flat sides that were at the bottom of the cake pan to be the top and bottom of the finished cake.

Now, scoop a sizable hollow out of the bottom of the cake. The bottom, of course, is on top, if you follow me, as the cake is upside-down at this point. The larger the hole you hollow out, the more blood you will be able to fit inside the cake. Of course, you'll also have less cake, so it's sort of a judgment call. Just make sure to leave a decent layer of cake on top of the hollow. You don't want the whole cake collapsing in on itself.
Once you have a hollow you're happy with, frost the inside with buttercream icing. Do a thorough job, so the cake is totally sealed. You don't want the blood to soak into the cake. While you're frosting things, also frost the bottom of the cake where it'll come in contact with the plate. Be generous. This icing is what keeps the blood from seeping out around the edges of the cake.
Now you're ready to add the blood. I like to use fresh raspberry sauce because it's bright red and totally delicious, but of course any red sauce or syrup will work as well. If you'd like to make the fresh raspberry sauce, it's quite easy. Just puree some raspberries and add a smidge of lemon juice and sugar to taste. Then strain the liquid to get the seeds out.
Fill the hollow carefully with blood. Make it fairly full, but definitely not overflowing. Now, set the plate or tray you're going to be using upside down on top of the cake. Squish it down into the icing so that the edge is sealed. Be sure to use a waterproof tray or plate, not a cardboard cake circle, because the sauce will soak into cardboard. I like to use a white plate because the blood shows up well on it.

Carefully holding the cake onto the plate, flip the entire assembly over, so the cake and plate are now right side up. Congratulations! You now have a cake full of blood and you're ready to start decorating.
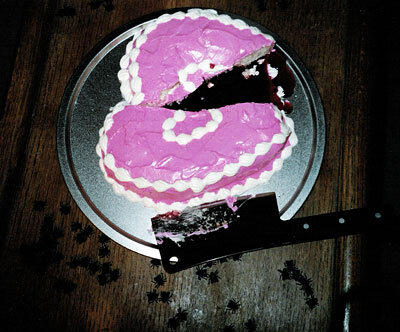
You can, of course, decorate the cake any way you'd like, using any kind of icing. I've gone in two opposite directions with my decor. The first time I made this cake, I iced it with bright pink buttercream, and then added white trim so it looked like a lovely, innocent valentine heart until blood started pouring out of it. The next time, I made the cake look evil from the outset with sickly maroon and grey icing and candles shaped like tombstones. I leave it to you to decide which option is more effective.
When it's time to cut the cake, I like to do the honors with a meat cleaver. Failing that, I recommend you use the biggest knife available. If you separate the cake a little with the knife while making the first cut, you'll get an even more impressive flow of blood.
An alternate version of this cake I once did involved the heart actually beating. Instead of just pouring the blood into a hollow in the cake, I poured it into a Ziploc bag. The bag was then attached to a turkey baster via a length of rubber tubing. I placed the bag inside the hollow in the cake, leaving the baster outside, concealed under a piece of fabric that I draped decoratively around the perimeter of the cake. The hollow in this cake was deeper than the hollow in the other version of the cake, so that the bag was very near the surface of the cake. When I squeezed the bulb of the turkey baster in rhythm, the bag expanded and contracted, pushing up the top of the cake, so the heart appeared to be beating.
Of course, this version of the cake isn't optimal for serving, since in order to get the blood out, you have to pull the bag out of the cake, puncture the bag, and pour the blood either into a bowl or on top of the cut pieces of cake. This is inconvenient, but does have the advantage of being entertainingly messy. I wound up with the hands dripping with raspberry blood sauce! Jason Voorhees himself never looked better!
Another variation I've done, which requires a little more sculptural skill, is to make an oversized anatomical heart. For this cake, I started with a large round cake, and then carved it into the shape of a heart. I used fondant icing to cover the cake and to sculpt additional veins and arteries, then painted the whole thing with food coloring, mostly red (obviously) and blue. The bleeding mechanism is the same as for the basic heart cake. When I made this cake I also poured a layer of clear hard sugar over the top, so cutting the cake would be like breaking someone's heart. I don't recommend this, though. It just made the cake very difficult to cut. Maybe this would work if you were planning to smash the cake with a hammer. If you spray or brush the cake with a little thinned corn syrup, you'll get the same oozy, wet look without the inconvenient hard candy shell.